The term “meter-long” refers to any wallpaper whose roll length exceeds the standard 53 cm. These include both 90-centimeter and Belgian trellises with a width of 1.4 m. They have their pros, cons and operating features, the main one of which is The problem is that hanging meter-long wallpaper alone is quite difficult. To do this correctly and beautifully, you must have certain skills and knowledge.
Advantages and disadvantages
- When gluing wide wallpaper, you get almost half the number of joints than when using standard wallpaper.
- The time spent on gluing is saved and energy is saved, since where 5 meter-long canvases are glued, it would be necessary to cut and glue 9-10 standard widths.
- The price of one meter tube is lower than the cost of 2 regular rolls.
- It cannot be glued to walls with an uneven surface, as unevenness will lead to poor joining of the canvases.
- Material consumption increases. If you need to stick a strip of only a few centimeters on the wall, you will still have to buy a whole wide roll.
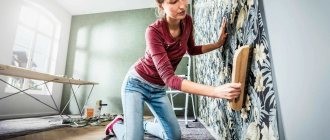
- Meter-wide wallpaper is very difficult to glue alone, in some cases it is an unrealistic task.
Preparatory work
Before starting work, you need to familiarize yourself with some recommendations, since only a professional or a person who has done this for the first time can properly glue meter-long wallpaper. The preparation consists of the following:
- We need to make calculations. First of all, you need to find out the area of the walls, find out how many rolls will be needed to decorate the room. In this case, the need to adjust the pattern should be taken into account, since in this case the material consumption increases.
- Surface preparation, including leveling the base, eliminating defects, puttying and priming.
Before gluing wide wallpaper, you need to properly prepare the wall. It is necessary to remove the old covering layer, dismantle switches and sockets, remove nails, screws and dowels from the walls. When cleaning the walls, various cracks and irregularities may appear, and plaster may fall off. Then you need to putty everything again. Using a finishing putty will smooth the surface.
To improve the adhesion of the material to the base, as well as reduce the absorption of glue into the wall, it is recommended to cover it with at least two layers of primer.
How to calculate wallpaper footage
- The required number of stripes is determined. First, the perimeter of the room is calculated. The length of adjacent surfaces is measured, the result obtained is multiplied by 2. If the length of one wall is 5 m and the second is 2 m, then the perimeter is (5 + 2) x 2 = 14 m. Since it is planned to glue meter-long canvases, it means that you will need to cut out 14 strips.
- The length of the stripes is calculated. The place in the room with the greatest height between the ceiling and floor is determined. The length of this section is multiplied by 14. If the ceiling height is 3 m, multiply by 14 and get 42 m. This is the minimum required total length of the canvases. If the room has windows, doors or other structures, it is better not to subtract their size from the figure obtained during calculations, so that the material is purchased with a reserve.
- Counting the number of rolls. The total length of wallpaper is divided by the length of 1 roll, the resulting figure is rounded up. If there are 10 m in 1 roll, 42 m is divided by 10 m, you get 4.2 rolls. So you need 5 rolls. It is recommended to take 1-2 more rolls in reserve for future repairs, replacing areas that have been soiled or torn by animals or children. In total you need to buy 7 rolls.
How to work in hard-to-reach places?
How to glue meter-long non-woven wallpaper for one person in places where access is difficult? For example, after a straight wall, there will be gluing around a radiator or pipeline pipe, finishing corners and other places with a complex configuration. In such cases, detailed planning, cutting and subsequent gluing are necessary.
To finish the radiator of the heating system, wallpaper of the required size is cut out. If there is an ornate pattern, the work becomes much more complicated.
Gluing the outer corner is done in the same way as the inner one, with a slight overlap, after which the excess part of the panel is cut off. In transition areas or openings of door structures, the joints of the panels are provided in the center to minimize possible damage or tears.
How to glue meter-long non-woven wallpaper in a corner yourself? The area is leveled with putty, using special corner inserts made of plastic material that are fixed to the wall. Before gluing the wallpaper material begins, the putty solution must dry completely.
Working in a corner, generously coat the wall surface with an adhesive mixture, covering the plastic element with it. The strips overlap, so experts do not recommend finishing the corner with a whole canvas.
There is a possibility that after the glue dries, defective areas will appear - the strip will wrinkle, become skewed, and the next sheet will not fit smoothly. To exclude such manifestations, it is recommended to follow certain rules. The canvas overlaps the other wall, glue the second strip onto the adjacent surface, also not forgetting about the overlap. The resulting “tail” is removed with a sharp knife.
Required Tools
- Pencil;
- plumb line;
- roulette;
- roller, spatula;
- construction tape;
- wide brush;
- knife;
- clean, dry rags.
To prepare for pasting, if you need to remove defects on the wall, you will need putty, a primer mixture, and sandpaper.
You also need to decide on the glue in advance. The type of mixture is selected based on the type of material, and meter wallpaper, like standard wallpaper, can be paper, vinyl, non-woven, etc.
Surface preparation
- Cleaning the walls. All existing screws, nails and self-tapping screws are removed from them. Switches and sockets are removed, and existing functional holes are closed with construction tape.
- Removing old cladding. To make the walls even for gluing wide trellises, you need to remove the old finish, plaster, paint and other outdated layers from them.
- Sanding the base with sandpaper.
- Putty. This stage is needed if the surface has serious unevenness. Walls that are too crooked will need to be plastered.
- Padding. To reduce the consumption of the adhesive composition and ensure reliable adhesion of the trellises to the walls, it is better to apply the primer in 2 layers.
- Applying white primer or painting. This preparatory stage is needed when gluing non-woven translucent trellises is planned.
Marking walls and cutting canvases
You can start gluing meter-wide strips from any part of the room, since they are glued end to end.
To ensure that the first strip lies as evenly as possible on the wall, using a plumb line, draw a vertical line on the wall with a pencil, which will become the starting mark for pasting. Instead of a plumb line, you can use a level.
Before cutting, the width of the wall is measured. This parameter will help determine the required number of stripes. The strips must be cut with a 10-centimeter margin on the top and bottom sides. You also need to remember about the allowances for combining the print. Even if there are a lot of extra pieces left after gluing, when the glue dries, they can be easily cut off with a construction knife.
For cutting, the roll is rolled out face down on a clean surface, and the required length is measured. A notch is made on one side of the canvas, the sheet is folded and cut along the fold. You can also cut along the line using a spatula, or use scissors.
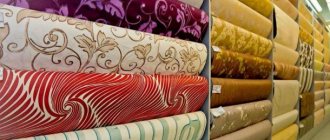
Advantages of wide non-woven fabrics
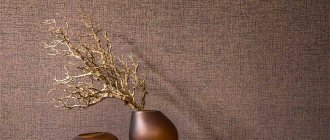
Meter-long non-woven wallpaper has a number of important advantages over other finishing materials due to the combination of composition and increased width.
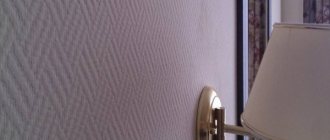
- Such coatings are sometimes called “seamless”, since the number of strips glued to the wall is less than in the standard version. Consequently, the number of joints is reduced. The textured surface of the material additionally helps to make the seams almost invisible.
- Installing meter-long sheets saves time, since fewer strips have to be marked, cut, applied, adjusted and joined.
- The price of one wide roll is not equal to the cost of two standard rolls, which means that the costs of material and repairs are generally reduced.
How to properly glue meter-long wallpaper
The technology for gluing wide canvases depends on their type:
- Paper. The back side is coated, and the base to be pasted remains dry.
- Non-woven. The mixture is spread on the ceiling and walls, and the finishing material itself remains dry.
- Vinyl. Glue is spread on the base and on the trellises.
To glue large-format canvases efficiently, you need to work with a partner. One person will hold the edge of the strip on one side, the second will glue and straighten it on the other. For pair work, it is more convenient to use two stepladders at once.
Actions are performed according to the following scheme:
- Glue is applied to the underside of paper and vinyl trellises. Non-woven fabrics remain dry.
- The paper web can be immediately glued to a dry base. For other types, glue is applied with a roller to a dry wall. The width of the coated area should be 20 cm greater than the width of the roll.
- The glue is carefully applied with a brush at the joints and corners. Particular attention is paid to the ceiling part of the wall.
- Gluing the canvas begins from the top of the wall, aligned along the marked vertical. To do this, with the cut held by the top edge, you need to climb a stepladder and glue it to the junction of the wall and ceiling. The coincidence with the drawn vertical line is visually checked by a partner.
- If the strip is applied evenly, its surface is leveled with a plastic spatula or rubber roller, starting from the middle part of the cut. Movements with the tool are made from the center to the left and right, up and down.
- After gluing the canvases, you need to get rid of wrinkles on them and air chambers; to do this, they are smoothed with a spatula, moving it from the center to the edges of the cut with slight pressure. In the corners and at the joints, use the tip of a spatula to smooth the canvas a little more intensely.
- For the second strip, glue is also applied to the wall with a margin of 20 cm. This is done so that during further work the composition does not get on the surface of the trellis. The second piece is joined to the first and glued according to a similar pattern. The same applies to the following stripes.
Pasting process
These wallpapers are glued end to end. To make the work easier, it is recommended to make markings on the wall, after which the roll is cut into strips of the required length. The process has certain features:
- Experts recommend starting gluing from the corner area. Having chosen a starting point, measure a distance of two to three centimeters. This is necessary so that an even joint is formed at the corner. For example, for a meter roll, the first line is applied 97 - 98 cm from the corner section;
- similar actions are performed from the opposite corner;
- Considering that a meter-wide canvas is not glued in one piece near the corner, the tape measure is moved a couple of centimeters from the extreme line, leaving marks on the next wall;
- We cut strips of the required length, providing a ten-centimeter margin. When the glue dries, the excess parts of the canvas will be cut off. If there is molding along the ceiling, it is allowed to leave a small allowance;
- According to the specified dimensions, we cut strips for pasting corners.
Now let's see how to properly glue meter-long wallpaper on a non-woven base. To understand the sequence of all actions, we will analyze the technology of gluing wallpaper 1 m wide on a non-woven backing in stages:
- Using a paint roller, we treat the wall surface with glue, applying it in a thin, uniform layer.
- The panel is applied to the prepared wall and aligned in the vertical and horizontal directions according to the applied marks. If this condition is neglected, the combined pattern will shift and the appearance of the decorative coating will deteriorate;
- If the strip does not lie quite evenly, it is immediately corrected until the glue dries. For such actions, the manufacturer of the adhesive mixture provides about ten minutes, but if you are working with wallpaper for the first time, purchase glue with a longer drying time;
- How to properly glue meter-long non-woven wallpaper on a wall? Press the canvas in the central part, roll it with a rubber roller in both directions, as if drawing fir branches. Move the tool from the top edge to the bottom, holding it at a forty-five degree angle. Remove any glue protruding from the edges of the panel with a sponge;
- Having pasted the first strip, move on to the next one, adjusting it end-to-end;
- It is recommended to make a small overlap, which is then trimmed with a blade, after which the joint line remains inconspicuous.
When processing the base under the wallpaper strip, it is recommended to protrude slightly beyond the markings.
Pasting difficult places
To work on difficult areas, it is better to cut the wallpaper into compact pieces and use glue that dries slowly and provides sufficient time to correct the position of the canvases.
Angles
If you glue wallpaper in the corners with a single strip, it will definitely warp or wrinkles will appear that cannot be eliminated without trimming the edges. Even if this does not happen, the crooked angle will still change the perpendicularity of the trellis, which will inevitably increase the number of flaws in the work. To avoid this, gluing in the corners is carried out according to the following scheme:
- The distance from the corner to the outermost glued strip is measured. A canvas is cut out whose width is 5 cm greater than the measured distance.
- The wall with a corner is carefully coated with wallpaper glue.
- The wallpaper is applied to the wall with a 5-centimeter overlap on the adjacent side of the corner.
- At the inlet, the narrowest section is determined. A mark is made on it at a distance of 1 cm from the edge of the canvas. A vertical line is drawn through this mark.
- Along this vertical, the next whole canvas is glued overlapping.
- The seam is trimmed with a spatula, ruler or utility knife.
It is better to glue plain wallpaper end-to-end in the corners, and overlapping wallpaper with a pattern.
Batteries
- A piece is cut out of the canvas to fit the radiator niche.
- At the points where the radiator is attached, vertical cuts are made on the strip.
- The section is coated with glue and carefully inserted behind the battery.
- The folds that appear on the trellis smoothly melt, the wallpaper is pressed against the wall and smoothed out with a rag. It is impossible to work in such a narrow space with a roller.
- The excess trellis that extends beyond the niche is laid overlapping onto the already glued strip.
- The overlap is pressed with a spatula so that a vertical cut is made.
- The cut strips on the sides of the cut are removed, the joint is leveled, and after drying it becomes invisible.
- If it is not possible to paste over a niche in one piece, the space behind the radiator is pasted over in several separate pieces.
Sockets and switches
When preparing a room for wallpapering, all protruding objects are removed from the walls. Wallpaper is glued over sockets and switches that have previously been removed. The outlines of the holes left from them are clearly visible under the wallpaper. In these places, a cross-shaped cut is made with a wallpaper knife. The cut parts of the canvas are hidden inside the hole. In the locations of round rosettes, the cut should be star-shaped.
There are switches that cannot be removed without dismantling the entire structure, so it is not recommended to remove the protective film from them before trimming. The canvas is glued to the switch, and punctures are made in the corners of its frame, serving as guidelines for making a cross-shaped cut. When a cut is made with a spatula, the edge is pressed around the switch, excess pieces are removed, the edge is rolled to the wall and the rest of the trellis continues to be glued.
Openings
The trellises on the doorway are trimmed. If you are gluing wallpaper in a room with an arch or window, then you need to cut the canvas to the size of the opening, carefully making sure that the pattern on the canvas matches.
Batteries
The wallpaper under the window sill is glued last. The work will require patience and accuracy, bordering on virtuosity.
- The wallpaper sheet is cut to the size of the radiator niche.
- Vertical cuts are made in areas coinciding with the battery mounts.
- The glue-coated section is carefully inserted behind the pipes.
- The next task is to straighten the folds formed on the sheet and press it against the wall. Due to the tightness, it is impossible to use a paint roller, so smooth it out using a rag.
- Excess overlap is applied to the edge of already pasted wallpaper.
- Pressing both layers firmly with a spatula, make a vertical cut.
- The joint remaining after removing the cut strips will become invisible when dry.
USEFUL INFORMATION: Is it necessary to prime the walls before puttying?
If such an operation was not possible, cut the wallpaper into smaller pieces and continue pasting the hard-to-reach area.