Requirements for compositions
When choosing a suitable composition, you should focus not only on the color of the paint, but also on its characteristics. The purchased paint and varnish material must withstand special operating conditions, and therefore must meet certain requirements.
In order for the applied coating to last as long as possible, it is necessary to choose compositions that have:
- resistance to abrasion and mechanical stress;
- resistance to ultraviolet radiation, which can cause cracking and peeling of the applied coating;
- good breathability;
- sufficient durability. The properties of the applied composition must remain unchanged for many years.
Which foundation is preferable?
When deciding how to paint concrete paths, listen to the advice of experts. They recommend paying attention to a special one-component acrylic paint designed for outdoor work.
Water-based facade paints are characterized by excellent water-repellent qualities, allowing concrete to breathe. In addition, they are not afraid of various mechanical influences.
- abrasion resistant;
- maintains its integrity under the influence of heavy objects;
- does not lose color for a long time.
Very often in the countryside they use special polyurethane varnishes, which form a thin transparent film on the surface of the path after drying.
It is not advisable to use oil paint for painting concrete. This composition easily penetrates into the pores of the base. This may cause cracks to appear.
Thus, to paint paths on the street, you should use a material based on:
- polyvinyl chloride;
- polyurethane;
- epoxy resin;
- latex.
Such compositions will perfectly protect the concrete base from destruction.
Preparing for work
At the initial stage, material and tools are purchased for applying paint and varnish. When calculating the required amount of paint, it is recommended to take into account the fact that the coating should be applied in at least three layers.
This number of layers will ensure a sufficiently long service life of the protective coating.
Tools
In addition to a sufficient amount of paint, you should prepare:
- metal brush;
- painting tools;
- putty knife;
- containers in which the paint will be diluted. When doing work in the country, you can use old, thoroughly washed buckets;
- primer for concrete;
- special putty for concrete;
- colors.
Removing contaminants
If you are going to paint outdoor paths in the form of tiles, you must remove all the grass between the seams. This can be done using a shovel or any other tool. In this case, it is advisable to remove all plants along with their roots to prevent their germination in the future.
All dust and dirt are removed from the surface of the paths, old paint (if any) is removed with a metal brush, and the base is dedusted. If damage is found on the surface to be painted, for example: potholes, chips, deep scratches, they should be puttied or covered with sealant.
Degreasing
Try to remove all greasy oil stains to prevent them from seeping through the paint layer. This can be done using an orthophosphate solution. You can also use special products designed to remove various types of stains.
Primer
The prepared surface is carefully primed. For work, special deep penetration mixtures are used, intended for application to a concrete base. The primer is applied using a roller or brush in at least two layers.
In this case, you must wait until the previous layer has completely dried before applying the next one. The paint coating can also only be applied after the last layer of primer has completely dried.
DIY dyeing steps
Before choosing paint for a concrete path, it should be noted that depending on the location and climate zone, the temperature range for it should be taken into account. It determines the suitability of the selected type of coating. Don't experiment and hope that the wrong paint will stick. This won't last very long. Also think about the effect. A glossy finish will have fewer scratches, but will show visible stains.
A matte finish isn't as impressive at first glance, but it looks like new longer and doesn't require as much care as a glossy finish . Preparation for painting should be carried out in sunny weather. The concrete floor must be completely dry. Be sure to read the instructions on all materials purchased for the job. Clean the path thoroughly with a degreaser. Do this as many times as necessary until it is completely clean. Let it dry thoroughly.
The coloring stages include several steps:
- Remove the old paint and smooth out any uneven areas. Remove any accumulated dust.
- If the surface becomes rough, make a concrete mixture following the directions on the cement package. Fill any cracks and holes. Let dry. If the surface is smooth, then proceed to the next step.
- Using a roller, apply two coats of primer. Allow the track to dry completely between coats.
- Then, using a clean roller or compressor, apply 1-2 coats of paint. See the packaging for drying time for each.
Concrete preparation
Before you start painting, remember that poor surface condition will show through the new coat. Cracks and other imperfections will attract attention, so they must be repaired.
Important! Be sure to wear safety glasses, clothing and gloves when working with concrete dust and acids.
Concrete preparation technology step by step:
- Clean any crumbling concrete using a wire brush.
- Remove debris with a vacuum cleaner and fill the cleaned cracks with new concrete.
- Smooth the surface using hard putty.
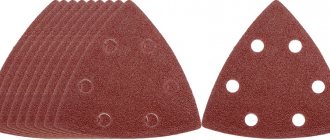
- Once the surface is dry, sand out the cracks with 100-grit sandpaper.
- To remove stains, use muriatic acid and a scraper with a durable high-carbon steel blade and an extended handle for easy handling.
- Remove rust using a rust removal solution designed specifically for concrete masonry.
- To ensure that the paint adheres better to the surface, degrease it. Apply the substance according to the instructions on the label. Use a brush with stiff bristles. Rinse off the surface with a garden hose.
A primer before painting will help ensure quality work and extend the life of the surface. Choose a primer that is compatible with both concrete and paint. Once you have finished preparing the path, wait until it is completely dry before priming, as moisture will prevent the material from adhering to the surface.
First, use a brush to apply the product to the curb or other type of driveway edge. Then, using a roller, prime the remaining canvas. When applying primer and paint, maintain a “wet edge,” that is, do not allow the edges of the painted area to dry before working on the next one. This helps prevent visible roller marks on the finished track. After the primer has completely dried, apply paint.
Applying paint
If the paint has two components, like epoxy, then both parts must be mixed according to the instructions on the label. Apply the emulsion in two layers to obtain a more abrasion-resistant surface. Use a roller, brush or airless spray.
Did you know? The first concrete road was built in 1909. Until this point, bricks, cobblestones, or a mixture of resin and stones were used for laying.
Adhere to the following rules:
- Do not work with paints and concrete at temperatures below +5°C, above +35°C and relative air humidity above 70%.
- Do not carry out painting work if rain or frost is expected within the next 48 hours.
- Although the surface will feel dry to the touch, maintain the drying time specified by the manufacturer.
- Three weeks after painting, carefully wash the concrete surface using a soft sponge and a clear detergent.
Brush
To paint the seams between individual slabs, use a thin brush 2–5 cm wide . For larger areas, wider products are used. If a drawing will be applied to the surface, it is convenient to make a template and paint it by applying it to the surface.
If you need to give the texture of a decorative stone, you can also use masking tape to mark the boundaries of the design. It is glued to the surface, and after the paint has dried, it is removed.
Spray gun
There are pneumatic and manual sprayers. The difference between the two is that the former uses an air compressor, while the latter needs to be pumped out periodically to keep the air pressure high enough to spray. The nozzle of the device must be adjusted to provide the best result when applying a “streak” with a width of 30 to 45 cm, although it can be adjusted.
The optimal distance to the surface at which to hold the sprayer is the same - from 30 cm. Always make movements across the entire width of the surface in one row, and then add another layer on top of the second, which slightly overlaps the first. Work your way across the path, row by row, until you're done.
Using a roller
Properly selected rollers will help save time. They come in different sizes and are designed for any surface. Each roller consists of a frame with a handle. Its length should be about 30 cm. A longer one will quickly tire your hand. A cylinder made of porous material is placed on the frame. It is made of foam rubber or velor.
Important! One coat of paint is never enough to achieve the desired result, so apply the number of coats recommended by the manufacturer.
A roller with natural fiber bristles is best used with oil-based paints and varnishes, while synthetic ones will work well with latex mixtures. The latter retain their shape and rigidity well, no matter how much moisture they absorb. For concrete, it is advisable to choose a model with a pile length of 1.2–1.5 cm . The shorter length is intended for applying thin layers of paint on smooth surfaces (for example, wood). Most often, conventional submersible models are used for work.
But rollers are also available with:
- piston system for supplying paints and varnishes;
- automatic feeding system.
The operating technique includes the following actions:
- Masking tape is used to cover the part of the surface that should not be painted.
- In order to evenly distribute the coloring material, the dip roller is dipped into the paint and rolled on a special grooved tray.
- Then they make a border along one edge of the path.
- Next, a stroke is made along this border, partially covering it. And so they continue along the entire length (paint should be applied towards the light).
- Each subsequent layer is applied only after the previous one has had time to dry.
- After use, foam rollers are thrown away, and those that can be used several times are soaked in kerosene or other solvent. And then they are stored in a heated room.
Did you know? Roman builders mixed lime, water and volcanic ash from Mount Vesuvius, calling the resulting material pozzolana. In fact, it was one of the forerunners of modern concrete.
Coloring
Painting work can only begin if at least a month has passed since the concrete was poured. The only exception is the option when dry pigment diluted with impregnation is used to paint the garden path at the dacha. In this case, painting can begin much earlier. In addition, the air temperature must be above +10 °C.
Applying coating with a brush
The paint is applied to a carefully prepared base in several layers. It is very important to apply the composition in thin layers, allowing each layer to dry thoroughly (for at least 12 hours).
How to paint a concrete floor - step by step plan
Painting a concrete floor includes 4 stages:
- Preparation
Use a grinding machine, scraper or wire brush to remove the old paintwork from the surface. Chemical stains are cleaned with a solvent (for example, sodium orthophosphate), the floor is degreased and dried. Cracks and chips are widened, cleaned and filled with concrete. After repair, the concrete is again cleaned of dirt and dust and degreased with a soap solution.
- Treatment with primer or primer.
Popular articles When is the best time to transplant irises
The primer will increase the adhesion of concrete and reduce the degree of paint absorption (and therefore the cost of repairs!). For this purpose, you can use the primer composition GSR. It is applied generously, in several layers, over the entire surface, with a roller or spray, and along the perimeter with a brush. An additional layer of sealant will help to obtain a flat and smooth surface in the future.
- Coloring
You can apply the paint with a sprayer, or with a brush to hard-to-reach areas. Each new layer is laid on the dried previous one. Work begins from the window.
- Drying
The painted layer should dry at an air temperature of +18–24 °C and a humidity of no more than 80%. You can use the floor in limited mode no earlier than after two days. Full mechanical loads should be postponed until a later time.
How to care for a painted path?
In order for the applied coating to last as long as possible, it must be carefully looked after. The presence of sand and other abrasives can compromise the integrity of the layer. To prevent this, the paths should be washed as often as possible by spraying them with water from a hose or wiping them with a bulky sponge. In the latter case, you need to act very carefully.
Thus, anyone can paint concrete paths with their own hands if they wish. The main thing is to purchase the appropriate tools and materials. In this case, the end result will be “pleasant to the eye” for quite a long time.
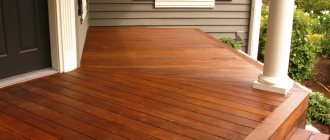
The easiest way to arrange paths on a house adjoining and summer cottage is concreting. And to give gray stone an attractive look, it is not necessary to do tiled cladding; sometimes it is enough to paint the sidewalks. This is an inexpensive and quick way to transform a site. How to paint a concrete path in a dacha and how to do it correctly - we’ll tell you about this in detail.
How to make a colored concrete path
- Staining concrete before laying.
- Painting the finished gray stone.
In the first case, a pigment of the desired color is introduced into the concrete solution. It is worth remembering that color purity is not easy to achieve due to the predominance of gray cement. If necessary, it is replaced with white.
The advantage of the method is that the entire volume of colored stone is obtained: even in the process of abrasion of the surface, bald spots of a different shade do not form.
Painting your concrete walkway is an option for those who have already installed their sidewalk. You can change the color not only of concrete, but also of tile and stone coatings.
Benefits of coloring
If you are just planning to lay a concrete path and are thinking about how to decorate it, pay attention to the advantages of painting:
- Possibility of changing color every few years;
- Unlike pigmentation of concrete mortar, surface painting of a concrete path allows you to obtain a coating of the desired color with a more saturated palette and density;
- The coating protects the concrete from the penetration of water into the pores, thereby extending the service life of the garden sidewalk;
- Application can be done manually in a short time, and walking on the concrete surface is allowed immediately after the paint has dried - from several hours to a day;
- The path can be washed with water; dirt, as a rule, does not eat into the coating formed by the paint layer.
Disadvantages include instability to abrasion. True, it all depends on the quality of the painting work and the choice of pigmented solution. The service life of the coating is from 2 to 10 years.
Repairing paths in the country: preparatory work
In order for the restoration of the trail to be successful, the owners of the hacienda should approach preparatory measures responsibly. First of all, they need to clean the concrete surface from foreign contaminants - leaves, soil, sand, rubble, using a broom and dustpan. The next task is to wash the path with water and dry it. After this work, the owner of the hacienda will be able to assess the severity of the damage to the paths and the complexity and cost of their major repairs or cosmetic restoration.
Coloring compounds
Not every paint is suitable for this - it is necessary to create a coating that is resistant to the sun and water, which can be done by:
- stain for concrete;
- rubber enamel;
- epoxy and acrylic paints;
- polyurethane varnish.
Staining
To cover a concrete surface, you must use a special stain for this material. There are solutions with intense or translucent color. They are similar in effect to wood paints - they only add a tint and allow you to create an imitation of noble marble and other rocks.
Stain is a liquid solution that, when applied, penetrates deep into the concrete through micropores. The chemical-based product interacts with the components of the concrete stone, permanently pigmenting it. The result is a moisture- and stain-resistant coating with improved surface quality. To get a good result, you will have to cover the path 2-3 times.
Stain can also act as a primer for higher density pigmented paint.
Rubber paint
Painting concrete paths with rubber paint is a way to create an elastic coating that is resistant to any type of impact. It is not for nothing that it is used to cover floors in garages with heavy traffic of people and vehicles.
The elasticity of the rubber coating does not allow the paint to quickly wear out under load of any intensity. The service life on garden paths can reach 10 years.
Epoxy and acrylic paints
We have combined these compounds into one group due to the similarity of their properties:
- form an elastic coating on concrete;
- do not penetrate deeply into the structure of the stone, therefore they require application in 2-3 layers;
- have a similar service life - 2-5 years;
- paints with deep colors and a wide palette;
- do not lose color under the sun for a long time.
- easy-to-apply solutions.
Paints based on artificial and natural polymers are sold in different containers in any construction stores, so purchasing them will not be difficult.
Polyurethane varnishes
The polyurethane varnish coating forms a translucent protective layer on the concrete path. The varnish can be clear or pigmented and is suitable for covering the painted layer to extend its service life.
The product can also be used to protect concrete that has been pigmented prior to placement.
Work technology
When painting concrete paths with your own hands, it is important to follow a few simple rules. Even minor disruptions during operation are fraught with a significant reduction in the service life of the coating and even its destruction in a very short period of time
Preparatory stage
First, you should stock up on everything you need so that work does not stop due to a lack of any material or tool:
- Paint in sufficient quantities, remember that for the best result you will need at least 3 layers, you should not save, since redoing the surface in a year or two is much more expensive than doing everything thoroughly at once.
- If the surface is tile, and grass has grown between the seams, you should stock up on a tool to remove it; it can be a shovel, a special hook, or something else.
- If there are stains of oil, resin or other difficult-to-remove stains on the surface, you should purchase a special composition, since the paint in such places may peel off.
There are special formulations on sale that can easily cope with any stains from petroleum products.
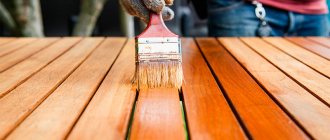
You need to decide how to paint the concrete path; a brush is best for this; with its help, the composition will get into all the unevenness and fill the entire surface, which is very important for the best adhesion
For work you should choose a high-quality tool with natural bristles
- To remove sand and other debris, you will need a broom or a stiff brush; they are the best way to remove sand.
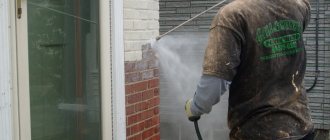
- It is also advisable to have a pressure washer. With its help, you can thoroughly moisten the surface and remove all remaining contaminants. If you don't have such equipment, you can borrow it or rent it for a few hours - it won't cost much.
Washing will help remove all dirt from concrete.
If everything you need has already been purchased, you can begin preparing the surface; for this you should choose dry, moderately sunny days; rain during work is extremely undesirable.
The sequence of events is as follows:
- As noted above, if there are concrete tiles on the path and grass has grown between the seams, it should be removed, otherwise the quality of the paint will be very poor.
- Next, using a stiff brush, you should remove all the sand as thoroughly as possible (if you have an industrial vacuum cleaner, the work can be done with it). (See also the article How to paint paving slabs: features.)
PVC brushes and brooms are an excellent option for cleaning concrete paths
And finally, the very last step is to moisten the surface using a hose or a special sink. The second option is preferable because the pressure washer not only moisturizes the concrete, but also removes any remaining grains of sand.
Application of the composition
To ensure that the coating lasts a long time, you should follow a few simple recommendations:
You can start work only after the moisture on the surface has completely dried, this is very important for the adhesion of the solution
Until the surface is completely dry, you should not begin work.
The first layer serves as a kind of primer, so the paint should be thinned. The brand of thinner most suitable for these purposes will be indicated by the instructions on the packaging. The dilution ratio is 4 parts of paint to one part of solvent; the composition will be quite liquid, so it will be able to penetrate all surface irregularities.
If desired, the path can be painted in different colors, which makes it even more similar to natural stone.
If you have a metal fence or other decorative elements next to the path, you should take care of protecting them; Zinga electrically conductive paint works well. If you are not satisfied with the silver color, you can use fire-retardant paints for metal Polistil, they are not only fire-resistant, but also resistant to atmospheric influences, in addition, you will be pleased with the rich color range of compositions.
Step by step painting instructions
The technology for painting concrete paths is the same for all products.
- Surface preparation. It is recommended to work with concrete that has reached 28 days. The surface must be cleaned of any contaminants and thoroughly rinsed with pressure water from a hose. It is not recommended to use detergents - they partially remain in the upper pores of the coating and can interfere with the adhesion of the paint to the base.
- When working with stain, you do not need to use a primer, but when painting with other compounds it is necessary. It is important to choose a concrete primer - it penetrates into the upper layers of the path and strengthens them, creating a non-porous base for painting. Apply the solution to the surface with a roller or spray.
- When the soil has dried, you can begin painting the concrete surface. To do this you will need a brush, roller or paint sprayer with a compressor. Applying color with a brush is convenient for working out the texture of the stone when creating a pattern using a template. A spray bottle is useful for evenly applying paint.
Brush painting technique
You should choose a brush of a convenient width to work out the pattern and texture:
- For seams between stones and thin patterns - width 2-5 cm;
- To cover large fragments, use a wide brush from 5 cm.
You can add the texture of stone or imitate masonry by eye or using a template.
You don’t have to buy a template - you can make it yourself from cardboard, which is recommended to be covered with film for easy cleaning. Painting tape will also help to create a texture - it can be glued to the concrete path in any order, indicating stones.
The paint must be applied through a tightly attached template. It is convenient to first draw the outline, then paint over the middle of the fragment. After transferring the template and removing the tape, use a brush to carefully paint over the “seams” of the simulated masonry.
Subtleties of working with a paint sprayer
When working with a paint sprayer, you must first protect the surrounding area - cover bushes, walls and other objects located next to the path with film.
Methods of painting concrete with a paint sprayer:
- Uniform coloring is the simplest option. The jet is directed at an angle of about 45° to the plane, the distance from the tool to the track is 50...60 cm. The jet is directed from the edge in parallel lines. For non-professionals, it is recommended to work continuously across the entire width of the pavement to prevent the formation of color transitions.
- Structured application allows you to achieve a visual resemblance to marble. To do this, the jet is not directed in strictly parallel lines, but with emphasis on individual areas.
We have presented several ways to improve concrete country paths. Coloring is available to everyone; you don’t need to hire professionals or spend a lot of time. All that is required is to choose the right paint composition and apply it according to technology. Then the result will please you for a long time!
Concrete is a durable and mechanically resistant material; without it it is impossible to imagine the construction of any object. But concrete does not always look aesthetically pleasing. In addition, it has a porous structure, which is why it is exposed to precipitation and other external factors.
To protect the surface and give it a pleasant appearance, special paints for concrete are used.
Painting a concrete path: mastering the technology yourself
With the help of capacious and informative master classes, hacienda owners will be able to not only independently master the technology of producing forms for garden paths, but also receive valuable recommendations on the technology of competent coloring of concrete. The step-by-step guide below will help them quickly complete a large amount of work and give stable and reliable concrete paths on the site a neat and well-groomed appearance.
- Preliminary cleaning of the path from litter, soil, dust and sand using a broom. Removing any grease and oil stains from the surface of the trail with solvents or special detergents.
- Determining the required amount of paint by measuring the area of the garden path to be painted.
- Using film or paper to wrap trees, bushes, small architectural forms and other elements. This is necessary in order to prevent them from being contaminated with paint during the work on improving the path.
- Preparing tools for work. The developer needs to pour the enamel into the paint sprayer, following the instructions for the paint coating for concrete paths.
- Carefully spray paint from a height of half a meter. It is better to start work from the corners, gradually moving towards the center. Achieving optimal results is possible by applying several layers of coating. However, each layer must be thoroughly dried before the next one is applied.
- After applying the final layer, the path is left for several days for the coating to dry. Only after this period will it be possible to step on it.
- To better preserve the color, developers can apply a concrete sealer over the paint layer. Its composition will protect the surface from fading, cracking and other defects that appear on painted concrete paths under the influence of the sun, temperature changes and humidity.
Imitation stone: subtleties of textured coloring of paths
To achieve a natural look for a garden path and give its surface a texture simulating natural stone, the painting procedure is carried out in a special way. Using a paint sprayer, the enamel is deliberately applied in an uneven layer, alternating dark and light areas. The next layer of composition is sprayed in the same way. When the coating dries, the surface of the path will acquire an interesting texture that will look natural and harmonious against the background of flower beds, fruit plants, berry bushes and coniferous plantings of the garden.
Types of paints for concrete
Concrete paints are used to cover walls, foundations, paving slabs, floors and ceilings. There are paint and varnish compositions that are used only for exterior or, conversely, only for interior work. They have different properties and different performance characteristics.
From the outside, buildings and structures are exposed to various external factors, so paints in this case must have certain properties: high moisture resistance, frost resistance, wear resistance, vapor permeability, beautiful appearance and have a short drying time.
The most important parameter of materials for interior work is environmental safety and the absence of a negative impact on human health. Enamels for interior work must also resist the penetration of liquids and various mechanical stress.
Classification of paints for concrete by composition
- Acrylic paints. The most common way to treat an unpainted concrete surface is with acrylic concrete paint. It contains acrylic resins and polymer particles. The ratio of the components determines how matte or glossy the result will be. Acrylic is harmless to health, waterproof, and easy to apply. There is a huge variety of acrylic paint colors. The composition of acrylic-silicone enamels includes silicone additives - polymer components that contain silicon particles. The introduction of additives makes it possible to give paints elasticity. The consumption of acrylic paint on concrete usually varies between 170-200 g/m2.
- Epoxy paints. The two components of epoxy paint for concrete must be mixed with a construction mixer. After covering the surface to be painted with a layer of paint, it forms a protective film on the concrete. Epoxy paints protect concrete well from moisture, and their color is always rich and bright. Their main disadvantage is the small variety of color palettes. Consumption: 300-350 ml/m2.
- Vinyl paints. Vinyl enamel is used in exterior and interior work. It has a rich color and an average service life of seven years. Even an initial coat of vinyl paint is enough, so you can skip the second coat. The enamel has virtually no odor; its drying time is 2 hours.
- Polyurethane paint for concrete. Concrete floors are usually coated with polyurethane enamel. It resists exposure to aggressive environments well and also resists mechanical damage. The main disadvantage of polyurethane-based compounds is the long drying time. It lasts 2-14 days. Consumption: 160-200 g/m2.
- Water-based paints. Such colorful compositions are resistant to high temperatures. They are environmentally friendly. The surface after coating with paint will be waterproof and frost-resistant. Consumption: 550 and 350 g/m2 for the first and subsequent layers, respectively.
- Rubber paints. They are made from a water-dispersed solution, a pigment additive and acrylates. The colorful composition creates an impenetrable polymer film on the surface of concrete. The drying time of the paint is 20 minutes, and the painting itself can be done even at sub-zero temperatures. Rubber paint is often used in unheated areas. Consumption: from 400 g/m2 (for 2 layers).
Acrylic paints for concrete walls
Most often, acrylic compositions, which are divided into organic and water-based, are used to decorate walls (both internal and external). Solvent paints form a coating with high mechanical strength that is resistant to temperature changes, moisture and other aggressive influences.
Many of them (for example, “Akrial-Lux” from KRASKO price - 140 rubles / kg) allow work in the winter. And yet, in private homes, organic paints and varnishes are rarely used. The reason is a sharp unpleasant odor, difficulties with tinting and a relatively long drying time.
Water-soluble acrylic paints do not have all these disadvantages. But they are inferior to “organic” in terms of strength and durability of the coating. However, in suburban properties the load on the facades and internal walls of buildings is much lower than in industrial areas, so most often the owners of private houses give preference to water-soluble emulsions. They are produced by almost all large “paint” companies, both domestic and foreign. The average cost of the product at the moment is 125-200 rubles/kg.
Popular articles How to help hydrangea bloom
Another option for finishing concrete walls is alkyd enamels.
Interestingly, they can be used not only on mineral, but also on metal and wooden surfaces. The paint layer adheres firmly to materials with completely different properties thanks to the binder – alkyd resin.
In air it polymerizes, forming a smooth and elastic coating with good adhesion. Alkyd compositions are extremely durable (much stronger than acrylic), but it should be noted that they are solvent-soluble. with all the ensuing consequences - unpleasant odor, long drying time, etc. The cost of products of this kind is relatively low.
For example, the price of PF-115 universal enamel from TEX in a 2.5 kg container is about 500 rubles. Alkyd enamels come in three levels of gloss: glossy, semi-gloss and matte. For outdoor work, it is reasonable to give preference to the first type - a smooth paint layer lasts on average 15-20% longer than a rough one.
Methods for painting concrete surfaces
There are two fundamentally different technologies for painting concrete surfaces: deep painting and surface painting. During deep painting, chemical processes occur due to which the paint literally eats into the concrete, resulting in a very durable color. Surface painting is much cheaper and is what is used most often. The strength and durability of the coating depend on the quality of the paint.
You can apply the coloring composition to concrete with a roller, brush or spray. The surface should be pre-cleaned and, if necessary, coated with a primer. The color coating needs updating from time to time.
Concrete paint manufacturers
The main difference between paints is their chemical composition. All the characteristics of the paint coating depend on it. Nowadays there is a huge selection of paints of all colors and textures on sale.
Mizar Rezolux Profi-52
This enamel is intended for painting concrete floors and stairs. It is characterized by increased frost resistance - the minimum permissible operating temperature reaches -15°C. While similar products (which include, for example, the popular Tikkurila Betolux Aqua) are not recommended for use at temperatures below +5°C.
Mizar Rezolux Profi-52 is suitable for painting concrete surfaces inside residential and non-residential premises (warehouses and garages), as well as interfloor and street stairs. For example, one of the largest housing developers in Russia uses Rezolux Profi-52 to paint public areas and staircases.
Enamel can be used not only for painting concrete, but also furniture, doors, wallpaper for painting and other surfaces. It has excellent wear-resistant, water-repellent and strength properties. The cost of 1 kg of “Mitsar” Rezolux Profi-52 is 220 rubles. And this is four times cheaper compared to the popular Tikkurila Betolux Aqua enamel.
The St. Petersburg manufacturer - the Mizar company - is notable for its vast experience in the development and production of coatings with increased wear and weather resistance (exposure to high/low temperatures, precipitation, etc.).
For example, Mitsar enamels with anti-corrosion and acid-resistant properties were used in the construction of the Leningrad and Kola nuclear power plants. Also, the manufacturer’s materials have the lowest (up to 5 times!) price among competitors with the same or higher parameters.
Therefore, paint and varnish materials of the Mizar company regularly win tenders and are actively supplied to enterprises within the framework of the State Defense Order.
Dufa Betoplast
Dufa Betoplast – polymer paint for concrete. The price is about 900 rubles. per liter, consumption: 10 m 2 /l. Apply with a brush or roller. It withstands mechanical stress well, is plastic, and can withstand high temperatures (up to 50 degrees).
Euro 3 Matt (Tikkurila)
Price: 300 rub./l. This is a frost-resistant paint for concrete. Apply to the surface to be painted using a sprayer, roller or brush. It is universal, used for painting not only concrete, but also wood, brick, and plaster surfaces. Consumption: 10-12 m 2 /l.
Master Good
Highly elastic paint. Average consumption – 190-250 g/m2. Not recommended for covering concrete floors. It is best to apply this paint in two layers.
Tex Pro
This is a washable paint that is used in rooms with high humidity. Creates a permeable protective coating. The paint consumption is 9-11 m2/l, it dries in one hour at normal humidity and room temperature. Its color is white, but you can add color if you wish. Able to withstand constant moisture.
Novbytkhim
Cost: 1500 rub./l. Paint with good resistance to chemical and mechanical damage. It is usually used in warehouses and garages. Retains color well. Can be applied in 1-3 layers.
Impregnation for concrete paths in the garden
Cracked and peeling old concrete garden paths were repaired. On top of them (after appropriate preparation) is laid a very dense DSP (1 to 3) with the addition of Escode P 80 plasticizer. I would like to protect the tracks as much as possible from new cracking, i.e. from the effects of all our wonderful weather events. How . How .
If they are not reinforced initially, they will still crack.
They are initially reinforced. The stratification is worrying, especially evident with the onset of the spring period. In some places there are quite deep cracks. But it's all been renovated. I don't want repetitions. There is a desire to waterproof the paths as much as possible. I don’t know what and how.
Maybe Epolast Aqua will be suitable” > It holds up well outdoors and prevents concrete from collapsing. Personally, I couldn’t find anything better for myself.
Water ones will not work - the water is no longer absorbed. Plus mechanical loads.
Stez wrote: Water ones will not work - the water is no longer absorbed. Plus mechanical loads.
Hasty! Read it carefully, this is epoxy for severe operating conditions, my car drives, it rains, workers stomp with materials, knock, plan, and whatever the hell.
That's a different matter.
I looked. Yes, that's not a bad price for a bucket. Does anyone know better budget options?
Yes, and besides, judging by the description, it is intended for concrete floors in indoor areas. And I have an atmosphere.
And I have an atmosphere, a healthy concrete area on the street. We read carefully again: “High resistance to chemical reagents and wear resistance allow the use of epoxy paint for painting concrete surfaces in workshops, laboratories, OPEN parking lots and auto repair shops.”
PS. I'm not insisting, I'm just sharing my experience. If you find something better and cheaper, then share the information. I couldn’t find it better, specifically for the street, maybe I didn’t look well. Well, except for white road marking paint
Yes, I probably scoured the entire Internet... So far I have found another option: varnish KO-85. Significantly cheaper and, according to reviews, durable.
A curious varnish, even for metal ” > ” >
Hm. Acetone solvent?! “KO-174 enamel and KO-85 organosilicon varnish are supplied ready-made and must be stored in special premises in compliance with fire safety and sanitary requirements. The putty layer is prepared in a clean, hermetically sealed mixer, mixing KO-85 varnish or KO-174 enamel with ground dry talc in a ratio of 1:1 (parts by weight). Enamel KO-174 or varnish KO-85 is diluted to the required viscosity with solvent R-5 (30% dibutyl phthalate, 30% acetone, 40% xylene). Enamels are applied with a brush, roller or spray gun GSH (R-68) SO-21A, etc., at a temperature of 18-20 0C.” Something is wrong, IMHO.
You have to stay, and it wouldn’t shine
Tikkurila has a shit ton of coatings for concrete” >, epoxy, BUT all are glossy, which I generally don’t like
Yes, it will look strange on garden paths. But gloss, as far as I understand, is an indicator of the water resistance of the coating. As for the KO-85 varnish, one (not local) forum member recommended it specifically for coating concrete and claimed that the result was time-tested. The cost of this varnish is very competitive compared to all other coatings. I would like to check this review, but so far there are no responses to KO-85. What confused you about it? There are links to it on the Internet that contain information about the possibility of using it on concrete.
There are links. This confused me: “. diluted with solvent R-5 (30% dibutyl phthalate, 30% acetone, 40% xylene).” Somehow it’s not suitable for concrete, but for metal it’s a different matter. Where can I get such a solvent?
Maybe something like Tikkurilov’s Kivisil Silicone Protection or Novasil” >
Today I asked the stone layers what they use to cover the flagstone. It turned out to be KO-85! So maybe this is what you need. Where is it sold? Have you seen it in Moscow and the Moscow region? " > More dug up " >