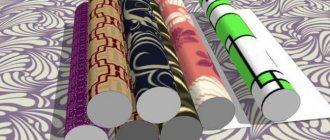
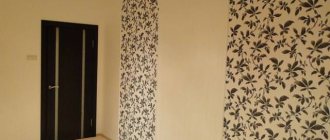
New wallpaper is always a joy and a pleasant update to the interior. However, so that this joy does not begin to disappear with the start of the heating season and the appearance of the first exfoliated fragments, you need to take the process of preparing the wall surface extremely seriously. That is why the answer to the question of whether it is necessary to prime the walls before wallpapering can only sound in the affirmative. We talk about all the specifics of priming walls and the basic procedure in today’s material.
- 4 reasons for mandatory priming of walls;
- Types of primers and specifics of their use;
- What you will need;
- Prepare the surface;
- Basic rules of priming;
- Conclusion.
Types of primers and specifics of their use
If you think that buying a primer is the same as going to the store for cigarettes, then you are deeply mistaken. The choice of primer should be based on the type of base surface
, with which you are dealing.
Today there are
4 most common types
.
Perchlorovinyl
- used exclusively for outdoor work.
Do not purchase this type of primer under any circumstances - it definitely cannot be used under wallpaper. More precisely, it will work out quite well, but it will be of little use. The main purpose of this type is to prime external surfaces to fully protect them from moisture and cold. It dries very quickly.
Alkyd
- goes well with chipboard, fibreboard, wood;
- Not recommended for use on plastered walls.
You should also not use this type of primer under wallpaper - after all, the wall will be plastered in any case, and completely different primer mixtures work well with plaster. They dry in about 15 hours.
Glyphthalic
- perfect for both wood and plastered surfaces;
- takes a very long time to dry.
This primer option is much closer and can be called universal, but the only drawback - the long drying time - makes many craftsmen lean towards a different choice. Let's note the popular mixtures: GF-021, Ecol
.
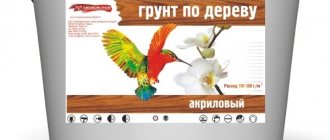
Acrylic
- 100% universal;
- dries very quickly;
- Ideal to fit under wallpaper.
In any unclear situation, buy an acrylic primer. This is, of course, a joke, but there is a lot of truth in it: it is suitable for any surface, and it will dry even faster than you can choose the most beautiful wallpaper for your interior. Focus on the following names: Ceresit, Snezhka, Pufas, Forman
- quite high-quality solutions at a reasonable price.
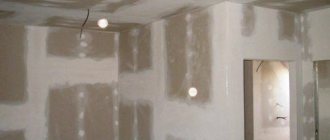
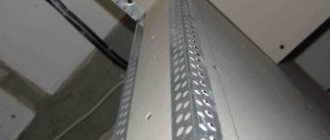
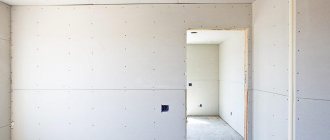
Plasterboard putty under wallpaper
It is impossible not to take into account the joints of the sheets, which must be sealed first. For this purpose, special white paper is used, which also stands out significantly against the background of the general surface. If finishing with plasterboard was carried out in a newly built house, then perhaps after some time the structure will shrink.
If the joints of plasterboard sheets are not reinforced and the entire surface is not puttied, then when the walls of the house shrink, folds and creases will appear on the wallpaper. For rooms where a high level of humidity is expected, it is better to use primers that also have antiseptic properties. Drywall today is firmly established in leading positions of popularity among other construction and finishing materials. It is used for leveling walls and installing partitions, creating suspended ceiling structures and other original interior elements. It can become an excellent base for any decorative finish - it can be wallpaper, paint, ceramic tiles and even artificial stone. - Due to the rapid setting of ready-made mixtures, it is necessary to work with them quickly enough. When making it yourself, do not knead a large volume of material.
The container with the prepared mixture must always be kept closed, collecting a small amount of putty in a separate container. The disadvantages of cement putty include a coarser-grained structure, in contrast to gypsum or polymer putties.
Additional information on the topic:
- How to make a transom over an interior door from plasterboard
- Plasterboard partition in a nursery for two children of different sexes
- Suspended plasterboard ceilings combined with stretch ceilings
- Installation technology multi-level plasterboard ceiling installation
- Plasterboard ceilings and plasterboard arches
What you will need
- roller;
- brush;
- gloves;
- respirator;
- spray gun or sprayer.
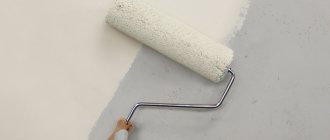
The last item on the list is, of course, a wish, because in this case the work will go much faster. However, a roller and brush will do just fine to distribute the primer efficiently and evenly over the entire wall surface. But there are some nuances in working with these tools:
- the roller helps to distribute the primer evenly over the wall, but not deeply; the brush promotes deeper penetration of the composition into the wall and, as a result, better protection against bacteria and fungus.
Stages of applying the composition
The technological process includes simple steps. Let's look at how to prime walls for wallpaper with your own hands. The algorithm consists of several steps. First, the work site and base are prepared, then the primer is applied.
Preparation
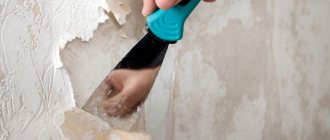
Before priming the walls and gluing non-woven wallpaper, you must first remove the old coating. If it was wallpaper and cosmetic repairs are planned, then it is recommended to wash off the remaining glue or paste. Large differences and defects must be filled with plaster solutions.
The purpose of the event is to create a clean and free area for work, level, without debris, oily stains, areas of fungus, mold and rust on the surface. Here you may need covering materials to protect the floor, windows and interior items from contamination. If necessary, the walls are leveled, treated with a degreaser, destroyers and preventive agents.
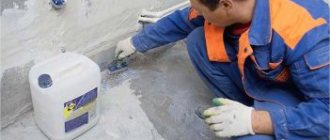
Preparation of working fluid
The manufacturer always informs the buyer about the rules for preparing a primer for walls. Deviations from the recommendations lead to changes in the declared characteristics for the worse, so the instructions must be followed. For mixing, it is better to use a container with high sides and a construction mixer (an attachment for a hammer drill or a drill for paintwork materials).
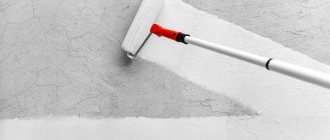
Application
Depending on the consistency of the primer composition, three types of tools are used to distribute it: a brush with rich bristles, a roller with short pile or foam rubber, and a spray gun. Accordingly, these will be thick, liquid and watery materials. The main thing here is to avoid smudges, bumps, and gaps. It is more convenient to deal with the latter when an indicator is added to the liquid.
Before applying the primer, the necessary conditions must be created. Thus, the relative humidity should not exceed 60%, and the air temperature should not drop relatively plus 10-15 degrees Celsius.
The room should be intensively ventilated, but drafts, fans and heat guns are excluded.
The characteristics of the primer layer are affected by intermediate and complete drying. Often, novice craftsmen check the coating for dryness and rush to continue the repair process. Rushing in this case will reduce the adhesion and strength of the materials that need to be reinforced.
Preparing the surface
In order for the walls to begin to be treated with a primer mixture, they must first be prepared.
- carry out complete dismantling of the old material;
- remove all dust, debris, scraps;
- Fill all defects with putty.
You can also read the step-by-step instructions for preparing walls for wallpapering.
Please note that complex wall treatment may include primer treatment at several stages:- directly during sealing of cracks and crevices;
- right before gluing.
A few recommendations
When preparing to prime and wallpaper your walls, use the following tips.
- Not everyone knows how many times to prime walls. It is enough to apply a high-quality primer once to a well-prepared surface. On porous, heavily crumbling and moisture-absorbing substrates, primer should be applied in 2 layers.
USEFUL INFORMATION: An alternative to a roller and brush: to paint walls, choose a spray gun
You can check the absorbency of the wall like this: apply the primer in one layer and wait half an hour. If the appearance of the surface has not changed, it means that all the primer has been absorbed and an additional layer is needed.
- The next layer is applied evenly over the entire surface only after the previous one has completely dried.
- Dry primer is cheaper than ready-made liquid primer.
- The soil mixture must be diluted strictly according to the instructions indicated on the package. The result should be a homogeneous mass composition.
- Be sure to follow safety precautions by protecting your body and eyes from contact with the primer.
- If you do not have the opportunity to buy a primer, you can apply diluted wallpaper glue to the wall before gluing.
Basic priming rules
The priming process itself, like plastering, does not represent any technological complexity and is accessible to anyone who knows how to handle a brush and roller (read the article for instructions on plastering walls with your own hands). However, we still consider it necessary to pay attention to some rules, especially since some of them are related to your health:
- be sure to wear gloves when working; it is advisable to wear a respirator on your face - this is due to the fact that many mixtures smell very unpleasant and can cause irritation of the respiratory tract;
- if you value your floor covering, then take care of it in advance and cover it with something - the solution will certainly drip all over the floor, and you can wipe it off without consequences only immediately, when it has not yet hardened;
- the primer should be applied in a top-down direction;
- large areas can be treated with a roller, and for those where it is difficult to reach with this tool, use a brush;
- if you notice that some areas on the surface absorb the mixture too quickly and actively, then be sure to go through them again - until a kind of “soap film” is established on the surface;
- the optimal number of applied layers is 2, and the second layer should not begin to be applied until the first has dried; after you have successfully applied the second layer, give the wall time to dry - the packaging of the mixture always indicates the minimum required time for this.
A reasonable question arises: how can you check that the wall has actually been processed according to all the rules? The answer is simple: after the treated wall has dried, simply run your hand over it. Does your palm slide freely over the entire surface? Congratulations, everything worked out! Does it cling to certain areas? It looks like you gave up some slack here and there and didn't process the surface well. In this case, you can process the wall again, paying attention precisely to those areas where the palm met desperate resistance from the relief.
Why do you need primer for walls: characteristics
In order to make wallpapering more practical, it is necessary to prepare the surface of the walls, for this they must be:
- cleared of old wallpaper;
- puttied;
- primed.
If everyone is sure of the need for the first two stages, then some people may neglect such an important process as priming.
- to create a dust-free surface that has maximum
- ability to bond;
- prevents the spread of mold or mildew;
- filling microcracks and micropores on the surface of walls, forming a monolithic film;
- improves the adhesion of wallpaper to the wall surface.