Do-it-yourself primer before laying tiles - Construction
Michel
7690 0 2
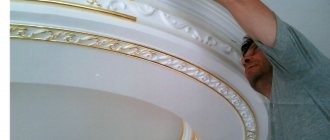
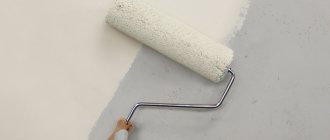
Greetings, comrades! Priming the base for tiles is an operation that is often neglected, and completely in vain. Today I'm going to tell you why you need to prime surfaces before laying tiles, which primers should be used in different cases and how to apply them correctly. Let's get started.
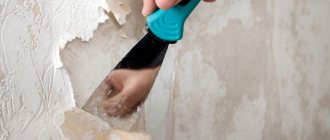
Are you going to lay tiles? Start with primer.
Necessary or not
Please note that the prices indicated in the article are valid for spring 2021.
First and foremost: do I need to prime the wall before laying the tiles? In my opinion, a primer is not needed only if several conditions are met:
- The wall surface is durable (that is, it does not have crumbling or peeling coatings - weak plaster, paint, etc.);
- It ensures high-quality adhesion of tile adhesive, that is, it has a textured surface with good adhesion;
- The wall is not dusty . Dust will noticeably weaken the adhesion of the glue to the base;
- The surface does not absorb water well and, accordingly, will not cause the tile adhesive to dry out prematurely.
The ideal scenario is to lay tiles on a brick wall made of solid red brick. Fired clay has low hygroscopicity, and the masonry seams provide good adhesion to the glue.
Smooth brickwork is an ideal base for tiles.
A primer is absolutely necessary if:
- You are going to lay tiles on walls with loose plaster;
- The base for laying the tiles is heavy concrete. Cement adhesive adheres rather poorly to the surface of a monolithic or slab partition.
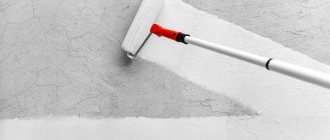
Do I need to prime the floor before laying tiles on a screed or floor slab? Let's just say: highly desirable. Otherwise, the adhesion of the tile to the base will deteriorate due to the absorption of water by the floor and, accordingly, the glue drying out before the end of the cement hydration.
Prime the floor using a leveling screed.
What to prime
What primer should I use for ceramic tiles? The answer depends on the type of surface.
Plaster, masonry, drywall, gypsum plasterboard
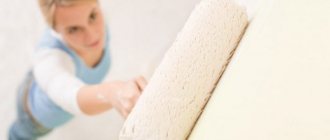
For gypsum fiber boards, brick and block walls (including plastered ones), penetrating acrylic primer is used. It solves several problems at once:
- Glues the remaining dust on the surface and thereby ensures the most reliable adhesion of the tile adhesive to the wall;
- Penetrating into the structure of the wall material, it increases its strength;
- Reduces water absorption and stabilizes the drying time of the adhesive.
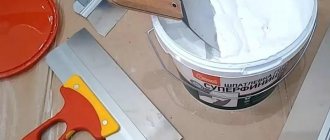
Here are a couple of samples of penetrating primers:
| Image | Description |
| Knauf Tiefengrund : ready-to-use acrylic primer with deep penetration. Country of origin: Russia. Suitable for highly absorbent surfaces (gypsum board, gypsum and chalk plaster). Price per kilogram - from 65 rubles. | |
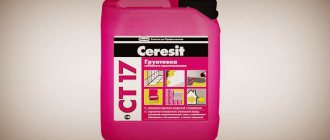
| Eskaro Aquastop Professional : concentrated moisture-proofing primer. Country of origin: Russia. Eliminates the penetration of moisture into the structure of the main wall (including from tile adhesive); in particular, ideal for walls in the bathroom and other damp rooms. Promotes better adhesion of the finishing layer to the base. Can be added to mortars. Before use, dilute with water in a ratio of 1:10. Price per kilogram - from 300 rubles. |
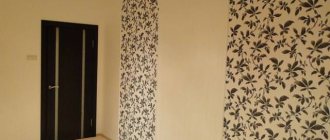
Do I need to prime the waterproofing before laying the tiles?
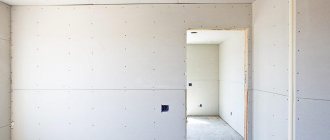
Drywall is the most popular material used in construction and repair work. It can be used in any room, even in the kitchen and bathroom.
Now many varieties of this material have appeared, including those with increased moisture resistance and thermal insulation. But, despite such advantages, waterproofing is necessary for drywall, especially in the bathroom.
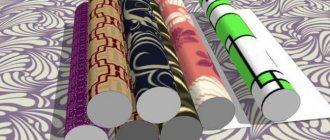
Nowadays, stores offer a wide range of different waterproofing materials.
Waterproofing gypsum board in the bathroom must be carried out
Methods for protecting plasterboard walls in a bathroom
Although moisture-resistant drywall is used in this room, additional protection would not hurt. Before installation on the frame, the sheets must be treated with mastic. It contains no organic solvents.
After it dries, a waterproofing film with good adhesion appears on the surface. After erection on the frame, the edges of the sheets must be covered with silicone sealant.
You can prime and apply PVA or rubber waterproofing.
We prime the corners resulting from joining the sheets and glue a waterproofing tape, its width is 20 cm. A waterproofing agent is applied on top of it. We also process external corners. The main thing is to protect the walls near the floor well.
They use bitumen-based coating or pasting agents. They are applied to the floor and wall to a height of 15-20 cm. Wall partitions near the shower and bathtub are fully processed.
The product is applied several times, allowing the previous layer to dry.
Pay attention to the corners on the floor, where the greatest amount of moisture accumulates
The reverse side of plasterboard sheets is treated with lining materials. First, a polymer or bitumen composition is applied, then roofing felt, glassine, or roofing material can be glued. Penetrating insulating agents are applied in a layer of 1 to 3 mm.
Once they get into the structure of the material, they turn into crystals - this creates a reliable moisture-proof layer. Painting with acrylic paint is no less effective protection. It is used to process only the back side of the sheet, applying several layers. Once the front side has been painted, tiling will no longer be permitted. The paint must be waterproof, and the coating must be primed before application.
Waterproofing surfaces is always highly effective if the room has good ventilation.
For greater waterproofing effect, you need to have good ventilation.
What type of drywall should I use?
Before starting a bathroom renovation, many people wonder: is it possible to lay tiles on drywall? There is a lot of discussion about this. No one can give an exact answer, but specialists successfully carry out such work.
First you need to choose the material itself - it will be moisture-resistant drywall (GKLV), usually green. It has two layers of special cardboard and a gypsum base, to which water-repellent and antifungal components are added.
Therefore, the material is protected from the appearance of fungus and mold and does not allow the absorption of liquid.
GKLV is usually green in color and has moisture-repellent properties
The best choice is gypsum fiber (GVLV) - a durable, highly reliable, strong material that has an increased service life. Suitable for rooms with a high percentage of humidity.
It is important to remember that such slabs are mounted only on a metal frame; wood cannot be used under any circumstances. The distance between the profiles is reduced and is 40 cm instead of 60 cm.
When you choose and buy drywall, be sure to pay attention to the thickness.
| When mounted on a wall | 12.5 mm |
| To the ceiling | 9.5 mm |
Attention! Do not forget that the cost of high-quality drywall is much higher.
When buying gypsum fiber sheets, pay attention to the thickness
How to make penetrating waterproofing
Nowadays, penetrating insulation is used almost everywhere, in any room where there is a high level of humidity. When the mixture penetrates the pores and reacts with the structure of the material, crystals are formed, preventing liquid from penetrating inside.
The material is suitable for any surface, reliably protects against moisture, increasing the service life of structures several times. Compared to brick and concrete, penetrating waterproofing does not penetrate very deeply into drywall.
Source: https://karandremont.com/nado-li-gruntovat-gidroizolyatsiyu-pered-ukladkoy-plitki/
Coating waterproofing: stages of work
- 1 of 1
On the picture:
Even if you use moisture-resistant drywall to build partitions in the bathroom, its junction with the bathtub still needs waterproofing. The only concession is that you do not need to prime the sheet before applying waterproofing.
Surface preparation This is the most important stage of waterproofing a bathroom. If a very high-quality waterproofing solution is laid on a poorly prepared surface, it will quickly begin to come off, crack or deform, and eventually allow moisture to pass through.
1Align. Permissible deviations are no more than 2 mm (in the complete absence of sharp protrusions). The surface should be almost perfectly flat.
2Cleaning The surface should be cleaned of substances that prevent strong adhesion of the solution: remove stains from building mixtures, varnishes, paints, etc. Next, all dust is removed (it also interferes with adhesion) - a regular vacuum cleaner will do for this.
3Primer. Before laying the waterproofing, a primer is applied to the base. It is selected depending on how well the surface absorbs moisture. If you purchase the wrong composition, it can ruin the whole thing. Porous surfaces (cement screed, plaster, concrete, etc.) do not require the application of a primer, provided that cement-polymer waterproofing is used. In this case, the surface is simply wetted with water from a sprinkler or using a sponge. This will prevent the waterproofing solution from drying out too quickly.
Attention to the joints! Before applying waterproofing, special attention should be paid to the joints between walls and floors, since they are the main places for leaks. A good solution is to seal them with sealing tape. You can nail slats in these places to close the gap, but they will create irregularities that will be more difficult to work with.
Preparation of the mixture There should be no difficulties with waterproofing based on bitumen or polymers. They are sold ready-to-use. All that remains is to open the package and start applying. Cement-based mixtures are offered in the form of dry bulk materials. Many of them require different amounts of water for preparation; this is always indicated on the package. After water has been filled into the container (the optimal temperature is room temperature), the mixture is poured into it.
- 1 of 1
On the picture:
We remind you that when laying heated floors, you should use waterproofing suitable for operation at high temperatures.
It must be immediately thoroughly stirred so that it turns into a homogeneous mass without lumps. This operation can be performed manually, but it is better to use an electric drill with a special attachment (the volume of the mixture to be mixed is too large, it is quite difficult to “break” it manually). This will make the process faster and better. The solution is left for 5 minutes and mixed a second time, after which it is ready for application. Waterproofing the bathroom must be carried out for a certain time (on average from half an hour to an hour and a half), otherwise the composition will begin to dry out and become unusable.
- 1 of 1
On the picture:
Bituminous waterproofing looks unpresentable, but it is easy to work with: it is sold as a ready-made compound, which only needs to be applied correctly.
Application of waterproofing In accordance with SNiP 3.04.01-87 (“Insulating and finishing coatings”), work on waterproofing a bathroom “must be carried out at a positive ambient temperature and the surfaces to be finished are not lower than +15 ° C and air humidity is not more than 60%. This temperature in the room must be maintained around the clock, no less than 2 days before the start and 12 days after the completion of work.” In some cases, it is not necessary to comply with such strict conditions. For example, some varieties with a polymer component can be applied at temperatures from -20 to +50? C (this information is indicated on the label). Of course, you should not carry out work in frost or extreme heat. These factors most likely will not affect the waterproofing material itself, but the base, when the temperature changes to room temperature, will slightly change its volume. This may be enough to cause cracks to form.
- 1 of 9
On the picture:
The greatest difficulties are caused by the waterproofing of a shower cabin in construction: it is necessary to carry out comprehensive work on waterproofing the floor, walls and their junction with the ceiling of the cabin.
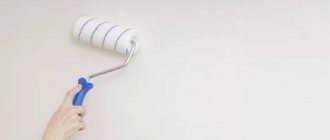
Waterproofing should be applied using a roller, brush or spatula. The layer should be uniform and smooth. The approximate drying time is indicated on the product packaging.
Sealing seams This is the last stage of waterproofing the bathroom, which is carried out after finishing work has been completed and the plumbing has been installed. It consists of sealing joints of various surfaces, seams and small holes. For these purposes, sealants produced in cartridges for a pneumatic “gun” are used.
The most common are acrylic, polyurethane and silicone sealants. In a bathroom environment, it is better to use the latter due to their durability and low price. It is desirable that they contain fungicides - substances that prevent the development of mold (fungus). Silicone sealants are either acidic or neutral. The latter are slightly more expensive than the former, but are suitable for use on a larger number of surfaces. Acidic compounds should not come into contact with copper, lead, zinc and brass, as this can cause corrosion of the metal. You should not use them on marble and cement-containing materials (they contain alkali, which reacts with acid).
- 1 of 1
On the picture:
The waterproofing has been completed, the plumbing has been installed - the last stage remains: treating the joints with the wall with sealant.
Whatever type of sealant you prefer, it should be applied in an even layer to a dry, clean surface - free of dust, grease particles and other contaminants. After the sealant has hardened, its excess can be easily cut off with a knife. But do not forget that when drying, the composition releases chemically active substances, so it is better to carry out work in a ventilated area.
Images used in this article: usg.com, younghouselove.com, conpro.com.au, showerrepairsplus.com.au, flextherm.com, craftsmanremodel.com, ontariotile.com