People are faced with the problem of lack of space in their apartment for things and accessories. By making plasterboard shelves with your own hands, you solve this problem. Built-in plasterboard shelves give you the chance to translate design ideas into the interior of a house or apartment. The main thing is to think through each stage to the smallest detail and complement the interior with a design that will give comfort and help organize the space correctly.
Design and design of plasterboard shelves Of course, people turn to plasterboard specialists for help, but this will require additional costs. But it’s better to make shelves from plasterboard with your own hands, this will allow you to pour a piece of the owner’s soul into the living space. And also gain a new skill that will be useful in life.
Purpose of niches in the living room
Based on the nature of use, niches are divided into three types:
- for installation of equipment;
- with shelves;
- for furniture.
Niches with shelves are used to equip small living rooms, which should not be cluttered with bulky furniture. Such structures are used for storing books, souvenirs, placing photo frames and other small items, and with the help of effective lighting you can beautifully highlight all the objects displayed on them. The design with niches and a fireplace in the center looks original.
Niches for equipment are also convenient and functional. A modern flat-screen TV, home theater system, speakers and other living room attributes can be comfortably accommodated here. Additional benefits include the ability to keep unsightly wiring harnesses out of sight.
The recess in the wall in which the sofa is installed looks impressive. This technique is appropriate both in spacious halls and in small studio apartments.
Beautiful examples in the interior
How to make a niche in a plasterboard wall with your own hands
If you have a rather small kitchen, then plasterboard niches will be an excellent design for it, which will help save space in the room and create an interesting design.
Shelves made of plasterboard are also perfect for the kitchen or dining room. They will replace massive hanging cabinets; you can place dishes on them or decorate them with decorative accessories.
An interesting and original option is to create shelves from gypsum plasterboard in the wall that separates the kitchen and dining room. There they look harmonious and therefore will be appropriate.
You can also fill the corner with shelves. This option looks especially good if there is a corner sofa and table. The shelf located above them can be decorated with a lamp.
Low shelves are suitable for a children's room. This way the child can easily reach any shelf. You can place textbooks and school supplies there. The shelves in children's rooms are decorated with LED strips and soft toys. It is advisable to make a box for the tape; it will greatly simplify installation and prevent it from overheating.
Recently, it has been fashionable to combine columns and shelves made of gypsum plasterboard. This design can serve as a unique way of zoning, for example, to separate the living room and dining room. On such shelves you can place various household items or interesting decorative items for decoration.
In the living room, instead of a large TV stand, you can make a niche, which will significantly increase the space in the room. A niche made of such material, unlike a wooden one, does not require special care. In addition, it looks compact.
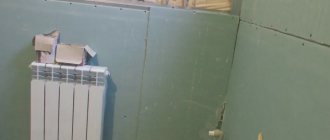
Shelves and niches made of plasterboard look interesting in the bathroom. They allow you to save the maximum amount of free space when it is limited in such premises. They can be placed both above the bathtub and above the sink, and even under these plumbing elements.
Plasterboard shelves in the bathroom can be decorated with bright mosaic tiles or adhesive film. You can place towels, hygiene items and scented candles there. This design looks beautiful and elegant.
Nowadays it is popular to use shelves in the bedroom instead of bedside tables. Such plasterboard shelves can be placed both above the bed and on the side of it. They can be decorated in different ways, focusing on the overall design of the room. Family photographs, portraits, souvenirs, decorative vases and flowers would be appropriate here.
Niches and shelves in the hallway and corridor look beautiful and stylish. For example, if you build lighting into a niche, this will greatly increase the space. Thanks to lighting, you can significantly expand a narrow corridor or small hallway. In this case, the shelves are not too deep.
Thanks to the use of such a solution, you can enliven the interior of any hall or hallway. A niche made of plasterboard can thus not only help emphasize the decor of the room, but also allow you to hide various defects in the corridor or hallway, for example, uneven walls. You can beautifully decorate plasterboard niches using simple paints to match the overall color of the corridor or decorate them with decorative putty, artificial stone, decorative glass, or artificial brick.
To learn how to make a shelf out of plasterboard, see the following video.
Finishing
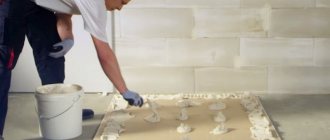
To give the structure a finished look, the surface is finished. To do this you need:
- Initially, it is necessary to apply a primer to the drywall so that the putty material adheres firmly to the surface. The primer is applied with a spatula in a thin layer.
- The first layer of putty is applied to the drywall with a spatula; it should be of such thickness as to hide all the seams, the caps of the screws recessed into the gypsum board, and the joints between the sheets. Simply put, the result is a homogeneous structure without protrusions and depressions on the surface.
- The first layer is sanded off with sandpaper to ensure a smooth surface.
- Then apply a thin second layer of putty with a spatula. When the material has hardened, they begin the final stage of the process - painting the drywall or gluing it.
You can create different designs for plasterboard shelves. Some build lighting fixtures into the structure, others decorate it with multi-colored glass. In any case, by creating a niche from plasterboard with your own hands, a person opens up the chance to organize the interior according to his own ideas and ideas.
Areas of application of plasterboard in the interior
Assembling a niche in a plasterboard wall with your own hands
By using this variation of finishing material, you can create various decorative elements. The scope of application of drywall is limited solely by the imagination of the author.
It can be used to resolve design issues of any level of complexity.
The use of plasterboard allows you to create the following decorative interior elements:
In addition, with the help of drywall, you can resolve the issue regarding wall decoration. Pre-installation of the frame allows you to hide all the irregularities, and also facilitates the most convenient placement of electrical wiring, pipes and other communication elements.
Drywall is quite often used for redevelopment work. By using it, you can easily resolve the issue of space zoning. Considering that the elements of the supporting structures will not be affected, it is not at all necessary to obtain the appropriate permission to carry out work of this type.
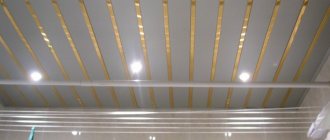
Thanks to the wide technological capabilities, the configuration of the plasterboard ceiling can be changed depending on the individual preferences of the homeowner. The ceiling surface can take any shape, which allows designers to free their hands.
Additional lighting elements can be integrated into the realized plasterboard structures. This determines the maximum functionality of the material.
The design of the so-called hidden cornice deserves special attention. The essence of this architectural technique is to install a suspended ceiling with a niche in which the cornice is hidden. This design variation can bring significant variety to the interior design of a room.
Plasterboard in bathroom finishing
Assembling a niche in a plasterboard wall with your own hands
The advantages of the material can be described for a long time. Let's list the main ones:
- Shelves made of plasterboard look very good in any room. The bathroom boasts an abundance of places where sheets of material can be used to create niches and built-in cabinets that will increase the functionality of the room and decorate it.
- Drywall is an easy-to-process material. It is not at all necessary to have any special skills, it is enough to do the work carefully and show a little intelligence.
- For the bathroom, shelves are made of waterproof plasterboard, the sheets of which are painted green for ease of recognition.
- The frame material is a metal profile, which, despite its low weight, has sufficient strength. If it is not intended to load the shelves with heavy weight, then a standard designation profile is used. If you want to create a plasterboard shelf with your own hands for a TV, you should use a reinforced profile.
Tips for choosing the design of shelves in a plasterboard bathroom
To install a TV, tape recorder or transistor in the bathroom on plasterboard shelves, it is recommended to choose the built-in option. It is not recommended to constantly store all these electrical appliances in a room with high humidity, but you can bring them while you take a bath to combine business with pleasure.
To store household detergents, soap, powder and shampoos, you can successfully use the corner design of the shelves, which will fit organically into the interior. To enhance the visual effect, the side and internal surfaces are painted in different colors.
The backlit option is used quite often; the rays from the lamps are directed in different directions, which creates a unique flavor for the design of the plasterboard shelf. Photos of such compositions can be viewed in various catalogs and albums from designers.
Various materials are sometimes used to decorate plasterboard shelves, which further expands the interior design options. The bathroom can have both small shelves and complex structures for multifunctional use.
Plasterboard shelves and niches can replace individual pieces of furniture in the bathroom. You can combine the arrangement of open shelves, made by yourself, with a large mirror installed in the center above the washbasin. For those who do their hair in the bathroom, it is recommended to combine such a shelf with a mirror and original lighting.
There is a great variety of shapes, finishing textures, combinations, and colors. All this makes plasterboard an excellent material for making niches, shelves and other built-in structures. On the Internet you can see photos showing options for plasterboard parts with a description of the work.
Material selection
Each owner can make the simplest designs of built-in shelves with his own hands. The material is really convenient to work with and does not limit the imagination of the master. You can realize the most unexpected fantasies.
For the bathroom, it is recommended to use only green sheets that can successfully withstand a humid atmosphere. Over time, pink sheets can bend from moisture and ruin the results of your work.
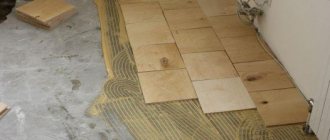
For flat horizontal surfaces, 13 mm thick sheets are used, which are called wall sheets. For the side walls, on which there is no load from objects, you can install thinner sheets, 9 mm thick, intended for finishing the ceiling.
It is advisable to use a varied thickness of the material if, after completing the renovation, there are pieces of drywall left in the house, which will be useful for making shelves in the bathroom with your own hands.
If you buy ready-made material, then you need to look at the integrity of the sheets; often they have chipped corners and the top layer peels off. The purchase of such materials should be avoided.
About the strength of plasterboard shelves and their structures
When making a shelf, rack or stand for household appliances from plasterboard yourself, it is worth determining the load to which the entire structure will be subjected. Both the service life and the safety of operation of the product depend on this.
GKL slabs are thin (0.6-2.4 cm) and fragile. A metal profile frame helps them withstand the load. Designing structures should begin by taking into account the expected weight of the items that are planned to be placed on the rack:
- if a plasterboard shelf will have a decorative function, then the frame is made lightweight in order to save materials and your own time;
- for stands for equipment, you need to assemble reinforced structures, and for long shelves, make additional vertical posts and double the number of horizontal guides;
- a rack for books or household supplies in the pantry is made using wooden blocks for the frame, because thin metal profiles sag when luggage weighs heavily, and the thickest gypsum board is chosen for shelves.
To make a plasterboard shelf in a room with high humidity, use moisture-resistant plasterboard. It is also undesirable to load the racks too much, since the gypsum filler becomes more plastic when exposed to moisture.
Partition marking
For marking you will need a level and a plumb line. Of course, it is more convenient to use a laser level, which aligns several planes at once. It makes it easier to make marks on the walls and floor.
Marking by level
Installation begins with attaching the guides to the floor, ceiling, and walls. To do this, use a level to draw a line under the guide profile. Next, using the same tool, we transfer it to the wall, then to the ceiling. We check the correctness of the marks with a plumb line; the lines of the ceiling and floor should match perfectly.
This is an important point; the stability of the future structure will depend on it. Therefore, you can “measure seven times” in order to then cut it correctly and install the profile.
Stages of work
The assembly of the shelf begins with semicircles. To do this, you need to cut the CD profile into small pieces of 3 - 5 cm, leaving only the side part untouched. This way you can bend it into a semicircle (see picture). It is best to make a semicircle pattern with a diameter of 30 cm, and use it to make a mark on the wall, and then attach a semicircular profile along this mark.
The profile is attached to the wall using self-tapping screws. Then, the same must be done on the other side of the wall, where the box turns upward, and in the opposite direction above the ceiling.
You can cut the profile using metal scissors or any other method familiar to you (someone, for example, is used to using a grinder).
However, for small trimming it is more convenient to use metal scissors. You can strengthen the semicircles with sections of UD profile to give rigidity.
After all the turns are fixed to the wall, you can connect them with straight lines from the CD profile. Horizontal and vertical profiles must be secured level.
When you manage to assemble the outline of the shelf, you can begin assembling the shelf-box itself.
To do this, a CD profile 30 cm long (shelf width) is cut into sections, which is inserted into a groove in the profile screwed to the wall with an indentation of 30 - 40 cm. These sections are fixed using LM metal screws.
The upper part of the box is assembled with a UD profile. Next, the design of the shelf is completely repeated with all the bends from the front part.
The next stage of work is covering the shelf with plasterboard. In straight places, sheathing is simple. All you need is to cut strips of gypsum board 30 cm wide and attach it to the profile with self-tapping screws. The situation is more complicated with the covering of semicircles on both sides. The first option to make a semicircle is to wet the drywall and gradually bend it. However, this method is slow and if the degree of rotation is too large, then you will most likely fail - the material will simply burst.
Therefore, in this particular case, it is best to cut a strip of drywall 30 cm wide, and then, taking a square and a construction knife, cut through the top of the cardboard, making strips with an indentation of 3 - 5 cm. This way, you can easily repeat the rotation of the shelf.
When fixing drywall in semicircles, it is necessary to tighten the screws frequently (cut into each segment cut with a knife). If you are doing this work yourself, and you do not have an assistant to hold the drywall, then you can use clamps for clamps.
The next step is attaching straight sheets of drywall. Thus, it is necessary to sheathe the entire metal frame.
We also cover the ends with plasterboard. For convenience, you can first cut out a pattern from paper, and then mark on it and cut out rounded parts from the base material.
If built-in lamps are provided in the upper tier, then it is necessary to pre-run the wire inside the upper box, make holes for lighting, and remove a piece of wire from these holes.
When you have completely covered the shelf, you can begin to putty the box, but first you need to install the corners. Before doing this, be sure to thoroughly prime the base. In this case, it is better to use a bending perforated corner.
It is attached to regular putty, but you can use special compounds for sealing seams.
It is also necessary to glue sickle tape in all seams of this structure and cover it with putty.
After the joint putty has dried, it must be cleaned to a smooth state, and then the box must be completely covered with finishing putty in at least two layers. For the front part of the shelf, you can use joint putty to strengthen it as much as possible, since in everyday life it is most likely to be subject to shock.
After finishing putty, clean the surface of the structure again until smooth, then apply primer to it again.
When the primer has dried, the shelf can be painted in at least two layers. For painting, regular acrylic paint or enamel is suitable.
To make the shelf stand out, it is best to paint it in light colors and make the background of the wall dark, or vice versa.
Finally, screw in the soffits.
In the middle of the shelf you can hang a TV, pictures, or make additional shelves for books. It's up to you.
So, we hope that this master class on how to make a plasterboard shelf with your own hands was useful for you and you can apply our tips at home.
List of materials and necessary tools
Before the actual start of construction, you should prepare the necessary set of tools for drywall, without which it is impossible to complete the above steps. Collecting equipment in advance allows you not to be distracted from work and concentrate solely on installation. The complete list of required tools is as follows:
- drill;
- hammer;
- plumb line;
- building level;
- roulette;
- pencil;
- screwdriver;
- screwdriver;
- metal scissors;
- putty knife;
- Victory drill;
- solution container.
Each of these tools is used at some stage of installation. Moreover, the presence of each of them is mandatory, and the absence of at least one element will lead to a slowdown in work and loss of time. Therefore, all equipment must be collected, materials folded and prepared, and their list looks like this:
- CD and UD profiles;
- metal screws (6 mm and 25 mm);
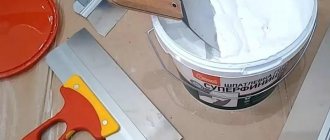
- gypsum putty for drywall;
- reinforcing mesh;
- dowels and fasteners for them;
- washers.
Having collected and prepared all the necessary elements, you can begin to form the frame system. However, you must first transfer the information from paper to the wall.
Drawing of a plasterboard shelf In order to maintain proportions and obtain even angles, markings are applied to the surface. It is performed using an ordinary pencil, a level and a plumb line. In this case, each line is checked 2-3 times and, if necessary, redrawn. A ready-made model of shelves will significantly simplify installation and much faster recreate a three-dimensional object on the wall.
Making a shelf from plasterboard with your own hands
The secret to a durable design is the correct selection of material in accordance with the tasks assigned to it. To do this, it is worth deciding on the place where the shelf will be placed and the tasks assigned to it. She may be:
- decorative;
- functional.
The first option allows the use of less durable and relatively inexpensive materials. Arched or ceiling gypsum plasterboard, the thickness of which is 6.5 and 9.5 mm, respectively. The design is based on a lightweight metal profile and the use of nylon dowels is allowed.
If a shelf is created that can withstand heavy loads, for example, a corner shelf, then wall plasterboard is used. Its thickness is 12.5 mm. The frame is made reinforced, and fixation on the vertical is carried out using metal dowels.
Required materials and tools
In addition to drywall, to create a shelf you will need a supporting and guiding metal profile. Due to the existing cuts, the arched profile is easily bent, acquiring the desired shape, which can be useful when creating curved shapes.
Supplies you will also need:
- screws and dowels;
- liquid primer;
- mounting grid.
Tools needed:
- level and plumb;
- roulette;
- knife and scissors for metal;
- screwdriver;
- plane;
- hammer and pliers;
- spatula, brush;
- sandpaper.
A separate line includes finishing materials, the type of which depends on the preferences of the apartment owners. This could be paint, wallpaper or something else.
Design
The design of the shelf depends entirely on the preferences of the apartment owners. In order not to be disappointed with the result, you need to make a schematic drawing of the structure and evaluate how harmoniously it will fit into the interior.
The next stage is a sketch indicating dimensions. Based on it, it will be possible to calculate the required amount of consumables. Focusing on the sketch, it is easy not to miss the number and size of elements when preparing for installation. And the latter makes it much easier.
Creating a frame and attaching drywall
Experienced craftsmen recommend first mounting the frame and only then starting cutting drywall. This will allow you to timely adjust the dimensions of the elements, achieving their maximum fit to each other.
Installation of the frame can be divided into 4 stages:
- Taking measurements and making marks.
- Fixing the supporting profile on the wall. The distance between the fasteners is unacceptable more than 25 cm. If serious loads are expected, the interval between the screws is reduced.
- Installation of guides.
- Adding lintels to weak points of the structure.
The profiles are connected to each other using short screws. Additional strengthening of the shelves is carried out using vertical racks.
When the metal profile structure is ready, all that remains is to cover it with plasterboard. First, the elements of the upper and lower sides of the shelves are mounted, then it’s the turn of the side ones. The end is sewn up last. Following this procedure, it is easy to adjust the parts, achieving maximum fit and avoiding distortions in the structure.
Step by step cutting of gypsum boards looks like this:
- marking element boundaries;
- cutting one layer of cardboard;
- bending and turning the sheet;
- cutting the second layer of cardboard.
The workpiece is treated with sandpaper or a plane to eliminate irregularities on its edges. The elements are attached to the frame profile using spacer butterfly dowels.
The penultimate stage of shelf construction is finishing putty. It is made multi-layered. Each layer is rubbed with sandpaper, which prevents the appearance of unevenness and roughness. When the putty has dried, all that remains is to prime the almost finished structure and begin decorating it.
Painting and lighting
The lighting of the shelves looks original, which can also play the role of additional lighting. For these purposes, you can use both LED strip and spotlights. If you decide to add shelves with them, then the wiring of power lines must be taken care of immediately after creating the frame from the metal profile. Holes for lamps in gypsum boards are made at the stage of cutting into cladding elements. To do this, you will need a special drill attachment (bit) of a suitable diameter.
There is only one requirement for decorative finishing - stylistic combination with the design of the room. Prepared drywall can be easily painted or pasted over with any materials, be it wallpaper or decorative stone. To get a high-quality coating, just follow the instructions from the finishing manufacturer.
Step-by-step instructions for assembling a plasterboard shelf
Before you begin installation, you need to prepare everything so that there is no downtime during work if something is missing. It is worth noting that the material needs to be purchased with a small reserve, since when constructing plasterboard shelves there may be a lot of scraps of material that will not fit anywhere.
Drawing with dimensions for assembling a plasterboard shelf
Important! If you are doing a comprehensive renovation in a new building, then you can plan the bookshelves from plasterboard so that all the remaining material will be used
Required tools and material
Tools you may need:
- rail;
- drill;
- plumb line;
- fasteners;
- serpyanka;
- building level;
- spatula.
Material for installation is purchased in advance - these are:
- plasterboard sheets;
- perforated corner;
- profile 27x28;
- 27x60 wall profile;
- putty;
- primer for drywall;
- wiring - if lighting is planned.
Drywall is a material with excellent characteristics that allow you to make shelves of any, even bizarre, configuration.
Option for the design and shape of plasterboard shelves
It is enough to use imagination and patience and you can get the most magnificent designs that no one else has.
Drawing up a sketch and necessary calculations
Before starting installation, you need to draw a sketch of the future structure. Think about what you want to see in your interior:
- simple plasterboard structures in the form of separately located shelves;
- gypsum plasterboard shelves assembled in the wall, which will occupy the entire wall;
- arched structures with shelves that will be equipped with lighting.
Once the sketch is ready, you need to carefully calculate everything, for this:
- take measurements of the wall on which the structure will be located;
- calculate the depth of the shelves, which is usually 50-60 centimeters in the standard form, but other sizes can be made;
- The length of the shelves is also of great importance in conjunction with the distance between them.
Sketch with dimensions of plasterboard shelves
Once everything is measured and recorded, you can immediately begin marking out the space for the frame and installation.
Frame assembly
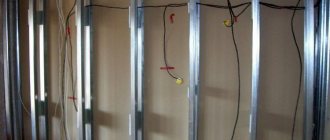
The frame for plasterboard shelves must be strong and stable. Construction of the frame is the most labor-intensive process, on which the quality of the final result depends. For the structure itself, it is better to use a galvanized iron profile. The choice of material in stores is very large, so there will be no problems with the purchase. The first step is to install the profile guides, which will be the basis of the entire structure. The profiles are installed on dowel-nails in increments of 25 cm for rigidity.
Assembling a plasterboard shelf frame
After this, you need to install the rack profiles according to the sketch. The profiles are fastened together with small profile screws, colloquially called “seeds”. As soon as the main frame is ready, they begin to arrange partitions for shelves - parallel to the floor.
It is advisable to use profiled steel slats for the structure, as they will make the structure more durable. It is advisable to install additional fasteners - rivets, brackets, hangers for the profile. It is worth remembering that the design must be constantly checked against the project in order to avoid errors and omissions.
Sheathing with plasterboard
Before you start screwing drywall, you need to run electrical wiring under the drywall if you plan to use lighting. It is advisable to put all wires in a special corrugation for insulation.
The drywall is cut to size, and holes are cut in the places of the lighting fixtures. As soon as the pieces are ready, they are secured to the frame using drywall screws, and the greater the load on the shelf, the more often the fasteners should be located. You can read how to hang a shelf on a gypsum board wall with your own hands on the website.
An example of sheathing shelves with plasterboard
If there are irregularities at the corner joints, they can be trimmed with a drywall knife.
Finishing
Once all the drywall elements are screwed in, you can begin finishing the plasterboard shelves. First of all, with the help of plaster, the perforated elements are fixed to the corners, at the same time all the screw heads are coated. Leave to dry. Next, the entire plasterboard structure is primed and puttyed, while reinforcing tape is glued to the seams. As soon as the first layer has dried, apply the second. For a high-quality finish, you need to go over the structure with putty three times.
An example of the finishing of shelves with backlighting made of plasterboard
As soon as the putty is completely dry, it needs to be sanded, after which you can apply the coloring composition to the drywall.
Installation
Attaching a shelf to a wall, its options and methods, directly depends on its weight. In this regard, there are two ways to attach shelves to a plasterboard wall:
- method for light shelves. Typically used for decorative and small shelves;
- method for heavy shelves. Using it, you can even nail bookshelves to a plasterboard wall.
Let's take a closer look at each of the options. How to hang a shelf that has little weight? Here you need to do the following:
- In the places previously marked on the wall, we make two holes using a hammer drill. You need to use a drill that has the same dimensions as the dowel;
- screw the dowel into the hole. Remember that the screw should be 1-1.2 cm longer than the dowel itself;
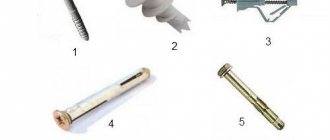
Note! In this case, you can fasten the shelf using special dowels: a butterfly dowel or an umbrella dowel.
- As it is screwed into the wall, the dowel will open up. As a result, you will get an excellent stop, which, instead of the wall, will take on the bulk of the load;
- We place hooks (brackets) on the dowel;
- We hang the shelf itself on these hooks.
Special fastenings for drywall
Using this method, you can quickly and efficiently hang light shelves on plasterboard walls. If you have heavy shelves, plus you also plan to place large and massive objects on them, then the above method will absolutely not work. Attaching massive shelves to drywall is carried out as follows:
- Drill holes in the right places on the wall. Moreover, they must pass not only through drywall, but also through a metal profile. To find it, use a magnet;
Note! If the distance between the plasterboard sheets and the starting wall is less than 5 cm, then a hole can be drilled in it.
- insert butterfly dowels into the finished holes;
- We screw the screws into the dowels and place the shelf mount on them. It is worth noting that in this situation the screw does not need to be tightened too tightly.
Mounting fasteners
The fastenings obtained in this way will be able to withstand the weight of the shelf itself and the pressure it exerts on the wall. Plus, the pressure on the drywall will be minimal. If you have inserted a wooden beam into the metal frame structure in advance, then the shelf can be attached using the method for lightweight products. In addition to these options, there is another very popular installation method. It is based on the use not of butterfly dowels, but of special anchor bolts.
The installation principle itself remains the same, only making holes in the starting wall is a prerequisite here. Only the type of fastener changes. Here the anchor can act as an independent fastening option, or you can additionally attach a hook to it. Also, instead of an anchor, the use of a Driva dowel is allowed here.
However, such a dowel can only be used when there is no metal frame under the drywall, and the sheets were simply glued to the wall. Therefore, many experts recommend using anchor bolts when working with drywall to hang products of any weight on the walls. By using anchor bolts, you can achieve much greater stability of suspended structures. This way your shelves won't fall on your head! The procedure for installing shelves on drywall is quite simple. The main thing is to adhere to the fastening technology and your shelves will hang more than securely.
Things to think about in advance
Since it is easy to assemble a wide variety of compositions from gypsum sheets, their shape and size will be a secondary factor. It is much more important to take into account the conditions in which the assembled structure will be used. This is, first of all, humidity. Different types of gypsum plasterboard are suitable for different conditions - in ordinary rooms, any is suitable, but for humid rooms, only moisture-resistant ones are needed.
In addition, when choosing a gypsum board, it is necessary to take into account the possible loads to which the structure assembled from it will be subjected. The thicker the sheet, the stronger the shelf or niche will be. However, the thickness of the sheet affects the appearance of the shelves, therefore, you need to look for a compromise solution, since a niche with shelves made of thick plasterboard may not look very nice.
Additional decor in the form of built-in lighting will significantly transform the entire composition and give it additional functionality. At the same time, the cost of the entire structure increases, not only by the cost of the lighting itself, but also by the cost of installation work. In the absence of relevant experience, it is better to entrust electrical installation work to a specialist.
Drywall for different rooms: types and advantages
Gypsum is a fragile mineral, easily susceptible to moisture, so a sheet covered with cardboard is not suitable for any room. Taking this into account, manufacturers produce different types of this material.
The main types of plasterboard sheets used in residential premises:
- GKL (ordinary plasterboard sheet) is used for the manufacture of items intended for dry rooms (living rooms, bedrooms, kitchens, hallways).
- For wet bathrooms and toilet rooms, gypsum plasterboard (moisture-resistant plasterboard) is used, which is impregnated with antifungal and moisture-resistant compounds.
The main advantages of using drywall compared to other materials include:
- The ability to give the product any shape and paint it in any color.
- Easy to install the structure (frame + casing).
- The appearance of such shelves definitely outperforms wooden ones.
- Cost price. Consumables are inexpensive, so a self-assembled structure will be much cheaper than a ready-made one purchased in a store.
- Absolutely environmentally friendly. This material is not impregnated with any harmful substances.
Design and layout
Drywall is a very malleable material, so it is not at all necessary to make standard corner shelves - you can experiment with sizes and shapes.
When developing the design of a structure, you should proceed, first of all, from how organically it will look in the interior of the room.
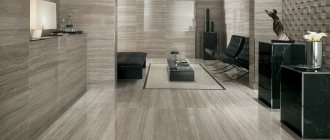
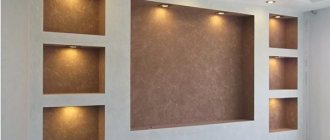
Shelves and niches in the living room
For example, plasterboard shelves for the living room can be equipped with spotlights; they are usually mounted on the side. This will create cozy lighting and an additional light source that will not take up extra space.
A great idea would be to make a built-in shelf on the wall and place it in a niche in the living room - this way it will take up an empty, seemingly non-functional space, without reducing the size of the room.
No less popular than shelves are plasterboard niches. Making them is no more difficult than shelves, but they can be used more functionally.
For example, you can create a niche in the living room where you can place a TV, or create a niche in the bathroom that can frame a mirror.
Photo:
Shelves and niches in the kitchen
You can hang a shelf on the wall not only in the bathroom or living room, but also in the kitchen or hallway.
A plasterboard structure with lighting will also look good in the kitchen - you can install one in the dining area, and it will add coziness to the room.
Of course, open shelves are not very suitable for storing household utensils, but placing decorative elements or vases with flowers on them is quite possible.
An illuminated arch can be an interesting design solution, as well as a border between the kitchen and the lamp.
In this case, the partition is equipped with spotlights from the inside - this is a little more complicated than placing them on shelves, but it is quite feasible for any non-professional.
Such an arch can be located in the corridor and serve as a passage to the living room if you want to remove the door.
Look at other options on how to make lamps in an arch niche and shelves in the photo.
Photo:
Features of drywall
Why is it worth making your own shelves from plasterboard? The thing is that this material has many advantages, because it is one of those rare materials that, due to its hygienic qualities, is absolutely safe and ideal for decorating interior spaces with your own hands.
Drywall differs in its thickness, so before purchasing, ask the seller whether the selected sheet is suitable for your purposes
The undeniable advantage of drywall is the ability to implement almost any idea
Advantages
- does not contain toxic substances harmful to health, hypoallergenic;
- has soundproofing properties;
- fire resistant;
- non-flammable and fireproof;
- is able to breathe - absorb moisture or release it, which allows you to create comfortable climatic conditions in the room;
- easy to process - easy to cut;
- easy to install.
Flaws
- the material does not withstand prolonged exposure to humidity and becomes deformed;
- requires careful installation, especially when it comes to complex geometric structures - sloppy execution can lead to deformation of the structure;
- the material does not like impacts and falls of heavy objects and can be damaged.
Important. Plasterboard shelves require the use of special fasteners in order to increase their load capacity and stability
Inside the structures, especially if they are shelves for household appliances and a TV, it is worth placing a mortgage in the form of a sheet of plywood.
Plasterboard structures require decorative design after assembly. Drywall should not be left as is. Shelves and other products made from it must be painted. The seams between the sheets of drywall are masked carefully. To do this, the seams are taped and covered with putty, achieving the illusion of a single whole. If the putty work is done carelessly, the seams will be visible and the product will lose its aesthetic appearance.
Varieties
Plasterboard shelves can be made to cover the entire kitchen wall. In this case, a lot of usable space will appear, which will significantly compensate for the thickness of the plasterboard wall
Drywall can be used in conjunction with wooden shelves.
In this case, you have the opportunity to rearrange the shelves without alteration. Drywall can be:
Waterproof drywall contains substances that prevent mold and mildew from growing on it. From this plasterboard you can make your own shelves for the bathroom and loggia. Again, we must take into account that moisture-resistant drywall will become wet and deformed if it is exposed to water for a long time. Therefore, the shelves should be out of reach of water. And they must be covered with moisture-resistant paint or ceramic tiles. The latter reliably protects the drywall from getting wet.
There is a particularly durable drywall - tongue-and-groove. It even has seismic resistance, so it can be used to make shelves of special strength for heavy equipment. However, such drywall is expensive and is not sold everywhere.