Technology for assembling gypsum plasterboard structures - step-by-step instructions
The general technology for assembling frames consists of three main stages of work:
- Creating a frame.
- Sheathing the frame on the outside with plasterboard.
- Finishing the surface of the box.
Let's look at these stages in more detail.
Frame making
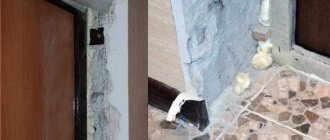
The pipe box consists of two mutually perpendicular planes, attached to the wall and the floor (for horizontal distribution) or to two adjacent walls (for a vertical riser). Therefore, the frame is also made of two gratings perpendicular to each other, fixed to the corresponding surfaces of the walls or floor. The order of assembling the frame is determined by the configuration of the room and the location of the pipelines.
First, you need to attach the main guides to the load-bearing surfaces of the walls or floor, to which the rack elements will be attached, connected by an edge from another main profile. They are connected using special self-tapping screws; at the joint areas, the side shelves are cut with metal scissors and bent to connect the elements more tightly. If wooden blocks are used, first assemble two gratings, which are then attached to the wall on one side and to the floor on the other (or an adjacent wall if you need to cover the riser).
Wooden frame for the box
Step by step procedure:
Step 1. Surfaces are freed from foreign objects (hooks, hangers, mirrors, etc.).
Step 2. The frame is carefully marked. The position of all lines is controlled by a building level or plumb line. The distance to the edge of the frame is determined by the area where the pipes protrude further from the walls, plus 5 cm for the width of the guides or wooden blocks.
We make markings
Step 3. Using an electric drill or hammer drill, prepare sockets for installing dowels. The installation step of fasteners is determined by the size and location of the box, but not less than 0.7 m.
Making holes for dowels
Step 4. Cuts are made on the side walls of the metal main guides where the crossbars are attached.
Step 5. The main guides are installed on the walls and fixed with self-tapping screws.
Fixing the guides
Step 6. Install pre-cut cross members.
Step 7. Both sides of the lattice are connected with an external rib from the main profile, in which cuts have been made in advance for attaching the crossbars.
Metal frame for vertical pipes
Installation must be done as firmly and accurately as possible. It must be taken into account that any mistake made when assembling the frame will subsequently affect the appearance of the box. Distortions will become noticeable when laying tiles or wall panels that have clear geometric shapes.
Self-tapping screws for metal with a drill tip
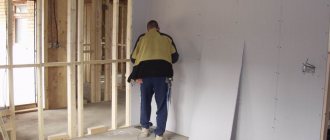
Drywall installation
After completing the assembly of the frame, they begin to cover it with plasterboard. First of all, you need to cut pieces of material corresponding to the sides of the box. It should be noted that the first will exactly repeat the shape of the frame, and the width of the other will increase by the thickness of the sheet. It is best to cut off and immediately attach one of the pieces (either horizontal or the one without inspection hatches) so that the size of the second piece can be measured without errors.
To cut drywall, use a hand saw with fine teeth and a slight spread, a jigsaw, and sometimes a regular stationery knife. They cut the sheet along a ruler, break it along the smooth edge of the table and finally cut it off along the fault line.
Cutting drywall with a utility knife
The resulting edge is rarely perfectly smooth, so it is additionally processed with a plane or a special grater. During cutting and processing, a large amount of gypsum dust is raised, so you should work with safety glasses and a respirator. In addition, you cannot work in rooms where computers are installed - fine gypsum dust has a fatal effect on fans, completely depriving them of their functionality and jamming the bearings.
The material is fastened to the frame using phosphated plasterboard screws. They are black with a fine thread pitch. You can also use ordinary wood screws, but you need to be more careful at the final stage - they have a larger thread pitch, so the head may go too deep into the surface of the gypsum board. It is recommended to make the distance between adjacent fasteners in the range of 10-15 cm.
Self-tapping screws for drywall
A socket for installing an inspection hatch or a window for taking meter readings is cut in place. First, mark the surface and drill holes in the corners. Then a hole is cut out of them according to the markings, the dimensions of which correspond to the size of the hatch frame.
Frame structure
Metal frame under the wall
Before covering the heating radiator with plasterboard, decorating the interior of the room with this, you need to build a frame. For its construction, channel-shaped metal profiles with a width of 60-70 mm are used.
In total, during the work process you will need:
- profiles - as the main frame;
- screws (40-60 mm) – fastening the structure;
- dowels (40-60 mm) – fastening to the surface;
- metal scissors - for making cuts, if necessary, bending metal;
- pliers, screwdriver, drill or hammer drill are auxiliary tools.
Related article: How to make a canopy over a bed
The profiles that are adjacent to the wall are attached first.
On our website you can watch a lot of videos on the topic of installing frames for drywall, but the basic instructions are as follows:
- the metal profile is placed on one side or the center to the marking line;
- a screwdriver leaves a small mark on the wall;
- a puncher makes a hole to fit the size of the fastener;
- a dowel is inserted into the hole made;
- a profile is attached to the prepared place;
- a screw is used to secure it.
After placing the metal against the wall, marks are made in increments of 15-25 cm. The holes are prepared for the entire profile at once.
The described process is used to attach all the necessary parts of the frame. In the case of fastening a corner of two elements, you need to trim the necessary parts with metal scissors.
When the parts that are attached to the wall are installed, we move on to the depth of the frame:
- cut parts of profiles of the required size;
- cut both edges of the element by 4-5 cm at the bend;
- bend the middle down and cut the sides to the width of the profile channel flange;
- We attach the sections to the edges of the main long elements at an angle of 90 degrees towards the room.
The last part is the connecting upper and lower short parts, elements.
Note! When constructing a wall covering the battery, long vertical metal elements are used, so two short ones on top and bottom are not enough - at least 4-5 pieces are needed.
The finished frame should be a strong structure and not wobble. If the frame is wobbly, it means that the fastening was not done well, or there are not enough additional short elements.
Read “How to make a frame for drywall - technological stages.”
How to close a radiator and how to close it
Using decorative grilles and screens that match the interior of the room, you can hide massive cast-iron heating radiators from view. This allows you to obtain the necessary aesthetic compliance of the room with the planned renovation. In addition, such structures also perform practical work, protecting children in institutions from possible injury.
The industry offers a wide range of similar products, so today our task is to help you choose the right one. Most often, inexpensive plastic screens are chosen for office and residential premises, which are produced in a wide range of colors, which makes it easier to match the interior. Only products made from natural wood are allowed in government institutions.
When choosing how to cover radiators, buyers most often pay attention to screens and decorative grilles, which have their own design features. They can be divided into the following groups:
| Mounted | May be with or without lids. Designed to disguise cast iron radiators placed in a niche under the window sill or slightly protruding forward. Their price depends on the size of the products. |
| Flat | Used for fencing batteries installed in deep niches. |
| Attached | Used to completely hide the installation location of the heating device. |
The following products are made from:
False wall or plasterboard box
Most of us, when carrying out repairs, want to remove from sight not only the batteries, but also the supply pipes to them. The latter also prevent the suspended ceiling or flooring from being properly made. In this case, the entire supply line along with the radiators is often hidden behind a false plasterboard wall.
Instead, you can install a gypsum plasterboard pipe box if every centimeter of usable space in the room is important. Below you will learn how to cover a heating radiator with plasterboard yourself.
- Prepare materials and tools:
- pencil;
- roulette;
- building level;
- metal scissors;
- screwdriver;
- dowels and screws;
- UD and CD profile;
- drywall;
- decorative lattice.
- Make a frame from a metal profile to mask a heating radiator installed in a niche around the perimeter of this recess. Create a single frame using a UD guide profile, which must be attached to the bottom of the window sill, to the walls and floor with self-tapping screws.
Insert the CD profile vertically into the resulting frame on both sides of the radiator. Make sure that the distance between them is slightly larger than the size of the decorative grille.
After this, connect the vertical CD profiles to each other with 4 pieces of UD profile 60 mm long. Moreover, place the segments with the open side facing the heating device. They will become the basis for horizontal profiles indicating the height of the decorative frame. Install additional vertical CD profiles, if necessary, every 600 mm.
- Sew up the frame with your own hands with sheets of plasterboard and putty them. After this, hang the decorative grille. Fasten the profiles together with small LM screws.
Advantages of decorative grilles
- The amount of dust settling on batteries, which have a difficult shape for cleaning and washing, will be reduced.
- A large selection of protective screens that match the interior of the room in style and material.
- They will be able to protect small children from injury when falling on metal heating appliances. In addition, there is no need to fear that the child will get burned from touching them.
- The practicality of the equipment - it ensures uniform distribution of warm air flows in the room.
- In a short time you can hide old cast-iron radiators, which with their appearance only spoil the interior of a newly renovated room.
There is another opinion of specialists who do not deny the beauty of the products and their contribution to the overall atmosphere of the room, but at the same time believe that in this way the heat transfer of the equipment is significantly reduced. At the same time, this is easily refuted by the practice of operating such grilles and screens that do not prevent heat from escaping through their openings.
How to close radiators with circulating air outlet
Before covering a heating radiator or decorating it, find out the recommendations of professionals:
- Do not completely block convection air flow paths. As a result, the temperature in the room will drop and condensation will appear on the windows.
- Opt for a design that is easily removable or has a window that provides quick access to pipe threads and batteries.
- The instructions oblige to provide access to the control components - taps and thermal heads.
Marking
How to attach a battery to drywall - marking stage
Marking of the future structure is carried out using:
- measuring instrument - tape measure, ruler, corner;
- drawing instrument - a simple pencil, marker;
- precision tool - construction or laser level.
When carrying out this stage, it is advisable to adhere to exact dimensions, limiting yourself to whole centimeters. Millimeters are used only in the case of a particularly precise design, for example, for an established interior design.
Before you cover the battery with plasterboard and get rid of its unpleasant appearance, you need to decide which sealing method to use for marking:
- the box is a simpler and faster method of work (only the battery area and, literally, 12-20 cm beyond it are sealed);
- wall - a more labor-intensive method (the wall in which the radiator is installed is completely sealed; if the heating device is installed near a window, it is necessary to make slopes).
In terms of the scope of work, sealing batteries using the first method is simpler: less material is used and a small number of construction processes are carried out. In the second case, even fewer construction processes are used, but more material is used.
Box
Radiator box
When installing a box, the structure takes up little space, covering a little more space than the radiator itself. The depth of such a box depends on the width of the heating device (most radiators are narrower than batteries with metal plates).
Note! The edges of the structure must protrude beyond the edge of the radiator by at least 10 cm - otherwise it will not be possible to install a removable screen on the front side.
Instructions for marking the box:
- Depending on the required position of the structure, a horizontal strip is drawn. If the box will hang, measure the distance from the floor and use a level to draw a marking line. If the structure rests on the floor, there will be 3 lines (two at the edges - depth, one in front - the edge of the structure).
- It is necessary to install a corner to the bottom edge and draw vertical marks - we achieve a right angle. Using a level, we bring the vertical lines to the required size.
- Identical marks are marked on the vertical lines, between which a connecting segment is drawn.
Related article: Bamboo wall and ceiling panels - the freshness of the forest in your room
The result should be a square or rectangle (if supported on the floor, additionally mark the base).
Wall
How to cover batteries with plasterboard - wall construction method
Analyzing the room and thinking about how to cover radiators and pipes with plasterboard and do it correctly, the decision to install an alternative wall comes naturally.
The essence of the solution is that the entire surface to which it is attached is covered along with the radiator. This method is wasteful, since you can get by with small volumes of material by arranging a point box. But a wall is the only way to completely hide a heating device from a room with your own hands.
To construct the wall, the frame is built to the entire height of the room:
- Using a level, several vertical lines are drawn on the base for the frame. Step – 60-100 cm. Lines for profiles in the corners of the room are required.
- From each vertical line it is necessary to extend to the floor. A corner is used for this. The depth of the floor lines is equal to the width between the main wall and the alternative one.
- Similar to the floor lines, lines are drawn on the ceiling - of equal depth and strictly parallel.
- The last marking lines are drawn at the top and bottom of the heating device, at a distance of 7-10 cm.
There are also markings on the sides of the radiator - along the perimeter of the device, profiles are needed in which the removable screen will be installed. But to get rid of unnecessary work, you can make basic markings (which span the entire height of the room) directly on the sides of the radiator.
How to sand the walls behind the battery
Now here is another important nuance. After puttying, if we follow the correct technology, we must sand the wall. But don’t forget that sanding with sandpaper is a sea of dust. But the main repairs have already been done. Therefore, here you can go for simplification, as in the case of plaster without beacons. We will not sand the wall with sandpaper. We'll just take a sharp spatula and cut off all the extra putty microtubercles. There will be minimal dust, and the wall will still be quite smooth. Even if the wall doesn’t turn out to be perfect, then for the case of batteries, as they say, it will work. Work for 0.5 hours:
Factory options or the best way to close heating radiators in an apartment or house
Modern industrial decorative grilles fit well into a residential interior, while simultaneously masking unsightly heating devices. The price of most copies is quite acceptable, all that remains is to make the right choice.
Hinged shields with top cover
Most often they are made of metal. Inexpensive products are made of painted iron, more expensive ones are made of stainless steel. The advantages of such panels include:
- Ease of installation - knowing how to cover a heating radiator with a decorative screen, the main work can be done with your own hands without the help of specialists.
- No obstacles to heat transfer - almost all products are manufactured with holes to improve convection. The shape of the holes is for every taste.
- Manufacturability - hinged panels are designed for one- or two-sided pipe connections.
Flat panels
The most common category, which is used to decorate heating devices located in niches. At the same time, such grilles play a decorative role in the interior of residential premises. In stores you can find a large assortment of screens with various designs, carvings and forgings, some of them can be compared to works of art.
Made of wood
Such false panels are ideal for any interior. If you have experience assembling at least small gazebos for your summer cottage, then the problem of how to hide the battery with your own hands does not exist for you. Products can also be made to order, in some carpentry workshop.
Wooden structures will help to withstand the elegant component of country style or all the rigor of classicism. When thinking about the topic of how to cover heating radiators in your own apartment, it is worth remembering the cost of handmade individual work - it is several times higher than consumer goods copies.
And yet, deformation of the wood due to temperature changes and humidity fluctuations cannot be ruled out. You can avoid such consequences only by purchasing a product made from high-quality wood.
Made of metal
Such fences attract, first of all, their affordability. The design component of such products is quite primitive, which is why they have a low price. However, despite this, they perform their function fully.
The panel is made of a thin sheet of metal, which can be painted in any color. More expensive specimens are made of stainless steel; their appearance is aesthetic and elegant.
Made of plastic
Taking into account the affordability of plastic products, you should not count on their durability. Moreover, not all of them meet the standards, as a result of which, when heated, they can release a bunch of harmful substances
Box screens
You can find out how to hide a battery in a room from photos of similar interiors. However, even modern heating devices do not always correspond to the design concept of the room. Then you have to completely isolate them “out of sight.” Box-shaped grilles are classified according to the type of material from which they are made.
MDF screens
One of the most common options for decorating heating appliances. Craftsmen who know how to carefully cover a heating radiator with a screen insist on this particular material. The MDF structure is not as difficult to maintain as wood, and is easy to install with your own hands.
An important advantage of such products is that their cost is 50-70 percent less than wooden ones. And this with characteristics that are not inferior to analogues made from natural wood.
Glass panels
The glass screen looks very aesthetically pleasing and can easily complement the stylish design of any room, including a corporate building. Depending on the appearance, glass panels are divided into:
- Matte.
- Transparent.
- Plainly colored.
- With unique photo printing.
Of course, the glass structure is fragile, so manufacturers produce samples with a thickness of at least 6 mm. For greater safety, you can buy tempered glass; it combines mechanical strength and heat resistance. Even if the panel manages to break, the fragments will be small and have blunt edges.
Options
There are many ways that allow you to close heating radiators and at the same time ensure a comfortable temperature regime.
The most expensive would be ordering batteries for a designed interior. That is, an individual heater design will be developed. An excellent solution that will force you to shell out a significant amount of money.
If this is not possible, then screen creation options are perfect. Namely, designing the radiator in various ways that allow it to be hidden. Several options should be highlighted:
- Installation of a hanging screen.
- Creation of a wooden – removable element.
- The use of plasterboard slabs is for the box.
Heating radiator design options
It should be noted that the last point is the most popular at the moment. At the same time, it cannot be considered the most ideal. The fact is that creating a solid box is a rather controversial decision. After all, in case of any breakdown or leakage, you will have to disassemble it completely, which is very inconvenient.
Therefore, the first step is to inspect the heating system. Check the joints and connections, inspect the radiator for possible leaks or blockages. Only after such preventive work and replacement of damaged areas begin the direct installation of the structure that will cover the battery.
The design for hiding the radiator must meet the following parameters:
- Streams of warm air should not encounter obstacles on their path. This ensures uniform heating of the entire room.
- All threaded connections and air and water relief valves must be easily accessible.
When creating a closing structure, it is necessary to provide access to the radiator control elements
Attention! Very often an option is allowed, which can be found in some apartments. It lies in the fact that heating radiators are completely hidden by gypsum boards. This is unacceptable.
Installation of a frame for a box: how to cover a battery with plasterboard
- To install the box, use the CD and UD profiles. Its use is convenient because the thickness of the CD is 27 mm with a width of 60 mm, and the UD has 27x27 mm - these dimensions will allow you to make the structure the most compact, pressed against the main wall. With such a device you can camouflage not only the battery, but also the heating pipes , making shelves on top for flowerpots.
- To install a plasterboard box with your own hands, you need to accurately determine the edge of the protrusion of the structure and screw the UD profile along it to the floor. If you intend to cover the pipes, then extend the guide from wall to wall, and if not, then limit yourself to the size of the battery. Connect the front line to the wall with the same profile.
- Along the wall, near the radiator, screw two UD strips vertically, marking the inner corner of the box. After this, determine the height of your structure and cut pieces of CD for vertical sheathing of the plasterboard floor. Insert the cut pieces into the floor UD and put the same profile on top, mirroring the location of what is on the floor - fasten all this together with self-tapping screws.
- Now you need to find a lattice for the facade and for the top of the box in order to make a frame according to its size. This same contour can be made from the same CD, cutting the side flanges at the junctions with the profiles of the same name. This way the frame for the drywall will acquire additional rigidity, and fix the profiles to each other using special small screws for sheet steel.
- Cover the metal frame with plasterboard sheets and, before puttingty or wallpapering, install a galvanized perforated profile at the corners for rigidity. In these cases, any gypsum board is suitable - wall, moisture-resistant and even ceiling - the main thing is that the instructions for its installation are followed. These prescribed rules mean the frequency of self-tapping screws (at least 30 cm from each other) and the depth of immersion of the screw head (1-1.5 mm below the gypsum board plane).
How to make a niche out of plasterboard with your own hands: creating a frame
Instructions for assembling the frame:
- The drawing from the sketch is transferred to the walls, floor and ceiling.
- The required pieces of the guide profile are cut off. Their back side is glued with damper tape.
- The guides are mounted on the ceiling, wall and floor using dowels in increments of 30–40 cm.
USEFUL INFORMATION: Installation of partitions from gypsum plasterboard: step-by-step instructions, price per m2
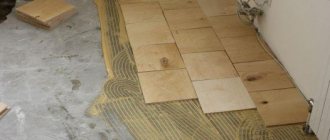
- The rear plane racks are installed: profile sections are cut 1–2 cm less than the height of the room. They are inserted into guides on the floor and ceiling, and then fixed with metal screws or a cutter. They can additionally be attached to a flat wall with dowels. If the base surface is lumpy, then straight hangers are used.
When the niche has a curved configuration, you can use a flexible arched profile. Another option: petal-shaped cutouts are made on the guide in the side walls, after which it will easily take the required shape. The required bend is fixed using vertical jumpers.
- The necessary horizontal jumpers are made from the rack profile and secured with self-tapping screws. The result will be a flat frame of the back of the future niche.
- In the same way, in a mirror, the frame of the front part of the structure is assembled.
- Both structures are connected by horizontal bridges. They are needed not only to create the outline of a recess or attach shelves, but also for rigidity. The jumpers are made from a rack profile and are fixed with self-tapping screws.
Step-by-step installation instructions
Preparing the base
To build a structure, the foundation must be properly prepared. The old coating is cleaned from the surface, dirt and dust are removed, and primed.
If the wall on which the battery is located has significant unevenness, then it should be made smooth using gypsum plaster. Then it is advisable to putty the surface, since it will be impossible to do this after the construction of the structure.
Markings and drawings
If you plan to make a floating box to disguise the battery, then:
We measure the required distance from the bottom of the radiator and draw a straight line along the level - the bottom of the box. Draw the side lines using a construction corner
It is important not to forget about the 15 centimeters that should be between the edge of the batteries and the beginning of the structure. We connect the upper edges of the perpendicular lines by level. We inspect all straight lines according to the level. If a box standing on the floor is mounted, then the markings begin from the top edge of the battery, and perpendicular lines are drawn from top to bottom
You can see how to do this in the photo
If a box standing on the floor is installed, the markings begin from the top edge of the battery, and perpendicular lines are drawn from top to bottom. You can see how to do this in the photo.
In addition, the box is marked on the floor so that the end of the box on the front side protrudes 15 cm relative to the radiator.
Example of a screen frame drawing
In some apartments, heating radiators are installed in niches that developers provide under the windows. In this situation, only the second method of constructing a box is suitable.
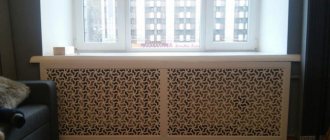
Friends, good day. I decided to cover the radiator in the kitchen with plasterboard. The kitchen area is quite large, allowing you to implement the idea without much damage to the space. And the presence of individual gas heating in the apartment and not too severe winters make it possible to lose some of the heat from the battery without compromising the overall temperature in the apartment. To begin with, I dismantled the old window sill and began to build a frame around the battery from ceiling metal profiles.
For rigidity, I additionally strengthened the long horizontal crossbars.
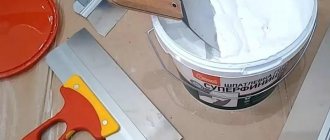
After assembling the frame, I installed the window sill, covered the frame with plasterboard and began to putty the structure.
After filling and cleaning, I painted the box along with the walls with water-based paint in two layers. That's what came out of it.
After that, I installed the decorative grille.
For normal heat exchange of the battery, I made holes in the window sill and installed ventilation grilles.
- Advantages
- Preparatory work
- Marking for the box
- Frame making
- Sheathing with plasterboard sheets
- Finishing features
The battery box is an excellent solution for disguising the heating device. This is especially true if the appearance of the radiator leaves much to be desired and disrupts the harmony of the interior. A home-made battery box can be adapted to match the color of the furniture, simply painted, covered with wallpaper, decorated with decorative stone or tiles. Today we will tell you how to make it using plasterboard sheets and metal profiles.
Installation of the structure
Sheathing batteries with plasterboard
The most difficult stages of solving the question of how to cover a heating radiator with plasterboard and not deprive the room of heat are left behind. If everything is prepared, installation is a simple procedure.
Fastening drywall is carried out according to the following method:
- a sheet of material is attached to a metal base;
- a drawing tool marks the place of the cut - this is how the material is marked into the necessary pieces;
- the prepared part is attached to the corresponding part of the frame and secured with a screw.
Related article: Window trim for a wooden house (and not only)
The pitch of the screws when fastening the material in the battery box is 10-15 cm; an example of the location of the fastening elements can be seen in the photo above.
It is better to prepare and attach one part of the material at a time; if you prepare everything at once, you can make a mistake because of the corners protruding in some places.
Note! When screwing in a screw, it is important to be careful - if you place the fastener too deeply, you can damage the front side of the drywall.
The removable screen should cover the radiator for ventilation and heat transfer into the room. Its first part, the inner one, is attached to the metal before working with drywall. Then the main material is arranged, and the last step is to put on the removable, outer part of the screen.
How to attach a battery to drywall: step-by-step instructions
Let's look at how to secure a cast iron battery - an outdated method, but many still use it.
The video shows how to properly mount the battery on a plasterboard
.
For structural strength, shaped legs can be welded to the cast iron structure, which will take the load from the weight of the battery. To prevent the battery from collapsing, brackets are screwed into the profile. In addition, iron pipes will support the battery. But we are looking at how to fix a radiator to drywall.
Attaching the battery to drywall: step-by-step instructions
First of all, using a drill with a wood drill bit, drill holes in the plasterboard. This must be done carefully, without pressing, as the drywall may break.
Important! The distance between the gypsum board and the base can reach up to 10 cm, so a drill bit for a hammer drill is taken 20 cm. Once the holes in the gypsum board are ready, you need to take a hammer drill with a drill 10 mm in diameter and drill holes for fasteners in the main wall. Try to keep the tool exactly parallel to the floor so that the bracket does not move sideways later. Then we hammer the hooks into the holes
Ideally, you need to install a dowel and screw a threaded fastener into it. But such elements are difficult to find, especially for a cast iron battery, so let's assume that we have a hook with a pointed end. If the hook moves or does not fit at the required distance, you need to pull it out and drill a hole with a larger diameter and deeper. Then prepare a wooden cap, into the middle of which fasteners are driven, and only then hammered into the wall. Hang the battery on the bracket and check the level. If the battery hangs unevenly, you can slightly knock down the fasteners with a hammer. Try not to knock too hard on the bracket, since in a brick wall made of old material, you can loosen the fasteners and have to do the work again.
These are all the instructions for attaching a cast iron battery to a plasterboard wall. Now let's look at how to fix an aluminum radiator.
Advantages and disadvantages
The main advantages are:
- Completely environmentally friendly material. There are no harmful or dangerous emissions into the air, the material itself does not burn.
- Assortment on the market.
- This is a cheap and economical method.
- Easy installation that does not require rare tools or specific knowledge.
- Everyone can use their imagination and mount the structure the way they see it in their head.
Main disadvantages:
The material is fragile and can crumble easily, which makes it necessary to work with it very carefully and carefully. The drywall needs to be finished additionally; prepare a spatula and other tools. The material should not be installed in the bathroom or other rooms with high humidity. Drywall absorbs water and begins to warp. We do not recommend storing such material; it can become deformed if left in a vertical position for a long time.
Necessary materials
Having made calculations based on the sketch, they purchase the necessary materials with some reserve:
- Drywall. In most cases, a regular wall gypsum board with a thickness of 12.5 mm is used, but thinner ones, including arched ones, can be used. For rooms with high humidity, such as a bathroom, moisture-resistant plasterboard is used.
- The frame is made of a guide (UD) and a rack (CD) profile.
- If the base wall is uneven, straight hangers may be required.
- Damper tape providing sound insulation of the structure.
- Dowel-nails 6 × 60 mm for attaching guides to the wall, floor and ceiling. With a large layer of plaster, longer hardware is used, for example 8 × 80 mm.
- Metal screws for fastening frame elements together.
- Putty and primer for drywall, as well as serpyanka mesh - to prepare the niche for finishing after assembly.
Box finishing
The final stage of work with the box is its finishing. The work depends on the material to be processed. Ceramic tiles or paint are used to decorate plywood, drywall or MDF. Covering with plastic panels does not require finishing. Closing the box with such material does not reduce the area of the room and does not spoil the appearance.
In addition, this method is used to close the pipes running under the bathtub. To do this, a frame is initially constructed from guide profiles, after which it is covered in the same way with the selected material. Remember about mandatory access to communications.
Ready decorated box
Puttying the box is one of the important stages of direct decoration. In this case, it is necessary to correctly design the corners. An even angle is obtained by using special metal corners, which are applied to the corner on top of a layer of starting putty. They are pressed in using a spatula, and then the excess putty is removed.
Another layer of special mixtures is applied to this corner. Repeat these steps until the surface is completely leveled. This makes it easy to make an even angle yourself.
You can watch the video on how to hide pipes yourself
Having processed the corners, the surface is primed and then covered with starting and finishing putty. After drying the surface, grind the putty using a special grater with fine-grained sandpaper.
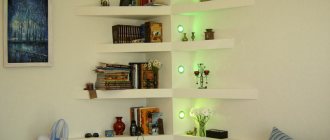
Remember that to solve lighting problems, you can install several small LED lamps in such a “niche”. This means that after constructing the box, such lamps will need to be properly connected to electricity.
After installing and finishing the box, the appearance of the room will change significantly. The interior of the room will become complete and harmonious. In addition, such measures help reduce the noise level from pipes.
Other solutions
You can cover radiators in a room not only with sheets of drywall. Some apartment owners install standard boxes from this material, and change the front panel to something more original.
Here are the most typical solutions:
Radiator grille (plastic or metal). Among the advantages of such designs, it is worth noting good heat transfer and constant access to the battery. The main disadvantage is the trivial design.
- Built-in niche. The pipes are covered with casing, and the battery itself is hidden behind a folding screen. The main advantages are the easy accessibility of the unit in case of breakdown and minimal heat losses. A good option for a kitchen where saving space is important.
- Wooden lattice wall. It harmonizes with classic interiors and allows you to quickly get to the battery in an emergency. Cons: cumbersome, low functionality.
The technique of installing a plasterboard box is quite simple; anyone can master it in a short time. Don't let radiator pipes ruin your interior.
Photo gallery
Several options for constructing boxes for placing communications in them:
Box under the ceiling for placing electrical wiring
Frame for the future box
The convenience of the box is obvious
Only with a box can you achieve an aesthetic look in the room
Ceiling box to hide wires
If necessary, take care of the door in advance
Horizontal design
After covering with plasterboard, all joints must be puttied.
Drywall for the bathroom is the ideal solution
Ceiling frame for suspended ceiling
A major renovation of a premises faces the problem of the impossibility of moving various elements of water pipes and communications. The design ideas will be disrupted by an old pipe or a bulky riser. The way out of this situation is to cover the pipes with plasterboard.
Drywall processing
To make the box, not only drywall is used. However, it is more suitable for these purposes and easier to process. And its surface lends itself to a variety of finishing methods. Drywall provides high reliability and strength to the future “pipe covering”, and does not limit the choice of design. Batteries are also covered with this design. Making a box without the help of craftsmen is not difficult.
Wooden structure
If a wooden structure is more suitable for the room, then it can be made completely removable (shown in the photo below). Thus, it is possible to close the heating radiator and not have to carry out numerous works.
- The markings are removed. Take into account the places where pipes are supplied.
- A wooden box is made, which is immediately equipped with an external lathing.
- Corner hooks are installed along the outer perimeter, the hinged part of which is screwed to the wall.
Now all that remains is to put the box in its place. It will also be easy to remove.
Let's start creating the box
You already have an idea of what a box is; essentially it is a structure made of a metal frame covered with plasterboard. But even this matter has its own nuances.
The first step is marking for the future pipe frame. Using a level, markings are made on the floor, wall or ceiling. Next, proceed to fastening the guide profile. Having drilled holes for the dowels and secured the guide profiles, install the jumpers. The recommended distance between jumpers is from 50 to 70 centimeters. The front edge, which is not adjacent to the walls, is mounted after the installation of the other two is completed.
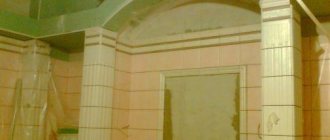
Finished box after tiling
When creating a frame for pipes, remember the places where you need to ensure their exit. And in places where valves or meters are installed, provide space for a door or a removable part of the box. If the frame is made over noisy sewer pipes, special materials are used for sound insulation that reduce the noise level. Since such a box is not dismountable after installation, think in advance about access points for pipe repair.
Later the doors can also be made
less noticeable by covering them with the same material as the rest of the walls. From an aesthetic point of view it is very beautiful. The main thing is to make sure that the door can open and close easily.
In the future, a door will be installed in this place to facilitate monitoring of water meter readings
The next stage is the installation of drywall on the frame. The sheets are cut so that the frame consists not of pieces of plasterboard, but of solid sheets. Remember that the side edges of the box are sheathed first, since the front strip should also cover the side sheets. The sheets are secured with self-tapping screws every 25-30 cm. Screw in the screws so as to recess the caps into the sheet by a millimeter. This will hide them while puttying the surface.
Installing a box on the ceiling, the main thing is to attach the jumpers, which will ensure the strength of the structure. Using the same technology, you can decorate the space under the bathroom. You can carefully hide communications only with the box. Example of using plasterboard boxes in the living room
Example video:
Having secured all the sheets of drywall, we begin to putty and process the corners. The corners are formed using special perforated corners, which are attached to the starting putty. At the last stage, final puttying or preparation for laying tiles is carried out. At this point, we can assume that the process of creating your box has been successfully completed.
Sooner or later the moment comes when it is necessary to make repairs in your apartment or office. I want a beautiful and stylish design of the room, regardless of its purpose and price factors.
Therefore, in such a situation, the most pressing question arises, requiring a prompt solution: how to make a box from plasterboard with your own hands.
GCR box for pipes in the bathroom
Fastening drywall
The cladding of the gypsum board frame begins with the rear wall of the niche, if required, because often its role is played by a flat base surface. First, the recess is lined, and then the drywall is installed on the front surface. There are a few things to consider:
- If you plan to place sockets or spotlights in a niche, then holes for them in the drywall are cut in advance.
- Bevels are made at an angle of 45˚ in all places where individual plasterboard fragments will be joined.
- Sheathing elements forming right angles are installed so that the plane of one covers the end of the other.
- Fragments from gypsum plasterboard are mounted in increments of 20–25 cm. The fastening points on adjacent pieces are shifted relative to each other.
- To bend drywall, for example for a niche in the shape of an arch, proceed as follows: the surface of the element is moistened with water and rolled with a roller with needles. Another option: a series of parallel cuts are made on the fragment, forming the desired bend. The smaller the radius, the more frequent the cuts. Only cut through the cardboard layer on one side of the element.
USEFUL INFORMATION: Step-by-step instructions for drywall work: making your own ceiling and walls