Is it a good idea to cover the battery with plasterboard? Many people don’t even understand why to do this. Let's discuss this in detail. Old cast iron radiators and steel gas pipes, which are found in so many houses, can hardly be called works of art. Their presence can spoil any interior in the room. If you create a special box from plasterboard, you can hide the presence of heating pipes and unpleasant parts.
The main advantage of this process is that anyone can do it. You don't need to have special knowledge or be a repair professional. A small layer of drywall will completely hide the radiators. It's also very cheap. In this guide, we will look at not only the process of installing drywall, but also many interesting nuances on this topic.
Design options
Before actual work, we select the type of structure. Finishing can be:
- Hinged screen and cover. Better for a large, cast iron radiator. Suitable for structures with large dimensions.
- Hinged screen without cover. For cast iron batteries, as well as other types of structures.
- Flat screen. It is better for installation on a modern radiator, which will be located inside a niche.
- Attachment box. It hides the entire battery well, as well as all the mounting points.
Each design must be selected individually. Consider the variety of your batteries, only then make a decision.
Necessary tool
To mask a heating battery correctly, you need to acquire a lot of tools. All of them will help you speed up and facilitate installation. An option is to borrow tools from friends and neighbors rather than buy new ones if you do not have your own equipment of this type.
Required tools:
- Building level.
- Knife for metal.
- Drill, screwdriver.
- Pliers.
- Hammer.
- Dowels and screws.
- Pencil, rulers.
- Roulette.
Necessary tool
This is a standard set of tools; you need to acquire each one from the list, without exception.
Additional materials are also needed in the form of plasterboard sheets, a small amount of putty and U-shaped metal profiles. It is better to think through the layout of the entire structure in advance. It can be standing, as the option is popularly called, and visually looks like a special cabinet under the heating equipment. The second option - a hanging box that does not touch the floor, is possible with individual gas heating.
Drywall sheets
Putty and metal profiles
Be sure to inspect the batteries before installation. If the paint has peeled off, you need to erase the old layer and apply a new one. This is the preparation of material for a future plasterboard structure.
Battery
DIY installation
Do you want to sew up the battery and have already acquired everything you need for this process? Then what are you waiting for, let's get started. And it all starts with markings for the box. You need to measure the entire battery very accurately; the error can be a maximum of a millimeter. To speed up the process, you need to use a tape measure, a building level, a square ruler and a pencil.
The depth varies depending on the dimensions of the radiator. Speaking about the edges of the structure, you should retreat no more than 10 centimeters. If the window sill is too narrow, it must be dismantled. How do you know if there is not enough clearance? The minimum level between the battery and the window sill is three centimeters.
Kinds
When choosing how to cover radiators, buyers most often pay attention to screens and decorative grilles, which have their own design features. They can be divided into the following groups:
| Mounted | May be with or without lids. Designed to disguise cast iron radiators placed in a niche under the window sill or slightly protruding forward. Their price depends on the size of the products. |
| Flat | Used for fencing batteries installed in deep niches. |
| Attached | Used to completely hide the installation location of the heating device. |
In the photo - a wooden protective screen
The following products are made from:
- metal;
- plastic;
- wood;
- MDF;
- glass
False wall or plasterboard box
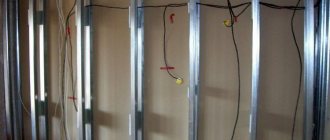
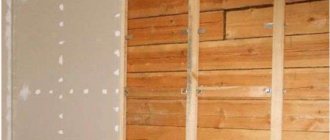
Most of us, when carrying out repairs, want to remove from sight not only the batteries, but also the supply pipes to them. The latter also prevent the suspended ceiling or flooring from being properly made. In this case, the entire supply line along with the radiators is often hidden behind a false plasterboard wall.
How to cover heating pipes with plasterboard and a radiator
Advice: be prepared that in case of emergency you will have to break all the “beauty”, so we recommend making the false wall quick-removable.
Instead, you can install a gypsum plasterboard pipe box if every centimeter of usable space in the room is important. Below you will learn how to cover a heating radiator with plasterboard yourself.
One of the options for covering a heating radiator with plasterboard
- Prepare materials and tools:
- pencil;
- roulette;
- building level;
- metal scissors;
- screwdriver;
- dowels and screws;
- UD and CD profile;
- drywall;
- decorative lattice.
Tip: if you don’t know how to cover heating pipes, you can also use plasterboard.
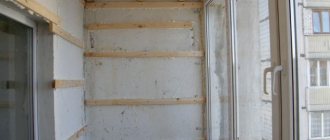
- Make a frame from a metal profile to mask a heating radiator installed in a niche around the perimeter of this recess. Create a single frame using a UD guide profile, which must be attached to the bottom of the window sill, to the walls and floor with self-tapping screws.
Tip: Please note that you are using 12.5mm thick wall plasterboard, so the front of the frame needs to be deepened by 13mm to ensure a level surface with the wall after installation.
Insert the CD profile vertically into the resulting frame on both sides of the radiator. Make sure that the distance between them is slightly larger than the size of the decorative grille.
After this, connect the vertical CD profiles to each other with 4 pieces of UD profile 60 mm long. Moreover, place the segments with the open side facing the heating device. They will become the basis for horizontal profiles indicating the height of the decorative frame. Install additional vertical CD profiles, if necessary, every 600 mm.
- Sew up the frame with your own hands with sheets of plasterboard and putty them. After this, hang the decorative grille. Fasten the profiles together with small LM screws.
How to cover a heating pipe with drywall
Advantages of decorative grilles
- The amount of dust settling on batteries, which have a difficult shape for cleaning and washing, will be reduced.
- A large selection of protective screens that match the interior of the room in style and material.
- They will be able to protect small children from injury when falling on metal heating appliances. In addition, there is no need to fear that the child will get burned from touching them.
How to cover heating radiators with a decorative screen
- The practicality of the equipment - it ensures uniform distribution of warm air flows in the room.
- In a short time you can hide old cast-iron radiators, which with their appearance only spoil the interior of a newly renovated room.
There is another opinion of specialists who do not deny the beauty of the products and their contribution to the overall atmosphere of the room, but at the same time believe that in this way the heat transfer of the equipment is significantly reduced. At the same time, this is easily refuted by the practice of operating such grilles and screens that do not prevent heat from escaping through their openings.
How to close radiators with circulating air outlet
Before covering a heating radiator or decorating it, find out the recommendations of professionals:
- Do not completely block convection air flow paths. As a result, the temperature in the room will drop and condensation will appear on the windows.
- Opt for an easily removable design or one with a window that provides quick access to pipe threads and batteries.
- The instructions oblige to provide access to the control components - taps and thermal heads.
Let's look at drawing markings:
- You need to start by carefully drawing horizontal lines. We set a level along the structure and make marks on it. If the box is a standing model, then you need to draw three lines at once.
- Lines must also be drawn in a vertical position. To do this, take a carbon ruler, apply it to the lowest edges, then create a perpendicular. Using a level, the markings are the correct size.
- Now all the lines need to be connected. All this will happen above the structure itself, the horizontal part will unite all the lines.
Before you start sewing up the battery with drywall, you need to inspect the structure and make sure that the markings are in the shape of a square or rectangle. Each line corresponds to a plumb line. Keep in mind that the error cannot be corrected in the future, so everything needs to be inspected at this stage and corrected.
Installation diagram
Installing the frame
To disguise the heating battery, you need to create a special metal frame. To do this we need several metal profiles, dowels and screws. The structure is held together and is reliable. Then we will use scissors, a hammer drill, a screwdriver and pliers. First, we cut and secure the main parts of the structure, then they need to be installed in the wall:
- Using the U-shaped profile, press it tightly against the wall.
- Use a screwdriver to create a small mark.
- You need to create several holes for future fasteners.
- Then a dowel is inserted there.
- We press the profile in the right places.
- We screw in the screws, securely and firmly.
Each hole in the profile must be at least 15 centimeters apart from each other, the maximum distance is 25 centimeters. The markings are created in advance so as not to cause trouble during installation. All guides are mounted on the wall. Where there are corner joints you need to use metal scissors. Now it remains to form the final depth of the box.
Construction of the box
This plasterboard structure can be fixed to the floor or suspended with a gap above its surface. The first option is preferable - the frame has two planes for support, which makes it stiffer.
USEFUL INFORMATION: Why do you need crabs for drywall: method of attachment to the profile, types, application
When designing the box, it should be taken into account that for normal operation of the device, a gap of at least 10 cm is required between the radiator and the surface of the drywall.
- Using a level (preferably a laser) and a tape measure, markings are carried out. The boundary of the upper edge of the structure is drawn on the wall, and perpendiculars are lowered from it to the floor. Using a square, lines are laid to the depth of the box. By connecting them, you get a lower border on the floor. As a result, you get two rectangles - on the floor and on the wall.
- The guide profile is secured along the lines with dowel nails in increments of 15–20 cm.
- Protruding vertical posts are made from a profile, bending it at an angle of 90˚. First, the side shelves are cut on the parts using metal scissors and bent. The bend points can be fixed using “bugs” (small screws for metal), or it is better to use a cutter.
There is an opinion that fastening with a cutter is not strong enough. However, when using a professional tool, the connection is not only very reliable, but also has the advantage of having no protruding parts, which is inevitable when using “bugs”.
- The required number of horizontal jumpers is installed. The more there are, the more rigid the structure. For a drywall box, 1-2 for each of the planes, with the exception of the front one, is quite enough.
- Parts of a decorative grille or removable screen are attached to the frame.
It is necessary to create a strong structure; any vibrations of the frame after installation are unacceptable.
- At the final stage, strips of plasterboard are cut to actual dimensions and secured with self-tapping screws every 25 cm. Subsequently, the plasterboard is puttied, and the finishing is carried out in accordance with the overall interior of the room.
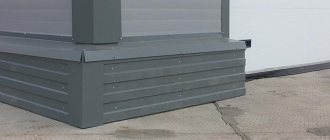
Creating the depth of the box
Our actions:
- We cut several profile pieces of the required size.
- Where the edges of the bends need to make small cuts of five centimeters.
- The middle bends downwards of the structure.
- Cut off each side.
- The fragments must be attached to the edge of the vertical guide at a right angle.
- Each element is connected to a long profile.
To sew up heating radiators correctly, you need to regulate the quality of all processes carried out. The structure should not wobble. Each screw must be tightened carefully, using caution. The profile is easily damaged, keep this in mind. In this case, the fasteners must fit tightly and securely. Inside the frame you need to leave a “window” for the screen, which guarantees the flow of heat in the future.
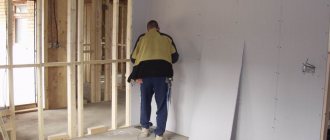
The last stage is installation of drywall
The main processes are completed, the easiest part remains. You need to start directly installing drywall on the old battery.
- We cut out several plasterboard sheets and attach them to the previously created profile.
- Then we mark on each marking sheet.
- Using a utility knife, cut out the necessary elements of the box.
- We lean the parts against the main structure and secure them with screws.
Remember that the material itself is quite fragile. To ensure its integrity, use a sharp knife. For one meter of drywall you need 4 self-tapping screws. Do not forget about the heat that the room will receive through a special hole. The maximum diameter of each is no more than five centimeters. It is possible to simply install a ventilation grill, this is a more beautiful option.
Installation of drywall to cover radiators
The next installation step is cutting the plasterboard sheets into pieces of a suitable size. To sheathe the battery with plasterboard, you need to attach the cut elements to the frame with self-tapping screws in increments of 15 cm. You need to tighten the screws very carefully - at high speed of the screwdriver, damage to the plasterboard can occur. In addition, the fastener caps can simply fall into the material and thereby render it unusable.
However, if you work carefully, then no problems will arise - it is very easy to interact with drywall. In the equipped box, the outer part will remain empty, inside of which the battery will be visible. The formed window is covered with a decorative screen, which ensures complete heat transfer into the room.
Making the box more beautiful
Finishing the box - the process is not included in the installation, but is integral.
- It all starts with a little processing of each joint between sheets of material. Everything needs to be sealed well so that the surface is smooth and prepared. We start by placing a serpyanka mesh over each joint, then the surface needs to be puttied.
- It is necessary to treat all places, even those in which fasteners are installed.
- If you need to make the corners stronger and each line clear, then you should apply drywall to the perforated corners.
- The entire box needs to be puttyed, and then allowed to dry and leveled.
- At the very end, the sanding process is performed with fine-grained sandpaper.
Grouting joints
When the finishing is finished, you can decorate the box. This may include color changes and other decorative processes.
Box finishing
The final stage of work with the box is its finishing. The work depends on the material to be processed. Ceramic tiles or paint are used to decorate plywood, drywall or MDF. Covering with plastic panels does not require finishing. Closing the box with such material does not reduce the area of the room and does not spoil the appearance.
In addition, this method is used to close the pipes running under the bathtub. To do this, a frame is initially constructed from guide profiles, after which it is covered in the same way with the selected material. Remember about mandatory access to communications.
Ready decorated box
Puttying the box is one of the important stages of direct decoration. In this case, it is necessary to correctly design the corners. An even angle is obtained by using special metal corners, which are applied to the corner on top of a layer of starting putty. They are pressed in using a spatula, and then the excess putty is removed.
Another layer of special mixtures is applied to this corner. Repeat these steps until the surface is completely leveled. This makes it easy to make an even angle yourself.
You can watch the video on how to hide pipes yourself
Having processed the corners, the surface is primed and then covered with starting and finishing putty. After drying the surface, grind the putty using a special grater with fine-grained sandpaper.
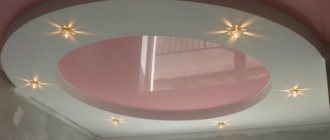
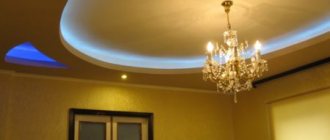
Remember that to solve lighting problems, you can install several small LED lamps in such a “niche”. This means that after constructing the box, such lamps will need to be properly connected to electricity.
After installing and finishing the box, the appearance of the room will change significantly. The interior of the room will become complete and harmonious. In addition, such measures help reduce the noise level from pipes.
Advantages and disadvantages
The main advantages are:
- Completely environmentally friendly material. There are no harmful or dangerous emissions into the air, the material itself does not burn.
- Assortment on the market.
- This is a cheap and economical method.
- Easy installation that does not require rare tools or specific knowledge.
- Everyone can use their imagination and mount the structure the way they see it in their head.
Main disadvantages:
- The material is fragile and can crumble easily, which makes it necessary to work with it very carefully and carefully.
- The drywall needs to be finished additionally; prepare a spatula and other tools.
- The material should not be installed in the bathroom or other rooms with high humidity. Drywall absorbs water and begins to warp.
- We do not recommend storing such material; it can become deformed if left in a vertical position for a long time.
Pros and cons of plasterboard structures
Our compatriots have been covering batteries with plasterboard for a long time, so there are many useful developments in this area. Why is this material so popular?
Here are the main advantages of drywall:
- Environmentally friendly (harmful substances are not released indoors, and the fire resistance of the box is very high).
- Multivariate (in construction stores there is a wide range of varieties of drywall).
- Budget-friendly (the material is very cheap).
- Easy to install (any adult man can handle the task).
- There is room for imagination (you can make designs of any degree of complexity).
Before you start covering the battery with plasterboard, you should find out the whole truth about the disadvantages of such a solution. You will encounter some things during the installation process, others will appear during the operation of the box.
So, the cons:
- Fragility (the material crumbles easily, so you need to work with it carefully).
- The need for additional finishing (after installation, arm yourself with a spatula).
- Low moisture resistance (water causes drywall to warp, swell and deform).
- Storage features (if you place the sheet vertically, you will find over time that it begins to bend).
How to keep warm?
There are several simple methods that can solve this problem. The first concerns a special heat reflector screen. It is mounted behind the battery itself and has a foil color, glitters and shimmers.
Heat reflective screen
As it heats up, it reflects heat into the room, a negligible percentage. Sintepon, which is covered with aluminum inserts on both sides, is a version of a homemade reflector. You will receive enough warmth even in the harshest winters. Another option is aluminum foam, it does not bend at all.
Aluminum foam
Also remember that screens should not have very small holes, the holes should be medium sized. This guarantees a normal amount of heat in the room. But don’t overdo it; you shouldn’t make them more than five centimeters in diameter. Holes must be made on the front side and on top of the entire structure. This ensures heat distribution throughout the room.