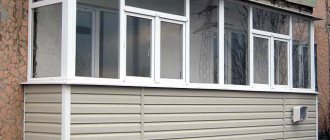
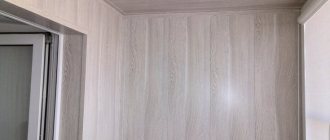
Well, I’m curious, I asked why he needed it. Some renovations have started in the apartment. He decided, he says, to line the inside of the balcony with plasterboard and then paint it beige.
He doesn’t like lining and plastic panels, so he settled on drywall. We talked with him, he told a lot of interesting information about drywall and, in general, about covering the balcony with this material.
We agreed that when he finished sheathing, he would call me to show off. In the meantime, I’m sharing with you the information I heard from him.
Pros and cons of finishing with plasterboard
When choosing a material for the internal cladding of a balcony, attention is primarily paid to its strength, reliability, ease of maintenance, and for those who are planning to beautifully cover a balcony with their own hands - ease of installation and low price.
Not all materials meet these requirements; plasterboard deserves the most attention. SK Comfort will help you figure out whether it is really suitable for covering a balcony; we will look at its advantages, disadvantages and types.
Advantages and disadvantages
Like any other building material, drywall has its advantages and disadvantages. First, let's look at the advantages of plasterboard sheathing:
- Drywall is an environmentally friendly material, which contains only natural ingredients - gypsum and 2 sheets of cardboard. It does not harm health and the environment;
- Drywall has excellent soundproofing properties, which is why it is also used in the construction of interior partitions;
- The material has excellent plasticity; it can be used to form arches and other compositions depending on the wishes of the customer;
- The light weight of drywall allows you to get a perfectly flat wall surface without a ton of putty and plaster.
- However, the material is not entirely ideal; it also has its drawbacks. The disadvantages of finishing a balcony with plasterboard are as follows:
- In its fragility. Drywall sheets must be transported carefully and not cause significant mechanical stress, since the material can easily deform;
- Increased hygroscopicity. The material quickly absorbs moisture, so many finishers recommend letting it sit for several days before installation. It is also not recommended to install drywall in rooms with high humidity to prevent it from collapsing. To avoid all this, it is better to use moisture-resistant drywall (the sheets on the back are green);
- The thickness of the frame, the sheets of drywall and putty “steals” the usable area of the room.
Installation of guide profiles and frame
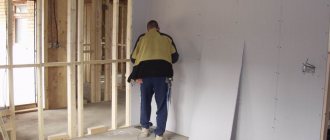
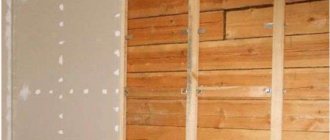
The interior decoration of a balcony with plasterboard begins with the manufacture of a frame on the ceiling and walls, onto which the finishing material itself will subsequently be attached.
First, the balcony is lathed onto which sheets of drywall will be attached.
The preparatory stage is performed in this order.
- Remove the previous finish from the ceiling and walls and clean them from dirt.
- Blow out the cracks with polyurethane foam, apply an antiseptic against fungus and mold.
- Mark the ceiling by drawing a center line in the center of the room, perpendicular to which to draw the remaining lines.
- Step back 3-5 cm from the junction with the ceiling and draw one line along the entire perimeter along the walls (the lower border of the frame).
- Make marks on the ceiling at intervals equal to 1/3 the length of the drywall sheet.
- Cut the profile to the required length using metal scissors.
- Attach the guide profiles to the wall. To do this, attach the profile to the pre-drawn line and mark the places for drilling through the holes.
- Drill holes in the wall with a hammer drill.
- Secure the profile with dowels.
- Attach the profiles to the ceiling with anchors along the edges and in the middle, starting from the corners of the balcony for subsequent plasterboard covering. It is advisable to do this with a partner, since bending or breaking the profile in this case is unacceptable.
- Attach the second profile in 40 cm increments. Do similar actions from the other edge of the balcony.
- If the length of one profile is not enough, then cut another to the required length, and connect their joints with crabs and self-tapping screws.
- After the ceiling, lath the walls. To do this, mark lines at intervals of 0.6 m, attach a profile and mark the places for drilling holes.
- Drill holes, attach profiles and secure them with dowels.
- In the place where the plasterboard sheets are supposed to meet, lay a double sheathing.
- Cut the insulation sheets of the required sizes with a little margin. Attach them to the wall between the sheathing, cover the top with vapor barrier roll foil, which is attached to the frame with staples using a mounting stapler.
Plastering the ceiling with plasterboard sheets
Types of drywall
If you are not frightened by the shortcomings and still choose plasterboard, we suggest considering which types are best to choose for wall finishing.
- Regular drywall. These are white sheets of plasterboard that are suitable for rooms with average levels of humidity and temperature.
- Fire-resistant plasterboard. These are red or pink sheets that are suitable for finishing rooms with increased fire safety requirements. These are mainly offices and some industrial premises.
- Moisture-resistant drywall. These are green-blue sheets that are used for covering rooms with high humidity.
For a balcony, the last option is more suitable - moisture-resistant plasterboard. Sheets of such drywall are coated with special compounds that protect against moisture and fungus.
Source: 0629.com.ua/article/1120848
Sheathing with plasterboard
Having prepared a strong frame for future cladding, we begin installation from the ceiling, gradually moving to the walls.
Stages of plasterboard covering of a balcony (loggia) Finishing stages:
- We take measurements and prepare gypsum sheets based on the measurements.
- We mark the installed wooden profile on the drywall.
- We fix the prepared material to the ceiling with self-tapping screws.
- We gradually move on to finishing the walls (in a similar way).
- When all the free space is filled, the sheets need to be primed.
- We lay a special construction tape at each joint.
- Carefully putty the joints.
- After complete drying, prime the surface.
- Let it dry completely.
Now we can safely proceed to the design of the balcony room: painting the surface or gluing wallpaper.
It is better to start installing walls with larger sheets of plasterboard, gradually moving to smaller ones.
Fastening and grouting plasterboard sheets
Detailed information about interior finishing of balconies and loggias with plasterboard
The demand for the service speaks for itself. Every second loggia at the MSK Project company goes into work with plasterboard finishing.
This service serves as a source for the implementation of creative ideas, thanks to which the potential of the premises increases many times over. The company's staff consists of craftsmen with many years of experience in finishing work, which allows them to implement even the most non-standard projects.
However, not all balconies are suitable for such finishing... What you need to know and what criteria are necessary to implement your plans can be found out below.
Drywall and cold glazing
Finishing with plasterboard for cold glazing of a balcony is strictly not recommended!!! This is due to the fact that the room is not heated, changes in temperature and air humidity on cold balconies are a completely stable phenomenon!
The material is not intended for such extreme conditions; condensation and high humidity will do their job! Just one winter and the room will need new decoration.
Unfortunately, many private masters and even some companies in Moscow, due to complete lack of knowledge of the issue or having a great desire to earn money, provide such services...
Quite often, especially in the spring, people turn to us with a request to redo the work of “woe masters.”
More on the topic: Lining the inside of the balcony with wooden clapboard
Drywall and warm glazing
Warm glazing and extensive insulation of the loggia are one of the most important criteria for finishing a room with plasterboard.
Thanks to the rough finishing material, a huge range of possibilities opens up for the implementation of many interior styles on your loggia. In addition to rough finishing, the company’s craftsmen will also perform fine finishing of the premises.
Wallpaper, painting, tiling, decorative stone on the walls, all this is included in the list of services provided. You don’t have to look separately for painters and specialists in laying heated floors! Turnkey finishing of balconies and loggias with plasterboard is real!
You only need to choose the wallpaper and paint color, and we take care of the rest!
Finishing loggias with moisture-resistant plasterboard
As a finishing material for balconies and loggias, the MSK Project company uses moisture-resistant “green” plasterboard with a sheet thickness of 12 mm.
The material itself is mounted on rigid metal profiles: guides 60x27; 27x28 in a bundle and fixed with hangers, crabs and other special elements. This method of installing drywall guarantees the reliability and durability of the finish.
Details
Preparatory stage for finishing work
Finishing the loggia using plasterboard contains certain important steps. So, the first will be the preparatory work of the surface of the walls and the common loggia as a whole. Most people mistakenly believe that there is no need to finish and level the wall surfaces of the loggia, since this building material will cover all the flaws. This is how you can calculate it, and it is logical. But leveling work still needs to be done.
Please note that it is necessary to install metal-plastic double-glazed windows in the loggia in advance to make it silent and warm.
So, you need to remove all old finishing materials from the surfaces of the balcony or loggia, regardless of what it is. Next, you need to get rid of all the dirt, clean all the cracks and clean the lines between the slab, that is, get rid of the general debris that is there. Afterwards, you need to buy an antifungal antiseptic in order to treat the wall surfaces of the loggia to avoid mold, mildew and other things. The next step will be the process of applying plaster and cleaning each of the walls. And again, it should be noted that large gaps should in no case be on the walls. They will need to be eliminated, but how? You need to take polyurethane foam, blow out all the gaps and do not forget to remove all excess foam.
Now we propose to return to the question - why is it still necessary to prepare the walls of the loggia, as well as eliminate various defects? When the walls are completely smooth, there are no cracks or defects on them, and in this case it will not be like a barrier that does not let in moisture and cold. After all work on the walls, it is once again necessary to disinfect the surface using fungal antiseptics. It is unlikely that when you find mold, for example, a month later, you will be happy to remove all the drywall trim in order to correct the problems. And so you can be fully confident that there will definitely be no mold or other harmful growths there.
Manufacturing of sheathing
Finishing the loggia with plasterboard should be done on the lathing, and this is the most important link in the work, on which the final result of the finishing work will depend. This must be a properly thought-out and high-quality installation of lathing on the wall surfaces of the loggia. Even wooden blocks can be used to create this sheathing, and it is not at all necessary to spend a lot of money on an expensive frame made of metal.
Helpful advice! Still, if you have the finances, it is recommended to use them, because the wood begins to rot and may begin to deform.
The choice of wood slats must be made taking into account the unevenness of the wall surfaces, and therefore the thickness of the insulating layer. Ideally, the loggia should be insulated by placing insulating material under sheets of drywall. An extremely important working criterion is the application of the frame (horizontal). The slats should be at a distance of 0.4 to 0.6 meters. In places where insulation materials will come into contact, the lathing must be laid using two methods. The installation of the structure can be carried out using various methods, but dowels are almost always used for this. Regardless of how the fastenings will be made, the structure must be perfectly fixed to the wall. The photo shows how to properly fix the sheathing on the balcony.
Insulation process
We need to remember that when we make a balcony or loggia, we need to make insulation and lay a layer of vapor insulation on top. It should be noted that the insulating material should be installed only when the sheathing is fully ready. In principle, you can choose all modern thermal insulators, for example, basalt or mineral wool, polystyrene foam, glass wool. Parts of such material must be installed in the sheathing, between the slats. If you use the same foam plastic, then there is no need to attach it to the wall. If we use mineral wool as an insulating material, it is recommended to attach it, because it is not so rigid. Specialized hooks or standard dowels can be used as fastenings.
What is important to consider when laying insulation material? Firstly, it needs to be distributed over the walls in a perfectly uniform layer. It cannot be that somewhere less was installed, and somewhere more. This will create an uneven finish for the drywall sheets. Secondly, the thermal insulation of your apartment loggia will depend on how accurately the gaps and cracks are eliminated, because they will play the role of cold bridges. From all this we can conclude that ideally you should choose both sheathing and insulating material. This is how you can choose the height of the sheathing, which corresponds to the height of the insulating material.
Next comes the simplest stage - working on the vapor insulation layer. Most people use foil rolls or other vapor-impermeable films quite often for this job. Accordingly, the layer of vapor insulation must completely cover the insulating material and sheathing. Using a mounting stapler it will be very easy to fasten the film to the surface. You should not forget about the joints when fastening a sheet of vapor insulation, creating an overlap of 10 cm. Using specialized tape, you can glue all the boundaries or joints between the sheets. It should be remembered that the vapor barrier layer is an extremely important component to prevent condensation from appearing. In itself, it is a dangerous “enemy” for the loggia, since it causes the formation of fungus and mold, which is very difficult to fight.
Installation of plasterboard sheets
Finishing the loggia with plasterboard with insulation ends when the plasterboard sheets are installed. One of the most popular and effective installation methods is to fasten the sheets on the side, which makes it possible to use only one full-length sheet of drywall. Thanks to this, you can save time, money and get rid of unnecessary work, because the most important thing is the quality of the work performed, and therefore you will need diligence and patience.
Please note that it is better for loggias to use a moisture-resistant sheet of plasterboard that is green in color.
This type of work is not difficult and does not require specific skills. Plasterboard wall finishing of a loggia is quite quick and easy to do. To avoid any unpredictable circumstances, you need to use the instructions so that the installation of a sheet of drywall will bring results.
Take sheets of drywall and its lower part needs to be partially installed on the sheathing.- Next, the sheet needs to be aligned with the wall surface.
- Press against the wall.
- Arm yourself with a drill and self-tapping screws, and with them you need to easily fix the sheet to the sheathing around the perimeter.
- Check the plane again using a building level.
- Next, you need to fully install the sheets on the sheathing, and the screws need to be screwed in at a distance of 0.2 meters.
- The tops of the screws, that is, the “caps,” need to be hidden in a sheet. The final finish, as well as its quality, will depend on this.
When work on the first sheet is completed, it is important to repeat this procedure for each part of the loggia until it is all sheathed. But the cladding doesn’t end there. It is imperative to carry out a number of quite important steps after wall cladding. Otherwise, below are all the necessary recommendations. To begin with, the wall surface of the loggia needs to be primed as best as possible for perfect adhesion. Next, you need to seal all the drywall seams with putty and lose the caps. After this, treat the surface with putty for the final finishing of the loggia. Let the putty dry, and after that the walls need to be rubbed down in order to reapply the primer.
Finishing a balcony with plasterboard in just two steps
Coordination of the design project
Before starting work, a detailed design project of the premises is agreed upon, which takes into account the design features of the loggia and your wishes.
The location of electrical points, the installation location of the convector, the color scheme of the floor covering, materials for finishing are recorded and a detailed estimate is drawn up.
A specialist from Project MSK will advise you on the best option in your case. You can call a manager by calling us by phone or leaving a request on our website.
A specialist will arrive at a time convenient for you, with catalogs of materials and draw up a design project completely free of charge! A contract for work can be concluded right at your home.
Room decoration
In accordance with the deadlines specified in the Contract, the craftsmen will deliver the materials to the address and begin work on the same day.
Preparatory work, insulation of the loggia and rough finishing, as a rule, takes 2-3 days, and the time for finishing can take from 2 to 5 days, the timing depends on the types of work agreed upon with you and their complexity.
Compared to other types of balcony cladding, this finish requires more time, but it's worth it! Thoughtful design of the room, attention to detail and the “right hands” will realize your idea, and the loggia will sparkle with interesting and rich colors!
Upon completion of the work, the craftsmen prepare the premises for delivery. After acceptance, you receive a warranty valid for three years.
More on the topic What if you decorate the balcony with plastic panels?
Finishing the loggia with PVC plastic lining: a practical and budget option
Plastic lining has several advantages over its wooden counterpart. First of all, it is necessary to note the cost of such cladding. The price of repairing a balcony using plastic elements will be lower, so this option is popular. Ease of installation is also a serious advantage.
Related article:
Plastic lining is versatile. It is practical and quite durable under normal use conditions. However, this material does not have a very presentable appearance. It is recommended to carefully study the photos of finishing the balcony with plastic clapboard, as they allow you to determine the feasibility of such a solution.
Plastic lining is practical and versatile
It is worth mentioning that this cladding has a wide range of colors and does not require additional processing, since the plastic is resistant to moisture and fungus. Plastic panels are easy to clean. In this case, dirt is removed using a wet cloth or sponge. All plastic products are divided into 2 types depending on the presence of seams in the structure:
- seamless;
- suture
Seamless. Finishing a balcony with panels of this type has many advantages. Seamless lining is highly durable, as it includes stiffeners. Using this type of plastic lining, you can easily independently cladding the internal surfaces on the balcony.
It is resistant to moisture, does not emit harmful chemical compounds, and also has good sound insulation properties. The width of this lining allows you to speed up the installation process. Separately, it should be said that plastic seamless products can be used in the temperature range from -50 to +50 °C. Among the disadvantages, we can note the large length of the parts (6 m), which makes them difficult to transport.
Suture. Finishing balconies with PVC panels of this type allows you to visually expand the space of a balcony or loggia. The width of individual parts, as a rule, is 10 cm. The presence of connecting grooves is reflected in the relief of the wall, which should be taken into account.
Seamless finishing of the balcony with PVC panels allows you to achieve a visual expansion of space
Finishing a balcony with plastic panels: what you need to know
Preparation of the working surface is the initial stage of any facing work. If the walls have an old coating, then it must be removed and the surface completely cleaned. Then markings are applied and wooden sheathing is installed.
In the case of finishing a balcony with PVC products, it is best to purchase additional heat and sound insulation materials. Before starting work, it is advisable to watch videos on the Internet on this topic. This will allow you to delve into the work process and understand its nuances.
Installation of plastic panels begins with the ceiling lathing. In this case, it will be easier to work with the cladding on the walls. This type of work is not difficult. After fixing the first profile, the subsequent ones are installed using tenons and grooves. The first part is fixed in the center of the ceiling. Photos of finishing loggias with this material can be easily found on the Internet.
Finishing a balcony with PVC products requires additional heat and sound insulation
Options for finishing balconies and loggias with plasterboard
Options and cost of the service are determined directly on site.
The cost depends on many factors and types of work. If you are planning to make major renovations in your apartment, and have you already found contractors?
Excellent, but you need to remember that it is still better to entrust the insulation of the loggia to craftsmen who specialize in this area, so to speak, “they have eaten the dog” on this and know all the subtleties and nuances of this area!
The MSK Project company is exactly what you need, the craftsmen have a highly specialized specialization and have many years of experience in the field of insulation and finishing of balconies and loggias. So let's look at what options there may be for finishing with plasterboard:
Rough finish
Renovation in the apartment, and the loggia is also waiting in the wings? And the final finishing is still a long way off... In this case, it is better to entrust the insulation and rough finishing of the loggia to professionals!
This is a correct and wise decision that will take unnecessary troubles away from you in the future! The masters of the Project MSK company will only perform rough work on the loggia, and when the apartment renovation is completed and the time comes for wallpapering and painting, our specialists will be happy to come and complete the finishing work on the balcony.
In some cases, clients wallpaper the loggia themselves or entrust this work to specialists who carry out repairs in the apartment itself.
Finishing
The company's craftsmen perform turnkey plasterboard finishing. Such work includes dismantling work (if necessary), sealing the loggia and eliminating pockets of blowing, insulation, rough and fine finishing, as well as electrical installation work on balconies and loggias.
By contacting us, you can be sure that our specialists will implement exactly what you want on your loggia! The company's warehouse always has all the necessary materials for work.
You will not need to run around stores and look for materials with unknown names, and at the same time think whether there will be enough of them! We take care of all the troubles, and all you have to do is decide on the color of the walls and the wallpaper pattern.
Disadvantages of using drywall
- Fragility. This is the main disadvantage, due to which it is undesirable to attach heavy objects and furniture to walls covered with plasterboard. The weight may simply collapse the wall. Also, sheets of plasterboard should be transported and installation work carried out with extreme caution. Any careless movement, strong pressure or impact can damage the material and compromise its integrity.
- Reduces free space on the balcony. Due to the fact that the sheathing is mounted on the frame at a certain distance from the surface of the walls and ceiling, upon completion of the repair the usable space of the loggia is reduced.
READ MORE: Options for interior finishing of a balcony
The best solutions for finishing balconies and loggias with plasterboard
Combining a loggia with an apartment
Combining a loggia with an apartment is quite common.
The popularity of this service is due to the desire to expand the boundaries and use their square meters more efficiently.
When combined, the load-bearing walls are not touched, but the window frame and balcony door are simply dismantled. A tabletop is installed on the remaining cube in accordance with the design of the room, often implemented on a window sill cube - a bar counter.
But you need to remember that for combination, a prerequisite is warm glazing of the balcony or loggia.
Workspace
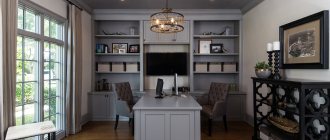
Implementing a home office is the key to success! The question is quite relevant for those whose work involves combining home life and work, and those who directly work at home.
As we all know, concentrating at work can be quite difficult at home, due to many distractions! And the organization of an equipped workplace and the opportunity to retire is priceless!
Essentially, this is the organization of a personal space where ideas are born, work issues are resolved, the room will serve as a catalyst, and more precisely, a source for creative thought.
General stylistic decision
We often meet the desire of our clients to finish the loggia in the same style as the adjacent room, be it a kitchen or a room!
The issue is especially relevant in studio apartments, since in the studio there is an acute shortage of square meters and with the help of a loggia you can slightly increase the space of the apartment, and at the same time, finish the room in a single stylistic solution.
Call us, and a specialist, at a time convenient for you, will come and offer exactly the option that will satisfy your needs and will please the eye for many years.
More on the topic Decorative plaster for interior wall decoration
Why should you use drywall for a loggia?
So, the selection of such material as drywall for a loggia is not made by chance. What is a building material such as drywall? This material has cardboard on both sides and plaster in the middle. Here are the following qualities that a sheet of drywall has:
- The material is very convenient for installation - cutting, installation and transportation. And this is a wonderful advantage, since in this way you can realize all the ideas when facing the loggia.
- Material such as plasterboard sheets is environmentally neutral because it can be used indoors without fear for the health of children. For balconies and loggias this is the best option.
- To keep your loggia warm, even a small crack is enough. It is also necessary to add that there is sound insulation during the service life of the product.
- Such a product can be classified as non-combustible building materials and complies with GOST.
Please note that building materials are very fragile if they are not handled very carefully, and even more so with large sheets.
In addition, it should be added that plasterboard can be used to level the surface of the walls near the loggia and prepare them to a high-quality finish using wallpaper, plaster or paint.
Sheathing a balcony or loggia using plasterboard is easy and quick. That is why it is almost always chosen by developers. Next, we propose to consider the entire process step by step.
Key features of plasterboard finishing
Design
The interior decoration of the loggia with plasterboard allows you to implement the most daring design solutions.
Repeat or continue the style of finishing the adjacent room (premises). Drywall is the basis for creativity, which allows you to implement a variety of finishing styles, such as: Chinese style, Egyptian, etc.
Warm
Finishing with plasterboard is preceded by work on major insulation, allowing the loggia to become an extension of the room, a cozy playroom, mini-gym or office.
A high-quality insulated loggia allows you to keep warm in winter and pleasantly cool in summer, expanding your comfort zone.
Source: projekt-msk.ru/otdelka-balkonov-i-lodzhij/gipsokartonom
Set of finishing tools
Standard finishing of a loggia with plasterboard is a simple process, it can be realistically implemented without the help of specialists. To do this, you need to choose the right building materials, tools and components:
- plasterboard and balcony insulation;
- building level;
- screwdriver and screws;
- perforator;
- roulette;
- hacksaw or jigsaw;
- hammer;
- construction foam;
- wooden profiles and reinforcing tape;
- connecting “crabs”;
- construction stapler;
- primer, putty.
Once everything necessary is ready, we proceed to the next stage.
The main point when finishing a balcony is the quality of the selected material and the correct construction of the frame on which the drywall will be attached.
Stages of finishing the floor of a balcony (loggia)
Finishing a balcony, loggia with moisture-resistant plasterboard Knauf (Knauf)
Gypsum plasterboard moisture-resistant KNAUF sheet (GKLV) is a rectangular sheet that consists of two layers: special cardboard with a layer of gypsum dough with reinforcing additives - while the side edges of the strip are folded with the edges of the cardboard (front layer).
One of the most important components of the plasterboard moisture-resistant KNAUF sheet (GKLV) is the facing cardboard, the adhesion of which to the core is ensured through the use of adhesive additives.
Cardboard serves as both a reinforcing frame and an excellent base for applying any finishing material (plaster, wallpaper, paint, ceramic tiles, etc.). Due to its physical and hygienic properties, cardboard is ideal for residential premises.
Moisture-resistant plasterboard sheets differ from ordinary KNAUF sheets by special cardboard, as well as hydrophobic and antifungal additives in the core material.
To finish balconies and loggias, we use moisture-resistant plasterboard with a thickness of 10 mm (on the ceiling) and 12 mm (on the walls).
Finishing a balcony or loggia with plasterboard is very convenient. You get smooth walls and ceilings that are completely ready for further finishing. All you have to do is plaster the walls, put wallpaper on them or paint them.
This finishing method is becoming increasingly popular when combining a loggia, balcony with a room or kitchen.
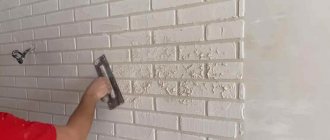
We also offer finishing of a balcony or loggia with plasterboard followed by laying decorative artificial facing stone on it, which will give your balcony or loggia a special exotic touch.
Our craftsmen will carry out high-quality finishing of your balcony or loggia with plasterboard in compliance with all standards and requirements in a short time. We do not do the final finishing of plasterboard walls: plastering, painting, wallpapering.
After dismantling the room window, the slopes of the window and doorway can be finished with plasterboard, or they can be designed in the form of a semicircular arch, installing halogen spotlights on top.
When combining a loggia or balcony with a living space, the walls are insulated with Penoplex slabs. We use Penofol as the second layer, with which we envelop the entire room, thus creating a “thermos effect”.
Penoplex does not allow cold from the slabs to pass through, Penofol is necessary for heat and vapor barrier, it retains heat inside the balcony or loggia.
You don’t have to run around stores and markets in search of materials to decorate a balcony or loggia, and also solve the issue of delivering and lifting it to your apartment - our craftsmen will do it for you. We also work with customer’s materials.
Finishing a balcony or loggia with Knauf moisture-resistant plasterboard will save you from unnecessary problems when insulating and leveling the walls, and is also ideal if you are going to arrange a loggia and a room in the same style.
Source: balcon77.ru/uslugi/steny_i_potolok/gipsokarton_knauf.php
What are the main steps to follow?
The procedure is no different from covering walls in an apartment. To finish the balcony, you need to prepare the surface. The preparatory stage includes removing the old finish and cleaning the wall. It is important to ensure that there are no peeling plaster or pieces of wallpaper.
Then markings are made for installing the metal structure. To do this you will need a tape measure, a pencil, a plumb line and a level. The next step is to assemble the frame from the profile. The result is a sheathing to which you can screw the sheets. Inside the frame there is steam and heat insulation. This stage is important, since GKLV alone will not provide the required degree of insulation.
General scheme for attaching drywall to walls
The next step is to cut out parts of the required size from drywall. It is attached to the sheathing using screws. The final stage is applying a primer and then putty. Now you can use any type of finishing - from wallpaper to tiles for the loggia.
Preparation
If there is old finishing, it will have to be dismantled. The wallpaper needs to be torn off, the tiles need to be chipped off. Clean the wall; old paint can be partially removed with a wire brush. After cleaning, you need to vacuum the surfaces so that no dust remains on them.
Sealing cracks
It is important to ensure that there are no cracks, otherwise moisture will begin to penetrate through them.
It is necessary to remove dust and plaster particles from the crack. Then pour polyurethane foam inside. To seal large cracks, a different technique is used. The edges of the resulting opening are cleaned with a file. Use a brush to remove particles of dust and flaking plaster. If the fittings are sticking out, you need to remove the rust from it with a wire brush. Then moisten the cracked area with water. Cement mortar must be placed inside and leveled.
Do-it-yourself balcony finishing with plasterboard
If lately you have been increasingly thinking about landscaping your balcony, pay attention to finishing materials such as drywall.
Features of work, pros and cons
The advantages of finishing with plasterboard are enormous:
- does not burn;
- keeps warm;
- has excellent sound insulation;
- hard, but when wetted with water it becomes very flexible.
Sheathing a balcony with plasterboard is an opportunity to save money, significantly reduce repair time and realize your design talent. In addition, this is an absolutely harmless material.
The disadvantages of drywall include instability to sudden temperature fluctuations and the need to be careful when working with it, as there is a risk of breaking a large sheet of this material.
As you can see, the advantages outweigh the disadvantages many times over. Experienced builders and renovation beginners enjoy using it in their work.
Positive properties of drywall
- The flexibility of the material allows you to level surfaces of any curvature. Drywall sheets can be used to cover the surfaces of walls and ceilings. Drywall will be a good basis for wall or ceiling structures of any configuration and complexity.
- Cleanliness and speed of the material laying process. Unlike applying conventional plaster, plasterboard sheets are installed faster with a minimum of dust and dirt.
- Installation of plasterboard structures makes it easy to hide any communications (pipes, ventilation, electrical wiring).
- Provides excellent sound insulation and heat protection on the balcony. A vapor barrier and heat-insulating material are placed under the casing.
- Finishing a balcony with plasterboard is available to everyone, since this building material is inexpensive.
- Due to its hygroscopicity, plasterboard on the balcony allows you to maintain good air exchange.
- Finishing the ceiling on the balcony with this material allows you to use a variety of lighting fixtures: from traditional pendant lamps to built-in spotlights.
- Drywall does not support combustion.
- The material is absolutely harmless to human health.
- The material weighs a little, which is very important for those who make repairs in old houses.
Covering the loggia with plasterboard with insulation
If you want to get a full-fledged room, then when covering it, use materials that have thermal insulation properties.
It is possible to insulate a balcony or loggia with the following materials:
- insulation with mineral wool;
- Styrofoam;
- expanded polystyrene.
Mineral wool is sold in rolls or slabs. The roller does not even need to be attached to the wall; it will be pressed down by sheets of drywall.
Cotton wool slabs, like polystyrene foam, require additional fasteners. If you choose expanded polystyrene, be aware that the joints between the plates will have to be foamed.
Materials and tools
A person without experience in construction can perform installation work independently.
In this case, you will have to purchase the following tools and materials for covering the balcony:
- Galvanized metal profiles of one standard size - U-shaped and rack-mount with C-shaped edges.
- Brackets and connectors for profiles - crabs.
- Rotary hammer and cordless drill.
- Self-tapping screws for drywall and dowels.
- Level, pencil for marking.
- Plumb line and tape measure.
- Set of spatulas.
- A tool for quickly connecting profiles is a cutter.
- Roller for applying primer.
- GKLV sheets.
- Insulation material - mineral wool, foil penofol or penoplex.
- Putty – leveling and finishing.
- Reinforcement mesh.
To calculate the consumption of materials, it is convenient to use an online calculator, for example, on the official Knauf website. To perform calculations, it is necessary to note the type of structure, in this case, the cladding. Then choose the type of Knauf cladding, for example, single-layer on a steel frame. At the final stage, it is necessary to enter the geometric parameters of the structure. The result can be printed and taken with you to the store.
Covering a balcony with plasterboard for painting
Have you already decided on the color of the walls?
Drywall is great for painting. It is best to choose water-based paint. In stores it only comes in white, but there are a huge number of colors. Which one to buy is just a matter of your taste. If you don’t know how to paint a balcony, we wrote about it.
When purchasing paint, pay attention to the following: glossy will highlight all roughness and the presence of hairs, while matte will hide all surface imperfections.
You can't do without a roller. Apply the first layer with horizontal movements, the second - vertically. If you are satisfied with the result, then you can finish painting.
If you want a brighter color, paint more horizontally. There is no need to wait for the layers to dry; feel free to apply the next one over a damp surface.
Insulation and vapor barrier
Lay insulation between the profiles. When covering a balcony, this is a necessary condition. The type of insulation is determined by the master. It could be penoplex, mineral wool or something else.
Cut the insulation into equal parts. The size of the segments is determined by the size of the “cells” into which you will install the insulation. To secure it, use a special adhesive mixture. Fixation is carried out with disc-shaped dowels.
Place a vapor barrier on top of the insulation. To secure it, use glue and a mounting stapler. On the drywall, draw marks for attaching to the profiles. Then cut out the required part of the sheet and attach it to the frame with the green back side.
Make holes according to the markings made. Use an electric drill. A step of 30-40 cm is required here
Insert the screws into the holes and tighten them with a screwdriver carefully and not all the way. Remember that excessive pressure on drywall can deform it.
Install all sheets in the same way.
8 photos
Covering the balcony with plastic panels, choosing PVC panels for the balcony
As for the shortcomings, there are practically none. This is perhaps the relative fragility of PVC panels for balconies and the imperfection of very cheap samples. Remember that the cheaper the plastic sheets, the more hassle they will cause during installation.
Covering a balcony with plastic panels is a pleasant and easy task that even a beginner can handle. In addition, our video, filmed by professional builders, will help you. The actual technology of work includes the following steps:
- Installation of sheathing. Perpendicular to the direction of the cladding, install a sheathing of wooden or metal slats at a distance of 400-500 mm from each other. Monitor the quality of the installed base by level.
- Installation of the first panel. Cut the wall panels for the balcony to the required size and install the first sheet in the corner of the sheathing, level it. Secure the part with self-tapping screws and a press washer or a furniture stapler. Install the remaining structural elements using the same principle.
- Installation of the final profile. The theory of how to cover a balcony with plastic panels does not end there. After processing each wall, it is necessary to install finishing profiles. This video demonstrates this technology in more detail.
- Installation of the finishing panel. Having cut the PVC sheet to the required dimensions, snap it into the groove of the previous element.
Now you know how to sheathe a balcony with your own hands, and you can repeat the work of the master yourself. And for inspiration, we invite you to look at beautiful and high-quality examples of balcony cladding, photos of which are in the gallery.
Calculation of consumables
How many sheets will be required for sheathing? Arm yourself with a tape measure and calculate the area of the surfaces that will be finished. With the ceilings and side walls of a balcony or loggia, everything is extremely simple: the length and height are measured, the results are multiplied among themselves and correlated with the area of the plasterboard sheets.
You will have to work hard with the walls where window openings or doors are located. First, divide the surface into rectangular sections, measure their area by the same multiplication of length and height, then add the results.
If the balcony is large and you plan to build a partition, keep in mind that it will be sheathed on both sides, so a double supply of material will be required. For niches, arches, and other complex-shaped structures, take extra material and do not subtract the area of the recesses from the surface area.
For example, to finish 1 m2 of area you will need the following consumables:
- GKL size 2.5*1.2 m – 2.1 m2;
- guide profile 50/40 – 0.7 linear m;
- rack profile 50/50 – 2 linear. m;
- mineral wool (for insulation) – 1 m2;
- reinforcing tape – 2.2 linear m;
- seal – 1.2 linear m;
- primer – 0.2 l;
- putty – 0.9 kg;
- dowel 6/40 – 2 pcs;
- self-tapping screws – 34 pcs.
Types of profiles for drywall
Drywall for finishing a loggia or balcony
P
It is quite advisable to use drywall to decorate a loggia or balcony. There are several ways to finish a loggia with plasterboard, and we will talk about them, as well as where it is really necessary and possible to use plasterboard on a loggia or balcony. Having talked a little about balcony insulation, let’s move on to the main question, where and how plasterboard is used in lining a balcony or loggias. Finishing a loggia with plasterboard has one feature.
And, to be more precise, a balcony or loggia has one feature - this is a place under the glazing, called a parapet. This is where the whole finishing touch lies - this place is special. The remaining walls of the loggia or balcony are ordinary and, in fact, they do not require finishing with plasterboard; they can be successfully simply plastered or lined with finishing, for example, plastic (PVC) panels or clapboard. It is convenient to use plasterboard to level walls by gluing it to special glue or plaster to load-bearing walls, thereby obtaining a flat, smooth surface suitable for high-quality finishing.
Also, when insulating a balcony, you often need to build a frame, and, of course, it is most convenient to sew it up with gypsum board. The same applies to insulating the balcony. It can be “warm” or “cold”.
For cold insulation, polystyrene foam or foam boards up to 50 mm thick are used. For a warm balcony, a cake is made from insulation materials (for example, mineral wool and expanded polystyrene) from 100 mm thick. Such insulation often requires a gypsum board frame and sheathing.
DIY installation technology
It begins with completely dismantling the old interior decoration on the balcony; if necessary, the surfaces are protected with a grinder. Identified cracks and recesses should be plastered to prevent wind from blowing into them. The floor of the balcony must be waterproofed; this can be done with ordinary roofing felt or mastic. Next, all drywall surfaces on the balcony are treated with an antiseptic primer to prevent the development of mold. After the primer has dried, the balcony is insulated with foam plastic or penoplex. If the balcony is closed, you can use glass wool. Insulating a balcony with drywall alone is ineffective. After sealing the seams of the insulation with foam or special glue, foil insulation is mounted on it. After all this work, you can begin installing the sheathing.
Lathing construction
The first step is to install the UD profile on the ceiling. It is attached to dowels, then the position of the UD profile on the floor is marked along a plumb line strictly vertically below it. The ceiling and floor profiles are screwed with screws in increments of 20-30 cm. Then guide profiles are installed in the corners of the balcony; it is ideal to use a laser construction level. The elements are connected by cutters.
Then the rack profiles are placed in increments of no more than 60 cm. They are attached to the ceiling and floor guides with self-tapping screws. The guides are attached to the wall with perforated brackets in increments of 40-50 cm. The last stage of the sheathing is the installation of transverse elements in increments of 40 cm. They are connected to the guides through “crabs”, i.e. cross-shaped fittings. After installing the sheathing, utility lines are installed behind it, incl. wiring. It should be laid in special fireproof polymer channels.
Installation of drywall on the balcony
The first step is to free up the space and remove the old finish. Only by cleaning the surface down to the base can you identify cracks and other defects that must be repaired. If the gaps are small, then a sealant will do; if there are larger ones, you should use polyurethane foam. To begin with, the crack is deepened a little, cleaned, moistened with water, and only then “treated.”
In addition, before starting installation work, you need to take care of installing a warm glazing system in advance to prevent precipitation from penetrating inside the balcony. It is mandatory to waterproof and insulate the premises with thermal insulation materials to prevent the occurrence of condensation. For the interior arrangement of a balcony, the optimal type of drywall is moisture-resistant. As a result of its use, the cladding will last much longer than when using classic gypsum plasterboard, and the likelihood of pathogenic microorganisms appearing will be minimized. To process corners, you will need special corners made of plastic or metal. First, the working solution is also applied, and then the corner is glued. On the internal corners, use serpyanka and putty with a corner spatula. Before you begin installing the frame, you need to determine the lines that will serve as a guide for attaching the guides. They can be made using either a painting cord or a regular pencil.
As a rule, a rectangle is drawn along the walls.
Is it possible to use moisture-resistant plasterboard on the balcony?
It is better, of course, to use facade materials and primers and putties. I would have second thoughts about even moisture-resistant drywall on an unheated balcony. drugoi vadim wrote: In general, I decided not to risk it and refuse any sheets and make do with facade plaster and then paint it. adr08 wrote: And at the same time, you can’t install insulation at all, but we wanted to make it not 5 cm thick, but smaller, 3 cm, for example. I am insulating the loggia; there are no additional trims on the windows; the distance from the wall to the glazing beads is 4-4.5 cm. 30mm penoplex insulation, 10mm foil insulation, so there is almost no air gap with gypsum board, can we leave it like that? I found the only cement putty that indicates the base of drywall - WEBER REND FACADE. But it’s not very common here in Minsk, I can’t imagine where you can buy it.
What should I do?! Maybe there are analogues?
In one fell swoop, seven at once or drywall on the balcony
Well, now you can tell us how to decorate a balcony with plasterboard yourself. The technology consists of several stages, presented in the diagram below: Some refuse this type of finishing, citing the fact that the price of the material is somewhat high. In response, I want to say that the cost of repairs needs to be calculated comprehensively. If you add up all the costs, for example, for insulation plus plastering, it turns out that you will spend almost more money on the latest technology. Sheets of moisture-resistant plasterboard have a special coating that prevents the absorption of moisture.
In addition, the material is treated with antifungal substances that prevent the development of various microorganisms on the finishing surface. I won’t talk long about the finishing touches. If only because I don’t know what decorative material you will use. To achieve complete mutual understanding, I want to explain why I install drywall on the sheathing rather than gluing it to the wall: