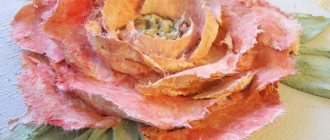
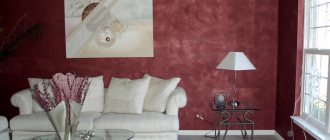
Among the various painting techniques, sculptural painting is considered one of the most effective, when the painting seems to come to life, acquiring relief. Volumetric, unfading flowers made of decorative plaster become part of wall panels and decorate interior items.
An example of relief painting: a clock with handmade flowers.
What is sculpture painting
This is a technique for creating relief works, mainly flowers, from special plaster. Before application, the material is mixed with color (color pigment) and after hardening it is no longer painted. This is the difference between this technique and classical bas-relief and high relief.
The main tool in the work is a palette knife. This is a small spatula with a flexible metal blade that is used to form petals and leaves from the paste. In classical painting, a palette knife is used to mix oil paints and apply them in rough strokes.
In order for the sculptures of flowers in the painting to be of high volume, fibers are added to the plaster, which reinforce and lift the material. I’ll tell you later how to make the right mixture for creativity.
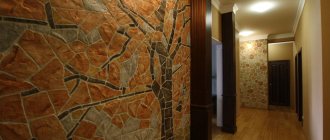
Features of creating bas-relief from different materials
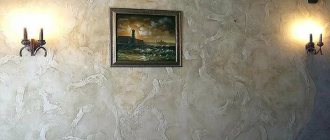
As a decoration, stucco is used in different conditions. Since the bas-relief of a house, while on the wall, is subject to intense precipitation, gypsum is replaced with cement. The idea of creating panels from polyurethane foam is also interesting.
From cement
Putties with cement instead of gypsum can also be used for panels. But it is more practical to use cement or cement-polymer plaster. The composition does not harden so quickly, is heavier, less plastic, and prone to shrinkage. This creates (compared to gypsum mass) certain difficulties. Therefore, it is better not to make a bas-relief on the wall with your own hands, but to entrust the job to the masters.
Based on polyurethane foam
Modern materials make it possible to reduce the time for creating large-sized elements and reduce the weight of the decoration. So craftsmen make fixed models from polyurethane foam, cover them with plaster and paint them. We invite beginners to familiarize themselves with the technique by watching the video.
Necessary materials
Perhaps half of the success in volumetric painting depends on the properties of the sculptural solution used. He must:
- holds its shape well, does not break or crack after drying;
- do not have rough roughness;
- spread in a thin layer;
- do not stick to the palette knife;
- have a white color for ease of coloring;
- and cheap =)
Factory materials that have the required qualities are expensive, mostly all imported. Moreover, they are only available in large cities. Therefore, to reduce the cost of work, craftsmen independently make sculptural plaster from more affordable materials.
Let's consider several mixtures for textured paintings.
Clavel Riviera . This plaster contains natural fibers that prevent cracking even with a thick layer of up to 20 mm. The material from Clavel has excellent ductility and adhesion to any surface. But this has a drawback - the paste stretches behind the tool, as if reluctantly sliding off it, so the flower petals are not very voluminous.
VGT Bas-relief . Decorative plaster with cellulose filler is designed to create textured surfaces with relief up to 10 mm. The marble powder in the composition gives snow-whiteness and strength, and does not shrink.
Marmur Stucco . This is essentially the German analogue of VGT plaster. The composition and properties are similar, but the price is much higher. In its pure form it is a little thin for sculptural painting; it needs to be mixed with other materials to increase density.
Evgenia Ermilova ™. An original mixture from Evgenia Ermilova, a master of relief painting. Completely ready-to-use plaster is sold already painted in the most popular colors. You can buy the material in the online store with delivery throughout Russia and neighboring countries.
NEOMID . Polymer putty for filling polyurethane foam. Contains microfiber that protects the coating from cracking. The material has an excellent consistency for our sculptural works; it is convenient to apply and form decorative elements. The downside is the light gray color, which reduces the brightness of the created pattern.
Expert opinion
Marina Zanina
Interior designer
I would advise novice craftsmen to purchase ready-made materials for decoration, so that it is immediately clear what the consistency and adhesion of the plaster should be. This will help you quickly master the technique of three-dimensional drawing.
Clavel
VGT
Ermilova
Neomid
Making an original Easter pot from gypsum plaster
Spring, the mood of awakening! On the eve of Easter, we offer a master class on making egg shells from plaster. Spring flowers can “grow” from such an egg; it can be a good Easter gift or interior decoration, creating a positive spring mood.
Materials and tools:
- gypsum plaster (for walls and ceilings, working layer 20-50 mm) or plaster bandages;
- gauze, bandage or tulle (nylon, natural fibers, but not organza);
- balloon;
- acrylic titanium white;
- artistic acrylic primer (you can use white acrylic paint for walls);
- water;
- scissors;
- wide brush;
- birch (or other tree) branches.
1. To begin, cut gauze or other fabric into squares of arbitrary size approximately 10x10 cm, 15x15 cm.
2. Fill the ball with air. The size of the ball depends on what and what size will be placed in the egg - a flowerpot with flowers, artificial greenery. For convenience, you should use a stand for the ball, for example, some old flowerpot.
3. We mark the boundaries of the chips of the future egg with a marker.
4. Let's prepare a plaster solution. Take a small container into which we pour the plaster. Gradually add a small amount of water. Stir until smooth. The consistency of the solution should resemble sour cream. The finished solution cannot be left for more than half an hour, as it will lose its working condition and begin to harden. We described working with plaster in detail at the master class >>.
5. We take squares of gauze and “soak” them in the plaster solution, squeeze out the excess and place it on the ball, placing the edges of the squares overlapping each other so that there are no gaps. We respect the boundaries drawn with a marker.
Apply the second layer: place a clean piece of gauze. To ensure that the edge of the egg chip is not fragile, we make sure that the layers do not have gaps. Apply a layer of plaster on top using gentle hand movements and smear it with your fingers. But you should not apply a thick layer of solution; you want the structure of the gauze to show through a little.
A total of 4-6 layers should be applied (more is possible if you have a large egg shell).
6. After completing the work on the layers, we leave our egg to dry - for one night. Drying time depends on room temperature.
7. After drying, take a needle and burst the ball. What remains is our shell.
8. We take sandpaper and sand the surface of the egg, removing excess tubercles. But don’t get carried away, otherwise you can rub it to the top layer of gauze and the fabric will be visible.
9. Next, we prime, and after the primer dries, we apply a layer of acrylic paint for greater density of white color.
10. The egg shell is ready! Now we need to decide what we will place in the egg.
To stabilize the egg, you can make a stand from branches. We selected birch branches and twisted them into a wreath, securing them with wire (or rope). You can also put an egg in such a wreath.
A pot with live hyacinths was placed inside the shell and decorated with pink sisal. You can also take other spring flowers: daffodils, primrose, muscari, crocuses.
If a wreath made of branches is not suitable, then you can do without it. You can place several eggs of different sizes on the festive Easter table.
You can also use artificial flowers. For example, as you can see in the photo, we took artificial daffodils and fixed them to the bottom of the shell with a hot glue gun. First we glued a piece of construction foam, and then we glued flowers into it.
This egg can be used in a panel or collage.
So, a plaster egg shell is a wonderful decorative element for a festive Easter table or spring interior. Fresh flowers placed in such a shell are a good gift for a loved one.
Thank you for your attention! Ask questions and have a spring mood everyone!
Homemade mixture recipe
For those who are already familiar with a palette knife and decorative plaster and are looking for something to make paste with their own hands, I will reveal two recipes. These mixtures are inexpensive, easy to prepare, and have all the necessary qualities.
Recipe for sculpture plaster No. 1:
- Paritet silk plaster (base coat No. 1) - white microfibers with an adhesive additive.
- Gypsum dry mix Knauf Fugen.
- PVA glue.
- Silk plaster will act as reinforcing fibers. Add it to the water and mix thoroughly until it becomes a paste.
- Add Knauf Fugen a little at a time and mix. In essence, we get ordinary gypsum plaster with reinforcing fibers.
- For better adhesion, you can add a drop of PVA glue to the composition, but do not overdo it!
Let the mixture sit for 5-10 minutes, stir well again, and you can get to work.
Step 1.
Step 2.
Step 3.
Recipe No. 2.
- Acrylic decorative mortar with marble filler - 200 g.
- Fiber fiber 3 mm (looks like cotton) or silk plaster from the first recipe - 10 ml.
- Measure out the required amount of material into a glass bowl.
- Lightly moisten 1 cap (10 ml) of fiberglass with water and add to the decorative solution.
- Mix with a palette knife, thoroughly breaking up the fibers.
Measure out 200 grams of plaster mixture.
Moisten one cap of fiber in a separate container with water.
Mix.
The resulting sculpture painting mixture can be stored in an airtight container for several months.
How to make a bas-relief on the wall with your own hands
Techniques for forming a bas-relief with your own hands:
- plastering;
- casting;
- modeling
Plastering is the application of a layer of plaster on top of a model of the desired shape. There are plastering models that are not fixed to the surface of the base - free (first type), as well as models attached to the base (second type). The models themselves, after the gypsum dough has hardened, are not removed, but are used in plastered form, creating a bas-relief.
Another way to create parts is by reverse casting using a model-mold that is removed after the mass hardens (third type). First, a model of the desired shape is made. Then, using it, a mold is made, in which the necessary parts will subsequently be cast. The method is also accessible to the novice finisher, since you can pore over the model itself without making mistakes on the wall.
Actually, modeling performed directly on the surface of the base (fourth type). This requires initial experience. This type of technique allows you to create large bas-reliefs that extend onto adjacent walls or ceilings. It is better for a beginner to practice and adapt to working on training sheets (for example, plywood or drywall).
creating a bas-relief
Types 2-4 techniques are used in two ways:
- immediately in place, creating a complete picture;
- parts, subsequently assembled and mounted on the wall.
In the second option, fragmented sheets of drywall are used as a substrate. Having applied the relief, pieces of drywall are attached to the leveled surface of the base.
Here is a step-by-step description of the manufacturing process:
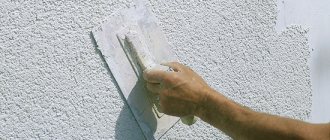
- Clean, level, prime the base surface (preparatory work).
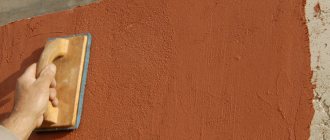
- Apply a background base texture.
- The relief is formed using the above techniques. Toning is performed if it is intended according to the plan.
- After drying, surface painting is carried out.
- Latex coating is performed.
- Dry for 1-2 weeks. Varnished.
- Using lamps, they create the desired lighting angle.
This technology is similar in its details to the technology described below. Therefore, we will describe the nuances there.
Preparatory work
Any technology used to create a bas-relief includes a preparatory phase. The base must be level, clean, firmly hold the heavy bas-relief, and ensure safe operation. Perform the following operations:
- remove worn-out finishing (wallpaper, plaster, paint, peeling plaster);
- clean the base from traces of oils, rust stains, foci of biogrowth, excess hardware (the ones left are isolated);
- repair damaged areas - cracks, chips, depressions, joints;
- remove dust;
- primed and dried.
If necessary, perform work to level the surface. Also, overhead, non-removable models for plastering are made in advance, and unattached models are plastered (using the first type technique). Flower petals, leaves, and berries are made from salt dough or polystyrene foam. Prime and dry. Where they plan to create thickenings, screws are screwed in for better fixation.
At the preparatory stage, an image is selected, correlating its size and location with the situation in the room. That is, the composition is selected before the creation of a three-dimensional picture begins.
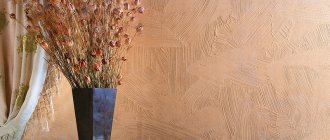
If the subject requires the creation of a background texture (for example, decorative travertine plaster), then a base coat is applied. The desired texture is applied on top of the “base” using improvised materials (foam rubber, roller, felt). The base is tinted.
Create and transfer a sketch
The idea of the drawing is selected according to the purpose of the room. Thus, landscapes are often used in the living room, children’s rooms are decorated with fairy-tale creatures, and the kitchen attracts owners with still life. Office scenes are different from home ones. If you have the skills of an artist, then there are no problems with creating or transferring a sketch.
bas-relief sketch 1
bas-relief sketch 2
transferring the sketch to the wall surface
Those who are starting such work for the first time can use the following methods of transferring a drawing to the wall:
- on the printed picture and on the site of the future panel, grids of appropriate scales are drawn, focusing on the cells, of which the outline of the pattern is drawn;
- the selected drawing is printed in full size on a printer;
- holes are made on the lines of the printed picture, the picture is placed on the wall, using cotton wool or a sponge dipped in charcoal powder, plugging the holes, leaving black dots on the wall.
The sketch is drawn as clearly as possible. For large panels, it is not necessary to draw the entire sketch at once. It is enough to indicate the main lines and draw the area to be designed.
Creating a reinforced frame
A particularly convex bas-relief may require the manufacture of a special frame on the wall. It is created from wire. For the branches, the frame is assembled from aluminum wires, screwing the outgoing branches with soft copper wire. Instead of wire for low-relief panels, cord is used. To obtain a run, the number of strands is gradually reduced along the length of the cord. The cord is dipped in plaster mash and laid out along the drawing line. This is done in a horizontal position (on film). After drying, the branch is easily removed from the film and glued to the wall with a plaster compound.
branches of the ornament are reinforced
For images with a height of more than 20 mm, the frame is made along the contour (perimeter) with an indentation of 1-3 cm, which is left for modeling. The wire frame is wrapped with a bandage soaked in a plaster mash of the consistency of kefir. They dip just a roll of bandage (it is advisable not to roll up small ones).
Metal mesh can be used to reinforce the wings or sheet plates.
Forming the main relief
Apply putty to the base using a convenient tool. In places of thickening, apply the solution in several passes. For better adhesion, we do not level the top of the underlying layers. We apply the drawing in sections. The main relief is done with large tools: staples, trowels, and sometimes the hands of a master.
If the area of the “high” area is large, we screw in the screws over the area, placing them evenly. We screw in the self-tapping screws in such a way that they guide you when applying layers (taking into account the fact that there should be about a centimeter left above their caps for modeling).
At the same stage, separately manufactured parts are attached to the wall. The joints are covered with plaster. After drying, smooth with sandpaper.
formation of large bas-relief details 1
creating large bas-relief details 2
Formation of small parts
Where we have reached the desired layer height, we form the surface without delay. Then we design the small details, the last is the surface texture. This is where you will need brushes, palette knives, and syringes. To remove excess (not yet hardened) mass, use a knife.
You should not prepare a lot of solution for making small details, since it takes a lot of time to draw and design the “little things.”
Panels are not always supposed to be made with massive parts. If the relief is shallow, then we create details by putting a little mass on a trowel and transferring the composition to the wall. When applying, we try to spread the mixture to get a strong adhesion. For small, narrow parts, apply the solution using a palette knife. After applying the mass, we form its surface with tools that can be used to obtain a thin pattern - palette knives, chisels, scalpels.
formation of small parts
Adjustment with chisels
To emphasize the bas-relief and make the pattern lines clear on the wall, they work with cutters (chisel, scalpel, knife, etc.). Using wood carving chisels, plaster is easily cut. This feature of the material allows you to create particularly fine patterns and correct complex shapes.
Grinding
To smooth and eliminate roughness on the panel surfaces, sandpaper and old needle files are used. There is no need to apply much force to grind gypsum compounds. The dust is swept away. After drying, the surface of the panel is primed.
Tip: After using sandpaper, streaks remain; they can be removed by walking over the sculpture with a thinly diluted plaster compound.
Coloring
Bas-reliefs are valuable for the play of shadows, which is most pronounced in monochrome colors. However, according to the design concept, sometimes coloring or tinting of the image is required. Before painting, wait for the stucco molding to dry completely, which is painted on top.
painting the surface of the bas-relief
Special paints are used for gypsum stucco. When applying the paint, immediately shade it with a damp sponge, obtaining subtle halftones. If sharp color transitions are needed, acrylic coloring compounds are used.
Paints fade on dried plaster. Latex treatment helps restore color. To restore color, a butodiene-styrene latex composition is used. Excess latex is absorbed and evaporated. After 1-2 weeks the surface can be varnished.
Organization of lighting
To “revive” a relief panel, you need proper lighting. They think about the placement of lamps in advance, because before starting stucco work it is necessary to carry out hidden wiring to mount the light source on the wall, and purchase lamps of suitable power and design. The lamps used should not be too bright.
beautiful relief lighting on the wall
The light is usually directed vertically (from top to bottom - the most natural direction, which does not make the image bulky, but creates the effect of separating it from the wall). Sometimes the panel is illuminated from the side. Lighting directed from bottom to top creates the illusion of massiveness and some majesty.
For illumination, LED linear or spotlights, as well as LED strips, are used. The design of the lamps is selected according to the theme or decor style of the room.
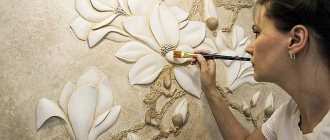
Technique for making relief paintings
The first thing you need to start with is preparing your workplace. You will need:
Plastic white board for modeling or any other easy-to-clean surface.
Wet wipes for cleaning the palette knife.
The instrument itself.
Water based color.
- Place decorative plaster on a plastic board.
- Add a few drops of color. You can not mix completely, but leave color transitions from saturated to almost white.
- We collect the material on the back side of the palette knife: use the edge of the working surface to separate it a little. You can apply it in one go or in several short strokes.
- In the place in the picture where there will be a petal or leaf, place the palette knife on the other edge and leave the plaster on the canvas with one stroke.
- Do not forget to wipe the palette knife from any paste residue.
- When forming a flower bud, first make the lower petals, then overlap them with the upper ones.
- With a palette knife, you can also correct the edges of the elements, wrap them, and leave characteristic grooves.
Having mastered this basic technique of strokes and combining their directions, you can create simple relief compositions.