Hand-made interior items have always had a high value: they not only make the decoration of your home unusual, but also allow you to show off familiar non-standard things in a one-piece copy, saving money if you do the work yourself. It's very easy to turn a boring window into a work of art, and stained glass paints will help you with this.
Drawing on windows: advantages and disadvantages
The main feature that painting on glass with stained glass paints can provide is the ability to turn ordinary standard glass into an interesting object that can decorate the interior and attract the attention of your guests.
- You can liven up the atmosphere, make a window or an old mirror, an interior door, a chandelier, dishes, or any other glass object interesting.
- You can make an original gift by decorating a photo frame with stained glass paint.
- The paint adheres well to the surface, does not wear off, and is not washed off with ordinary detergents or water, so you do not have to worry about the safety of the object painted with it.
Read more about stained glass in our article “Modern stained glass windows - a unique and unique home design.” Where else stained glass glazing is used, see the link https://oknanagoda.com/steklo/osteklenie-steklo/vitraznoe/vitrazhnoe-osteklenie-varianty-i-pri.html.
If it’s expensive for you to make stained glass inexpensively and you want to do it faster, then read our article “Stained glass film - an affordable option for creating your own sophisticated style”
What are the advantages of stained glass painting?
The main advantage of stained glass painting, like any other decorative and applied art, is the opportunity to make an exclusive designer item yourself. Stained glass paints allow you to update your home interior and add a fresh touch to it. For example, you can use them to decorate a mirror in a hallway or bedroom, decorate glass parts of doors, paint chandelier shades, and dishes.
In addition, stained glass painting allows you to create spectacular photo frames and other products, which, if the opportunity arises, can be given to your friends and acquaintances. This is a great and original gift.
What tools do they use?
In order to create a stained glass pattern yourself, you will need the following set of tools:
- Artist's brushes of different sizes.
- Drawing templates and outlines.
- Waterproof glitter.
- Gels for drawing.
- Acrylic paints and thinners.
- Varnish.
- Structural paste.
- Palette knife.
- Stained glass paints.
Most often, stained glass paints are quite liquid and do not need to be diluted. Applying them to glass does not cause problems, as they adhere well. The colors are usually bright and saturated; this material allows you to create an interesting pattern.
Stained glass paints usually spread on the glass; to prevent this from happening, you need to use special contours.
Acrylic paint is thicker and does not bleed. Please note that stained glass paint dries quite quickly, so if you make a mistake, you need to wipe it off immediately. Stained glass paint tolerates high temperatures well, so it is suitable for painting clay products or other materials that need to be fired in a kiln or will be used as tableware.
Materials and tools for work
In addition to paints for creating stained glass, you will also need other specific things, however, you don’t necessarily need to buy brushes. So, the list is as follows:
- Contour (special stained glass or for fabric).
- Drawing templates, made independently or ready-made.
- Transparencies.
- Ready-made plastic stencils.
As you can see, nothing complicated is needed.
A way to make your own paint
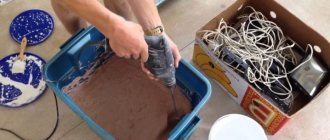
It is not necessary to purchase expensive ready-made stained glass paints: it is quite possible to create stained glass paints with your own hands. To do this, you will need to purchase food coloring and PVA glue. The result is a stable, harmless product that is not difficult to make at home. This is done as follows: find a shallow plate or plastic container. Place 2 teaspoons of PVA glue in it, then add a few drops of the desired dye until the desired color is achieved.
This way you can make paint of any color or mix several shades to get the desired tone. The dye will need to be thoroughly mixed with the glue until a homogeneous mass is obtained. You need to use the paint right away: it sticks well to the glass, turning into something similar to a sticker as it dries. If necessary, it can be torn off from the glass without causing damage to it. In addition to glass surfaces, such paints can be applied to files, oilcloths, and other surfaces of a similar type.
Stained glass paints can also be made from the ink found in the refill of a regular pen; To do this you will need PVA glue and a gel pen of the color you need. The finished material is created in the same way as with food coloring. It is enough to mix the glue and ink until a homogeneous mass is formed.
Factory-made paints are thicker than homemade ones, so when applying homemade paint, let each layer dry thoroughly before applying another. To make paint based on PVA glue thicker, you can add loose glitter or other materials of a similar nature to it.
Materials for stained glass technology
To apply painting on glass, you will need a minimum set of accessories:
- circuit;
- stained glass paints;
- several brushes.
The main tool in creating stained glass painting is the outline. It is a thick mixture placed in a tube with a pointed spout. The contour can be water-based or alkyd-based, differs in color, and may contain glitter.
It is the outline that outlines the drawings. After 30 minutes it dries, forming a convex edge. This border should hold the paints, preventing them from spreading and mixing colors.
Important! Stained glass painting is performed only with a pattern, all lines of which are closed. The element of each color should be separated from its neighbors so that the colors do not leak out or mix.
The stained glass paints themselves have a more liquid consistency. They come in two types:
- acrylic - water-based;
- solvent - containing a solvent.
Acrylic dyes are absolutely safe. They can be used by allergy sufferers and are suitable for children of all ages. Stained glass decorated with acrylic paint is less resistant to mechanical damage and washing off with water. Baking helps increase the stability of the dye. The finished product is placed in the oven, where it is fired at a temperature of 150-170 degrees.
Solvent dyes come in a very diverse palette; they are brighter and less susceptible to spreading. Products painted with solvent-based paint do not need to be fired. The patterns stick firmly to the glass surface and do not wear off or wash off with water. The only drawback is the toxicity of the dye. Such compositions are not suitable for children, and adults must follow safety precautions when working: ventilate the room, wear gloves, and avoid getting paint in the eyes.
You can purchase stained glass paints in large stationery stores or specialized departments for creativity. Both acrylic and solvent-based dyes are presented in a wide range; there are domestic and foreign materials. The most famous are Decola, Marabu, Pebeo. However, the cost of even the simplest stained glass paints (Russian Decola, for example) is quite high; their purchase is justified only for professional craftsmen.
A method for making paints from glue and solvent
The above methods for making paints are not exhaustive: at home you can make stained glass paints from other components. You can get higher quality materials, which will require:
- Mixing container.
- Nitrolac. Suitable with markings 2141,218, 222.
- Solvent, you can use inexpensive 647.
- Oil paints.
You will need 1/3 of nitro varnish, you need to add solvent to it as needed so that you can mix well and get a homogeneous substance. After this, you can add paint and stir again until smooth. The resulting substance should have a medium-thick consistency, which can be adjusted by adding a solvent to the mixture. The resulting paint is applied to glass surfaces using a brush.
Types of stained glass
To appreciate the splendor of stained glass, it is worth getting acquainted with its history.
Stained glass is a type of decorative and applied art. It was conceived as an element filling window openings. The design is designed for through lighting, that is, it makes no sense to fill a blind niche with glass decor.
Art originated in Europe and was mainly used to decorate cathedrals and temples. Not only the church, but also titled persons could afford to have such wealth, decorating the windows of their castles.
Various types of stained glass differ in the complexity and cost of work and the materials used, but all of them allow you to create a unique interior.
Initially, glass mosaics were assembled from pieces of colored glass, fastening them together with lead bridges. Then the technique of scraping glass specially painted with colored paint appeared.
Performance technique
Modern stained glass has about two dozen types. In order to make stained glass windows with your own hands, you need to figure out which ones are suitable for homework. It all depends on the complexity of the materials and manufacturing techniques.
- Classic (or mosaic) stained glass has come down from the depths of centuries, practically unchanged. It is also called stacked, because during the creation process, pieces of colored glass are “set,” that is, connected, to each other with tin, lead or brass plates.
This is how stained glass was made in medieval times, and this technology is still used today.
- The pattern on glass when making etched stained glass is achieved in this way. A pattern is applied to the glass with hydrofluoric acid, which reacts to “etch” the grooves that make up the pattern in the surface.
- Fusing is another type of colored mosaic. It is based on sintering pieces of glass assembled together at a very high temperature. The second name is stained glass. In this technique, a design can be created by baking foreign elements (wire, stones) into glass.
To create it, colored glass fragments are baked; in addition, small foreign particles can be included in them - for example, pieces of wire.
- Another option is a combined panel. In this technique, the author is not constrained by standards; he can combine different types of stained glass, achieving a three-dimensional effect and expressiveness of his creation.
- When creating sandblasted stained glass, a stencil is applied to the glass or mirror, and then a stream of air and fine-grained sand is applied using a sandblasting machine under strong pressure. Small particles deform the surface, leaving a matte mark.
It is created by sandblasting glass and is more often used for the facades of sliding wardrobes, interior doors, and partitions.
- Creating cast stained glass involves casting or blowing each element. The glass modules assembled together are unique; each can have its own shape, thickness and size. Rays passing through them are refracted differently. The composition is connected using cement composition and reinforcement.
- Painted stained glass is perhaps the most popular technique. Painting does not require special devices or expensive equipment. All you need is a piece of glass on which to create a masterpiece, paints and brushes. In order for the panel to last longer, the surface of the finished product is baked. But at home they do without burning.
A pseudo-stained glass window, not made up of individual fragments, but painted with special paints inside a three-dimensional contour.
There are also simplified options for creating stained glass windows. Film stained glass speaks for itself: a multi-colored film is glued to the surface of the glass. When creating an overlay version, colored pieces are glued onto the base.
And if the creator’s talent as an artist awakens, you can make a contour filled masterpiece. Its highlight is the imitation of lead plates. The relief lead contour is achieved with a special polymer composition. Then the windows of the intercontour space are filled with paint or colored varnishes.
Stained glass "Tiffany"
Elegant glass painting using the Tiffany technique
Stained glass “Tiffany”
This method is somewhat similar to the classic one. To work, you need to prepare two sketches in natural size in duplicate. One of them is cut into fragments; colored glass will be cut along them.
Each piece of stained glass is processed and framed with copper tape, which is soldered when the picture is assembled. Copper tape is much easier to use than lead due to its flexibility, so products made using this technique are used to decorate not only windows and doors, but also interior items.
This stained glass window looks especially beautiful in combination with varnished wooden elements.
Etching technique
An unobtrusive addition to the interior
Etching technique
Here it is necessary to use hydrofluoric acid, which has a destructive effect on silicon dioxide, the main component of glass.
To ensure that the acid acts only on certain areas of the stained glass window, stencils made of acid-resistant material are used. Thanks to such stencils, you can create multi-layered patterns with different reliefs, which are even used to decorate tableware, such as glasses.
It is better not to engage in such activities on your own, as you can easily burn the skin and mucous membranes.
Stained glass styles
If you classify stained glass not by manufacturing technique, but by style, then there are some rules here too. Having set out to decorate your home with stained glass, you need to determine what style it belongs to.
Stained glass windows will be appropriate in any room - they can be placed in the bedroom or living room, as well as in the bathroom or hallway.
Color compositions are divided according to the direction in art or in relation to a certain time.
- Thus, a painting made in the Baroque, Renaissance, Gothic or Antique style would be appropriate in a country multi-storey building. A Gothic style would be especially appropriate in a room with a fireplace and animal skins. Gloomy purple, green and burgundy tones will immerse you in the Middle Ages.
- Oriental, Indian motifs, Arabic script look good in a spacious room.
- Panels in high-tech, modern, classic, and art deco styles are more suitable for an apartment. Calm tones and simple designs do not tire, creating an atmosphere of comfort.
- The children's room will be decorated with scenery with landscapes and cartoon characters.
- Romantic people will transform their home with compositions depicting flowers, landscapes, and nature.
Floral, landscape scenes, sea spaces are themes for decorating houses in modern styles.
Advantages and disadvantages of stained glass
A decorative glass composition will attract the attention of professionals and ordinary people. Bright colors, refracted sun rays, a stylish or classic design will make you linger on the glass mosaic. However, colored panels have both advantages and disadvantages.
Stained glass windows in the interior will become a means of visually expanding the space.
Advantages of stained glass:
- Colored mosaics add an aesthetically pleasing look to indoor and outdoor spaces.
- Stained glass windows are resistant to corrosion and do not freeze.
- If the mosaic consists of separate fragments, they can be replaced if necessary.
- A bright panel installed in a window opening replaces curtains and curtains and visually increases the volume of the room.
- Mosaics do not burn or melt, that is, they are fireproof.
- This type of glazing is recognized as environmentally friendly.
- With the help of stained glass you can give an unsightly building a modern, non-standard look.
- And most importantly: a stained glass window created with your own hands emphasizes the individuality of the home and the artistic taste of the owner.
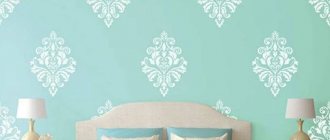
It may be interesting How to hang two types of wallpaper (photo): types of wallpaper in the living room, design options for walls with different wallpapers and rules for combining
Initially, stained glass consisted of carefully selected pieces of glass connected by metal partitions.
However, decorative panels also have disadvantages. True, there are much fewer of them.
- Mosaics made with acrylic paints require special heat treatment.
- Stained glass is fragile, like any glass.
- When glazing large areas (office building), it is necessary to take into account the resistance to wind loads and the seismic activity of the area.
- Spherical mosaic shapes are not durable.
- Prefabricated stained glass windows have a low percentage of strength. For large areas it is better to use film or cast panels.
A variant of classic stained glass is called Tiffany style.
Using acetone to create paints
You can create a fairly high-quality mixture for painting on glass if you use acetone. To create paint you will need:
- Glue BF-2.
- Acetone.
- Any paint that dissolves in water.
First, glue is poured into the mixing container. It will become the basis for future stained glass paint. BF-2 needs to be diluted with acetone in a ratio of 1 to 1, after you have mixed the components well. Having received a homogeneous substance, you can add paint of the desired color to them and stir again.
Dyes and gelatin as main components
You can use inexpensive and completely safe ingredients to create stained glass paints: to do this, you will need to purchase fabric dyes and gelatin. In addition, you will need plain water.
In order to create one stained glass window, you will need a little paint; you can use only 6 grams of gelatin. Fill it with water until it swells completely. Dyes separately from gelatin are also poured with water, stirred and then added to gelatin until a thick colored mass is formed. After applying such paint to the glass, it must be allowed to dry and coated with nitro varnish to protect it from external factors.
Other uses
Stained glass paints can also be used for other purposes. For example, they can be used to paint vases or other interior items to give them the necessary decorative and stylistic look.
Painting with stained glass paints is usually not difficult. You can entrust this process to children, turning it into fun entertainment for the whole family. It is not necessary to know how to draw, just print out the necessary stencils. The following items may be useful to you when working on stained glass:
- A permanent marker on glass.
- Contours.
- A palette or object on which to mix paints.
- Cone-shaped tip (it is needed to obtain thin and even lines in the drawing).
- Cotton swabs for correcting errors in the drawing.
- Sewing needle. It will help get rid of air bubbles if they appear. This must be done immediately, and not after the paint has hardened.
- Thinners (they will come in handy if the paint is too thick or needs to be removed from a certain area of the picture).
- Paint brushes of different thicknesses.
- Sponge, you can also use a clean rag.
Before work, prepare everything listed in advance. You shouldn’t start painting with stained glass paints right away: first, prepare a stencil. The sketch can be printed if you don't know how to draw. Using a marker, apply the design from the stencil onto the glass; you should immediately outline it. After half an hour has passed and the contour has dried, you can begin the main work. It doesn’t matter where you start in the picture, the main thing is not to accidentally touch an already painted area.
After you apply the paint, no matter what type of paint was used, the design needs at least 4 hours for the paint to set and dry. After this, you can check the quality of the staining. To do this, touch the drawing with your hand. If the dye is applied correctly, the pattern will be smooth and will not have air bubbles. Dried paint does not stick to your hands.
If you are thinking about how to decorate a room, then read our article “Stained glass in a modern interior.” Stained glass doors look especially beautiful in the interior. Read how to use them in the interior of an apartment or country house.
Is stained glass expensive for you? Read on our website, “How to make stained glass with your own hands at home
How I made stained glass painting on glass with my own hands. Stained glass painting experience.
How I made stained glass painting on glass with my own hands. Stained glass painting experience.
I always wanted to draw a picture myself and hang it on the wall of my house. Of course, it was possible to buy something similar ready-made, but I wanted to make something beautiful with my own hands and generally master this type of art. But this process was constantly postponed. Either there were no colors, or there was no mood, or the drawing didn’t work out. But one day on the Internet I came across drawings of stained glass paintings. The admiration that I felt when I saw the stained glass windows and drawings made with stained glass paints pushed me to take decisive action.
At a nearby office supply store, I asked for stained glass paints. To my surprise they were on sale. Six colors, water-based, and for only 90 rubles. They were called “Deko Gamma” - how to start the first wash in a washing machine. The package contained one tube with a black outline of an accordion door in Minsk. Of course, I bought paints and began cutting out glass for painting. Having ruined more than one sheet of glass, not being a glazier, I decided to use ready-made photo frames for this. There are many of them on sale, inexpensively and in all sizes. This is undoubtedly a plus for novice “artists” to make their own carpentry workbench drawings. The glass is usually thin, transparent and the frame is already ready.
I will not describe the first work. I’ll say right away that contours for stained glass painting need to be purchased separately. The one that was sold with paints turned out to be liquid and the nose was of such a diameter that it was impossible to draw small fragments. Only later did I realize that the plastic spout can be pressed with pliers, thereby reducing its diameter.
Then I bought a Decola set consisting of six contours in tubes. Thin noses made it possible to accurately and efficiently apply them to glass. In addition, the gold, bronze and silver contours looked very beautiful. By the time I made the picture, which I divided into stages, I bought another set of paints - “Marabu”, because I clearly did not have enough colors and it was not always possible to obtain colors by mixing. These paints differed in quality from the first ones and had one drawback: when drying, they slightly crawled away from the contour, so a second layer had to be applied. So, I’ll tell you about the step-by-step production of a “masterpiece”.
• Selecting a design and drawing a template on paper
Choose the design you like and draw it onto paper. Translucent checkered paper is best suited for this. Anything will do as a starting picture, even a piece of wallpaper with simple flowers. Remove the glass from the frame. We outline its borders on a sheet of paper, taking into account the fact that 5mm from the edge of the glass the frame will cover the instructions for the wallpaper. The drawing must be placed on a sheet with this amendment. Using a soft pencil, draw the design on paper and use an eraser to correct it. When corrections are no longer needed, we outline it with a fountain pen or a thin marker. This is our template.
• Glass preparation and pattern transfer
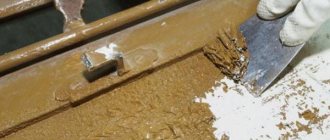
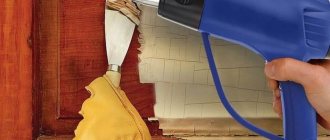
Before work, the glass must be degreased. I simply washed it with soap and wiped it dry with crumpled newspaper, as they usually wipe glass. I tried various rags - lint remains, but the surface should be clean. Of course, it is better to degrease glass with alcohol, vodka, acetone, or soda solution. From that moment on, I only took the glass by the ends. Otherwise, fingerprints are guaranteed to remain, and you will have to degrease again. Carefully place the glass on the drawing. An important point is that the contour is squeezed out of the tube by pressing on it. It’s difficult right away - pressing and drawing, you need to practice on a piece of glass. The best option is to hold the tip slightly above the glass and lay the contour thread that is squeezed out from the air according to the pattern. It doesn't work right away. So at first I just moved straight across the glass, touching it to remove whitewash from the ceiling. Your hands immediately begin to shake! This is how everyone first makes a wooden bed with their own hands. Stop and calm down. When the outline dries, it is easily removed with a wooden toothpick and you can redraw the damaged area. This helps you gain confidence and your hands stop shaking.
In thin spouts, contour paint dries quickly, so when taking a break, even for a short time, cover the spout with a lid. It is difficult to clean and there will be unnecessary loss of contour paint. When drawing, look at the glass perpendicularly, otherwise an optical illusion occurs. In general, all work on applying contour and paint should be done while holding the tool perpendicular to the surface and looking from above, not from the side.
Good lighting is helpful in work, but a bright lamp directly above the table can “glare” on the glass and interfere with seeing the drawing. We apply the contour carefully, reducing the pressure on the tube in advance, before the end of the line. If the contour is interrupted, go back and squeeze the contour onto the missed area. Use a sharp toothpick to align the edges of the insert with the ends of the lines, blending them. The thickness of the applied contour should be sufficient to prevent paint from flowing beyond it. After drawing the outline, you need to lift the glass and look at the light to see what came out of it like cutting hinges into a honeycomb door. There should be no missing places. I had them at first. I placed the glass with the pattern on a blank sheet of paper, the gaps became visible and I drew an outline on the missing areas. When the outline dries a little, you can trim it with the sharp end of a toothpick. Just try it and you'll see what I mean. A contour that is not completely dry is easily removed like a film, but a dried contour is removed without a trace.
• Working with paint
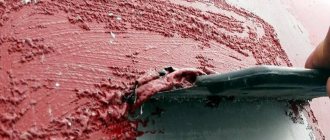
Ideally, the drawing should consist of painted fragments limited by a contour, like shores. And the paint is poured in there! It is not drawn, as on paper, but rather fills a limited fragment. You can take the paint directly from the jar, or you can take it from a homemade palette so that it does not dry out in the jar. To do this, I took a piece of candy molds from the box. In order not to constantly wash it, you can cover it with metal foil, from the same sweets and then throw them away, and I just wash my “palette” with moisture-resistant drywall bought in Minsk. Using a thin brush, take a drop of paint and place it in the fragment to be painted. Not in the middle, but from the edge, from the contour, in any place and, as if stretching it with a brush, we fill the area, adding more paint to the brush as we go. If air bubbles appear, we drive them away so that they burst or pierce them with the same toothpick. The fact that it is wooden is to our advantage as we glue foam insulation in rolls to the walls. It doesn’t scratch the glass, it’s moderately thin, I used it to smooth out the paint in corners that were hard to reach with a brush. But it is advisable not to stain the outline with paint. But this cannot be done without it, and after the paint had set, I washed it off the outline with a damp cotton swab. Unpleasant process.
Once a layer of paint has been applied and there is a flaw, you cannot touch it until it has dried. Then you can put another one on top. The paint dries quickly, and the fragment is covered with a film. Any interference only spoils it even more. In those places where it was necessary to make a transition from one color to another, I dripped paint of two different colors onto the edges and stretched them to the transition point and quickly mixed them on the glass. The main thing is to achieve a smooth flow of color into color. Make the blending border wider. Then the transition from color to color will be smooth. After the first layer of paint had dried, I again looked at the light and at a white sheet on how to prepare the ceiling for whitewashing. Where the paint moved away from the contour or had a not very saturated color, another layer of paint was applied. When using two types of paints, I tried not to mix them, not knowing the reaction. I just remembered where I applied it. Please note that “marabu” paint, when applied, is not immediately transparent, but becomes so after drying.
• Final stage
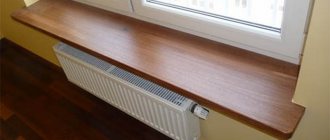
After the drawing is ready, it must be allowed to dry for at least 5-6 hours. To speed things up, I put glass with a pattern on the radiator and thereby speeded up this process. Before inserting the finished work into the frame, I placed a piece of yellow colored paper under the glass. This noticeably revived her, making her seem more sunny. It is necessary to make a lining, and it will be white or colored - it depends on your taste, like inserting corrugation into a plumber. You can place foil, smooth or crumpled, under the glass. This makes the "stained glass" more "cool". See the photo for the final result.
It is worth noting that making stained glass and painting on glass with stained glass paints are not the same thing, in principle. Stained glass implies an imitation of a pattern assembled from colored pieces of glass. This means that the contour here not only serves as a limiter against the spreading of paints, but also marks the boundaries of these colored pieces. If you look at photo 1, photo 2 and photo 3, you will notice that a simple drawing with a blue bird looks like stained glass and looks much more original. Therefore, when choosing the type of pattern, it is advisable to pay attention to this.
What can you paint with stained glass paints?
Don't limit your imagination. Stained glass paints adhere well to smooth surfaces, so they can be applied not only to window glass, but also to tiles, with the exception of places with high humidity, interior doors if they have glass, mirrors, vases with a smooth surface, various films and oilcloth materials . You can try decorating dishes and decorative items.
Stained glass paints are an interesting material that will help you easily decorate your interior, making it unusual. You can add zest to the design of your home without much expense, and enjoy it.
Objects to Draw
Stained glass paints are a universal material with which you can paint many different objects. Moreover, there are practically no special restrictions here. They can be used to decorate a wide variety of things. Even in ancient times, this type of paint was used in temples and cathedrals, to decorate the windows and ceilings of monasteries, houses of wealthy gentlemen, as well as other significant buildings.
These days, these paints are still relevant. In fact, there is nothing difficult in creating stained glass windows with your own hands. Master classes can provide invaluable assistance in this matter. Paints for their creation are used even by those who recently did not know how to make stained glass on glass with their own hands. They can be successfully used to decorate doors and glass decorative partitions, which often act as zoning elements in residential premises. To add exclusivity, you can use such paints to paint vases, paintings, dishes, candles, jars and other decorative interior items.