ps They helped us a lot, so advertising is free))
Published on October 25, 2018 by Stroitel
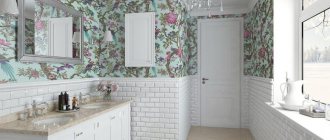
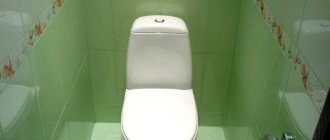
When finishing a bathroom, tiles are most often used. It's not about tradition, it's really a comfortable material. Hygienic, not afraid of dampness, beautiful, durable. But this is not the only suitable material; nowadays there is something to decorate a bathroom other than tiles.
Original ideas for replacing tiles
You can use pieces of glass. If you have access to ownerless material, say, your friends work in installing double-glazed windows (and the owners have nowhere to put the old windows, they ask you to take them away). The installation and sale of Salamander plastic windows in Ukraine is carried out by OKna5. You can find detailed information about the company and questions of interest by following the link to the official website
We cut identical pieces with a glass cutter and use them instead of tiles. You can also use mirrors. True, amalgam is afraid of dampness, and besides, it requires care: the mirror also reflects dust, and even if it is equally dirty, it seems more dirty. A combination is possible: use the wall as a canvas, and after painting a picture, cover it with glass.
So, as said at the beginning, in order to decorate the bathroom with something other than tiles, there are various ways to decorate the walls. In any case, not only (even not so much) effort and money are important, but artistic taste. However, we do not live on a desert island: it is not difficult to find free advisers or hire a designer. The second method is more reliable, but more expensive.
- Decorating a small bathroom in a panel house (+42 photos)
- Secrets of a high-quality self-leveling floor in the bathroom: expert recommendations (+40 photos)
Interesting bathroom finishing options (2 videos)
Different types of finishes (35 photos)
When it comes to bathroom renovations, many people choose ceramic tiles as a wall finishing material. It is the walls in the bathroom that are exposed to intense moisture, so materials should be chosen that are moisture-resistant and waterproof.
More expensive alternatives
If you have a solid budget or are willing to spend more than average on decorating your bathroom, we recommend taking a look at natural materials. They are more expensive than those listed above, but they have a lot of undeniable advantages, including:
- excellent strength;
- immunity to moisture;
- resistance to sudden temperature changes;
- long service life;
- aesthetic appeal.
A variety of materials are used for this purpose, with natural stone being the leader. This is what is worth considering first.
Marble
It is lighter (relative to granite) and has a beautiful structure with clearly visible veins. In addition, the variety of marble is unusually large, which helps you choose a wide variety of shades. For example, white, yellow, pink or red marble may be suitable for finishing a bathroom. With the right approach, finishing with natural stone turns out to be almost eternal.
Glass panels
They are spectacular and absolutely not afraid of moisture. For production, special tempered glass is used, which is highly resistant to shock and external influences. To create a beautiful effect, you can apply curly engraving to the surface of the glass panels, which will make the finish unique.
Mirror walls
Many people will find this option very attractive. Firstly, glass walls visually expand the space, helping to transform even a small bathroom. Secondly, they fill the room with light, making it more comfortable. This is why mirrors are very popular in the market.
Now you know much more about bathroom finishing options. As you can see, not a single example used tiles, so you can safely move away from established stereotypes and create a designer finish that will please the eye day after day.
We recommend: 7 suitable styles for decorating an attic bathroom
Plastic panels
Covering the walls in the bathroom with plastic is a quick and economical way to change the interior of the bathroom. Plastic bathroom panels are available in a wide range of colors and textures. Geometric patterns, wood imitation or prints can be applied to the plastic.
The advantages of plastic are:
- resistance to temperature changes;
- moisture resistance;
- low cost of material;
- covering with plastic panels is easy to do with your own hands;
- siding allows you to hide uneven walls.
Siding can also be used to cover the bathroom ceiling. The disadvantage of finishing with plastic siding is low fire safety and fragility. In addition, they reduce the volume of a small room due to the peculiarities of siding installation. Finishing with siding will allow for economical repairs and a fresh interior.
What does "budget" mean?
Under the word “budget”, the article will consider finishing options with the most affordable materials:
- paint and varnish;
- PVC panels;
- wallpaper.
In addition, the secret of creating a loft-style interior will be revealed and it will be proven that brick as a finishing material in the bathroom is not inferior to other materials. After all, “budget renovation” can also be stylish.
Budget bathroom design
Loft style in the bathroom
Vintage bathroom
Dye
When choosing the most economical option for updating your interior, you should use an option such as paint for the walls in the bathroom. It is better to cover the walls in the bathroom with moisture-resistant latex or acrylic paint, which contains fungicides to protect the room from mold, an antibacterial agent, to prevent the development of pathogenic flora in the room.
Before applying paint, dry walls must be primed with a water-repellent primer, and then begin painting the walls. If the walls are grooved to hide pipes or wiring, then these places should be puttied, and then primer should be started.
Using paint, you can paint the walls in the bathroom, make drawings, or combine different colors or materials. A brick wall in a bathroom looks great with painted walls. It is better to cover wet areas around the shower and sink, and the walls above the bathtub with tempered glass or glass blocks. Blue colors are perfect for painting bathroom walls. Benefits of painting bathroom walls:
- easy care;
- a wide palette of colors obtained using tinting;
- compliance with all hygiene standards;
- ease of repair work.
Bathroom wall paint
For many years, using paint instead of tile has been and remains the most popular option. The market is replete with a variety of compositions with enhanced moisture-resistant properties.
Advantages of paint instead of tiles
The main advantage is the ability to carry out repair work yourself. Besides:
- There is a choice of textures - paints can be matte, glossy, textured;
- Inexpensive cost - taking into account the fact that you will paint it yourself, the repairs will cost you inexpensively;
- A wide variety of colors - you can create the desired shade yourself by adding color;
- The ability to use paints to create a unique interior - using airbrushing, painting, coated with acrylic varnish in several layers;
- Speed of repair - if you get to work in the morning, you can finish painting by the evening.
Types of bathroom paint
Oil paint is not recommended for hygienic premises - it “does not breathe”, creating a dense film, and over time it will crack and lag behind the wall. The most popular way to paint bathroom walls instead of tiles is to use water-based and water-dispersion compositions.
Water-based paint
The most common option for painting the interior walls of a home, including the bathroom. Advantages of paint:
- Low price;
- Ease of application;
- Environmental friendliness;
- Fast drying.
Water-based paint is easy to use, applied to walls with a roller or with a spray gun. You can create any shade by adding the necessary pigment. Over time, even under the influence of sunlight or electric lamps, the surface does not fade or fade.
Important! It has no smell and, perhaps, only one drawback - it cannot be washed. However, it can also be eliminated by covering it with several layers of varnish.
Waterborne paint
There are two types of paint for interior work:
- Latex;
- Acrylic.
Both compositions contain substances added to resist fungus, so they are suitable for use instead of tiles on bathroom walls. When applied to the surface, they emit a slight odor, which quickly disappears, so paints are environmentally friendly materials.
Both paints form a smooth surface, filling small cracks; after drying, the walls can be wet cleaned.
Silicone paint is the third type of water-dispersed painting compositions that can replace tiles on bathroom walls. It appeared recently and is superior to all the above-mentioned paints, but it is too expensive and not available to everyone.
Self-adhesive film
Film is a relatively new option for wall finishing. The range of self-adhesive films includes glossy, matte, with or without patterns. Variants of colors and textures of self-adhesive film will help realize the most daring design solutions. Mirror self-adhesive film looks impressive in the interior. You can cover not only bathroom walls with film, but also pipes and furniture. Mirror or self-adhesive film has the following advantages:
- mirror or self-adhesive film will ensure quick DIY repairs;
- mirror or self-adhesive film will ensure minimal repair and interior costs;
- mirror or self-adhesive film will ensure ease of maintenance;
- self-adhesive film will provide a wide selection of colors and textures;
- The mirror film will provide a fairly practical renovation for the bathroom in which it can be applied.
Mirror film for the bathroom has its disadvantages: maximum service life is 10 years, smooth walls, possible formation of mold and pathogenic flora under the self-adhesive film. Mirror and self-adhesive films can be used on any surface: gypsum fiber board, MDF, plastic, lining, glass, tiles. In addition, bathroom film is an excellent choice for those who like to change their interior on a budget and often. Stone textures will create an imitation of marble. A mirrored wall will help visually enlarge the interior of a small room. The height of the wall in the bathroom can also be visually increased by using a film with a glossy surface.
Natural materials for wall decoration
All materials for finishing interior spaces in an apartment can be divided into natural and artificial. The first ones - wood, stone - are preferable from the point of view of environmental friendliness, but thanks to modern technologies, artificial materials also have high qualities of strength, hygiene, and durability, which is why they are so popular.
Thanks to modern processing technologies, wood and stone are increasingly used in bathroom decoration
Stone
Natural materials for wall decoration in the bathroom instead of ceramic tiles are preferred to stone. Strict, solid and expensive - this is how this type of finishing can be described. Its undoubted advantages:
- Environmentally friendly - a natural stone, the safety of which for humans should not be doubted - it does not emit toxic substances into the air, and does not form compounds harmful to people with other materials.
- High moisture resistance is a quality inherent in nature. For marble, granite, coils and other materials used to decorate walls in the bathroom, neither water nor steam is dangerous.
- Easy to care for – increased resistance to detergents containing alkalis.
- Aesthetics - natural stone looks luxurious - therefore it is used for expensive interiors of large premises, decorated in classical, historical styles - baroque, rococo, gothic and others.
Stone helps bring the most daring projects to life
Of all the types of stone, the most famous is marble - it is often used to decorate bathroom walls when looking for a replacement for tiles - it has the lowest moisture absorption and the lowest level of radiation. However, marble is not cheap and requires skill in installation and special care for its high aesthetic properties to be maintained for a long time.
Marble is one of the most expensive materials that can be used in bathroom decoration
Tree
Natural wood for finishing a bathroom is an unpopular option, this can be explained simply: wood easily absorbs moisture, it is unable to withstand high temperatures, and requires special care.
However, instead of tiles in the bathroom, panels with a special coating are often used on the wall. The tree must:
- To be moisture resistant - this is achieved by treatment with special compounds;
- Resist the formation of fungus;
- Have low deformability.
Among the most suitable species for finishing bathroom walls as an alternative to tiles are: oak, elm, ash. In “wet” areas, panels made of bamboo, teak, cedar, larch, balsa wood and others can be used instead of tiles.
Important! Wooden panels can be used in classic interiors, eco-styles - rustic, vintage.
Linoleum
You can use linoleum to cover the wall in the bathroom. There should be no old tiles or other materials between the wall and the covering, for which you should level the wall, putty the grooves, and then glue the linoleum. You can glue linoleum with your own hands. Linoleum allows you to avoid joints between tiles, where bacteria multiply in a wet environment. Linoleum is a wear-resistant material with a service life of more than 10 years. In addition to regular linoleum, there is special linoleum for walls; it is plastic, durable and moisture-resistant, has different textures or patterns and does not provide joints between materials. In addition, such repairs are easy to do yourself.
DIY wall painting
Painting walls is considered one of the easiest and least expensive finishing methods. It is important to choose the right paint and prepare the surface of the walls.
Painted walls in the bathroom
Bathroom decoration
Advice! Create a design project for your bathroom. It is not recommended to paint absolutely all surfaces; it is advisable to cover the areas near the bathtub and sink with moisture-resistant panels or trim them with an apron made of inexpensive ceramic tiles.
Step 1. Choosing paint for the bathroom
Bathroom paint should have antibacterial properties and be moisture resistant. Otherwise, the appearance of fungus and peeling of the coating cannot be avoided.
Moisture resistant paint
Moisture-resistant paint for walls and ceilings
Moisture-resistant paint for walls and ceilings “Optimum”
Moisture-resistant paint for walls and ceilings matte Tikkurila Luya (Luja Tikkurila)
Due to their low cost and excellent performance characteristics, latex, silicone, and acrylic paints are most widely used. At the same time, water-based mixtures do not have an unpleasant pungent odor, and silicone paints can act as a water barrier.
NovaTech Interior paint for walls and ceilings
Traditional oil paints do not have this advantage, and also quickly become covered with cracks, so it is better to immediately abandon this option.
Oil paint
When choosing shades, remember that it is inappropriate to paint small bathrooms in dark colors, as this will visually reduce the space even more. Do not overdo it with the number of bright spots or complex patterns and their quantity so that the interior does not look vulgar. Soft pastel colors will visually expand the room and fill it with light.
Choose shades from the manufacturer's catalog
Please note that paints can be matte, glossy or semi-gloss. Of this variety, it is matte enamels that best hide small defects on the walls, while drops and streaks are clearly visible on glossy surfaces. However, if you cannot make a choice, consider a combination of glossy and matte surfaces. This technique will make your bathroom modern and stylish without significant costs.
The photo shows a combination of matte and glossy paints
bathroom paint
Step 2. Preparing the walls for painting
Don’t forget to remove all the furniture from the bathroom, remove the mirrors, cover the faucets with masking tape, and cover the plumbing fixtures with film or newspaper, because preparing the walls for painting is the dirtiest and most time-consuming stage.
You should not apply new layers of paint over the old peeling one, nothing good will come of it. If you have a drill in your arsenal, get a couple of sanding attachments for it and clean off the old paintwork from the walls. Remember safety precautions.
Removing paint with an angle grinder
Don't have a drill? Use paint strippers, a scraper and a putty knife. The method is effective, but it is better to work with a respirator and thick rubber gloves.
Remover for old paint
Chemical paint removal
Scraper
If the paint on the walls was applied a long time ago, chemicals will not cope with it.
You can remove paint using thermal methods, for example, using a torch or a hair dryer. Heat a section of the wall and scrape off the peeling coating with a narrow spatula.
Removing old paint from walls using a gas torch
When all the old paint has been removed from the walls, it is necessary to repair cracks and potholes and knock down protrusions.
Fill cracks and gouges in the wall
Crack repair
Step 3. Preparing materials and tools
Prepare paint and tools, follow manufacturer's instructions. To apply paint you will need a roller, brushes, if you have a spray gun - great. Before purchasing, measure the area of the surfaces to be coated and adjust the amount of material taking into account the volume. For high-quality painting, it is better to apply two layers, keep this in mind when purchasing.
Brushes, rollers, cuvette
Step 4. Preparing the workplace
Clear the work area near the walls of unnecessary objects; if you are not going to redo the flooring, then cover it with film or paper. Carefully protect the bathtub and sink from contamination.
Protect surfaces with masking tape
Surface protection when painting walls
Start your work from the most inconspicuous corner, in this place you can learn the properties of the paint in practice and, if necessary, dilute it to the optimal consistency. We recommend painting the walls with a roller, and using a brush to treat only hard-to-reach areas, corners and borders of joints of different colors. Panels in the bathroom are still in fashion; if you plan to make them, mark the height on the wall and draw a horizontal line.
Step 5. Start coloring
Apply a deep penetration primer to the wall. It will not only improve the appearance, but also increase the durability of the coating and reduce the likelihood of paint peeling.
Applying primer
Allow the primer to dry for 3-6 hours
Apply a second coat of primer over the first and wait 24 hours
Pour a portion of paint into a special plastic tray for rollers. Dip the roller into it, turn it several times, remove excess paint on a horizontal surface.
Practical advice. To minimize the chance of paint getting on the floor, give the roller a spinning motion before blowing it out of the tray.
Step 6. Painting technology
First paint the surface with a brush along the edges
Start painting from top to bottom, this method reduces the likelihood of drips forming, they are immediately smeared, and the roller “rolls” over them. Paint carefully, do not allow any omissions. Don't be upset if the first coat looks ugly, this is expected. The fact is that there are areas on the wall with old and new plaster, remnants of un-removed coating, etc. They all absorb paint differently, which is reflected in the appearance. The second coat will correct all problems, the finish will be uniform.
Apply the first coat
How to paint walls with a roller
Paint in small areas, correct difficult areas immediately with a brush. The paint should smooth out lint marks on its own. If this does not happen, add solvent to it. Pay attention, so that he is conscientious, read the instructions for use. If in doubt, test the solvent for compatibility with a small volume of material; if the paint has curled, change the solvent.
It is advisable to apply the second layer when the first one is not completely dry, this increases the adhesion coefficient between them. It’s easy to check the readiness of the surface - run your fingertips along it, they should not get dirty, but only “creak” a little.
Paint application scheme
Level the paint along the ceiling by rolling the roller long horizontally without loading it with paint.
If you are making a multi-colored panel, then you need to paint the surface in the second color only after applying two layers of the first. In this case, start working from the top of the wall; the panel is finished last. This way you will be protected from paint getting onto finished areas. Apply masking tape along the border line. Make sure that the paint does not flow under it; paint only with a brush, moving in the direction opposite to the tape. Never apply tape to paint that is not completely dry, this is very important. If you glue it to a freshly painted surface, then during removal it is likely that part of the paint will be removed along with it, and you will have to redo everything.
Marking a wall for striped painting
Apply masking tape
Apply paint
Creating stripes
Stripes can also be horizontal
Original wall decoration
The color transition is achieved by using color and a regular sponge
Example of non-standard wall painting
Mosaic
In addition to tiles, you can lay out the walls in the bathroom with mosaics. It is not only practical, but also effective. Mosaics for walls in the bathroom allow you to lay out drawings and decorate even round surfaces or plasterboard niches with mosaics. Mosaic visually increases the height of the wall in the bathroom.
Mosaic can be used as an additional material, laying out the wall above the bathtub, combining it with painted walls or surfaces covered with paint, patterns or MDF panels. Laying a mosaic with your own hands will require certain skills and artistic talents, so it is better to entrust its installation to professionals. GVL or plasterboard in the bathroom, used to create niches or partitions, can also be covered with mosaics.
The types of mosaics are varied, the most common being glass mosaics, which are used from kitchen interiors to swimming pools. Venetian glass is used for this mosaic. Chips or small mosaic details can be either black or multi-colored.
Wallpapering walls
Wallpaper for the bathroom
Wall decoration with wallpaper
For wallpapering, you can use only waterproof types. This finishing method has a number of undeniable advantages.
- Low cost allows you to have exclusive and reliable coverage with small material losses.
- High technology. Of all the possible ways to decorate walls in a bathroom, wallpapering is the simplest. The work is completed within a few hours, the room can be used for its intended purpose the very next day.
- It is possible to frequently change the design of the premises. In some cases, re-pasting can be done without removing the old one - the repair time is significantly reduced and the amount of construction waste is minimized.
Washable wallpaper
Waterproof wallpaper
Disadvantage: in terms of physical strength, wallpaper is inferior to traditional materials. But, if you behave carefully and avoid mechanical damage, the period can be calculated in many years. In addition, defects on wallpaper can be easily eliminated; after pasting there will always be a small amount of material left. Don't throw it away, keep it “just in case” for repairs.
Which wallpaper to choose for a bathroom
It goes without saying that only waterproof ones. When purchasing, pay attention to physical strength, and it depends on the material of manufacture.
| Wallpaper type | Brief performance indicators |
Vinyl on non-woven base | The most modern ones are distinguished by high levels of mechanical strength and can have long-term direct contact with water. They are produced in a wide range of colors, can be plain or with various patterns and ornaments, with a structured or smooth front surface. Disadvantages - relatively high price, the need to use special glue. |
Washable | The cheaper segment is inferior in performance characteristics to vinyl. It is recommended to use in areas of the wall that are not exposed to splashes of water. |
Self-adhesive | They are made from a special polymer film and have a huge number of design solutions. Disadvantages - relatively high price and complexity of finishing. In addition, they can only be used on perfectly flat surfaces. |
How to glue wallpaper correctly so that you don’t have to constantly re-glue the peeling areas?
Step 1. Surface preparation
The most important point in the production of work, of course, is not counting the correct choice of wallpaper. The linearity parameters of the wall affect not only the appearance of the wall, which is very important, of course. It is even theoretically impossible to stick waterproof wallpaper on an uneven wall. This means that there will definitely be air pockets and other places where the wallpaper is not glued. While using the bathroom, these areas constantly increase in size, and this continues until the peeling becomes noticeable. Repair will be required; perfectly aligning the wallpaper after repair is quite difficult, and in some cases impossible. What are the requirements for the wall surface?
- Roughness cannot exceed ± 1 mm. Run your hand along the wall, your palm gets scratched badly - that’s a problem. Use a strong steel scraper to cut off any protrusions.
Sand away any rough edges
- For plastering, only durable cement-sand mixtures should be used. All others, under the influence of moisture, significantly reduce their strength indicators, the glue falls off along with the smallest pieces of the solution, and the wallpaper sag.
- The surface must be perfectly dry. There is no air gap between the wall and the wallpaper; natural ventilation is completely absent. Fungus will inevitably appear on a damp wall, and it will certainly destroy the plaster. You will have to make expensive repairs, remove the old plaster, saturate the surface with special chemical compounds (very poisonous, by the way), and plaster and paper the walls again.
- The maximum size of recesses and protrusions cannot exceed several millimeters. Manufacturers tell the truth that some types of wallpaper hide small irregularities. But they don’t say anything about the fact that unglued areas appear in these places with all the negative consequences described above.
Surfaces must be primed in two layers, this increases the reliability of adhesion and serves as additional protection against moisture penetration.
Wall primer
Calculate the surface area, make a small reserve. Each roll of wallpaper is indicated on the length, width and total area. Use this information when purchasing materials. Do the same when choosing glue.
Step 2. Algorithm for gluing vinyl wallpaper
Prepare your tools
Pay attention to the manufacturers' recommendations on which side to apply the glue. There are options for spreading it on the wallpaper, on the wall, or on both surfaces, it all depends on the specific characteristics of the wallpaper.
Glue preparation
Mix thoroughly
Ready-made wallpaper glue
Measure the height and width of the wall, cut the required number of strips. The stripes, depending on the pattern, can be applied end-to-end or overlapping. Cut with a small margin in length, it will then be removed with a knife, the uneven cut will be buried in the ceiling and floor skirting boards.
Cut a strip of wallpaper with scissors or a decorative knife
Make sure that the cut is strictly at right angles
Practical advice. It is most difficult to glue wallpaper in the corners of the room. The fact is that they can have slopes, and this has a negative impact on quality. To prevent such consequences, never make strip joints at the corners; try to have them in the middle in these places.
Next you need to do this.
- Glue the strip coated with glue to one wall of the corner, align it strictly vertically.
- Carefully bend the wallpaper, but not all the way into the corner, lightly glue the strip to the second wall.
- Slowly begin to bend the wallpaper towards the corner, while constantly monitoring the displacement of the second edge, it should always be in a vertical position. An uneven wall angle is not a problem; even if there are air pockets in some places, the main thing is that the edge of the wallpaper on the second wall is vertical.
Definition of vertical
Apply a thick layer of glue evenly with a brush
After applying the glue, fold the left edge of the wallpaper strip towards the middle
Read the wallpaper label to see how long the glue needs to sit on the wallpaper before it sticks to the wall.
If you do not pay attention to this nuance, then on the entire adjacent wall the stripes of wallpaper will be slanted, and this is a big waste.
To apply glue you will need a large room; the bathroom, as a rule, does not have such dimensions. Decide where exactly you will prepare the wallpaper. Take measures to prevent contamination of floor coverings, do not allow glue to get on the front surface. When wallpapering walls, accuracy is one of the important conditions for quality work.
Gluing the first wallpaper
Smooth out wrinkles and bubbles under wallpaper
Cut off the excess
Immediately wipe off excess glue with a damp sponge.
Gluing the second wallpaper
Smooth out wrinkles and bubbles
Carefully squeeze out the air from under the wallpaper. You can use rubber spatulas or rollers. But it is best to do the work with clean, dry hands. This way you will feel the irregularities and be able to eliminate them in a timely manner. It happens that an air pocket is discovered late, several strips of wallpaper have already been pasted. It's not a problem. Poke the air bubble in 2-3 places with a needle, after which you can press the wallpaper again, it will take the desired position.
In the inner corners, stick one strip so that it overlaps the corner by 1-2 cm
Apply the wallpaper across the outer vertical edge of the door frame with a slight allowance, immediately smooth or trim the allowance
Also glue the next strip on top of the frame, smooth it out and cut off the rest from the bottom
Without pressing, cover the switch with wallpaper and make a diagonal cut through it. Carefully cut out the edges and press the wallpaper to the wall
Once the glue has completely dried, cut off the excess length and attach the baseboards. Skirting boards are fastened with liquid nails or other methods, taking into account the material they are made of.
Wallpaper in the bathroom
GVL or moisture-resistant plasterboard in the bathroom
The use of gypsum fiber board or drywall in the bathroom refers to the rough work stage. At the finishing stage, drywall in the bathroom can be hidden from view. Linoleum, MDF, and other finishing materials can be glued onto the gypsum fiber board or plasterboard of the bathroom wall. Despite the water resistance of GVL, drywall in the bathroom should be protected from prolonged exposure to water.
You can do this yourself: the ends of the drywall and the seams between the sheets can be coated with tile adhesive, which is a moisture-repellent agent. Polyethylene can be laid between the bathroom wall and the GVL sheet, which will protect the GVL from dampness on the inside of the wall. GVL is often used to hide communications, for which gating can be done first, but it is worth remembering that pipes often leak and condensation forms on them, so it is possible to provide an inspection hatch and moisture protection in such a design.
Wall finishing with moisture-resistant plasterboard
GKL tabletop in a niche
Finishing a bathroom with plasterboard
Not very popular, but having the right to exist, is wall decoration with gypsum board. For the bathroom you need to choose a special moisture-resistant material. It will not swell or tear the base due to high humidity. This may be due to the outer coating, which repels moisture.
Finishing walls with plasterboard is possible in two ways:
- Fastening sheets to a frame, which is mounted from profiles.
- Gluing sheets to walls.
The first option is good because it allows you to hide all communications and does not require preliminary preparation of the walls. In addition, you can show your imagination and create a unique room design. But the method with profiles is not suitable for rooms with a small area, since it will reduce it even more.
The second option is ideal for small bathrooms, but it will require additional work to prepare the walls. If there is a problem with how to decorate a small bathroom, you should think about such a solution.
Having chosen this option, it is worth considering that the space around the bathtub itself should be finished with a more moisture-resistant material. This can be tiles or PVC panels.
The installation of drywall is carried out in a certain sequence:
- cleaning the walls;
- covering the walls with an antiseptic solution;
- installation of a profile frame;
- installation of sheets on the frame;
- processing sheets with putty, priming and painting.
Lining
In addition to wooden lining, when finishing the wall in the bathroom, moisture-resistant types of lining are used: plastic lining and MDF lining. Plastic lining has the same properties as the plastic panels described above. Lining made from MDF is most suitable for use in a bathroom. Installation is easy to do with your own hands, after which it will last for many years. MDF is a very practical material with the following advantages:
- aesthetics;
- easy DIY installation;
- excellent sound insulation and light stability;
- ease of care.
The height of the bathroom wall can be visually increased by vertically installing the lining. Using this material you can hide the grooves in the wall. Wooden lining can also be used for repairs. It will allow you to create an eco-style interior in a small bathroom. This lining can be coated with varnish or wax with a transparent texture to protect it from moisture. You can lay insulation between the wall and the lining and thus insulate a cold room.
Features of wall decoration in the bathroom
The bathroom in an apartment is a room exposed to many negative environmental influences. This is increased humidity in the absence of proper ventilation - natural, as a rule, is not enough to prevent moisture and condensation from accumulating on the surface of the walls and ceiling. Therefore, the material for wall decoration, an alternative to tiles in the bathroom, should be:
- Resistant to high levels of humidity, changes in air temperature, and condensation.
- Environmentally friendly - in residential premises it is prohibited to use materials that emit toxic, hazardous substances.
- Hygienic - the materials chosen for finishing the walls in the bathroom should be easy to clean. The bathroom has special requirements for cleanliness.
- Durable - the material that is chosen for the walls of the bathroom must faithfully serve for at least several years, taking into account the expensive cost of repair work.
- Beautiful. The aesthetic component is of great importance. The design rule is that the entire interior of an apartment or house should be made in the same style.
Natural stone is an environmentally friendly and durable material. In addition, it looks very impressive in the bathroom.
If you are planning to renovate your bathroom yourself, ease of installation will also be important. The need to invite specialists for this will entail additional repair costs.
Important! When choosing a material for a bathroom wall that will replace tiles, take into account such an indicator as adhesion. The ability to firmly grip the wall surface is the key to the durability of the repair.
Plastic panels can imitate wood, natural stone or brick
Criterias of choice
The choice of material for walls in a hygienic room will be influenced not only by the properties of the material, but also by:
- The style of the room being decorated;
- Size and shape of the bathroom;
- Layout features;
- Choice of colors;
- Proposed design solutions - creation of podiums, multi-tiered ceilings, niches;
- Type of plumbing.
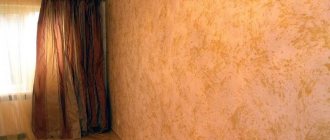
Decorative plaster is perfect for creating a classic style in the bathroom.
General Design Rules
The general rules for decorating walls in the bathroom establish that for small rooms you need to choose light colors, horizontal lines, mirrors - they visually expand the space.
For a large bathroom, it is possible to use several materials to separate the “wet” and “living” areas, in dark shades. The vertical direction of the pattern, mirrored or multi-stage, suspended ceilings are not prohibited.
Textured decorative plaster adds a fresh touch to the bathroom interior
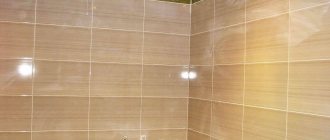
Porcelain tiles
Porcelain tiles are a high-quality, durable material for the bathroom. For a wall in a small bathroom, you can choose between matte and glazed porcelain tiles. Porcelain tiles have the following advantages:
- wear-resistant;
- durable;
- non-conductive;
- moisture resistant;
- hygienic;
- not subject to fading;
- frost-resistant.
Porcelain tiles are stronger than tiles due to the less porosity of the material, but porcelain tiles are not as rich in colors and patterns as tiles. You can hide grooves for wiring or grooves for communications under porcelain stoneware. Due to its weight, porcelain stoneware is not very suitable for finishing, especially if the structure is to be covered with gypsum fiber board, which can be covered with it.
Bathroom style
Any of the proposed finishing options requires thorough preparation. Before you think about how to decorate the walls in the toilet and bathroom, you should understand the style of the future interior of the room.
Basic bathroom styles:
- classic - ceramic tiles combined with marble texture in combination with decorative panels and borders;
- ethno - stone or wood, they can be combined with each other;
- minimalism - glass, plastic, steel will create the effect of simplicity without unnecessary details;
- modern - suitable for a small room, various types of lighting and stylized mirrors are appropriate;
- Provence - natural facing materials in combination with antique furniture, floral patterns and pastel warm colors are welcome;
- hi-tech – its main task is not to create visual comfort, but to automate all possibilities for relaxation.
Glass blocks
Glass blocks for bathroom partitions have become popular now, so they are gaining momentum again. This material looks new and fresh against the background of tiles and allows you to add an urban note to the interior. Glass blocks can be used for decoration or used to make a partition or shower room of the required size. What are the advantages of glass blocks:
- ceramic tiles combine well with glass blocks;
- ease of care;
- hygiene;
- light transmittance.
The disadvantage of glass blocks is their susceptibility to scratches. To fasten glass blocks together, you can use cement glue or special modular systems, which allow you to make walls from glass blocks very quickly with your own hands.
Ready-made parts are available for sale for installation on walls or slabs with a primed surface, prepared for further painting with acrylic or silicone paints.
The disadvantage of this design method is the cost. But the appearance of your bathroom will not make you regret the money spent.
- Plastic panels. The most common alternative to ceramic tiles. The popularity of this material is due to its high performance properties and low cost.
Walls made of plastic panels in the bathroom.
Plastic slats are great for decorating a bathroom. They can even be placed in a shower stall, where they are constantly exposed to water. It will not affect either the appearance or the duration of operation.
Since PVC panels are the most popular in our country, I will further focus on describing the properties of this particular material. So, what are the advantages of plastic slats for walls and ceilings in the bathroom:
- Environmentally friendly. Polyvinyl chloride used in the manufacture of lamellas is absolutely harmless to the human body. By the way, the same plastic is used to make, for example, food packaging and water pipes.
- Thermal resistance. The material retains its original dimensions and integrity at very high air temperatures. Combustion and melting are possible when exceeding + 370 degrees Celsius. In case of fire, the material emits low-toxic smoke, which does not complicate the evacuation of people and the elimination of the source of fire.
- Moisture resistance. Wall panels are completely waterproof. To prevent moisture leakage at the joints, the ends of the lamellas are equipped with locking connections. The material has low porosity, therefore it is slightly contaminated and has antiseptic properties.
- Easy to install. Unlike tiles, the panels are easily glued directly to the walls or installed on a frame. The latter method allows you to level surfaces, lay utilities, insulation, etc. at minimal cost.
- A wide range of. Nowadays there is a huge variety of plastic panels on sale that will satisfy the artistic taste of even the most picky buyer.
As for the shape and size, here I can highlight the following options:
- Lining. Plastic slats are 3 cm long and 10 cm wide. Although there are models 12.5 cm wide. Most often, such panels are painted white, although I also came across colored options. The ends are decorated with European (wide lock) and Polka (narrow) lock joints.
The ceiling is made of plastic lining.
- Panels. This is the most popular finishing option. The length of the wall panels varies from 2.6 to 3 meters, and the width from 15 to 50 cm. Most often in my work I used 25 cm slats. The outer surface can be painted, varnished or covered with thermal film. The parts fit together very tightly, the seam is almost invisible.
The walls in the bathroom are made of plastic slats.
- Plates. In this case, the width of one element is from 80 to 200 cm, and the length is from 150 to 400 cm. The material for manufacturing is foamed cellular polyvinyl chloride, but the top layer is still formed smooth and able to withstand external loads.
Plastic plates for bathroom decoration.
Paint: alternative No. 2
Painted walls are a great way to decorate surfaces.
Now let's look at what else can replace tiles in the bathroom? Naturally, this is paint. Painting walls in sanitary facilities has the following advantages:
- Saving money. Even the most expensive paint costs less than tiles and any other decorative materials. Therefore, if your goal is to save as much as possible, use it.
- Variety of appearance. By combining certain colors or shades you can easily decorate your bathroom in a unique style. And if you have artistic talent, you shouldn’t look for a better option. A landscape or still life depicted on a wall or ceiling will make even the most sophisticated connoisseur gasp.
- Ease of work. I think each of us has held a brush in our hands at least once, so the process of painting walls should not pose any difficulties. This is not gluing tiles or constructing frames for panels.
It should be noted here that all the benefits of paint are revealed only when the walls in the bathroom are already leveled with plaster (or gypsum board), carefully puttied and sanded. Otherwise, there can be no talk of saving money, time and effort.
If the enclosing surfaces have significant vertical deviations, it is better to give preference to other finishing options.
An excellent appearance of painted walls is possible only with their high-quality preparation.
To achieve an ideal result, it is also important to take care of choosing the right coloring composition. Only those types of paints that tolerate exposure to water are suitable. Ordinary water-dispersion paint will not work, since it will wash off upon contact with liquid.
Therefore, I recommend using the following options:
- Acrylic. It tolerates operation well in humid air and can be applied to any surface except metal. This paint is not very expensive, and there are a huge number of colors to choose from. In addition, you can tint the compositions in the store using pigments, creating your own shade.
Acrylic paint for use in the bathroom.
- Latex. A material that is distinguished not only by high water-repellent properties, but also by good elasticity. The paint is not washed off with water and does not form cracks with minor movements of the walls during shrinkage and thermal expansion. Can cover small (up to 1 mm) cracks.
Latex paint is perfect for decorating walls.
- Silicone. High-strength paint, which is usually used for facade work. It is ideal for painting walls and ceilings in the bathroom; it can withstand significant mechanical loads and direct contact with water. The big disadvantage is the high cost.
Silicone based paint.
On the Russian building materials market you can find paint from various manufacturers. All of them comply with current standards, so they can be safely used in work. As an example, I can give several options:
- Tikkurila is a company from Finland that has been supplying paint to interior decorators around the world for several decades. I can separately recommend paint made on the basis of a moisture-proofing primer, which prevents surfaces from getting wet.
- Dulux is one of the world market leaders among manufacturers of paints and varnishes. The product range of this company includes very high-quality paints at a very affordable price.
- Jobi is a German company whose paints are of unsurpassed quality, but you will have to pay a considerable amount for them.
Plaster: alternative No. 3
I have already listed two ways to decorate walls, besides tiles - what else can you decorate a bathroom with? I suggest using decorative facade plaster for this. Although this material was originally intended for finishing the external surfaces of buildings, it is excellent for decorating the bathroom.
Walls decorated with facade plaster.
Here are a few features that allow me to draw this conclusion:
- High degree of vapor permeability. The structure of the hardened façade plaster is such that it does not prevent air infiltration through the walls, and therefore promotes self-regulation of the microclimate in the bathroom. Moreover, with high air humidity, the material is able to absorb water vapor and release it back as the air dries.
- Easy to care for. Decorative plaster is far from being as delicate and fragile a material as it might seem at first glance. Modern materials perfectly resist mechanical stress and withstand the effects of sponges and household detergents during cleaning without damage. And the surface itself has an antistatic effect, thanks to which dust does not stick to it.
- Unique appearance. With the help of facade plaster you can decorate the walls in the bathroom very beautifully and unusually. Specialists using this material can create real artistic masterpieces. However, for this, of course, you need to have considerable skills.
- Hydrophobic properties. Since this material was originally intended for use in difficult external conditions, it feels quite comfortable in the bathroom, without collapsing even if a stream of water from the shower is directed at the plaster. This result is achieved thanks to a thin film formed on the surface.
- Resistance to salt precipitation. Despite the presence of a cement binder in the plaster, other components of the decorative material prevent the appearance of efflorescence on surfaces.
To finish the bathroom I had to use two groups of facade plasters:
- With a smooth surface. The most popular representative of this category is the Venetian. It was from this that the fashion for using façade finishing in sanitary facilities began.
Venetian plaster will serve as a real decoration for the room.
After hardening, a glossy, smooth surface is formed on the walls, along which water rolls down and is not absorbed by the walls. Plaster usually imitates natural stone, in particular marble.
Therefore, it will not be possible to achieve too much variety here. All that remains is to vary the color scheme and dilute the design with some effects (for example, an artificially aged surface).
As an option, I can recommend using stencils when finishing, but this significantly complicates the finishing process (or makes it more expensive if you use the paid services of a craftsman).
- Structural plasters. In this case, various mineral components (granite stones, mica, etc.) are added to the composition of the initial mixture, which make it possible to form a characteristic relief on the surface. Prominent representatives of these types of plasters are pebble or bark beetle.
Textured surfaces can accumulate moisture.
It is better to use this material to finish surfaces that will not experience direct contact with water during operation. The liquid does not roll down, but gets stuck in the depressions, which negatively affects the sanitary condition of the room and the integrity of the walls.
To prevent the finish from deteriorating for as long as possible, you can increase the water-repellent properties of the surface by additionally covering it with wax, varnish or another similar composition.
Wallpaper: alternative No. 4
Another option for decorating walls in the bathroom is wallpaper. But not the usual ones that you are used to seeing in residential areas, but waterproof ones. Like paint, this type of decorative finishing is very cheap, and any of us can hang paper rolls on the walls, right? Naturally, the surfaces must be pre-leveled.
Wallpaper in the bathroom also looks very organic.
Apart from this, using wallpaper in the bathroom has several other benefits. First of all, this is the variety of design. You can choose wallpaper with a pattern already applied, a relief texture, or white, which is subsequently painted in the color you like.
What I also like is the possibility of spot repairs. If any section of the wall is damaged or heavily soiled, you just need to re-paste a sheet of wallpaper on it to once again enjoy the exquisite appearance of the room.
But in order not to be disappointed in the purchase, you need to choose only those types of wallpaper that can withstand use in humid air. The following options are more or less suitable:
- Washable wallpaper. They are ordinary paper wallpaper, the outer surface of which has a waterproof coating in the form of a thin transparent film. Thanks to it, moisture does not penetrate into the thickness of the material, the finish does not delaminate, does not swell, and retains its performance properties for a long time.
Classic washable wallpaper in the bathroom.
Another advantage of washable wallpaper is that dirt, dust, fungus and water marks are easily removed from their surface. Well, the main thing is the affordable price.
- Vinyl wallpapers. An excellent option for decorating a bathroom. The outer decorative layer of the material not only withstands exposure to humid air, but also does not collapse upon direct contact with water.
Vinyl wallpaper in the sanitary room.
However, you will have to pay quite a lot of money for this option, so you won’t be able to save significantly on plumbing repairs. However, the price is fully justified by its long service life, durability and attractive appearance.
- Self-adhesive wallpaper. Here we are talking about a polymer film, on the back surface of which glue is applied, protected by anti-adhesive paper. To glue such wallpaper, it is enough to remove the protective layer and press the material tightly to the surface.
Wall decoration with self-adhesive film.
Self-adhesive film tolerates direct contact with water, so I recommend using it to decorate sections of walls near a bathtub, shower stall or washbasin.
- Liquid wallpaper. They are a dry mixture (like plaster) of a binder and decorative elements (pigments, cellulose fibers, etc.). Before use, they are mixed with water and applied to the walls with a spatula.
Walls decorated with liquid wallpaper.
This finish is perfect for the bathroom. With the help of liquid wallpaper you can perfectly diversify your design; the surface of the material is not damaged by water and has great mechanical strength.
- Glass wallpaper. Rolled finishing material based on fiberglass. The finish is absolutely impervious to moisture and has increased strength characteristics.
Textured glass wallpaper can be painted with acrylic paint.
Fiberglass wallpaper is usually supplied in the form of white canvases with a surface textured with a fine pattern. After gluing to the walls, the wallpaper is painted in the desired color and can subsequently be repainted up to 10 times.
- Photo wallpaper. Another popular trend in bathroom design. Modern drawings and photographs are distinguished by very high print quality and resolution. With the help of photo wallpaper, you can radically transform your bathroom in a couple of hours, surprising your significant other.
Photo wallpaper on the wall in the bathroom.
Thanks to the hydrophobic film on the surface, the finish tolerates use in the bathroom well (if you choose a material with the required designation).
How to replace tiles
Common people believe that since not all walls are in direct contact with water, it means that they can be covered with any type of cladding, including wooden lining, fiberboard panels and paper wallpaper. But steam is the same water, albeit in a different state of aggregation. And it harms wood just like any liquid. Repairing a bathroom without tiles is possible if you use 8 types of finishing materials listed below for the walls.
Classic enamel
The most cost-effective and easy-to-use alternative to bathroom tiles is enamel paint. They are used for cosmetic repairs, that is, a kind of renovation of the interior of sanitary premises. We recommend purchasing:
- standard alkyd compositions, for example, PF-115;
- safe acrylic enamels for mineral surfaces;
- durable and mechanically resistant urethane-alkyd or polyurethane mixtures.
All of the above varieties, after polymerization, form a waterproof film on the walls, inert to abrasion, steam, and aggressive chemicals.
Table 1 . Advantages and disadvantages of using enamels in bathrooms.
| № | pros | Minuses |
| 1. | Resistant to liquids and steam. | Careful preparation and leveling of the base is necessary, since the paint reveals every defect: roughness, cracks, etc. |
| 2. | Affordable – from 40 RUR/liter. And when choosing a high-quality composition, it is economical in consumption. | Over time, it begins to peel off, fade, and the white coating turns yellow. |
| 3. | Easy to care for. | When subjected to strong impacts or applied to deformable structures (plasterboard, SML), it cracks and peels off. |
| 4. | Easy to apply. | |
| 5. | Moderate resistance to shock loads. | |
| 6. | Can be used in “wet” areas. | |
| 7. | Restoration and renovation of the coating is possible without significant costs. | |
| 8. | Wide range of colors due to the use of special colors. | |
| 9. | Long service life when applied correctly - up to 10 years. |
If the room has poor ventilation and there is no window, then it is undesirable to use low-quality products or enamels with a strong odor, for example, NC. Toxic fumes will take a very long time to dissipate, at least 3-5 months. But it is easy to end up with severe poisoning or allergies with corresponding symptoms (headaches, nausea).
Water-dispersion paint
An excellent option for connoisseurs of environmental and budget solutions are dispersion painting compositions. They contain an acrylic binder, therefore they are safe to use and practically odorless. They can be used to cover plaster, wallpaper (fiberglass or paintable), drywall, decorative cladding made of cement or gypsum mixture, foam tiles, etc.
An important point: for the bathroom you can and should use latex high pressure paints from the interior series with fungicidal additives. Due to the content of synthetic rubber, this coating is not only resistant to water. It can be washed using mild household chemicals, as clearly stated on the labels. For example, “up to 5000 cycles,” etc. For best results, we recommend choosing formulations with a coverage rate of at least 95%.
Table 2 . Advantages and disadvantages of using dispersion paints in bathrooms.
| № | pros | Minuses |
| 1. | Moderate cost - from 60 rubles per liter. | Careful preparation of the substrate for painting is required. |
| 2. | Wide palette of shades - up to 7000 with computer tinting and more than 1000 with manual tinting. | It is not advisable to use it in the “wet area” around the bathroom or in the shower. |
| 3. | Resistant to steam and liquids. | Over time, the coating fades and requires renovation. |
| 4. | Environmentally friendly. | |
| 5. | Easy to apply. | |
| 6. | Durability – up to 15 years. | |
| 7. | Fast and easy update. |
Plastic panels
A very practical, although not very durable finishing option is PVC panels. Despite numerous assurances from marketers and salespeople, no other type of panel cladding is suitable for the bathroom. Only plastic finishing materials have the necessary resistance to water, steam and various liquids, including dyes and aggressive ones.
PVC panels are available in a wide range of designs: wood and tile, natural stone and fabric, leather and even metal. Collections with three-dimensional 3D patterns are interesting. All areas in the sanitary room, including “wet” ones, are allowed to be sheathed with plastic. It is especially convenient that the same material can be used to disguise pipes and cover open areas under the bathroom.
Installing wall coverings in restrooms is no different from working with them in other rooms. But we recommend using galvanized metal profiles for the frame part, or gluing the strips with special adhesives like Titan, Titebond, Bison MontageKit and the like.
Table 3 . Advantages and disadvantages of using dispersion paints in bathrooms.
| № | pros | Minuses |
| 1. | Acceptable cost - from 120 rubles/m2. | The surface is not very durable: with strong pressure, dents and cracks may form. |
| 2. | A good range of decors and shades. | You need a large set of components to install the panels or extra-strong mounting adhesive to fix the PVC to the wall. |
| 3. | Excellent water and chemical resistance. | Over time, light-colored panels may turn yellow. |
| 4. | Do-it-yourself installation is possible. | A large number of low-quality products in stores and markets. |
| 5. | Allowed for use in “wet” areas. | |
| 6. | Long service life - 10 years or more. |
We remind you once again: neither MDF panels, nor gypsum vinyl planks, nor tile-like slabs on a fiberboard base are suitable for bathrooms. An acceptable alternative is plexiglass or tempered glass slabs.
Decorative plaster
A spectacular bathroom without tiles is a reality. An invariably fashionable type of wall finishing is textured plaster with a volumetric effect to resemble concrete, craquelure, travertine, “Venetian” and other types of coatings. It is used both in natural and tinted form. After application, it can be coated with decorative paints, glazing compounds, and protective varnishes for stone.
Plaster mixtures in this series are most often sold as ready-made pastes. To apply them, deep knowledge of technology and some dexterity are required. To create a pattern, a special technique of working with a spatula or special textured rollers is used. Professional craftsmen manage to use decorative plaster alone to create three-dimensional paintings on the walls: castles, mountain landscapes and much more.
Table 4 . Pros and cons of using textured plaster in bathrooms.
| № | Advantages | Flaws |
| 1. | Moderate price - from 80 rub./kg. | Careful preparation of the base is required. |
| 2. | A wide range of shades and effects, from simple “bark beetle” to luxurious marble. | Not recommended for use in “wet areas” around the bathtub or shower area. |
| 3. | Resistant to steam and water. | Difficulties in removing limescale deposits and drops. |
| 4. | Safety. | After application and curing, it is advisable to paint the surface with protective compounds: glazing, coloring, varnish. |
| 5. | Possibility of restoration of damaged areas. | Difficult to apply with your own hands. |
| 6. | Durability – at least 10 years. |
Wallpaper
This method of decorating walls does not fall into the “cheap and cheerful” category. With good taste and some skill, you can create a truly royal interior. It’s easy to glue wallpaper yourself, and the number of decors and shades exceeds all reasonable limits.
However, there are limitations when it comes to the bathroom. Paper, natural and cellulose-based coverings are strictly contraindicated in sanitary premises. The best option is high-quality glass wallpaper from manufacturers such as Vitrulan, Tassoglas, etc. They are absolutely inert to water, household chemicals, shock and deforming loads. After pasting, it is recommended to coat them with water-dispersion paints. In relation to the bathroom, these should be washable compounds containing latex.
As an analogue, you can use vinyl and non-woven fabrics. However, there is a limitation on them: manufacturers do not recommend finishing “wet” areas with them, since the wallpaper can peel off or delaminate.
Table 5 . Advantages and disadvantages of using wallpaper in bathrooms.
| № | pros | Minuses |
| 1. | High level of environmental safety for glass wallpaper. | Lots of fakes and low quality products. |
| 2. | A rich range of colors and a good selection of decors. | A good, high-quality glue for gluing is required, as well as adherence to installation technology. |
| 3. | Easy installation. | For surface painting, you will need to purchase interior paints with fungicidal additives. |
| 4. | Moderate cost - from 60 rubles/m2. | |
| 5. | Restoration of damage is possible, as well as re-painting up to 10 times. | |
| 6. | Reinforcing effect. | |
| 7. | Long service life - at least 15 years. |
Artificial stone tiles
An interesting and striking analogue of traditional tiles is tiles for various surfaces, such as roughly processed concrete, unpolished natural stone, old brickwork, etc.
Made from:
- clinker or standard ceramic mixture;
- cement, lightweight concrete or gypsum;
- polymer cement composition containing acrylic, epoxy and other synthetic resins.
The material is interesting because it allows you to decorate the bathroom in styles such as loft, boho, rustic, chalet. The wide color palette is complemented by an equally rich assortment of various textures.
Tile or assembly adhesives are used for installation. The seams can be filled with grout or simply painted over to give the wall volume. Since there is a high level of humidity in the bathroom, experts recommend covering the surface with protective compounds: stone varnishes, acrylic enamels or latex dispersion paints. In our opinion, it is better to use the first two types of coatings, since they create a waterproof, dense film. It will make it much easier to clean surfaces from limescale and dirt, even with abrasive detergents.
Table 6 . Advantages and disadvantages of using decorative tiles in the bathroom.
| № | pros | Minuses |
| 1. | Moderate price - from 220 rubles/m2. | Careful preparation of the base is required. |
| 2. | Wide selection of textures and colors. | It is not advisable to use it in the “wet area” around the bathtub or in the shower, since it is very difficult to remove limescale, foam and other contaminants from the recesses and crevices. |
| 3. | Resistant to steam and non-abrasive household chemicals. | Low-quality products are sensitive to steam and water and may crumble. |
| 4. | Safety in operation. | |
| 5. | Easy installation. | |
| 6. | Durability – up to 15 years. | |
| 7. | Quick update and restoration of damage. |
Vinyl laminate
An unusual idea is to use an analogue of a floor board instead of tiles when decorating the walls. The result will be a very beautiful imitation of wooden panels, textiles or stone, which is not afraid of water, mold, mildew, or insects.
On the wall, the coating is assembled in the standard way for laminate, but with one important addition. Hardware must be used for a kind of safety fixation: pins or dowel-nails. The flush fastener is screwed or driven into the lock groove at an angle of approximately 30–45°.
When choosing decor, you must take into account the area of the room. The smaller the bathroom, the lighter the color should be.
Table 7 . Pros and cons of vinyl laminate flooring in bathrooms.
| № | Advantages | Flaws |
| 1. | Good selection of decors and shades. | It is necessary to follow the technology for preparing the base and assembling it. |
| 2. | Inert to steam, water and detergents. | Price – from 700 rub./m2. |
| 3. | High durability of the coating. | When using low-quality products, a strong chemical smell may remain in the room for a long time. |
| 4. | Restoration of minor damage is possible. | There may be some difficulties in cleaning the surface from limescale. |
| 5. | Long service life. |
A natural stone
Facings made of marble, onyx, travertine, granite and other types of stone are characterized by special beauty, brilliance and originality. Traditionally, they are used to decorate baths, saunas, and hammams. In private houses and apartments, this type of cladding is used to create bathrooms in antique, Moroccan, Japanese or Greek styles. Slabs made of natural stone are also suitable for decorating interiors to resemble Provence, rustic, or chalets.
Natural wall cladding is installed in the same way as standard ceramic tiles. But with a few significant differences:
- Special white super-strong adhesives are used, resistant to slipping and preventing color migration (coloring of the facing material).
- Particular attention is paid to the pattern, as well as to the areas around the pipes, in places where mirrors, cabinets, cabinets, etc. are installed. The slabs must be adjusted in such a way that the cuts are combined, partially or completely, as if moving from one element to another.
- Natural stone is difficult to work with, so it is best to entrust its installation to professional craftsmen.
Table 8 . Pros and cons of natural stone in bathrooms.
| № | Advantages | Flaws |
| 1. | Wide choice of colors - more than 7000 options. | High cost - from 1400 rubles/m2. |
| 2. | High strength of the coating, resistance to impact and deformation loads. | It is not advisable to clean the surface from dirt using aggressive household chemicals. |
| 3. | The resulting chips and small cracks can be restored. | Almost all types of natural stone have a porous structure, which is why water and dirt easily penetrate into the cladding structure. |
| 4. | Long service life with careful use. | Labor-intensive installation. |
Summary
Now you know what you can do in the bathroom instead of tiles. You can get some ideas for decorating plumbing rooms with alternative types of finishes in the video in this article. It also describes how to install them.
You can leave your opinion on the information presented in the material in the comments below.
August 26, 2021
If you want to express gratitude, add a clarification or objection, or ask the author something, add a comment or say thank you!
- February 27, 2021
- February 21, 2021
- February 20, 2021
- February 16, 2021
- February 15, 2021
- February 13, 2021
Latest replies on the forum
- Cinder block walls
How to cover cinder block wallsQuestion added: February 09, 2021 - 19:32
views
- Walls
Hello. Can you tell me how to put decorative stone on a putty wall?Question added: August 03, 2021 - 12:25
views
- Question about wall cladding in the bathroom
Good day. Having studied quite a lot of information, I could not come to a clear conclusion. Maybe you can help me. Situation …Question added: May 20, 2021 - 11:50
views
- Mystic... scary
Dear forum users, I want to know if anyone has had anything similar... I’ll say right away that alcohol and nothing else that clouds my brain...Question added: October 20, 2021 - 08:44
views
You might be interested
Similar articles:
There are no similar articles.
Tiling
Wallpaper for finishing walls in the bathroom
This option of decorating the walls in the bathroom instead of tiles is quite popular; its positive qualities include its inexpensive cost and the ability to carry out bathroom renovations yourself. It is only important to choose the right wallpaper - it must be moisture resistant. There are different options suitable for the bathroom, there are many of them.
Vinyl wallpapers
They are made of polymer and can easily withstand temperature changes, high humidity and vaporization. They cost more than other options, but will also last longer.
Washable
This is an inexpensive option that allows for easy wet cleaning using a sponge and cleaning solution. They are protected from moisture by a special coating that does not let water in. They won’t last as long as vinyl ones, but they will give you a reason to update your bathroom interior more often.
Self-adhesive
Such materials are easy to use; they are a moisture-resistant film with an adhesive base. They can be conveniently and quickly applied to the wall, but the choice of options is limited, so this design of walls in the bathroom is not popular.
Liquid
It is simply a plaster consisting of natural fibers, cotton and glue, which is sold as a dry mixture, diluted with water and applied to the walls. The ability to add color allows you to create a bathroom interior according to your wishes. After the plaster dries, the walls are able to withstand water and steam. To be sure, you can apply a layer or several layers of acrylic varnish on top.
Glass wallpaper
The word itself - glass - suggests that they are not afraid of water and steam. The basis of glass wallpaper is glass fiber impregnated with starch, which, once applied to the walls, gives a durable coating that can be repainted many times if you want to update the design of the bathroom. The finishing option is not cheap, but given its durability, environmental friendliness and high moisture-resistant qualities, it is one of the popular ones.