The modern construction industry provides apartment owners with a variety of ways to finish the walls in the bathroom. Among them: moisture-resistant wallpaper, PVC panels, decorative plaster, etc. However, despite the large selection of options, wall painting and tiling remain the most popular. And here, those who do the work with their own hands have a lot of questions: is it necessary to plaster the walls under the tiles, what plaster to use in the bathroom for painting, and which one to use under the tiles? Below we will try to give answers to the questions posed.
Why do you need to plaster the walls in the bathroom?
The question of whether it is necessary to plaster the walls in the bathroom is asked by many property owners, especially for beginners. Any slightest unevenness on vertical surfaces is noticeable to the naked eye. Not only professional builders know about this due to their extensive experience and keen eye, but also home craftsmen, since the negative impact on the appearance of the walls is obvious. At least, this applies to further processing with paint, whereas with tiles, most owners do not want to bother themselves with leveling procedures, because tile adhesive is enough.
If you lay down the adhesive in a thick layer, the tile will roll down under its own weight. In addition, due to the shrinkage of the glue, the tile is attracted to the wall surface or comes off, which is accompanied by disruption of the finish, but in most cases it simply cracks.
The most important thing is that any tile adhesive is significantly more expensive than plaster compounds (with rare exceptions), and this greatly increases the cost of repairs. In addition, laying in several layers takes much longer - the coating dries faster. That is, if someone has a question: is it necessary to plaster the walls of the bathroom, the answer is yes.
Leveling the surface with a layer of plaster eliminates unevenness
Surface preparation
Before plastering the walls in the bathroom, you should carry out high-quality preparatory measures, the implementation of which will allow you to achieve the desired result in the future. It is necessary to remove whitewash, plaster, wallpaper, paint and other old finishes from surfaces.
If work is carried out in a newly built house, then its walls need to be thoroughly removed from dust, dirt, as well as grease and bitumen stains.
When carrying out preparatory activities, it is advisable to remove the plaster right down to the concrete base or other material acting as it. This process should not be avoided, since in the opposite situation, after completion of the repair work, the old plaster coating may not withstand it and collapse. As a result, processes that have already been completed will need to be repeated, which will not only waste time again, but also cause a significant increase in costs.
If the surfaces to be treated are not rough enough, then after removing all excess, small notches must be applied to them using a small ax or chisel. During this process, it is possible to achieve an increase in the level of adhesion of the base to the applied composition.
When applying plaster to brick walls in a bathroom with filled joints, it is necessary to notch or scratch them with a depth of 10-15 mm in advance, eliminating dust arising during work. If the seams are empty, then this process is not required, since the walls already have an optimal degree of roughness.
Types of plasters
When the time comes for finishing work, novice plasterers have a number of questions. Which building mixture is better for tiles: cement, lime-cement or gypsum? Is it worth choosing gypsum solutions for the bathroom? To understand the best way to plaster bathroom walls under tiles, you should familiarize yourself with the advantages and disadvantages of specific types of plaster.
Cement plaster for bathroom
Cement plaster for the bathroom is the best solution for tiles. The structure of the material prevents the penetration of moisture into the material, making it more resistant to external influences. The surface of cement plaster is rough, which is an additional advantage, because... the adhesion of tile adhesive to future plaster increases.
It is best to plaster uneven walls with cement-based mixtures, because... This is the cheapest option for interior decoration. It binds and hardens faster than a cement-lime composition. However, such a solution has low plasticity, which makes it difficult to apply plaster to the walls and lengthens the work.
Among the advantages of cement-based plasters are:
- high moisture resistance;
- high strength;
- high adhesion with tile adhesive;
- low price.
The disadvantages of cement plasters are the following:
- long time to gain strength;
- high shrinkage after drying;
- high probability of cracking (especially if the layer is thin);
- high mixture consumption (12-20 kg/m2 with a layer thickness of 10 mm);
- high weight and, as a result, load on the wall;
- low plasticity of the mixture, which complicates application.
You can immediately draw the right conclusion - cement plaster mixture is the optimal solution for finishing bathrooms.
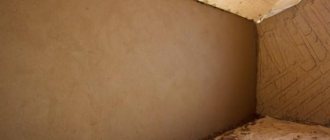
Plastering under tiles in the bathroom is often done with cement-sand mortars
Cement-lime plaster
Cement-lime mixtures are widely used. Thanks to the presence of lime, the mortar becomes more plastic, the weight of the plaster decreases, and the strength decreases. Cement-lime mortars are highly resistant to the formation of fungi and mold. Cracks rarely appear on walls made of cement-lime plaster.
Advantages of cement-lime plasters:
- increased ductility compared to cement plaster;
- resistance to cracking;
- increased adhesion to the base;
- additional antibacterial effect;
- average consumption (13-18 kg/m2 with a layer thickness of 10 mm);
- the weight is lighter than that of cement plasters, thus the load on the wall is less.
Flaws:
- less durable than cement;
- moisture resistance is lower than that of cement plasters;
- more expensive than cement mortar.
The setting time for lime plasters is longer than for cement plasters, and this makes the application process more convenient. Also, these plasters are more environmentally friendly.
Lime plaster has a less durable base for tiles, unlike cement-sand plaster
Gypsum plaster in the bathroom
Gypsum solutions are used mainly in dry rooms; they are used quite rarely in bathrooms. They are highly hygroscopic, i.e. ability to absorb moisture and water vapor from the air.
There is an opinion that if you use gypsum plaster to decorate the walls in the bathroom, lay tiles on it and seal the seams with grout until completely sealed, then water will not penetrate into the plaster, and you don’t have to worry about the reliability of the structure. In practice, everything is different. At the slightest flaw or crack in the grout/tile, moisture begins to seep in, moistening the gypsum plaster, thereby destroying it. Over time, the defect will spread wider and deeper until one day the tile falls off along with a piece of plaster.
Also, in the event of a sudden leak from above from neighbors, deformation of the gypsum plaster, loss of strength properties, and partial peeling of the plaster from the base are possible.
It is not recommended to use gypsum plaster without additional protection in small rooms with constant humidity above 70%. They must be protected in the form of liquid water-repellent primers, and the surface of the wall must be tiled with hermetically sealed seams. However, such additional measures significantly increase the cost of work.
It is allowed to use gypsum plaster away from direct exposure to water and water vapor, while good ventilation must be provided in the room.
Advantages of gypsum plaster for bathrooms:
- short setting time;
- low consumption (8.5-10 kg/m2 with a layer thickness of 10 mm);
- no shrinkage and high ductility;
- high environmental friendliness;
- relatively low weight.
Flaws:
- low water resistance; if there is a sudden leak from neighbors, you can lose the plaster;
- reduced strength, not resistant to mechanical stress;
- smooth surface of gypsum plaster, impairing adhesion to tile adhesive;
- relatively high price.
Important!
When choosing plaster for the bathroom, remember that it must first of all be resistant to high humidity.
The main disadvantage of gypsum is the porous structure of the material.
Sanitation mixtures
Sanitating plaster mixtures are elastic, environmentally friendly, vapor permeable and can be used as a good waterproofing material. In this case, the composition is suitable for leveling, since a thick layer can be applied. After drying it does not crack.
In addition, sanitizing mixtures retain salts escaping from the base materials of the surfaces. This provides protection to the walls from leaching, preventing the formation of efflorescence. And since the mixture is waterproof, it is a suitable solution for finishing a bathroom.
However, despite all the existing advantages, the obvious disadvantage of sanitizing mixtures lies in the fact that it takes a long period of time for the plaster to set. You will usually have to wait at least a week before continuing finishing work in the bathroom.
Sanitating plaster mixtures contribute to the uniform distribution of salts as they reach the surface
Comparison of plasters
To finally decide which plaster to plaster a bathroom under tiled cladding, a summary table is provided with the characteristics of the various types of mixture.
| Characteristic | Cement | Cement-lime | Plaster |
| Moisture resistance | Very high | Average | Low |
| Strength | Very high | High | Low |
| Price | Low | Average | High |
| Start time of setting | From 2 hours | From 3 hours | From 1 hour |
| Time to reach full strength | 30 days | 7 days | 7 days |
| Shrinkage after drying | High | Average | Absent |
| Possibility of cracking | High | Average | Low |
| Mixture consumption at a thickness of 10 mm | 12-20 kg/m2 | 13-18 kg/m2 | 8.5-10 kg/m2 |
| Plaster weight | High | Average | Short |
| Plasticity of the mixture | Low | Average | High |
| Adhesion with tile adhesive | High | Average | Low |
| Minimum layer thickness | 8 mm | 8 mm | 5 mm |
| Maximum layer thickness | 30 mm | 30 mm | 50 mm |
| Antibacterial effect | Average | High | Short |
| Environmental friendliness | Low | Average | High |
The data from the table allows you to more clearly understand what plaster to use in the bathroom when you plan to lay tiles in this room.
Is it possible to paint silicate plaster with silicone paint?
If plaster has been applied to the facade, which has a tinting effect or textured treatment, silicate paint can be applied to the surface. It should be based on liquid glass and other fillers that act as binders. Silicone paint penetrates well into the plastered facade, creating a reinforced surface. This way you can solve the problem of chips and cracks, but not eliminate the ability of the base to breathe.
We recommend for review: Silicone paint for interior work
Decorative plaster in the bathroom
The choice of decorative plaster for wet rooms today is presented in a wide range - acrylic, silicate, polymer and other varieties. All these mixtures are resistant to moisture, including direct contact with water. With such compositions, there is scope for imagination to bring any style into reality.
However, the use of decorative plaster entails a number of mandatory restrictive measures. Firstly, the formation of excessive relief on the walls should be avoided. After all, moisture always accumulates in the recesses, which forms favorable flora for the development of pathogenic microbes and microorganisms. Secondly, a special relief coating like bark beetle is very difficult to wash.
On a note!
For this reason, it is better to give preference to Venetian or Moroccan plaster. These formulations are even created for bathroom conditions. The real Moroccan mixture is even suitable for creating bathtubs, sinks, and shelves.
Venetian is a material with good water-repellent characteristics
Criterias of choice
Among the key points when choosing plaster products for the bathroom are:
- hydrophobicity parameters of the solution. For rooms with special microclimate conditions, exclusively waterproof finishing options are used;
- The composition for plastering walls is selected depending on the base material. For example, when arranging wall blocks, the priority is a solution with a filler made of fine sand; in the case of brickwork, preference is given to the version made from coarse sand;
- it is necessary to make sure that the shelf life of the product corresponds, check the storage conditions, otherwise it is difficult to predict the results of finishing work.
When choosing plaster for a bathroom, you need to take into account the parameters of hydrophobicity.
Priority is given to offers from well-known brands in a competitive environment. Waterproof plaster for the bathroom in Moscow and other regions is represented by a number of domestic and foreign manufacturers. It is worth remembering that purchasing relatively inexpensive products from new companies risks questionable quality of the product, the need for new repairs and additional investments.
What is the best way to plaster the walls in the bathroom?
Special operating conditions dictate their own requirements for finishing materials. In particular, the mixture must have the following qualities:
- resistance to high levels of humidity;
- withstand temperature changes, even abruptly;
- the solution must be completely safe to use.
But, in addition to this, it is also important what finishing material will be used in the future - paint or tile cladding. The type of composition depends on the choice.
Under tiles
When plastering walls under tiles in the bathroom, you should pay attention to cement or gypsum mixtures. When using cement-sand plaster there are no special conditions, as well as obvious contraindications.
Using a gypsum product for finishing wet rooms poses a number of difficulties:
- As a result of prolonged exposure of gypsum plaster to moisture, the risk of coating failure increases.
- Far from the highest strength.
- Contact with tile adhesive increases the likelihood of the formation of ettringite, a mineral that breaks down gypsum.
Attention!
Experts strongly do not recommend gluing heavy tiles onto gypsum plaster. But if this option is chosen, you should select the right primer.
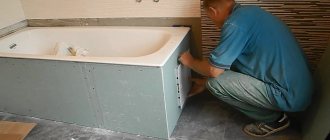
Ceramic tiles on the surface of the plaster layer protect it well from moisture penetration
Many manufacturers are aware of the problem areas of such compositions, and therefore the building materials market is regularly updated with new options. In particular, it is worth noting deep penetration primers, the use of which allows not only to improve the adhesive qualities of tile adhesive with a gypsum surface, but also to increase the strength of the gypsum layer. In addition, the walls are provided with reliable protection against the development of fungi.
When the tiles are laid, all seams must be sealed with a special compound to prevent moisture from penetrating to the base. And those areas where increased contact with water is possible (near the washbasin) you can use silicone sealant. Taking this into account, property owners generally prefer cement mixtures when it is necessary to lay tiles in the bathroom.
For painting
At first glance, it seems that the painting process can be cheaper than laying tiles on the bathroom walls. However, in reality, even such a finish is far from cheap, because it is necessary to create perfectly smooth surfaces. And if you paint walls where there are a number of defects, then all the existing concavities, convexities, cavities, and scratches appear in all their glory and can be seen without much effort. In addition, additional operations are required, such as finishing coats and puttying of surfaces (when using tiles, these procedures can be neglected).
The material of the walls also matters, which in turn affects the choice of plaster. For example, it is highly not recommended to use a cement composition for finishing aerated concrete blocks. For the bathroom, it is necessary to choose those mixtures that will not subsequently crack. And if for various reasons there is nothing to replace the cement-lime mortar, then provide the walls with additional protection from moisture, otherwise over time the consequences will be destructive.
The preparatory stage in the bathroom for painting can be carried out with cement mortar, but only when the finishing coating is moisture resistant. The paint, in turn, will also serve as a protective barrier against external factors.
Acrylic material is suitable only as a finishing layer or for wall insulation. Silicate and silicone compounds are most suitable due to their long service life.
Painting the surface requires it to be perfectly smooth.
Preparation of the solution
Before plastering the walls in the bathtub, it is also necessary to prepare a high-quality mixture. If preference is given to ready-made formulations, then before doing so you need to study the manufacturer’s instructions and strictly adhere to them. Some craftsmen prefer to prepare the plaster themselves instead, since, in their opinion, they have a longer service life, the absence of unnecessary additives, and are also noticeably cheaper.
If you want to prepare your own solution, you need a bucket of M 400 cement and river or ordinary sand from a quarry, as well as water. It would be a good idea to add a small amount of clay to the sand, which will increase the elasticity of the mixture and make it easier to apply to the surface. If the sand does not contain any additives, then you can mix a little washing powder into it.
After this, cement and sand must be placed in a large trough or other similar container, and then thoroughly mixed so that no lumps remain. To quickly apply plaster mortar to the walls in the bathroom, you need to adhere to the following nuances:
- When preparing a mixture from a dry composition, it is advisable to use clean water at room temperature. The plaster must be poured into the liquid, stirring regularly.
- The thickness of the coating depends on the thickness of the solution. The thicker the mixture, the thicker the layer will be.
Note! It is necessary to mix the solution in such an amount at a time that it can be used up in about 20 minutes.
Tools for work
After determining the type of plaster mixture, you need to stock up on the necessary tools:
- construction bucket;
- drill with mixer attachment;
- level;
- construction plumb line;
- plaster beacons;
- building code;
- set of spatulas;
- Master OK;
- falcon;
- grater;
- grater;
- trowel.
For your information!
In addition to preparing the tools, you need to pay attention to the material itself. And, in particular, determine how much plaster will be needed for interior wall decoration.
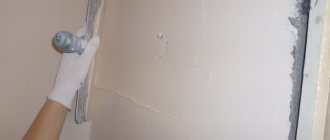
Plastering technology
Plastering the walls before laying the tiles is carried out in the following sequence:
- Control cords are installed to form the future surface of the plaster. To do this, 3 dowels are mounted on each edge of the wall at equal distances in height, using a plumb line to control that the heads of the screws are strictly vertical.
- Beacons are placed along the entire height of the wall. The pitch of the beacons is selected based on the length of the rule - the width between the beacons should be 15-30 cm less than the length of the rule. This is due to the fact that when leveling the plaster, the master moves the rule along a zigzag path to the sides outside the beacons.
- The plaster solution is being prepared. To do this, pour the finished mixture into a construction bucket, add the required amount of water according to the instructions, and then mix thoroughly with a mixer.
- The solution is applied from the bottom up using a spatula or ladle. Throwing is done evenly over the entire area of the wall. After the first layer has dried, a second layer of the mixture is applied. Then the last layer is aligned by the rule. The cut off excess mixture can be used in local areas where unevenness still remains, after which we repeat the leveling procedure.
- The dried coating is rubbed with a construction float in a circular motion. If the plaster has dried too much, you can moisten it with water and then continue grouting.
The result should be an even and smooth surface, ready for tiling.
Technologically, the process of leveling walls in the bathroom is no different from plastering in other rooms
Preparing walls for work
Before starting plastering work, it is necessary to inspect the old coating and assess its condition. If there is old plaster, you should examine it by tapping it with a hammer: if the sound is loud, the surface is normal and can be left, if the sound is dull, the plaster has peeled off from the wall and should be dismantled.
Important!
If areas are found where the old layer is crumbling and there are cracks, such areas are also removed, and the resulting recesses are sealed with mortar.
If the surface is painted with old paint. In this case, you cannot apply tile adhesive to a painted wall; adhesion to the adhesive will be extremely low. Even if the walls are relatively smooth, we recommend applying a thin layer of plaster, but first you must carefully prepare the painted wall.
In the absence of old plaster (provided that the wall itself is made of brick or blocks), it is necessary to first cut the seams. This is done to increase the adhesion of future plaster to the wall. A hammer and a narrow chisel are well suited for these purposes. It is enough to remove the old solution to a depth of 1-1.5 cm, then remove the dust with a wet cloth.
Before plastering concrete walls, you need to examine the surface for sagging. It is necessary to cut down the protruding parts with a chisel, then grout the irregularities with cement-sand mortar. Also, using an ultraviolet lamp, inspect the surface for greasy oil stains, and if found, remove them. If there are cavities in the wall, they should be filled with mortar a few days before the main plaster.
It is also necessary to prime the walls before applying the solution. It is better to use a primer from the same manufacturer as the plasters. The type of primer depends on the base:
- For concrete and cellular concrete, a deep penetration primer is mainly used, for example Ceresit CT17, Optimist G103. In the case of using gypsum plasters, soil compositions of the “concrete contact” type are used.
- For brick walls, the choice of priming method depends on the type of plaster used. If the future plaster is cement-based, then a special primer is not required; instead, the wall is generously moistened with water immediately before applying the plaster so that moisture from the mortar does not escape into the brick. If a gypsum mixture is used, then acrylic primers are used, for example Rotband Grund.
The service life of the entire finish, and not just the plaster layer, depends on how well the preparatory stage is carried out.
The quality and durability of the entire finish depends on the quality of preparation.
Installation of beacons
After completing the preparatory work, you can proceed directly to the plaster. The required thickness of the layer under the tile depends on the degree of unevenness of the wall. If the base is uneven with differences of more than 10 mm, preference should be given to beacon plaster. In the future, this will allow you to save on tile adhesive, and will also guarantee smooth walls with the correct dimensions, which is important for further laying of tiles.
Beacon installation sequence:
- Check surface geometry.
- Make markings of the places where the planks will be fixed. The step between the beacons should be 100-150 mm.
- Place strips of gypsum mortar along the intended line.
- Beacons are applied to the stacked piles, slightly deeper into the solution, until the required vertical plane of the planned layer is created. Control the level.
- Clean the correct plane of the beacons from dried plaster residues.
On a note!
It is important to wait a certain time for the plaster fixation of success to dry in order to firmly fix the beacons.
Preparation of the solution
To implement the classic recipe you will need the following ingredients:
- cement;
- sand;
- water;
- liquid soap or dishwashing detergent.
The last ingredient is added to increase the plasticity of the solution. At the same time, cement grade M500 requires sand in the amount of 4 buckets, for M400 less - 3 buckets. Water must be added slowly while mixing the solution. The finished mixture should have a consistency similar to thick sour cream. It is not recommended to mix too much solution if you lack the skills.
As for ready-made dry mixtures, all that remains is to add the required amount of water (indicated in the instructions) and mix everything well. Usually you need to wait a few minutes, then stir the mixture again to lift the settled heavy particles, and then the solution is ready to be applied to the walls.
To level the walls in the bathroom, plastering is carried out along the beacons
Applying spray and base coat
Spraying means throwing plaster onto the surface to be treated using a trowel. The goal of this stage is to fill all the cracks and voids. The desired layer thickness is no more than 5 mm. Just before applying the solution, it is recommended to moisten the wall.
After spreading the mixture, there is no need to level anything, and this is the whole idea - it creates a rough surface to which the subsequent base layer sticks more easily. And the latter must be leveled in order to create a flat surface.
Leveling the surface
After applying the base, it is leveled using a rule focusing on the beacons. The main goal here is to get the most even and smooth coating possible.
If you plan to paint the walls, then you need a third layer (coating). Its thickness varies from 2 to 5 mm, no more. In this case, you need to wait until the base sets, but is not yet completely dry. The covering is leveled with a spatula, and after the layer has dried, it is recommended to go over it with a grater to give the surface the smoothest possible coating. For the desired effect, you should make circular movements with the tool, and then finish with straight ones (up and down).
Apply a base coat over the spray
Finishing
The final stage of plastering work begins only after the rough layer has completely dried. Paint is usually used as a finishing touch, covering not only the walls, but also the ceiling. But you can also cover the walls with tiles. Before tiling the walls, professional builders recommend waiting at least 3 weeks for the coating to gain the necessary strength.
The use of decorative plaster will significantly increase the cost of finishing work. If you don’t have enough money, it’s better to opt for paint or tiles to give the interior a more presentable look.
Control check
Before starting finishing work, you need to once again check the geometric dimensions of the room and make sure that the walls are really vertical and rectangular. This is necessary to ensure that the tiles fit correctly in the corners of the walls, as well as to avoid gaps between the bathtub and the walls.
It is convenient to check the quality of plaster using a rule. A perfectly smooth surface is not needed here; the deviation from the plane should not exceed 0.5 mm. Remove any existing solution build-up. If depressions larger than 0.5 mm are found, it is better to level them, otherwise count on increased overuse of tile adhesive.
Painting requires special smoothness and evenness of the wall plaster
Technique for applying silicone plaster
The algorithm is unchanged with all types of similar finishes. Silicone plaster for interior work is applied to a rough base, free of crumbling layers. The wall is coated with primer and dried. Now you can work with plaster.
Surface preparation
It is necessary to dismantle elements that could reduce the adhesion of the mixture to the wall. It is important to rid the walls of grease, dirt and dust, as well as remnants of old paint. If you notice deep depressions, they should be filled with putty. You can increase the adhesion of silicone plaster by applying a primer on an identical base, which shows the best results. It is recommended to form two layers, between which you should not rush. The primer must be allowed to dry.
Tools
To apply silicone plaster, you should prepare a certain set of tools, namely:
- construction trowel;
- rollers;
- putty knife.
You will also need silicone plaster; it has the type that is suitable for working with it. Self-breeding is not required. You can purchase the material in any volume, which is sold in cans or buckets. It is important to take into account the consumption, it depends on the type of plaster. If the mixture has been stored for a long time, it may thicken; in this case, it is diluted with clean water and the ingredients are mixed well until a homogeneous mass is obtained. You can purchase tinted silicone plaster mixture for external or internal work.
Application
This step can rarely be performed well if there is no experience. Therefore, to begin with, it is recommended to practice on a small area and only then begin to process the main area. Application of silicone plaster can be carried out in a certain way, which will depend on whether you will do the work yourself or not. The technique can be mechanical, not only using improvised tools. The outer or inner layers should have a thickness no greater than the fraction of the filler that is included in the composition. The surface must first be cleaned of mechanical elements that can reduce adhesion.
In order to eliminate the occurrence of differences in shade, you should not wait for the first layer to dry. This method of covering interior walls was called “wet on wet.” The surface is leveled with a grater so that the design can be applied later. The cladding of the facade and internal walls can be carried out to create an imitation of any elite material, for example, moire fabric.
You can easily create relief images on a layer of silicone-based plaster, which can later be painted. Once silicone plaster has been applied, the façade or walls of the room should be hidden from various influences, such as moisture, sun and wind. The surface must dry well, only then can it be painted. Depending on the temperature outside or in the room, as well as the thickness of the layer, it may take up to 48 hours to completely dry. Conditions must be maintained normal, otherwise you may get slightly or completely different results than you expected.
Plaster in the toilet (bathroom)
Unlike the bathroom, the toilet room does not have high humidity. At the same time, over time, condensation accumulates on utility pipes. Finishing a toilet has its own difficulties, just like plastering the ceiling in the bathroom. In addition to plaster, other materials can be used in the toilet, but with the help of a building mixture, favorable conditions are created that increase the level of comfort.
The walls along with the ceiling are covered with a sanitizing compound, followed by the priming stage. For plaster, it is preferable to choose moisture-resistant mixtures. And those areas where direct contact with water may occur are best treated with water-repellent wax.
How to choose a mixture for plaster under tiles?
Plastered walls in the bathroom under tiles
Before choosing a mixture for finishing under tiles, you need to take into account the fact with what layer you plan to cover the surface. You also need to pay attention to the types of binding materials that manufacturers mix into the composition.
For living rooms, it is best to use gypsum solutions, because in such rooms not only the aesthetic appearance is important, but also the environmental friendliness of the materials used.
For rooms with high humidity levels, it is better to choose a cement-based solution, which will act as a barrier and will not allow excess moisture to penetrate deep into the base of the wall.
Before you start preparing the mixture, you do not need specific knowledge and skills; the process looks elementary. To do this, pour sand into the container, add cement, mix the dry ingredients and add water a little at a time until the desired thickness and uniform consistency is obtained.
If you follow these simple rules, the tiles will be laid more efficiently, which will ensure long life and good durability of the cladding.
Waterproofing compounds
To provide walls with additional protection from the harmful effects of moisture, you should pay attention to waterproofing compounds. This product can be found in any hardware store. And despite the fact that a bathroom is a non-residential premises, it is still necessary to buy environmentally friendly building mixture. These compositions are suitable for aerated concrete surfaces and gypsum tongue-and-groove slabs.
Waterproofing impregnation does not change the color, texture, or appearance of the surface
Recommendations for choosing formulations
Moisture-resistant plaster for the bathroom should be chosen taking into account what the finishing coating will be. Quite often, in rooms with high humidity, walls are lined with ceramic tiles. In this case, the first priority is the requirement for the strength of the material under constant exposure to moisture and ideal alignment of the walls. The color of the plaster and the appearance of minor cracks do not play a significant role, since it is masked by the tiles. Therefore, the use of cement-polymer and cement mixtures is justified.
A different approach is required when preparing walls for painting. With the help of paint it will not be possible to hide even the smallest defects; rather, they will appear more pronounced. Even the slightest cracking is unacceptable. Gypsum plaster fully meets these requirements.
In recent years, preference has increasingly been given to moisture-resistant plaster for the bathroom, which does not require additional coating. This issue can be solved with the help of decorative plaster, which is also produced in a waterproof version. The decorative effect can be achieved in different ways: volumetric texture, different colors, imitation of natural materials.
In bathrooms, it is not recommended to apply a layer with deep grooves (for example, the so-called bark beetle plaster), since microorganisms can multiply in them. Of the ready-made compositions, moisture-resistant plaster for the Knauf bathroom has proven itself to be excellent (their price ranges from 350 to 730 rubles per 25 kg).
The combination of areas with decorative plaster and tiled cladding looks very original. When creating an unusual interior, Venetian plaster is often used today. To increase the reliability of such coatings, it is recommended to cover them with a protective layer. The most common are wax compositions, for example, “Optimist”.
Experts recommend that in rooms with high humidity, you should play it safe and use additional protection against the effects of moisture. This is achieved by applying a very thin primer layer of Aquastop.
It is necessary to carefully select moisture-resistant decorative plaster for the bathroom. Price is sometimes decisive, but you should not save on these compounds, since inexpensive mixtures from unknown manufacturers do not always guarantee high quality.
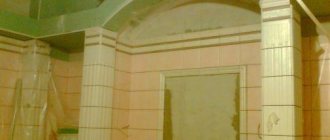
Bathroom tile design: the best combinations and application features for a stylish interior. Design of bathroom tiles.
Material calculation
In order to correctly calculate how much plaster mixture you will need to use, you need to determine the thickness of the applied layer. For this purpose, first of all, you should measure the difference in height of vertical surfaces, and take measurements at several points, applying a rule or a flat bar to the wall. And the more such points, the better. All obtained values are summed and divided by the number of points.
For example, 5 zones with different indicators were selected:
- 10 mm;
- 20 mm;
- 25 mm;
- 27 mm;
- 30 mm.
The total is 112 mm, and dividing by 5 - 22.4 mm (it’s better to immediately convert to centimeters - 2.24). This is the average thickness of the plaster coating.
The packaging of any building material (the vast majority) contains data regarding its consumption per 1 m2 of surface with a thickness of 10 mm. With a value of 15 kg/m2, the calculation will be as follows: 15 * 2.24 = 33.6 kg. That is, 33.6 kg of plaster is needed for 1 square surface, and exactly how much is required depends on the area of the walls to be treated.
With a total area of 20 m2, 672 kg of mixture (33.6 * 20) will be required. Dry formulations are usually packaged in 25 or 30 kg bags. It is not difficult to calculate the required quantity - 672/25 (30) = 26.88 (22.4) pcs. It is always advisable to round up, since it is not possible to perform an accurate calculation to the nearest gram. As a result, it turns out that 23 bags of plaster need to be purchased.
The actual consumption of plaster depends on many components
Most popular mixtures
The modern construction market contains a wide range of plaster compositions. Products from Ceresit and Knauf are popular. At the same time, the Ceresit series contains not only the waterproofing mixture CR 65, but also a cement-based composition of the CT 24 brand. There are also other types of moisture-resistant plaster for the bathroom. Among them are acrylic, silicone and cement-polymer mixtures.
The construction brand Knauf is known for the fact that the manufacturer produces finishing materials of predominantly high quality. Mixtures with the required qualities are provided especially for bathrooms and restrooms - Rotband (gypsum), Unterputz (cement), Sevener (universal). But there are other analogies with no less popularity, including Kreps Master, Caparol Streichputz and other options.
Manufacturers offer different materials that can be used as bathroom plaster
If you take the process of preparing walls for future tiles responsibly and follow the instructions, then at the end of the work you should get smooth and reliable plaster. You don't have to worry that something will go wrong during the tile laying process.
Was this information useful to you? Share in the comments!
Installation of beacons
If the bathroom has small dimensions with small differences, then there is no need for guides. To install beacons for plaster, the room must be large. Fixing the guides on the surface of the walls should be done using a solution that should harden quickly.
In rooms without high moisture, it is optimal to use gypsum-based compositions, like Rotband from Knauf.
If the question arises about what kind of plaster to use in the bathroom for lighthouses, but it has already been decided that cement mortar is planned to be used as the main coating, then placing a gypsum mixture inside it is extremely undesirable.
The first step is to install the guides on the sides, and then along the perimeter at a distance not exceeding the length of the rule.