Wall cladding with decorative stone continues to be in demand, as it allows you to create the effect of naturalness and luxury. However, after laying the materials, the spaces between them are finished, which makes the composition complete, holistic, and airtight. Grout for decorative stone can be purchased ready-made or prepared independently.
Types of grout for stone
It is easy to do without additional solutions when finishing surfaces and decorating them. But offers for highly specialized compounds from construction stores still have not decreased. Such materials consist of many components and are available in packaging of several kg.
The basic element can be:
Plasticizer components on latex;
- Silicone;
- Rubber;
- Epoxy;
- Cement part;
- Gypsum additives;
- Polyurethane.
Dry and wet varieties of grout are available. The first option is useful in the case of serious volumes of work, the second is suitable for the opposite conditions.
The performance and technical properties of the original compositions are improved through the use of various additives. The use of pigments makes it easier to achieve specific colors when using decorative stone grout.
Such materials consist of many components and are available in packaging of several kg.
Leading manufacturers
If you are looking for something to grout seams with, pay attention to the Ivsip fugue. The popular material is produced in different colors and is used for facade surfaces and interior walls. The average consumption is 500 g per square meter of masonry surface if the depth and width of the seam measures three and four millimeters, respectively.
The classic options are Ceresit and Polymin, sold in the form of a white material with different composition and viscosity and excellent isolation of seam areas from water. For interior walls, it is better to choose a polymer-based grout, and for the surface of façade areas, choose a grout containing cement.
Don't know what to use to grout the bathroom walls? Purchase a special mixture from Litokol. In this white composition, color components are added to achieve the necessary solutions.
Which grout for artificial stone is better?
You should not try to make such mixtures yourself. But you may encounter some problems when purchasing ready-made options. White color is the most common among grouts that meet all requirements. Yellow and gray colors are also used, but less often. Clinker bricks were no exception.
Under all conditions, MQ 950 becomes a decorative grout that meets the requirements of experts. This is a certified composition, the main purpose of which remains the treatment of facades covered with artificially quarried stone materials. Reliable operation and a large number of colors are guaranteed.
Reliable operation and a large number of colors are guaranteed.
Solution consumption
Gaps between tiles or decorative bricks are sealed after masonry work is completed.
The aesthetics and reliability of grouting are achieved only in areas constructed in compliance with construction and finishing rules - on even masonry with equal spaces between finishing elements.
In this case, filling the seams is easy and quick. On curved masonry, you will have to arrange jointing or use a combination of different grouting materials.
The final consumption of the grout mixture is influenced by the width and depth of the joint section. The standard version, the width and depth of which is one centimeter, will require six to eight kilograms of mixture to grout a surface of one square.
If the finishing is made of natural brick stone or clinker material, the seam areas are sealed with three kilograms of grout per square surface. It turns out that a standard package weighing twenty-five kilograms will allow you to do work on an area of eight to nine squares.
Requirements for grouting for decorative artificial stone
Not every time, when laying tile and stone compositions, they form gaps that can no longer be used without filling. But usually giving up work is not expected. Before purchasing, you should consider various criteria:
- An interesting visual effect is achieved by the location of the grout above the facing surface;
- Is it worth making sure that the grout and cladding are on the same level?
- How much lower should the material be compared to the cladding? You also need to think about this when you take coarse-grained sandstone;
- Straight, convex or concave – you can choose any of the available shapes for the surface. The texture can be smooth, or imitating various materials, just rough.
An interesting visual effect is achieved by the location of the grout above the facing surface.
The conditions do not affect the requirements for mixtures, they remain the same:
- Grout for artificial stone during operation under different weather conditions must be protected from cracks and crumbling;
- Timely and simple cleaning of the solution from the surface is mandatory;
- The presence of high adhesion;
- Maintaining sufficient mobility. And the curing time should be enough to give the necessary shapes and textures;
- The total quantity should be enough to complete the entire job.
When done correctly, grouting helps emphasize the appearance of the facade and its positive qualities.
Timely and simple cleaning of the solution from the surface is mandatory.
Making at home
How profitable is it to make decorative gypsum tiles yourself and isn’t it easier to buy ready-made material? There are several reasons to start tiling:
- No heavy equipment is required for the production of gypsum tiles; casting molds are made quickly and do not take up much space.
- There is no need to use a vibrating table.
- All components are affordable and the process itself does not take much time.
In addition, the owner himself chooses the format and shade of the elements, creating a unique decor in his own home. What you need to start producing gypsum tiles:
- Matrices;
- Container for solution;
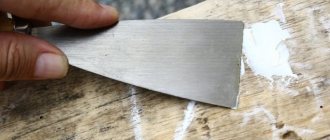
- Putty knife;
- Tassels;
- Raw material;
- Plasticizer in the form of slaked lime or citric acid;
- Coloring pigment;
- Acrylic lacquer;
- Primer.
Important! When choosing gypsum, you should look at the quality. Gypsum or alabaster must be at least grade G10.
You should not buy consumables to spare; it is better to take them with a small margin, so that if the finished product breaks down, you will have something to make additional elements from.
Preparing the molds
Before you start producing gypsum tiles, you need to stock up on molds or matrices. They are sold in special stores, and for home use it is better to take silicone ones. Polyurethane molds are universal matrices into which you can pour not only gypsum, but also concrete, but such forms are much more expensive.
You can make the mold yourself, which will require silicone, a sample mold and formwork. The formwork is made from a strong cardboard base (a juice box will do), then the inside is coated with greasy petroleum jelly or soap solution, a sample of the tile is placed on the bottom (also coated) and silicone is poured. After complete polymerization, remove the mold, rinse and dry.
Another option for making a matrix:
- Cover a piece of chipboard measuring 1*0.5 m with thick cellophane;
- Cut the old rubber conveyor belt into fragments 1 m long and 1.5 cm wide;
- Apply markings on the inside of the sheets in the form of a rectangle of the required dimensions (according to the size of the tile);
- Using self-tapping screws in increments of 5 cm, secure the rubber dividing strips “on edge” inside. The form is ready.
The size and width of the strips are selected individually, depending on the size of the products being manufactured. In essence, the forms are baths with hermetically sealed corners, the dimensions of which are determined by the tile being manufactured. Therefore, making matrices yourself is not particularly difficult.
Preparing the mixture
To make a decorative facing material, a composition is prepared, the recipe for which is as follows:
- 6 parts plaster;
- 1 part slaked lime;
- for 1 part gypsum 0.7 parts clean warm water.
You can immediately add color, but it is also possible to paint elements after the drying process. The proportions of the composition must be observed exactly, and when mixing ingredients, each composition should be thoroughly mixed before adding a new component. Everything needs to be done quickly; you won’t have to stir for a long time, as the mixture dries out quickly. It is better to stir with a construction mixer at low speeds to avoid “beating” the mixture and increasing the hygroscopicity of the finished products.
Important! The consistency of the composition should be similar to liquid sour cream without lumps.
Adding cement during production is a matter of choice. Although making tiles with cement will make the cladding more durable, it also increases the risk of fungus formation. If you still decide to add cement, then take 1 part of it to 5 parts of gypsum.
Pouring and drying
Before you start making gypsum tiles, the mold must be cleaned and lubricated with a grease-containing substance so that the finished tile does not stick. The composition must be poured quickly to the selected tile thickness. Level the mixture with a spatula. The composition is prepared only for 1 time and is consumed quickly.
Important! The dried solution cannot be diluted with water and used again.
Initial drying takes up to 15-20 minutes, while the molds must be on a perfectly flat surface. Full setting occurs within a day; the finished product should be kept in a dry, ventilated area without direct sunlight. It’s easy to take out the finished products - pull the edge of the silicone mold and carefully remove the tile.
Advice! If it turns out that the composition has been shaken vigorously and there are a lot of bubbles in the mixture, the air is expelled using a vibrating table. But you can not use equipment, but carefully move the matrix from side to side, ensuring that the bubbles come out of the thickness to the surface, from where you remove the layer with a spatula.
Final processing of the product
After the gypsum tiles are made with your own hands, they need to be modified. Sand the surface with coarse sandpaper to remove burrs, fingerprints and other imperfections. You can scratch the surface of the tile with a nail or chisel to enhance the resemblance to brick, stone or other imitation.
Composition of stone grout
Work on facades is carried out using any grout with the components described above. If the volume is large, preference is given to dry varieties. Wet ones are also relevant, but during a break their elasticity decreases.
All manufacturers producing grouts guarantee resistance to moisture and negative temperatures. There are pigment additives with different colors and designs. Some mixtures allow you to add colors yourself to get the right shade. Regardless of the type of stone grout used, application is carried out using approximately the same technology.
All manufacturers producing grouts guarantee resistance to moisture and negative temperatures.
Decorative brick. How to fill seams
Brick cannot be made from a “gypsum-cement-sand mixture” because gypsum and cement have different pH and acidity. These are incompatible materials; over time they will destroy each other, like copper and aluminum wires. Most likely the brick is made from a “lime-cement” mixture with sand filler.
Any building materials nowadays come with instructions for use, as well as the corresponding related materials and tools.
Based on the fact that the bricks contain cement, such decorative material can be glued using tile adhesive (best in dry form in bags)
A plastered wall must be primed, especially since the plaster is gypsum and the glue is cement. Let's remember once again about PH - the acidity of materials. There is no need to prime the brick itself; its surface must match the tile adhesive.
At the seams it is difficult for me to make up my mind. Perhaps this decor is not designed to fill “decorative seams”, but only requires masking the real tile seams. In my opinion, complete jointing is a very labor-intensive job that requires special diligence, accuracy and even mental balance)
You will have to do it by hand in the literal sense of the word, since the seams are different and there are no tools to choose. Maybe it would be easier to sand the existing tile joints and carefully paint the decorative ones white with a brush? But I wouldn't do that either. White color tends to turn yellow, darken and quickly lose its freshness and “dazzling attractiveness”. Maybe it's better to leave it as is? Then you will save a lot of time and nerves)
the system chose this answer as the best
add to favorites link thank
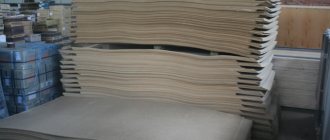
Many manufacturers have been making stone from HCPV for a long time. Gypsum, cement, plasticizers, modifiers))), there is information on the Internet. I haven't glued the brick yet. Each brick is glued separately, this is a photo on the floor. Therefore, all seams are real between tiles. I understand that everything is done manually, but the amount of work is small, only 6 m2. So it doesn't scare me. I read on some forum that the brick is primed, supposedly so that the tile adhesive or grout can be washed off the brick well. Therefore, the question is what to fill these seams with, and what then, after grouting the seams, to treat the entire surface with? - 2 years ago
GCPV is not sand, but gypsum-cement-pozzolanic mixtures. When they are sealed with water, the chemical formula of the gypsum changes and the tension disappears. Moreover, the gypsum used is natural dihydrate (2H2O), and not burnt construction gypsum. But that’s not what we’re talking about) I looked at the pictures now and didn’t notice that anyone was embroidering the bricks, there was a shadow from the seams everywhere. But if you want, you can try. You will probably need to embroider it flush with a rubber spatula so that it smoothly goes around all the irregularities. If you use traditional tile grout (white), then yes, then it is difficult to wash it off the stone. You can try to stick masking tape tightly so as not to get dirty. I don’t see much point in priming, since it is very difficult to remove the grout even from uneven porcelain tiles; primer or varnish will not help. It’s easier with varnish for brick; there are special acrylic varnishes for stone (brick), just try to find a matte one, otherwise the gloss is too unnaturally shiny. - 2 years ago
You can also embroider not with standard grout, but with any white gypsum mixture (or then paint it with white emulsion). The gypsum mixture is much easier to wash off the stone. And after drying, coat the top with acrylic varnish for stone. It’s better to use a sprayer; there are small hand-held electric sprayers. They can be bought in small quantities and inexpensively from China. They are normal, they just don’t like water (paints on water), you need to immediately wash them thoroughly, clean with a solvent and dry quickly and well. - 2 years ago
How to use stone grout correctly
The quality of the result will not be high if you do not prepare grout solutions. The packaging of each product contains instructions from the manufacturers. Separately indicate the order of dilution and the amount of water to add. Then the consumption is guaranteed to be small.
Preparing a wet mixture always requires the following equipment:
- Set of trowels with spatulas;
- Sufficiently deep containers;
- Mixers;
- Drills.
Each method for filling defects has its own disadvantages and advantages. Tiles require certain work options.
The packaging of each product contains instructions from the manufacturers.
Possible options
There are several options for how to do the jointing. The visual effect that the wall will receive depends on the chosen method.
When working on the filling, you need to follow the sequence, starting first with the vertical seams, and then with the horizontal ones.
Special attention is not paid to the thickness of the seams. The indicator can vary from ten to fifteen millimeters for horizontal seams, and from eight to twelve for vertical ones. But most often you can find thin seams, four millimeters thick. This decision was driven by the desire to save on cement mixture. Also, the thickness of the seams depends on the worker’s approach to performing the procedure and climatic influence.
The process of finishing the seams is important regardless of the thickness, because a clear pattern will not only decorate the walls, but also increase the performance characteristics of the building. What methods exist to highlight brick seams?
Flush
This option is the easiest to implement. You can do jointing in this way even without a special tool. Filling mortar that protrudes beyond the brick or gets on it is removed with a trowel. After the main process, the seam is processed using a stiff brush.
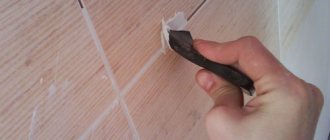
Concave
This method requires a special narrow spatula. This small tool will fill the seams. For ease of working on all lines, the spatula should not be long. The cement mortar is removed from the masonry, as in the previous version, after which they go along the seam with a jointing tool. The grout solution is applied inside in the same way.
Convex
To work on jointing with a convex effect, you need an arched spatula. The tool is applied to the seam with the arc part facing outwards, the resulting space must be filled with mortar. Afterwards, the spatula is moved further to the untreated area and the construction mixture continues to be applied.
Rectangular
This option is more difficult to work with than the previous ones. First, you need to remove five millimeters of cement from the seam, even if it has already dried. After this, the gaps are filled with grout mixture. This design looks interesting, but experts do not recommend using this method for facade decoration due to poor drainage.
Beveled
This method is suitable for buildings that are being built in harsh climates. In this option, the mortar between the seams is not cut straight, but at an angle. The cutting angle should be sharp, 3-5 millimeters.
Technique for filling seams using a syringe gun
The speed of work increases to the maximum, pollution is kept to a minimum. An indispensable method when processing a large volume of areas. The guns are perfectly combined with street work, when processing sandy, porous substrates is expected.
When applying grout to decorative stone joints, the description of the work will be as follows:
- Use a stiff brush to completely clean the seams.
- Increased adhesion to materials after wetting.
- The mixture is prepared, the material is distributed over the base.
- Grouting the seam with your own hands. It goes from bottom to top, from left to right.
After finishing filling the surfaces, the stone is immediately removed from excess traces. If guns are not available, use disposable tubes that have tips.
An indispensable method when processing a large volume of areas.
Briefly about the main thing
Before rubbing the seams on the decorative brick, select a mixture. When selecting it, the composition of the solution and the location of the work are taken into account. The grouting process is carried out using gypsum, silicone, cement, latex, rubber and polyurethane compounds.
I also choose the grouting technology. After all, driving seams can be done using the slurry method, using a syringe gun or spatula. In addition, the method of forming the weld surface is determined. It can have a convex, concave, beveled, triangular shape. It is also made flush with the brick surface.
Ratings 0
Technique for filling joints using the slurry method
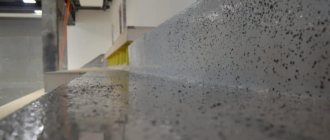
With a smooth surface of the facings. Suitable types of stone grout for exterior use are applied evenly to the surface. Among the disadvantages, increased consumption comes first. But there were some positive aspects:
- Increasing the speed of decoration due to the absence of the need to embroider joints and level the surface;
- Homogeneous structure, reducing the risk of cracks;
- Evenness, density and smooth structure of seams;
- High level of adhesion to the side walls. Maximum filling of joints.
The work is carried out at least with a stiff brush and a rubber spatula. If possible, use a trowel or grater with a plastic sole. Excess material is removed with a sponge.
The sequence of work is described as follows:
- The joints are cleaned before filling.
- Adhesion improves when the joints are wetted with water.
- Distributing the solution with a brush, onto which the solution was applied in a small amount. It is necessary to ensure that all the recesses are filled.
- If there is not enough material, re-application is carried out. The joints are carefully smoothed with a float. White plaster is no exception.
A wet sponge helps get rid of excess when the job is finished. Finally, wipe the walls with a dry cloth.
Suitable types of stone grout for exterior use are applied evenly to the surface.
Independent work
If you want to carry out the work of filling the seams yourself, it is recommended to study the entire work process in advance and prepare a list of necessary materials. The process is described in detail below.
Tools and materials
The list of materials depends on the method by which the work will be carried out. But basically you will need to use:
- container for solution;
- trowel;
- mixer;
- Additionally, you can purchase the most convenient spatulas or graters for applying the composition.
Preparing mortar for grouting decorative bricks
To properly prepare the solution, you need to carefully read the instructions and the proportions of dry mixture and water indicated therein. The process of diluting brick grout is not difficult to cope with - the main thing is to strictly follow the specified amounts of substances. Prepare the solution according to the following scheme:
- prepare a suitable container and the required amount of water;
- gradually begin to pour in the dry composition of the grout for artificial bricks, mixing everything thoroughly;
- then leave the solution for 5-7 minutes and mix again;
- A construction mixer will help simplify the procedure for preparing the solution. If you use a construction mixer, you need to stir the solution for at least 3-4 minutes. If the procedure is carried out manually, then at least 10-12 minutes.
The water for preparing the solution must be at least room temperature.
Seam rubbing technique
The algorithm for performing grouting work is as follows:
- Initially, the joint space is cleaned, removing adhesive, dirt and dust. This needs to be done as carefully as possible;
- Using the most suitable and favorite tool for the job, take a small amount of mortar and fill the seams;
- lay the material as tightly as possible;
- after the entire surface lined with decorative bricks is filled with grout, wait 15-20 minutes and remove excess composition with a damp cloth or sponge.
Before starting work, it is worth calculating your strength and preparing the amount of solution that will be used at one time. Many grouting compounds lose their properties after 2 hours.
Technology for filling seams using a spatula
One of the effects of grouting is strengthening surfaces. The solution is applied to the place where the joint has formed with a rubber spatula. The procedure does not require practical experience or serious skills.
These are the stages of work:
- Preparation of the solution. Stir everything with a construction mixer after adding water.
- Clean the joints.
- The seams are moistened and filled.
- The second layer follows the first, but after rubbing in and completely drying. Next comes the jointing. Only in this case is it possible to comply with the GESN.
The procedure does not require practical experience or serious skills.
Saving Tips
Treating a seam with grout is not always cost-effective, since some compounds are expensive. However, you can save money. To do this you need:
- Calculate exactly how much material is needed.
- If the joints are wide, it is better to use a rubber spatula. With its help, excess mortar can be collected and compacted into the seam.
- It is not always worth buying colored compounds. It’s cheaper to buy a white solution and a color for it
Joints must be filled carefully, so adherence to technology is mandatory.
What do you need to know?
When choosing a material for sealing joints, take into account the color shades of decorative elements, the space between them, the thickness of the brick stone, etc.
To fill the gap areas created during laying of building material, different compositions are used.
The grouting of decorative bricks can vary in shades, taking into account the color of the main facing material. In addition, it is allowed to combine mortar mixtures of different shades to obtain the desired color.
When preparing the grouting composition yourself, take into account the specifics of the masonry and the location of the walls. If the room is expected to have high humidity levels, it is recommended to use jointing compounds that can prevent the negative effects of water associated with its penetration between the stones. This is achieved by using a variety of components added to the mortar mixture.
The advantage of gypsum grout for decorative brick is that the mixture quickly hardens. True, all work should be done carefully so as not to stain the front surface of the masonry with the mortar mass. It will be quite difficult to wash it off later.
Sometimes grouting of seam areas is done with a colorless silicone-based sealant. It is allowed to add coloring pigments to it. With such grouting you will emphasize the natural color shade of the base material and smooth out uneven places in the seam areas, if any.
Care
Proper treatment of the seam with grout is already half the guarantee of its long service and attractive appearance of the facade made of decorative stone.
Many of the grouts are stain resistant and stain resistant. Further care is carried out in conjunction with the care of the decorative stone itself and involves periodic cleaning of the surface.
First of all, it is necessary to provide a roof structure and a sloped blind area to prevent stagnation and water from getting onto the decorative stone and sealed seams. Washing out of the mixture when using water is unlikely if the application technology has been followed. But in any case, cleaning the surface from contaminants must be carried out carefully so as not to wash out the solution.
What can you make it from with your own hands?
Budget-friendly, but no less high-quality - making a grout (grout mixture) yourself. Initially, you need to know the main types of grouting components:
- Cement mixtures are simple, easy to prepare, cheap, but high-quality material. To make a fugue, you will need to mix cement mixture (you can use white cement), sand and water in equal proportions. Sand is selected to the smallest fraction. A dye or color of the desired decor color is added to the mixture.
- Gypsum fugue - this composition requires skill, as the gypsum sets quickly. The mixture is made in small portions, which do not have time to harden during work. Gypsum is diluted to a semi-liquid state; slaked lime or 2% of any glue of animal origin is added for strength. Such substances will replace the plasticizer, make the fugu less fragile, and increase the hardening time.
- Alabaster mixture is a type of gypsum, only after additional heat treatment. Alabaster powder is diluted with water to a semi-liquid, thick state, you can add dye. In use it is similar to gypsum composition.
- Clay grout - a grout of this material is made from a clay mass with the addition of a small amount of slaked lime and cement. When hardened, the mixture will be very strong.
Advice
You can buy a ready-made grout mixture and modify it, for example, add the desired color and even glitter. If the design requires a transparent seam made of liquid glass or epoxy, then adding shiny elements will make it more impressive.
A fugue made independently is inferior to industrial compositions, but the quality can be similar. Before mashing, you should make sure that the self-made fugue has the necessary qualities or is close to these parameters:
- elastic, easy to fit at seams;
- after drying, it does not crack, does not crumble, and does not fall apart when cared for;
- the setting time of the composition should be equal to the treatment of one square meter of cladding surface;
- for wet rooms, the composition of the fugue must be moisture resistant;
- the grout mixture must withstand washing with household chemicals;
- aesthetics of the composition: the grout must correspond to the idea and overall design of the facing surface.