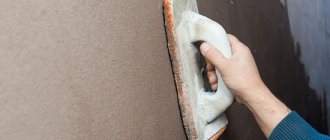
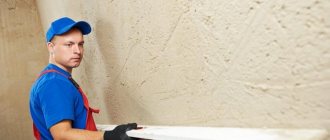
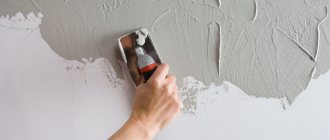
What is plaster grouting?
The final stage of plastering the base involves eliminating problem areas and leveling the surface. This is done by grinding the set solution. When using decorative plaster composition, it is important to create the desired relief.
Before grouting the walls after plastering, a “covering” is thrown over them. This is the last layer, the purpose of which is to obtain smooth surfaces without puttying. The base base (“soil”) is highly durable and difficult to rub down. At the same time, the covering easily fills the resulting unevenness; subsequently, rubbing, a maximally smooth surface is formed.
Important!
The plaster is rubbed down after it has set. In this case, the surface to be treated should not be too hard.
Grouting the walls will help you get a perfectly smooth surface.
Basic methods
Surface treatment is performed in several ways. The master chooses the one that is most correct for him. Next we will tell you how to grout plaster.
Using the dry method
Important! You need to put a lamp with strong light so that the irregularities are clearly visible.
To complete the work, do the following:
- When performing processing, you need to go through the entire wall from top to bottom. To improve quality, it is recommended to divide the wall into sections and process them one by one.
- Leveling is done using circular movements. At the same time, do not press too hard so that the grout layer is not completely erased. When processing joints, the float is held parallel to the corners. In these places, movements are made in the vertical direction. The use of circular movements will be difficult to justify.
- You can check the smoothness by running your hand over the surface. Sandpaper is used to process hard-to-reach places.
When preparing for wallpaper, minor scratches are allowed. If painting is intended, the surface must be perfectly flat.
“Catch-up” method
This method of work is used while the wall is still wet. It is usually used after round-the-clock processing. Leveling is done with uniform up and down movements. It is not recommended to change the pressure force.
Important! During the work process, additional moistening of the surface is required. For work use a clean tool. It should have rounded edges so that they do not leave marks.
Wet grout
In this case, the wall is first wiped with a dampened sponge. The wet surface must be rubbed using a spatula. During work, some of the water will flow down, forming puddles. What the surface turned out to be can be assessed after complete drying.
Tools for work
To rub the plaster layer, first of all you will need a grater - a cloth (usually in the form of a rectangle) with a comfortable handle. However, manual work is not necessary at all. In order to mechanize and significantly facilitate work, you can purchase special devices.
Grinding graters
The main tool for grouting is made from different materials and in all sizes. It all depends on its intended purpose.
Types of graters:
- Wooden. Used for gypsum, cement plaster, it is easy to make yourself. The wooden product perfectly smoothes the base and quickly removes unevenness. Cons: absorbs moisture, the lower part of the instrument wears out and becomes deformed after a while.
- Polyurethane. Comfortable, strong, not subject to heavy wear, well suited for most plaster compositions.
- Plastic. It is used to distribute the solution over a small area, forming a relief, smooth texture. The main disadvantage: not suitable for beginners, as it requires work skills.
- Spongy. Made from different sponges and rubber. Using it, you can easily create decorative textures and perform final smoothing.
- Metal. Perfectly compacts the plaster layer, creates a smooth (without defects) base for further painting. Such a tool must be new or thoroughly cleaned of previous contamination.
- Foam. Cheap, lightweight, and has a minimal service life. A similar tool is used to smooth out solutions with a fine fraction.
Attention!
Together with graters, a spray bottle with ordinary water is often used. If, when grouting, you periodically spray the base of the tool, as well as the working surface, the plaster will then dry faster.
Wooden
Polyurethane
Plastic
Spongy
Metal
Foam
Sander
To make work easier on large areas, it is recommended to use powerful power tools - grinders. They significantly increase work productivity. Manufacturers offer similar devices of the following types:
- Tape. They are used to process a thick layer of plaster; with their help it is impossible to perfectly level the surface.
- Orbital eccentric. In such devices, the disk rotates at enormous speed, which can be adjusted. Finish grinding is performed at minimum speed.
- Flat vibrating. The surface resembles a soleplate to which abrasives are attached. In hard-to-reach places, use a tool with a triangular base.
Most grinding devices do not allow you to process corners, so you have to grind them manually. If the tool is equipped with a retractable sole, it can be used even for inaccessible areas. For processing walls with multiple bends, it is recommended to choose a reliable eccentric unit. Some of its models contain a dust collector. Most modern tools are quite compact and easy to use.
Tape
Orbital eccentric
Flat vibrating
Sanding block
If the surface to be treated is small, it is permissible to use an ordinary wooden block. It should have convenient clips for attaching sandpaper and sanding mesh. The latter is considered more effective: it lasts longer and does not clog. The mesh is cut depending on the dimensions of the bar, so before purchasing the material it must be measured.
The block can also be made of plastic. At the same time, it will be perfect for sanding corners and niches. Procedure: you need to cut a suitable piece from the profile, then glue the paper onto double-sided tape and cut off the corners.
A sanding block is most often used for sanding.
What type of sandpaper is needed for grouting?
To save money, paper material is often used instead of a more durable mesh. Then it has to be changed frequently, resulting in considerable consumption.
When choosing sandpaper, it is recommended to listen to the following tips:
- Base material. The fabric base is stronger (compared to paper) and more resistant to moisture. Sandpaper on fabric is more expensive and lasts longer.
- Size. It is selected depending on the dimensions of the bar or grater. It is advisable to purchase rolled material or in the form of sheets, so that you can then cut out the required pieces yourself. For rectangular tools, sandpaper is sold ready-made (cut). When purchasing it, you need to add 0.5 cm to the dimensions of the bar on four sides (for fastening).
- Grain. In order to rub down the plaster layer for further painting, you should buy sandpaper number 180, for wallpaper - 80 -100. In imported products, as the number increases, the sandpaper grain decreases. Domestic manufacturers produce material numbered from 0 (the smallest) to 80.
Helpful information!
Spotlights are useful for illuminating the work surface. They will provide high-quality lighting, which will not allow even minor defects to be missed.
When sanding by hand, you can use sandpaper or a special abrasive mesh.
Tools
To rub down the walls manually we will need:
- a sanding block with replaceable mesh or sandpaper;
- sponge for wetting walls;
- wide spatula (for wet grouting);
- portable lamp;
- dust protection;
- ladder.
What type of sandpaper is needed?
For dry sanding, you will need a grater or block to which sandpaper is attached.
- For rectangular bars with clamps, sanding sheets are sold already cut to size.
- For long polyurethane floats, it is convenient to use paper-based sandpaper in rolls of 5 or 50 meters, with a standard width of 115 mm. The tape is cut to the size of the grater and attached to pushpins or small screws.
Grain. The sandpaper has a number indicating the degree of grit. For grouting putty under wallpaper, a grain size of 80-100 is suitable. For putty for painting - 180. These designations are for an abrasive from an imported manufacturer. The higher the number, the finer the grain.
Domestic skins are designated by numbers from 4 to 80 with the letter N. And here, coarse-grained materials, on the contrary, are marked by higher numbers. The finest sandpaper is “zero”.
Expert opinion
Sergei Shablovsky
Plasterer
The base material may vary. Fabric-based sandpaper is stronger than paper sandpaper, and is also more moisture-resistant and wear-resistant. If there is the right size, then I choose the fabric base.
In construction stores, of course, imports predominate. There are many manufacturers of sandpaper and a wide choice.
Grater nets
Grinding mesh
Grinding meshes are a perforated fabric. It is more expensive, but it does not become clogged with grinding dust during operation. This happens due to the fact that the excess putty is cut off by the sharp edges of the cells, after which it falls through them without clogging the working part itself.
The meshes are also divided by numbers, just like the skin.
The block to which the mesh is attached must be smaller in size. The curved edges are inserted into the clamps of the bar. Replace the meshes as they wear out.
Important! Since sanding can be a very dusty job, we recommend using simple protective equipment: goggles and a respirator. Cover your head with a cap or scarf.
Before starting work, you need to protect adjacent rooms from dust by covering the doorways with a wet cloth or plastic film.
Preparation of solution for work
The finished covering contains fine sand. This is the only difference between it and the soil; the other components are the same. In addition, this mixture is less viscous. To make it correctly, it is important to maintain the ratio of ingredients.
Sequencing:
- Pour water into a suitable container.
- Pour in the dry composition (purchase in advance from the store).
- Mix thoroughly (until a homogeneous mass is obtained).
- Leave for 15 minutes, then stir again.
If there is no ready-made plaster composition, you can make it yourself: you will need cement and sand (proportion 1:3). To obtain a cement-lime mortar, it is necessary to add another part of slaked lime.
The composition of the covering is selected the same as in previous work
Covering
The covering is the top layer of plaster, which will subsequently be rubbed down to create a flat and smooth surface. To create it, a liquid solution with a creamy consistency is used. The layer thickness should not exceed 2 mm.
Before preparing the solution, sift the components of the mixture through a sieve with cells no larger than 1.5 mm.
Wet the primer with water using a paint brush. Apply the solution with a trowel, and then smooth the surface with a trowel, making circular or wave-like movements.
How to grout plaster - 5 steps
The procedure is performed in this order:
- The covering is applied.
- Grouting is done either dry or using a solution.
- Mashing in a circular or accelerating manner.
It is possible to grout plaster using different methods. Each of them has its advantages. You should choose the most optimal method in terms of quality, cost, and deadlines.
Step 1: Apply Covering
Additional plastering is performed as a result of applying a coating layer. It is laid on a moistened surface. It is easy to wet it if you use paint brushes. 25 minutes after wetting, the mixture can be used. The prepared composition is applied to the wall with a spatula: movements should be straight, arcing. It is recommended to level the mass with a wider tool.
Advice!
The thickness of the laid layer should be less than 3 mm. Then the coating will dry within a minimum period of time.
The purpose of applying the coating is to create another almost even layer
Step 2. Dry grout
Apply only after the covering has hardened a little. The surface is slightly moistened, then treated with a grater. To do this, sliding movements are made along the entire wall, with moderate pressure on convex areas. When grouting depressions, the pressure on the tool must be reduced. During dry grouting, a small amount of the mixture usually accumulates on the grater. It is periodically removed with a brush.
Grinding of the plaster should be done carefully, and the pressure should be controlled to avoid accidental damage to the base.
Dry grout is used in a situation where the layer has already hardened a little
Step 3. Grout with mortar
It is used when there are numerous cracks: in this case, additional material is required. The mixture is applied in small quantities to the work surface (pre-moistened), using very little of it. Compared to simple grouting, this process requires much more time.
When rubbing walls with mortar, it is important to follow this rule: nearby areas should be treated with a minimum time interval. Moreover, it is advisable not to interrupt even for a short rest. When moistening a new place, it is recommended to wet the finished section of the wall. Then the grip will be much stronger.
Grout with mortar is used if there are many gaps on the surface
Step 4. Grouting “round” and “running”
All movements during mashing must be performed according to a certain pattern. Moving in a circle allows you to remove even barely noticeable gaps.
When grouting with acceleration, the tool moves cyclically and rectilinearly. It is often used immediately after circular movements. As a result, traces of defects are completely eliminated. To get a good result, apply moderate pressure on the tool.
On a note!
Thanks to the types of grout described, it is possible to achieve invisible transitions between adjacent sections of the wall.
High results can be achieved if movements are performed according to a certain algorithm
Step 5. Smoothing the surface
It is not considered a mandatory step in surface finishing; it is sometimes used instead of rubbing. The smoothing procedure is carried out using smoothing irons. Often the surface of the latter is metal, occasionally rubber. Tools can be convex (used for corners) or smooth. The quality of work is additionally affected by the content of the solution.
When smoothing, the movements are performed in the same direction, then it changes. Typically, the mixture is applied and leveled at the same time. This allows you to significantly save work time.
How to trowel gypsum plaster: smooth with a metal trowel from top to bottom and horizontally (in order). Moreover, the surface must be damp.
Smoothing is not a mandatory action
What is grout?
We applied the main layer of mantle (primer) and leveled it with a wide spatula or rule. But the surface, even in the ideal case of execution, remains rough, gaping with pores of different sizes and protruding large grains of sand.
Usually, perfect leveling is not possible, and therefore, when lit from the side, tool marks, stuck lumps of plaster mixture, waves of bumps and depressions are visible on the plane. If you leave the finish in this form, a lot of dust will collect on the wall, unpainted pores will help absorb odors, lumps will stick out the wallpaper paper or scratch the skin when you run your hand along the wall.
To bring the surface to perfection after the soil begins to set and stops staining your fingers, the surface is rubbed down. This is done simultaneously with applying a dry covering or with a small amount of additional solution, either with your own hands or with the help of a mechanical assistant, in a circular or sweeping manner.
The result is an almost smooth surface that can be painted without additional putty. Smoothing is slightly different from grouting in terms of results. The main difference is in the method of execution.
Grouting may not be necessary if the work was done in a utility room, where it is enough to scrape off the dried pellets with a wide spatula (for example, when plastering a basement). It is also not needed when finishing with ceramic tiles or other applied sheet materials.
Options for grouting decorative plaster
Rubbing is also used for decorative plastering. However, this happens in a completely different way. To obtain a soft relief, smooth graters are used. Various textured tools will help make the drawing more expressive.
Option 1
A ready-made solution of decorative plaster is applied to the base. Moreover, the mixture is not smoothed out, only rubbed evenly. After a while, when the plaster layer has set, the spatula will not stick to it, it is allowed to begin rubbing. The grater is first moistened, then, pressing lightly, moved in the same direction, protruding places are removed. The result is the desired relief.
Option 2
The plaster mixture is applied in a layer (no more than 3 mm), then leveled with a spatula so that the surface becomes as smooth as possible. Immediately after the composition has dried, you can rub it with multidirectional movements. The grater used is periodically moistened and excess solution is removed.
Advice!
The use of a textured tool allows you to obtain a more pronounced pattern.
The process of grouting decorative plaster differs from the standard one
Splash
This layer of plaster ensures adhesion of the coating to the wall. To create it, a solution that is not too thick is used, with a consistency similar to sour cream. The thickness of the layer is about 0.5 cm.
Scoop out the solution and place it on the center of the falcon. Do not take too much material so that it does not fall off the surface of the tool. Bring the falcon to the base, tilting it slightly towards the wall. Take a small amount of mortar with a trowel and throw it onto the surface, making a sharp movement away from you.
Cover the base with the solution gradually, in strips, moving from bottom to top. Try to throw the material from the same distance all the time. When finished, remove protruding areas if necessary. There is no need to level the coating.
Wait until the plaster layer hardens. After making sure that the material does not crumble or press through when pressed, proceed to the next step.
Mechanical grouting
To process a huge plastered area and reduce work time, a trowel is used. This is an electric tool that works using special disks.
Sequence of actions when grouting cement plaster:
- Connect the device to the power supply.
- Wait until the disks reach the required speed.
- Gently press it against the wall and gradually move it in a circular motion.
- Periodically spray the wall with water.
The mechanized method greatly simplifies the work process, but using the machine requires experience.
The mechanized grouting method greatly simplifies the work process.
Grouting methods
Experienced craftsmen apply the mortar mixture and grout it at the same time. There are no fundamental differences, the result remains the same. The main requirement is to thoroughly rub the solution over the entire surface in order to hide uneven areas.
Dry
Let's say you decide to wait for the plaster to set. How then to rub the plaster after it dries? We proceed as follows.
We take a grater made of metal or polyurethane material, moisten it, press it to the plastered surface, smooth it, performing circular movements.
It is not recommended to press hard on the tool - the solution is quite fresh, and after scraping it off, you will have to repair the damaged areas. However, you should not rub too lightly.
The movements should have the same effort; move slowly along the entire plane from the top to the bottom, or work horizontally. At the connecting sections of the walls, apply the float parallel to the corner and perform vertical movements.
In noticeably elevated places, we press harder on the tool, working along the recesses, and remove the force. During operation, a solution accumulates on the side of the grater, which is periodically cleaned off.
On a large surface, the covering has time to dry out in some places, making it more difficult to wipe down. It is recommended to moisten such areas from time to time.
With application of solution
Let's look at how else you can grout cement plaster. We act in this sequence.
The mortar mixture is prepared a little thinner than for plastering; a small amount of it is scooped onto a grater, the tool is pressed at an angle to the surface of the wall, and the mixture is rubbed under pressure over the entire surface.
Having distributed the mortar mass, press the trowel cloth against the wall and rub it thoroughly, performing round or arc-shaped actions.
You should not press intensely, the efforts should be uniform, this is the only way to achieve high-quality smoothing.
This method of solution requires little, but the process is quite long, so the material is mixed in small portions so that it does not have time to harden.
When working on one surface, keep the gaps between finishing adjacent areas to a minimum, being distracted solely by preparing the next batch. When moving to a new area, lightly dampen the edges of the already treated area to increase the adhesion of the mortar mixture and hide the edges of adjacent areas.
Round and round
Smoothing with movements resembling a circle is called “circular” rubbing. This method perfectly compacts the applied mortar mass, eliminating bumps and other irregularities. Unfortunately, it does not provide the necessary evenness, since after a grater moving in circles, marks remain that resemble arcs. If the wall is to be tiled with tile material or painted with a textured composition, then you can work on such a base, but a regular painting composition will not hide the marks left by the grouting tool.
Maximum smoothness is achieved by the second method - “running”. After what time can the plaster be rubbed down in this case? The surface of the applied layer retains moisture; work begins after completion of the “round” grouting. When such conditions are met, quality is guaranteed. In this case, there is no need to prepare the solution; the wall is moistened as needed.
Another important point is the maximum cleanliness of the troweling tool, the evenness of its sole, and the roundness of the edges. Mortar crumbs remaining on the sole scratch the plaster layer.
It is more convenient to process small sections of the wall in this way - up to one square meter. The grater is pressed to the surface and rubbed up and down.
Try to maintain the same pressure force, do not separate the tool from the wall, work only with vertical movements.
How to protect your apartment from dust
Before you begin finishing the surface, it is important to take effective measures to ensure that the resulting fine dust does not penetrate into other rooms.
Procedure:
- Carefully wrap all furniture and other items in the room with protective polyethylene. For reliable fastening, it is recommended to use construction tape.
- Cover window openings in a similar way.
- Hang a damp towel on the front door, and place another one under the threshold. In addition, it is worth closing the door gap.
Attention!
Work on walls must be carried out wearing a mask and special glasses.
Construction dust is always harmful to health
If you have no experience, grouting plaster may seem like a complicated process. But if you wish, you can do it yourself. To do this, you first need to decide what to grout the plaster layer with and purchase the necessary tools and materials. In addition, it is extremely important to choose the appropriate option for such a procedure and follow the technology.
Did you learn something new? Share in the comments!
General rules for applying plaster
In order to obtain a durable and high-quality coating, it is necessary to follow the following rules:
- It is necessary to carry out work only when the base temperature is between +5 and +30 degrees, and the humidity level does not exceed 60%, but sometimes conditions may vary;
- it is necessary to strictly follow the instructions for preparing the solution recommended by the manufacturer;
- tools that are used during the application of plaster must be thoroughly cleaned and rinsed after each stage;
- In order to be able to apply the next layer, you must wait until the previous one has completely dried. The degree of readiness is determined quite simply: you need to press on the plastered surface with your finger and, if the surface does not crumble and does not sag under pressure, then you should begin applying the next layer.
Preparation of mortar for covering and prices for various types of cement
The process of making a coating solution is simple. But when breeding it, you should remember some of the features of this material. The finished coating is very similar to the primer, but unlike the latter, it contains very fine sand. This choice is justified, because small particles of sand fit better into a denser layer.
As for the remaining components, they are completely similar to those contained in the composition. Upon completion of the work, you should end up with a mixture that is less viscous than the soil. To make a high-quality covering, it is necessary to strictly observe the proportions of the components.
The procedure for preparing the mixture for this type of work is as follows:
- The required volume of water is poured into the prepared container.
- A dry mixture is poured into it, which can be easily found in any hardware store.
- All components are thoroughly mixed. The resulting mass should be homogeneous.
- Before starting work, it should stand for about 15 minutes, and then be well mixed again.
If there is no ready-made mixture, make it yourself, carefully measuring the required volumes. In this case, the order of preparing the covering is preserved. The cost of covering is primarily influenced by the price of concrete. M500 cement is mainly used to make the mixture. Before mixing, it is advisable to pass the cement composition through a sieve. The cost of this component can reach up to 300 rubles. Experts do not recommend using gypsum when making covers, because... the quality of such a layer will be low.
Tools for work and prices for various types of plaster floats
It is worth finding out about grinding plaster, what type of work it is and what its purpose is, how to grind plaster correctly. All these questions are of interest to beginners who are doing home decoration for the first time on their own. When performing this type of work, a coating is used - a material similar in composition to putties. Therefore, to work with it you need to use the same tools as when putting putty.
This list can include:
- spatulas;
- rule;
- grater;
- trowel;
- a brush that is comfortable enough to easily remove the solution from the grater;
- ironing board;
- mixer.
When to use mechanized grouting
The mechanized method is used 2-5 hours after applying the solution. The wall is moistened with water and processed using a trowel. Make several passes. If there are any irregularities, they are filled with a covering and processing continues.
Methods for sanding walls after puttying for finishing
Types of decorative plasters - what are they?
How to make a roller for decorative plaster with your own hands
Features of choosing a hopper bucket for plastering
Source
Types of graters
Any type of this tool, in principle, has the same shape and always a handle. However, this device for grouting the plaster mixture can be made of different materials and have different sizes:
- A wooden grater is the first tool that has been used for many hundreds of years. It consists of a bar on which a handle is attached. The wooden device today is not as popular as in past years. The fact is that during operation, the grater quickly gains moisture and it becomes more difficult to work with it. Also, it has the ability to quickly wear out, and if it constantly dries out after plastering procedures, it can change shape and become unusable;
- The foam float for grouting attracts with its affordable price. In addition, it is lightweight and very convenient to use. The downside of this tool is that it does not last long. A grater made of this fragile material often breaks during grouting of walls; the handle is especially vulnerable. This is the kind of instrument that you need to be able to get along with. Despite its low price, it is better for beginners not to work with it;
- A polyurethane grater is the most popular tool today. Its advantage is that it has excellent strength, almost does not wear out, and is easy to work with;
- A plastic trowel is mainly used in small areas to distribute the mixture on the surface. This device requires some skills, so it is usually used by specialists. It is worth noting that this tool is sometimes equipped with a special telescopic handle;
- A sponge trowel for plaster, as well as a rubber or latex trowel, is used for finishing decorative finishing. With its help, using a special technology, a certain pattern is applied to the surface of the wall;
- A metal float is good for compacting the final layer of plaster. The result is a perfectly flat surface that is ready for further decorative coating.
Grouting after plastering
Grouting can be done manually if the finishing area allows it. You can manually smooth rough plaster, or you can apply and grout decorative mixtures, and grouting is done in completely different ways.
Mechanical equipment with rotating disks saves time, and the quality is much better compared to manual work - the difference is especially noticeable on large areas of the walls. But with mechanical grouting with an abrasive wheel, it is impossible to apply patterns other than circular ones. When manually grouting, there are too many decorative effects to list.
It is especially important for high-quality grouting and artistic decor - if it is provided - to have good hand tools, and it is extremely unprofitable to skimp on their quality. Classic hand grouting tools:
- Wooden graters. Inexpensive, durable - the canvas wears out for many years. The downside is that they are quite heavy, and even an experienced master’s hand gets tired quickly.
- Foam graters are modern modifications of ancient wooden analogues, the configuration and methods of operation are the same, but their low weight gives the advantage of ease of work. But in terms of service life, polystyrene foam is incomparable with wood; the grater wears out very quickly. But since prices are low, replacement is not a problem. The standard size of foam floats is 12*24 cm, convenient to work with.
- Sponge trowels are universal - with this tool you can not only wash (the correct definition of the operation is wet leveling) the plastered surface, but also tile joints at the final stage of cladding.
- Metal smoothers. Same as graters, but made of stainless steel and polished. The sole is smooth, and the specifics are different than when working with the graters described above. The metal does not rub over the plaster layer, contrary to the name, but smoothes it out. The best way - and, as a rule, is most often used - is to use a metal float to smooth over semi-liquid putties or covering mixtures.
- Putty spatulas - wide spatulas from 400 mm are used for smoothing gypsum plasters.
Why is grout needed?
| Illustrations | Reasons for grouting concrete walls and floors |
| Leveling the plastered surface . Tightening the rough plaster with a rule does not ensure optimal quality for the subsequent application of putty. By rubbing, you will level the surface, reduce the consumption of putty and simplify the work associated with its application. | |
| Grouting putty (grinding). After the last finishing layer is applied to the wall to be finished, you need to wait for the putty to dry, and then remove all the unevenness. For grinding, use a grater with sandpaper or a diamond mesh. | |
| Application of decorative plaster . There are decorative methods in which the required texture of the applied mixture is imparted with a special grater. By working with a grater, you can apply horizontal, vertical and even circular patterns. A typical example is bark beetle plaster. |
Grouting technology
| Illustrations | Technological methods for performing grouting |
| Manual method . Manual processing of plaster is used on surfaces with a small area. The manual method is suitable both for smoothing rough plaster and for applying mixtures with a decorative effect. | |
Mechanized method. This method involves the use of mechanical equipment with a rotating disk. The advantage of the mechanical method, compared to the manual method, is higher productivity and better surface quality.
|
Grouting tool
| Illustrations | Hand tools and their description |
| Wooden grater . This is a classic solution that has long been used in plastering work. The advantage of the tool is its durability, since the grater blade does not wear out for many years. The disadvantage of the tool is its heavy weight, which makes your hands tired after prolonged use. | |
| Foam grater. This is a modern version of the wooden instrument with the same configuration but lighter weight. The disadvantage of the tool is its small resource, since the foam sole wears out quickly. However, the low price of the tool allows you to replace it as needed. The most common and easy-to-use grater size is 120×240 mm. | |
| Sponge grater. This is a universal tool that is used for wet leveling (washing) plastered surfaces and tile joints. | |
| Metal smoother . Essentially, this is the same grater, but made of polished stainless steel. Due to the smooth sole, such a tool does not rub the plaster, but smoothes it out. Therefore, it is preferable to apply a semi-liquid putty or covering mixture using a trowel. | |
| Putty spatula . A wide spatula (from 40 cm) is used for smoothing gypsum plaster. | |
| Water sprayer . During leveling, the plaster layer gradually dries out, and therefore the sole of the trowel and the surface to be treated are regularly moistened with water. | |
| Lighting . To achieve acceptable quality of plaster you need good lighting. To do this, a spotlight is installed on the side of the surface to be leveled. With the correct direction of light, all missed irregularities will be visible. |
| Illustrations | Tools for mechanized grouting |
| For vertical surfaces . Such plastering and troweling machines are used for finishing walls. The device is lightweight, since the machine has to be held in hands during the entire working time. Devices of this type use an electric motor with a low vibration level, which greatly simplifies the leveling of plastered surfaces. | |
| For horizontal surfaces (floor screeds) . These machines are characterized by increased dimensions and weight, and are used for smoothing floor screed in large rooms. The use of such units is advisable on almost dry substrates. |
Methods for manual grouting of cement-sand plaster
The direction of the trowel depending on the chosen grouting method
For manual plastering work, two methods of surface treatment are used - circular grouting and spreading. The difference between the two methods is the direction in which the grater is pulled.
With the circular method, the tool is guided in a circular motion with slight pressure. When processing a surface during acceleration, the tool moves up and down.
Practice shows that it is more difficult to grind in a straight line than in a circle, but the result of the work done will be more accurate. If you need a perfectly flat surface, both methods are combined - first the grouting is done in a circular manner, and then the smallest irregularities are removed by smoothing.
Mechanized grouting
When wetting the surface, try to ensure that the water does not flow in a stream, but splashes in small drops
The work is performed on a dried cement surface, on average 2-5 hours after applying the solution. The surface is wetted with water, and then we pass over the wet cement screed with a trowel.
An example of leveling a concrete screed with a felt circle
Smoothing the screed is performed in several passes. The number of passes is determined by the evenness of the base. In case of significant unevenness, we put a covering in the holes - a cement-sand mixture, diluted to a creamy consistency.
Leveling vertical surfaces is carried out using a drier solution than when leveling screeds
Smoothing out irregularities on vertical walls is carried out according to the same principle as working on a screed. Large irregularities are filled with a mixture made thicker than the covering solution. During smoothing, we periodically moisten the cement surface using a spray bottle. As the disk, covered with felt or felt, fills, we clean off the sludge - the adhering mixture.
Smoothing gypsum plaster
Angle between the plastered surface and the trowel
Gypsum plaster, unlike cement plaster, is not rubbed off, but smoothed over. This can be done with a metal trowel or a wide spatula.
Horizontal smoothing alternates with smoothing from top to bottom
The tool is applied to the plastered surface at an angle of 20-30 degrees and pulled in the direction from bottom to top. Next, the tool is moved horizontally from right to left, and then from left to right.
The work is carried out on a still damp surface, so sludge will accumulate along the edge of the trowel - do not shake it off, as it will fill small depressions.
Grouting decorative plaster
A vertical “bark beetle” is obtained by moving up and down
The “bark beetle” is rubbed down - a decorative mixture that includes stone backfill (granite chips with a small fraction). During grouting, the crumbs are moved with a float through the thickness of the plaster, as a result of which straight or curved patterns appear on the surface.
A circular “bark beetle” is obtained by radial movement of the grater
By giving one direction or another to the grater, you can give the necessary direction to the crumbs and, as a result, form a pattern. By moving the grater vertically, you will get a vertical, straight “bark beetle”. By moving the grater in a circle, you will get a circular “bark beetle”. The direction of the pattern in the circular “bark beetle” will depend on which direction the movements are directed - from left to right or from right to left.
