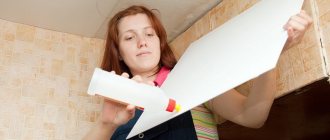
Every family has undergone a test of strength through renovation at least once. The fact is that this is not only a rather lengthy and labor-intensive process.
Expert opinion
Irina Kovtun
After repair work, dust, dirt and remnants of building materials remain on the floor and walls. To help housewives quickly and effectively put things in order in a renovated interior, let’s look at how to wash tiles after renovation to restore them to their original appearance.
Cement
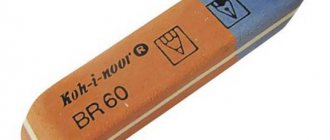
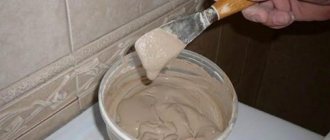
To remove drops of cement from the surface of the tile during repairs, remove them with a damp cloth. But the task becomes more complicated if the solution has already hardened. In this case, there are two options:
- Soak with water. Pour or spray regular warm clean water onto the dried lumps and leave to act for 10-15 minutes. The softened composition can be easily removed with a spatula. The main thing is to work with the flat side, like a scraper, and do it very carefully so as not to damage the glazed top layer.
- Use a solvent. If even soaked cement does not want to come off the tiles after repair, purchase a special product. A cement solvent (for example, Nerta ATC 350) will help remove residues quickly and without a trace, even from a textured surface.
Important! When working with any chemical compounds, be sure to use gloves!
Washing floors after renovation: general recommendations
In general, cleaning the floor after finishing renovation work is not much different from regular cleaning. But it is often necessary to use special solutions or components to deal with white spots on the base. Before we talk about floor cleaning products, we will share a few useful tips for cleaning the base:
- You cannot use soda to wash linoleum - its effect will have a bad effect on the appearance of the coating;
- It is best to remove paint and other similar liquids from the coating immediately - then it will be more difficult to wash them. The same applies to whitewash stains;
- laminate and other similar coatings should not be rubbed with abrasive materials - the top protective layer can be damaged;
- You cannot treat varnished surfaces with potassium permanganate - stains will appear on the floor;
- It is best to wash all stains after the initial treatment of the floor - sweeping and wet cleaning;
- It is better to wash the floors from the wall farthest from the door , moving towards the exit, so as not to trample on the just washed surface;
- It is recommended to change the water as often as possible when washing floors after repairs - this way you can quickly deal with corrosive stains and avoid stains, which especially often appear during whitewashing.
Try to change the water as often as possible
Grout
It is easier to wash the grout from the tiles, like any other hardening substance, immediately after finishing the work. If the tiles above the bathtub are dirty, a shower and a rag will help you; if in another place, a generously dampened rag will help. Rinse the surface several times with clean water until the white marks disappear.
For those who do not want to take a long time to wash the tiles after repair, there are other options:
- Chemical. Dilute liquid bleach in water, wipe the tiles with this mixture, then rinse with clean water. Other options for household chemicals (for glass, dishes) are suitable.
- Natural. Prepare water with vinegar or lemon juice, it will also help clean the grout from the tiles.
All of the above applies to ordinary cement compositions; if your grout is epoxy, water will not help. Purchase an alkali-based cleaner from a hardware store. For large surfaces and light stains it is diluted; on hard polymerized residues it is used neat. Apply, leave on, rinse or scrub off.
Advice! To prevent damage to the seams during washing, treat them with glitter.
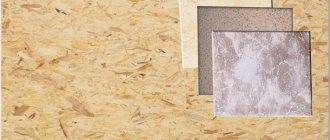
Tiles on the floor: how to clean them after renovation
Ceramic tiles, a very durable type of finish that is resistant to aggressive chemical solutions, nevertheless require careful handling. Even if, when laying ceramic tiles, all visible dirt was wiped off, nevertheless, the floor tiles must, first of all, be cleaned of dust particles and visible dirt that have settled on them, then washed with a soapy solution, and to add shine, when washed with clean water, add vinegar, citric acid or ammonia to it.
Related article: Features of installing a corner bathtub
To clean floor tiles, you can use several products, including bathroom cleaner, hydrochloric acid, or glass cleaner.
Ceramic tiles can be cleaned using the following available products:
- Liquids for cleaning bathrooms, smearing the stains in several layers;
- Apply table salt to the stain and moisten with water;
- Hydrochloric acid 5%;
- Spray glass cleaning liquid onto stains;
- Apply tooth powder to the stain, wet it and scrub with a stiff brush.
If the contamination is significant, then you must use a cleaning agent after reading the instructions for use. But, if you’ve tried everything, but you can’t wash the tiles, then you’ll have to buy a special product for a specific type of stain, and wash off the remaining residue with the purchased anti-stain product.
Primer
The primer only looks like ordinary water, but after hardening it turns into a tightly ingrained film. Getting primer off tiles is a really difficult task. As with the first two contaminants, it's best not to let it dry out - wash the tiles immediately after finishing the process and you won't have any problems.
If time is already lost, you will have to turn to heavy artillery. What detergents can help:
- alcohol;
- polyurethane foam cleaner;
- cement solvent;
- acid-free removers;
- vinegar essence.
But first of all, try the primer itself: apply a fresh coat over the old one, wait 3-5 minutes, wipe with a damp cloth.
For unglazed matte ceramic tiles, try abrasive products: the cured primer can be scrubbed with a stiff wire brush. It is better to soak the stains before doing this. You can simply cover the tiles on the floor with a wet cloth, and spray the tiles on the wall several times.
How and with what to wash primer from porcelain tiles
If porcelain tiles are stained with a primer, and unpleasant whitish stains remain, then you can clean it with household chemicals that contain acid.
If stains appear again after drying, then you need to apply a bathroom cleaner, cover with a wet cloth and let it soak for an hour, then thoroughly rub the stain with a stiff brush or washcloth, then rinse with clean water and quickly wipe the stain dry.
You can easily and quickly wash the primer from porcelain stoneware using available detergents.
The ingrained, dried primer is difficult to wipe off from porcelain stoneware; it is recommended that when repairs are carried out, the following precautions are taken:
- Cover porcelain tiles with plastic film or other protective material;
- Wipe off dirt as soon as it appears, do not allow it to soak in and dry out.
- If the tile surface is unpolished or semi-polished, special protection is required.
It is necessary to apply the preparation to the porcelain tiles, rub it over the surface with a hard sponge, and then rinse with clean water. Be careful with your ceramic tiles, and then you won’t have to wash them with all sorts of chemicals.
Silicone sealant
It is almost impossible to wash even fresh sealant - so do not touch fresh drops so as not to smear the product on the surface. It's better to wait until it dries completely. After that, try one of the methods for cleaning tiles after repair:
- Mechanical. Using a sharp scraper, knife or spatula at an angle of 30-45 degrees to the surface, pick up and remove the sealant. More suitable for bulky stains.
- Chemical. If you do smear the composition on the tiles, you will need a solvent - for example, 646. Soak a rag in it and rub off the stains little by little.
How to remove old paint from ceramic tiles
During the finishing work, paint can end up anywhere, and even the protective measures taken are not able to completely protect against its splashes. Often the paint gets on the tiles. If you immediately notice this problem, then cleaning the tiles will not be difficult, but what if the paint has dried and adheres firmly to the surface?
There are many methods for removing paint from various surfaces, and the choice of one or another depends on the type of paint, the degree of contamination and the characteristics of the material with which it is in contact.
In the case of tiles, the last factor plays a particularly important role - tiles with cracks or with a textured surface are especially difficult to get rid of dirt.
But nothing is impossible, and we have prepared for you three methods of removing paint, which can be used both individually and, in particularly difficult cases, in combination.
1 way
If the paint appears on the tiles in patches or spatters, you may want to try scraping it off first. A safety razor or utility knife blade may be suitable for this.
For maximum efficiency, the angle between the tool and the surface should be approximately 45 degrees. The blades must be used carefully so as not to injure yourself or damage the top layer of the tile.
It is better to start in a place that is not too visible - if you see that a layer of glaze is being removed along with the paint or scratches appear on the surface, then you should stop cleaning and try other methods. But, in most cases, it is possible to achieve good results with a blade, and by wiping the tiles with a damp cloth at the end of the work, you can verify the effectiveness of this method.
Method 2
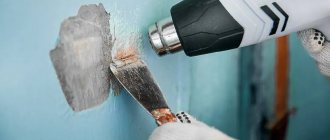
Old, dried paint that cannot be scraped off can be removed using heat. A hair dryer is usually used as a cleaning tool.
Before you start heating, ensure the room is ventilated, as many paints, when exposed to temperature, begin to smell strongly and even emit substances that are dangerous to the human body.
When using this method, it is best to divide the contaminated surface into small areas, 30x30 centimeters in size or slightly larger. You need to heat the paint gradually, continuously moving the nozzle of the hair dryer. To begin with, set the air heating temperature to the middle position and then, if necessary, increase it.
When the paint gets hot enough to become sticky and soft, you need to take a plastic scraper and start removing it.
As with the blade, the tool should be held at a 45-degree angle to the surface of the tile. You need to use a scraper starting from the edges of the tile and moving towards its center.
As you work, you will notice that the paint will begin to harden and in this case you will have to pick up a hairdryer again.
3 way
If the first two cleaning methods do not help, you will have to resort to the most radical, chemical action. Removing paint using various solvents is most effective and works especially well with tiles that have a textured, uneven surface.
This method will also help clean old tiles covered with small defects and cracks. It must be remembered that although such cleaning is the most effective, it can also be considered the most risky.
It would also be a good idea to test the chemical on leftover tiles or in an inconspicuous place, such as a corner or behind furniture. Don’t forget about safety precautions - add rubber gloves to your goggles and respirator to protect your hand skin from burns.
If you doubt the chemical resistance of a glazed surface, start with the least aggressive solvents.
We suggest you read: How to clean a pan from burning inside
In some cases, you can get by with regular table vinegar diluted 50 to 50 with water.
For greater effectiveness, you can try soaking the stained surface with liquid and leaving it for a few minutes. To remove softened paint, use the familiar plastic spatula.
Useful tips 09.20.2019 12:51:11
Only registered users can leave reviews. Please register
Ceramic tiles are present in every apartment today. It is used in rooms where there is often high humidity, temperature changes, and splashes of dirt and grease. The tile takes a powerful blow, but even such a resistant material can become covered with plaque, which is not always easy to remove.
Specialists whose main specialty is office cleaning helped us select the most effective ways to clean ceramic tiles.
The company employs real professionals who know well how to clean this or that type of surface, even from the most difficult contaminants, and do it in the shortest possible time so as not to disrupt the work process in the office.
The industry has long developed a lot of special compounds that help wash away plaque, greasy stains, various types of dirt and even traces of mold from tiles. Under the trademarks “Silit”, “Santik”, “Domestos”, “Komet”, “Sif”, “Mr. Muscle” and others, products are produced that in a matter of minutes allow you to return the tiles to their original appearance.
Before purchasing, it is important to read very carefully the instructions for use and the type of tile that can be cleaned with such products.
It is better to take cream or gel-like compositions - products with abrasive particles can leave a lot of small scratches on the tile, in which dirt will accumulate in the future.
It is also worth considering the chemical resistance class of the tile: tiles of class A and AA are the most resistant to various types of aggressive agents and will easily survive almost any impact, which cannot be said about tiles with resistance rating C.
It is advisable to take a product that does not contain chalk. If the seams between the tiles are treated with epoxy grout, then acid-containing products are also prohibited. If a whitish coating appears on the tiles, it is better to use a product containing chlorine. The processing method will be indicated in detail on the packaging - it must be followed carefully.
Light stains can be washed off with regular dishwashing detergent. It is enough to dissolve a small amount of it in warm water until foam forms. The resulting solution is applied with a sponge to the contaminated tiles, left for 10-20 minutes, and then thoroughly washed off with plain water.
Instead of detergent, you can use regular soap (laundry soap is not recommended). To make the dissolution process faster, you can rub the bar soap into warm water. Next, the washing process is similar to that when using dishwashing detergent.
If a special means for washing tiles is not always at hand, then every housewife probably has a composition for washing glass and mirrors in her arsenal.
Almost every such product contains ammonia, which will help remove minor dirt from the tiles and restore it to its former shine.
The cleaning method is no different from washing windows: you need to spray the composition, and then carefully treat the surface with a soft cloth.
Modern detergents are, of course, effective, but they also have disadvantages. Firstly, household chemicals can cause allergies.
Secondly, it requires very careful handling, since sometimes the concentrations of aggressive chemicals in them can damage the skin of the hands and even the respiratory tract. Thirdly, some products cannot be completely washed off even with a large amount of water.
Therefore, it is not surprising that today many people abandon store-bought products and switch to using folk remedies.
The most popular and easiest way to clean ceramic tiles from grease, lime deposits and plaque is to use lemon juice. Problem areas should be thoroughly rubbed with lemon and left for a few minutes.
Lemon juice can be squeezed out, diluted a little with water and sprayed with a spray bottle. After a few minutes, the juice is washed off with water.
The bonus of this method is that the room will be filled with a pleasant and, most importantly, natural aroma.
An alternative is citric acid powder. The bag is dissolved in a glass of warm water and the resulting liquid is used for processing.
No. 5. SODA AND VINEGAR
The reaction of baking soda and vinegar allows you to soften deposits of dirt and plaque. To clean ceramic tiles, you need to apply a paste of soda slightly moistened with water to the problem areas. Then they spray a solution of table vinegar; it is most convenient to do this with a spray bottle. Let the components react for 3-5 minutes, then the slurry must be washed off.
No. 6. SODA
Soda itself can also have a good effect on fatty stains. In general, this substance is considered a universal cleaning agent; it can also be used to remove, for example, coffee and tea stains that have become ingrained in dishes.
The washing method is the simplest: wet a sponge, dip it in soda powder and begin to carefully work the surface of the tile, dipping the sponge in soda powder again and again as necessary. Plaque and dirt should be cleaned thoroughly, but you should not press too hard to avoid scratching the tile.
Tile adhesive
Like grout, there are two types of glue; they will have to be removed in different ways. Therefore, first of all, decide what type you are dealing with.
- Cement. Unlike pure cement, water will not help here, because the glue contains other components that complicate cleaning. Acid solvent is recognized as the most effective and safe for cladding. It is applied to stains (neat or in a 1:5 solution with water), left for a short time, then removed with a scraper or rag.
- Epoxy. Where water and acids are absolutely ineffective, alkali will come to the rescue. The older the stain, the more concentrated the composition should be. Undiluted alkali is applied pointwise to old drops. After removal, be sure to thoroughly wash the entire surface.
Let's shine
We will use only environmentally friendly materials:
When choosing laundry soap, you should wash the tiles with the prepared soap solution. To do this, rub laundry soap and dissolve it in clean water. For washing, use a soft cloth, sponge or microfiber cloth.
A vinegar solution will help add shine and newness. Calculation of the product - 2 tablespoons per 500 ml of water. After you wash off the soap, wipe the tile with “sour” and it will shine. Vinegar can be replaced with citric acid.
The result will be the same, but it smells nicer. More precisely, it doesn't smell at all.
Baking soda is indispensable as a detergent. It removes small and large stains, helps dissolve grease, and makes the tiles practically new. For regular washing, a 2% soda solution is enough, but for washing after repairs it is better to do this:
- Moisten the tiles well before cleaning them after repair.
- Clean it with dry soda applied to a sponge, rags, etc.
- Dip a damp toothbrush into dry baking soda and scrub the seams.
- Afterwards, rinse everything off with clean water.
During routine cleaning, it is good to wash tiles with window cleaners. They are easy to spray and give excellent results. In principle, all solutions that are used to wash glass are also suitable for tile coverings.
There is no difference for glossy and matte finishes.
Now a little about cleaning materials. Microfiber, bamboo napkins, sponges in all variations are closely involved in this process. We advise you to pay attention to melamine sponges.
This material has amazing properties; the less effort you put in, the better it “works.” That is, when using a melamine sponge, you do not need to vigorously rub the tile; it is enough to simply “walk” along the surface. There will be no streaks, no lint, no dirt left.
If you really need to scrape the surface, use a plastic bristle brush, as metal brushes will leave rust marks on the seams. Do not use cleaners containing soap as it dulls the tile surface. Remember not to mix different types of cleaning products and never mix ammonia and bleach or products that contain them.
The fumes from such a mixture are dangerous to your health.
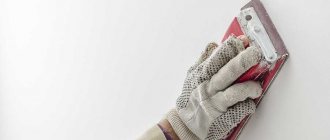
Construction dust is the most harmless type of dirt. It's easy enough to fix. Such dust is present even during cosmetic repairs. Therefore, it is better to remove it as soon as possible so that it does not eat into the tiles.
First you need to vacuum the coating or sweep away the dust with a soft brush or rag. Frozen finishing materials must be carefully removed so as not to damage the glaze with a sharp blade, sharpened with a spatula, or in another way. Then you can begin wet cleaning using the following solutions:
Do not use hard brushes, metal sponges or abrasive powders. Such products will scratch and ruin the surface of the tile. If you use a brush rather than a cloth for cleaning, choose clear products.
How to remove paint from ceramic tiles? Colored brushes shed and leave hairs on the surface that are difficult to remove.
- Antifungal grout cleaner. Spray the problem area with the product and leave for half an hour. After treatment, rinse the area thoroughly with warm water and wipe dry.
- Bleach. Dilute the product in water in a ratio of 1:10. Wipe the contaminated area and rinse with water.
- Borax. Prepare a solution: a glass of borax per three liters of water. Apply the solution to the contaminated surface and scrub with the hard side of the sponge. Do not rinse off the product, remove it with a dry cloth.
- Soda. Clean the problem area with baking soda and not only will the mold itself be removed, but also the unpleasant odor left by the microorganisms.
A vinegar solution will help add shine and newness. Calculation of the product - 2 tablespoons per 500 ml of water. After you wash off the soap, wipe the tile with “sour” and it will shine.
Construction dust
This is one of the most harmless types of pollution - superficial, easy to wash. Try cleaning the tiles after renovation using a sponge and dishwashing detergent. Lather, wipe the tiles, rinse with a clean damp cloth.
If the dirty ceramic tiles are glazed and glossy, use a weak vinegar solution for washing and rinsing - it will help avoid soapy stains.
Cleaning tile elements after repair
As soon as the repairs are completed, it is necessary to put everything in order, especially the tiles that were laid in the rooms, both on the floor and on the walls, need cleaning. Matte tiles are cleaned with products that should not contain organic acids and fats, because they can destroy the top layer of the tile, because its surface is porous. To clean glossy tiles, do not use soda and laundry soap, metal brushes or sponges.
If you need to wash the tiles after repair, then you should first prepare detergents and special gloves so as not to damage the skin of your hands.
After completing the repair, you need to carefully check those places that may be the most contaminated:
- The surface next to the seam;
- Cement stains all over the tile surface;
- Whitish stains from primer.
If machine oils, enamel or resin, traces of rubber, or candle wax get on the tiles, they can be removed with a nitro solvent, acetone or turpentine. Regular animal or vegetable oils can be washed off with caustic soda.
Construction dust is the most harmless type of dirt. It's easy enough to fix. How to clean linoleum from water-based paint? Such dust is present even during cosmetic repairs. Therefore, it is better to remove it as soon as possible so that it does not eat into the tiles.
First you need to vacuum the coating or sweep away the dust with a soft brush or rag. Frozen finishing materials must be carefully removed so as not to damage the glaze with a sharp blade, sharpened with a spatula, or in another way. Then you can begin wet cleaning using the following solutions:
- Soap solution is the simplest and most affordable remedy. Soap can be replaced with washing powder.
- Water with lemon juice. Gives glossy tiles shine and distributes a pleasant citrus aroma throughout the room.
- Vinegar. Also diluted in water. Suitable for cleaning serious stains. It also adds shine to the surface and creates a protective layer on its surface.
- Glass cleaner. There is one in every home. It copes well with dirt and eliminates stains.
Dye
How to clean tiles after repair depends on the type of paint:
- water-based ones are washed off with plain water;
- acrylic is removed with a solvent or nail polish remover;
- oil is afraid of alkaline compounds.
Advice! Before using any products, try them on an inconspicuous area - some caustic compounds can damage the glaze and make it cloudy.
How to clean the seams between tiles
Baking Soda and Vinegar
- To clean the grout between tiles after renovation, prepare a thick paste by mixing baking soda with water (to 3 parts baking soda to 1 part water). This product is suitable for seams of any color.
- Apply the prepared paste with your finger to the seam line.
Despite the fact that baking soda is absolutely harmless, you should work with rubber gloves to avoid scratches and inflammation of the skin on your hands.
- Then prepare a solution of white vinegar and water (1: 1), pour it into a spray bottle and spray it onto the grout (on top of the soda paste). Instantly forming bubbles will indicate the beginning of a chemical cleaning reaction. However, it should be borne in mind that vinegar can harm some natural materials (for example, limestone or marble); using vinegar for treating such surfaces is strictly not recommended.
- As a rule, the cleansing process lasts several minutes. When the solution stops bubbling, the cleaning is complete.
- Scrub the seams with a nylon bristle brush or an old toothbrush. Be especially careful with corners and joints with walls or flooring.
- To remove any remaining baking soda and vinegar, thoroughly rinse the tiles with clean water.
Oxygen bleach
- We offer another answer to the question of how to clean the seams between tiles after renovation. Prepare a solution of oxygen bleach (take 2 tablespoons of bleach for two glasses of warm water). For best results, mix the solution thoroughly and prepare it immediately before use. It must be borne in mind that oxygen bleach can harm colored grout and the pigment will fade.
- Before using the solution, test it in an inconspicuous place. Apply to a small area and see if the grout and tile colors change.
- Pour the solution onto the grout lines until it completely covers them. To avoid flooding the entire floor, clean in small areas.
Rub in the solution using a nylon bristle brush. To achieve the best effect, leave the solution in the joints for a few minutes.
- Brush the seams with the brush, moving it back and forth.
Pay special attention to cleaning in corners and joints with a wall or floor.
- To best clean tiles after refinishing, you can simply dip a dampened brush into powdered bleach.
Note: in order not to wet and spoil the entire package of bleaching powder, pour the required amount into a separate container.
- Pour clean water directly onto the floor, wash and dry with a cloth or towel.
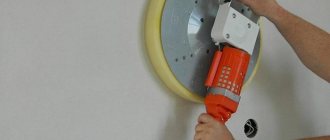
Steam cleaner
To wash and disinfect tiles after repairs, it is convenient to use steam cleaners. Buy your own device or borrow it from friends or at a rental office. When choosing a steam cleaner, make sure it is suitable for cleaning the joints between tiles. To perform this function, its kit must include:
- steam hose;
- small nozzle with brush.
When preparing the steam cleaner for use, read and strictly follow the operating instructions supplied with it.
- Fill the tank with clean water (without any cleaning products).
- Plug in and let it heat up to the desired temperature (heating time is indicated in the instructions).
- Start cleaning on one side of the room and gradually move to the opposite. Move the steam cleaner back and forth over the seam line. Steam perfectly removes dirt and kills mold.
- Remove excess moisture with a rag or towel. If using a steam cleaner is your answer to the question of how to clean tiles after repairing the floor, then be extremely careful while working - due to condensation, the floor covering becomes slippery.
Liquid Nails
Are there any drops on the tiles after the renovation? Let them harden and remove with a scraper or knife. If the mechanical method does not help, use a solvent.
The usual inexpensive composition 646 can easily cope with stains from liquid nails on tiles.
Important! Sometimes the fresh composition is removed with oil or fatty cream.
How to make cleaning easier after renovation?
Cleaning up after renovation is not an easy task. Fine and nasty dust generated as a result of construction work will have to be raked out from everywhere in large quantities. It gets clogged up in upholstered furniture, settles on cabinets, and sometimes gets clogged up in the most inaccessible places.
Important! Fine construction dust has a negative impact on human health. It settles in the respiratory system and often causes the development of respiratory diseases. Coughing and pain in the lungs are common companions for those who do repairs and do not follow safety precautions, that is, do not use personal protective equipment.
Damage from construction dust
Minimizing harm from construction dust
That is why it is important to remove as much debris and dust as possible after completing the repair. And also, before starting this large-scale operation, it is recommended to make some preparations that will protect the interior from dust and whitewash.
It is advisable not to leave anything in the room where the work will be carried out - all the furniture is taken out, it is best to pack things in boxes or bags so that dust does not penetrate to them even through small cracks. It is recommended to wrap the furniture itself with plastic film, because even if it is standing in another room, it will be “attacked” by the smallest particles of building mixtures. It is recommended to wrap anything that cannot be taken out with cling film, as it will not allow dust to get to the interior item.
Preparing furniture for repair
If a procedure such as whitewashing a ceiling is being carried out, and there is already a new floor covering on the floor or it is not being replaced at all, since it will be used further, then the floors need to be protected as much as possible. To do this, the base is covered with a thick film, which is then fixed along the baseboards using masking tape.
Important! If you neglect fixation, the film will become crumpled and will be of no use. It is also important to seal all joints of individual panels with tape.
Some people use regular old newspapers instead of film, but this method is not the most reliable. When wet, paper loses its strength and tears easily. To maximize the safety of the base, it is recommended to lay newspapers in at least two layers. It is not recommended to use a cloth to cover the surface, as it will still allow all the fine dust to pass through.
Polyurethane foam
If construction dust is the simplest pollutant, then foam is the most complex.
- Fresh contamination. Because the composition hardens quickly enough, you should also act with lightning speed. Immediately after completing the work, cut off the foam with a knife or spatula. Remove any remaining residue with a gun cleaner.
- Frozen stain. The good news is that the process is not much more complicated and is almost the same. You must first remove the volume, and dissolve the residue with the same gun product, any suitable solvent, white spirit, or acetone.
Available means for softening foam:
- dimexide;
- hot vegetable oil;
- petrol.
It is always easier to clean tiles after repair if the stains are fresh. Therefore, do not delay cleaning - spend a little time after styling or other work to save energy in the future.
How to remove old paint from ceramic tiles
3 way
Tiles require special care - after all, stains on tiled or porcelain stoneware coatings after repairs do not decorate them at all. So let's start fighting them.
It is clear that each type of pollution requires its own remedy. We suggest moving from simple to complex, i.e. we will analyze the different types of stains on tiles and how to eliminate them.
Removing inscriptions and graffiti from the facades of residential buildings. A joint project of LLC Management Company "Holmservice" Krasnoyarsk and...
It is not difficult to clean tiles from construction dust after renovation. To do this, you will need a soft cloth and warm water. The tiled surface will have to be washed several times, so get ready for this right away. And do it this way: wash the tiles with a rag and plain water, wait until it is completely dry.
What is the price for removing old paint from walls? Repeat the process until you get the desired result. Usually, for absolute cleanliness, changing the water 2-3 times is enough.
When contaminated with construction dust, it doesn’t really matter what material you wash – ceramic tiles on the wall in the bathroom or kitchen, or porcelain tiles on the floor. In any case, water is the best helper.
Important! To speed up the process and get excellent results, use a liquid cleaner that you add to the water. The most famous of this line of household chemicals is Mister Proper.
If dust gets stuck in the seams between the tiles, use a toothbrush. With its help, you can efficiently clean hard-to-reach areas.
Washing the paint
With paint the situation is more complicated. The easiest way to deal with fresh marks: if you accidentally get paint, you should quickly wipe it off with a soft cloth, and that’s it. If you hesitate, it won’t be so easy to wipe off dried paint from tiles or porcelain tiles.
- Stains from water-soluble paint should be thoroughly moistened and then washed off.
- Fresh traces of oil paint can be removed with vegetable oil.
- Old paint stains can be removed from tiles using a solvent.
To clean floor tiles from stains, first try removing them mechanically - with a blade, felt or sandpaper, and then wash them with plain water with the addition of dish gel.
If, after laying the tiles, there are still strips of silicone adhesive on it, carefully cut off the remains with a sharp blade or knife. Small remaining traces are easily dissolved with the help of white spirit, gasoline or kerosene.
Important! When working with flammable liquids, be careful! Wear a mask and gloves when working, do not smoke under any circumstances, and do not light the gas stove!
We suggest you familiarize yourself with How to clean coins from rust and oxidation at home? Cleaning copper, silver, aluminum, bronze coins from rust and oxidation at home
After repairs, traces of grouting leave streaks on the tiles. They will disappear if you wash the tiles with water and dish soap. The primer is removed using vinegar essence, as well as soapy water.
If you are unable to get rid of the stain on the tiles after repair, “soak” it overnight. Cover the stain with a damp cloth, then with cellophane. Overnight the stain will soften and wash off easily.
Various chlorine products help to thoroughly clean tile surfaces from dirt. To do this, apply a bleach solution from a spray bottle onto a damp tile, wait a few minutes and rinse with water.
A well-known household stain remover, ammonia, can also be used to clean tiles and porcelain tiles. To do this, dissolve 2 tablespoons of ammonia in a liter of water and begin cleaning. Particularly noticeable stains will need to be rubbed thoroughly.
The final cleaning of the tiles after repair is carried out after removing all kinds of stains. We invite you to get acquainted with the methods used by the older generation. The peculiarity of our grandmothers’ products is their budgetary availability and the complete absence of aggressive chemicals.