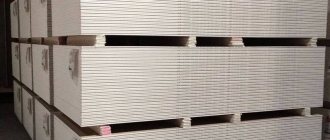
Repairs in an apartment can be different, ranging from a purely cosmetic replacement of wallpaper to a major one, when everything down to the screed and plaster of the walls must be replaced. In any case, no repair can be done without dust. Construction dust is a variety of debris, ranging from a fine suspension of cement mixture to pieces of plaster and finishing materials. The big problem is naturally fine dust. It is difficult to sweep away or wash, and ordinary household vacuum cleaners are not able to contain it, especially since they can fail if there is a large amount of dust. So how can you get rid of dust in your apartment and not drag out the cleaning process for many weeks?
This problem can be solved by several fundamental methods: preventing the spread of dust during repairs and high-quality cleaning of contaminants at all stages of work. There will be a separate discussion for cases when it was still not possible to keep dust within the premises being repaired and it is necessary to remove construction dust from the finishing premises. However, the most important thing is to ensure your protection and safety.
Why do you need dust removal from walls?
The need to get rid of dust is due to the fact that dust can be dangerous, especially construction dust. Parasites and pathogens can multiply in it. However, dust can also pose other dangers. It is important not to forget that construction dust can not only be soft, but also contain small and hard particles. They can have an extremely negative effect on things they come into contact with, for example, scratching glass or plastic surfaces.
Therefore, in most construction and renovation work, it is recommended to protect the respiratory tract using respirators.
Only a specialized team with the appropriate skills and equipment can quickly and fully cope with such a task. However, some of the useful work can be done with your own hands.
How to remove dust from walls after renovation: practical options
Important! An effective way to combat dust is to take preliminary measures, which makes it possible to prevent or reduce the volume of dust formation.
In order to remove dust from walls and other surfaces, after finishing work, you can use the following options:
- Vacuum cleaner.
- Dry broom.
- Dry rags.
- Brush.
- Wet cleaning.
- Construction vacuum cleaner.
In each case, the tools for dust collection will be different. It depends on the reason for the formation of dust, the surface where it settled and its quantity. But it is generally accepted that moistened construction dust is much easier to clean. However, the degree of moisture should be moderate so that dirty stains do not form on the surfaces.
When dry cleaning, you should carefully select products and tools. In this case, the main goal will be to avoid the formation of a dust cloud that may arise when attempting to clean, and then settle again when finished.
How to remove the most common wallpaper stains?
How to remove fingerprints?
Fingerprints can be easily removed from almost all wallpapers using a regular eraser. There is also a “folk” method - rubbing contaminated areas with bread. Bread gluten will cope with the problem perfectly.
Fingerprints are removed using an eraser
How to clean wallpaper from grease stains?
It is necessary to apply talc to remove grease stains. Pour talcum powder onto the sponge. Wipe the wallpaper and leave for 10 minutes. Then wipe the powder off the wall with a dry cloth or brush. Another way to deal with greasy stains is to iron. It is necessary to apply a paper napkin to the stain, and then carefully iron it with a hot iron.
You can get rid of greasy stains with an iron
How to remove marker marks?
In every apartment where there are small children, you may encounter the problem of wallpaper painted with felt-tip pens. Depending on the wallpaper and the type of felt-tip pen used, the type of wallpaper cleaning is selected:
- it will not be possible to eliminate contamination if any delicate wallpaper is pasted in the room;
- when using a water-based felt-tip pen, you can wipe with a damp cloth, but only on washable wallpaper;
- To remove alcohol markers, it is better to use alcohol, vinegar or citric acid. Apply a small amount of liquid to a cotton swab and wipe the “masterpiece”. It is possible that the procedure will need to be repeated several times.
But do not forget that any cleaning you do gradually destroys the structure of the wallpaper. And sooner or later they will need to be re-glued due to wear. Never use washing powders, even if they are intended for delicate fabrics. It is very useful to read the labels that are on the wallpaper rolls. After all, this will facilitate the process of cleaning them from various types of contaminants.
Remember, wallpaper care is not that difficult if you follow the instructions!
Leave your recommendations and share your experience in the comments to our article.
Dust removal of very high walls after renovation
If there is a need to clean up a room with high walls, then one of the best options in this case would be a brush with a long handle. In addition, you can use a mop, using a dry or damp cloth if necessary.
In order to facilitate the task of removing dust from high walls, it is recommended to carry out thorough preliminary preparation. This means that the walls should be tightly covered and dampened underneath a layer of film to facilitate dust collection.
Tips and tricks
As already mentioned, correct preliminary and preventive measures play a decisive role in the fight against construction dust.
Before starting work, do the following:
- Remove everything possible from the work area.
- Cover surfaces with film, including windows and doorways.
- Cover furniture and other objects that cannot be moved.
- Use a respirator.
- Use dust collectors.
- Humidify the air regularly.
It should be understood that complete cleaning can only be carried out by a team with the necessary equipment and cleaning products. When cleaning on your own, a certain percentage of dust will remain and will continue to bother you for some time.
It is obvious that the dust removal operation is a necessary process that, one way or another, must be carried out. In each case, the actions may be different, but their goal is the same.
Classification of washable wallpaper
Conventionally classic wallpaper that can withstand wet cleaning can be divided into several types:
- paper, thin wallpaper made of paper, coated with a special moisture-resistant varnish, most often used in kitchens and hallways,
- vinyl, kitchen-themed wallpaper, material foamed and fixed with inhibitors, soft and pleasant to the touch,
- silk-screen printing, very strong and thin vinyl with added fabric fibers,
- Hot-stamped vinyl on a non-woven backing, usually in long, meter-long rolls that can withstand very harsh washing.
Paintable wallpaper, liquid wallpaper, metal, wood and other non-standard moisture-resistant types of wallpaper can also be washed.
Vinyl washable wallpaper with a kitchen theme
As dust and dirt accumulate on the wallpaper, the time comes for decisive action; now, armed with cleaning products, cleaning and washing operations are carried out.
But not all cleaning products can be used; there are certain nuances for different types of wallpaper, which will be discussed.
How to remove construction dust after renovation
In any room, sooner or later it is necessary to carry out repair work. However, after putting the apartment in order, a thick layer of dust settles on all surfaces, and it seems that it is simply impossible to get rid of it. In fact, cleaning up construction dust after renovation is a completely solvable task. Next we will look at what needs to be done to restore order.
Necessary tools and cleaning products
If you don’t know how to remove construction dust after renovation, then use our tips and recommendations on this topic.
First of all, prepare rags for cleaning. They can easily wipe off dust, wash away dirt and clean surfaces. You can easily make such a working tool yourself. For this:
- Take a meter of soft matter.
- Fold the fabric into a square and cut into four equal pieces. You will get several rags. One will replace the other.
- Hem the edges of the resulting sections. To prevent the threads from puffing up, use a buttonhole stitch. Now they can be used for their intended purpose.
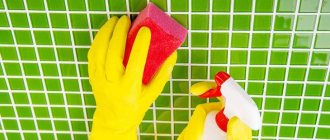
Important: for cleaning, purchase rubber gloves to prevent detergents from getting on your skin and drying it out. They should be put on on clean and dry hands. The product must fit exactly in size.
You will also need trash bags. It is advisable to purchase large and dense bags. Prepare solvents to remove tough, sticky stains and stains. For inexpensive products, you can take a home cleaning “kit”: baking soda, peroxide, vinegar. You will also need a set of detergents. It will include liquid soap, dishwashing and plumbing detergent, floor detergent, glass sprays, and preparations for treating various surfaces (wood, plastic).
To avoid dirtying chairs and other furniture, it is better to get a stepladder to clean the walls and ceiling.
How to remove construction dust
Cleaning your apartment from construction dust is a matter of not only putting things in order, but also the health of the whole family. After all, small dust particles can cause serious harm to the human body. Getting on the mucous membranes of the eyes and respiratory tract, they can lead to disruption of the functioning of these organs. In addition, if you stay in a dusty room for a long time, small particles can penetrate into the lungs, making it difficult to breathe and causing a cough. Also, some people may experience an allergy to construction dust in the form of redness and itching of the skin.
Cleaning the floor from dust
Most construction dust accumulates on the floor. Therefore, cleaning the room begins with it. Before you start cleaning your apartment, you will need to protect yourself from fine dust, which can significantly complicate breathing and cause allergic reactions. Skin can be protected using special rubber gloves for cleaning. You will need a respirator or dust mask for your face. Removing dust deposits from the floor after renovation includes the following steps:
- Fill a spray bottle with clean water and actively spray the room so that small dust particles become heavier and settle on the floor covering.
- After an hour, you will need to collect construction dust with a vacuum cleaner. It is permissible to use a regular household appliance. But cleaning will be much better if you use a construction vacuum cleaner. At the same time, you should not bring it into the room, so as not to carry dirt, just extend the hose into the room.
- If necessary, vacuum the floor several times until it becomes washable.
- At the end of the hygiene procedure, you will need to thoroughly wash the floor. To prevent whitish stains from remaining on it, it is recommended to change the water many times. The best way to clean the floor from construction dust is to change the water every time you rinse the cloth.
How to clean laminate flooring after renovation
It’s easy to clean laminate flooring from construction dust. However, a large number of small dust particles will inevitably leave many micro-scratches on a smooth surface. Therefore, it is best to cover the flooring with a special film before carrying out repair work. If such protection from construction dust was not initially provided, debris should be removed from the laminate as follows:
- get rid of global dust deposits using a construction vacuum cleaner for cleaning;
- pour a couple of liters of hot water into a bucket, but not boiling water;
- also pour in three tablespoons of nine percent table vinegar and add a teaspoon of salt;
- mix all ingredients until all particles of table salt are completely dissolved;
- moisten a cleaning cloth in the resulting solution and quickly wash off the construction dust;
- during the final wash, you need to add five to seven milliliters of sunflower oil to the water, this will give the flooring a characteristic shine.
We wash linoleum after repair
The method discussed above is quite suitable for removing construction waste from linoleum after repairs. In this case, it is possible to carry out wet cleaning several times, since this floor covering is not so sensitive. It is also possible to use ordinary laundry soap to thoroughly clean the linoleum after repairs. To prepare the detergent composition, you just need to dissolve a bar of laundry soap, previously crushed on a coarse grater, in five liters of clean warm water.
Prevention of dust formation during work
When drilling holes, chiselling walls, grouting putty and plaster, as well as when removing old layers of plaster and screed, a huge amount of dust is generated. There are several ways to reduce its spread and the amount of formation.
Dust collection during work
The best option is to always use a vacuum cleaner for construction dust, which will collect all the resulting dust. Household vacuum cleaners are not suitable for this; they will quickly fail. A specialized construction vacuum cleaner is required. Purchasing such expensive equipment can be expensive, especially for small private repairs. You can rent it or use it in another way. When drilling, place a scoop or container cut from a plastic bottle under the hole to collect debris and dust. You can lightly wet the surface, if possible, using a spray bottle.
Ventilate the room, use a spray bottle
When chipping walls using a grinder, it will no longer be possible to avoid the spread of dust in the room. So we close the doors tightly with a very wet cloth, and open the windows wide open. After work, a hand sprayer helps again. It is enough to lightly spray water throughout the room so that the main dust is nailed to the floor. In this case, cleaning up construction dust can only begin after it has settled or evaporated through the window.
Cleaning before each new stage
If there was a lot of dust, then spray water all over the floor, just lightly moisten the surface. After this, use a broom to collect all the dirt into pellets and easily remove it. It is important not to overdo it with water so that streaks do not form. It is imperative to remove dust and other contaminants after each stage of repair. At first glance, this is tedious and unnecessary, but it will ultimately save a lot of time, which will subsequently be spent on removing dust throughout the apartment.
Tip: When dismantling old wallpaper, paint or whitewash, use the wet method, that is, thoroughly wet the surface to soften the material and prevent the formation of dust when stripping off the old coating.
Follow the instructions for using building materials
For various plastering works or when forming a screed, drilling holes or cleaning surfaces, the surfaces must be primed or ironed. The same applies to all surfaces on which finishing materials will be laid on top: linoleum, carpet, wallpaper, tiles. This will prevent materials such as concrete, plaster, putty, etc. from crumbling.
Step-by-step work plan
One of the secrets of professional cleaning is that for each type of work there is a technological map - a clear step-by-step plan. It helps to clean the room better, faster and with less money. A certain sequence should also be used when cleaning an apartment with your own hands after renovation. It consists of the following stages:
- Preparing for cleaning, planning work.
- Collection and removal of construction waste.
- Cleaning dust from all surfaces.
- Wet cleaning and washing of surfaces that require it.
- Removing specific stains.
- Polishing mirrors and glass.
- Cleaning and arranging furniture, carpets, curtains.
You may want to deviate from the recommended sequence. This will make the job more difficult, but the cleaning will still get done. The only rule that cannot be broken is: first remove dust, then wash surfaces. At first glance, it seems that it is easier to remove dust with a damp cloth, but in fact it will only turn into stains. It is then extremely difficult to get rid of them.
Advice! Start all work from the upper parts of the room, moving from the ceiling to the walls and further to the floor.
Furniture preparation
When the bulk of the dirty work is completed, it's time to start washing and cleaning the furniture. If you purchased a new one, all you need to do is uncover and vacuum it. If the sofas, armchairs and tables are the same, then to update the interior they need to be given more attention.
- Reupholster your upholstered furniture. To do this, use the services of specialists.
- Clean contaminated areas from rust, dirt, debris, and stubborn stains.
- Treat wooden surfaces with polish.
- Wash the plastic elements with a damp cloth and then wipe dry.
- If upholstered furniture has an unpleasant odor, then it is better to first take such items to dry cleaning, where they will be brought into proper condition.
- Do the same with carpets and rugs. Everything in the house should be fresh and washed.
- Don't forget about cabinets and built-in appliances. Get rid of dust. Rinse them very thoroughly on all sides. To avoid streaks, wipe dry.
Getting ready for cleaning
There are several important points here:
- Plan your actions.
- Pick up everything you need to clean the apartment after renovation - tools, equipment, equipment.
- Take care of your protection from dust and chemical detergents.
First, about planning. We usually send a team of 2–4 people to clean after renovating an entire apartment. These are experienced specialists with a whole arsenal of professional tools and equipment. It takes them a full shift to complete the task. Now evaluate your physical capabilities: you won’t be able to do such a volume alone in a day.
Therefore, firstly, it is better to involve assistants in cleaning. Distribute responsibilities between them: who can vacuum, wash windows, move furniture or carry heavy garbage. Secondly, decide how you will divide the work over several days - by rooms or by stages. If you clean one room at a time, make sure that dust and debris do not get from dirty rooms to clean ones. Construction dust is very fine and tends to quickly spread throughout the apartment.
Next, you need to assess the degree of contamination of the apartment after renovation and make a list of cleaning products. Approximately you will need:
- Durable garbage bags (for large construction ones, polypropylene, for smaller, household ones - dense polyethylene).
- A powerful vacuum cleaner, preferably with a water filter. Ideally, rent a professional unit that can accurately handle large amounts of fine dust. Please note that household vacuum cleaners often break due to such work; they are not designed for it.
- Mops or brushes (for floors, walls, ceilings, glass), 2-3 buckets for water and cleaning solutions.
- Large set of microfiber cloths and sponges. Be prepared for the fact that after such cleaning you will have to throw away almost all your equipment - rags and brushes will be full of dust.
- General purpose detergents. Here, focus on the finishing materials: washing should not harm them. Usually, after repairs, there is no need to use highly specialized “chemistry” to remove grease and heavy dirt. All-purpose detergent for floors and plumbing, glass cleaning spray, and furniture polish are enough. If there is limescale on the plumbing, also use an acidic solution to dissolve it. To care for parquet you will need special wax.
- “Chemistry” and special tools for removing stains from building materials - grout, polyurethane foam, primer, glue, paint. It all depends on the type of contamination; usually acetone and white spirit are enough, and for mechanical cleaning - a stiff brush and a small plastic or wooden spatula.
- A stepladder, which will be convenient for wiping ceilings, cornices, lamps, etc. It can be replaced with a stool, but this is more dangerous. Using telescopic mops and brushes for “height work” requires some training.
Choosing equipment for cleaning after renovation
It is unlikely that you will be able to wash all surfaces with your bare hands. To carry out cleaning after renovation, you will need a whole set of equipment - disposable and reusable.
What will definitely be useful:
- Buckets and basins for cleaning solutions.
- Absorbent rags made from batting for initial wet cleaning (they will have to be thrown away).
- Disposable wipes for wet and dry dust removal.
- Microfiber and suede cloths for final wiping.
- Flounder mop for cleaning floors and walls.
- 2-3 loop mops for dust removal of walls.
- 3-5 microfiber mops for cleaning floors.
- Sponges for washing dishes (to remove dirt).
- A utility knife or spatula for removing dried-on “bloopers” from building materials, or a special scraper for cleaning tiles and glass.
- A brush with stiff bristles and an abrasive sponge for cleaning tiles and other surfaces that are resistant to mechanical stress.
- Personal protective equipment – gloves, goggles, respirator.
What else to read about post-renovation cleaning:
Cleaning after renovation in the new Church of St. George the Victorious in Zelenogorsk
Cleaning after renovation in a luxury 2-story apartment
Return to contents
Getting rid of trash and unnecessary things
So, you are completely ready to go. Where to start cleaning an apartment after renovation? Of course, from “clearing the territory.” What you can find in newly renovated rooms:
- Work tool. Collect it, wipe it with a cloth soaked in soapy water and put it in its place (in the closet or garage).
- Remains of building materials. Sort them out. Decide what can and is worth keeping, and what is better to throw away or give as a gift to someone. Send the necessary materials for storage, put the unnecessary ones in a pile - they will become the first garbage.
- Large construction waste. Brick and concrete scraps, scraps of tiles, laminate, plastic and metal profiles - all this needs to be collected in large bags. It is more convenient to stack large pieces of drywall, boards, fiberboard, and linoleum. Such waste cannot be thrown into garbage containers (there is a fine for this), but should be taken directly to a landfill. To prevent bulky waste from interfering with cleaning, store it at the exit or, if possible, immediately take it outside.
- Small construction and household waste - pieces of cardboard, paper, tape, etc. Collect everything in bags and throw away.
Advice! First, get rid of hazardous debris. These are scraps of glass wool, paint cans, remnants of solvents, antiseptics, and impregnations. Take them out of the apartment immediately or pack them in bags, tying them tightly. This way you won't have to breathe in harmful fumes.
How to start and how to finish cleaning
It is better to tidy up the room at all stages of repair, removing dirt at each workplace. Although this is time-consuming, it will help save energy in the future during final cleaning and will not allow large amounts of debris to accumulate.
A large amount of concrete dust hangs in the air and then settles on the floor after working with a hammer drill or grinder. During these procedures, it is important that the room is well ventilated and dirty air is removed to the street. If the dust suspension does not settle, it is necessary to humidify the air, this will help bind debris particles and easily remove them. You can also use special attachments when drilling - dust collectors, a vacuum cleaner, or simply glue a bag near the location of the future hole. Such methods are suitable when you need to hang a shelf, cornice, or for other small work upon completion of repairs.
Wet cleaning should be carried out 2-3 hours after collecting dust and debris
It will be easier to clean your apartment from construction dust after renovation if you promptly remove fallen drops of paint, primer, putty or cement from any clean surfaces. Then you won’t have to subsequently scrub them off or rip them off with a knife and spatula, risking ruining the surfaces. It is worth considering that some materials cannot be removed or washed after drying, so they need to be removed as quickly as possible.
Washing an apartment after renovation is a responsible job. To make it easier to remove construction dust and debris, you need to follow the following procedure:
- Removing large debris. After gluing the wallpaper and installing electrical points, you must manually or with a damp broom collect all the debris. Remove construction tools and other unnecessary materials, clearing the surface to be removed as much as possible.
- Dust collection. The ideal option is a vacuum cleaner. It will collect dust even in the most difficult to reach places. This work must be carried out in two stages: before unpacking things and after that, a few hours later, with replacing the dust collector.
- Wet cleaning. Before starting this step, you need to wait a couple of hours so that the raised dust has time to settle. Prepare a lot of rags; you will have to change them often. For example, for the floor you will need to change at least 6-7 pieces, for furniture you may need 2-3. You will also need to change the water frequently - this will help get rid of the white deposits faster.
By following these recommendations, you can easily remove dirt, even if there is a lot of it. All that remains is to do the final cleaning as you usually do, and also wipe off any remaining dust from the furniture.
No matter how thoroughly you clean your apartment, you will have to frequently wipe horizontal surfaces for the first few weeks after renovation. This is due to the fact that dust microparticles linger on the wallpaper and ceiling, and then settle on the furniture.
Dust all surfaces
How to effectively remove dust after renovation throughout an entire apartment?
Only with a vacuum cleaner and, if possible, a professional one. Do not try to wipe off dust with napkins, sweep with a broom or collect with a brush. And even more so, do not wet the surfaces “to reduce dust.” When vacuuming with a regular vacuum cleaner, use disposable bags and change them more often than usual. For example, after cleaning one very dusty room, replace the bag before continuing to work in another room. The fact is that the filters of household vacuum cleaners are not designed for fine construction dust. When the bag is filled, it can break through its walls and gaps in the parts, and fly out through the air outlet hole. This type of cleaning is not very effective.
Be sure to treat all surfaces in the room, starting with the ceiling. Dust can be invisible on wallpaper, vertical walls of furniture, on doors and window glass. But it’s definitely there, and it needs to be removed. Clean corners, grooves, and crevices behind baseboards very thoroughly. The dust cannot be removed from there with anything other than a vacuum cleaner.
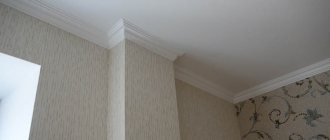
Be careful when vacuuming painted walls, ceilings (especially glossy stretch ceilings), polystyrene and polyurethane decor (ceiling baseboards, stucco), and lacquered furniture. They are easy to scratch with a regular brush, even without pressure.
Advice! If there is furniture in the room with protective covers, vacuum them too. Did you just cover your sofas and cabinets with film or old bedspreads? We'll have to take it all off and take it out at once. If you first clean and wash the walls and floors, and then start removing the dirty bedspreads, the whole room will be dusty again.
Preparatory stage
Repairs in an apartment or house begin with preparing the work area. This is necessary to later protect curtains, indoor plants, small interior items, etc. from contamination. It is important to free up space as much as possible to make it easier to remove dirt after work.
It is better to remove small and medium-sized household appliances from the premises being repaired, and send large ones into boxes or wrap them in film.
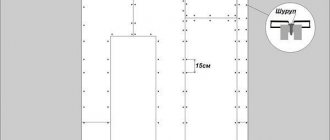
Then the room is divided into work areas. It is important to isolate the room being repaired from others. The door frame opening is covered with thick material or special film.
For this purpose, old thick curtains and bed linen are used, the main thing is that their size matches the doorway. If there are gaps at the bottom or on the sides, then this canvas is not suitable.
If you hang a door with a cloth, lightly moisten it before use, so it will absorb dust. When the canvas dries out or becomes very dirty, it is rinsed in clean water and hung again.
When repairing, construction film is often used. To fix the material on the doorway along its length, sew in a zipper or make a kind of screen from 2 pieces of film, fixing them overlapping. But it is important to leave a margin of 25 cm, which will cover the junction.
Protect the rest of the rooms from contamination by closing the door and covering the cracks with a damp cloth rolled into a roller. In the same way, it is recommended to fill cracks in the doors of other rooms.
After creating a protective structure against dust, you can carefully leave the premises being repaired. This will prevent dirt from spreading into clean rooms.
Transparent film is used to protect windows. If you ignore this point, the glass will become covered with a thick ball of dust. To clean the windows you will have to wash them 3 to 5 times with warm water and a cloth.
In addition, you should take care to protect the floor from dirt from the walls and ceiling. It is important to properly cover its surface with film. If there is high humidity in the room, then you should not delay the repair, as the likelihood of damage to the parquet or laminate increases.
Upholstered and cabinet furniture that remains in the work area must be wrapped in construction film. The section should be wide so that dust does not penetrate into the joints. Experts recommend putting 2 layers of film, covering sharp corners with a soft cloth.
Thus, the preparatory stage includes the removal of small and medium-sized items, protection of the floor, furniture and doorways.
Wash and clean
If you have dealt with the dust remaining after the renovation yourself, then wet cleaning of the apartment will no longer be a problem. Here it is important to correctly assess the condition of the surfaces and decide which of them really need serious cleaning. Not all finishing materials can even be wiped, much less washed. Cleanliness must be ensured so as not to damage them.
Like dust removal, wet cleaning should start from the top, from the ceiling, and gradually move down. Frequently change the water or cleaning solution in which you rinse your wipes and brushes - this will help avoid streaks. If you are not sure whether a detergent is suitable for a particular surface, try it on a small area in an inconspicuous place. And only after making sure that there is no harm, wash the entire area. Further separately about the different surfaces in the apartment.
Ceilings
- A painted ceiling, if it is well cleaned with a vacuum cleaner, does not require additional cleaning. The same applies to fabric tension structures.
- Plastic seamless ceilings, coatings made of laminated polystyrene foam or polyurethane foam should be wiped very carefully with a damp cloth. If the coating is glossy, with a mirror effect, immediately wipe it dry to avoid leaving streaks from moisture.
- PVC stretch ceiling structures can also be wiped with a soft, damp cloth. Do not use detergents if there are no stains on the film. Heavy dirt can be washed off with soapy water; the main thing is not to scrub the ceiling with a hard brush.
Chandeliers, lamps, switches, sockets
Lighting fixtures are wiped with a very well wrung out damp cloth and then wiped dry. Be careful - be sure to turn off the electricity before working on electrical appliances. Moisture should also not get inside. If possible, it is better to remove the lampshades and wash them separately. Wipe glass and chrome elements immediately dry; if necessary, you can use a window cleaning spray. Carefully wipe sockets and switches with a clean damp (not wet!) cloth.
Walls
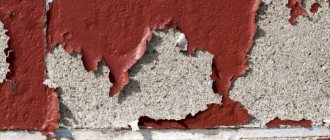
Painted walls, decorative plasters, liquid, vinyl and paper wallpapers cannot be washed. They can only be gently wiped in areas of heavy dirt or stains. In other cases, vacuuming well is sufficient.
Which wallpapers are washable?
First of all, in order to avoid unpleasant situations and not spoil the coating, let's figure out what wallpaper can be washed. I think everyone understands that paper wallpaper cannot be washed.
Vinyl and non-woven wallpaper are called washable. However, not everyone knows that these fabrics may have different resistance to moisture and cleaning agents. Therefore, manufacturers inform customers about this characteristic of the material using special designations that are applied to the wallpaper packaging :
| Designation | Features of the canvas |
| One wave | Such wallpaper is moisture resistant, but not washable. Therefore, they can only be wiped with a damp cloth, doing this very carefully. In this case, no cleaning agents should be used. |
| Two waves | Fabrics of this type are washable, i.e. they can be washed with soapy water. However, this must be done very carefully. |
| Three waves | Fabrics with this designation are called super washable. They are resistant to water and can be washed using any household detergent. |
| wave with crest | Such fabrics are resistant not only to moisture, but also to friction. Thanks to this, they can be washed using a brush. It is also allowed to clean them with a washing vacuum cleaner. |
Designation of wallpaper resistance to moisture and cleaning
It must be said that not only vinyl and non-woven wallpaper can be washed. Paintable glass wallpapers withstand moisture well. However, it should be borne in mind that a lot depends on the paint with which they are painted. If the paint is not moisture-resistant, then, of course, you cannot wash such wallpaper.
Fiberglass wallpaper is not afraid of moisture
Liquid wallpaper is often used in kitchens. They themselves are not resistant to moisture. This coating can simply be washed off the wall with a wet rag or sponge. However, if liquid wallpaper is varnished, it becomes resistant to moisture.
Another type of wallpaper that often attracts people is paper canvases, as they often have an attractive appearance and are much cheaper than their vinyl counterparts. I already said above that this finishing material does not withstand washing . However, many people are interested in how to cover the wallpaper so that they can be washed?
It is indeed possible to make such canvases moisture resistant. For these purposes, there are special wallpaper varnishes of the type VAK-A-104 .
People often wonder whether non-woven wallpaper can be washed if its moisture resistance level is unknown. I’ll say right away that all types of this finishing material can withstand wet cleaning. As for more thorough washing, resistance to it can be checked by washing a small inconspicuous area, which, for example, is hidden behind furniture.
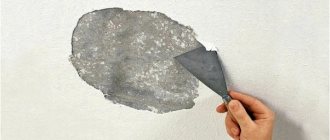
We remove stains and specific contaminants
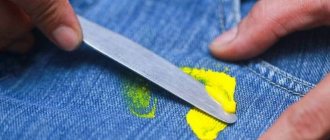
How can you remove the remains of building materials from different surfaces with your own hands? This is perhaps the most difficult question for cleaning an apartment on your own after renovation. Here are some tips for removing the most common stains:
- Drops of enamel paint and varnish are wiped off hard surfaces with solvent or alcohol.
- Cement, tile adhesive, and polyurethane foam are removed with an abrasive sponge.
- Scotch tape, glue, and paint can be removed from a plastered or painted wall with white spirit.
- Rust is dissolved with a solution of copper sulfate.
- Grease stains from laminate and parquet are removed with turpentine or alcohol.
Shutdown
Now you know how to properly clean an apartment after renovation. When everything is clean, all that remains is to ventilate the rooms well and put things in their places. And if the smell of paint, varnish or other “chemicals” remains in the premises, try to get rid of it using improvised means:
- Lay damp towels and sheets over the surfaces, leave them for several hours, then collect and wash.
- Pour roasted coffee, coarse salt or soda into wide plates. These are excellent sorbents, leave them for a day and then throw them away.
- To remove particularly strong odors, it is worth using more sorbents - charcoal, a commercial odor and moisture absorber. They are sold in bulk packs. Spread the sorbent in a thin layer on a paper or fabric mat and leave it in the room for a day or two.
- To eliminate the smell of solvent (acetone, white spirit), light several candles in the room. Solvent vapors will burn, and combustion products can be easily disposed of by well ventilating the room.
After eliminating the unpleasant odor, you can enjoy a comfortable life in a clean, renovated apartment. And if you don’t have the desire and time to clean up all the construction dirt yourself, call us for help. Dom Cleaning specialists know how to clean an apartment after renovation; they will clean it quickly and with a quality guarantee.
Source
Detergents
One of the most common and common means for cleaning wallpaper is a solution of baking soda. This grandmother's recipe has been passed down from generation to generation and is popular among housewives.
Since baking soda is almost always available to an experienced housewife, the composition is not difficult to make, and its cost is a few pennies. The effectiveness of this detergent is above average, which is quite enough to maintain order during infrequent cleaning.
The recipe for a soda solution is not a secret; it consists of only two ingredients.
We don't often use this ancient remedy in everyday life.
We moisten a rag or sponge with the finished mixture and wipe the wallpaper, being careful not to damage its surface. However, if you have hot-stamped vinyl wallpaper on a non-woven base, then instead of a sponge or rag, you can use a brush with soft bristles, the effect of such cleaning will be even better.
Another popular composition for washing wallpaper is a soap solution. Creating such a mixture will not cause any difficulties for anyone.
A good soap solution is obtained by mixing water with soap in a ratio of 1 to 10. In addition to soap, it is permissible to use dishwashing detergent. Wipe the wallpaper with the resulting foam composition and remove external dirt and dust.
Reliable and proven product for working with dust and dirt
As pollution decreases, it is recommended to make a less concentrated composition, or even switch to clean water.
If the contamination has an established appearance, and its layer is not only thick, but also extends into the texture of the wallpaper, then you should think about using chemicals.
Before use, read the instructions on the packaging of the chemical to see if it will harm your durable wallpaper or corrode it. If everything is in order, then to check its qualities, try mixing a less concentrated composition.
Fighting mold is a popular activity for many people.
To get rid of mold in hardware and construction stores, it is recommended to look for a product called “Anti-mold” or “Whiteness” - these compounds will help cope with the emerging fungus.
In addition to detergent and soap, baking soda is great for cleaning wall coverings. This solution can be prepared at home and from scrap materials. This folk method is based on soda.
- soda – 40 g;
- warm water – 2 l.
- Combine the powder with water. Mix thoroughly until smooth.
- Dip the sponge into the solution and carefully wipe the wall with it.