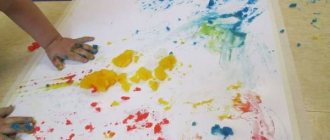
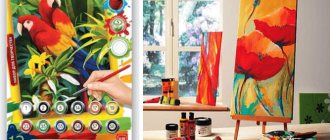
Finger paints for kids
Finger paints are great for little ones.
- They can be given to a baby from about six months of age.
- Such paints are specially made for little ones and they do not contain harmful and toxic ingredients, they are made using food coloring, because little children put everything in their mouth and taste it.
- To prevent children from doing this, they usually add salt or another ingredient to the paints, after trying which the child will no longer want to repeat it.
- Finger paints can be easily washed off any surface, washed off from a child’s skin, and washed off from clothes.
Types and composition
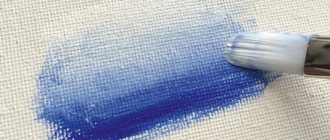
Children's paints are sold in specialized art stores. They include color pigments, water and a thickener. They have no smell. Each color is in a separate tube. Even when stored without a lid, the coloring mass retains its consistency. The following types of finger paints are distinguished:
- Fluorescent. They glow in the dark after drying.
- Gel. They contain moisture-retaining components that prevent the skin from drying out, which is important in childhood.
- Sensory. Due to the content of tiny grains in the composition, after transferring paint to paper, the surface becomes rough.
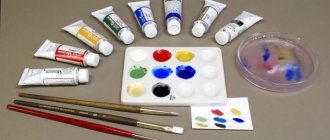
Among the most famous paints for children are:
- Ses;
- Jovi;
- Crayola;
- Djeco.
Child development through drawing
The benefits for children from such creativity are enormous: fine motor skills develop, which in turn affects the child’s speech and memory. When painting with finger paints, the child’s nervous system also develops, he learns to sit and walk correctly.
By painting with their fingers, children better perceive colors and see the boundaries of their work. In the process of creativity, you can study colors, shapes, counting, paint animals and various objects that you will introduce your baby to.
Benefits and harms
Finger paints are very useful for kids. They help speed up the process of acquiring various skills in a playful way. Drawing from an early age instills in a child an artistic taste and teaches him to correctly perceive colors. In the future, he can independently combine them with each other. The skill of transferring what you see in life onto paper also develops. The benefits of using finger paints are as follows:
- activation of the thinking center;
- normalization of the nervous system;
- accelerating the development of fine motor skills;
- formation of the ability to distinguish colors;
- development of self-control and self-discipline;
- opportunity to have fun.
Paints can only be harmful if they were purchased from untrusted places. Saving in this case is impractical. Low quality paints may contain toxic substances that can have a negative impact on the health of children.
Organization of the process of painting with finger paints
The drawing process itself is very exciting, so don’t forget about the precautions:
- dress your child in clothes that you don't mind getting dirty
- put on a bib or apron, there are special aprons for creative activities
- use a large sheet of paper, preferably Whatman paper or a piece of wallpaper, so as not to limit the child
- if you will draw on the floor, put oilcloth underneath
- transfer some of the paint you will use to other containers so that the child does not use all the paint at once, which is exactly what he will do if you give him the whole jar; can be transferred into lids or toy dishes
- prepare wet wipes or a wet cloth
It is better to start drawing when the child is in a good mood, so that he associates drawing only with positive emotions.
Preparing to Draw
You need to prepare for the fact that paint will be everywhere - on the floor, on clothes, and on furniture, if you do not protect a certain corner from it in advance. Therefore, carpets and sofas should be covered with some unnecessary sheets or other linens. It is better to choose a large Whatman paper as a canvas, since a child’s creative scope may well not be enough for an ordinary album sheet, and its continuation will be wallpaper and linoleum or parquet. But if trouble does happen and something gets dirty, finger paints are very easy to clean. It is recommended to always practice in a specific place in the home: this way the child will gradually get used to the fact that the process of drawing (and subsequently studying and working) should be tied to one area of the house.
How to teach a child to paint with finger paints?
So, you have decided to introduce your child to finger paints. For the first acquaintance you need to know:
- The child must be well-rested, not hungry, and in a good mood
- do not give your child several colors at once, limit yourself to one at first so that the child does not get confused
- the first lessons may last 2-3 minutes, this is normal, let the child get used to the new material
- if a child has lost interest in work and started throwing paint cans around, it’s time to finish for today
- At first, the child most likely will not draw, this is natural, he needs to master and understand something new; he will most likely dip his hands in the paint and look at it on his hands, squeeze them, hear the paint squeak, feel the new material for him
Finger painting techniques for children 1-3 years old – what can you use to draw with?
A child can start drawing from the infant period - after he can sit well. The first drawing lessons can be taught by the mother herself - even if she believes that she has no artistic abilities.
Young children find it very easy to draw with their fingers and palms.
The first lessons are conducted like this:
- To begin with, you can give your child a few flowers. 3-4 main ones are enough.
- A small album sheet of paper is completely unsuitable for drawing with your palms. Here you will need a large sheet of Whatman paper or a piece of wallpaper.
- The child should be dressed in clothes that you don’t mind, or, if the room is warm enough, stripped down to panties. The young artist will definitely get dirty and try to depict something on himself.
A child’s first steps in art will resemble paintings by abstract artists. There is no point in asking your child to complete certain tasks. He will not be able to draw accurately, because he does not yet control his own hands well enough.
At the age of one to two years, a child can draw with his fingers on semolina scattered on a tray . The material for drawing can be pre-tinted and scattered into different jars. Before class, the cereal is poured out in small slides on different edges of the tray, and the child is asked to mix it like sand with his palms. Then run your fingers along the resulting multi-colored surface, leaving a mark. Invite the child to repeat the action.
With a child over 2 years old, playing with visual aids can be a little more complicated. At the beginning of the lesson, the plane is covered with unpainted material. Then the mother shows the child how to draw lines with her fingers, and then with a stream of colored semolina. For this purpose, colored cereals are poured into rolled paper bags , in which a small hole is left at the bottom.
You can paint with children using any available means:
- Crumpled paper.
- Toothbrushes.
- Natural material (leaves, twigs, blades of grass).
- Pieces of fur.
- Cotton buds.
- Scraps of fabric.
One-year-old children are not able to draw perfectly even geometric shapes and complex objects. A child's drawing consists of a set of dashes - lines, scribbles and spots.
The more often a child draws, the more complex and interesting his work becomes.
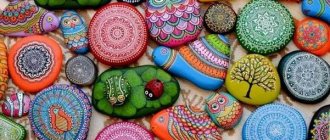
How to paint with finger paints? Photo
Dip your child's finger into the paint and put a dot on the piece of paper, then draw a line. You can use cotton swabs and make dots with them. Let your child try to dip a piece of sponge and draw with it. Let him dip his palm and leave its imprint on the paper. In general, use your imagination and create.
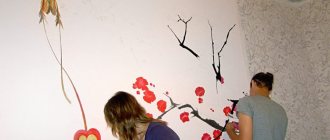
You can spend time with finger paints in the bathroom in a very interesting and unusual way. You can either simply draw on the bathtub or tiles, or you can glue whatman paper or wallpaper to the wall above the bathtub and draw on them.
The field of activity for a child is large, but it won’t be difficult to wash it all, and most importantly, the child will not be able to go beyond the boundaries of the bathtub and dirty the whole house. You will see that your child will really like this activity!
For older children, you can color the pictures in a coloring book or print some images yourself, such as mushrooms or leaves, so that they are large and with a small amount of detail. Color them with your fingers or a cotton swab; it’s convenient to color large pictures with a sponge.
Or make a stencil - cut out something simple on cardboard using a stationery knife, attach it to our Whatman paper and apply paint over the stencil with a sponge, and then remove it, you will get an interesting picture. Show it to your child first, and then let him try it himself.
There are also many other interesting ways to paint with finger paints. Here are some examples of how to draw an animal, butterfly or other objects with your fingers and palms. There is nothing complicated here, but what a result!
In this activity, it is important to only show the child how to draw and give him complete freedom. Don’t tell him what he’s doing wrong, just show him everything, and then he’ll figure out how to draw and where. Be sure to praise him - this is very important to him.
Finger and palm painting ideas for children 1-3 years old
The first drawing lessons should last from 5 to 10 minutes . Kids get tired very quickly, it is difficult for them to concentrate their attention on one type of activity.
Any educational activity with preschoolers is carried out in the form of a game - especially this rule applies to very young children.
During the lesson, parents show the child what to do. They dip their finger into the paint first and draw lines with it. All actions must be accompanied by explanations.
Hand drawing “Sun”
The lesson can be carried out with children from 1 year.
This work is performed on a sheet of blue paper or cardboard.
At the beginning of the lesson, the mother puts the baby in her arms. Then in the very center of the sheet she draws a yellow circle with her palm. A child draws stylized sun rays with his palm. To make the drawing work, the mother holds and guides the baby’s hand.
After the solar circle with rays is ready, the mother draws a wreath and the face of the sun with the baby’s fingers.
Finger painting "Rain"
Recommended for children aged 1 to 2 years.
One blue or cyan color is enough to do this job. During the lesson, the mother shows the baby how to depict falling raindrops using her fingers.
It is difficult to expect a child to perform a task perfectly. The main task is to teach him to draw stripes in one direction with his fingers.
How to choose paint for painting and how to work with it: tips
- Before purchasing, check the composition of the paint; it is advisable to ask for quality certificates, because... the paint must be safe for your baby. The composition should not contain any harmful substances; only food dyes should be used, because children often taste the paint
- Choose colors according to the child’s age, look at what is written on the packaging. Some manufacturers offer such paints from 1 year, some from 2 or 3 years
- You shouldn’t buy a kit with a bunch of different colors; at this age, a child needs to learn only the basic ones: red, blue, yellow and green. As a rule, paints are sold in jars of 4 or 6 colors, no more is needed
- It would be nice if you painted with the color you are currently learning. This will help your child learn colors easily through play.
- For drawing, choose whatman paper or a piece of wallpaper, because an A4 sheet is not enough for a small child, he still does not know how to see boundaries and not go beyond them, so he will decorate everything around you
- Take care of how you clean everything up later, because once the child gets the hang of it, he may forget about whatman paper and explore the territory beyond, draw on himself or you. It is best to cover everything with oilcloth and dress in old clothes
Learn to draw lines
In order for the child to be able to draw what he has in mind, he simply needs to learn how to draw a variety of lines with a pencil - straight, wavy, close them into a circle, oval, etc. And if it costs us, adults, nothing to draw any line with a pencil, then for a child it is real work. The child has not yet learned to control hand movements and it is still difficult for him to handle writing instruments.
So one of the first things you can teach a young artist is to draw lines. To do this, invite him to play the following games.
"Connections". This game not only gives you the opportunity to practice drawing straight lines on paper, but also develops logical thinking. You need to prepare for it in advance. Draw or stick images on a piece of paper and ask your child to connect them with lines, following a certain logic. You can give your child the following tasks:
- Connect identical butterflies (cars, flowers, berries...) with lines.
- Connect cookies of the same shape with lines.
- Connect the fruits to the plate with lines.
- Connect objects of the same color.
You can gradually make the tasks more difficult.
“Complete the picture.” Invite your child to fill in the missing details. Let them be just straight lines at first, for example:
- mushroom stems;
- umbrella handles;
- tree trunks;
- rays of the sun, etc.
Let the baby connect the flower heads with the vase, the balls with the man’s hand.
Draw a cloud and make it rain with your child. Draw the ground, and let the child draw the grass.
Stencils. Teach your child to draw using a stencil. Nowadays, stores offer a wide selection of stencils on different themes - animals, vegetables, fruits, sea creatures, etc. You can also use the edges of a sorter cube as stencils.
This activity trains muscle memory. By tracing stencils, the child learns to draw closed lines and shapes.
"Circle the object." Place cups, cubes, frames and inserts on a piece of paper and trace with a colored pencil. Then match the corresponding object with the figure drawn on the paper. This game teaches you how to trace flat shapes, as well as relate a flat image to its outline.
And of course, don’t forget to trace your baby’s hands - this activity brings great joy to little artists.
"Paths". Draw paths on paper - two parallel lines. Invite your child to first trace them with his finger and then run a pencil over them.
You need to trace with your finger so that the baby understands the task. It also develops muscle memory. If you remember, at school students first write letters and numbers in the air with their hands and only after that - in their notebooks.
To make it interesting for your little one, come up with a plot. For example, draw a ladybug at the beginning of the path, and a house at the end. Now, together with your child, help the ladybug get to the house. You can also help the truck get to the garage, the ship to sail to the island, and the butterfly to fly to the flower.
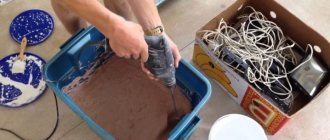
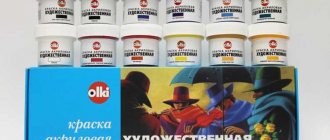
How to make finger paints at home yourself: recipe
There are several recipes for finger paints, let's look at one of them, in our opinion the most suitable.
Take:
- 2 tbsp. white flour
- 7 tbsp. l. fine salt
- 1.5 tbsp. ordinary water
- 1.5 tbsp. l. any vegetable oil, preferably refined (odorless)
- food coloring in desired color
Mix the flour with salt, slowly add water and stir, otherwise lumps will form that we don’t need at all, you can even beat it with a blender or mixer. Then put in the oil. The consistency should resemble liquid sour cream; adjust the thickness with flour and water. Now you can divide the mixture into jars and add food coloring of different colors.
That's all, the paints are ready. Let your little one draw with them just for fun!
How to order finger paints in the Aliexpress online store?
Follow the link to the online store
Choosing pencils and markers
So, short and triangular pencils will teach your baby to hold them correctly.
In addition, the first pencils for drawing should be very soft so that they can leave a mark on the paper without strong pressure. These can be wax and plastic pencils, water-based pencils. They are easily sharpened with ordinary sharpeners, leave soft and even strokes, and the designs are rich and bright. Such pencils do not stain your hands, are easily washed off clothes, and have no odor.
And of course, your baby can easily draw with felt-tip pens. Now on sale there are harmless markers with ink based on food coloring. They also sell felt-tip pens that can be easily washed off your hands and clothes.
Finger exercises before drawing
I have one memo “Finger games for children of different ages - a memo for parents” , where I wrote about the benefits of physical exercises (finger gymnastics) up to one year old and up to 5-6 years. I pay special attention to rhymes, counting rhymes, and games. The fingers bend and straighten while doing exercises. The combination of movements and rhythm are also very important. In this article I write about squeezing your hands into fists, unclenching them, bending and straightening all your fingers together and alternately, and making circular movements with your hands.
Before children draw on their own, do this kind of finger exercises. By training their fingers, children develop fine motor skills. For example, from seven months you can play ladushki and magpie-thief with children. Children really like these nursery rhymes.
Keep your children's first paintings. Maybe they will become artists, or maybe they will choose another profession. But the first works will still be valuable. Do you agree with me, my dear readers? Finger painting, if it does not reveal the talent of children, will certainly benefit them. The most important thing is that they will develop perfectly.
At what age should a child be taught finger painting techniques?
Another question that interests parents is at what age children are interested in drawing with such paints. It’s not easy to give a definite answer, it all depends on the child himself - some draw as soon as they learn to sit, others may be interested in this activity only at one and a half to two years. Psychologists advise teaching a child this drawing technique from 5-8 months.
They say that Picasso learned to draw before he could speak. Perhaps your son or daughter is a future genius. To the question “How to develop a child?”, the answer is clear – to draw. And the sooner the child’s creative abilities are revealed, the better.
Precautions and Rules
Finger dyes must have an ideal composition without harmful components, are non-toxic and completely safe for children. The baby will immediately put them in his mouth to taste them, so it is best to purchase products designed for children's drawing. Before purchasing, you need to check whether the selected product meets the safety standard and whether it will harm the health of its consumers.
Note ! You can make safe dyes at home. For a kilogram of flour, add five tablespoons of salt and two tablespoons of vegetable oil. Mix the ingredients thoroughly and add water until the consistency of sour cream is formed. Transfer the mixture into containers and add a different food coloring to each container.
The baby will not be able to engage in creativity without smearing his clothes and everything around him. Therefore, it is better to immediately allocate a place for studying, which will then be easy to clean.
Consultation for teachers of preschool educational institutions “Drawing with fingers and palms”
Emma Couular
Consultation for teachers of preschool educational institutions “Drawing with fingers and palms”
Consultation for preschool teachers on the topic : Drawing with fingers and palms .
For the first time the technique
«Finger drawing»
was described in 1932, and in our time
finger painting has gained particular popularity. At exhibitions, museums, galleries, we can see paintings drawn using only our fingers . Have YOU ever thought that you could create your own masterpiece? For this you have a significant prerequisite - five fingers on your right hand and five on your left.
In the West, not so long ago, exhibitions and auctions of finger-painted babies ! These pictures are reminiscent of impressionist pictures, which are based on intuitive drawing . And they are much more brilliant than adults, because their brains are not yet filled with stereotypes, clichés, and internal attitudes. Children give free rein to their limitless imagination. And they usually use cheerful colors. Beauty! By allowing the child to experience everything and try it for himself, we expand children’s knowledge and creative horizons. After all, a baby stained with paint can be easily washed with soap and water and a napkin. And the desire to create, suppressed in early childhood, may never awaken.
The most accessible way to develop a child’s creativity is to interest him in drawing . Through creativity, the baby develops imagination, imaginative thinking and taste.
Little artists will really enjoy drawing with their fingers and palms .
What is the significance of finger painting for a child ? This type of drawing develops fine motor skills well, which affects not only the mind, but also the use of one’s pens, and promotes the development of speech.
- How?
The fact is that the center that responds is located in the cerebral cortex very close to the speech center, and when it starts working, it makes the second one work too.
Finger painting is a good reflex massage. There is a certain point on that is connected to all organs of the body. By massaging these points, you can improve your condition in general.
Development of fine motor skills of the hand, concentration, coordination of movements under visual control, preparation for future writing, consolidation of relationships in the “Child - Adult”
- the result of the exciting process
of drawing a child with teachers .
How can you draw with your fingers ?
There are several finger painting .
1. We draw with a half-open fist, for example, this is how you can draw a rainbow , hills, banana, etc.
2. Draw with your palm , while your fingers can be closed (butterfly - two decorated palms , fish - one palm is applied horizontally to the paper).
3. We draw with our fingers - namely : we put dots with our fingertips (this is how you can draw a caterpillar , grapes, rowan, or use this technique to paint a regular coloring book, draw lines with your fingers (it’s so good to draw geometric shapes)
.
We apply the fingers (paint 1-2 fingers and attach them to paper - bushes, trees, stars will come out, collect the fingers in a bun (and get flowers and winter snowflakes)
.
4. Draw with a fist from the side of the thumb (beautiful roses, shells, snails will come out)
5. Finger painting on foggy glass.
Bring your child to the window and show him how to draw paths with his fingers on the damp , foggy glass. Such drawings look especially effective in the evening, when it is dark outside the window.
6. Drawing on wet paper.
Thick paper can be moistened in a bowl, under a tap or with a wide brush. The kid will probably want to taste this kind of drawing , because it’s so interesting to watch how, with one touch of his fingers , such a beautiful spot blurs on the sheet. also draw using this technique on paper , on an easel or against a window. In this case, the paint will flow down.
Finger paints mix very well and lay on top of each other, so experiment with your child to create new colors and shades. Another option is to put several multi-colored puddles on a sheet and smear them with your hands - you get very beautiful pictures.
In addition, recently a huge selection of special paints for finger painting has appeared - they are easily washed off your hands and wash well from clothes. You can also prepare your own paints for finger painting .
The easiest way is to dilute the gouache with a small amount of water, adding a few drops of dishwashing detergent or starch.
More complex recipes - cook thick jelly from 1.5 tbsp. spoons of starch and a glass of water, set aside and divide into several parts. Add a different color of food coloring to each serving. Safe and inexpensive finger paints are ready .
The easiest way to draw dots is with your fingers . It will be more interesting for a child to decorate pre- drawn objects (fly agaric, sunflower, lady's box, draw apples on an apple tree , a circle on a dress, etc.) or complement plot pictures ( draw falling snow or rain, peas for a cockerel, grains for chickens and etc. ... To begin with, you can invite the child to finger paint on a tray with semolina , salt or river sand.
If creative abilities remain unclaimed, then emotional depression accumulates over the years. Drawing helps to release pent-up creative energy and express your “I”
.
Recently, children under the age of one year drawing The youngest artist is six months. “Then so early?”
- many are surprised.
M. V. Gmoshinskaya, Candidate of Medical Sciences, pediatrician, author of a method for teaching drawing to children in the first year of life, believes that it is necessary to start as early as possible.
Drawing helps to establish creative and emotional contact between mother and child, develop attention, memory and thinking through artistic methods. In addition, in the process of creative work, the development of sensory skills, fine motor skills, and light perception . “Unlike all proven methods, we do not show the baby “how to”
and
“what’s right
,” but we rely entirely on his intuition, imagination, desire and even whim,” writes Gmoszynska.
Little artists learn to choose and mix colors from a palette, and they do it themselves. At first, babies simply draw with their fingers , a little later with their palms , and after a year with brushes. The result depends on both the artist’s mood and “artistic experience”
, as well as from the mood of others.
Drawing at any age is great fun. Unfortunately, most of us almost never draw or do it extremely rarely. By doing this we are greatly impoverishing ourselves. Maybe we should have started drawing earlier too...
Educators say that at 4-5 years old, some children are afraid of a white sheet of paper. The teacher has to imitate some kind of “squiggle”
on the sheet so that the child decides to start his drawing.
But with children who have started drawing for about a year , there is never a fear of a white sheet
. About tasty and tasteless paints.
The first thing your six-month aspiring artist will try to do is put paint in his mouth. This is completely natural for a child at this age. The most common reaction of parents is to limit the movement of their hands and tell the child constant “no”
.
Unfortunately, such actions exclude the free activity of the baby. In this case, the whole point of the drawing process is lost .
Of course, any paint is an absolutely inedible thing, and you need to remember this! You can wean your child off from eating paint in the following ways: add salt or mustard to the paint. The child will understand: it’s “bitter”
, means
“impossible”
!
It is worth noting that both gouache and finger paints themselves also taste quite unpleasant, and it is unlikely that the child will want to try them again. So don't worry too much if he licks his painted finger or drawing.
Many experts advise combining drawing and music . Music helps create a certain mood. Use classical music as background for your practice. If you pay attention to your child’s creativity, you will be able to make an interesting observation after some time: while listening to different pieces of music, the child will select different colors for his drawing.
Don't throw away "masterpieces"
little artist! They can be kept as a keepsake. The baby will grow, create new creations, and samples of his first creative experience will become more and more valuable over the years.
Keep your drawings in chronological order; this will help you see how writing style, themes and subjects have changed, and how new colors and shapes have appeared. The works will be able to tell you a lot about the development of the child, and about changes in his character and mood. Sometimes the conclusions give you a lot to think about.
Let's help our children not to lose their natural talents.
Benefits of finger painting
Start drawing with your child at seven to eight months.
Acquaintance with the creative world at this age will affect his further development and general knowledge of the environment. Everyone knows that on the tips of the fingers there are points that are responsible for various human organs. Therefore, finger massage is very useful, because it activates the speech center. In addition, as a result of this, babies pronounce words faster.
Wonderful and colorful albums will create conditions for creative activity, intelligence and taste development in children:
- “We draw with our palm and finger. Games-activities. 3-4 years”
- “Album for the development of fine and creative skills “Drawing with your palm and finger” for children 3-4 years old”
The effect of finger painting on kids
Have you ever tried finger painting with your child? No? Then let's see what the result will be using such an interesting method. So, let's list the actions that improve after it:
- speech development through finger massage;
- development of figurative and abstract thinking;
- liberation of the baby with the release of his innate creative potential;
- development of artistic taste and teaching colors;
- exploring the world through the color and texture of paints, as well as experimenting with them; development of fantasy.