Ways to level walls
To make the surface even and smooth, two methods are used:
- Leveling with plasterboard boards.
- Applying a plaster layer.
The first option is considered cheaper and faster to implement. However, the resulting base cannot boast of particular strength. As for plaster, there are two ways to apply it: planar (just a rule) and along beacons. The planar method is used to design bases that do not have significant differences. If there are large irregularities, plastering is carried out along the beacons.
What should the quality be?
SNiP III-21-73 contains instructions on the level of quality of plastering work. They are recommended to be used in cases where hired workers are invited to carry out repairs.
There are three levels of plaster quality:
- Simple. Vertical deviations of up to 3 mm/1 m are allowed. However, along the entire height of the walls they should not exceed 15 mm. In rooms with a standard height of 2.5 mm, this figure is within 7.5 mm. It is possible to have smooth differences of 5 mm up to 3 pcs. / 4 m2. Their height or depth should not exceed 5 mm. Horizontal deviation is allowed within 3 mm/1 m.
- Improved. Vertical deviations should not exceed 2 mm / 1 m (in total - no more than 10 mm). Smooth changes of up to 3 mm can occur in quantities of up to 2 pieces. / 4 m2. The limit of horizontal deviations is up to 2 mm.
- High quality. Vertical deviations cannot exceed 1 mm / 1 m (up to 5 mm in total). Irregularities are allowed in the amount of 2 pieces. / 4 m2, with a depth of up to 2 mm. Horizontal error - up to 1 mm / 1 m.
Selection of plaster mixture
You can prepare a solution for plastering walls on lighthouses yourself, or you can buy it ready-made. The last option is more preferable, because Such compositions are distinguished by the accuracy of their proportions and the presence of plasticizers that facilitate the work.
There are four types of plaster mortars:
- Lime. With its help, dry heated rooms are finished. It is characterized by long service life and low cost of ingredients.
- Clay. Heat-resistant composition for the design of specific surfaces (stoves, fireplaces, etc.).
- Cement. The main components are cement and sand. To improve characteristics, special additives are sometimes added to the composition. The resulting base is durable and compatible with most finishes.
- Plaster. Plastic and environmentally friendly material with the ability to “breathe”. Gypsum plasters are most often used for interior decoration due to ease of application and quick drying.
Plastering facades
Plastering external walls (facades) using lighthouses uses almost the same technology as indoors. The main thing here is to observe the temperature regime. The temperature outside should be above zero.
For facades, a mixture based on cement and sand is usually used. For greater durability, you can attach a metal mesh to the facade and plaster over it. It is especially important to use a mesh if the walls of the house are made of sand-lime brick.
We have looked in detail at how to properly plaster walls using beacons. Now you can do this work yourself without any problems. Don't be discouraged if you don't succeed the first time, everything comes with experience, and you will definitely learn how to make the walls perfectly even. We also recommend that you read our article about applying decorative plaster.
Types of plaster beacons
Modern builders use the following types of beacons for plaster:
- Metal. We are talking about galvanized metal profiles of small thickness with perforations. Act as guides for the rules during plastering of walls. Usually they have a length of 300 m, with a width of 3, 6 and 10 mm. The metal stops are fixed with screws. Their popularity is due to their low cost and ease of use. There are also disadvantages: damage to the profile during installation leads to the appearance of rusty spots on the wall.
- Plaster. They make it possible to plaster walls with small differences. The surface for plaster is equipped with holes with dowel screws. Using a level, the screws are positioned at the desired height. Pieces of metal profiles or wooden planks are attached on top of the caps. They serve as limiters when laying islands of gypsum mortar, after which the profile has hardened and is dismantled.
- Plastic. Analogues of metal guides, however, for their manufacture, not galvanized steel is used, but plastic of special strength.
Important: when plastering walls on plastic beacons, you should be careful not to hit the profile with the rule so that cracks do not appear.
Rules for plastering lighthouses
Leveling the walls by plastering is carried out following the rules developed over centuries.
- The plaster should not be stronger than the base material. During hardening and strength gain, internal stresses arise in the composition, which can be destructive for a weak base.
- The base surface must be carefully prepared before plastering. Any negligence will lead to the appearance of cracks, peeling of the plaster layer or the appearance of stains, efflorescence and other defects in the plaster.
- Applying a primer to patches, mortar marks, and mortar paths is mandatory.
- It is better to place beacons under the plaster slowly, especially paying attention to the accuracy of the geometric constructions.
- When plastering, the solution is applied evenly, spreading without leaving gaps.
- The strip between the guides is plastered in small sections, since otherwise too much excess mortar will accumulate on the rule. This may cause the instrument to become deformed.
- It is necessary to rest the rule on the guides only with slight pressure, so as not to damage the tops of the profiles.
- After leveling the mixture from bottom to top, one leveling is performed in the opposite direction, which ensures the mixture is fixed to the wall and prevents the composition from sliding.
- The profiles are removed until the plaster gains strength.
- The resulting grooves are filled with a solution that is more viscous than when plastering.
- If plastering is done with gypsum, then the excess is either immediately thrown onto the wall where the mixture is missing, or thrown into a separate container. The gypsum composition, which has already been on the wall, can cause the freshly prepared solution to instantly set, becoming the center of crystallization.
From all of the above, it is clear that the correct installation of the outer guides becomes the basis for the correct exhibition of intermediate beacons for plastering walls with your own hands. Having successfully completed the beginning of marking work, beginners usually get a taste for it and work with great pleasure, because the result - perfectly maintained geometry - is inspiring.
What you need for plastering
To level the walls along the beacons with your own hands, you need to prepare the following materials and tools:
- Plaster mortar (it is better to use a ready-made dry mixture).
- Screws, screwdriver and hammer.
- A drill (or hammer drill) with a mixing attachment for mixing plaster.
- Construction level, tape measure and plumb line.
- Metal scissors for cutting lighthouse strips.
- Rule, trowel, brush, roller, and a set of spatulas.
- Kneading vessel, work clothes.
Necessary tools and equipment
If you prepare the necessary devices in advance, you can significantly reduce the labor costs of applying the solution and speed up the work. When plastering walls yourself, you need to provide yourself with protective equipment and tools for carrying out the technological process.
What you will need to prepare the solution and apply it to the surface:
- tape measure, level, plumb line, beacons and screws for determining irregularities and installing the structure on the wall;
- construction mesh, roller and brush for preparing the base;
- container and mixer for preparing the solution;
- trowel, ladle, spatula, trowel and rule for applying the mixture and leveling the surface.
In addition, a plastic film may be useful to protect the floor from splashes of solution, a scaffold or stepladder for working under the ceiling, and a set of tools for fixing beacons.
You can read more about tools for plastering walls in a separate article.
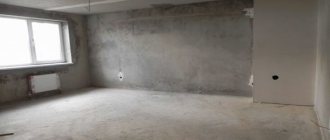
Preparing the base
Leveling the walls with plaster according to the beacons begins with preparatory activities. It is recommended to clear the room where the renovation is being carried out from furniture and other items. The surface of the wall is cleared of old finishing, right down to the base. To remove the old plaster, you will need a hammer drill or a hammer with a chisel. It is more convenient to remove paint with solvents or a hairdryer; old wallpaper needs to be wetted and cleaned off with a spatula. Using a hammer, tap the entire area looking for weak areas (these areas need to be knocked down). Next, the surface is analyzed using a building level to detect vertical deviations. Applying a long rule, mark with a marker all the identified depressions and protrusions.
TOP 7 mistakes when plastering walls
Let's take a look at the common mistakes that are often made when leveling walls with plaster.
When preparing, water is added to the dry mixture . It would seem that everything is logical, but in reality this method leads to the appearance of lumps, which, in turn, will not have the best effect on the evenness of the walls. How to do it correctly: the mixture is poured into water and gradually mixed.
Adding water to dry plaster when preparing the mixture
No primer is applied to the base . Priming is a mandatory step; the choice of the type of primer mixture is determined by the type of plaster and the characteristics of the base. The soil partially remains and is partially absorbed into the base. A protective film is formed on the surface, preventing moisture from escaping from the solution.
No primer
Joints made of different materials are not reinforced . With such joints it is impossible to do without reinforcement, because different materials interact with the plaster differently, which means that it does not dry at the same time. Without the use of reinforcing mesh, there is a high risk that cracks will appear at the joint.
Do not reinforce joints of different materials
The mesh is not laid correctly . The reinforcing mesh must be laid under the plaster, and not inside it.
Incorrect grid location
A continuous layer of mortar is laid under the beacons . Because of this, the train is divided on different sides of the beacon. Hardening occurs unevenly, which, again, leads to the appearance of cracks.
A continuous layer of plaster under the lighthouses
Plaster is applied from bottom to top . This move also seems logical, but in reality, pieces of the mixture will fall onto the finished coating and damage it. Apply from top to bottom only!
Applying plaster from below
Dry under sunlight . It is advisable to shade the windows during the drying period. Direct sunlight increases the temperature, and due to the difference in shade and light, part of the wall will dry out faster. As a result, cracks may form at the “border”.
Drying plaster in the sun
Marking for beacons
Before leveling the walls, beacons are installed. The first and last profiles are placed along the edges of the wall, at a distance of approximately 30 cm from the corners. A vertical line is drawn on the surface along a plumb line. If the work is carried out according to the rule of 2 m in length, then a distance of about 160 cm is made between the individual planks. Therefore, the remaining area is divided by vertical lines into sectors of 160 cm. To display horizontal markings, an indent of 15 - 18 cm is made from the floor and a line is drawn at an angle of 90 degrees to the vertical guides. The intersection points are equipped with holes with dowels and screws: the fishing line is pulled through them. In the ceiling area, you need to make a second horizontal line, similar to the first: holes are also made at the points where it intersects with the vertical markings.
Important: the result of the procedure should be holes located in two lines. The screws can be removed from the corner points.
How to set beacons on self-tapping screws
The preparatory stage is over, the actual installation and placement of beacons under the plaster walls begins. There are several methods, but the most popular is using screws or flat head screws.
To make plastering easy, you need to set the beacons correctly
Setting up self-tapping screws
Having retreated 5-10 cm from the floor and ceiling with a painting cord (blue cord), we beat off two horizontal lines on the wall. At the intersection of horizontals and extreme verticals (along which we will mount the beacons), we screw in self-tapping screws. It turns out there are only 4 of them: two at the top and two at the bottom. For now, their height is arbitrary.
Next, the height of the screws must be set in one plane. The consumption of material for plaster and how smooth the walls will be as a result depend on how accurately and correctly this is done. That’s why we try to do everything as accurately as possible. The procedure is as follows:
- Based on the previously made assessment of the curvature of the walls, unscrew or tighten one of the screws to the desired distance. Then, using a long level or a rule/bar with a level attached to it, you align the second screw so that they are in the same plane. You can also use a laser level: it generates a plane parallel to the wall, take a screwdriver and mark on it the distance from the head of the already installed first screw to the generated plane (it is visible on the screwdriver as a luminous dot). Place the other screw at the same distance relative to the mark. The principle of placing screws under beacons
- Similarly, we set up another pair of screws - top and bottom.
- At the intersections of horizontal and vertical lines on the wall (top and bottom), we also screw in self-tapping screws.
- Next, you need to align all screwed-in intermediate screws in the same plane. If there is a plane builder, we do this with its help; if not, you will need a cord. We stretch the cord between the outermost exposed screws, and align the caps of the remaining stops along it. We carry out this operation at the top and bottom.
- Now, using the same method, we place screws on each vertical line: we pull the cord between the top and bottom, we align the caps along the thread on one line, then we repeat the same operation on the second. The distance between the screws on the vertical is 40-50 cm. Repeat with each vertical.
After all the screws are aligned, to be sure, check how correctly you did everything using a rule or a level bar.
If the work was carried out without a plane builder, it may turn out that the stretched cord lies on a bulge on the wall. Then you will have to reconfigure all the screws, starting with the first four. It's very unpleasant, but it doesn't take that much time.
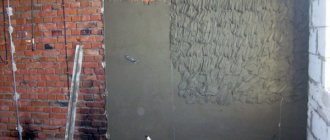
Installation of beacons
We dilute the composition that we will use for plastering, a little thicker than indicated on the package. Near the screws (you can also between them), stepping back a little to the side, apply small cakes of mortar with a trowel. We take the beacon strip and press it into the solution to the right or left of the screws. The protrusion of the beacon should be flush with the head of the screws.
We take a rule/bar and use it to set the beacon so that it is perfectly level. The metal on beacon strips is often not very thick and can be easily bent. That's why this check is required.
This is what a wall with already installed beacons looks like, ready for plastering
We set up all the beacons in a similar way, and then check that they are all in the same plane. Again we take a flat bar, but this time we compare the installed lighthouse bars with each other. We adjust if necessary. Once everything is level, leave everything until the solution dries (the exact time depends on the solution). When it dries, you can begin to level the walls with plaster. Now you know how to place beacons under plaster using self-tapping screws.
Base primer
Before leveling the walls with plaster, they need to be primed. This allows you to increase surface adhesion, remove dust and reduce the percentage of water absorption. This primarily applies to porous brick and aerated concrete bases. It is recommended to treat smooth walls with Concrete Contact, and porous walls with a deep penetration liquid.
While the primer dries, both rows of holes are equipped with self-tapping screws: the caps should be located in the same vertical plane. To check their evenness, a plumb line is used. It is important to ensure that the profiles do not stick out after installation. For control, a fishing line is used, stretched diagonally through the screw heads. Carry out a test application of the beacon strip - it should fit freely. The positioning of the remaining dowels is carried out thanks to the second diagonal braid.
Installation of beacon profile
Beacons on the wall are mounted in this way:
- The beacon strips should be slightly shorter in length than the distance between the screws. Metal scissors are used for cutting.
- To fix the profiles, you will need a small amount of plaster mortar. It is prepared in a plastic container by mixing the dry mixture with water. The thickness of the solution is such that it does not slide off the spatula when applied.
- The plaster is applied along the lines in such a way that there is no protrusion beyond the screw heads. To immerse the profile in the solution, it is convenient to use the rule: it should “sit” no deeper than the height of the caps. It is advisable to perform this procedure with an assistant.
- To check the evenness of the installation of the beacon strip, use a long rule and a level. Detected errors are eliminated. After this, all screws are removed.
Important: before the solution dries, the rule needs to be cleaned.
Laying plaster mortar
The technology for plastering walls using beacons is as follows:
- The dry mixture is poured with water and mixed. The exact proportions are usually indicated on the packaging. As the thickness of the leveling layer increases, it is recommended to make the solution thicker.
- It is recommended to moisten porous substrates with water before laying plaster: this will protect the solution from rapid loss of moisture.
- First, the lighthouse plaster is applied so that 10–15 mm remains to the level of the profiles. If you fill the entire volume at one time (at a height of more than 15 mm), then deep drying occurs unevenly. As a result, the solution will crack and crumble.
- After the first layer has completely dried, apply the second. The mixture is applied with a small margin: this allows you to plaster along the beacons, moving the rule along them. The tool should slide from bottom to top, with the sharp edge down. To improve alignment, it can be slightly rocked, but under no circumstances should it be pulled away from the guide profile. All removed excess is thrown higher using a spatula.
- The corners are formed after most of the plaster has been tacked using a trowel or square trowel. This also applies to the area between the wall and the ceiling.
- It is better to remove metal profiles after the surface has dried by carefully prying them off with a screwdriver. The resulting voids in the finishing are sealed with fresh mortar. This action is easy to implement by simply smoothing them flush with the plane of the wall.
Important: leaving beacons on the wall is allowed in two cases: if plastic strips are used, or if tiles will be laid on top.
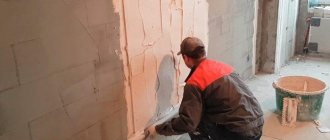
Applying plaster
Working with profiles is quite simple. Work begins with one of the finished sections, the first from the corner. The entire plastering process can be divided into three stages:
- Spraying the walls. It is needed to improve the adhesion of the wall to the plaster. Spraying the wall is done using a trowel or spatula. Basically, there is no need to level the plaster layer, but it is required that the surface is treated evenly. The thickness of the first layer is about 3 mm. The wall is left to dry.
- The next layer is soil. This is the foundation that bears the entire load. Thickness – up to 5 cm, depending on differences and installation of profiles. The consistency is not so liquid, reminiscent of thick sour cream. The mixture is scooped up with a wide spatula and transferred to the wall. She stretches along it, moving from bottom to top. Using the rule, all excess is removed and the layer is leveled. The rule leans against the profile, and moves from side to side to align it with it. The remaining mortar is poured onto the top of the wall. The procedure is repeated, so all sections are plastered. And here the question arises: is it necessary to remove the beacons after plastering? Usually, when the soil dries out, the planks are removed. Grooves are formed, which are sealed with plaster mortar and leveled using a spatula. They are removed so that during use the product does not spoil the finish. One option is that the metal profile will rust and a stain will form on the wall. Another option is that when fixing a shelf or a picture to the wall, you can get into the product and the plaster will crack. True, if you use a PVC plaster beacon, there will be no rust. And there will be no problems when screwing in the screw. Therefore, whether it is necessary to remove the beacons after plastering the walls or not, everyone decides for themselves.
- The final layer is the covering. It is the last, smoothest and thinnest. Thickness – about 3 mm. Application occurs using a spatula and trowel. You need to put a small amount of solution on the tool and stretch it along the wall. When the layer has set, it is sanded.
Note! The plastering process is controlled by the level.
Grout
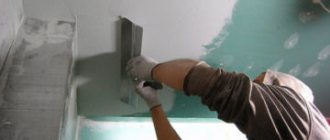
Before the plaster dries completely, it needs to be rubbed down. To do this, you will need a more liquid solution and a smoothing iron. It is more convenient to smooth over small sectors (about 1 m2), pre-moistening them with water. Scoop the mixture with a trowel and rub it over the surface in a thin layer. Next, this patch needs to be leveled to the general level, using strong pressure (the tool is at an angle of 45 degrees). Smoothing continues until the bottom plane of the trowel is no longer covered with solution. In the same way, the entire plastered area is rubbed down step by step. It is advisable to carry out this work without pauses.
Types of plaster beacons
Before you think about how to install beacons under plaster, you should decide on their types. Depending on the specific situation, a specific variety is selected. Each type has its own positive and negative sides.
Metal (factory) beacons
The most popular type with the following advantages:
- low cost and availability;
- ease of use;
- different sizes - 3.6 and 10 mm.
The disadvantages include their softness. During transportation or sale, they are easy to bend, but restoring them is not so easy. Due to their flexibility, profiles require additional rigidity during installation. To do this, a solution is poured under them. It is also possible that rusty stripes may appear on the wall. For these purposes, it is recommended to remove beacons from the plaster; it is better to do this two weeks after leveling.
Advice! Thicker profiles are required for external work. For interior walls with slight sloping, 3 mm is sufficient.
Plastic profiles
In many ways they are similar to metal ones, but have a number of characteristic features:
- easy installation, suitable even for an inexperienced technician;
- preservation of the original shape in case of accidental deformation;
- are not prone to rust and oxidation and can be safely left in the wall.
The plastic is quite fragile and cracks from mechanical shocks. Improper fastening can lead to deflections of the profile and, accordingly, to sagging of the finished surface.
Reusable steel profiles
Such beacons under plaster are often used by professionals. Reusable use allows you to recoup the high cost, but requires a more careful approach. Good rigidity and strength eliminate deformation; for use, it is enough to secure the profile at several points. It is not rational to purchase such products for one-time repairs in an apartment due to the high price.
Note! The profiles are pulled out before the solution has completely hardened, otherwise they can be broken or deformed.
Homemade lighthouses
A large assortment of store-bought products does not reduce the popularity of homemade lighthouses. Their cost is much lower, and any available materials can be used. Often a metal pipe or wooden block is used to imitate the profile. A profile for drywall is also suitable.
Some of the most common methods include:
- Strings. A budget and simple option for displaying beacons on the wall. All you need is wire and screws. This method is suitable for any beginner. Its disadvantage is the possible curvature of the surface due to the incorrect position of the screws.
- Mortar. This method is used by experienced plasterers. The point is to install self-tapping screws and then apply the solution in a continuous strip. The strip is made as narrow as possible and aligned with the rule. This process requires care and accuracy from the performer. But despite its complexity, this method significantly saves the mixture and does not require further removal of products.
Note! Homemade beacons for plastering walls require an increased amount of solution to level the surfaces.
Intermediate beacons
When it is necessary to place plaster beacons over large areas, there is a need for intermediate beacons. They are attached between the main ones or where ordinary ones cannot be installed. For example, pipes are in the way. Their installation is carried out only after the main products have dried. Don't forget to keep the center lines level.
Installation of beacons for plastering walls in different ways
When installing, the main thing is to securely fix the beacon profiles to the wall. To reliably, quickly and accurately install the beacon on the wall, use ready-made or home-made fasteners, for example, eared ears, clips. Often the installation of beacons for plastering walls is done using mortar.
To prevent the solution on which the profiles were installed from serving as an accelerator for the crystallization of the plaster composition applied during plastering, the flashings are coated with a primer after installing the beacons.
Installation on plaster mortar or tile adhesive
Let's look at how beacons are placed, when they are installed and fixed using a plaster mixture. If you install the profile directly on the screw caps, it may rotate during the fixation process, deviating from the correct position. Therefore, piles of plaster composition protruding above the caps are laid around the hardware with a spatula.
Round or rectangular “bedside tables” are formed from the slides; the top is cut off along an auxiliary vertical plane at the height of the caps. On such hardened bedside tables, it is much easier to place beacons under the plaster and secure them with plaster mixture or tile adhesive.
After installing the plaster beacons on the marks, fix the position of the profiles between them. Pieces of cut drywall can be useful here, from which you can make a mark of the required height by gluing the pieces with a solution or adhesive mass. If the beacon profiles are located close to the surface of the base, it is enough to place a mortar mixture under them in the right places.
Installation of beacons without mortar
Since our task is the reliable installation of beacons with protection against displacement during the plastering process, we need quick, strong fastening of the profiles to the self-tapping screws. For this purpose, several types of fasteners have been invented.
You can install beacons on hardware using:
- clips;
- creamers;
- eared;
- cleverness;
- homemade brackets made from straightened and cut beacon profiles.
The advantage of such fastening is the speed of installation, the absence of the need to wait for the plaster mixture to harden. In other words, it is enough to install the beacon profile and secure it with the fixing parts on the screws, and almost immediately after installation you can begin plastering. Beacon profiles installed on the walls will no longer move.
The disadvantage of such fastening compared to fastening to a plaster mixture is that it requires the installation of additional hardware, as well as the purchase of clamps.
Lighthouses from solution
You can make your own beacons for leveling walls using a plaster composition, for example, gypsum or cement. Such paths, made from the same plaster composition that will be used for subsequent plastering, do not need to be removed.
The easiest and fastest method is suggested by Andrey Shaiter.
To make guides from mortar, only a rule, a spatula and a trowel are used. The axes of the beacons are first marked on the wall, the zero point is found using a laser device, an auxiliary plane is set, and marks are made on the rule. Before starting work, prepare a viscous elastic solution.
Step-by-step production of a mortar beacon using the Scheiter method:
- the rule is installed on the edge (fixed in this position on the scaffolding);
- use a trowel to apply a solution to the upper edge of the rule;
- apply the correct bar with the solution to the wall, pressing until the line on the rule and the laser beam are aligned;
- using a rectangular trowel, adjust the angle of contact between the rule strip and the wall (to achieve the formation of a perpendicular);
- use a spatula to remove excess mortar from both sides of the instrument;
- using cotton threads, cut off the edge of the rule from the created mortar path, remove the rule;
- Allow the solution to dry for a day, after which they lightly pass along the top of the beacon with a block of sandpaper.
Fixation rule on scaffolding
Application of the solution
Adjusting the contact angle
Combining the line on the rule and the laser beam
Cutting off the rule from the track
This method creates mortar paths 2 cm wide. Made from gypsum, they dry out within a day and become suitable for plastering. During manufacturing, it is recommended to rest the lower end (heel) of the tool’s strip on a wooden wedge to avoid displacement of the strip when cutting with a thread.
Another method of making mortar guides and controlling their vertical level is somewhat more complicated.
- The rule bar is attached to the pre-installed screws to the wall (perpendicularly, on the edge).
- The gap between the plank and the wall is filled with mortar (without gaps).
- Use a spatula to remove excess plaster longitudinally from both sides.
- Gently tapping, shift the rule along the axis of the beacon, and then remove it from the formed path.
Marking for beacons
Surface marking is a mandatory procedure before installation. There are several ways to do this.
Simple method
When placing beacons for plaster on the solution, you must perform the following steps:
- Draw vertical lines along the edges of the wall, making an indentation of 30 cm and 15 cm from the corner.
- Measure the distance between the marks and divide by 1–1.5 m, the extracted number is the number of future beacons. Cut the profiles to length; they should be 30 cm less than the height of the ceiling.
- Holes are made on the drawn lines at the top and bottom, and dowels are driven in. Next, the surface is drawn with lines at a distance of 1–1.5 m from each other.
- Self-tapping screws are screwed into the installed dowels at the extreme marks, and threads are pulled between the caps. At the points where the threads intersect with the marked lines, marks are made with a marker, then dowels with self-tapping screws are installed.
- The screw caps are leveled. To begin with, the wall collapse indicator is measured and added up. Let’s say the distance of the collapse is 0.9 cm, the thickness of the profile is 0.3 cm, and 0.5 cm is always taken as a reserve. As a result, the result is 1.7 cm, the gap for the indentation of fasteners from the leveling surface.
- Having adjusted all the screws, the threads are stretched diagonally and held with a beacon under the resulting plane. If everything is done correctly, the product barely touches the threads.
It is important! Installing beacons for plaster is the most important point. The quality of the finished work will depend on the accuracy of the work performed.
Spider Method
Installation of beacon profiles is carried out without measuring instruments. This method is distinguished by its accuracy and the ability to calculate the optimal thickness of the plaster layer. To install the profiles, the following manipulations are carried out:
- Drill holes for dowels along the edges of the surface with a distance of 15 cm from the ceiling, from a corner of 5. Drive in the dowels, leaving a distance of 5 cm from the wall.
- Identical holes are made from below, but clamps for plumb lines are already installed in them. The holes must be precisely positioned one below the other.
- A plumb line is tied at a distance of 2 cm from the wall. After it comes to a complete stop, the exact location of the plumb line is marked on the clamp, and the thread is tied at this location.
- You get two vertical lines to which horizontal threads are tied with the further ability to move them.
- By adjusting the longitudinal threads, the maximum collapse of the wall is determined, the thickness of the beacon and a margin of 0.5 cm are added to it.
Note! When installing beacons for leveling walls using a simple method, self-tapping screws remain on the surface, with the help of which the profiles are subsequently set. With the “spider” method, there is a need to take measurements with a tape measure.
Laser level
- Use the level to determine the collapse of the wall. It is necessary to place the device against the opposite wall and turn on the cross-level.
- Using the laser mark as a guide, mark vertical lines on the wall with the indicated indentations.
- Set the level 40 cm from the corner and turn on the vertical line.
- Determine a place with a minimum distance to the wall, for example 38 cm.
- On a 0.5 m long strip, mark a point 39 cm from the edge (the distance from the line to the wall, the thickness of the lighthouse and the margin).
- Apply glue to the marked lines and press the product with a strip until the mark coincides with the laser line.
How to level a wall with plaster
First of all, beginners are interested in how to level curved surfaces with plaster with their own hands, and also how to properly plaster walls using guides.
Because there are various features:
- the structures themselves;
- materials from which the walls, ceilings and partitions of the house are made;
- plastering materials;
- degree of curvature of the base.
Depending on this, the appropriate technology is selected for leveling.
If the deviations are insignificant, do not exceed a few millimeters, they can be eliminated without the use of special measures, since the thickness of the leveling layer is small.
But if the wall plane collapses or the height difference is large, the leveling plaster layer can be more than 20 mm. In this case, they mainly use the technology of plastering walls along beacons - supporting guide strips installed on the structure being leveled.
Leveling with beacons does not require many years of skill from the plasterer; it allows you to achieve the evenness of the surface, which is required by the tolerances specified in the snip, with less effort, so it is quite feasible for beginners.
How to plaster walls on lighthouses? Almost any technology involves performing several successive stages. Plastering walls along lighthouses is also carried out sequentially, in stages.
Main stages:
- Removing old finishes, such as old wallpaper, plaster, cladding, paint (in case of renovation). If the old plaster finish turns out to be unusable upon inspection, it is removed completely or partially.
- The degree of unevenness is determined visually, as well as instrumentally.
- Prepare materials, tools, and equipment.
- Prepare the base (repair, clean, prime, reinforce).
- They mark the surface and install beacons.
- Spray and primer are applied successively, leveling the created wall surface along the beacons.
- The beacon strips are removed and the grooves are sealed.
- Apply a covering (if you plan to paint or wallpaper).
- Perform grouting.
- Allow the plaster composition to dry.
- If necessary, polish.
- Clear the dust.
Surface cleaning
Checking for unevenness
Padding
Installation of beacons
Plastering a wall
Removing beacons
Grouting the plaster
Each of the stages also requires explanation.
Determination of wall unevenness
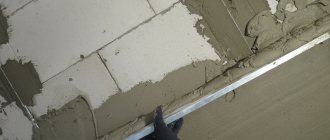
Most of the irregularities are visible to the naked eye. However, instrumental methods help to correctly assess unevenness or curvature, as well as decide where and how to level the walls. The unevenness of the plane is revealed by applying the rule. A gap is formed above the depressions and recesses between the wall and the rule, the size of which can be measured if necessary. A profile fracture is also detected by the rule.
The parameters of the collapse or oblique position of the wall (the geometry of the position in space) are identified and measured using simple tools (level, plumb line, square) or a laser level.
The verticality of the structure is checked using a rule with a level, applying the rule to the wall vertically (along the level) in several places, since the wall can “go screw”. When a wall is tilted inside a room, a deviation from verticality can be detected using a plumb line.
The angle of connection of the walls with each other is checked with a square or using simple geometric constructions.
The test using the Pythagorean rule is carried out in the following way: strictly horizontal lines are drawn from the inner corner on the adjacent walls. On one of them they lay one and a half meters from the corner, on the other - two. These points together with the third (corner) form a triangle. If the right angle is maintained, the length of the hypotenuse should be 2.5 meters. If the measured distance is less, the angle is acute; if it is greater, it is obtuse.
Constructions can be done directly on the floor (if the baseboards are removed). At the same time, the use of a square gives more visual results and allows you to immediately plan the correction correctly. Calculating the need for plastering materials and the minimum distance between the plane of the future top of the wall and the current existing surface will allow identifying the most protruding point of the base (zero).
Marking
For plastering along beacons, special guide profiles - beacons - are mounted on the base. These can be plastic or wooden slats. Plastering walls along beacons is often done using metal profiles that can be purchased. However, all these slats are removed after plastering the walls. The exception is profiles made from gypsum mortar on site.
Homemade plaster lighthouses
To install beacons, the base is marked by drawing straight parallel lines on the surface. If plastering walls on beacons with your own hands is being done for the first time, then it is better to choose the distance between the beacons within 1.0-1.3 m. Experienced plasterers place the beacons at a greater distance (not exceeding the length of the rule, reduced by 20 cm). The distance of the outer beacons from the corners of the walls is 15-30 cm, from the doorways in the apartment - 10-15 cm.
Base primer
Preparation of the base from any material before plastering includes priming. The primer composition performs several functions, the main one of which is to ensure reliable adhesion of the plaster composition to the base. The primer composition is capable of forming additional “roots”, penetrating deeply into the material of the structure, as well as a rough surface, allowing the plaster composition to cling to the roughness.
Additionally, primer compositions include antibiotic agents and fire retardant (fire-retardant) additives. Primers can also strengthen the weak, crumbling surface of the base material, increasing the strength of the material by adhesion of its particles. The sealing function of primers is also important. Primer particles fill the pores and seal them, preventing water from being sucked out of the plaster composition. Special primers are applied for the purpose of waterproofing and sanitizing (similar to waterproofing and sanitizing plasters).
The primer is selected according to the type of base material and plaster mixture so that, while forming an intermediate buffer layer, it does not lead to the appearance of technological defects. It is usually applied with a roller, and a brush is used where it is impossible to prime with a roller. More often, application is required in two passes; after each application, the product is allowed to dry for at least a day.
Installation of beacon profile
The profile must be installed on the wall, maintaining a certain distance between the surfaces of the wall and the plank.
The easiest one for a beginner is to install metal profiles on exposed screws.
- Mark the installation locations of the beacon strips using a laser level, and if it is not available, using a plumb line and a construction cord.
- On the beacon installation lines, retreating 20 cm from the floor (ceiling), drill holes in the base and install wooden dowels. In addition to them, 3-5 intermediate dowels are also made on each line.
- Self-tapping screws are screwed into the 4 corner dowels, after which the cord is pulled: horizontally (under the ceiling and above the floor), vertically, diagonally (in a cross). The most protruding (zero) point of the wall is marked with a cross.
- Using a screwdriver and a level, adjust the position of the screws so that the tensioned threads of the fishing line lie in the same vertical (zero) plane. There must be a distance between the zero plane and the zero point equal to the minimum permissible thickness of the plaster coating.
- Self-tapping screws are screwed into the remaining wooden dowels, ensuring that their heads are adjacent to the zero plane.
- Check the accuracy of creating the zero plane by applying a rule with a level to the caps. Remove the fishing line, using the rules established on the heads of the screws, and adjust the position of the first screws.
- We wrap the wire around the screws, leaving tendrils for attaching the strips.
- Along the lines between the screws, gypsum composition (grades) is placed in slides protruding above the zero plane. Place the beacon profile and press down with a rule until the beacons fit on the screw heads. Excess slide solution is squeezed out through the holes in the profile flanges. It helps fix the profile. If necessary, beacon strips are secured with additional mortar.
Marking the beacon installation using a laser level
Installation of dowels
Pulling the lace
Adjusting the position of self-tapping screws with a level
The screw head is adjacent to the zero line
Checking the zero line using a rule with a level
Application of the solution
The beacon strip rests on the head of the self-tapping screw
To ensure that the profile rests firmly on the heads, a “bedside table” with a flat top is made from gypsum mortar around the dowels with self-tapping screws - a mark.
For a better understanding of the beacon making process, watch the video.
Laying plaster mortar
As with plastering without guides, plastering of walls along beacons is also carried out in layers: spray, primer, covering. The difference will be the leveling of the top layer of soil itself. Proper plastering is carried out sequentially, filling the paths between the beacons one after another. The composition is applied in sections 1 meter long.
Spray application
If it is necessary to make a plaster coating of large thickness, then the soil is laid in several passes, without leveling the top of the intermediate layers for the sake of greater adhesion. When the primer begins to protrude above the beacon strips during application, after applying the composition, the top of the plaster layer is leveled using the rule.
The rule bar is placed edge-on on the beacons, then, swinging from side to side, the tool slides from bottom to top along the edges of the beacons. Collected on a rule, the cut mortar is thrown into a container using a spatula or added in portions to areas where there is not enough mortar.
Usually, two or three passes of the rule are enough for leveling. To fix the composition on the base on a flat area, the solution is applied additionally from top to bottom. After this, the solution no longer tends to slide.
Alignment of corners and slopes
The corners are plastered after the entire wall is plastered. When leveling the internal corners, everything is done in the same way as along the entire wall, but when leveling, the rule is based on two lines of beacons on one side of the area to be plastered. You can plaster the corners even after all installed beacons have been removed from the plastered wall and the grooves have been sealed. In this case, level the mortar in the corner using the rule, resting it on the leveled wall. To level the corners, profile corners with a mesh are used - counters and a corner spatula.
Before leveling the slopes, protect window or door frames with masking tape. Next to the window, a vertical beacon is installed on the solution; at the corner, along the edge of the slope, a bar is strengthened to control the thickness of the applied layer. After applying the composition, it is leveled with a rule, resting against the bar and beacon and moving the horizontally located rule. After allowing the solution to stand for a while, leveling is performed, holding the rule vertically. The guides are removed, the groove is filled, and the slope is rubbed in the same way as on the wall.
Removing beacons
After the soil begins to set (before it gains strength or, less often, after the coating has hardened), the lighthouse strips are removed from the laid mortar.
This is done based on the following considerations:
- metal profiles begin to rust when moisture gets on them, rust appears on the surface in dirty spots, spoiling the appearance of the finish;
- Over time, the plank may move away from the base and pull the plaster along with it, covering a large area with cracks;
- When installing dowels, you can inadvertently hit the plank, which will lead to the formation of cracks along the entire lighthouse.
Read about how to eliminate cracks and other defects in plaster in the articles on our website.
No one has insurance against these situations, so it’s easier to remove the beacon profiles while plastering. Only beacons made of gypsum mortar or when walls are covered with ceramic tiles are not removed.
To remove the lighthouse profiles, you may need a magnet (if the planks are hidden by putty or a layer of decorative plaster), pliers, a chisel and a narrow scraper.
If the beacon strip is clearly visible, it is pryed off from the end with a chisel and lifted to be grabbed with pliers. The edge of the profile, captured with pliers, is folded over itself and removed gradually.
The grooves formed after removing the planks are filled with a solution of the same composition as the leveling coating. Using spatulas, level according to adjacent areas.
Grout
To level the setting mortar, grout is used. Rubbing the surface using graters. Before performing the solution, the area of the solution is moistened and a leveling circular motion is made with the tool. In this case, the tool is driven with pressure.
Over bulges, the pressure is increased, over depressions - reduced. As the tool moves, various lumps are cut off by the edge of the tool, and the milk that collects before the grater fills the pores. As a result, the surface is flat and smooth.
There are two grouting techniques:
- circular (circular movement of the hand, usually against the direction of the sun),
- acceleration (forward-reciprocating straight-line movement of the grater).
If the finishing is cladding, decorative plastering or wallpaper, grouting is carried out only by smoothing.
For painting, after such grouting, grouting is also carried out using the second technique, making vertical movements on the first pass, and horizontal movements on the second. When grouting, you can apply a little coating solution to the surface. After grouting, the wall is allowed to dry for a day, after which the top of the coating is sanded with sandpaper or a sander.
How to properly install beacons under plaster
There are only two options for attaching beacons under plaster:
- solution;
- on special fastenings.
Installation on solution
For fixation you need the products themselves, a level and cement mortar. The process itself can be divided into several significant stages.
| Surface preparation | Delaminations and protruding elements are cleaned, cracks are covered. Then the primer is applied. Next, the angle of deflection is determined, and lines are drawn for future beacons. |
| Mixing cement mortar | The finished solution should be thick in consistency. For effective and quick drying, a little gypsum is added. |
| Fastening products | 1. The solution is applied to the edge of the wall and the profile is fixed level. The same operation is carried out on the other edge of the surface.2. After the mixture has dried, a thread is pulled between the beacons. 3. Intermediate profiles are set strictly according to the thread and checked by level. |
Installing beacons on walls using special fasteners
The following tools are required for installation:
- a thread;
- self-tapping screws with dowels;
- building level;
- drill;
- directly beacons.
First, vertical marking is carried out - lines are marked along the entire surface at intervals of 1–1.5 m. The starting point is taken from the corner, with a distance of 20 cm from the edge of the wall. A plumb line, construction or laser level must be used.
On the extreme lines, holes are drilled at intervals of 30 cm, dowels are driven in and screws are lightly screwed in. Their caps are leveled, and fasteners for beacons under the plaster are installed on top. All that remains is to insert the product into this fastener. A thread is stretched between the resulting beacons, and all other fasteners are adjusted along it.
Note! This method allows you to reduce plaster consumption to a minimum and very accurately adjust the beacons.
How to put beacons on the wall
It all starts with assessing the differences in the wall. First you need to find the most protruding point. If you have a laser level or plane builder, you can use it. Align the beam parallel to the wall. And relative to this beam, look for the highest point on the wall.
If there is no laser device, we take a long rule or just a flat long bar (about 2 m long). We tape a building level to them with tape and, using such a device, determine where this most protruding part of the wall is located. This is how the verticality of the walls is assessed.
Finding the most protruding point on the wall
But there are also humps and depressions in the longitudinal plane. They can be “identified” using a fishing line stretched at some distance from the wall. It can be tied to nails or screws driven into the wall. They are tied to them at the same level and see where and how much the level deviates. They go through the entire plane, determining the most protruding point. At the same time, you evaluate the most “recessed” one.
What is this for? The most protruding point is found in order to use a minimum layer of plaster: here it will be minimal. Which layer will be next depends on the curvature of the walls. The “deepest” point is found to select the correct plaster. In the technical data of any composition there are two important positions: minimum layer and maximum. You will need to choose so that your drop fits within these limits. For example, the well-known and popular Knauf Rotband plaster has a minimum layer of 5 mm and a maximum of 50 mm. If it suits you, you can use it (it's plaster).