Plastering walls is a fundamental process of any renovation. If you have smooth walls, then even cheap furniture will fit harmoniously and fit against the walls and corners without gaps. If you have already decided on the choice of plaster and calculated the required amount of material, then let’s talk about the preparation and the plastering technology itself.
What tool to plaster walls
I will note the main tools for manual application, and we’ll talk about them. And so, what we need:
| Tool | Description |
| Rule, cutter | Aluminum long tool for leveling plaster on the surface (see photos below). Available in different lengths up to 3m. Usually, for indoor repairs, we will need 3 cutters of different sizes (1m 1.5m 2.5m), if there are hard-to-reach places, then we can cut them to any desired length. |
| Level | It will be needed to identify deviations from the horizontal or vertical level of the surface, to set beacons, to check the finished wall, to set corners, etc. You can use either a bubble level or a laser level (it will speed up the process). |
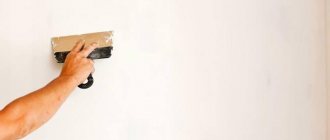
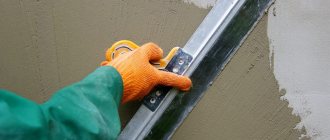
| Spatula and smoother | For applying material to a surface. We will need a trowel with an average length of 30-35 cm. A spatula is 10 cm. |
| Trowel, trowel | Needed for throwing material. It has different shapes and types. To apply the mortar, a teardrop-shaped “drop” trowel is usually used, but often craftsmen also use square, mason’s trowels. A matter of taste. |
| Roller and bucket and brush | For priming and wetting the surface. |
| Polyurethane grater | For final grinding of cement and lime compositions |
| Trough, container for kneading and water | For kneading, you will need a 40 liter trough and a 10-15 liter bucket for water, or better yet 2 buckets, because you will need to wash the mixer or kneading whisk in one. |
| Mixer, whisk | Without a construction mixer or something similar, I do not recommend starting such a process as plastering walls. |
| Covering film, masking tape | In order to cover window sills, doors, windows, radiators or simply paste over adjacent walls. |
| Plastering ladle | If you don’t have the skill, then it’s better not to pick it up. We’ll talk about how to plaster walls with this tool in another article. |
Plastering technology
Plastering work is conventionally divided into several stages.
Surface preparation
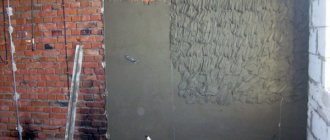
The preparatory stage is carried out taking into account the type of wall and the material that will subsequently be applied to the surface. But regardless of these criteria, the wall must be cleaned of dust, old plaster, paint, stains, etc.:
- stains from oil-based paint can be wiped off using oily clay, which must be applied to the paint, dried, and then cleaned off along with the stain;
- the smoky surface is cleaned with a three percent solution of hydrochloric acid, after which the area must be rinsed with clean water;
- dust and dirt can be removed with a stiff broom or steel brush.
Beacon device
Beacons are a tool with which you can navigate when applying plaster to a wall.
- Beacons are installed on dowels, which are driven in at a distance of 15 cm from the ceiling and corner. The dowel itself should stick out from the wall by 10-50 mm.
- Next, a plumb line is attached to it, which, before reaching the floor, falls down.
- Another dowel is driven in 15 cm from the floor, the head of which should barely touch the thread.
A similar procedure must be done with a different angle, after which you can begin measuring vertically and horizontally.
Attention
The stretched threads should not touch the wall.
Splash
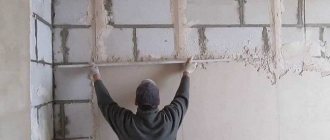
After preparing the surface and identifying irregularities, you can begin to apply a “rough” layer of plaster. It is applied to the wall with a thin mortar by throwing it using a trowel and a plaster trowel.
If you choose to apply the first layer using a falcon, the solution must be applied from left to right from different heights. This way all the unevenness will be filled and eliminated.
Primer
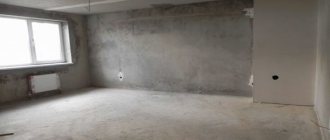
This is the main stage of the work. To cover the wall, a thick solution is used , and the layer should be at least 10-20 mm.
Covering and grouting
The final stage of plastering is to apply the last layer (coating). To do this, you need to prepare a solution of lime and fine sand, which, when applied, will smooth out all the last irregularities.
For grouting, use a trowel, which must be pressed against the wall and moved in a circle counterclockwise.
Important
During grouting, the surface should be wetted with water using a brush.
Preparing walls for plaster
Plastering walls with your own hands also involves preparation. Any finishing begins with preparation; the better the surface is prepared, the less chance you have of cracking or pieces of mortar falling off. Below we will look at different options for preparing walls and the features of plaster. Let's start with primer and what it is.
Padding
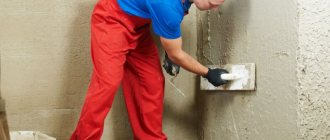
Preparation may include different stages, it all depends on the condition of the surface. One of the most important stages of semi-preparing is priming the walls (I devoted a separate article to this). It comes in several types, but we will need a maximum of two:
Deep impregnation primer - Liquid composition, sold in cans, yellow or white. It is often concentrated, so dilution is required in the proportion indicated on the canister. Applied with a brush or roller, it penetrates the surface and binds small particles both outside and in the depth of penetration.
Sand primer, putzgrunt, betonkontakt - Primer designed for better adhesion of smooth concrete surfaces. It contains quartz sand. Mix well before use. It is advisable to pre-prime the surface with a deep-penetrating primer. Apply with a large brush in different directions. After application, you need to wait for complete drying, preferably a day.
General preparation
We remove the old wallpaper, everything that rings does not hold well and falls off. Do I need to prime? Any surface must be primed before plastering or puttying. If your surface is well prepared, that’s a third of the success.
Removing old plaster
If you need to level old walls, then initially you need to tap it, you may need to knock off poorly adhering pieces of old mortar or knock it all down. We'll talk about how to shoot down a little lower. Then we remove as much dust as possible from the surface and prime with deep penetration soil. Wait for the primer to dry completely.
How to remove old plaster? what to beat off with? For this we need:
- Rotary hammer, with spatula attachment
- Hammer
- Respirator, gloves, headphones
- Garbage bags
Plastering walls usually occurs in several stages, one of them is preparing and dismantling the old coating. We begin to beat off the layer of solution from the places where it best comes off and falls off. If a conventional hammer drill does not cope with its task, then you will need a large, powerful hammer drill (you can rent it for the day) and things will go much faster. When everything has been cleared away, we dust the surface, either vacuum it or sweep everything off the surface. We collect the collected waste in bags and take it away. After we managed to remove the old plaster and collect all the debris, we prime the surface with deep-penetrating primer, preferably 2 times.
Using reinforcing mesh
Reinforcing metal mesh
When applying thick layers of plaster, use a plaster mesh. It helps to increase the adhesion of the solution to the surface and protect it from cracking. It is also used when finishing surfaces made of silicate bricks.
For gypsum mixtures, a plastic mesh is used. It is permissible to use fiberglass products only for fastening a small 2-3 cm layer of plaster. In other cases, metal meshes are used.
- They are attached to the wall with dowel nails or self-tapping screws (see photo). To do this, the mesh is simply passed through the heads of the screws. In metal products with small cells, holes are pre-drilled for inserting fasteners
- The mesh is laid with an overlap of 10 cm
- When applying the first layer, it can simply be pressed into the solution. A plastic painting mesh is attached in a similar way.
- Beacons are installed after installing the reinforcing mesh
- If differences in height are observed in small areas, the painting mesh is applied pointwise
Preparing various surfaces
I repeat that different surfaces are prepared slightly differently, that’s all the difference. As much as I would like to write the same thing, demand creates supply.
Aerated concrete, gas block, foam block
Clean with a spatula (35cm) from excess glue and poorly adhering particles. Without sparing the primer, we saturate the wall with deep penetration soil. How to plaster foam blocks inside and outside? The inside can be plastered with either gypsum or cement. But on the outside, only with cement plaster, having previously reinforced the surface with façade fiberglass mesh. Plastering walls with your own hands from gas silicate blocks is carried out in exactly the same way as on other surfaces.
Brick
The protruding mortar and protruding bricks are beaten off with a hammer and everything is also primed. The whole difference in plastering brick and other surfaces is the preparation, although the preparation all boils down to the fact that we remove it, beat off the excess and prime it well. The plastering technology is the same as on other walls, read below in the chapter about technology. If a brick is chipped, or there is a large gap between the ceiling and walls, then it is better to seal such brick gaps with a cement-sand mortar 1:4 (sand-cement). This type of masonry mortar has much better load-bearing characteristics than the plaster mixture.
Arbolite slabs
Preparation and plastering of wood concrete slabs is carried out in the same way as on brick surfaces.
Panel house, concrete walls
All excess is removed from the concrete surface. We carry out a thorough cleaning; if the walls are plastered with gypsum plaster, then the concrete is primed with sandy soil or concrete contact. If it is cement, then it is simply primed. Wait for the primer to dry completely. And only then the solution is applied.
Wooden surfaces, SIP panels, OSB(OSB), Plywood
Such surfaces CANNOT BE PLASTERED! They are initially flat and must be mounted level and flat, so there is no technology for plastering OSB and plywood. Large differences can be smoothed out with special compounds by first sanding the surface and gluing all the seams with sickle tape. Then the entire surface is covered with reinforcing fiberglass mesh, but only then can large differences be leveled with specially designed mixtures.
Whitewash
Is it possible to plaster over whitewash? no, you can’t, you need to thoroughly wash off the whitewash, if possible, scratch it with a hatchet or hammer drill, then prime it 2 times, wait until the layers of soil dry.
How to prepare the solution
And so, knead. First, clean water is poured into the bottom of the trough or bucket, a different amount for each type. Gypsum plaster is mixed exactly as it is written on the package, usually this proportion is 2:3 (water-plaster). The technical characteristics of the VOLMA mixture indicate that 18-19 liters of clean tap water will be required per 30 kg of dry composition. For ease of work, we make a medium-thick batch so that it fits well on a spatula, but does not drip. Wait 2-3 minutes and mix again. Now the solution is ready for use.
Under no circumstances should you add water to the solution after mixing. It is allowed to add a little dry mixture if the solution is very liquid, but do not add water if it is thick. It is allowed to stir once if the solution begins to thicken, but you do not have time to work it out.
For cement plaster you need approximately 1:5. The technical specifications for the LUX dry mixture indicate that 5-5.5 liters of water will be required per 25 kg bag. and during the kneading process, add either a little water or a little loose mixture so that the solution is convenient to work with (not too liquid and not too thick). It all depends on the brand and manufacturer; different amounts of plasticizers and cement in the solution require different amounts of water. After kneading, wait 5 minutes and mix again. Ready for use, all that remains is to figure out how to plaster the walls, but more on that later.
You need to add a little less water to lime plaster and gradually, it has strange properties when mixed, it can become very liquid if you stir for a long time, so the main thing is to maintain the proportions for preparing the solution (lime-cement) 1:5, and add water after the fact and little by little. Sometimes the lime is frozen or already damp, so we regulate the amount of water ourselves. I also recommend adding a little liquid soap or dishwashing detergent (literally a couple of drops) to each batch; the soap will act as a plasticizer and will prevent the solution from squeezing out water. The solution will dry evenly, and the smell will be pleasant.
Solution consumption per sq. m
Cement mortar
Although the cement-sand mixture seems to be cheaper, it should be borne in mind that its consumption is higher than that of gypsum mortar. It's easy to calculate consumption. When applying a layer of 1 cm per square meter, 17 kg of cement mortar will be required. Accordingly, as the layer thickness increases, the consumption will increase. You will need much less gypsum - about 9 kg. Accurate mixture consumption per sq. m the manufacturer always indicates on the packaging.
Plastering technology, stages of wall plastering
If we managed to install the beacons and it turned out well, then the rest is a matter of skill. And so, what we have, and we have a well-prepared wall with exposed beacon profiles. You could call this chapter “aligning with beacons.” Mix the solution, I wrote about this above. Here's a quick tutorial for DIY plastering.
Application and plastering technology:
Finally, talk about how to plaster walls with your own hands. Let's start in order.
- Spread a thin layer of mortar on the wall
- Apply the plaster mixture onto the wall using a trowel (trowel) evenly without gaps. We start working from the bottom up. We sketch it so that the solution extends beyond the plane of the beacons
- We tighten the solution from bottom to top with the rule (not in one movement, but smoothly moving left and right at a low frequency), we don’t put pressure on the rule, we just touch the beacon profiles and move it along the vector upward.
- We send the removed plaster higher up the wall or back into the trough.
- After the wall has been covered and pulled together, all the fallen mixture and debris have been removed, we wait for everything to dry.
- We tear out the beacons, seal the resulting grooves, wait for them to dry
- Wet the wall with water (using a roller)
- Apply a thin layer of plaster with a 35cm trowel (the solution is a little thinner than it was)
- We tighten the rule in different directions, with priority diagonally and vertically, remove as much of the applied composition as possible, but do not put too much pressure on the rule so as not to deform it.
- If the finish is gypsum, then we simply remove the excess well (pulling it in all directions) and wait for it to dry, after which we go through with a spatula and remove excess drops and sagging
- If we are working with cement, then while this layer is still a little damp, moisten it with water and rub it with a polyurethane grater,
- If it is lime plaster, then it is not spread on first, but immediately thrown on. can be removed as a rule and after removing the beacons it is advisable to re-tighten the cement mixture (in a thin layer). And grind everything using cement technology.
Do-it-yourself finishing plaster of walls, grinding walls
Cement plaster is ground with a special grater for grinding. Graters are made of foam, polyurethane and felt. The first two leave the same rough circular effect. Felt has a more pleasant sand effect (if you need to prepare it for painting). Finish plaster involves grinding. This grinding of the wall is carried out until the surface has an acceptable, neat appearance.
Plaster reinforcement
Do you need mesh for reinforcement? the surface must be reinforced with large layers, starting from 2 cm. It is reinforced with a special mesh:
- polymer mesh
- galvanized mesh
- metal grid
- nylon mesh
- fiberglass mesh
I would like to point out the fiberglass mesh; it is more convenient for it to reinforce small layers of 2-3 cm. It can be reinforced like a plaster mortar, making sure that it is in the center of the layer. Or you can use cement glue for reinforcing mesh, which is also not a bad option. After reinforcement, you can apply the solution another 2 cm.
If the layers are large, then a galvanized mesh (mounting mesh) is stuffed and secured with dowels and plastic washers so that they do not rust. After filling the reinforcing material, a layer of liquid plaster should be thrown over the mesh so that the solution penetrates and envelops the reinforcing material; after drying, you can continue to cast the main layer. The maximum thickness of the solution layer with galvanized mesh reinforcement is approximately 5-6 cm. The thickness of the mesh should not exceed the standards indicated on the packaging.
Plastering corners
At the stage of setting up the beacons, the outer corners are being set, I recommend immediately installing perforated painting ones (the main thing is to buy hard ones). I will tell you the detailed technology for setting the corners in another article.
External corners should be used as an additional beacon, and it should be aligned with the rest of the beacon profiles. We form the internal corner using the rule during the alignment of adjacent walls. The main thing is that the edge of the rule is not blunt, but cuts through the corner until it is sharp. Next, the angle is formed at the grinding stage (if it is a cement composition). To make even corners you need a polyurethane float and it should not be blunt, but with a good right angle, you can even make the angle sharper (it can be sharpened with sandpaper). If you have an even angle, then the plaster of the walls looks smoother, even if the plane is a helicopter.
How to repair a crack with plaster
As easy as shelling pears, let's start by preparing the crack. Use a spatula or trowel to open up the crack; if it’s deep, you can use a hatchet to open it up. We remove dust from the crack and prime it. After complete drying, coat well with the solution. When the solution dries, it will shrink, so you can re-spread it with a thin layer and rub it with a polyurethane grater.
We decide on the type of plaster, brand and consumption
Before starting work, you first need to decide on the type of plaster that is best suited for your work. To determine the amount of dry mixture required, you need to calculate the area of the walls of the room and the thickness of the wall plaster layer.
You can find out the thickness of the layer, which will allow you to achieve perfect evenness, using a thin thread stretched in several places, in the horizontal and vertical directions. Using a regular ruler, the level of maximum and minimum differences is measured. Beacons are installed at the minimum value point. The easiest way is to take measurements using a level (laser level).
We calculate the consumption of plaster and soil
The consumption of plaster depends on many parameters. On average, experts calculate based on a value of 3-3.5 sq.m. from one bag of 30 kilograms, provided that the layer thickness does not exceed 10 mm. Accordingly, the master initially needs to decide on the thickness of the applied layer and compare the resulting figure with the consumption indicators indicated on the bags with the mixture.
Below, we have provided a consumption calculator that will roughly calculate everything. A prerequisite for plastering walls is their primer. Since this product is relatively inexpensive, no one thinks about the required quantity, buying with a reserve. On average, for processing 1 sq.m. area of the wall, 200 ml of primer is consumed. However, this indicator is conditional, since the primer can be applied in several layers, it all depends on the absorption rate and the material of the walls (you need to check the information on the primer packaging).
Calculator for plaster consumption per 1 m2 of wall
Price
The market offers a wide range of plaster in the form of dry mixtures that serve as the basis for the solution. The average cost of a bag of cement plaster weighing 30 kg is 250-300 rubles.
What type of plaster should I choose?
Quite an important question. Among the most popular types of plaster that are used for interior work are the following:
- cement - used mainly for leveling walls made of brick, expanded clay concrete, concrete, aerated concrete, in conditions of high humidity;
- gypsum, like the previous type, are used for all types of walls, only in conditions of an optimal microclimate. Gypsum plaster is more demanding on the humidity and temperature of the room, but it is easier to work with.
Conclusion: for wet rooms you can use cement, for dry rooms - gypsum.
The choice of plaster mixture is based on the following parameters:
- determine the type of surface;
- determine the level of differences that affects the thickness of the layer;
- we specify the microclimate - humidity, temperature, artificial and natural ventilation;
- We study the scope of application on the bag, indicated by the manufacturer.
Based on the quality characteristics and properties, cement plaster is preferable. It has greater strength, can withstand significant loads, is resistant to wet environments, and is also more durable. For renovation of bathrooms and kitchens, this type of dry mixture is suitable. But, it will be easier to work with gypsum, especially for beginners, and in terms of its properties it is only slightly inferior.
Comment from our expert: Use any mixture you like, the main thing is to study the recommendations for use on the bag before purchasing. Usually it indicates in which rooms and on which walls a particular mixture is suitable. Gypsum is more massive and easier to work with. Cement-sand - more difficult to work with, but stronger and more durable.
Brands
Preference should be given to trusted brands that have been presenting their products on the market for a long time and also have an extensive product line of plastering products.
These brands can confidently include:
- Knauf.
- Volma.
- Unis.
- Ceresit.
Comment from our expert: “I would also add Rotband plaster to this list.” Good mixture too.”
When choosing a specific type of mixture, it is important to carefully read the manufacturer’s instructions. In particular, the purpose of the plaster is an important point, since it can be completely different, despite the similarity of the bags’ design.
By the way, look at our article about how a man built a crib and house with his own hands. Article with drawings and all expenses.
Gypsum plaster without putty for wallpaper
There is a way to prepare gypsum plaster for wallpaper without using 3 layers of putty, but this requires practice. Now I'll tell you everything:
- pour water, mix the solution, let it sit for 2-3 minutes, mix well.
- beacons are on display
- plastering
- leave a little solution in the bucket
- wait 30 minutes
- remove the beacons, seal the grooves with the remaining solution
- wait 15 minutes
- we draw the entire wall with a trapezoidal rule
- after another 15-20 minutes, moisten the surface with water and rub with a sponge grater (in a circular motion)
- wait until the surface becomes matte
- smooth everything with a 35cm hard spatula
The entire surface is ready for wallpaper, a little less effort was spent than on putty and time was saved. But personally, I support the option with putty; it turns out to be of better quality, in my opinion.
Plaster without beacons
If the evenness of the walls, their level and the error of unevenness are not important to you, then you can plaster the wall without beacons. This method will take you twice as long as with beacons. This technology does not bring anything good in the future, especially high-quality, leveled walls. If you don’t have the necessary skill, then it’s better not to try it, but for those who don’t see any other options, I’ll tell you about this method. It is not possible to teach in words how to properly plaster walls without beacons. You need to understand very well the curvature of the plane and what you are doing. In other words, everything is done by eye:
- Apply with a trowel (if a small layer)
- If it’s large, then we sketch it with a trowel (trowel)
- We tighten the rule from bottom to top horizontally, then vertically
- After drying, you can comb out anything crooked with a metal rule.
- If there are a lot of holes, then apply the solution and pull it again in different directions.
- Then rub with a plastic or polyurethane grater.
How to plaster facade walls
Plastering the walls of the facade is not much different from the technology inside the room. The difference is in the size of the walls, and the uselessness of lighthouses. The corners of the corners of the building and the window corners act as beacons on the façade of the cottage. We will pull the plaster along these corners. I’ll answer the question right away, “which plaster is better for the facade?” We use exclusively cement, it can be special for facades, or it can be universal. You cannot plaster the façade with gypsum materials! I allow lime plaster to be used only on the base of a building, where there are large differences and high humidity and serious reinforcement is required (although there are different cases, and many where this is not required).
The surface of the facade must be prepared. if your house is insulated, then it should already be covered with reinforcing mesh. All façade corners must be exposed and everything must be primed and dried. Now we mix the cement composition of normal consistency (so that it spreads well), preferably working in cloudy weather so that the solution does not dry out.
Apply the solution to the façade in a thick layer using a trowel 40-50 cm long. We pull together everything that was applied in the corners with the rule, the longer, the better. If there are no corners nearby, we tighten the large holes and smooth them out with the bulk of the mortar. wait until it dries a little and rub it with a foam grater (40-50cm long).
If you are asking the question “is it possible to plaster in the cold in winter?”, then the answer is definitely no! Even if there is a special plaster for working in cold weather, I personally do not recommend working outside in winter; plastering at 0 degrees is also impossible. after thawing, everything may fall off and lose its properties. You can plaster after +5 degrees, at least that’s what it says on the bags. But at night the temperature can drop lower, so do not take risks, but carry out work in good weather. Do not plaster in direct sunlight.
How to plaster bathroom walls
Plastering the walls in the bathroom should be done exclusively with cement mortar; no need to bother with lime, etc. “Can gypsum plaster be used in a bathroom?” — Gypsum cannot be used in rooms with high humidity. Therefore, we take any cement plaster and perform all the same operations that were described in the chapter on “how to plaster walls using beacons?” There are certain nuances in the bathroom if you plaster under good tiles and make good repairs.
Firstly, with high-quality repairs under the tiles, it is necessary to plaster and do this in a beacon manner. It is necessary to respect the geometry of the room, especially where the bathtub or shower will be located. To do this, you will need a large square (corner) and the beacons need to be set so that each corner is 90 degrees. There are often a lot of disputes and questions about this, because it is when the angles are set at 90 degrees that large layers appear. There is only one way out - plaster!
Don’t skimp on the geometry of the room, the tiles are square, they will show all the errors in the bathroom. It is unlikely that you will want to spend a lot of money on tiles and a bathtub, but by saving on plaster, you will end up with unsightly wedge-shaped tile cuts and huge gaps between the wall and the bathtub. I hope I answered the question of how to plaster a bathroom wall under tiles, etc.
Choosing a suitable notched trowel for laying tiles: main points
Uniform distribution of the adhesive composition, which is the key to strength and quality of installation, is achieved by filigree actions with a serrated blade.
The basic rule when choosing it is that the length should be greater than the corresponding dimension of the tile. However, it is worth considering the parameters of the teeth:
- 10x10, 12x12 - laying 30x30 fragments less than 1 cm thick;
- 6x6, 8x8 - the optimal choice for elements with dimensions 20x20 and 20x30;
- 4x4 - installation of mosaic elements and fragments no larger than 10x10.
In retail sales there are canvases with semicircular profile recesses more than 12 cm high for working with cement mounting mortars and synthetic adhesives with low spreadability (laying large materials).
Plaster for different types of finishing: tiles, wallpaper, putty, painting
Any leveling of walls with plaster begins with surface preparation. Here I will tell you the main nuances of preparation for different finishes.
Plaster under tiles
I talked about the bathroom, but the same situation awaits us in the kitchen, when leveling the work area under the tiles. I emphasize once again, do not skimp on the amount of solution, while maintaining angles of 90 degrees, especially in bathrooms and the kitchen. In the kitchen, it is also advisable to plaster with cement mortar according to the standards. Practice shows that cement-based glue adheres better to cement plaster than to gypsum plaster; in general, gypsum and cement mixtures have poor contact and delaminate (I repeat). Practice shows that the work area in the kitchen under the tiles can be plastered, for example, with rotband knauf, or VOLMA, nothing has fallen off or cracked over the years. But still, high humidity can lead to the spread of mold behind the sink. the choice is yours. Before laying the tiles, prime the surface well.
Plaster for wallpaper
A common question that arises among people who have started a renovation is “how to plaster under wallpaper?” The answer is simple, exactly the same as any other wall for any other type of decoration. Plastering is a rough leveling of the surface, and preparation for finishing is already a function of putty. We putty 3 times, grind and voila, the wall is ready for wallpaper. Before gluing the wallpaper, prime the surface well. If you need to plaster the walls before painting after wallpapering, or more precisely if the wallpaper will be painted, then special attention should be paid to the junction with the ceiling. The smoother the junction, the neater the painting will look.
Plaster for painting
And so, how to prepare and plaster for painting. Plastering walls for painting is not a very good solution, of course, unless you mean subsequent filling of the surface. Although, in repairs with brick restoration, this goes well. It is enough to grind the cement with either a polyurethane grater or a foam float (for a rough effect). Or you can grind it with a felt grater for a finer grinding texture. The most acceptable option for grinding for painting is a balcony and a loggia, where it would come in handy. Plaster can be prepared both for wallpaper and painted. In my opinion, plastered walls should be puttied before painting.
If you need high-quality painting, then here are all the stages of preparing a wall for painting - the order of work:
- plastering
- 2 layers of putty
- grind
- primer
- glue cobwebs or fiberglass mesh
- 3 times finishing putty
- rub with fine sandpaper
- ready))
Principles of working with toothed blades
- An adhesive layer is applied to the prepared, often plastered surface using an ordinary monolithic sheet (working angle - 30 degrees).
- You should walk over the applied layer with a serrated cloth, maintaining an inclination angle of 45-75 degrees (deviation of the ridges of the solution from the parallelism of the sides of the laid tiles is not allowed).
- Lay the tile and, moving it perpendicular to the formed ridges, fix it.
Often, a notched trowel for tiles undergoes a slight modernization. On the short side, the first tooth is cut off from the side of the long toothed surface. This ensures more economical glue consumption and cleanliness of the gap between the tiles.
In the process of plastering walls, a profile tool is used to finish both internal and external corners, allowing you to achieve ideal geometry and surface cleanliness. When puttying, a monolithic canvas is the main tool: with progressive horizontal and then vertical movements, with proper control of the angle (at the entrance - 60-50 degrees, at the exit - 20-25) you can get a thin finishing layer without sagging and other flaws.
A notched trowel is a tool that allows you to create a high-quality adhesive adhesive pad for laying tiles: the working angle is 45-75 degrees (the mixture is first laid as a monolithic sheet at an angle of 30 degrees).
Mechanized plaster - pros and cons
A few words about mechanized plaster. Mechanized plastering of walls involves the use of all kinds of equipment. This article is about do-it-yourself plastering, so I won’t write much about it. There are many types of equipment: a plastering station, a powerful compressor that uses a special gun, or special plastering installations on guides.
Of course, there are many advantages to using technology, such as speed and enormous output. But the disadvantages are that if you plaster apartments, then this is not such a huge amount of work in which you can use a plastering station. It takes longer to wash it than to plaster the apartment. A compressor with a special gun (hopper) is a more suitable option for apartments and small cottages. But you still have to mix the solution manually and tighten it accordingly. One of the advantages is the speed of application, but you still have to sweat. There is also such a device as a “manual plastering machine,” but that’s a completely different story, which is used in decorative coatings. In general, the thing is quite funny, I wouldn’t mess with it.
So we figured out how to properly plaster walls in theory, everything else will come with practice. Please ask all questions in the comments.
Composition of plaster mortar
Depending on the surfaces on which the plaster solution will be used, its quantitative and qualitative composition depends, but it must include the following components:
- a binder, which uses cement, gypsum, clay or lime;
- the filler is mainly quartz sand, but to improve the thermal insulation characteristics, perlite can be used instead or together with it. Most dry mixes contain exactly this in their composition, and the result is warm plaster for interior work , which has well replaced the traditional cement-sand mortar;
- water acting as a solvent and catalyst.
If a ready-made mixture is used for work, then when making it you should strictly follow the recommendations and take into account such a water parameter as hardness, and when preparing it yourself, in addition to observing the proportion of the solution for plastering walls, you need to learn to recognize its condition by consistency:
- if the solution does not stick to the construction tool, then it will also not stick to the surface, and that means it is “lean”. To fix it, you need to add a binder;
- in the opposite case, when the solution is “greasy”, that is, dense, you will need to add filler. It should be borne in mind that a very dense solution that clings well to the surface is not always good. It is difficult to rub, and, therefore, it will be difficult to obtain a smooth surface, and in addition, after gaining strength, it will “tear”, as evidenced by characteristic cracks.
It should be taken into account that the answer to the question of how long it takes for plaster to dry depends on several factors: the density of the solution, the thickness of the applied layer and, of course, environmental conditions (air temperature and humidity).
Plastering technology
How to choose a binder for plaster mortar
The most common type is a cement-based mortar as a binder. They are the ones who perform façade plastering of walls . It is moisture and frost resistant and has sufficient strength to reliably protect the house from wind loads.
The main components of such a solution are cement, sand and water. The ratio of cement and sand is 1:3, and you should first mix the dry ingredients, and then gradually add water to the finished mixture, achieving the desired consistency.
For indoor work, other binding components are also used, most often clay or gypsum, which give the solution greater elasticity. But if you are plastering a bathroom under tiles , then the same composition is used as for facade work.
Cement sand plaster
It is imperative to take into account the characteristics of the surface to be finished; the choice of the binder component mainly depends on this factor. And if cement-sand plaster is ideal for concrete or stone, then better adhesion, for example, with aerated concrete, is provided by a composition containing lime, the “native” component of the cellular block.
If you need to plaster walls made of wood , in addition to the fact that you must first make a special cover from shingles, it is better to use compositions containing gypsum or clay.
That is, use the “like for like” principle, although this is not always applicable when it comes to exterior finishing, but the plaster mixture for interior work is selected precisely based on this criterion. In this case, the creation of a reliable and durable wall covering is ensured.
In cases where a parameter such as thermal stability is important when choosing a composition, you should again think about clay. It is this component, as the main or even the only one, that is used when plaster is needed for stoves and fireplaces , that is, objects that experience not only high temperatures, but also sudden changes in temperature.