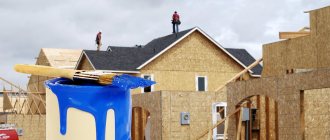
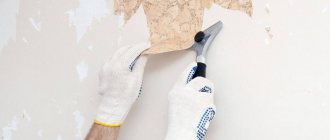
The protruding ends of the logs are an important element of the entire structure, the protection of which requires special attention. Treating the end surface of log logs with special means can stop the negative impact of the environment. Timely measures will allow the wood to dry evenly, which will have a positive effect on the appearance of the building.
Rules for choosing paint
Oil paint completely hides the pattern on the wood
Paint for wooden walls inside the house should not only be practical and beautiful, but also safe. Indoors it is allowed to use compounds that, during drying and further use, do not emit harmful substances, strong odors, etc.
For interior decoration, water-based and organic paints are used. The former are not always resistant to water. Some of them can be washed off with water. Organic solvent compositions usually have a higher degree of hiding power, water resistance and durability
However, you need to choose them with caution: not all solvents are safe for humans and pets
Oily
A type of coating on an organic basis - drying oil. The thinner is white alcohol, turpentine, gasoline. The cost is low, the hiding power is high: the wood grain becomes invisible. Oil paints adhere well and, due to the large thickness of the layer, mask minor surface defects. This coating is not afraid of moisture; it can be washed with plain and soapy water.
Among the disadvantages, it is worth mentioning the long drying time and the strong smell due to the solvent. During drying, the composition releases harmful substances, so you should not enter the painted room for several days.
Oil paints are often used for exterior decoration. However, they are often used for painting kitchens and bathrooms, where high resistance to water is important.
Acrylic
Most often, acrylic paints are chosen for interior work, as they are the safest.
A type of water-dispersion paint. The solvent is ordinary water, which makes the composition safe. The coloring matter, polyacrylates, is introduced into the mixture in the form of a dispersion, not an emulsion. This feature provides higher resistance to water compared to water emulsion: the acrylic coating is not washed off the walls and can withstand repeated wet cleaning.
Acrylic paints can be diluted with water to make the shade less intense, and aqueous pigment pastes can be added to the solution to obtain a different color. This significantly increases the color gamut.
Alkyd and enamels
Alkyd paints are best used for exterior house painting as they take longer to dry.
Paints and enamels of this kind are based on alkyd resin. When dried, the substance forms a very dense, smooth, even surface, so most enamels are glossy or shiny. The paint completely hides the pattern and color of the wood. Enamels are used for interior and exterior decoration, since the finished coating is completely resistant to water and aggressive household chemicals.
The composition is very durable and dries quickly. However, the solvent for it has a strong unpleasant odor, which does not disappear until it dries completely. Although not all compounds emit toxins, work can only be performed in a respirator.
When choosing, you need to pay attention to the composition of the paint and its purpose. Not all options are suitable for painting wooden or log walls inside the house
Water-dispersed
The base of the composition is water. Coloring pigments and fillers are in the form of a dispersion. A common feature of such paints is resistance to water and steam.
Water-dispersed ones include polyvinyl acetate, latex and acrylic. The former are used only indoors with low humidity, as they are not resistant to water. The latex composition can be used in the bathroom and in the pool, as it withstands the influence of steam well. Acrylic paint is an option for wood inside and outside the house.
Silicone
Silicone paints are used for facade work
For painting the inside of a wooden house, a mixture based on silicone resin seems to be one of the best options. With high water resistance, the coating allows air to pass through, which retains all the advantages of a wooden building. The paint does not fade in the sun, is completely insensitive to mold and fungi, and does not wear off.
Silicone mixture is one of the most elastic coatings. The finishing layer masks cracks up to 2 mm wide. The composition can be pigmented, changing the shade and intensity.
Brushes and rollers for painting log houses
The choice of how to paint a log house outside and inside can be made from all types of tools intended for painting work. But different products can be applied with tools made of different materials.
The following types of rollers and brushes are distinguished:
- Made from synthetic materials;
- From natural;
- Mixed option.
The first type is used for water-based paints; for products with an organic thinner in the composition, only tools made from natural materials can be used, otherwise the thinner will corrode the synthetic bristles.
Using natural bristles for water-soluble compositions causes the bristles to absorb the water base, causing the brush to swell.
Different products can be applied using tools made from different materials.
What paint can you paint a wooden house?
The question of which paint is best to paint the outside of a wooden house is far from idle. The choice of paint for the facade of a wooden house is a determining factor that determines how long the coating will last and how the wooden structure will look.
Paints for exterior painting must meet the following requirements:
- provide protection of wood from atmospheric agents;
- protect the structure from UV radiation;
- have a high level of moisture resistance;
- ensure color preservation for a long time.
There are several types of painting compositions that can be used to coat the external walls of a log house (including rounded logs), timber houses, and also to paint a frame house. To determine how to cover the outside of a timber house and understand what is better, impregnation or paint, to paint a wooden house so that it does not peel off and retains its original appearance for a long time, you need to get acquainted with the characteristics of each product.
Acrylic paints
- They have good resistance to atmospheric conditions.
- Protect wood from exposure to ultraviolet radiation.
- They create an elastic film on the surface that does not form cracks during wood shrinkage.
- They allow air to pass through and do not interfere with air exchange processes occurring in the wood.
- They dry very quickly, the specific time depends on the type and moisture content of the lumber.
- They form a durable coating that retains its original color and does not lose its aesthetic characteristics for 8-10 years.
Acrylic paints are quite expensive. Instead, you can use inexpensive acrylate dyes for a log house, which have similar characteristics. The difference between them is that in the first case the composition contains only concentrated compounds without any impurities. In the second, additives are used: acrylate-copolymer dispersions, which reduce the cost of paint.
Oil based paints
- They are distinguished by a very high degree of resistance to precipitation.
- Provide reliable protection of wood from moisture penetration.
- They have excellent penetrating ability and are perfectly absorbed by wood.
- They form a beautiful glossy finish that will last about six years.
The only drawback that oil-based façade paint for a wooden house has is that it takes quite a long time to dry. The drying speed of this paint is about a day.
Antiseptic impregnations
Antiseptic compositions are divided into:
- Glazing. They form a transparent coating that preserves and enhances the beauty of natural wood.
- Toning. The wood is painted in the chosen color, while completely preserving the natural relief of the wood.
Varnishes, waxes and stains
- Wax is absorbed very well into wood and protects it from moisture and dirt. After waxing, the surface of the imitation timber will acquire a beautiful matte shine.
- Stain protects the surface from fungus and various pests, but this product alone is clearly not enough, such a coating will be short-lived. How to treat the outside of the lining after applying the stain? It is best to apply varnish on top, which will enhance the protective properties and extend the service life of the coating.
- Clear or colored varnishes are great for painting a house made of laminated veneer lumber. In both cases, the natural relief of natural wood will remain visible; colored varnish will only change its shade.
Wood shrinkage
Shrinkage of timber logs takes about two years. And in the future, wood is a natural material that constantly gains moisture and dries out. These processes go on continuously. And to protect it from moisture accumulation, it is coated with special compounds.
But, in the first year of a log house’s life, painting of logs should be done only so that the logs do not lose their freshness. And the protective composition must be chosen so that it does not interfere with the drying of the wood:
- removal of moisture from the inner layers of wood of the log along the longitudinal fibers to the ends
- removal of moisture from the inner layers of wood along the transverse fibers to the outer surface of the log
- evaporation of moisture from the surface of the outer layers of the log
Yes, the system for removing moisture from wood is quite complex. And it doesn't work evenly:
- Along the longitudinal fibers, moisture reaches the ends of the logs faster than along the transverse fibers - to the outer surface
- due to uneven evaporation of moisture through the ends and side surfaces, stresses arise inside the wood, which leads to the formation of cracks in places of greatest stress
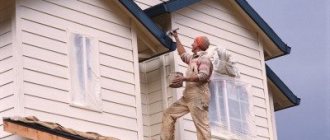
Painting the outside of a log house: factors affecting quality
The quality of painting a wooden country house depends mainly on two factors:
- Weather
. Ideal weather is dry and windless. Do not paint in the sun (the paint will dry too quickly and unevenly), during or after rain. The permissible temperature is determined by the type of paint (indicated on the label).
- Wood moisture content
. It should not exceed 20% during painting, so façade walls made of wood with natural humidity are painted after the frame has shrunk.
A necessary condition for a quality result is ease of use.
Following several rules will help make the painting of a log house durable:
- Log ends
. They are treated with lime or water-based paint for the first time immediately after cutting the log house (this prevents the logs from drying out suddenly and reduces cracking). After sanding, the ends are painted at least 3-4 more times.
- Tool
. A spray gun helps to apply paint quickly and evenly if you have experience. Otherwise, a wide brush with a dense padding will be the best choice. The paint is applied with a brush in the longitudinal direction (according to the location of the crowns of the log house).
- Working methods
. If necessary, intermediate manual sanding with re-application of primer is allowed. The glazing or covering antiseptic should be stirred periodically during operation; this will help the pigment to distribute evenly.
Painting of a wooden house is completed
Professional coloring services
Specialists will perform the entire range of interior painting work for a wooden house:
- carefully prepare the surface,
- high-quality polished walls,
- treat the wood with protective agents,
- They will paint the house taking into account any of your wishes.
We have a huge range of high-quality and certified paints and varnishes at our disposal, which we purchase directly from the manufacturer. This allows us to set minimum prices for high-quality painting of any complexity and volume. You can order a specialist visit and ask your questions by contacting us from the “Contacts” page.
Calculate the cost of painting and insulating your home right now
Select types of work:
Select materials:
Lime painting
There is now a lot of slaked lime available. Fluffy is the second name of this product. How should it be used to protect garden trees from insect pests?
First of all, you should think about safety: before you start diluting the dry mixture, you should put on gloves and safety glasses.
It is recommended to mix lime (fluff) in large plastic containers without rust or cracks.
The cooking process is troublesome and quite labor-intensive. It is necessary to carry out the following steps step by step:
- Dilute the fluff at the rate of two kilograms of the purchased mixture per ten liters of water.
- Add two hundred and fifty grams of copper sulfate.
- Add one kilogram of fatty clay.
- Add half a kilogram of cow dung if desired.
The resulting mixture should be liquid, with a consistency similar to low-fat sour cream. The finished whitewash should not flow down the tree trunk. If this happens, you need to add a small amount of clay again.
This method of painting trees, in addition to being labor-intensive to prepare, is also not very effective. Lime whitewash is washed off very quickly, so it does not provide 100% protection for tree trunks.
What to do? How to paint a tree trunk so that the effect is long-lasting and does not require a lot of time and effort?
Why and from what wood needs to be protected
The outer layer of wood, devoid of bark, is completely defenseless both from the destructive effects of wind and sudden fluctuations in humidity, and from insect pests. The risk increases if the house is located in a rural or wooded area. This is explained as follows:
- As a result of complete cleaning of the wood surface from bark, it is easier for wood-boring beetles to access it.
- Under the influence of constantly changing relative humidity levels throughout the year, mold appears on wooden houses over time (usually in inconspicuous places, where it is most difficult to remove).
- Moisture stains remaining on an unprotected surface provoke the development of fungal diseases on the wood.
- With constant weathering, the surface of the building changes its natural color, becoming dull brown, which is why a wooden house loses its aesthetic appearance.
Based on this, when a wooden house is ready, it should be subjected to surface sanding, antiseptic treatment, and then painting.
Painting logs on the outside has a number of advantages:
- paint and varnish materials prevent destruction, dampness and rotting;
- antiseptic treatment protects the log house from pests, fungal mold and corrosion;
- Exterior painting provides an opportunity to create a façade that fits perfectly into the architecture of the house and landscape solutions.
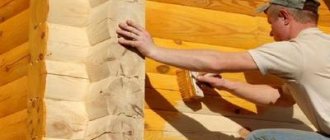
Wood pre-treatment
In order for the paint to apply smoothly, absorb well and last a long time, you need to prepare the surface for painting. Before treating the outside of a wooden house with any compound, antiseptic or fireproof, it is necessary to level the surface and seal the cracks.
After finishing the construction of the house, it is necessary to seal the joints and putty the cracks
The main condition is that the wood must be dry with a moisture level of no more than 20%, so preparation begins in the dry and warm season. If you put paint on a wet surface, the internal moisture will evaporate and destroy the coating and tear it away from the base.
The dry surface is cleaned of dust and dirt. If stains and stains of resin are difficult to remove, you can use a solvent. It is advisable to sand wood that was previously exposed to the open air mechanically.
After sanding, painting is carried out within 48 hours to ensure that the maximum effect of sanding is preserved.
First, the surface is treated with antiseptic primers or wood impregnations. Sometimes builders take on this work, but they often use the cheapest compounds - not very effective for preserving wood and environmentally unsafe. It is recommended to use water-based antiseptics that protect against the formation of mold, mildew and other biological formations on wood.
Antiseptics for wood
The application of antiseptics is carried out in strict accordance with the instructions indicated on the packaging. You cannot process at subzero temperatures, even if manufacturers offer winter antiseptics.
Mistakes when painting a log house unqualified
If the desire to save on professional services for some reason outweighs the guarantee of the quality of the work performed, then after a while unsightly results such as stripes, stains and simply peeling areas on a recently painted surface are very likely. In such cases, the quality of the paint product is not always to blame. Unprofessional builders, due to inexperience, make basic mistakes that affect the final result:
- The facade is not properly prepared for painting: poor-quality sanding (or lack thereof) leaves the surface rough.
- painting technology (sequence) is violated
- Work is carried out in unsuitable conditions (high humidity or under the scorching sun).
- Newly erected ( naturally damp ) walls are painted.
- Incompatible materials were selected for painting .
Peeling of paint is caused by a violation of technology Source otdelka-expert.ru
What products can be used externally
Products for treating building facades can be divided into types according to the raw material composition, solvent, the possibility of adding a certain pigment dye and other parameters.
Antiseptics
These substances protect a plank or log house from rotting; they can rightfully be called full-fledged paints.
In appearance, the compositions can be coating (completely changing the surface of the material) or glazing - emphasizing the texture of the wood. After application, antiseptics penetrate deeply into the wood fibers. For normal impregnation, it is enough to cover the products with two layers.
Painting logs with antiseptics is carried out every two or three years, but the application of expensive, high-quality solutions is repeated every five years.
Without proper care, the walls of a residential building may turn gray. To prevent this from happening, it is necessary to choose antiseptics with special components (ultraviolet filters) for treating wood that prevent the coating from fading.
Acrylate (acrylic) paints
Acrylic dyes are supplied to hardware stores in the form of water-soluble emulsions and dispersions. The raw material composition of these solutions contains acrylic copolymers, acrylate resins, antiseptics and rubber.
The compositions can be transparent or white, they form a film of varying degrees of gloss, and are glossy, semi-gloss or matte.
When choosing acrylic paint for the facade of a wooden house, you can choose any color scheme. A tinting machine is used to mix primary colors until the desired shade is obtained. The advantages of such compositions include:
- large selection of colors and shades;
- good adhesion to wood;
- no odor;
- solutions are made from environmentally friendly raw materials;
- low fire hazard of acrylic paints;
- the solution can be used to paint the inside of a wooden house.
Alkyd dyes
Alkyd protective solutions are made from polycondensation resins, alkyds. The paints differ from their analogues in their good adhesion to wood, excellent coverage, and low cost. The compositions are used for painting wood cuts, planed boards and logs that have been cleared of bark.
After applying alkyd paint to a wooden surface, an elastic film is formed, which reacts to changes in the overall dimensions of the material. Swelling or drying of wood occurs under the influence of humidity and sudden temperature changes.
Many manufacturers include antiseptics in the raw composition of dyes, as well as substances that prevent combustion (fire retardants). The presence of these components can be determined by the composition of the paint. If they are not there, then the wood needs to be additionally treated with protective impregnations. If additional elements are present, the price increases, and at the same time the service life of the coating increases.
Alkyd paints are white or transparent solutions. To give the required color, a certain amount of pigment is added to the base composition. Alkyd enamels can withstand temperature changes from -50 to +50 degrees, maintaining their properties, so they can be applied externally to wooden houses in almost any climate.
Oil solutions
Paints made from natural oil or drying oil are often used in construction. When painting the gable or walls of a wooden residential building, many users use a spray gun.
To apply oil paint to a surface with a regular brush, you will need experience with a painting tool.
The compositions are inexpensive, absorb well into the wood structure, but take a long time to dry.
Import substitution of paints for wooden structures in 2015
In 2015, all imported wood paints purchased for dollars and euros became unreasonably expensive.
The price-quality ratio of imported paints has become unreasonably high in relation to Russian paints and varnishes.
Therefore, we advise you to opt for Russian-made impregnations and paints in 2015.
Photo: Healthy Home wood protection product will help provide reliable protection against pests for walls, floor beams and rafters of a wooden frame.
Photo: the color scheme of the “Healthy Home” composition has a fairly wide range, from light tones to the darkest color.
Photo: decorative protective paint and varnish composition of the Neomid BioColor Ultra brand has enhanced protection for log wood and is a high-quality composition intended for wooden log houses. There are 10 primary colors to choose from, ranging from clear formulations to dark protective formulations.
Requirements for paint and varnish materials for wooden facades
All paint and varnish materials can be divided into two large types: for interior and exterior work. External painting of a wooden house will help protect it from negative influences. Therefore, increased demands are placed on exterior paints. After all, operating conditions inside and outside are significantly different. The main requirement for compositions for interior work is odorlessness, environmental friendliness and abrasion resistance. Interior painting of a wooden house is faster and easier.
Requirements for compositions applied to the façade surface:
- High rates of adhesion and adhesion to the surface.
- Improved characteristics of resistance to minor damage, impacts, scratches, chips. High wear resistance.
- Weather resistance. The environment and bad weather should not affect the appearance of the facade and the quality of the paint. This includes chemical inertness to acids and alkalis.
- High levels of protection against moisture. Wood is afraid of it, so façade paint for wood should provide reliable protection to the coating.
- Resistance to temperature changes.
- They are not afraid of the influence of ultraviolet rays.
- High levels of vapor permeability, so that painting the external walls of a wooden house does not interfere with the wood’s ability to breathe.
- Be flexible even after drying. Wood tends to expand and contract under the influence of temperature changes. Therefore, the paint layer should not crack. This is achieved by the elasticity of the composition. Rubber paint on wood for exterior use has high indicators of this parameter.
- Easy to care for. Frequent washing should not be a problem.
- Resistant to fading, maintaining the original color for a maximum period of time.
If the composition meets most of the requirements, then painting wooden surfaces will be as effective as possible.
WHY PAINT THE HOUSE EXTERIOR
The appearance of the house is the calling card of the owner, so the question “why” usually does not arise. Every self-respecting owner tries to maintain the facade in proper form. But there are several mandatory indications for painting the outside:
- When building a house, poor quality timber is used; paint helps prevent mold and the spread of fungi.
- The house is built from poorly treated wood;
- Exposure to weather conditions affects the wood material, it begins to rot and deteriorate;
- Darkening of wood affects the aesthetic appearance, logs deteriorate and are destroyed;
- Bark beetles make the material brittle, so treatment of the structure is necessary;
- The influence of moisture leads to expansion and drying of the material, the appearance of cracks and a decrease in high performance.
- Wood is damaged by weather conditions, ages, and is susceptible to mold and mildew.
Antiseptics (coating, glazing) are sold on the construction market, which allow you to emphasize the structure and restore the color of wood. There are also covering paints for wood, for example, Tikkurila Pika Teho, which is a matte acrylate paint containing oil. Used for painting external wooden surfaces: plank walls, cladding boards, fences.
Painting the facade of the house:
- Reduces hygroscopicity;
- protects against ultraviolet radiation, which causes wood to darken;
- prevents putrefactive processes;
- renews the house and gives the appearance originality.
Painting a log house: the best paints, impregnations and varnishes. Technological process of preparing a log house for painting
What should I paint the outside with?
It is difficult to answer these questions in a few words, but we will try.
First, let's find out whether it is necessary to paint the log house, or to preserve the original texture of the wood, that is, we can use varnish or special impregnations. Thus, we will protect the wood from the harmful effects of moisture and prevent fungi and mold from developing. In recent years, this topic has been very relevant, since many people are building bathhouses on their property, and the issue of preserving a log house for many years is of interest to every good owner.
Be sure to prepare for the fact that after painting you will experience a completely different effect. After all, the paint on a copy board in a store and on the walls of a bathhouse are two completely different things, it all depends on the scale, lighting, and surroundings. This is a completely common reaction for beginners who have carried out painting work for the first time, because the log house may have unevenness, and this also affects the shades and increases the consumption of the paint and varnish product significantly.
How to treat the ends of logs
Since in the first two years the process of shrinking the logs occurs, and the log house shrinks, it is recommended to treat the ends of the log logs with a breathable composition.
For example, previously the ends of logs were painted with lime:
- protects the surface from ultraviolet radiation
- disinfects and prevents logs from rotting
- inexpensive
In the future, when the frame has already settled, it will be possible to paint the end sections with any product that forms a film coating, containing oil or wax.
How to properly paint the outside of an old wooden house
Problems may arise with an old wooden house. We mentioned what happens to material over a long period of time. It can crack and become deformed. In addition, the old decorative layer causes problems. Before you paint the outside of an old wooden house, you need to have it inspected.
Has any part of it fallen off? Or maybe there are severe deformations on one of the sides, cracks in the walls? Then we are no longer talking about painting, but about a complete renovation. According to observation, the western and southern sides of the building suffer the most and lose their appearance, as they are negatively affected by direct rays of the sun. It may be necessary to only paint the gray walls of a wooden house, and not treat the entire surface.
If repainting is carried out, it is important to use the same paint and the same type of coating. What if you bought a house, but you don’t know what paint was used? It is enough to independently determine the type of coating:
- If the walls are painted with oil paint, they will be matte, and a thin chalky trace will remain on the hand after contact with the surface. The oil-based composition cracks across the fibers or cells.
- If the surface looks and feels like leather, then it is an acrylate-based substance. It cracks along the fibers.
- Glazing antiseptics wear out over time and become thin. A wooden house is painted with another antiseptic or oil-based paint. If there are no traces of antiseptic, the use of an acrylate composition is allowed.
To paint the outside of an old wooden house, you need to remove the old layer of paint. To do this, use a spatula, grinder or metal brush. Everything is removed down to the base, the façade is washed with water.
Mold is removed with a solution for this purpose. Rotten boards are replaced with new ones, the cracks are filled with wood putty. Finally, primer is applied. All that remains is to paint the wood using the above method.
Design styles
Classic involves the use of white, cream, beige and light shades.
It is characterized by symmetry, precise forms, correct geometry and architecture. The interior is furnished with solid furniture and massive decorative elements. You will see paintings on the walls and voluminous vases on the floor, heavy curtains, lambrequins and draperies on the windows. The bedroom and living room are decorated in this style. It is desirable that the rooms have high ceilings, otherwise heavy curtains with draperies or lambrequins will make the space heavier and smaller. Classic style will make the room festive, romantic and luxurious.
Empire style is distinguished by red and bright, white and cream colors. Here you will see a lot of gilding and various decorations. To decorate this style, tablecloths, furniture covers and velvet curtains with embroidery, curls or drapery are used. To equip this design of a log house, heavy double doors and large furniture are installed. It is suitable for furnishing spacious rooms, such as a living room or dining room.
Art Deco emphasizes strict geometry and patterns. When decorating, geometric patterns and ornaments, stepped shapes and discreet stucco molding, wide lines and streamlined curves are used. Here you will not find bright colors and elements of romanticism. This style is characterized by halftones and predominantly dark colors, among which brown and beige, black and purple, and green are often used.
You can play on the contrast of black and white, black and purple, black and green. This style is distinguished by luxury and chic. Expensive materials are often used, including rare woods, silver, ivory, crocodile skin, etc. Art Deco is suitable for rooms with high ceilings.
Modern is a light, soft and sophisticated style that is suitable for a comfortable stay. Here they use light tones and muted colors, natural colors, smooth and flowing lines. You can see arches instead of doors, nature-themed wall paintings, light curtains and round tables.
Due to its closeness to naturalness and the use of natural motifs, modernism is perfect for decorating the interior of a log house. And since it encourages relaxation and creates a comfortable and cozy environment, a bedroom, a guest room, or a living room with a fireplace are decorated in this style.
High-tech is a modern and practical style that allows the use of open communication pipes. This simplifies finishing, but does not provide complete safety in a wooden house, as experts advise covering pipes and electrical wiring. When decorating this style, glass and metal, synthetic materials, sliding doors and transformable furniture are used.
Here you can often find panoramic windows, smooth and even surfaces, an effective combination of space and light. The main colors used are grey, metallic and silver, black and white. Small rooms are decorated in this style, as it allows you to save space and functionally distribute the space in the room. This is an attic, an office or a kitchen.
Odorless paints
It is advisable to paint residential premises with quick-drying, odorless compounds. Residents spend a lot of time here, so the finishing solution should consist of environmentally friendly raw materials and not emit harmful fumes. Painting of furniture, decorative elements and other wooden products that are constantly located inside the house should also be carried out with water-based compositions that are safe for health.
Acrylic
This is the most modern type of paint. Acrylic compositions are highly expensive, they are made from environmentally friendly raw materials, and when applied they form an elastic film.
The pigment solvent in acrylic paints is water, so they do not emit harmful substances into the atmosphere. The high price of the material in question is justified by improved technical characteristics. The film is resistant to moisture, sudden temperature changes and ultraviolet radiation. Despite the frost resistance of the coating, the finished paint should not be stored at subzero temperatures.
Acrylic paint for wood is considered one of the highest quality materials. The coating retains its structure and color for 8 years.
Application of paint and varnish products to the prepared base can be carried out in various ways: with a paint brush, roller or spray gun. The solution penetrates deeply into the wood structure and dries quickly. The starting composition mixes well with various pigments, which allows you to obtain a coating of the desired shade. The acrylate composition protects wooden products from moisture while still being breathable.
Latex
Many consumers believe that a better effect can be achieved by coating wooden products with oil paint, but this solution has a characteristic odor, so it is better to use it for painting the facade of a residential building or in outbuildings. Instead of oil paints, you can use water-based latex paints, which will create the same effect as oil paints. The difference between latex paint and acrylic paint is the presence of rubber substances in the composition, which add elasticity to the dried surface.
The latex solution penetrates deeply into the wood structure, does not form streaks when applied, and creates a water-permeable layer on the surface. Despite the presence of water in the composition, dirt on the latex surface can be cleaned with a damp sponge.
The main advantage of the dye in question is the ability to breathe. This means that wooden walls painted with latex paint will allow water vapor to pass through the structure of the material well. A favorable microclimate is established in the house. The main disadvantage of the composition is the possibility of cracks appearing on the surface under the influence of negative temperatures, so the solution is recommended for use inside heated rooms.
Polyvinyl acetate (PVA)
Polyvinyl acetate compounds are considered in demand among consumers due to their low cost. This solution is used for interior decoration of walls and ceilings, consists of natural materials, and can be applied to wood bases, plaster or cardboard. The base solution can be diluted with any color, which allows you to obtain the desired color. After applying the composition, the user receives a beautiful matte or glossy surface. Another advantage of polyvinyl acetate paint is its rapid drying.
The disadvantages include the inability to paint metal products and the destruction of the coating under the influence of moisture. Therefore, the paint is not suitable for facade work; it cannot be used in wet areas.
The consumption of the composition depends on its color. To cover 1 m2 of usable area you need 250 grams of light-colored dye or 150 grams of a dark-colored substance. This is due to the fact that the first composition must be applied in two layers.
Materials for dyeing
When deciding what to paint the walls, ceilings and floors of a wooden house, pay attention to the range of products from the GNature company. Paint for walls and ceilings is represented here by three main products:
- solid oil GNature 245;
- glaze with beeswax GNature 470;
- wax glaze GNature 450.
Step-by-step instructions: how to paint the inside of a house
After the choice has been made - what paint to paint the inside of a wooden house - the necessary purchases are made and preparatory work is carried out.
List of things needed for different options for painting a wooden house
In addition to paint and varnish coatings, primers and other basic materials, for comfortable and safe work you need:
- protective clothing and equipment. Clothing (overalls or trousers with a jacket) must be tight, protect the entire body, and allow air to pass through. Additions – household or industrial respirator, gloves, goggles. For noisy procedures (cleaning surfaces with power tools), earplugs will be useful;
- protective equipment for the premises. Even if all surfaces in the room are treated, it is necessary to protect them from paint stains (varnish, stain, etc.). For this purpose, coarse canvas fabric, dense polyethylene, and special films are used. You can ensure an even paint line and protect small elements using masking tape or tape;
- devices and tools for preparing wood. The minimum is sandpaper of different grain sizes (from 40 to 360 grid, depending on the initial condition and the desired quality). Grinding (abrasive) sponges and bars of various shapes are more convenient for complex surfaces. Processing large surfaces manually is time-consuming and ineffective; you will need a flat or vibratory grinder; it is acceptable to use an abrasive attachment on a drill. If necessary, remove a layer of material 3...10 mm using an electric planer and similar tools;
- containers and tools for surface preparation. This includes primers, impregnations, stains - depending on how you plan to paint the timber inside the house. The application tool can be a spray gun (for liquid compositions), a swab, a brush or a roller. The cracks are sealed with sealant or putty using a spatula and sanded after drying;
- containers and tools for applying the finishing coating. Topcoat paint for painting a wooden house is applied with a brush, roller or spray gun, varnish is applied with a brush or swab. For large volumes of work, a spray gun is used.
Sequence of work
The actions are performed in this order:
- the room is cleared of furniture, equipment and other things, ventilation is provided. In the cold season, natural ventilation is undesirable, so as not to reduce the room temperature to critical;
- Removes dust, old coating, and remnants of care products (polish, wax) from wooden surfaces. For high-quality dust removal, you can use a powerful household or industrial vacuum cleaner. Using a washing vacuum cleaner requires time for the wood to dry completely;
- All cladding elements are checked. If mold, mildew, damp spots, cracks and chips are detected, they are cleaned to a “clean” material and treated (antiseptic, fire protection, moisture protection, putty and/or primer). Places where defects are repaired are polished after the repair composition has cured;
- Using masking or adhesive tape, textiles or paper, protect all parts that are not planned to be painted and that need protection from dust during sanding (sockets, switches, glass, etc.). It is advisable to dismantle electrical appliances before starting work;
- cleaning the surface to the desired level of smoothness (hand or machine grinding), removing dust, drying;
- applying preparatory layers - primer (for topcoat paints), stain or impregnation for varnish;
- applying the topcoat according to the manufacturer's instructions.
Important: varnishes are often applied in two or three layers with intermediate sanding. This provides better protective properties and a more attractive surface appearance.
Processing of wooden ends
The cut must be processed immediately after constructing the structure. While log trunks retain their natural functions and require at least a year to dry completely before processing, the ends need immediate protection.
When impregnating logs, you should pay attention to the order of this procedure, and also take into account that the wooden beam must be able to breathe and evaporate moisture. Therefore, if you are working on the external parts of a wooden structure, then you cannot carry out internal treatment of the premises.
End protection is carried out in several stages and requires special tools:
- Before using the material to cover the timber, it must be given a smooth, even surface using a chainsaw or other tools;
- The next stage is sanding the wood section. By sanding, the timber is cleared of irregularities, stains, and mold, giving the wood a smooth surface. Darkened wood is removed before painting.
- Applying material or impregnation to protect the end.
Color Basics
When choosing a color for a country house, follow the following recommendations.
- The colors of the external and internal cladding must be in harmony with each other.
- Be sure to take into account the style of the exterior. Each decor is characterized by certain color combinations.
- Each shade has certain visual properties. Light colors visually increase the size of the room, so they are best chosen for painting small garden houses. Dark and rich colors can be chosen when cladding large residential buildings.
- The colors for the house are chosen taking into account the personal preferences of the residents. Residents should feel comfortable and pleasant. Also, the choice of color depends not only on the character of the client. Women choose pastel and delicate colors (pink, purple and other similar options). Men prefer dark and classic options (brown, gray). For families, universal tones (green, white, beige) are better suited.
How to paint a log house?
Typically, what they want and expect from coating a log house with paints and varnishes is:
- effective protection against fungi, mold, blue stains, insects, UV radiation, and other aggressive environmental influences (rain, frost);
- aesthetic appearance (as an option - so that the coating remains visible and emphasizes the natural texture of the wood, is glossy, etc.);
- With effective resistance to environmental influences, expectations are associated with the longevity of the results - that is, so that both protection and beauty last for a long time (15 years, or even 50 - before major repairs!);
- environmental friendliness of the result and even active health benefits (at this point the factor of “breathing” walls is popular);
- so that all this, if possible, can be done easily and cheaply.
But, unfortunately, everything is impossible at once. All that remains is to determine priorities and choose the optimal combination.
First, let's talk about labor intensity. If you are willing to spend not-so-minuscule funds, cover it with ten layers - that is, paint a lot and for a long time - separately applying bio-, fire-, UV protection, then primers, then the first-second-...-twelfth finishing layer, you won’t have to. There are compositions that, according to manufacturers, combine all this in a primer and topcoat (and the protection functions are duplicated). But, of course, you can choose additional fire-bioprotection from the manufacturer’s line, for example. By the way, the fire-bioprotective composition of most manufacturers is also a primer.
The video from Tikkurila is completely universal, it protects everything from almost everything:
Note: fire-bioprotection (also: fire-protection, otherwise fire retardants, and bio-protection is often combined) is applied before decorative painting!
Another tip: I remembered when I wrote about the “manufacturer’s line.” Company consultants and independent specialists unanimously recommend using formulations from one manufacturer and combining them according to its recommendations! As a last resort, if you have already applied a fire-bioprotective composition of one brand, but want another paint, then ask the manufacturers (first and second) about the possibility of paintwork compatibility.
Now about prices: good paint doesn’t come cheap! Especially when we are talking about advertised brands, like Tikkurila, Pinotex, or Remmers, for example. There are relatively inexpensive wax-based protective and decorative compositions, including from domestic manufacturers, which are positioned as environmentally friendly (and even healthy!), incredibly durable, according to the manufacturer, and if this is true, then great, but Word about them hasn't spread yet.
Besides! If you choose imported paint, expecting to receive higher quality than from domestic brands, then look for the opportunity to purchase a product produced and packaged in the final container in the country of the brand, and not somewhere in Russia under license. That is, if you want Tikkurila, then it’s safer to find a Finnish can! Because there are enough complaints and opinions that even if the paint is delivered “from there”, but is poured into cans here, then it is already “very spoiled”.
A little more about choosing paint from foreign manufacturers. I recommend paying attention to how the climate of the brand’s country corresponds to Russia’s. Each manufacturer primarily focuses on the consumer within its own country. For example, in southern Italy, Spain, and France, the climate is unlike ours, soft, and their façade paints are not exposed to such severe frosts as in Russia. Therefore, their products can show excellent performance there, but not here. Thus, between the Slovenian “Belinka” and the Finnish “Tikkurila” it is more advisable to choose the latter - the Finns at least know what frosts are.
Fragment from “Build not rebuild”:
Useful recommendations for purchasing paint and painting
When choosing and purchasing paint for the interior decoration of wooden walls, it is very important to pay attention to the date of manufacture of the composition and the availability of certificates confirming its quality and sanitary compliance. If the seller cannot provide documents for the product, and the manufacturing date is not stamped on the packaging, but is written on paper and pasted on top, so to speak, interrupted, then it is recommended to immediately refuse to purchase such paint, especially if you are purchasing a fairly expensive version of it.
The fact is that if the paint is expired or frozen, then it may simply not lie on the surface, even if it is well prepared, and you can determine the quality of the composition only by opening the package and trying to apply it to the wood. For example, it will not be possible to paint anything with a frozen solution, since the paint will most likely curdle and have the consistency of liquid cottage cheese.
High-quality paint should spread easily over the surface of the wood, while having high hiding power
If the paint is of high quality, it will be easily applied to the surface, which means that painting the walls can be done by a person who has never even performed such repair work before.
Next, it is worth considering those factors that will directly affect the final finishing result.
- First thing to note. It is a common phenomenon that many homeowners, when doing their own renovations in a house or apartment, are careless about the preparatory stage of work, since they consider it unnecessary. However, if the base for the decorative coating is uneven and untreated with protective agents, you should not expect the desired result. In addition, after a short time, even defects that are invisible immediately after completion of the work will begin to appear, for example, such as blue discoloration, blackness of the wood, or “resin pockets” near knots. Therefore, the preparatory process must be considered mandatory and carried out as efficiently as possible.
- When treating wood with one of the protective compounds, it is necessary to very carefully process the end parts of logs or beams if they face the rooms. If the walls of the house are covered with clapboard, then its side surfaces should also be carefully treated with antiseptic solutions.
- All protective and coloring compounds are applied to wooden surfaces in thin layers along the grain, otherwise their absorption into the wood will be uneven, which will negatively affect the overall appearance.
This simple “improvement” from ordinary rubber rings will greatly simplify the process of applying paint with a brush from a can.
To ensure that there is no excess paint on the brush, and that it does not flow, but lies flat, it is recommended to use a simple device consisting of two stationery or ordinary rubber bands. One of the rubber bands is put on the bottom and top of the can, and the second along its diameter. The second elastic band will hold the first one, preventing it from sliding to the side.
After dipping the brush into the paint, press it against the stretched rubber band, leaving excess solution in the container.
- When applying paint to the surface of wood, do not try to cover it with a thick layer at once, as the painting will turn out sloppy. If you plan to get an opaque surface, then you should apply the paint in several thin layers, each of which should be applied after the previous one has completely dried.
- When painting walls covered with wooden clapboards, it is best to apply the final top coat starting at the top and gradually moving down - this method will help make the surface of the wall smooth.
- Paint can look different in a can and on the wall, so it is recommended to do a test paint job, that is, apply the solution to a small section of the wall in an inconspicuous area. It is best to choose the lower corner part of the surface.
- In order for the decorative layer to lie evenly on the surface, experts recommend adding a color to the primer that is one or two tones darker or lighter than the base color.
- The optimal temperature for painting surfaces is 22÷25 degrees. You should not carry out this process in hot weather, as the paint will dry too quickly and therefore unevenly. If the temperature is too low, the fluidity and hiding power of the compositions deteriorate, and the drying period increases.
Step-by-step instructions for painting a wooden wall indoors
By adopting all the little tricks listed above, it will be easier to cope with the preliminary stage and painting the walls. Having prepared all the tools and workplace necessary for the process, you can proceed to the finishing itself.
The “lion’s share” of the total amount of work in the process of painting wooden walls is always occupied by the preparatory stage
The main part of the work is preparing the surface for painting, which is why they require a more detailed description.
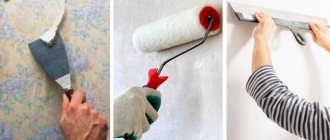
| Illustration | Brief description of the operation performed |
| For preparation and painting, you need to have at your disposal some of the tools shown in the illustration. In addition to them, you will need a grinder with replaceable abrasive paper blades and, possibly, a grinder with an iron brush. If the wooden wall has an old coating, you can use a hair dryer and a scraper (trowel) to remove it. | |
| The first step is to clean the surface of the old paint coating (if there was any). To do this, the paint layer is heated until it softens and peels off from the wood, and then is removed with a scraper or spatula. This work is quite time-consuming and labor-intensive, but it must be done efficiently, otherwise the remaining paint will appear through the new decorative layer as unaesthetic irregularities. | |
| If the wall does not have an old coating in the form of a paint layer, but has acquired an unrespectable appearance during use, or wallpaper has previously been glued to it, its surface must be thoroughly cleaned by removing the top thin layer of wood. | |
| Restoration of such a surface is carried out using a grinder, on which a brush with soft metal bristles is installed, and then a grinding machine with first coarse-grained (P80÷P120) and then fine-grained (P150÷P180) sandpaper attached to it. In addition, cleaning the wall or its individual areas protruding above the general surface can be done using an electric plane. | |
| When the wood is cleaned, its surface should be sanded with a fine bristle brush or sandpaper. In the case where a wall made of new wood is being prepared for painting, it also needs to be sanded smooth. Cleaning and polishing difficult places, for example, between two logs of a log house, can cause a lot of difficulties. But here, as they say, there’s nothing you can do—you’ll have to “sweat” if you want to get a high-quality result. | |
| If you don’t have a sanding machine, you will have to sand the walls manually - this is a very difficult and time-consuming process, so it’s still better to purchase a specialized tool, since it will come in handy more than once in a wooden house. The sanded surface must be cleaned with a vacuum cleaner to remove any dust generated during the sanding process. | |
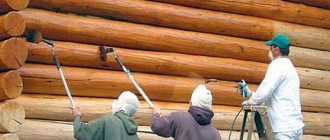
| The dust-free wooden surface is then coated with one of the selected protective agents - it can be an antiseptic and fire retardant, or one of the compositions described above. This operation can be carried out using a roller, a wide brush or a spray gun, depending on the topography of the wall and its area. If it is log, then the work will go faster if you carry out this process using a sprayer. At the same time, we must not forget about the need for increased precautions - many protective primers are very toxic before absorption and drying. | |
| As a preparatory, and sometimes even the main decorative layer, one of the types of varnish is used, which is applied with a wide soft brush. | |
| If, after the primer has dried, you plan to apply paint or a dark tinting varnish to the surface, then you should protect the ceiling from contact with the solution. To do this, it is recommended to stick masking tape onto the ceiling along the upper edge of the wooden wall, which can be easily removed upon completion of the work and will not damage the plastered or painted ceiling surface. | |
| To paint wooden walls, you will definitely need a soft brush and roller. The roller will significantly speed up the work, as it covers a large area of the wall at once and evenly distributes the paint solution over it. True, this is only possible on flat surfaces - when painting a log wall, a roller will not be a great help. | |
| A brush is needed for painting hard-to-reach places, for example, corner areas or horizontal joints between logs. It is recommended to paint in two or three approaches, but each layer must cover the entire area of the wall, otherwise the paint will lie unevenly. Each subsequent layer is applied only after the previous one has completely dried. |
So, the process of painting wooden surfaces in a house is a very labor-intensive, large-scale task, which, however, any owner must cope with. And for successful work, in addition to your own desire, you must:
- Have the necessary tools of good quality.
- Select and purchase high-quality primers and paints for preparing and painting surfaces.
- Carefully, without simplification, carry out all the preparatory processes, without convincing yourself that “it will do.”
- Do the painting without rushing and without trying to complete it in one go, that is, do not apply the paint in one thick layer - this approach will result in nothing but drips, overuse of paint and a sloppy surface.
If you strictly adhere to all these conditions, the coloring will definitely turn out the way it was originally intended, that is, neat and uniform, and the finish will last as long as possible.
And at the end of the publication, we invite you to watch an informative video in which the master tells and shows how to properly paint the inside of the walls of a house made of natural wooden beams.