What is chipboard with tongue and groove?
The abbreviation stands for “chipboard”. It is obtained by hot pressing of a base mixed with binding resins. To obtain additional protection from moisture, a polymer component is added to the mass.
Unlike other varieties, the product is equipped with a tongue and groove. The design of the connection consists of a protrusion and a groove at the ends of the part, due to which it is possible to connect the elements extremely reliably, avoiding distortions and disruption of the plane at the joints. This method allows you to obtain a solid surface that is less susceptible to various influences due to a more even distribution of the load.
Connecting elements through a tongue and groove has been practiced for several decades and has proven its quality, reliability and durability
Where is it used?
Finishing specialists recommend installing tongue-and-groove chipboard for rough leveling of walls. A decorative coating is already applied to this base: lining, board, laminate, and so on. Also well suited for interior partitions.
The slabs perform quite well as a suspended ceiling. Unlike drywall, they do not sag, are easy to install and weigh noticeably less. Regarding floor leveling, chipboard has a special role here. Pre-leveling promotes insulation from moisture and noise, which will reassure the neighbors below. Linoleum or parquet is already applied to the surface of the sheets.
What is tongue and groove chipboard
In moisture-resistant chipboard boards of the first grade (without defects and “peculiarities”), a tongue and groove are formed (on both sides - a tongue, on both sides - a groove). These slabs are called tongue-and-groove chipboard. During installation, the tenon (“male”) fits into the groove (“female”). If the quality of the material is good, the connection is invisible.
A tongue-and-groove chipboard looks something like this
Tongue-and-groove chipboard can be mounted on joists, sheathing, or on a flat surface without significant protrusions. The joint is coated with PVA glue, one plate is inserted into the other, then additionally fixed with self-tapping screws around the perimeter and in the middle. Due to the presence of locks, installation of the material on the floor, walls or ceiling becomes much easier and faster. The glued connection creates a monolithic coating.
You can cover the entire room from the inside
Tongue-and-groove chipboards are also called QuickDeck - after the name of the manufacturer who was the first to enter our market. Can be mounted on the ceiling, walls, or floor. They are convenient to use for leveling uneven surfaces or for covering frames.
Installation diagrams
Floor laying schemes depend on:
- number of storeys of the object,
- floor area,
- load-bearing structures (walls, supports or beams),
- modifications of slabs (solid, hollow, prefabricated monolithic or monolithic).
SNiP standards allow 3 schemes for supporting slabs on walls: on two, three and four sides. They are determined during the development of the project and depend on the modification of reinforced concrete slabs and the performance characteristics of the original concrete and reinforced frame. Thus, PB floor slabs are allowed to be installed on 2 sides.
PC slabs are produced in factories with several installation options depending on the number of supporting sides:
On 2 sides on opposite load-bearing walls with narrow sides, as they have longitudinal reinforcement.- On 3 sides for U-shaped corner spans of the box, these PP modifications have reinforced end reinforcement.
- As a rule, PP are installed on 4 sides in complex structures, when it is necessary to optimally distribute high loads, for example, with additional superstructures, these modifications are reinforced with a special reinforced version along all 4 ends of the structure.
Before adopting a slab laying scheme, their design features should be taken into account. Thus, when placing slabs of PC models, it is necessary to protect them from the loads of overlying building structures at the ends, for the reason that with increasing depth of support, the possibility of a danger of structural failure due to crushing of the end sections of the PC increases.
To eliminate such negative risks in these areas, structures install small vertical nets . Actually, for this reason, the slabs of these models are not allowed to be cut independently.
But for slabs of the PB series, the support depth is not so categorical, and therefore this indicator is not considered strictly regulated, but experts still advise not to allow it to exceed the standard value of 120 mm. The individuality of the structural voids and the formless installation method guarantee sufficient reliability of the end areas of these modifications.
If you comply with all operating conditions regarding permissible loads on the ends of the PB slabs, then no problems with their integrity will arise.
The technology used in the production of PB brand slabs and the reinforced frame design integrated into them makes it possible to cut them without loss of strength at an arbitrary angle. Supporting PB grade slabs on 3 or more sides is not permitted .
Advantages of chipboard
What is the reason for this popularity?
Several factors at once:
- ease of leveling the floor level;
- excellent material for creating a base coat;
- good insulation;
- low price, especially in comparison with plywood or wood (read: “Chipboard or plywood for the floor - pros and cons of materials”);
- simplicity and speed of installation.
Perhaps the only limitation where laminated chipboard flooring is not applicable are rooms with constant high humidity. It has an extremely negative effect on the material. The best option would be operation at a temperature of 10 degrees Celsius and in a room with a humidity of no more than 60%,
Prices for moisture-resistant tongue-and-groove chipboards: market overview
The following table shows the current assortment of the largest domestic). This company produces corresponding building materials under the QUICKDECK brand.
| Series | Thickness x Width x Sheet length in mm | Price in rub. per sq. m. | Notes |
| Standard | 12 x 900 x 2440 | 290-340 | The most inexpensive products. They are suitable for creating structures that are not subject to heavy loads during operation. |
| Standard | 16 x 600 x 1830 | 330-380 | These products are used for wall cladding. They can be installed on the floor if there is a solid base. |
| Standard | 22 x 600 x 2440 | 460-540 | Universal boards suitable for all types of surfaces and building structures. |
| Standard | 38 x 600 x 1200 | 950-1020 | Thick slabs are used if strong mechanical stress is acceptable. |
| Master | 22 x 600 x 2440 | 520-580 | These chipboards have a special protective layer that extends their service life. |
| Plus | 16 x 900 x 1200 | 640-780 | The price of moisture-resistant chipboard for a sheet of this type is higher compared to products of the “Standard” class. But in this modification a special decorative and protective coating is installed. |
The cost of chipboard depends not only on thickness. Additional finishing is also important. It improves appearance and protection from external influences.
High-quality laminated surfaces look great. But this solution is cheaper compared to using wooden cladding
Related article:
Necessary tool
After we decide whether it is possible to lay chipboard on the floor in a particular room, it is worth collecting the tools necessary for installation.
His list includes:
- hammer;
- ruler and tape measure;
- pencil;
- saw;
- screwdriver or drill.
Nails, dowels and self-tapping screws are used for fastening, and putty is used for final processing, which is used to level the base.
How to lay and secure?
The method of fastening depends on the type of base and fastening element. Typically used as a base :
- concrete screed;
- underlying layer;
- frame made of wooden blocks;
- frame made of steel or aluminum profile.
The following is used as a fastening element :
- glue;
- self-tapping screws;
- dowel-nails and anchor bolts;
- clamps and nails.
Concrete screed
When laying tongue -and-groove slabs on a concrete screed, the method of fastening depends on the characteristics of the screed itself, that is, its horizontalness and evenness.
If the screed allows the material to be laid directly on it, then most often various adhesives are used for fastening , both bitumen and polyurethane based.
Where a high vertical or horizontal load is expected, the glue is duplicated with dowels and nails . If you need to ensure reliable fastening of the slab as a whole, but problems are possible at the edges, or you need to do all the work very quickly, then dowel nails are immediately used instead of glue.
However, this method of fastening often leads to the fact that the underlying layer begins to wander around the edges if there are defects on the screed. Moreover, defects can appear if water is spilled on the floor and it penetrates through all the layers and reaches the concrete.
Under the influence of water, concrete stone loses its strength and becomes loose.
Therefore, it is advisable to use glue and dowel-nails, and it is necessary to coat with glue both the screed and the back side of each slab, as well as the grooves of the tongue and groove connection .
In addition, the glue will play the role of additional waterproofing and prevent the cement stone from getting wet.
If the concrete screed is not suitable for laying the underlying layer or subfloor, then either self-leveling mixtures are poured, or a frame is mounted, to which the slabs are then attached.
In the first case, after the mixture has completely hardened and gained strength, the finishing material is attached as described above. In the second case, methods are used that will be discussed below.
Substrate
When laying the finishing coating on the underlying layer, either the technology of creating a floating floor is used, or it is fixed with glue . Compositions based on bitumen or polyurethane are used as glue.
The exception is the underlying layer of wood or plywood, because these materials hold screws well, which is why they secure the finishing coating with screws.
The essence of the floating floor technology is that the sheets are laid without fixation, due to which they can in a small space limited by walls and other slabs under the influence of temperature deformation and various loads .
As the temperature increases, each finishing element also increases in size.
However, thanks to thermal gaps, there is no overstressing of the material, as happens with rigid fixation.
After all, the coefficient of thermal expansion of the finishing coating, glue and underlying layer is different, and the temperature affecting them is also different.
The disadvantage of this installation method is the unpredictability of the behavior of the finish if the thermal gap is chosen incorrectly .
After all, only the outer elements pressed by the baseboard are fixed, so there is always a possibility that when the temperature in the room drops and there is intense movement through it, all the finishing elements will gather in one direction, causing a large gap to appear on the other side.
Frame made of steel or aluminum profile
The method of attachment to such a base depends on the type of finish of the slab and the shape of the tip of the screw. Laminated elements are secured using clamps, drilling holes in the profile for self-tapping screws.
The polished elements are secured from the outside using simple or drill screws. For the former you need to drill a hole of a suitable diameter, while the latter do it yourself.
The method of fastening parts to other front surfaces depends on the ability to hide traces of the installation of self-tapping screws .
If this is impossible or too difficult, then clamps are used. If possible, they are attached to the profile through the body of the slab. The same method is used if the reliability of fastening is more important than the appearance of the coating.
Frame made of wooden blocks
To attach to such a frame, clamps are used , which are inserted into the groove and nailed or screwed to the block.
However, due to the design features, clamps cannot be used for fastening GSP .
The laying of the remaining materials begins from the corner, turning towards both adjacent walls with ridges.
After this, the material is attached to the bars at the level of the plinth with nails or self-tapping screws, so that the plinth will then hide the fasteners. Having exposed the slab, it is secured using clamps, after which another slab is laid, its ridge is inserted into the groove of the previous one and also secured to the bars with clamps.
If for some reason it is impossible to use clamps, then the finishing material is attached to the bars with self-tapping screws .
How to plant with glue?
Glue mounting is used when laying slabs on the floor; it is not suitable for mounting on walls. sheets for glue mounting , except those on both sides:
- painted;
- varnished;
- laminated.
The choice of adhesive depends on the type of slab and base material. For gluing chipboard, MDF and OSB to a concrete surface, adhesives based on :
- polyurethane;
- polyvinyl acetate (PVA)
- bitumen
For gluing the same materials to wood, polyvinyl acetate gives the best results.
To glue folded gypsum boards to wood, it is advisable to use PVA, and to concrete you can glue them with any type of glue, although PVA also gives the best results.
Polyurethane
Polyurethane adhesives come in water-soluble and gel forms . Water-soluble ones are easier to work with, but provide less reliable fixation.
Gels are much more difficult to work with, but they provide more reliable fixation. Both types of glue are incompatible with each other .
However, the preparatory measures for their use are the same - you need to:
- clear the room of all objects;
- vacuum the floor using a construction vacuum cleaner;
- wipe the floor with a damp cloth;
- dry for 2–3 days.
You need to bring the slabs into the prepared room one at a time.
They are marked on the reverse side , after which they are laid on the floor without glue to determine which finishing materials need to be shortened, as well as where and exactly how much needs to be trimmed.
The size of the thermal gap depends on the conditions in the room . Then all materials are taken out of the room, cut according to the markings and the back side of each slab is treated with coarse sandpaper to increase adhesion, and the room where the slabs will be laid is vacuumed again.
Tools
To work with water-soluble glue you will need :
- drill or hammer drill with a nozzle for mixing the solution;
- Master OK;
- notched spatula.
To work with ready-made glue, you will need a hard paint brush . For any type of glue you will need a laser level , because without it it will be difficult to position the finishing materials correctly. The first slab is placed vertically next to its place so that it lies strictly along the laying line.
Instructions for working with water-soluble glue
Water-soluble adhesive is applied only to the flooring using a notched trowel, the optimal layer thickness is 3–5 mm.
Then the slab is placed in place and lightly moved in different directions to distribute the glue more evenly.
Then they are aligned strictly along the lines of the laser level and carefully pressed over the entire surface.
If you are laying thin finishing material, then on top of it and walk on it for 1-2 minutes to evenly press the finishing to the floor over the entire area.
Then glue is applied to the area from the side of one of the tongue grooves, and the ridge of the next slab is coated with PVA , after which the slab is placed with the ridge on the protruding part of the groove of the previous slab.
If both protruding parts of the tongue groove are the same in size, then the slab is placed on the mortar close to the one already laid and pressed down as well as the previous one.
After that, placing a wooden block in the groove, carefully strike the two slabs with a hammer. If the PVA from the tongue comes to the surface, then the glue droplets should be carefully blotted with a clean rag, then wiped along the joint, first with a wet and then with a dry rag. All other finishing elements are laid according to the same principle.
Procedure for working with gels
Laying on adhesive gel is used only for finishing materials of small size, in which the length of any side does not exceed the thickness by more than 50 times. That is, for a thickness of 9 mm, the maximum length of any side will be 45 cm.
the glue with a brush
to the back side of the finishing material and set it aside for 5 minutes.
After 5 minutes, glue is applied to the floor and, after waiting another 2-3 minutes, the slab is laid and carefully pressed to the floor.
Then they also prepare a place for the second slab and its reverse surface.
Then they insert the comb into the groove of the first one, after which they gradually lower it and push it deeper and deeper into the already laid one.
When 2–3 cm remains from the edge of the second slab to the floor, pieces of wood are placed against its edge and sunk as much as possible into the first slab, after which they are laid on the floor and carefully pressed. All other finishing elements are laid according to the same principle.
PVA
PVA glue is used only for gluing sanded and unsanded surfaces to wood, gypsum and concrete screed , so it cannot be used to glue slabs that have a reverse side:
- painted;
- varnished;
- laminated.
Preparatory activities and markings are carried out in the same way as described in the previous section, including the use of a laser level. Then the floor is primed with a mixture of glue and water in a 1:1 ratio and left to dry for 48 hours.
If possible, you need to prime and dry the back surface of the slabs, this will increase the strength of the adhesive joint.
Then the glue is applied in a thin layer to :
- a section of the floor slightly larger in size than the finishing material;
- back side of the plate;
- tongue ridge.
The slab coated with glue is placed in place, slightly moved in different directions (it is acceptable to turn slightly in place) to distribute the glue evenly, and aligned along the lines of the laser level.
Then they cover it with a sheet of thick plywood and spread the loads evenly . You can use bricks as weights - 2-4 pieces per 1 m2, evenly distributing them over the entire area.
The setting time of the glue is 24 hours , after which you can remove the placed load and plywood.
Immediately after laying the first slab, the next slab is smeared and laid next to it, after which, substituting wooden blocks, its ridge is inserted into the groove of the previous one with light blows of a hammer. The remaining finishing elements are laid according to the same principle.
Bitumen adhesives
Bitumen adhesives are available for hot and cold applications . The former provide more reliable fastening of finishing elements, so they are even used for laying parquet. The latter are much easier to use, although they provide less reliable fixation.
Moreover,
both compositions are completely interchangeable , because they differ only in thickness.
Therefore, we recommend diluting the glue (mastic) for hot styling with a suitable solvent.
This will slightly reduce the fastening strength, but for slabs whose smaller side exceeds 40 cm, this is not significant.
Preparatory measures are carried out in the same way as described above, after which the floor is primed with cold-applied mastic, diluted with a suitable solvent in a ratio of 3:5 .
The drying time for the soil is 1-3 days , depending on the type of solvent, while the vents, and if possible, the windows, should be constantly open .
Then the floor and the reverse side of the finish are smeared with cold applied mastic (the tongue ridge is not smeared), after which the slab is laid strictly along the lines of the laser level.
It is not necessary to move the slab; with this application, the mastic itself will be evenly distributed . In addition, the movement of the slab can disrupt the integrity of the soil, causing the installation strength of the entire floor to suffer.
Once the slab has been laid, a sheet of plywood is placed on it with the same weight as described in the previous section. The setting time of the glue is 2-3 days , while windows and vents must be open. Immediately after laying one finishing element, the next one is laid according to the same principle.
When working with bitumen-based adhesive, be sure to open all windows and not smoke. After all, solvent vapors are not only poisonous, but also very flammable, and at high concentrations they are explosive.
Fastening with self-tapping screws
When choosing self-tapping screws, it is necessary to take into account the base material .
Self-tapping screws for wood are distinguished by larger threads (a pitch of approximately 2 mm, versus 1 mm for metal screws). Despite the fact that there are drilling screws, we recommend using regular ones , adding a drill with a drill of a suitable diameter to a screwdriver with a Phillips head.
This will not only reduce the time it takes to install each self-tapping screw, but will also simplify the entire installation. Reducing the time it takes to install one screw will be especially important in cases where you have to attach heavy slabs to the ceiling.
In addition, you will need a drill for countersinking holes , which it is also advisable to install in a separate drill to avoid constant rearrangement of drills, which significantly increases the overall operating time.
Installation Features
Fastening with self-tapping screws through the body of the slab is used when laying sanded and unsanded materials on a solid wooden base and a frame made of wooden slats and a metal profile or on logs.
Also, the edge slabs with a painted, varnished or laminated surface are fastened with self-tapping screws at the location where the skirting boards will be installed.
After aligning the finishing element using a laser level or lines drawn on the floor/frame, determine the location for the screw and first drill a hole with a diameter of ½ outer diameter of the thread .
The depth of the hole depends on the type of base. For wood, it should be half the depth into the base.
That is, with a plate thickness of 15 mm and a self-tapping screw length of 50 mm, the hole depth is 32 mm. For metal, the depth should be 3–5 mm greater than the thickness of the plate.
Having drilled a hole , take a second drill and countersink a seat for the head . The diameter of the hole should be ¼ greater than the diameter of the cap, and the depth should be sufficient so that the cap goes 1 mm below the surface of the slab. Then a self-tapping screw is inserted into the hole and tightened using a screwdriver.
Selection of self-tapping screws and putty of mounting holes
To attach the trim to the floor and walls, you can use hardened (black) self-tapping screws , but for ceiling mounting you need white or yellow self-tapping screws . Black self-tapping screws are very fragile, so they can break off during tightening.
In addition, when attaching slabs to the floor and walls, it is necessary to tighten the self-tapping screws until the trim is pressed to the base and not overtighten them, but when attaching to the ceiling, it is necessary to tighten them with a force of 30–40 newtons.
After installing all the screws, the holes for the cap need to be filled with putty . On sanded and unsanded boards, a mixture of sawdust and PVA is suitable for this; on painted, varnished or laminated boards - acrylic or polyurethane putty.
Moreover, it is necessary to putty so that after the material hardens, it does not protrude above the surface of the slab or its coating.
How to attach to dowel-nails and anchor bolts?
This method of fastening is used only for installing tongue-and-groove slabs to a concrete surface when it is impossible to use an adhesive connection or its low efficiency.
Dowel nails are suitable for fixing finishing material of any thickness to the concrete floor from the floor side and for fixing materials with a density of 500–850 kg/m3 and a thickness of 8–10 mm to the ceiling .
Thicker or denser material needs to be secured to the ceiling using anchor bolts only , but working with them poses a problem. To bury the bolt head into the slab, it is necessary to make a round-shaped seat with a flat bottom parallel to the surface.
Procedure for fastening to dowel-nails
After installing the plate in place, a hole is drilled in it , the diameter of which is equal to the diameter of the plastic dowel. For drilling chipboard, OSB and MDF, use ordinary metal drills.
To drill GSP, you need metal drills with carbide tips (not to be confused with Pobedit drills for concrete). Then take a hammer drill with a concrete drill (the same diameter) and drill a hole, the depth of which is equal to the length of the threaded nail from head to tip plus 5 mm.
Having drilled the holes, pull the nail out of the dowel and cut off the head of the latter , that is, the extension under the head of the nail. After that, first a dowel without a head is inserted into the hole, then a nail.
The inserted nail is driven in so that it touches the slab and presses it slightly. In the same way, you need to install dowel nails along the edges of the slab, after which countersinking of the holes for the nail head is added to this procedure. It is performed in the same way as described in the previous sections.
After installing all the dowel-nails, unscrew the screw nails that were hammered along the edges, countersink the holes for them and re-hammer them . If you have an additional drill or hammer drill, you can countersink the holes right away.
Guidelines for installing anchor bolts
To install an anchor bolt, a small recess is drilled in the slab , the diameter of which is 3–5 mm larger than the diameter of the bolt head, and the depth is equal to the thickness of the head plus 3 mm.
Next, a hole is drilled along the diameter of the anchor bolt cage using metal drills, after which a hole is drilled in the concrete using a Pobedit drill.
The diameter of the hole should correspond to the diameter of the holder, and the depth should be the length of the anchor bolt plus 1 cm. All this time, the plate should remain motionless.
Once the hole is drilled, the frame anchor is inserted into it (other types of anchor bolts are not suitable for installing tongue and groove slabs due to the irregular shape of the bolt or inappropriate fixation method).
When the anchor has entered all the way, it is slightly deepened through a suitable spacer with hammer blows and begins to be tightened until it attaches the trim to the ceiling, and the tightening force reaches 20–30 Newtons.
After this, the bolt is tightened using a wrench and a cross-shaped nozzle until the force reaches 60–80 newtons. All other bolts are installed using the same algorithm.
Laying panels using clamps and nails
This fastening method is suitable for installing tongue-and-groove slabs on a sub-layer of :
- wood;
- plywood;
- OSB,
as well as a frame made of wooden blocks.
The clamps must fully correspond to the finishing material and be supplied complete with it.
If you take separate slabs and separate clamps, then there is a high probability that they will not fit and the finish will become brittle.
In most cases, clamps are fastened using nails, but there are models that can be fastened using hardened self-tapping screws, so they can even be attached to a metal profile.
Using clamps, the finish is attached to the floor and walls. When laying the finish on the floor, perform all the preparatory measures that are described in the previous sections.
By the way, this method is not suitable for fastening to the ceiling , because the clamps are not designed for load and only hold the finishing material.
When laying on the walls, it is enough to clear the room of clutter and dirt. Then the configuration of the slabs is determined and marked on the reverse side. If some slabs require cutting, then this is done as prescribed for finishing materials of this type, that is:
- Chipboard, MDF and OSB are cut using a circular saw or jigsaw with a standard cutting tool;
- GSP is cut using a circular saw with a diamond or carbide disk installed on it, or with an electric jigsaw with a ceramic file.
Laying begins from the corner along the markings or laser level lines . The end plate is secured with self-tapping screws at the location where the plinth will be installed. When attaching to the wall, I use self-tapping screws (if you plan to install a corner) or nails with bitten heads, and fasten the material from the corner side, turning it towards it with the ridge of the tongue.
When driving nails, care must be taken not to damage the material, as well as
sink the nail to a depth of 2-3 mm and cover the hole putty of a matching color .
Having attached the finishing material from the ridge side, insert the clamp into the groove until it stops and nail it with a nail 20–30 mm long to the block or underlying layer.
If fastening with self-tapping screws is provided, then screw in a self-tapping screw of suitable size. Claymers are placed on each block, and on the underlying layer the distance between them is 50–80 cm.
Having attached one panel or slab, the ridge of the next one is inserted into its groove and also secured with clamps. If it is impossible to install clamps in the corner, then the material is secured with self-tapping screws or nails without heads, depending on whether a decorative corner will be installed over the corner of the walls.
Where can it be used
Many of us remember the ineradicable smell from furniture made from chipboard of the past period. It became especially obvious when heated. The new material does not exhibit such harmful fumes throughout the entire period of its use. Of course, the panels are made using polymer resins, but their composition and quantity are already quite reasonable. Sanitary services allow the use of tongue-and-groove chipboard even in hospitals, kindergartens and schools where children study. This material is now recognized as the most environmentally friendly among the entire group of materials with similar characteristics.
The unusual strength of tongue-and-groove chipboard against deflection and point loads gives every reason to use it in the hallway and corridors. The material is quite suitable for these places, and we will see how to lay it correctly.
Peculiarities
Tongue-and-groove chipboard is a common building material, presented in the form of panels with protrusions at the edges on one side and gutters on the other. The depth of the gutters (grooves) corresponds to the height of the protrusions, ensuring tight joining of the sheets with each other. During production, a mass of sawdust is compacted under a press with the addition of special resins, ensuring the waterproofness of the material. Therefore, as tests have shown, chipboard, completely immersed in liquid for a day, can increase by swelling by only 10%.
that have been pressed at elevated temperatures have high strength and are therefore often used for rough finishing of flooring. Special laminated chipboard is endowed with noticeable durable qualities.
During its production, a special film coating is applied to first-class products (without noticeable defects), increasing the wear resistance of the material.
Kinds
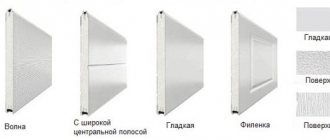
Now we are not talking about sizes, but about the types of tongue and groove boards. This material is available in three types:
- Just tongue and groove chipboard. Moisture-resistant chipboard with molded grooves and tenons. Usually called QUICK DECK or QUICK DECK Professional.
QUICK DECK Professional boards
- A tongue-and-groove chipboard with a dense polyethylene film glued to the front surface. It's called QUICK DECK Master. This option is good for the floor if high requirements for the cleanliness of the base are required for laying the finishing floor covering. Before applying the finishing coating, the film is removed along with the debris, leaving an absolutely clean surface.
This is an option with a protective film - Laminated tongue-and-groove chipboard (tongue-and-groove chipboard). A laminate film is applied to the front surface of a conventional tongue-and-groove board. It's called QUICK DECK Plus. Lamination corresponds to class 34, that is, abrasion resistant. An excellent option if you previously planned to lay laminate flooring.
With laminate (other shades available)
There is a solution for every case. The last two options are in some cases more convenient, although they are more expensive. But they save time. For example, immediately after installing each row of slabs on the floor, they can be covered with film, securing it to the walls with tape. But this option does not guarantee that dust and debris will not get under the film. It can also move. In this sense, a film glued to the surface is more reliable.
As for laminated tongue-and-groove chipboard, this option is more expensive than a chipboard + laminate set. But, if you add the cost of an additional substrate and time for installation, then this difference does not seem that big. On the other hand, the choice of colors is not nearly as wide as that of conventional laminate. In general, the choice will have to be made based on your own preferences.
Advantages and disadvantages
There are several advantages of tongue-and-groove chipboard:
- moisture resistance;
- safety - paraffin resins are used as a binder, and they are harmless and at the same time provide increased resistance to moisture;
- easy and quick installation;
- no height differences at the joints (in fact, slabs from different batches may have deviations);
- the resulting surface is monolithic, that is, the load is redistributed, which increases the reliability and rigidity of the structure;
- The tongue-and-groove chipboard floor does not creak.
Manufacturers state that the surface does not require treatment before using the topcoat. If linoleum or laminate is used, this is the case. But for wallpaper, and especially for painting, putty is necessary: the seams under these types of finishes are still visible.
Installation of tongue-and-groove chipboard on the floor is the most common application
The disadvantages include the high price, and not always ideal geometry. It is rare that the seams match exactly. In any case, all the reviews say that the walls/floor were puttied before painting or wallpapering.
Multifunctionality of tongue and groove slabs
Chipboards - both regular and tongue-and-groove - can be used in rooms for various purposes:
- residential - apartments and houses;
- administrative buildings, offices;
- at enterprises;
- in buildings that are used for public purposes (galleries, shopping complexes, etc.).
In apartments, moisture-resistant chipboard is used in any room - in bedrooms and halls, bathrooms, toilets, kitchens, etc. Due to its ability to withstand moisture, it is sometimes even installed on balconies and loggias that are not particularly isolated from the effects of weather factors. Chipboard feels great and does not lose its quality even in unheated rooms.
Laminated chipboard Quick Deck PLUS Brownie
In general, tongue-and-groove chipboard is ideal for arranging a subfloor. It can easily cope with the task of leveling the base for laying any covering, be it tiles, laminate or parquet. Moisture-resistant chipboard is also ideal for leveling walls and is mounted under the finishing touches of a room. Various interior partitions are often created from it.
Prices for moisture-resistant tongue-and-groove chipboard "QuickDeck"
Moisture-resistant chipboard
On a note! Suspended ceilings, despite the popularity of suspended ceilings, have not gone out of fashion. And chipboard makes very interesting ceiling structures, which, by the way, are much easier to install than drywall.
Another purpose of using such chipboard is to create formwork when pouring the foundation. It is easy to install and can be removed just as easily as it was installed.
Moisture-resistant tongue-and-groove chipboard
Table. Types of moisture-resistant chipboard.
| Type | Purpose of application |
| Facing | It is used only for finishing walls under the finishing coating or for creating ceiling structures. |
| tongue and groove for floor | A rough base for the floor is made from it. |
| Standard | Can be used for any purpose. |
Moisture-resistant and tongue-and-groove chipboard for laying on the floor
Chipboard (abbreviated as chipboard) is a material that has been used in construction for many decades. Furniture is also made from it and used for other purposes. Therefore, it cannot be called a completely new material. However, conventional chipboard has certain disadvantages that significantly limit the possibilities of its use. Such a slab does not like moisture very much and can swell under its influence, despite its high density and strength. But, since science and progress do not stand still, we have now learned how to make a type of chipboard that is not afraid of water.
Regular chipboard
Tongue-and-groove moisture-resistant chipboard is a real find for those who want to level floors quickly, without creating gaps between individual elements, and to get a base that is not afraid of water. The difference between such chipboard and regular chipboard is that during manufacturing, special components and compositions were added to the raw materials to provide the same protection from water. For example, these could be paraffin emulsions. In general, the same woodworking waste (shavings of inexpensive coniferous and deciduous wood) and resins that connect them together are used in production. The process of making plates takes place at high temperature and pressure.
Chipboard tongue-and-groove moisture-resistant QuickDeck
Advice! To distinguish moisture-resistant chipboard from regular chipboard, just look carefully at the color. The one that is not afraid of water has a lot of emerald green inclusions all over its surface. However, if such chipboard is completely wet and left in water for a long time, the board will deteriorate and swell anyway.
Differences between moisture-resistant chipboard
Tongue-and-groove chipboard has a special type of connectors - on one side of such a board there is a so-called tenon, and on the other there is a groove for this tenon. When laying several slabs in one row, they are butted together and firmly connected precisely thanks to this technology, which has the simple name “tenon and groove”.
On a note! Typically, moisture-resistant chipboard is tongue-and-groove on all four sides. That is, each end will have either a tenon or a groove, which will ensure the connection of not only vertical, but also horizontal rows of slabs with each other. This allows you to simplify and speed up the entire installation process.
Floor made of moisture-resistant chipboard on joists
Such a slab is usually marked as B, which means “moisture resistant”. Chipboard also has classes - P3 and P6, which are suitable for rooms with low or medium humidity levels, respectively. But class P5 is useful where the humidity is very high. Also, chipboards can be divided into several types depending on the number of layers - single-layer, three-layer or multi-layer. Most often, slabs of the latter type are used, with a large number of layers. In their manufacture, small and large chips are used, while the outer layers consist of smaller components. The dimensions of the slabs are usually the following - 2440x600 mm or 1830x600 mm. In this case, the thickness of the products is either 16 mm or 22 mm.
Tongue-and-groove moisture-resistant boards are made from wood chips mixed with thermosetting resins
Dimensions
Tongue-and-groove chipboard is produced in the form of long and narrow sheets - this makes installation easier. The width of the material is mainly 600 mm, there is also 900 mm, although in less variety.
Dimensions of tongue-and-groove chipboards
Slab thickness: 12, 16, 22, 38 mm. Twelve mm are usually used for sewing ceilings and walls. Sometimes, when laying on a solid base or with frequently located joists, it can be laid on the floor. For joists it is often recommended to use 16 mm or 22 mm. In this case, the distance between the supports can be up to 60 cm.
How to install tongue-and-groove chipboard on the ceiling and walls
Installing the ceiling and walls using this material, as well as laying the floor, is quite simple and does not take much time. Additional lathing for installing sheets on the wall is not required, which allows you to save on the purchase of material for lathing. Fastening is done using self-tapping screws. The distance between them is recommended to be 30-40 cm.
When installing the ceiling, choose sheets with a thickness of 12 mm. To install them, you will need to pre-install a frame made of slats. The sheets are secured with staples, screws or nails.
When assembling any structure using tongue-and-groove slabs, it is necessary to treat the joints with a sealing compound - mastic, glue, liquid nails.
Having become familiar with all the advantages of moisture-resistant tongue-and-groove chipboard and having studied the rules for its installation, we can conclude that this material is very convenient to use. Its characteristics allow it to be used almost everywhere and greatly facilitate installation. Considering its low cost, this material is optimal for installing floors, installing ceilings and walls.
Specifications
The plate has the following parameters:
- Width – 600 and 900 mm.
- Length – 183 and 244 cm.
- Thickness – 12, 16 and 22 mm.
- Moisture resistance – with prolonged direct exposure to water, deformation ranges from 10 to 20%, depending on the type.
- Density – high, not less than 820 kg/m2.
The produced panels have a standard size, which allows you to lay them without any problems. Processed options can be 120 cm long.
For flooring, slabs with a thickness of 16 mm or more should be used; walls and ceilings can be sheathed with material of any thickness
Technical description of the material
Chipboard is a solid board material made from wood chips of various sizes. It is produced with the participation of a binder component that contains formaldehyde resin. The formation of blanks is carried out by hot pressing.
Tongue-and-groove chipboard for flooring is a cladding building material with mounting edges for joining using the tongue-and-groove system. The modified fabric is also distinguished by increased strength, moisture resistance, and density. Due to changes in humidity and temperature (within acceptable limits) in the room, the assembled coating does not deform and retains its given shape.
Production of SDSP
The production process begins with the stage of preparing the working mass. Chips and shavings of various species are used here - waste from wood processing enterprises. The raw materials must be crushed to a maximum size of 5*40 mm. After sifting, large residues undergo the procedure again.
Wood shavings for slabs Source mebel-expert.info
The chipping mass is dried to a relative humidity of 3-5%. The harvested mass undergoes additional sorting to create a multilayer slab. To ensure that it meets high strength requirements, the core of the web is formed from larger chips.
The working composition for molding is considered to be a viscous mixture of wood with an astringent resinous component. The composition in the form of a carpet is subject to compaction in pressing equipment. Here, a pressure of 20-40 kgf/sq.cm is provided, and a temperature of +180 to +220 degrees Celsius.
Subsequent actions with the received blanks:
- cooling to general thermometer readings in the production workshop;
- grinding both planes to create a flat, relatively smooth surface;
- cutting of finished products according to standardized parameters (it is acceptable to carry out individual orders by prior agreement).
Pressing is performed in two ways. Flat involves pressure on the carpet in a perpendicular direction, extrusion - in a longitudinal direction. To achieve higher flexural strength values, the first method is used, so the second is less in demand.
Pressed blank for slabs Source yandex.net
A characteristic feature of the production of tongue-and-groove floor slabs is the addition of a water-repellent component at the stage of preparing the working mass. Paraffin resins are used here, which help increase the moisture resistance of the finished product. Externally, such canvases are distinguished by characteristic inclusions of a greenish tint.
Specifications
The production of particle boards with increased moisture resistance is regulated by GOST 32399 of 2013. In accordance with the requirements presented here, an internal classification of finished SDSP is carried out. Let's look at each criterion in more detail.
According to the standard, commercial slabs must meet the following dimensions:
- chipboard thickness for the floor – from 3 to 40 mm;
- width – 1220, 1830 or 2440 mm;
- length - 1830, 2440, 2500, 2750, 3600, 3660 or 4200 mm.
Permissible deviations in geometry look like this:
- thickness – 0.3 mm for chipboard Ш, up to 1.7 mm for boards without processing using grinding equipment (chipboard NSh);
- width – 5 mm;
- length – 5 mm;
- edge straightness – up to 1.5 mm per linear meter;
- right angle between the edges - no more than 2 mm per linear meter. (diagonal difference – up to 0.2%);
- slab warpage - up to 1.2 mm for grade I, up to 1.6 mm - for grade II.
Products are sorted according to external characteristics:
| Defects | Sanded board (chipboard Ш) | |
| First grade (I) | Second grade (II) | |
| Recesses and protrusions | None | At 1 m there are up to two dents with a depth of 0.3 mm and a diameter of up to 20 mm. Up to two scratches with a maximum length of 200 mm. |
| Oil stains | None | Up to two per 1 m2 with an area of about 1 cm. |
| Dust and resin stains | None | No more than 2% of the surface. |
| Chips on the mounting edge | Individual sizes up to 3*15 mm (depth*length). | The limit values correspond to deviations in the length and width of the web. |
| Grinding | No defects | Up to 10% on the working plane. |
| Presence of bark per 1 m of fabric (cross section of inclusions) | Up to 3 mm | Up to 10 mm |
| Defects | Unsanded board (chipboard NSh) | |
| First grade (I) | Second grade (II) | |
| Recesses and protrusions | On 5% of the area with a depth or height of up to 0.5 mm. | On 5% of the area with a depth or height of up to 0.8 mm. |
| Oil stains | On an area up to 2% of the plane. | |
| Dust and resin stains | Acceptable | |
| Chips on the mounting edge | The limit values correspond to deviations in the length and width of the web. | |
| Grinding | Defects not identified | |
| Presence of bark per 1 m of fabric (cross section of inclusions) | Up to 3 mm | Up to 10 mm |
Formaldehyde resin is added to the binder component for the production of particle board. Depending on its content and release of finished products into the environment, a class is assigned. Conventionally, it is designated as E1 or E2. The table shows the permissible standards for slabs with an absolute humidity of 6.5% (W). For other options, the indicator is multiplied by a coefficient, which is calculated using the formula: k=10.133W+1.86.
| Test method | E1 | E2 |
| Perforator (in mg applied to 100 g of dry slab) | up to 8 | up to 0.124 |
| In the climatic chamber (in mg/cub.m. air) | 8-30 | 0,124-1,25 |
See also: Catalog of companies that specialize in finishing materials and related work
For the consumer, one of the important selection criteria is the mechanical strength of the material. Based on this feature, three moisture-resistant boards are distinguished:
- P3 – can be used for unloaded structures;
- P5 – suitable for use in flooring in residential and public buildings;
- P7 – copes with increased loads.
Normalized indicators in accordance with the standard in conditions of +20-22 degrees Celsius and relative humidity in the room of 65-70% look like this:
For P3
| Thickness (up to mm) | Bending strength (from MPa) | Modulus of elasticity (from MPa) | Tensile strength across the slab (from MPa) | Swelling in thickness (up to %/day) |
| 3 | 13 | 1800 | 0,5 | 25 |
| 4 | 13 | 1800 | 0,5 | 23 |
| 6 | 14 | 1950 | 0,5 | 20 |
| 13 | 15 | 2050 | 0,45 | 17 |
| 20 | 14 | 1950 | 0,45 | 14 |
| 25 | 12 | 1850 | 0,4 | 13 |
| 32 | 11 | 1700 | 0,35 | 13 |
| 40 | 9 | 1550 | 0,3 | 12 |
| From 40 | 7,5 | 1350 | 0,25 | 12 |
For P5
| Thickness (up to mm) | Bending strength (from MPa) | Modulus of elasticity (from MPa) | Tensile strength across the slab (from MPa) | Swelling in thickness (up to %/day) |
| 3 | 16 | 2000 | 0,5 | 16 |
| 4 | 18 | 2400 | 0,5 | 16 |
| 6 | 19 | 2450 | 0,45 | 14 |
| 10 | 18 | 2550 | 0,45 | 13 |
| 13 | 18 | 2550 | 0,45 | 11 |
| 20 | 16 | 2400 | 0,45 | 10 |
| 25 | 14 | 2150 | 0,4 | 10 |
| 32 | 12 | 1900 | 0,35 | 10 |
| 40 | 10 | 1700 | 0,3 | 9 |
| From 40 | 9 | 1550 | 0,25 | 9 |
For P7
| Thickness (up to mm) | Bending strength (from MPa) | Modulus of elasticity (from MPa) | Tensile strength across the slab (from MPa) | Swelling in thickness (up to %/day) |
| 4 | 20 | 3000 | 0,75 | 10 |
| 6 | 21 | 3100 | 0,75 | 10 |
| 10 | 22 | 3350 | 0,75 | 10 |
| 13 | 22 | 3350 | 0,75 | 10 |
| 20 | 20 | 3100 | 0,7 | 10 |
| 25 | 18,5 | 2900 | 0,65 | 10 |
| 32 | 17 | 2800 | 0,6 | 10 |
| 40 | 16 | 2600 | 0,55 | 9 |
| From 40 | 15 | 2400 | 0,5 | 9 |
Manufactured chipboards must, among other things, have low absolute humidity. The limits are 5-13%. Deviations are unacceptable here.
Consumer properties
Moisture-resistant tongue-and-groove chipboard is in demand for a number of reasons. They can be attributed to the advantages of the material that the consumer highlights. They look like this:
- Moisture resistance. The canvas is intended for use in conditions of short-term humidity increases up to 85-90%. Direct contact with water is not allowed. But from a single immersion for a day, unlike other wood boards, minimal swelling is observed - up to 10%. In this case, no deformations are observed after drying.
- Strength. Moisture-resistant chipboard for floors copes well with constant and point loads. Therefore, it can be used for roughing and finishing flooring.
- Environmentally friendly. Due to compliance with sanitary standards, the canvas is approved for use in the residential sector, educational and medical institutions.
Laying flooring in a residential area Source oboiman.ru
- Simple technology for installation work. For cutting, it is enough to have a wood saw or an electric jigsaw on hand. Joining the slabs using the tongue-and-groove system is carried out quickly, without additional devices. Lifting equipment is also not needed, since the sheets weigh relatively little (for example, a 16 mm sheet is about 15 kg).
- Durability. Moisture-resistant sheets are not susceptible to rotting and fungal growth. Thanks to this, the canvas lasts longer than conventional chipboard or plywood.
Installation features
Products can be laid on different types of base. The technology of work is different and is carried out in stages.
Construction of a subfloor using chipboard
Laying such a covering before further cladding is not difficult. To do this, a simple set of tools is used, and all processes are performed without outside help.
Sequencing:
- A vapor barrier is laid on the concrete surface.
- After this, it is necessary to lay logs made of wooden beams and treated. They are leveled in a single plane; for this it is advisable to pull the cord. The pitch between parts depends on the thickness of the selected material. So, with a thickness of 16 mm, the distance will be from 300 to 400 mm, and with 22 mm – 400–600 mm. Substrates are used for leveling. The design must be reliable, so it is fixed with self-tapping screws, dowels and anchors.
It is possible to lay logs directly on the screed only if the surface is perfectly flat; in other cases, the timber is mounted either on pads, which is cheaper but longer, or on adjustable racks
- The resulting gaps are filled with insulation. This can be mineral wool or penoplex.
- Next you need to lay the panels. Work begins from the far wall. The first slab is laid with a gap of 10–15 mm from adjacent surfaces. This gap is maintained along the entire perimeter, so it is advisable to use spacer wedges.
The flooring is mounted from the far corner of the room to the exit, and do not forget to maintain a damper gap around the perimeter of the room
- The fragment should be leveled and secured with self-tapping screws. The main fixation points are located along the edges in 200 mm increments, several points should be in the center. The screw heads are recessed.
- The next element is adjusted to the previous one and connected into a lock. Using a hammer and a die, the part is hammered to ensure maximum reliability.
The joints of the plates are coated with glue, and recesses are made for the screws so that the cap is flush with the plane of the floor
- The second row is assembled offset, this will require trimming the material. To avoid a large amount of residue, a scheme for the exact distribution of slabs on the surface, taking into account trimming, is drawn up in advance.
Take into account that all joints must be on joists. If this is not possible, then the crossbars are hemmed.
Laying on a concrete base
Chipboard slabs for concrete floors are laid in the following order:
- The coating is being prepared. To do this, it is cleaned of all unnecessary things. Uneven areas with significant differences are filled with a leveling mixture. It is necessary to achieve maximum dryness to avoid condensation.
- A vapor barrier is laid on top. The film is placed over the entire base, the joints are overlapped and taped. It is also recommended to use a foil backing, which is especially important for the first floor.
- A work plan is drawn up. It is not difficult to attach the panels correctly, the main thing is to arrange the lines in a checkerboard pattern.
When directly installing slabs on a screed, in addition to waterproofing, it is advisable to lay a layer of foil foam foam; using a similar technology - “Floating floor” - a laminate is installed
The peculiarity of this installation is the absence of self-tapping screws. All plates are fastened using a locking joint with preliminary application of silicone, which enhances fixation. A gap of 1 cm must be left from the wall.
To obtain a high-quality result, it is necessary that the concrete be poured according to the technology; this will prevent it from swelling. A dry component – crushed stone with expanded clay – can also be used for leveling.
On a note! If there is a lot of traffic in the room and you plan to install heavy furniture, then in several places along the edges the coating can be secured with self-tapping screws and dowels.
Leveling a wooden floor
Working with such a surface occurs according to the following scheme:
- Since wood can warp, the level of deviation is measured. If the old layer has seriously damaged parts, they are replaced with new ones. It is advisable to check the joists for rot or mold, which will require cleaning or removing a piece.
- The nails are driven flush. It is recommended to additionally secure all old fixation points with self-tapping screws. The cracks are coated with elastic putty.
The most important part of arranging flooring on an old wooden floor is considered to be the preparation of the base; here differences in the plane of up to 3 - 4 mm are allowed, but not desirable
- The base is cleaned to maximum evenness. Tongue-and-groove wood boards can be laid on a wooden floor with minimal differences. Minor defects are corrected with a jute backing. In addition, it will avoid disruption of the steam exchange process.
- Construction panels are assembled using the standard method in a checkerboard pattern. Self-tapping screws are used for fixation. Be sure to deepen the cap.
When laying slabs on a wooden floor, do not forget to maintain a damping gap of 10 mm around the perimeter of the room
- If the selected products have a decorative layer, then fastening is carried out with glue and additionally with screws along the edges. Take into account that the fixation points must be completely covered by the baseboard.
If everything is done correctly, the resulting coating will be an excellent base for laying laminate, linoleum or carpet.
Laying a floating floor
Such floors are essentially dry screed. With this method, there is no rigid connection between the base and the floor covering. The device is a multi-layer structure, where the final layer is tongue-and-groove chipboard. This is what it looks like:
- The first layer of vapor barrier is laid on the concrete base. You can use regular plastic film for this.
- Next, small expanded clay or polystyrene foam boards are laid.
- The next layer is the substrate. It can be made of plastic, membrane, construction paper or other materials.
- The flooring is completed with tongue-and-groove chipboard sheets.
How is it arranged?
Chipboards differ from each other in the number of layers of wood shavings: single-, three- and multi-layer. For flooring, it is better to choose multilayer sheets that have large particles of wood inside and smaller ones around the periphery. This will provide the necessary shock absorption when walking. Also, the surface of the panels can have a fire retardant coating, which gives them heat resistance.
Types and application of material
Such particle boards are divided into three groups:
- P3. Used for objects with stable humidity levels.
- P6. Moisture-resistant variety, suitable for rooms with average humidity.
- P5. Waterproof option, laid in bathrooms and shower rooms, as well as on balconies and loggias.
In places with high humidity and rooms where sudden temperature changes are possible, P5 grade chipboard should be used.
The scope of the product is quite wide:
- Laying on the floor. Allows you to perform work on various substrates, regardless of design.
- Wall covering. Due to the locking connection, the process occurs quite quickly. This is an excellent solution for finishing partitions.
- Ceiling lining. Sheets of tongue-and-groove chipboard are an excellent alternative to plasterboard.
- Construction of façade and roof. Only P5 brand products are suitable for outdoor events.
- Use as removable formwork when pouring concrete.
High-strength moisture-resistant boards equipped with a tongue and groove connection allow you to easily and quickly equip any working surfaces
Important! Moisture-resistant laminated chipboards can be used for finishing work indoors, but special attention must be paid to the availability of safety certificates.
Features of a chipboard subfloor
When working with chipboard, it is necessary to take into account some features of this material, due to the specifics of their production:
- Chipboard is afraid of moisture. Therefore, it is not recommended to use chipboard for flooring in rooms with an increased likelihood of moisture (bathroom, kitchen, etc.);
Moisture is detrimental to chipboard - the sheet quickly turns into dust - When cutting particle boards, it is necessary to ensure that the cut surface is as smooth as possible. To avoid chipping or crumbling the ends, it is better to use a hacksaw and a blade with a fine tooth. Holes are cut with a wood drill at high speeds;
- When laying the end slabs, be sure to leave compensation gaps of 2-3 cm on each side of the wall. If this is not done, seasonal expansion of the material can lead to bending and swelling of the floors;
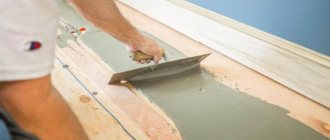
- Since the finishing coating is usually immediately laid on a chipboard base, its surface must be absolutely flat. To do this, all joints must be treated with putty and sanded. It is especially important to do this when working with soft surfaces: linoleum, carpet, etc.
You can use chipboard to support flooring in an apartment or country house. It is not recommended to use this solution in high-traffic areas, such as offices, shops or other service enterprises.
To summarize, we note that laying a flat surface under the finishing coating with your own hands using chipboard is quite simple. With minimal skills in handling wood materials, almost anyone can do this. Our video clip will help you once again analyze in detail the main stages of this process.
Moisture-resistant tongue-and-groove chipboard: pros and cons
The name tongue-and-groove moisture-resistant chipboard was given to slabs whose characteristics are improved using moisture-resistant polymer materials and a four-sided tongue-and-groove system. Thanks to these features, the material, which can be identified by green spots on the surface, has the following advantages:
- easy recovery option;
- resistance to rot, mildew and mold;
Mold on boards, which will never happen on moisture-resistant tongue-and-groove boards
- low thermal conductivity, providing savings on insulation of premises;
- environmental friendliness, which ensures the use of chipboard in schools, kindergartens, hospitals and other premises and buildings with high hygiene requirements;
- long service life;
- moisture resistance, the maximum value of which is for materials of class P5, which retain their geometric dimensions and structure even after a long stay in water.
Differences between regular and moisture-resistant chipboard
Painted and laminated boards can be used as a topcoat. And among the few disadvantages of laying tongue-and-groove chipboard, it is worth noting the need for additional protection of its ends from moisture and the low content of formaldehyde resins, which are used for pressing chips. This material also weighs more than similar-sized wooden panels and is not suitable for installation on curved structures.
Laminated chipboard
Application of chipboard with tongue and groove
The scope of application of the material is residential and administrative buildings, office premises, sports facilities, warehouses and shopping centers. At the same time, moisture-resistant tongue-and-groove chipboard is suitable for the following structures:
- ceilings. To do this, you should use slabs with a minimum thickness of 12 mm, which are easy to connect and can easily replace drywall. They are also used to level the ceiling surface before applying finishing coatings;
- foundations. The slabs themselves are not included in the design of the bases, but removable formwork is made from them;
- walls and partitions. The plates increase the heat-shielding properties and level the surface before painting, wallpapering or installing panels;
Laying materials on walls
Layout of floors on joists using chipboard
Another way to use the material is to perform roofing work. Due to their increased density and ease of installation, the slabs are the best option for roof insulation. And the relatively small weight allows you to reduce the load on rafter structures and save on their production.
Residential building, the walls and roofing of which are made of moisture-resistant slabs
Related article:
Floor insulation
Can chipboard be laid on a floor with insulation? Certainly. To do this, it will be enough just to add insulation to the sheathing. This method will also help protect against unnecessary noise. Almost any material can be used as a filler, but the most popular are isolon and technical cork.
The latter is an environmentally friendly material; it has a small thickness but excellent thermal insulation characteristics. However, the price of technical cork is noticeably higher than its analogues.
Izolon is noticeably easier to use - just roll it out over the surface and seal the joints with tape.
As you can see, laying chipboard on the floor is quite simple technically. Even a non-professional can cope with the task, and the result will definitely please you with a comfortable heated floor.
How to choose?
For finishing, builders advise choosing 3- and 5-layer flooring. Among the quality indicators of sheets, tensile strength (0.2-0.6 MPa) is distinguished. Also, the plate must withstand fracture under pressure up to 25 MPa. The permissible degree of swelling should not exceed 25%.
In terms of strength and water-repellent properties, the slab is marked in two classes:
- Class A - slightly swells when exposed to water. Suitable for use in rooms with high humidity.
- Class B is less resistant to humidity, so it is advisable to use only in dry rooms.
When purchasing, you need to understand that a first-class product should not contain cracks or irregularities. Such layers can be used to level the floor.
The content of toxic formaldehyde in resins during the manufacture of chipboards must be indicated by the manufacturer on a prescriptive document - label, packaging, etc.
- E1 indicates that 100 grams of dry material contains about 10 mg of formaldehyde.
- E2 – no more than 30 mg.
- E3 – has no more than 60 mg of harmful substances per 100 g of wood.
Sheets with a high resin content are used for exterior finishing or well-ventilated and technical premises - warehouses, utility rooms and others.
Reviews
Although quite a lot of time has passed since the appearance of this material on the market, there are very few reviews about tongue-and-groove chipboard. If we proceed from the fact that people who are happy with everything are not too eager to write something, but simply live in peace, then this is probably not bad. This means that the material meets most expectations, and the sellers’ promises do not diverge too much from the real state of affairs.
After reading about five forums where the topic of how good or bad tongue-and-groove chipboard is was discussed, we can draw the following conclusions:
- Laying is really simple and quick, only the slabs must be placed with the correct side up: the one with the tenon that is slightly beveled, which is why it turns out shorter.
- Some of them, when laying QwickDeck on joists, did not glue the joints, and the slabs were not fixed in any way. With this installation method, it is recommended to leave a gap between the plates of 1-2 mm. For those who laid tightly, the seams rose in the spring. I had to go over the new one, using a sander to smooth out the edges that were too swollen in places.
A tongue-and-groove chipboard board with a thickness of up to 22 mm requires a support pitch of less than 60 cm. If the logs are installed with this pitch or more, lathing is needed - The material from different manufacturers varies greatly. There may be discrepancies in sizes (slabs are several centimeters shorter/already declared), and the density may also be different.
- The geometry is far from ideal. There may be differences of a millimeter or more. If you need a perfect one, use thin pads during installation, but it’s easier to use a grinding machine.
- When laid on joists without a subfloor, the slab floor turns out to be a little “booming”: if someone takes a step at one end of the room, you will feel it at the other - through vibration.
- Can be cut with a grinder or hand saw without any problems. You can directly on the floor, placing a block down.
For filing the ceiling, the rules are similar. - When unloading, you need to be careful: the edges chip easily. The sheets weigh a lot, especially thick ones for the floor. Therefore, only two people can move it.
- Before starting installation, you need to keep the material in the room for some time so that the humidity levels out. Then the slabs will not warp during operation.
To summarize, the reviews from those who fully complied with the recommendations are positive. The hollowness of the floor and imperfect geometry are a reality. As, indeed, the different quality of tongue-and-groove chipboards at one point of sale.
Installation of chipboard on joists
The sequence of laying tongue-and-groove chipboard along the joists:
- Prepare your work surface. Clean it of all dirt and level it.
- Install waterproofing. The concrete base should be covered with plastic film, and the wooden base with glassine or waxed paper.
Advice. The waterproofing material must be laid with a slight overlap in order to subsequently wrap the ends of the chipboard slabs with it.
- Install the joists. Boards made of hardwood or softwood are installed on clay brick posts no more than 20-25 cm high. The logs are laid in increments of 40-50 cm and fixed with self-tapping screws. A gap of 1-2 cm should be left between their ends and the walls.
- Lay heat and sound insulating materials. Fill all the gaps between the joists with them.
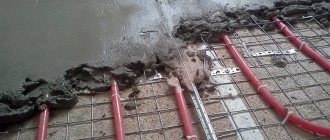
- Install chipboards. Lay the sheets away from the wall towards you, tightly joining them together using a tongue-and-groove pattern. Before joining, glue or mastic must be applied to the lock joint to securely fasten the slabs. Chipboard can be fixed directly onto the logs with self-tapping screws, mastics or glue.
Dimensions, specifications and prices
The cost of building materials usually depends on their size.
Chipboard QuickDeck
Here is a comparative table on the characteristics and prices of particle boards in Russia using the example of a building material:
Moisture-resistant chipboard for QuickDeck flooring
| Name | sheet size | leaf area | wholesale price | retail price | |||
| RUR/m2 | rub./sheet | RUR/m2 | rub./sheet | ||||
| Quick Deck (E1, P5), 12 mm. | Professional | 1830*600*12 | 1,098 | 266 | 292 | 280 | 307 |
| 2440*900*12 | 2,196 | 584 | 615 | ||||
| Quick Deck (E1, P5), 16 mm. | Professional | 1830*600*16 | 1,098 | 295 | 324 | 310 | 340 |
| 2440*600*16 | 1,464 | 432 | 454 | ||||
| Master | 1830*600*16 | 1,098 | 365 | 401 | 380 | 417 | |
| 2440*600*16 | 1,464 | 534 | 556 | ||||
| Plus | 1200*900*16 | 1,08 | 590 | 637 | 630 | 680 | |
| Quick Deck (E1, P5), 18 mm. | Professional | 1830*600*18 | 1,098 | 371 | 407 | 390 | 428 |
| 2440*600*18 | 1,464 | 543 | 571 | ||||
| Master | 1830*600*18 | 1,098 | 415 | 456 | 435 | 478 | |
| 2440*600*18 | 1,464 | 608 | 637 | ||||
| Quick Deck (E1, P5), 22 mm. | Professional | 1830*600*22 | 1,098 | 440 | 483 | 460 | 505 |
| 2440*600*22 | 1,464 | 644 | 673 | ||||
| Master | 1830*600*22 | 1,098 | 535 | 587 | 560 | 615 | |
| 2440*600*22 | 1,464 | 783 | 820 | ||||
| Quick Deck (E1, P5), 38 mm. | Professional | 1200*600*38 | 0,72 | 840 | 605 | 880 | 634 |
| Master | 1200*600*38 | 0,72 | 880 | 634 | 920 | 662 | |
How to impregnate chipboard for moisture resistance
The construction budget only seems large at first. When it comes to interior decoration, it turns out to be too small. Therefore, we are looking for any ways to reduce the cost. As an option, you can make moisture-resistant chipboard from ordinary chipboard. Don't think that it will withstand moisture as well as one that is initially made waterproof. But definitely better than usual.
If you need to save money, you can increase the moisture resistance of conventional chipboards
So, how can chipboard be treated to increase water resistance:
- drying oil in several layers;
- PVA;
- varnish (combined, bitumen, wax-resin);
- any water repellent compatible with wood;
- floor paint;
- impregnation for wood.
In general, you can use almost the same products as for wood. After all, chipboard consists of sawdust and shavings. But with any composition it is necessary not to coat it, but to saturate it. And not just once, but at least twice. And from all sides. Pay special attention to the tenons and grooves. In general, there will be more work.
Tongue and groove chipboards are an alternative to plywood sheets used to level the floor. Their main advantage is quick installation, which does not require professional skills from the installer. We will tell you how to lay QuickDeck on the floor in two ways: on joists and using the “floating floor” method.
Advantages
Let's consider the advantages of moisture-resistant tongue-and-groove chipboard in more detail:
- Increased density (820 kg/m3) ensures the rigidity and strength of structures made of chipboard (can be installed on joists - the special structure of the material allows you to effectively distribute the load over the entire surface of the floor);
- The process of processing chipboard in production allows you to achieve a perfectly flat surface of the board;
- Simplicity and ease of installation, dismantling, replacement of the entire structure or its parts, due to the system of protrusions and grooves, as well as the small size and weight of the plate itself;
- Increased resistance to humidity, dampness, temperature changes, unfavorable climate, as well as fungi, mold, microorganisms;
- Thermal/sound insulation;
- Low price (compared to similar building materials);
- Possibility of reusing dismantled slabs.
Flaws
Installing chipboard on logs
To eliminate undesirable consequences in the future, it is worth carefully considering the disadvantages of particle boards:
- Purely aesthetically, the appearance bears little resemblance to wood, so it is recommended to use it in rough finishing, as well as for hidden interior work;
- The use of various formaldehyde resins for impregnation can be toxic, therefore, when purchasing a moisture-resistant type of chipboard, you should read the operating instructions: is it allowed for use in residential premises or for furniture production (the manufacturer indicates on the label the amount of harmful substances in the chipboard);
- If the resin content is low, then additional insulation from environmental conditions is necessary;
- Not suitable for curved surfaces.