There was a time when oil paint for walls was a little forgotten, after other, improved options began to appear on the market: enamel, acrylic, water-dispersion, latex and acrylic. They even began to say that oil paint was toxic and should not be used.
Let's try to figure out whether this is really so.
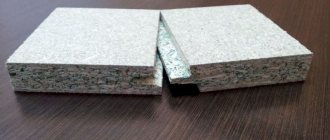
Characteristics and composition of oil paints
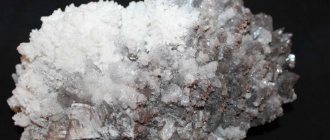
The two main components of oil paint are a binder and a pigment, which is responsible for the color of the finishing material. The pigment is usually made from very fine mineral flour, which cannot be dissolved, and drying oil is often used as a binder. Since the colorant is usually heavier than oil, sediment will form at the bottom of the paint can, so it must be thoroughly mixed before using the mixture.
The production of oil paint is as follows:
- part of the coloring matter is diluted in a small amount of drying oil;
- then the remains of mineral flour are gradually introduced into the composition, and the paint is diluted with drying oil to the desired consistency;
- to improve the quality of this finishing material, it is passed through a paint sprayer;
- It is customary to add a certain amount of drying oil to thickly grated paint before finishing work, approximately 20-40%.
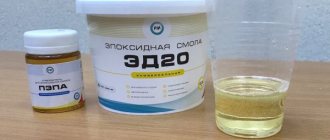
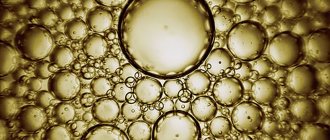
Drying oil is a viscous liquid of dark brown color. This substance is produced from vegetable or synthetic oils. On the modern building materials market you can find drying oils of various groups, the most popular of which are oil and alkyd compositions. Alkyd drying oils are substances made from oil-modified resins. Oil compositions, in turn, are divided into 3 types: natural, combined and oxol drying oils. Natural drying oil is considered the highest quality material, but its cost is significantly higher than the price of other types of material, so such drying oil is rarely used in the industrial production of paints.
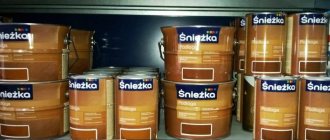
Most manufacturers sell oil paints in containers of 0.5-3 liters. The following information must be written on the product label:
- color of the dye;
- material consumption per 1 m² for single-layer and two-layer application;
- what surfaces this paint is intended for;
- How can you dilute oil paint?
In construction, oil paints are widely used for decorative painting of surfaces, as well as for creating a primer layer on wooden parts. This composition can be diluted with gasoline, solvent naphtha, turpentine, kerosene or white spirit.
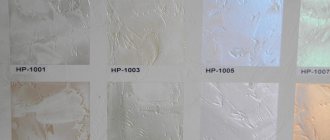
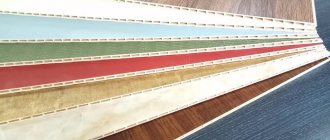
The colors of oil paints presented on the modern building materials market are surprising in their diversity. Among hundreds of different shades, each consumer will certainly find the desired option, and by mixing different colors, you can create new tones. The choice of the desired color depends on the design idea, as well as on the tastes of the consumer. As a rule, dark, deep shades are used in exterior decoration, while lighter and brighter colors are used for painting interior elements. It is worth noting that over time, oil paint fades a little in the sun, so the most saturated colors are used to paint external surfaces. Its consumption per 1 m² of area may also depend on the color of the paint.
Regardless of the brand of oil paint, most manufacturers put the following codes on their product labels:
- B – dilution with water is possible;
- P – powder paint;
- B – without volatile substances;
- VD – water-based paint;
- OD – organodisperse paint.
In addition, if only one substance is used as a pigment, then its name will be written on the label, and not the word “paint”.
Nowadays, oil paints are rarely used for finishing surfaces, due to certain disadvantages of the material:
- The time for complete drying of oil paint ranges from 6 hours to several days. All this time, the composition emits a rather unpleasant odor.
- Modern paints are produced on the basis of unnatural drying oils, which release toxic substances into the environment. Finishing the interior walls of a room with oil paint can be harmful to human health.
- This finishing material does not allow air to pass through at all, so the surface under oil paint does not “breathe” - this leads to cracking of the coating.
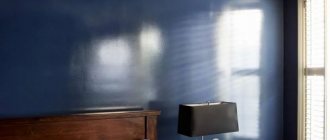
- Drying oil, which is part of the material, acquires an unpleasant yellowness over the years, which noticeably spoils the shade of the painted surface.
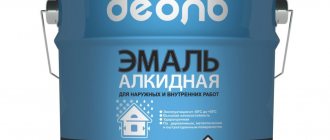
- Modern alkyd coatings are considered more reliable, durable and flexible than oil paints.
However, even despite all the above disadvantages, oil paint is still very popular among other finishing materials. The main reason for this is low cost and availability, because consumers of completely different incomes can afford such a composition.
PVA-based water-based paint
Water-based paint, which is based on PVA, is quite a convenient option for painting walls in the “cheap and cheerful” style, and also with a good appearance . Although this water emulsion does not have a wide choice of colors, it is simply created for a room in which there is no need for a special design and color saturation. The main thing to remember is that water-based emulsion material cannot be used in rooms with high humidity, as well as in places where it can be wiped with wet wipes.
Need to know! For color saturation, PVA-based water emulsion must be applied in several layers. For a stronger effect, it is advisable to prime the wall of the house before work. Such an event, first of all, will strengthen the adhesion of the paint to the plastered surface, and will also reduce the consumption of the water-based composition.
Water-based waterproof paint based on PVA with the addition of acrylic
Technical characteristics of oil paints
In order not to make a mistake in choosing a suitable finishing material, it is important to pay attention to the main technical characteristics of the paint. Let's take a closer look at these parameters:
- One of the significant characteristics of oil paint is the amount of film-forming substances in its composition. The mass fraction of these elements must be at least 26% of the total volume of paint. The function of film-forming substances is to create a continuous impermeable coating on the treated surface. The higher the indicated indicator, the more durable the paint will be. However, a high percentage of film-forming elements reduces the shelf life of the finishing material. In a closed container, the paint can be stored for many years, but after opening the package, air will get inside the can, and if you do not use the entire composition, its remains will turn into a solid lump, unsuitable for further use.
- Another important technical parameter of oil paint is the amount of volatile substances included in its composition. For high-quality material, this figure should not be higher than 10%. Volatile substances are generally toxic and harmful to human health. They evaporate at temperatures above 20°C and have an unpleasant odor, so it is customary to ventilate painted rooms until the paint is completely dry.
- The next technical indicator of the quality of the material is the degree of grinding of the paint components. The grain size of the treated surface depends on how fine the grind is. If this indicator is less than 90 microns, then the painted surface will be smooth; with higher indicators, the surface will be rough.
- The consumption of oil paint, its fluidity and hardening time depend on the level of viscosity of the substance. The viscosity level of high-quality material ranges from 65 to 140 units. It is also worth noting that the drying time for oil paint should not be more than 2 days.
- Among the quality indicators of oil paint, the hardness of the film formed should not be underestimated. It is especially important to take this characteristic into account if the paint is used to treat external surfaces. The harder the coating, the longer the paint will stay on the surface and the better the material will be protected from the negative effects of the environment.
- Another important parameter for the quality of a material is its hydrophobicity. For most compounds used outside buildings, hydrophobicity must be absolute. In the case of paints used for indoor work, this indicator can range from 0.5 to 1 unit.
Acrylic paints
Acrylic-based paints are a good and quite popular material among people. It is used for painting living rooms and rooms with high humidity.
Such compositions have the following characteristics:
- They react well to evaporation, which is why during operation they can be wiped with damp wipes without any problems, their aesthetic appearance will in no way be spoiled;
- For tinting, manufacturers have produced a large assortment of different shades and colors; thanks to this quality, the coloring composition can be found to suit any interior of the room;
- After applying the composition to the plaster, the walls of the house will have a matte surface;
- The material, which is made on an acrylic basis, is affordable; in a trailer it is the “golden mean” between quality, modern technology, production and price.
There are nuances that you should pay attention to. This type of paint is not recommended for purchase in rooms where there is a risk of liquid getting on the walls or ceiling. This can easily include bathrooms and car washing facilities. For contact with water, it is best to choose latex-based coatings.
Acrylic paint is recommended for use in rooms with high humidity
Features of using oil paints
On average, when painting surfaces with oil paints, the material consumption is 100-150 g per 1 m². The main role in the amount of composition used is played by the structure and roughness of the object; for example, wood perfectly absorbs any liquid, including paint, so the consumption when painting wooden parts can increase several times.
Oil paint is used on almost any surface: plastic, concrete, metal, wood. The composition is often used as a primer for finishing. When painting with oil paints, some subtleties should be taken into account:
- When processing narrow parts of window frames, door frames, etc., there is a risk of staining the glass or walls. Removing oil paint later will be quite problematic, so you should take care in advance to protect those elements that must remain clean. The easiest way to cover the walls is with a piece of plywood, tin sheet or cardboard, and it is better to stick paper on the glass. Cut wide strips of paper, moisten them with soap diluted in water and secure them around the perimeter of the windows. Once the paint has dried, removing the paper will be quite easy.
- If the glass has been stained, remove the paint using your own prepared composition. Mix sifted chalk and an aqueous solution of washing soda; the consistency of the substance should resemble a paste. Apply the composition to the desired places and leave for a while. When the paint becomes soft, wipe it off with a cloth or paper.
- It is also possible to remove dried paint from a wall. Place a sheet of aluminum foil on the painted surface and iron the area with a hot iron. Softened paint can be scraped off the surface using a spatula.
- In order for oil paint to adhere well to metal, it should first be wiped with vinegar and dried.
- If you want to mix paint in an open can without risking staining your clothes, use a drill. Make a hole in the lid of the container, insert a bent rod into it and secure it with the other end in the drill chuck. Turn on the device and mix the composition for 1 minute.
- The easiest way to remove paint from your hands and body is with a special solvent, but if you don’t have the right composition at hand, try removing the substance with vegetable or animal fat. Rub the oil thoroughly into the skin, then wash the stained area with soapy water. It is worth saying that washing powder also copes well with this task.
- If you are painting a narrow frame and are afraid of getting dirty, fix a thin strip of wood on the back of the product.
- It is advisable not to close windows and doors treated with paint until the coating has completely hardened, but if you still need to do this, place wrapping foil between the painted sashes.
- Metal surfaces will look more neat if you use a spray bottle rather than a brush when applying paint.
How to remove old paint from walls under plaster
Removing paint is a troublesome task. The paint can stick to the base firmly in some places, but in others it easily crumbles when using a spatula. Depending on the condition of the paint coating and the capabilities of the finishers, different methods of cleaning the surface are used. Similar methods are used when removing decorative plaster.
Removal is performed:
- mechanically;
- thermally;
- chemically.
Mechanical method
Classic scraping (manual or mechanized) or grinding (abrasive removal). Performed manually or with electric or pneumatic tools. Usually the removal starts with it.
Simple, inexpensive tools include spatulas and scrapers. These tools have thin, wide blades that slide under the paint layer. The tool itself is held at a slight angle to the surface being cleaned, so when pressed, its action resembles that of a wedge that converts longitudinal force into transverse force. Paint that adheres weakly peels off easily.
removing paint with a spatula
To make the “swing” wider, a scraper or spatula is attached to an elongated handle. The telescopic handle allows you to work with this tool from the floor, even when cleaning the ceiling. You can make a scraper yourself or purchase one. Replacement blades are produced for scrapers. For our work, it is not necessary to buy the most durable thin blades. Enough cheap Chinese ones. Working with a spatula or scraper is quiet and does not disturb neighbors.
If the bond between the paint and the base is strong, its layer is separated using carpentry tools - a chisel and a hammer. Here, instead of manually pressing “to the wedge,” a striking force is applied, since the end of the chisel handle can be lightly tapped with a hammer. The disadvantage is the small size of the peel-off coating. Therefore, it would be rational to first clean (where possible) the wall with a spatula.
removing the coating with a chisel and hammer
The old paint layer can also be removed using a drill, for example, using a long bolt with a piece of chain attached. In this case, the layer is knocked down by chaotic impacts of the chain links. But along with the paint, the underlying plaster often peels off. The method is dustier and noisier. In terms of cleaning speed/operation safety ratio, it is optimal.
There are models of drills with impact action. Such tools with a spatula attachment can also remove the film of the paint layer. You can use an attachment in the form of a disc brush with stiff wire bristles.
Rotary hammers have attachments for film removal - blades, brushes, abrasive discs. For rotary hammers, nozzles with dust outlets are available for connection to the hose of a construction vacuum cleaner.
Often angle grinders or, otherwise, grinders are used for removal. Use equipped with an abrasive or brush disk. All mechanical assistants are produced in two classes: for domestic purposes or for professionals.
cleaning a wall from paint using an angle grinder
If the coating was removed with such “assistants” of impact action, then the surface of the wall must also be leveled after removing the dust. For example, such an uneven base is not suitable for thin-layer decorative plasters such as Venetian. Get ready to putty.
Thermal method
Paint films can soften as a result of high-temperature heating. The softened mass can be easily removed from the walls mechanically by hand - with a spatula or scraper. Hair dryers are used for local heating. Heating with a blowtorch was once a classic.
The disadvantages of thermal removal are obvious: when heated, paint masses release unpleasant, toxic substances; The softened substance cools quickly, so you have to reheat it twice.
The room must be ventilated.
Chemical method
The method itself, like the previous one, is combined. By applying a chemical, the coating layer is softened, after which the layer is scraped off with a spatula. Means (washes) have been developed to soften the compositions of each type of paint. There are also universal washes. The method is not difficult, least labor-intensive. However, it is necessary to ensure the exchange of air in the room, since many volatile substances are harmful. For such cleaning you need to work in a respirator.
Removers are successfully used only for “fresh” paint layers (up to 2-3 years). Old finishes are difficult to soften.
There is a product that replaces the remover. This is liquid glass, which is applied in a thin layer. When dry, the “glass” film peels off along with the paint particles. She is removed. If necessary, perform the operation several times. Liquid glass is not as caustic as cleaning compounds.
chemical method for removing paintwork
Process of working with oil paints
Before you begin the process of painting walls with oil paint, you should learn some subtleties:
- There are 2 types of paints sold on the construction market: thinly grated and thickly grated. Liquid grated ones are compositions that are completely ready for use, but thick grated ones must be diluted with drying oil before application. If you use turpentine instead of drying oil, the treated surface will not be glossy, but matte.
- To make the paint dry faster, special substances are added to its composition - driers, and their amount should not exceed 4% of the total volume of the material. It is customary to add only light-colored driers to light-colored compositions, and driers are not needed at all to complete the final coating layer.
- You can get a surface with a matte texture by adding laundry soap to the paint. It must first be grated and filled with water, then heated on the stove and wait until the fragments are completely dissolved. Gradually add paint to the hot soapy solution, constantly stirring the ingredients. As a rule, 1 bar of soap is used for 3 kg of paint.
The painting process consists of the following stages:
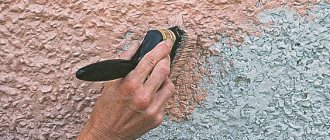
- The first step is to prepare the surface. If it was previously painted with oil paint, then you can remove the old coating using a stiff wire brush. If the old paint holds up well enough, then it is easier to use a solvent or special paste.
- The surface that was previously exposed with varnish should also be cleaned of its residues. For these purposes, prepare a mixture of ammonia and chalk. The resulting paste is applied to the varnished coating and after a while wiped with a cloth. Water-based paint is the easiest to remove; to do this, you need to wet it with warm water and scrape it off with a spatula.
- When the old coating is cleaned off, the surface of the plastered walls must be treated with drying oil. To create a durable and high-quality cladding, a layer of primer consisting of thickly rubbed oil paint and drying oil is applied to the walls. Per 100 g of drying oil there should be from 0.6 to 1.2 kg of paint.
- Before painting the walls, cracks and irregularities are sealed with oil or semi-oil putties. The semi-oil composition is prepared according to the following recipe: 20 g of liquid soap is diluted in 200 g of hot animal glue, and then, stirring the ingredients, pour in 1 kg of drying oil, 250 g of turpentine and 50 g of drier. In order to obtain the composition of the desired consistency, chalk is added to the putty. The resulting product is used to level the surface, and after the putty has dried, the wall is carefully sanded.
- The prepared surface is coated with oil paint. After opening the jar, you need to remove the film that has formed from the surface, and stir the paint itself thoroughly. Then you can paint a small section of the wall to see what the final result will be like. During the work, the brush is not completely immersed in the paint, but only 1/3 of the length of the pile - this way there will be no streaks left on the object being painted. When working with a brush, you should try to hold it at an angle of 90° to the surface, applying the composition in broad strokes. The paint is first rubbed with horizontal and then vertical movements.
- The paint composition should be applied in a thin layer, and before painting the wall a second time, the surface should be allowed to dry completely. If you apply a second layer of paint over a wet first layer, the coating will be unsightly and short-lived.
- If you want a very smooth wall, then apply the first coat with a primer, leave it until completely dry and sand with fine sandpaper. Use oil-based enamel as the final coat of paint.
- To ensure that white oil paint retains its color for a long time, apply it over clear varnish.
- A surface painted according to all the rules does not require repainting for 6-7 years.
How to plaster a painted wall
If you do decide to apply plaster over paint without removing it. It is necessary to strictly follow the technology. Let's consider sequentially what types of work must be performed so that the new coating is durable and tenaciously held on the wall.
Examination of a painted surface
What is this, what is it for? As is already known, the treatment of surfaces painted with oil compositions differs from the treatment of walls painted with water-based compositions. Therefore, first we determine what kind of base the paint film has.
To figure out what was used to paint the walls, you can use the following techniques:
- see whether the surface is glossy or matte;
- run your hand over the surface, check what trace remains on the skin;
- wet the coating;
- rub it with sandpaper.
Water-based paint looks like whitewash. Whitewash, when passed over it with your hand, leaves a whitish mark on the skin. When soaked, the whitewash darkens, the water-based emulsion remains the same color, however, when soaked, it “foams”, and if rubbed with a sponge, it will be partially erased. On sandpaper (after rubbing), the water-based film leaves smeared marks, while oil and enamel coatings leave small fragments and particles. Enamel paint compositions have a glossy surface, whitewash and water-based paints have a matte, porous surface.
checking paint adhesion to surface
Most often, oil and water-based bases are used for painting. Oil forms a dense, non-breathable film to which the plaster solution does not “stick” well. Water-based emulsion, on the contrary, with its pores allows air to pass through well, and plaster solutions adhere more firmly to it.
Preparatory work
The purpose of such work is to take measures to eliminate all defects that contribute to subsequent peeling of the plaster coating, increase adhesion, and strengthen the plaster mortar with reinforcement.
concrete contact applied to oil paint
- Check the condition of the paint film by tapping the surface of the wall. Areas where the coating moves away from the base or crumbles are cleaned with a spatula. Loose pieces of paint can be removed more easily if the painted wall is wetted.
- To increase adhesion to a wall coated with an oil or enamel paint base, notches of such depth are applied to the finish so that the underlying material is also “touched” by them.
- The surface is treated with sandpaper to get rid of the thinnest glossy smoothest layer. Sandpaper is chosen with a grain size of 60-80.
- The resulting dust is removed from the wall. Wipe the top with a cloth and dry. In a kitchen where tiny beads of grease have adhered to the finish, degreasing is required.
- The surface is coated twice with a primer. The first pass is performed with a composition that seals the pores and penetrates deeply. After drying, concrete contact is applied, which contains quartz sand grains. In this way, grip is increased. Please note that application requires a special concrete contact compound designed for application over alkyl or oil coatings (different from concrete intended for priming).
- For additional reinforcement of the plaster coating, a plaster mesh is screwed to the wall. For interior work, a mesh made of PVC or propylene is suitable; it is not screwed on, but pressed into the solution, as when reinforcing wet facades. It is important that the solution goes not only into the cells, but also between the mesh and the wall. It is better to attach the metal mesh to the ceiling with self-tapping screws.
Other information on preparing the surface for plastering can be found in a separate article.
Concrete contact cannot be used in bathrooms, and ordinary primer cannot be applied to concrete bases. Concrete contact is applied to substrates that do not absorb water, for example, ceramic tiles.
Applying plaster to paint
After completing the preparation, the walls must be dried. They plaster over paint in the same way as without it, using the same methods, for example, when leveling, you can use beacons. Plastering can be done manually or mechanically. The top of the layer is rubbed and smoothed (depending on the type of finishing, for example, for wallpapering).