Properties of ED-20 resin and application
Epoxy-dian resin ED-20 is a transparent viscous liquid of yellow, brownish color without mechanical impurities or inclusions. It is a fusible reactive product based on diphenylolpropane and epichlorohydrin. The manufacturer of this brand of resin is FKP Plant named after. Sverdlov, it is also produced by a number of other companies. The average mass fraction of epoxy groups in the resin is 20%, hence the designation of the material.
ED-20 is combined with different hardeners; in some cases, the addition of plasticizers is required (to reduce the rigidity of the finished product). Curing is possible in cold and hot ways (at room or elevated temperature); this process does not require pressing or thermal equipment. The properties of ED-20 are as follows:
- high density, non-porous finished product;
- excellent hardness, resistance to mechanical damage, aggressive environments, and moisture;
- heat resistance;
- dielectric and anti-corrosion abilities;
- good adhesion to plastic, metal, glass, ceramics, wood, Kevlar, carbon fiber and many other materials;
- ease of work;
- low shrinkage, low specific gravity.
Epoxy is widely used in various areas of the national economy. It is used for repairing electrical equipment, computers, radio electronics, parts and hulls of yachts, boats, boats, and for the production of furniture - tables, chairs.
Using ED-20 they make beautiful countertops, haberdashery, and bathroom products. The material is well suited for construction, mechanical engineering, aviation industry, and instrument making. Its use for covering walls and creating self-leveling floors helps in the most daring design decisions.
ED-20 is included in various paints and varnishes - primers, impregnating varnishes, enamels, potting mixtures. Reinforced plastic, fiberglass, and fiberglass are made from epoxy.
Basic properties
Epoxy resin ED 20 is a transparent viscous liquid with a yellowish or brownish tint; it does not contain mechanical impurities. Due to the presence of epoxy groups in the composition of 20%, the number 20 is present in its name. The letter abbreviation ED stands for epoxy diane type. The composition is determined by GOST 10587-84.
Resin 20 is mixed with various hardeners, which include the introduction of plasticizers. Curing occurs using hot and cold methods, and the use of heating devices is not required. Primer ED 20 technical characteristics:
- High density, the finished product has no pores;
- Good resistance to weathering and mechanical stress;
- Water-repellent property;
- Resistance to high temperatures;
- Electrical insulation and anti-corrosion performance is high;
- Good adhesion to many types of materials;
- Easy to apply;
- Low shrinkage;
- Fast polymerization.
High density, the finished product has no pores.
Technical specifications
The epoxy gelatinization time is 8 hours, and the complete curing period is 24 hours. The description of the highest grade of material contains the following technical characteristics:
- density during cold curing – 1110–1230 kg m3, during hot curing – 1200–1270;
- mass fraction of chlorine ions – 0.001%, saponified chlorine – 0.3%;
- mass fraction of hydroxyl groups – 1.7%, volatile substances – 0.2%;
- dynamic viscosity – 13–20 PA/second;
- temperature for softening is up to 60 degrees.
Analogs of material
In terms of components, properties and application, there are a number of similar epoxy resins from the ED, TEG, KDA groups. If necessary, they can replace ED-20. Below are the most famous resins.
ED-8
Epoxy ED-8 is produced in accordance with GOST 10587-84. It is a soluble fusible oligomeric product from the same substances as ED-20 (diphenylolpropane and epichlorohydrin). The resin is widely used in the aviation, shipbuilding, mechanical engineering industries, in the production of paints and varnishes, at construction sites, in the repair of equipment and electronics. Epoxy also serves as a binder for reinforced plastic.
In terms of physical and chemical indicators, ED-8 also differs little from ED-20. The content of chlorine ions and saponified chlorine is similar, but hydroxyl groups are not detected in the mass. The viscosity and softening point are the same. The main difference is in the mass fraction of epoxy groups (8%) and gelatinization time (3 hours).
ED-16
Epoxy resin ED-16 has the same properties and applications, but includes a different number of epoxy groups - about 16%. The viscosity of the product is less than that of ED-20, therefore, gelatinization occurs faster (about 4 hours). The product has high strength properties of the adhesive joint, but it contains a higher amount of chlorine.
ED-22
Another epoxy based on epichlorohydrin and diphenylolpropane, the proportion of epoxy groups is 22%. ED-22 resin, among its features, has a higher gelatinization time - 18 hours, while the dynamic viscosity is 8-12 PA/second.
E-40
The manufacturing technology of E-40 epoxy is somewhat different from the creation of ED grade materials. The product is obtained by condensation of epichlorohydrin and diphenylolpropane in an alkaline medium with the addition of toluene solvent. The product can be rendered infusible by using hardeners - polycarboxylic acids, their anhydrides, polyamines.
The scope of application of the material is the preparation of enamels with high protective properties, as well as the creation of varnishes and putties. In addition, E-40 acts as a semi-finished product for the production of other epoxy resins, adhesives and potting compounds. The resin has high plasticity, moisture resistance, and in its polymerized form does not react to the action of moderately aggressive acids and alkalis.
The following material is based on the experience of our customers and does not constitute official instructions for use.
Advice is advisory in nature. Our company is not responsible for the consequences of following these tips. A short version of this document, containing only instructions for working with epoxy resins in their most common applications, without a review of the various brands of epoxy resins, hardeners and plasticizers, can be found here: “Brief instructions for working with epoxy resins”.
Photos – illustrations for some questions are posted in the photo gallery. This material has been prepared due to the fact that, in our experience, the previously prepared “Frequently Asked Questions” and “A Little Theory” documents are too complex for those who have never encountered epoxy resins before. Here we will help you navigate our range as briefly and clearly as possible and provide you with the information necessary to carry out the most typical work with epoxy resins.
Most often, epoxy resins are used as (1) epoxy adhesive, (2) impregnating material together with fiberglass for the manufacture and repair of various hulls (boats, car body parts, etc.) or for waterproofing premises (floors and walls of basements, swimming pools) , as well as (3) the most affordable way to make a fiberglass product at home, both immediately ready after casting into a mold, and with the possibility of subsequent processing by cutting and grinding.
The use of epoxy resin as epoxy glue (1) is the simplest; most people are familiar with it from the boxes of EDP epoxy glue produced in our country since the times of the USSR, consisting of ED-20 epoxy resin produced by the plant named after. Y.M. Sverdlov (Dzerzhinsk) and hardener PEPA (see “Frequently asked questions”, question 2). Mixing the resin with the hardener in this case is usually carried out in extremely small volumes (several grams), so mixing is done at room temperature and does not cause difficulties, and the accuracy of the hardener / resin proportion is not so important (the standard proportion is 1:10, a decent overdose is acceptable hardener, up to 1:5). It’s a completely different matter when you need to prepare a large volume of resin with a hardener for work, at least several kilograms. This operation is very different from preparing a few grams of epoxy glue, which often causes confusion among our customers who have repeatedly used epoxy glue for household purposes, but have encountered difficulties when working with a fairly large volume of resin. An even more difficult matter is the manufacture of a sufficiently massive product from resin (i.e., in fact, the manufacture of fiberglass), which must, for example, be sufficiently transparent, clean, not contain air bubbles, and harden evenly in the thickness and over the surface. We will consider this issue at the end.
So, first, let's look at the use of epoxy resin as an impregnating material or sealant (2). First, let's briefly look at the range of products that our company offers. For the purposes under consideration, almost any ED-20 or ED-22 resin or their imported analogs will be suitable. What to choose? ED-20 is the most commonly used epoxy resin (it accounts for at least 90% of all our sales), ED-22 has a 2% higher content of epoxy groups (i.e. 22% versus 20%), and is “shorter” polymer molecule (see “A Little Theory”), correspondingly lower viscosity, as a rule, for domestic resins, higher quality and price. (At the moment, none of the domestic manufacturers produces high-quality ED-22 resin of the highest grade that complies with GOST.) For use as an impregnation, it is usually more convenient to use a more liquid resin (except for cases where dripping from the walls is possible), but, strictly speaking, the result A more liquid resin will result in a less durable (“shorter” polymer molecule) and less heat-resistant. For example, for repairing the hulls of marine boats or in the construction of bridges and overpasses, ED-16 resin is used to obtain maximum strength and adhesion (see “Frequently Asked Questions”, question 3). But in reality, in practice, there is no big difference in the strength of a product made from ED-20 and ED-22 resin; technology is of greater importance. It should also be noted that despite the fact that at the same temperature ED-22 resin has a lower viscosity than ED-20, a significantly greater difference in viscosity can be obtained by changing the temperature of the resin. We can offer ED-20 resin produced by the plant named after. Y.M.Sverdlova (Dzerzhinsk), i.e. the same one that is included in the EDP glue. This is a fairly high quality product, its use is well known. The disadvantages include poor color (this resin has a noticeable color from yellow to yellow-brown, while imported resins are almost transparent), uneven properties compared to imported resins, the presence of foreign inclusions (in other words, specks), high compared to imported resins. resins contain chlorine ion and saponified chlorine (i.e. toxicity). All imported resins are highly transparent (in a layer up to 5 cm, and sometimes up to 10-15 cm, the yellowness is practically indistinguishable) and highly pure (the content of chlorine ion and saponified chlorine is 1-2 orders of magnitude lower than in domestic ones). In terms of price, imported resins are no more expensive than domestic ones, often even cheaper. Let's name three main disadvantages of imported resins: the inadmissibility of using imported materials in a large number of industries based on GOSTs and specifications (1); insufficient development of technologies that take into account, albeit minor, but still existing differences between each brand of imported resin and ED-20 (2); crystallization during storage (see Frequently Asked Questions, questions 8 and 14) (3). The largest number of our imported resin sales is DER 330
– an analogue of ED-22 resin, produced by Dow Chemical Comp.
(Germany). 128
(analogous to ED-20, the most transparent and most viscous of our entire range of analogues ED-20, ED-22) and
127
(analogous to ED-22) produced by NanYa Plastics Corp., which
recently appeared on our market » (Taiwan), as well as Epoxy 520
produced by Spolchemie (Czech Republic). The latter is, in our opinion, the most complete high-quality analogue of ED-20 for the types of work considered here. Let us note that some of our clients, who at one time with great reluctance switched from domestic ED-20 resin to its imported analogues (due to the closure of resin production at Ufakhimprom, there was a large shortage of domestic products for some time), now in no case they don’t want to go back to ED-20.
Our range includes two hardeners - PEPA (polyethylene polyamine) and TETA (triethylenetetramine). Both of these hardeners can be used with all the resins discussed above. Without going into technical details, we will indicate the main differences in their properties and applications. We recommend using polyethylene polyamine (PEPA) (this hardener is part of EDP glue) in the vast majority of cases, because it is much easier to work with, it works well at room temperatures, and also “forgiving” minor deviations from the technology. There are two significant reasons when the use of PEPA is undesirable or impossible. PEPA is a viscous dark brown liquid. Accordingly, if transparency of the product is required, the use of PEPA is impossible (1). According to the specifications according to which PEPA is manufactured, 65-75% of the product is the so-called. “bottom residue”, i.e. uncontrolled impurities, and the share of the hardener itself remains only 25-35%. The bottom residue does not participate in the reaction of the resin with the hardener and remains in the product. Therefore, we do not recommend using PEPA if the finished product is intended for domestic use, storage of clean water (swimming pool), contact with food, etc. (2). Sometimes the surface of a product cured with PEPA appears greasy to the touch - a consequence of the presence of fatty acids in the bottom residue. Triethylenetetramine (TETA), an imported product (today produced by Dow Chemical Comp.), is a clear, low-viscosity liquid, quite caustic and with a pungent odor. According to certificates of analysis, the mass fraction of TETA itself in the product is at least 96%. Triethylenetetramine has fewer tertiary amino groups than polyethylene polyamine, so its curing ability is lower, especially at room temperatures (see “A Little Theory”). When using TETA, it is very important to strictly follow the technology; this is not always good for those who do not have much experience working with epoxy resins. Post-curing usually occurs only at elevated temperatures; at room temperature, the surface of the product often remains sticky. But in case of successful curing using TETA, the product will have greater mechanical strength, uniformity of properties, transparency and chemical purity than when using PEPA.
If it is necessary for the cured product not to be brittle and brittle like glass, a plasticizer must be added to the resin. A plasticizer must also be used when making a fairly large product, since otherwise cracks may appear during the hardening stage. We offer two plasticizers - dibutyl phthalate (DBP) and epoxy aliphatic resin DEG-1. Both of these plasticizers can be used with all the resins and hardeners discussed above. Dibutyl phthalate is a universal plasticizer; its range of applications is quite wide; plasticization of epoxy resins is one of the areas. DBP reacts quite poorly with the resin; to achieve the result, the resin with DBP must be “cooked”, i.e. slowly heating to 50-60°C, stirring vigorously for 2-3 hours. DBP gives an extremely small plastic effect; it is usually sufficient to prevent cracking of products during the hardening process or in the cold. There is an opinion that over time, DBP evaporates from the finished product, and plasticity disappears. The maximum dosage of DBP is 10%. DEG-1 resin is a plasticizer and active diluent, specially designed for plasticizing epoxy resins. It mixes well with resin, various proportions are acceptable (from 1 to 20% or more; usually 5-10%) and can give a very powerful plastic effect (with a large proportion of DEG-1, the cured resin will resemble bitumen; DEG-1, being an epoxy resin, can be cured in its pure form). The resin mixed with a plasticizer can be stored indefinitely; such a resin is called modified. When using a plasticizer, you should remember that as plasticity increases, the mechanical strength of the product decreases (DEG-1, cured in its pure form, can be crumbled by hand). The disadvantages of DEG-1 include its brown color (DBP is a transparent fatty liquid), which does not allow its use for the manufacture of transparent products.
So, we come directly to the technology of working with resin. The reaction of the resin with the hardener is irreversible; we strongly recommend that you first practice on small test samples. To successfully mix the resin with the plasticizer and hardener, it is advisable to heat the resin to above room temperature so that it becomes less viscous. For resin that can crystallize during storage, you need to make sure that it is transparent, not cloudy, otherwise by heating to 40-50 ° C and vigorous stirring, return it to a transparent state (see “Frequently Asked Questions”, question 8) . To heat the resin, it is convenient to use a “water bath” - lower the container with the resin into water at a temperature of 50-60°C and stir for uniform heating. Attention! Avoid getting water into the resin. Avoid heating the resin to temperatures above 60°C. In case of overheating, the resin may “boil”, the resin will become dull white and become covered with foam - such resin is unsuitable for use.
First, a plasticizer is added to the resin, the resin with DBP must be “cooked” (see above), when using DEG-1, simply mix thoroughly.
For mixing, it is convenient to use a construction mixer attachment on a drill. The resin/plasticizer ratio may vary depending on the desired plastic effect, but typically 5-10% plasticizer is added (see Frequently Asked Questions, questions 1 and 5). After mixing the resin with the plasticizer, a hardener is added to it. Sometimes it makes sense to cool the resin a little (to 30°C) to reduce the risk of the resin “boiling.” The standard hardener/resin ratio is 1:10. In some specific technological processes it can differ greatly from the generally accepted one - from 1:5 to 1:20, but in the vast majority of cases a ratio close to the standard is used. The hardener must be poured into the resin
very slowly, stirring constantly. A strong overdose of hardener, even temporarily in part of the container, can lead to “boiling” of the resin (the resin will become dull white and become covered with foam), in which case the entire resin will be damaged. It must be borne in mind that the process of mixing the resin with the hardener is exothermic (heat is generated), the resin will heat up. Sometimes, during the process of adding a hardener or immediately after mixing, an avalanche-like process occurs - the resin very quickly heats up and almost instantly “stands up” (hardens). The exact reason for this is unknown to us; we think that it is due to an overdose of the hardener and the initial temperature of the resin being too high. The pot life of a mixture of resin and hardener is usually 30 minutes - 1 hour (this greatly depends on the temperature of the resin, the type of hardener and its amount; longer times can be achieved). Upon completion of work, it is recommended to first cure the product at a temperature slightly above room temperature. Within 2-3 hours the so-called “tack-free” curing (primary polymerization), after which the product can be heated strongly, DER 330 - up to 70 ° C (there is no exact information for other resins, perhaps a little less), which will allow the curing process to be completed in 5-6 hours. At room temperature, complete polymerization can last several days (up to 7 days, according to the literature), and when using TETA, the surface may remain sticky (see “Frequently Asked Questions”, questions 6 and 13). Note that a few grams of EDP glue mixes well and cures at room temperature, but when a large amount of resin is used in the work, the technology must be different. If it is completely impossible to heat the product during curing, it is best to use domestic ED-20 resin and PEPA hardener. But even in this case, polymerization must take place at a temperature of at least 20°C, otherwise the process may drag on indefinitely.
In the work with resin discussed above (impregnation of fiberglass, sizing, waterproofing, etc.), the layer of resin usually does not exceed 1-2 mm. If greater thickness is required, the material is usually applied in layers, waiting for the primary polymerization of the previous layer before applying the next one. The process becomes somewhat more complicated if it is necessary to make a three-dimensional product from resin (fiberglass) (3). The resin can be cast into a mold; to ensure that the finished product can be separated from the mold, the mold is lubricated with grease (for example, technical petroleum jelly). By adding powder dye to the resin, you can give the product any color. The resin cast product can be further machined by cutting and grinding. For casting a three-dimensional product, domestic resin is of little use, because Due to uneven properties, the product may harden unevenly throughout the thickness. The most suitable material for casting a three-dimensional product may be DER 330 resin and TETA hardener (most likely, any high-quality imported resin and TETA). Primary polymerization (“tack-free”) usually occurs at temperatures up to 30°C for 3 hours, after which the product (still in the mold) is placed in an oven at a temperature of about 70°C for several more hours until final curing (see “Often asked questions”, question 13). Another problem can be the presence of air bubbles in the resin. They can be partially eliminated by heating and stirring the resin; to ensure a guaranteed result, it is recommended to use a vacuum molder.
In conclusion, I would like to add that here we have collected only the most general recommendations based on the experience of our regular customers. For each specific type of work, it is necessary to develop your own most suitable technology, which will include the preferred brands of resin and components, their exact proportions and features of the technological process.
PS This material was prepared in 2006 and has since become a little outdated insofar as it concerns the selection of hardeners for specific technological processes. We strongly recommend that you read the following new article: “Modern Epoxy Resin Hardeners.”
Instructions for using ED-20
The result of mixing resin and hardener will greatly depend on their proportions, environmental conditions, the quality of container preparation and a number of individual factors. The instructions for use are not always step-by-step; they usually indicate only the exact ratios of the components and the basic requirements for the polymerization process. It is recommended to first buy the liquid hardener specified by the manufacturer (if it is not included) and mix it with the resin in the smallest dosages. This will allow you to see the result and draw conclusions about the correctness of the proportions.
Mixing resin in small volumes does not present any difficulties. For this purpose, cold curing technology is ideal, when all work is carried out at room temperatures. Before mixing epoxy in large quantities, you will have to prepare a container for heating the resin, since the hot curing method is used. The epoxy is heated in a water bath to a temperature of 50–55 degrees, after which further work is carried out in an accelerated mode.
It is important to take into account that after adding a hardener, the polymerization reaction is irreversible, it is impossible to stop it, there is a chance only to slow it down slightly by lowering the ambient temperature. Incorrectly performed actions will lead to damage to a portion of epoxy, so all calculations must be made in advance.
Resin preparation
For cold curing, no special preparation of the material is required. For the hot method and to speed up the impregnation (pouring), it is recommended to heat a measured portion of the product. To do this, install a water bath and place a container with epoxy resin on it. It is important to ensure that not a drop of water penetrates into the mass, this will ruin it. Also, you should not overheat the material, the reaction will go too quickly, and bringing it to a boil will render the resin unusable. Heating to 55 degrees or less will be optimal. You can even lower the container with the material into a bowl of hot water and let it stand without boiling the water. Stir the mixture periodically to ensure uniform heating.
When stored or exceeded, the epoxy may crystallize. You need to make sure that there are no crystals or turbidities in it, otherwise it is heated to +40 degrees with intense stirring. This will help restore transparency to the material.
Use of plasticizer
Adding a number of components will help plasticize the epoxy resin. Why is this necessary? If the product in the future must withstand high impact or other mechanical loads, breaking force using a lever, its elasticity must be increased. The addition of special plasticizers makes it possible to partially absorb such loads. Their introduction is also recommended to enhance the elasticity of seams if epoxy is used for gluing and filling.
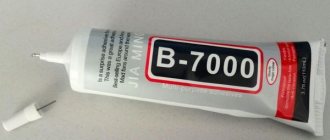
Plasticizer DBP
Dibutyl phthalate, or DBP, is the most popular plasticizer for epoxy; it is added in small quantities - up to 2-5% of the total volume. The product can protect products from cracking due to frost and shock. It is especially recommended to introduce DBP when using PEPA and TETA hardeners. If the hardener Etal 45M is used, adding a plasticizer is not required. The disadvantage of DBP is that it has a complex connection with the resin, so it requires long-term mixing with heating.
Plasticizers DEG 1 and TEG 1
Diethylene glycol, or DEG 1, itself is an epoxy, and is suitable for diluting the bulk as a plasticizer. The working concentration for ED-20 is 3–10% - the more product is added, the more the resin will resemble rubber. DEG-1 easily combines with epoxy, it is much easier to use if colorlessness is not important. Due to its orange tint, this plasticizer is not suitable in every case.
TEG 1 is similar in properties and application to DEG 1, but is slightly more viscous in consistency and has a brown or yellow color. The main difference in composition is that instead of diethylene glycol, TEG 1 contains triethylene glycol.
Using Hardener
The hardener is a full-fledged participant in the chemical reaction of polymerization of epoxy resin. It is introduced into the mass after adding plasticizers. To reduce the risk of epoxy boiling, its temperature at the time of mixing with the hardener should be no more than 30–40 degrees.
Typically, 1 part hardener is added to 10 parts resin, but the proportions will depend on the needs and type of finished product. In some cases, a ratio of 20:1 is sufficient, and sometimes, on the contrary, 5:1 is required. The hardener is added to the base mixture very slowly, since starting a thermal reaction can cause overheating and damage to the resin. Rapid infusion usually causes an avalanche-like process, when the mass overheats and instantly hardens. Too much hardener and a high initial temperature of the epoxy can lead to the same consequences.
PEPA, THETA and DEET
Polyethylene polyamine, or PEPA, is an inexpensive and very popular hardener; it works at room or low temperatures and does not require heating the original mass. PEPA does not reduce its properties even at high humidity. It has a yellow, brown, sometimes slightly greenish color, and is based on ethylene amines. The optimal amount to add to epoxy is 13.7%, it is important to enter the range of 10–15%.
Triethylenetetramine TETA is another well-known traditional hardener that allows you to prepare the resin at temperatures of +15...+25 degrees. The disadvantages include a pungent odor and toxicity of the substance. It requires strict adherence to proportions (for PEPA this is not so important).
The DEET hardener belongs to the same group of substances for cold polymerization of epoxy resins. A distinctive feature is the capture of moisture and carbon from the air, so it must be stored tightly closed. The product cures resins in 1.5 hours.
ETAL 45M
This universal hardener has “specified plasticity” and therefore does not require the introduction of plasticizers. Its consistency is close to the ED-20 resin itself, mixing will be easy. The temperature reaction from adding Etal 45M is less violent, moreover, it is non-toxic, does not cause allergies, and has no unpleasant odor.
Working with epoxy resin ED-20 / Etal Optic / Art Resin
When working with epoxy resin, keep in mind that:
There are various types of resins, conditionally divided into two groups: technical and decorative. When starting a task, choose the appropriate type of resin. There is no need to fill the tabletop with technical ED-20 or use jewelry grades for boats and modeling. The correct choice of material at the preparatory stage will eliminate many problems during the final processing of the product. Epoxy resin ED-20 is a cheap and accessible material. The name of the resin indicates the composition (epoxy-diane), the number 20 indicates the content of epoxy groups in the resin molecule. The lower the number, the higher the resistance of the resin to temperature influences, i.e. heat resistance ED-8 > heat resistance ED-16.
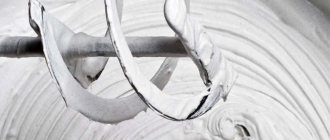
ED-20 is the most popular Russian-made resin, most often sold in kits with PEPA hardener (300 grams of resin and 30 grams of hardener). The kit is ready for use (the proportion for the mixture corresponds to the packaging: 10 parts resin / 1 part hardener). The resin is transparent, slightly yellowish, and when a hardener is added, it acquires a rich shade from amber to cinnamon color. The main inconvenience when working with ED-20 is its high viscosity, which prevents the release of air bubbles from the finished mixture. At room temperature, the mixture resembles honey, but when heated, the viscosity of the material decreases significantly, approaching the viscosity of sunflower oil, which allows air bubbles to easily rise to the surface.
You can increase the temperature of the mixture in several ways: 1. Water bath. Place the container with the prepared mixture in a tank of hot water. 2. Heating the mixture in the oven. 3. Warming up the applied layer with a hair dryer or gas burner. 4. Use of an aerosol corrector that dilutes the top layer of the poured mixture (recommended when pouring large volumes of resin to avoid overheating and premature polymerization / rejection of the poured layer).
An increase in the temperature of the poured mixture affects the polymerization process, significantly reducing the lifetime of the mixed composition. If the resin is overheated, the material can not only harden before casting, but also foam, become cloudy, and change color. To save time and money, do a few test pours before starting to work with unfamiliar material.
ED-20 is a technical resin suitable for gluing parts, priming surfaces, and repairs. However, this type of mixture is not intended for work with high (artistic, decorative) quality coatings. When working with ED-20, a number of disadvantages are inevitable: the lack of absolute transparency and color purity of the finished product, the need to purify the mixture from air, and grinding the finished surface.
Before pouring: 1. Place cling film or oilcloth under the mold (the paper or cardboard will be saturated with resin and stain the work surface). 2. Dry the base of the future product well. 3. Degrease (ordinary white spirit or acetone will do) and prime the surface intended for pouring. To do this, carefully coat the top layer with the prepared mixture (primer is especially necessary when pouring a wood base: impregnation of the material eliminates the escape of air that fills the material in microcracks and kinks. 4. When preparing the mixture, mix the components thoroughly. It is best to use two containers: half the time mix the components in one container, then pour and mix in another (when mixing in one container, the original composition will always remain near the walls and bottom.) 5. Add the hardener gradually, in a thin stream, mix the resin carefully, avoiding the penetration of air bubbles into the mixture. Homogeneity of the resin - a prerequisite for a good result, the absence of streaks and waves on the surface of the product.
When installing formwork, be sure to seal all connection lines of the outer perimeter: 1. Plasticine can be used to seal formwork for small products. 2. You can use wax (drop each joint or melt the wax in a metal bowl and coat the seams with a brush). 3. You can use a mounting gun with hot glue. 4. Or silicone sealant - the most reliable method for filling large volumes.
When installing the formwork, do not forget about the separator (a layer that prevents the adhesion of the resin and formwork). The best option is polyethylene (for small-scale work, the formwork can be covered with tape) or wax. Use any option of your choice, selecting a separator for a specific brand of resin or using the most common and cheapest option - technical petroleum jelly. Be sure to check the sealing of the formwork (for example, using a flashlight). The smallest hole will be enough for the resin to leave the mold and end up everywhere. After filling the form, protect the filling from random debris (cover with plywood, canvas, cardboard). Even the smallest dust, lint, hair and pet hair will ruin the workpiece and require sanding.
When using lightweight fillers (such as petals), pour the first layer of resin thinly to secure the individual elements before adding the bulk, otherwise loose parts will rise to the surface of the mixture.
About polymerization: The polymerization process heats the mixture and the resin expands. When the reaction with the hardener is completed, the resin “stands up”, gradually cooling, which causes the compression process to occur. The compression ratio depends on many factors: the resin used, hardener, plasticizers, environmental characteristics and temperature conditions in the working room. When working with multiple layers, add resin to the live mixture (a mixture at the gelatinization stage with the possibility of diffusion of the poured and added composition). If topping up is on a hardened surface, be sure to clean the top layer before adding a new one. If an amine film appears - polymerization products that appear on the surface of the mixture when the resin hardens under conditions of low temperature, high air humidity, exposure to water vapor or carbon dioxide - the film should be removed. Rinse the surface of the product thoroughly with plain water, dry it, and sand it if necessary. During the polymerization process, the mixture releases toxic volatile substances, so it is best to leave the poured mold for a day in a ventilated room with a set temperature of +25 to +30 degrees.
ED-20 has a significant compression ratio; during polymerization of the resin one can observe (depending on the area of the base and the thickness of the poured layer): deformation of the product, rupture of small parts along the connecting seam line, significant bending/delamination of the base. To reduce defects, modify the mixture with a plasticizer, select the optimal type of hardener, dry thoroughly and prime the base of the future product.
During the experiment, a task arose: to fill a wooden surface with ED-20 resin in such a way as to completely avoid curvature of the base, assuming that the compression coefficient is a negligibly small value if the casting technology is followed. Then the cause of deformation may be excess moisture in the material. Once cured, the resin will form a film that is impervious to water, causing the wood to begin to split on the exposed, “soft” side. To test the version, the dried board was covered on one side with a layer of plaster that absorbs moisture, which was then painted with acrylic (as a hydrophobic separator between the plaster and the resin). After a week, the treated board completely retained its original shape. A mixture of ED-20 and PEPA hardener was applied to the acrylic (in a ratio of 10:1, with a layer thickness of 5 mm). After two days, the curvature of the base reached 6 mm per 40 cm in length.
About grinding: Grinding is a necessary step when finishing a product. Some resins do not require finishing, but even a perfect casting requires alignment of the bonding edge created when the resin contacts the formwork. Grinding is performed with an orbital sander (in extreme cases, you can use a drill with a grinding attachment, but carefully monitor the deviation of the axis of rotation). Start sanding with sandpaper with a grit of 600, gradually lowering the grain size: 600 - 1200 - 2500. When using sandpaper, wet the surface of the resin. The resin effectively “washes” the sandpaper, the water removes the removed material and smoothes the surface being treated. After sanding, use a hard foam pad with abrasive ointment; final polishing is done with a soft foam pad with polish. It is not recommended to use felt tips - the fibrous material leaves raised indentations on the surface of the resin.
When working, be sure to follow safety rules: avoid skin contact with the resin, use gloves and a respirator, work in a room with good ventilation. When polishing the product, be sure to protect your respiratory tract: the resin is inert and cannot be eliminated from the body.
About hardeners: There are two types of hardeners. Cold (polymerization occurs at room temperature) and hot (polymerization occurs at temperatures from +50 degrees). Only cold hardeners are discussed below.
PEPA (polyethylene polyamine) is a technical hardener developed in the USSR in the second half of the last century. The hardener has a whole range of disadvantages, however, it is still popular today, primarily due to its extreme availability and low cost.
The main disadvantages of PEPA: 1. Coloring of the resin. PEPA is a rich copper-colored liquid. 2. Low quality of the original product. About 70% of the hardener consists of impurities that do not react and remain in the product. 3. Toxicity. 4. Uneven reaction when interacting with resin. When working with large volumes, the mixture may boil. 5. Not suitable for work in conditions of high humidity / low temperature (minimum temperature: +15 degrees). Advantages: 1. Extremely cheap. 2. Forgiving about precise dosage. 4. High curing ability.
TETA (tetraethylenepentamine) is a hardener that differs from PEPA in better distillation (mass fraction of the active substance is at least 96%) and high requirements for working conditions.
Disadvantages of TETA: 1. Minimum ambient temperature for reaction in the mixture: +25 degrees. At room temperature the mixture will remain sticky (removable by heat treatment). 2. Strict adherence to the technological process, precise adherence to proportions, and very thorough mixing are necessary. 3. Toxicity. 4. Not suitable for work in conditions of high humidity. Advantages: 1. Transparency. The hardener is almost completely colorless. 2. If used successfully, the product will receive high strength and uniformity of composition (compared to PEPA).
Etal-45 is a continuation of the line of amine hardeners, but, unlike PEPA and TETA, Etal-45 has practically no disadvantages.
Advantages: 1. When added to the mixture, it also acts as a plasticizer (the proportion in the mixture is 2:1 / resin: hardener). 2. Non-toxic. 3. Suitable for work in high humidity conditions. 4. Permissible ambient temperature: from -7 to +45 degrees. There is only one drawback: thick, dark brown color.
None of the mentioned hardeners were suitable for the production of Aurelia. The first two are due to their technical profile, the last is due to their coloring properties. After experiments with ED-20, Etal Optic resin was tested.
Resin characteristics: 1. Low viscosity (air will leave the mixture quickly and easily). 2. Transparency. 3. The use of the same hardener (10:4 / resin:hardener) plasticizes the resin well.
This resin was perfect for making “Aurelia”, but to obtain the effect of waves, a different material was required (see “Making sea waves”). Unfortunately, experiments with Etal Optic did not provide such a range of impressions as working with ED-20. The only useful note: when painting resin, pay attention to the density of the resulting mixture and the viscosity of the components, and do not use water-based paints. Epoxy and water do not mix; upon contact, the resin loses transparency, becomes cloudy, and acquires a whitish tint.
About organics: When pouring organics (flowers, leaves, buds), be sure to dry / stabilize the material. Water getting into the epoxy resin can completely ruin the job. To stabilize, use wax, spray varnish or glycerin. If using glycerin, mix equal parts glycerin and water, then immerse the flower in the liquid and leave in a cool place for several weeks (depending on the size of the plant). During the stabilization process, the water will evaporate, the glycerin will fill the tissues, and the flowers will retain their elasticity, shape and color.
About silicone: After completing work on the sculptural part, a silicone matrix is removed from the plaster cast. When working with silicone, there is one rule: follow the proportions and mix the mixture thoroughly. If you follow the technology exactly, you cannot spoil the shape.
Before you begin: 1. Select silicone of the correct hardness. The Shore A scale is used to indicate the hardness of silicone products. The scale ranges from 0 to 100, the higher the number, the harder the material. A material hardness of 30 is equivalent to a hard eraser. 2. Prepare your work area. As with epoxy resin, silicone is extremely fluid and requires careful sealing of the formwork. 3. Degrease/dry the master mold. 4. Pour silicone onto the surface with minimal adhesion; if necessary, use release mixtures or materials. 5. The thinner the layer of silicone poured, the longer it will take to complete the reaction. A volumetric fill and a layer of a millimeter can harden within a day of each other. The final reaction time of the mixture is up to 48 hours. 6 Use the material effectively. When pouring complex forms, it is much more profitable to fill the formwork to a certain height, then surround the protruding elements with a new perimeter and add the useful volume of the form.
Making sea waves, coloring resin, working using the Resin Art technique.
Before starting work: To work in the Resin Art technique, you cannot use any resin, even the best, flowable, distilled one. A resin that gives an impeccable result when filling areas or volumetric surfaces with a single color or gradient coloring is not suitable for this work. What is required here is a resin with a certain viscosity, combining, if you like, the fluidity of technical resins and the purity of jewelry mixtures. This feature is necessary for two reasons: - To prevent arbitrary mixing of layers of different colors. — For controlled manipulation of the painted surface. Use brands specifically designed for this technique.
Once again, using resins intended for jewelry making, flooring, or countertops will not guarantee a predictable result. This is a fact that has been repeatedly tested in our own experience with various brands of resins and dyes (from powder pigments and acrylic paints to specialized dyes for epoxy resin).
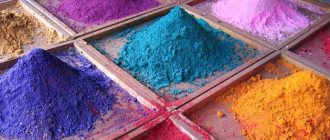
Workplace: Cover the workspace with film, put on gloves, prepare a hair dryer, containers for mixing resin, and pigment.
Prepare the base: It is not recommended to use canvas or similar material for the base. The base must be rigid, otherwise the material will sag. Cover the back of the base with masking tape. During operation, the resin forms smudges; after the mixture hardens, tape will help you easily clean the material. Formwork is not required when working with this technique. When forming a pattern, the painted plane periodically tilts in the desired direction, the layers move on the surface, any obstacles will only limit the free flow of paint. In addition, the absence of formwork will save the work from forming the outer edge. After the mixture hardens, the surface immediately has a clean, smooth, glossy appearance. Working without sanding is a big plus. Think over the design in advance and prepare the required number of containers for each paint. It’s convenient to do this: mix the total volume of components A / B in one container, then divide the finished mixture into separate containers (try to calculate in advance how much resin will be needed for each color), then color the resin and start pouring.
Process: Having learned to work with the original mixture, you can move on to complex modified compositions that form a whimsical pattern of granular, cellular color zones. To obtain such cells you can use:
Natural Layer Blending: Fill the base color with the bottom layer, then add a thin release layer of clear resin, then add a layer of secondary color on top.
Use of modifiers (for example, Resi Blast): The modifier is added both to the finished colored resin before pouring and to the surface of the product with the plane laid out. Can be used when working with the “dirty pouring” technique (mixing colors in one container immediately before pouring). Some modifiers actively interact with the resin, leaving depressions and pits on the product.
Adding alcohol to resin (alcohol purity must be >90%): The technique is used both for “dirty pouring” and when working with the traditional method. Alcohol is added to the mixture of resin and dye, the cells appear gradually as the layers are distributed on the plane. There is no need to add alcohol to each color - dilute the base color to interact with the other colors. After the reaction is completed, no traces, streaks or stains remain on the hard surface, the alcohol completely evaporates.
Using Silicone: It is advisable to use pure silicone oil. As a last resort, you can spray silicone spray into a container (not onto the finished mixture), then mix the liquid sediment with the paint. Then proceed as when working with any modifier.
Also, to create the effect of depth, you can sequentially paint and pour several layers of resin, giving each level the necessary properties. Finally, in case of accidental marking (for example, you checked the hardness of the layer and left a fingerprint on the surface): simply heat the damaged area, the resin will liquefy and the surface will become smooth again.
Conclusion: The total time spent working on “Aurelia” was two weeks. Taking into account test fills and checking materials - almost two months. The main experience: learn from the mistakes of others (if you read the entire text, that’s what you do). But if you do make a mistake, analyze the situation and remember the lesson. Only perseverance and work lead to success.
experience epoxy resin
Epoxy pot life
The lifetime is the period of time during which the liquid or viscous state of the mass remains after the introduction of the hardener. During this period, epoxy is suitable for use. Different resins have different pot life, as do hardeners. Typically this figure is 30–60 minutes.
When adding PEPA to ED-20, the lifetime is 30–50 minutes and depends on the temperature and the amount of hardener. Complete polymerization lasts from 24 hours to several days. For Etal 45M, the viability is 3 times greater, and complete polymerization is the same, which is convenient for the master.
Safety ED-20
Work with this product should be carried out in a well-ventilated area or in the presence of high-quality ventilation. For protection, you should use a respirator, goggles, gloves, thick clothing or an apron. ED-20 is not explosive, but it burns if it gets into a fire.
The degree of danger of resin is typical for substances of the 2nd class of impact on the human body. In case of contact with skin, allergic reactions and dermatitis often occur. The affected area should be washed with soap, wiped with alcohol, and then lubricated with Vaseline and castor oil.