In recent decades, along with the concept of “European-quality renovation”, a large number of new construction and finishing materials have entered our lives. One of them is plasterboard sheets. Despite its relative novelty, plasterboard for walls and ceilings has become not only very popular, but truly indispensable. The durability of a plasterboard wall depends on the correct choice of material and compliance with all technologies for installing gypsum plasterboard sheets on the wall. In this regard, it is necessary to take a closer look at what thickness of drywall is best for walls and how to attach it correctly to load-bearing surfaces.
Pros and cons of drywall
But before that, you should dwell on the pros and cons of drywall. The advantages include:
- high level of sound insulation,
- the possibility of turning the most daring ideas into reality, for example, creating a round-shaped structure,
- possibility of finishing by painting, plastering, laying tiles, wallpapering, etc.,
- safety for humans and pets,
- affordable price.
In turn, the disadvantages are:
- fragility and, as a consequence, the need for additional strengthening of the entire structure,
- not suitable for use in rooms with high air humidity,
- When cutting, gypsum dust is generated, which can cause serious harm to the respiratory tract and eyes, so you need to wear a respirator and goggles.
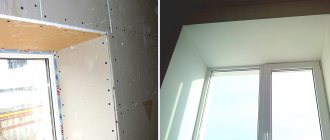
Applying markings under the frame
Before finishing a room with plasterboard, you will need to install a frame for gypsum board sheets, in turn, the frame requires preliminary marking. Ignoring this step may result in uneven installation of the sheets. It is recommended to first carry out the markings and only then purchase materials, otherwise there is a chance to spend more money than necessary. When determining the position of the guides, you should actively use a level so that the lines on the floor and ceiling are accurate. Initially, it may turn out that it is impossible to achieve the exact horizontal position of the profiles without installing additional profiles. It should be taken into account that the width of the rack is 60 mm, and the distance between the centers of the racks is 600 mm. Based on these data, it is possible to determine the installation locations of vertical profiles. These racks are fixed on vertical hangers, the pitch between which should correspond to 400 mm.
We install insulation under drywall without the help of hired specialists
Types of drywall
Now let's move on to talking about which drywall is better. In order to find the answer to this question, you need to get acquainted with the following classifications. Based on what plasterboard sheets are used for, this material can be:
- Ceiling. Used as a decorative finish, for example, a multi-level suspended ceiling. Ceiling plasterboard also perfectly hides communications. Distinctive features are increased flexibility and inability to withstand significant loads.
- Wall. The best option: quite flexible and at the same time durable, inexpensive. You can call it universal.
- Arched. Flexible and thin. Designs are created from it that involve the presence of curved lines. The disadvantage of arched drywall is the need for a double layer.
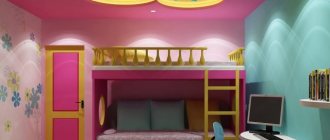
- Acoustic. The point is sound insulation, which is why it is found in musical institutions, assembly halls and children's rooms. It has a porous structure and perforated surface.
- Restoration. Placed on top of old drywall. Plastic.
- Laminated. The top is covered with polyvinyl chloride (PVC). It practically does not allow air to pass through and is therefore not recommended for residential buildings.
Drywall can also be divided into groups such as:
- Standard (GKL). Suitable for rooms with low and normal air humidity, those where there are no special requirements for construction and finishing materials.
- Fire resistant. Thanks to the reinforcing elements, it is not susceptible to fire.
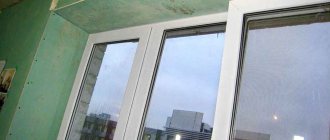
- Moisture resistant. Suitable for rooms with high air humidity, as it is treated with hydrophobic and antifungal agents.
- Fire and moisture resistant. Combines fire-resistant and moisture-resistant properties. Suitable for all rooms - with low, normal, and high air humidity.
In addition, the material we consider varies in size, weight and edge. Let's dwell on them.
Step-by-step instruction
How to properly cover walls with plasterboard? We offer general instructions for covering walls with KGL sheets.
- Marking and installation of guide metal profiles. It is necessary to retreat 2-3 cm from the walls, then draw a marking line. This is where the guide profile will be fixed. If the plans include covering all the walls in a living space, the markings are carried out parallel to them.
- The profile is applied along the marked line and fixed with self-tapping screws. Vertical guide profiles are installed on the sides of the walls. It is necessary to check the evenness of the created frame with a building level.
- So, how to cover walls with plasterboard yourself? The brackets are screwed along the entire perimeter of the room, leaving 0.5 m from the wall. Metal guides are inserted into the upper and lower brackets.
- The next step is to lay utilities and electrical wiring inside the room (they should not protrude beyond the guides). Professionals use special plastic clamps for installation. Particular attention at this stage must be paid to high-quality sealing of joints, as well as insulation of wires. If you neglect this advice, you will have to dismantle the gypsum board sheets to correct the defects.
- Wall cladding. Starts from the corner. The first sheet is applied to the profile, if necessary, aligned along the edges, screwed onto self-tapping screws (fasteners are placed at a distance of 25-30 cm). The next piece of drywall is fixed nearby so that the joints between the materials are aligned. Installed around the entire perimeter of the room.
Advice! Drywall has slightly rounded edges, so small seams appear during joining. They can be removed using a spatula, special reinforcing tape, or putty.
Size
The size of the drywall sheet is represented by three parameters:
- length: from 2 to 4 m,
- width: from 0.6 to 1.2 m,
- thickness: from 6 to 12.5 mm.
In this case, the length has a step of 50 cm. In other words, a sheet of drywall can be 2, 2.5, 3, 3.5 and 4 m long. The most common is 3 meters. Waterproof drywall meets parameters 2500/1200/12.5.
The minimum thickness of a plasterboard sheet, as mentioned earlier, is 6 mm. Preference should be given to material with an average value of 9.5 mm. The fact is that thinner drywall is only suitable for arches, while thicker drywall will increase the load on the structure. Now you know what thickness of drywall is best for walls.
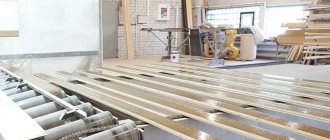
Technology for installing sheets on galvanized profiles
To assemble the frame, we take a galvanized profile. We run a UD profile along the floor and ceiling, which we fix with 6x40 dowels. After securing the starting profiles, we proceed to the installation of vertical jumpers (CD profile). The edges of the profile should be facing the wall, the wide side facing the room.
The profile is cut to the required size using metal scissors or a grinder.
We secure the profile with self-tapping screws specially designed for galvanized profiles. We attach the first main profile near the side wall, the next ones in increments of 60 cm. We set the distance from the center of the profiles, and not from their edges. We fasten the profile closely under the next surface, regardless of the distance between this and the previous profile.
To enhance fixation, it is recommended to use perforated hangers. The products externally look like galvanized strips with perforated ends. We give these clamps the shape of the letter “P” and fix them with the middles to the wall under each vertical profile. At the edges of the perforated hangers there are so-called “ears”. We screw them to the profile and check the evenness of all elements with a building level.
Sound and heat insulating material is laid between the wall and the plasterboard sheet. Special mineral wool for gypsum board. After which, it is advisable to lay a layer of vapor barrier film.
If the height of the wall exceeds the height of the plasterboard sheet, you can add the missing part of the material from above or below by installing jumpers from the CD profile.
Edge
In the vast majority of cases, a sheet of drywall has straight and smooth edges. But when thinking about which drywall to choose, remember that the edge can be:
- straight - used when so-called dry installation is carried out, which includes multi-layer cladding,
- thinned on the front side - requires puttying of joints with laying of reinforcing tape, a labor-intensive process,
- semicircular on the front side - just as in the above case, it is necessary to putty the joints with reinforcing tape, although in a smaller volume,
- thinned and semicircular on the front side - puttying of the joints is carried out using the same technology as for the semicircular on the front side,
- rounded on the front side - two layers of putty are applied.
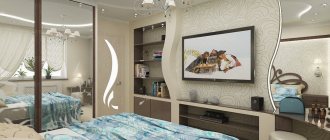
Methods for finishing gypsum board walls
The original clean finish of drywall will help give the room a stylish look. Acceptable options for cladding walls from gypsum plasterboard include:
- painting: for painting you can use conventional compounds or paints with a craquelure effect, pieces of fabric, glitter;
- wallpapering: an affordable and simple finishing method;
- coating with decorative plaster: non-standard compositions will help quickly transform a room;
- tiling: the optimal solution for the bathroom, but it is worth remembering that plasterboard walls are not able to withstand heavy loads, so it is better to place the tiles at the bottom and combine them with other types of finishes;
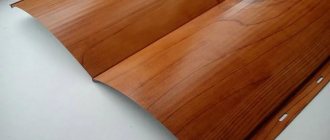
- finishing with plastic lining: installing the lining is easy and simple, in addition, it will help to reliably protect the drywall itself from moisture and mechanical damage;
- wooden lining or board: an unsuitable option due to the significant weight of the materials, however, such elements can be used to stylize (divide or decorate) walls.
How to choose the right drywall?
The first thing to consider when choosing drywall is the purpose. And only after that select sheets by size, weight and edge. So, before you go to the store, answer questions such as:
- what is drywall used for?
- what size, weight and what type of edge,
- price.
Write everything down on a piece of paper. If you are not a specialist in construction and repair, then remember that:
- the cardboard should not peel off, even at the corners,
- during transportation, the drywall must be securely fastened, otherwise it may break,
- thickness depends on such criteria as the purpose, type of object and features of its operation.
Tool for the job
To cover surfaces using frame technology you will need:
- The material itself is plasterboard sheets.
- Pencil, knife for cutting plaster sheets, blades.
- Tape measure, building level, preferably laser
- Metal scissors
- Dowels 6x40, 6x60.
- Galvanized profiles CD, UD.
- Perforated hangers (CD bracket)
- Grinder, drill, screwdriver.
- Metal self-tapping screws for gypsum boards
- A cutter, or self-tapping screws (bugs) for attaching profiles to each other
- Planer for smoothing edges
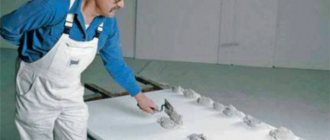
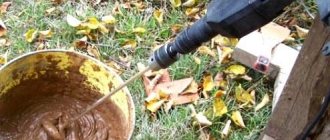
- Spatula and bucket, gypsum glue (if we glue plasterboard)
- Everything for finishing plasterboard seams
Covering walls with plasterboard with your own hands involves not only installation, but also preparation. Before covering the surface, you need to perform several preparatory work:
- Remove old finish. Before you begin finishing, you need to remove all previous layers from the walls to the base.
- Treat the walls. This procedure is not considered mandatory. However, experts recommend priming the walls and treating them with a special antiseptic.
- Make preliminary markings. Mark boundaries above the floor and below the ceiling where the slabs will begin and end. Usually a distance of 5 cm is maintained.