Lime is obtained by burning mountain limestone in specially equipped kilns. As a result of the thermal process, the output is lumps of lime of different sizes, which retain their strength in the air. Lime has been used in construction for quite a long time; extinguishing lumps with water allows them to dissolve, resulting in a white solution.
Lime whitewash
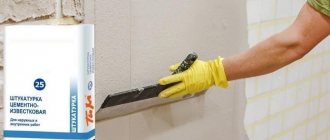
Lime is one of the most inexpensive materials for redecorating premises. Lime solution is used both for whitewashing the interior of the house and for outbuildings.
The benefits of using lime include:
- Low cost, experts rate the price of lime in lumps as five points; it is quite difficult to find a cheaper and at the same time high-quality finishing material.
- Lime has antimicrobial properties, that is, bacteria that get on its surface die. These properties of the raw material successfully make it possible to whitewash with lime in rooms for pets and outdoor toilets.
- Lime is moisture resistant and does not crack due to temperature changes. Walls treated with slaked lime are not afraid of fungus and mold; these microorganisms simply do not settle on this raw material.
- The natural material is safe for health, it does not have a strong odor and does not emit substances harmful to breathing; on the contrary, after using lime, the room is partially disinfected.
- This material can be applied both to old whitewash and to new walls.
During the whitewashing process, after the layer of lime dries, a special film is formed on its surface, which prevents fading and increases the resistance of the walls to abrasion.
Another feature of slaked lime is its good miscibility with dyes, that is, as a result of diluting the raw material with paint, any shade can be obtained.
No. 2. What to whiten with: lime, chalk or water-based paint?
When people talk about whitewashing, they most often mean lime whitewashing . Lime (calcium oxide) is slaked with water to obtain a material that is used for finishing.
The main advantages of lime whitewash:
- bactericidal properties of the material, which is why this finish is used in kindergartens, schools, medical institutions, even in wet rooms. The antiseptic qualities of lime also make it possible to actively use it in arranging cellars and chicken coops. For the same reason, tree bark is treated with lime whitewash;
- if the lime mortar was prepared and applied correctly, the coating will last about 3 years or even more;
- resistance to temperature changes and high humidity. That is why bathrooms can be finished with lime if other materials are not affordable;
- excellent adhesion to almost all materials, including brick, wood, plaster and concrete;
- ability to fill small cracks;
- low price, which is typical for any whitewash.
With all its advantages, lime also has disadvantages . The main one is the possibility of getting burned, so all work must be carried out with gloves. Chalk is much safer in this regard. In addition, there is a possibility of leaving stains and stains. Allergy sufferers are not recommended to use this finish.
Chalk , like lime, is inexpensive and environmentally friendly, and among its additional advantages :
- safety at work;
- a deeper white color, which many people like better than the color obtained with lime whitewash;
- Possibility of use in rooms where allergy sufferers live.
Chalk, when interacting with water, is capable of accumulating it, which leads to the appearance of cracks on the surface and rapid peeling of the whitewash layer, so chalk whitewash is taboo in bathrooms, kitchens and other wet rooms. If the application technology is violated, you can get not only stains and stains, but also bubbles. In addition, chalk whitewash gets dirty.
There is such a thing among people as whitewashing with water-based paint . This finish has nothing to do with whitewashing and refers to painting. It began to be classified as whitewashing, apparently, due to the composition of the materials used - these are paints based on cement and lime . Today, painting with mineral water-based paints can be considered the best alternative to whitewashing. Among the main advantages of this option:
- resistance to abrasion, temperature changes;
- bactericidal properties;
- ability to breathe;
- safety for humans;
- ease of use, high drying speed.
However, the durability of such a coating is also not great, but the price is significantly higher than that of conventional whitewash.
How to properly slak lime at home
It is best to purchase lime for planned repairs in the form of lumps. Such raw materials are preserved for quite a long time, and they can be prepared for use in a short time. In order for the dilution to result in a solution that will suit the concentration and homogeneity, you need to know the basic rules for preparing it from quicklime and be sure to follow safety precautions when working.
Rules for extinguishing lumps of lime at home:
- For whitewashing walls and ceilings, so-called lime milk is used. It is easy to prepare - you will need one part lime and about three parts cold water.
- Large lumps of lime should be crushed, but not into crumbs, and placed in a metal container.
- Water is poured into a container with lime; the solution must be stirred.
- After contact with water, a dissolution reaction occurs during which the lime may bubble and splash. Therefore, in the first 10-20 minutes, the container must be closed or moved to a safe distance. It is a good idea to use safety glasses and gloves, as splashes of the solution can cause burns.
- The prepared lime should sit for at least 6 hours, during which time it will completely dissolve.
- After preparation, the solution is filtered through a sieve. Thus, all undissolved elements and small debris are removed.
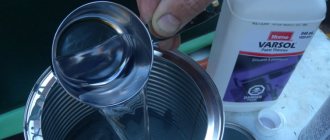
- Lime milk is completely ready for use. To increase strength and to prevent lime on the walls from staining clothes in the future, experts advise adding ordinary salt and drying oil to the solution. The amount of drying oil and salt is chosen from the volume of the resulting solution; 100 grams of both are sufficient for 10 liters.
If the solution turns out to be thick, then it can be diluted with water to the required proportions. Tint dyes are introduced in dissolved form; in order to give the lime an exceptionally snow-white appearance, it is recommended to add a little blue.
Slaking lime is not a labor-intensive process, but not safe. When slaking lime, you must follow safety precautions. Extinguish in the open air, in free space, always wearing glasses, gloves and special clothing:
Is it possible to change colors, how to choose the right one
It is mistakenly believed that surfaces treated with lime can only be white. This is because of the colloquial name for the material - “whitewash”. But that's not true. Color variety can be achieved by using appropriate pigments. The main thing is to choose the right element correctly and determine its quantity correctly. And the resulting whitewashing of walls and ceilings will pleasantly please you.
Water-based pigment must not be mixed with lime.
Since slaked lime is alkali, it can only be tinted with dry alkali-resistant pigments. Information on how to properly dilute lime for whitewashing walls should be indicated on the packaging of the painting material. There are several types of suitable compositions:
- Chromium oxide – gives green color;
- Iron minium – colors reddish-brown;
- Ocher - makes the mixture yellow;
- Ultramarine - to create a blue tint;
- Umbra – brown tones;
- Soot – classic black.
An excess of pigment can affect the strength and durability of whitewash, significantly reducing it.
Color variety can be achieved by using appropriate pigments.
Whitewashing equipment
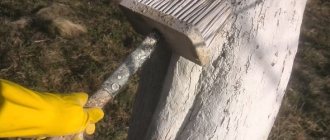
Whitewashing can be done in different ways. Previously, there was only one way to distribute lime over surfaces - using brushes. Modern technologies make it possible to reduce the time spent on renovations using lime milk; a brush is now most often used if you need to whiten small surfaces.
You can make your work easier using the following devices:
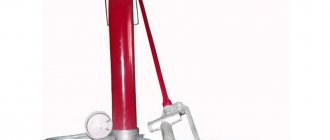
- The spray gun can be manual, electric or pneumatic. If you are not going to process large surfaces, then the most economical option would be to buy a manual type of spray gun. The principle of operation of the devices is similar: one hose of the device is immersed in the solution, through it the lime is taken and fed through the accumulator into the other hose. At the end of this hose there is a nozzle, it is through it that the lime is released. The size and speed of the jet can be adjusted. You can buy a manual spray gun from about one and a half thousand rubles; electric versions of the device cost an order of magnitude more. Using a spray gun simplifies painting work; whitewashing with its help is carried out much faster, while the supplied jet easily penetrates hard-to-reach places.
- The lime whitening machine is used to treat large surfaces. Its operating principle is the same as that of a spray gun; its capacity can be up to 100 liters.
- A spray bottle for whitewashing can be used the same one that is used for spraying plants. Only its capacity should be in the range from 5 to 15 liters.
Any devices for mechanizing the whitewashing process can reduce repair time and ensure uniformity of lime layers. The labor intensity when using them is minimal, any person can understand the structure of the device and its principle, and it becomes possible to paint high ceilings without using a stepladder.
When using spray guns, lime consumption is also reduced, since large drops do not fall on the floor and furniture. The only condition is to use a high-quality solution without impurities or lumps, otherwise the device may clog and fail.
This is what the equipment listed above looks like
Manual spray gun Electric spray gun
Whitewash sprayer
Whitewashing apparatus
Advantages of the method
Even a beginner without experience in the construction industry can do whitewashing with his own hands. The requirements for raw materials and tools are minimal. Advantages of the method:
- After drying, the lime coating is safe for humans. No hazardous substances are released into the air;
- lime available. Significant capital investments for cladding are not expected. Sold at any hardware store;
- easily and quickly applies to any surface: brick, wood, concrete, plastered surface;
- bactericidal properties. Used for painting walls of kindergartens, schools, medical clinics;
As an antiseptic, it is used to treat cellars and agricultural buildings: poultry house, barn.
- if you work strictly according to technology, the painted surface can be used for more than 3 years;
- The lime surface is resistant to moisture. Allowed to be used for cladding rooms with a high degree of humidity - kitchens, bathrooms;
- after drying, a reliable, durable film appears that is resistant to abrasion;
- no training required. Even a beginner can handle the job. It is necessary to follow the application technology, the correct proportional creation of the solution;
- absorbs well into microcracks.
Do-it-yourself whitewashing rules
To process the desired surfaces with lime, no special skills are required; even using this material for the first time, you can easily learn during the work process. But it is still necessary to take into account some nuances and then the repair will be fast, safe and of sufficient quality.
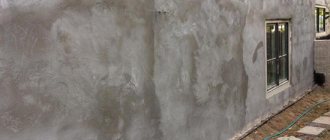
Whitewashing the walls
Walls can be whitewashed with lime both indoors and outdoors. Whitewashing the outside of a house is most quickly done with a spray gun. In order for the lime to adhere well, not change its color and not swell, it is necessary to first prepare the walls.
Rust stains, dirt, and greasy areas are removed from surfaces. If there are cracks, they need to be treated with a primer; good adhesion of the lime to the walls is ensured by treating them with a metal brush. Lime does not adhere to paint, so the layer of old paint must be removed.
Whitewashing is best done in cloudy weather; bright sunlight distorts perception and does not allow you to achieve even strokes. When using a spray gun, you need to hold it at an angle of 90 degrees to the wall, this will ensure less consumption of the solution and evenness of its application.
The video shows how you can whitewash walls with lime using a spray gun:
Whitewashing the cellar
Using lime to treat all surfaces in a cellar intended for storing food is considered the best option. Lime destroys all microorganisms, disinfects the room, prevents the appearance of fungus, due to these factors the shelf life of products increases, vegetables do not rot. Lime is resistant to moisture, so it protects the walls of the cellar from moisture.
The cellar is whitewashed with a fairly thick solution of lime; you can use both spray guns and brushes. Spraying devices are usually used in large areas, but when using them, safety precautions must be observed.
The spray gun creates clouds of tiny lime particles; in a closed space, such as a cellar, this cloud negatively affects the mucous tissue of the respiratory organs and eyes. To avoid harm to the body, you need to wear glasses and a respirator that fit tightly to your face.
If the cellar is being whitewashed for the first time, then it is advisable to apply a second coat after applying the first layer and drying it.
Whitewashing the stove
Some private houses, dressing rooms and other premises have brick walls. Whitewashing with lime is the most practical option for quickly repairing them. The surfaces of the stove quickly become dirty with soot and grease and therefore require regular updating.
Lime can be used at any time, especially since a brush can also be used for small surfaces. In order for the solution to be smooth and easy, the oven must be cooled and all greasy stains must be removed with sandpaper or a scraper.
How to whitewash and decorate a stove with lime can be seen in the photo below
Furnace No. 1
Furnace No. 2
Furnace No. 3
Furnace No. 4
Furnace No. 5
Whitewashing the facade
The easiest way to whitewash the facades of buildings and houses is to use spray guns. Windows, doors, decorative elements need to be closed, and whitening should begin from the highest points, moving down. It is advisable to whitewash external walls in calm, cloudy weather.
Whitewashing the ceiling
Separately, whitewashing the ceiling with lime is carried out if the remaining walls have wallpaper or other finishing material. If you plan to change the wallpaper, you must first remove the old ones, then whitewash the ceiling and only then re-paste the walls. All old coverings need to be removed from the ceiling, cracks must be repaired, and dirt must be cleaned. Rust and mold can be easily removed with a solution of copper sulfate.
Lime milk applies most easily and evenly to a wetted surface, so it is advisable to moisten the ceiling. After preparing the ceiling, you need to cover the floor, furniture, and windows with waterproof materials, since lime splashes well and is difficult to wipe off when dried.
The ceiling is whitewashed in two layers. The first layer begins to be applied from the window, making strokes perpendicular to the light. The second layer is applied to the still wet first, strokes are made parallel to the sun's rays. This whitewashing technology ensures the adhesion strength of the lime and the absence of streaks.
Repair lessons or how to whitewash a ceiling with your own hands:
Tree processing
Whitewashing tree trunks with lime solves several problems at once and is carried out in the spring and autumn. Treating trees in the spring protects the wood from pests and prevents the sun's rays from burning the bark. In autumn, lime is used to reduce the impact of temperature changes in winter.
Grown trees are whitewashed; young plants are not treated, since lime clogs the pores of the bark and thereby disrupts the growth processes. Before processing, you need to remove all dried parts and clean areas with rotting bark.
For whitewashing, lime is used in combination with copper sulfate. Two kilograms of lime are diluted with 10 liters of water, after preparation, 400 grams of vitriol are added to the solution.
Chicken coop treatment
Whitewashing the chicken coop with slaked lime allows you to disinfect the room. It’s even better if the lime slaking is carried out in the chicken coop itself, naturally without its inhabitants. The vapors released when lumps of lime are dissolved penetrate well into all cracks and destroy bedbugs, ants and other small insects.
In a chicken coop, you need to whitewash both the ceiling and walls, and it is advisable to do this several times a year. In the spring, whitewashing is done to prepare the room for the summer; before the onset of cold weather, lime helps remove all parasites.
In summer, it is advisable to whitewash the walls in the chicken coop at least twice, this will interrupt the breeding chain of many insects. Additionally, before whitewashing, walls can be treated with a weak bleach solution. The practicality of using lime for treating animal premises is rated 5 points; it is an inexpensive material, environmentally friendly and has the most optimal disinfection properties.
Consumption for whitewashing
Lime milk is usually used to whitewash walls and ceilings in a house. The consumption of lime for every 2.5 square meters is approximately 0.5 kg of lumps of lime, diluted in the appropriate proportion with water.
Proportions of lime dilution and its consumption
The proportions of lime dilution depend on the type of material used. Quicklime and slaked fluff lime are displayed on store shelves. Read below on how to dilute the second type of lime. As for slaking lime and using chlorine solution, this information is located in a separate section of the same name.
Slaked lime is sold in two versions - powder or liquid dough. Both configurations are diluted in a ratio of 3:1, that is, 3 liters of water per 1 kg of powder or dough. The result is about 8 kg of whitewash, which is enough to treat 12 m2 of surface. Consumption will increase if you whitewash brickwork.
Another way to calculate how to dilute slaked lime correctly is to proceed from the total square footage of the surface being treated. To do this, for every 2.5 m2 take 500 g of lime and 750 ml of water.
Consumption depends not only on the type of surface to be coated, but also on the materials used for whitewashing - brushes, sprayers or others. Optimal materials for whitewashing will also be discussed in a separate section. As for the cost of work, lime is not an expensive material at all, which will make finishing activities inexpensive.
Features of painting and putty on lime
If you apply lime milk directly to a layer of water-based paint, it may happen that the quality of the repair will not satisfy you.
The lime adheres to the paint and runs with it, and once it dries, it is likely to cause blistering.
To prevent this, you must first wash the surfaces with paint with soap and water and a brush and then treat them with a stiff brush for better adhesion of the compounds.
Putty is used during repairs to ensure a good leveling of the surface. If you plan to putty on walls covered with lime, you must first remove the old layer. Alternatively, you can remove all swollen areas with a scraper and apply a primer, after which the lime can be easily removed.
Nuances
The nuances of applying whitewash:
- You can slak lime yourself by mixing it with water in equal volumes. The composition is stirred for half an hour. Cover with a lid and leave for two weeks;
- To obtain the desired shade, dye can be added to the lime mortar. For 1 sq. m section of wall will require 0.5 liters of composition;
- The first ball of lime is applied perpendicular to the window, the second - perpendicular to the frame.
Painting walls with lime is a simple and affordable process. Refers to a budget method of surface finishing. It is recommended to use safe work practices and protective equipment.
How to remove lime from floors and walls
During the process of whitewashing surfaces with lime, stains inevitably remain on all surfaces. The easiest way to remove them is while they are still fresh; this will require water and a sponge; treatment with water is carried out several times, this allows you to remove all the white stains.
If a layer of old lime needs to be removed to apply other materials during repairs, then the following points must be adhered to:
- Wet all desired surfaces with water using a brush or spray gun.
- Wait until thoroughly wet, then remove the lime with a hard, metal sponge or scraper. If there are several layers of lime, you will have to wet it several times and also use paper clips several times.
- If you are not afraid of dust in the room, then the process can be speeded up by using an angle grinder with a special attachment.
- It is imperative to use goggles and a respirator, since dust during work can negatively affect the eyes and the condition of the respiratory tract.
The removal of old lime can be facilitated by the use of special liquid products, under the influence of which the whitewash layer dissolves and easily comes off from surfaces.
These include:
- Guard Industry product
- Decap' Sols Plus Guard.
- Tool Space.
All products contain acid, so you need to protect your hands and eyes. Some people also use diluted hydrochloric acid, but since it is hazardous to health, it is not recommended for use.
Disadvantages of lime
The mixture has not only positive characteristics, but also disadvantages. Lime is a caustic material. This imposes certain requirements on safety measures both during the preparation and application processes. It is best to work in old clothes, which you can simply throw away later. It is necessary to protect the mucous membranes of the eyes, respiratory tract, skin of the face and hands - wear gloves, special glasses, and a respirator.
If you do not observe the proportions in preparing whitewash, or do the mixing incorrectly, then stripes, bubbles, and stains will appear on the surface being treated. A solution that is too thick will not only bubble during drying, but also fall off, while a solution that is too thin will not allow you to obtain the desired shade on the wall. To avoid poor-quality whitewashing, you need to dilute lime in strict proportions, follow the instructions and recommendations.
Prices for whitewashing
Using whitewash is considered the most inexpensive repair option. Construction crews also charge minimal amounts for whitewashing. Typically, whitewashing walls with an area of one square meter and using one layer starts from 50 rubles.
Naturally, the cost varies greatly and depends on many factors - surface contamination, cleaning application, application of lime in several layers. If you know your square footage, then it will not be difficult for you to calculate the approximate cost of all the work.
In conclusion, we suggest watching a video - useful tips from Professor Chainikov when whitewashing:
Preparing walls for whitewashing
If whitewashing is applied for the first time
In order for whitewashed walls to look beautiful, the surface must be prepared for repair. If the walls are simply plastered and have never been whitewashed before (as, for example, in a new building), the work is simplified. True, under these circumstances it is necessary to whitewash the walls in three layers.
The first layer can be applied without using bluing. When the base layer has dried, you can apply subsequent ones, to which, if necessary, you will add ultramarine blue or a special dye of a suitable shade. As for the surface drying time, it is approximately five to six hours for each individual layer.
Removing rust and grease stains
Sanding the ceiling surface
In the same case, if the surface of the walls is not ideal, careful preparation should be made for applying a layer of lime whitewash. First of all, carefully wash off any stains on the walls, as well as rusty stains, with plain water. Then treat these areas well with a solution of copper sulfate. The proportions for preparing this solution are as follows: from fifty to one hundred grams of vitriol are diluted in one liter of boiling water.
What to do if there are greasy stains on the walls you plan to whitewash? In this case, soda ash will come to your aid, from which a two percent solution is prepared.
Dampen a clean white rag with this solution, and then blot the stain thoroughly. Hold the rag until the stain is completely gone. Next, the surface treated with soda ash solution should be thoroughly rinsed with water.
No soot, cracks or whitewashing at 100%
But if the walls are quite smoky, another recipe will help you. Take a solution of hydrochloric acid (two or three percent) and wipe the surfaces to be whitewashed with this solution.
If there are cracks and other defects on the walls, you will need to repair them before starting to whitewash the walls. This will require putty. You don't have to buy an expensive branded mixture.
You can easily make the solution yourself. To do this, take one part plaster, two parts chalk, and two parts wood glue (diluted). Keep in mind that when diluting wood glue, you also need to take into account the rules regarding proportions: for example, fifty grams of glue are required per liter of water. As a result, you will get a simple, but high-quality putty mixture.
There is another recipe for excellent putty. Take lime paste (that is, thick slaked lime) in the amount of two and a half kilograms. Add five liters of water to it. And finally, add one more component - one hundred grams of ordinary table salt (it must be diluted in hot water).
Then you need to add another five liters of water to the resulting solution and mix everything carefully and thoroughly. Then strain the mixture through a fine sieve. The last stage is the addition of wood glue diluted with water in a ratio of one to ten, as well as with chalk powder (about two hundred grams).
This amount of putty will require about one and a half liters of adhesive solution. So, as a result, you get an excellent consistency, which you can later also use for priming walls. This composition creates an even, smooth film and can easily replace an expensive branded primer. As for applying putty, you will need an ordinary spatula.