Coloring gypsum mortar
One of the options for coloring plaster is to add color to it. However, here it is necessary to take into account that the solution is very thick, and making the color uniform will not be so easy. Well, if we are not talking about a ready-made solution, but about a powder that we will dilute over and over again, then this method does not work at all, since in this case the shades will always be different, and you will simply ruin the wall. Finally, when diluting colors in such a thick environment, it is difficult to decide how much paint to add, so you can easily overdo it. If you do paint the solution, then you need to understand that when it dries it will become a little paler, so it’s better to make the color more saturated.
Is gypsum on cement allowed?
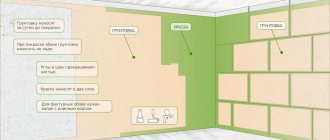
Another common “horror story” is that gypsum plaster cannot be used on surfaces containing cement, just as cement-based compounds cannot be used over gypsum plasters and putties. It’s worth repeating - gypsum plaster can be used on any type of base. On gypsum plaster, you can safely glue tiles using cement glue or apply mineral-based decorative plaster. The main thing is to first thoroughly treat the surface with a suitable primer and let it dry.
The higher the quality of the rough preparation, the fewer problems with decorative materials both during application and in operation. The use of primers and plasters from KNAUF is the key to high quality, reliability and durability of the finish.
Subscribe to our Telegram channelExclusive posts every week
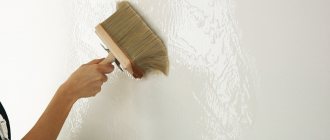
How to paint plaster?
It doesn’t matter whether we are talking about bas-relief or gypsum tiles - the material itself has excellent adhesion. In other words, it absorbs water very well, and therefore paint and varnish coatings. We list the main ways to paint a plaster surface:
- Acrylic, water-dispersion or water-based paint;
- Varnish for plaster. A great way to highlight the natural color of the plaster coating;
- Pigments including gold and silver. The latter, as well as specialized paint for plaster products, can be purchased at an art store. Moreover, the choice of shades there will be incredibly wide.
Advice! In order for the painted layer to adhere better, it is best to apply a clear varnish on top. Since paint on plaster dries very quickly, you can start varnishing almost immediately.
Preparatory work with materials
To prepare for work, you need to make sure that the condition of the paint is normal; to do this, just open the jar and mix the composition. Clots that float to the surface will indicate that it was stored incorrectly or has expired.
High-quality plaster paint is not too liquid; it should mix well with the base material. If the pigment is added directly to the composition, you need to find a large container and a long stick for constant stirring. This is the only way to carry out the procedure correctly and get a good effect.
All dyes for plaster can be found in an art salon; often this is where paints of the required shades are sold, because by mixing colors you can get an incredible option that will fit perfectly into the interior.
The process of painting a plaster wall
- Over time, plaster loses its ability to absorb paint well, so it is better not to delay the painting process. If you nevertheless see that gypsum has lost its ability to adhere, then it is best to try to influence it with drying oil. By the way, with its help you can achieve other effects, but more on that below;
- Since the adhesive properties of gypsum are great, painting it can take quite a large amount of paint. To reduce this indicator, it is best to prime the product. In addition to the fact that this will give the surface strength, it is also about the possibility of obtaining a more uniform application of color;
- Acrylic paint is applied to the plaster in at least three layers.
Gold leaf finishing
Gilding can be done by using gold leaf or real gold leaf. This is a natural material laid in thin layers, which are then purchased for finishing. This method of decoration can be considered the most expensive. The result, as a rule, exceeds all expectations.
Potal is an imitation of gold leaf. Externally, it is no different from the original. Only a professional can distinguish one from the other after a detailed examination. The cost of gold is significantly lower. When working with the design of apartments and houses, preference is often given to gold leaf.
Gilding with gold leaf and gold leaf is performed by experienced craftsmen. To begin with, the desired pattern is determined. Then the element of the desired shape is cut out and applied to plaster. Using this method it is possible to achieve a stunning visual effect. Decorating with gold leaf or gold leaf is the first most popular method. It is also the most expensive.
How to paint bas-relief and stucco molding from plaster
Wall decorations such as stucco and bas-relief are painted with acrylic, water-dispersion or water-based paint. The last two types of paint, by the way, will not only provide the plaster with color, but also protect it from external influences.
In addition, various pigments are widely used to help imitate metal surfaces or natural stone. By the way, the plaster can not be painted, but covered with gold foil on top, which will imitate the surface of this metal as realistically as possible. In this case, the foil is applied to the glue, and the top is coated with varnish.
A variety of tools are used, ranging from a spray gun to small brushes and cotton swabs to treat protruding and smallest parts. Depending on the technique used, it is possible to paint under the old surface and achieve other effects.
Techniques for applying paint compositions
Plaster has been painted in interiors and exteriors for thousands of years, so many techniques have been developed. Let's look at the main ones:
- Simple coloring;
- Multi-layer painting;
- Gilding, silvering, bronze plating;
- Creation of relief;
- Patination;
- Application of a coating that imitates natural materials - marble, granite, wood, brick;
- Finishing with decorative plaster.
Before starting work, you need to make sure that the paint has the correct consistency: not too liquid, otherwise drips will appear, not too thick - this will lead to an increase in the thickness of the layer and overspending. When painting with brushes, it is necessary to apply not too much composition so that there are no drips or splashes. The brush should be cleaned of excess paint on the edge of the can. Stray hair that has fallen from the brush should be immediately removed with a flute or pad before it has time to dry to the surface.
The second mandatory condition is that the gypsum product must be dry and clean; the purchased decor must be kept for 2 days at room temperature before painting. Before changing color, the plaster must be sanded - a very difficult task, especially with deep relief.
Begin applying the paint layer from the deepest areas of the relief, painting small details with thin soft brushes. The range of brush numbers is 1-24, depending on the size.
The process of painting stucco
Paints that are too thick are diluted up to 10% with water or up to 5% with solvent, depending on the composition. Work with paints and varnishes is carried out according to the manufacturer's instructions. The primer and paint must be compatible in composition; it is advisable to purchase them from the same company.
The paint is applied in 2-3 layers, drying every 3-6 hours. Application of the composition, drying time, compatibility of paint and primer is always determined according to the manufacturer's instructions.
Let's take a closer look at the techniques.
Simple basic coloring
For simple painting in one tone, take acrylic, lime or water-based paint of the desired color, a primer of the appropriate composition, and, if desired, varnish. When drying, gypsum loses its color intensity, therefore, and also to protect the surface from damage, it is coated with varnish. It is better to use water-soluble varnish - it has almost no odor and dries quickly.
It is better to do the work not with a brush, but with a spray gun or an airbrush - this way the primer and coating will form a more even layer, reducing consumption, but it is difficult to paint over deep depressions; they will have to be finished with a brush.
Painted plaster products
How to paint decorative plaster tiles:
- The dry surface, free of dust and dirt, is primed. The primer reduces absorption, reducing the consumption of the base compound, while at the same time ensuring adhesion of the layers. It is advisable to tint the primer - this will also reduce the consumption of the base paint and increase the brightness of the color.
- The soil has dried - apply a layer of paint; on an untinted base you will have to repeat the operation 2-3 times.
- Dried plaster is coated with varnish.
When using new generation acrylic paints we obtain the following coating:
- with lotus effect (contains wax) - resistant to dirt;
- the glow effect is provided by the content of marble dust or finely ground quartz sand;
- colored and shiny inclusions - with fiber or chips.
The latest technologies make it possible to achieve original effects on the surface.
Multilayer painting
Painting decorative gypsum stone in several layers is used if the product needs to achieve a smooth transition from one color to another, for example, painting tiles with a voluminous decor in the form of an autumn maple leaf or flower. We take paint of 3-4 shades:
- yellow;
- orange;
- crimson;
- terracotta.
Painting gypsum stucco begins with the lightest tone; apply a layer of yellow paint over the primed base. After it dries, apply the orange tint closer to the edges. We smooth out the border of the flowers with a pad made from a soft cloth or sponge. Along the edge of the leaf there is a section of crimson coloring. We also smooth out the border, achieving a smooth transition from one color to another. We paint the background with terracotta and draw veins on the leaf.
Painting stucco
Gilding, silvering, bronzed
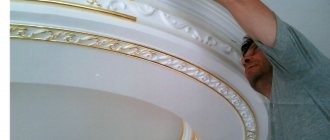
Painting plaster stucco with gold, silver or bronze paint gives the interior solemnity and aristocracy. This technique is typical for classical styles of architecture from Renaissance to Empire. In the classical technique, gilding was done with thin leaves of gold leaf or gold leaf; now they often use metallic paint in aerosols. Traditional gilding is performed as follows:
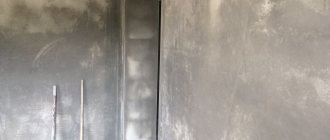
- The surface is prepared - all chips and cracks are repaired, sanded with a special machine or sandpaper manually, dust is brushed off with a brush or vacuumed, the surface is primed with an industrial compound or glue;
- A layer of gold plating paste mixed with glue is applied over the dried primer;
- Next, apply gold leaf or gold leaf with a soft bristle brush and carefully, so as not to tear, smooth it to the base, repeating the relief of the stucco.
Painting plaster gold
It is much easier and cheaper to use acrylic compositions with a metallic effect in aerosol packaging: they dry quickly, have almost no smell, and apply well. Primer and varnish are selected according to the recommendation of the manufacturer.
Painting gypsum bronze is done over a primer with heated drying oil. Powdered bronze is diluted with varnish and applied with a brush.
Process sequence:
- Preparation of the base - cleaning, dust removal, priming;
- The surfaces are painted 3 times - 1 layer is the lightest, the entire product is covered with liquid paint, after drying, the convex areas are processed with a grinding machine or sandpaper, the dust is brushed off; 2nd layer is thicker, paint the recesses using paint with the addition of bronze powder; 3rd layer - paint thinned with turpentine, with the addition of beeswax to give a metallic shine. In order to imitate patina, some convex areas are painted with the addition of chromium oxide, or a mixture of bronze and graphite is used. Another option is to apply a solution from a mixture containing silver nitrate (10 g), vinegar (100 g), water (300 g) over the painted layer of bronze powder in varnish. Due to oxidation, bronze develops a patina.
- The painted and patinated surface is saturated with a solution of wax in turpentine until absorption stops, and wiped with velvet cloth.
Bronze painting of plaster
Painting plaster like silver
Now the process is significantly simplified: metallic paint is sprayed from a can on the primed surface, and areas of unpainted paint are corrected with a thin squirrel brush. Often, individual elements or edges of protruding parts in a pattern are trimmed with gilding. In this case, it is important to first protect areas that do not need finishing. This can be done using masking tape or a portable cardboard screen.
Creating relief
You can emphasize the reliefs of stucco decoration or plaster tiles using paint of 2-3 shades of saturation. They start with the lightest tone, covering the decor completely, paying special attention to the convex parts - there should be no unpainted areas here.
Then they take a darker shade, cover the buried parts of the relief with it, smoothing out the transition of tones with a brush with stiff bristles without paint: from light to dark. Accidental splashes or incorrectly applied color are immediately removed with a dry brush or rag.
Stucco relief
Lastly, the background or the deepest depressions are covered with the darkest colors, also achieving a gradual color transition with a hard brush.
Patination
If we want to achieve the look of an ancient, authentic finish, we paint the gypsum stucco molding with an aging effect: the base is tinted with primer or natural drying oil to a yellowish tint, then the main coloring composition is applied with fillet brushes. To paint sunken areas, we use thin brushes with soft bristles. You can achieve transparency of the paint layer by changing the thickness of the paint layer in different areas: a thicker layer is applied with a swab (rag or sponge), a thin layer is shaded with a brush with short, stiff bristles.
Intermediate gypsum patination process
The product can be patinated using a grinding machine, sandpaper or a metal brush: the painted, dried surface on the relief convexities is sanded, depicting abrasions. This technique looks great on stucco painted to look like wood (brushing effect) or coated with metallic compounds.
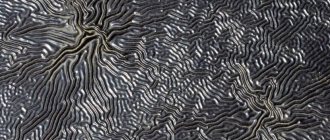
Application of a coating that imitates natural materials - marble, granite, wood, brick
Painting gypsum tiles to look like stone - this design technique for decorating gypsum is used to achieve an imitation of natural stone. Painting plaster to look like marble using a traditional technique involves using heated drying oil on a well-dried stone. Uneven absorption of oil by plaster produces stains reminiscent of marble veins. The dry product is coated with varnish to protect it and obtain shine.
To give gypsum tiles the appearance of granite, they use the spraying technique: the tile is primed, painted in the main background, then several brushes of varying degrees of hardness are taken and paint in colors different from the main background. Apply excess paint to the brush and use your fingers or a special tablet to ensure that the paint splashes onto the decor. Brushes of different hardness and bristle lengths, shades of paint produce splashes of different sizes and colors, resulting in a texture reminiscent of granite grains. To perform this technique well, you will first have to practice on an unnecessary sheet of cardboard.
Painting plaster to look like wood is done with a stain that imitates the colors of different valuable types of wood. You can get a characteristic wood pattern by making longitudinal movements with a rigid flute with different pressure; this results in uneven thickness of the layer of paint composition.
Painting to look like terracotta is done with rosin and varnish diluted in industrial alcohol.
How to paint decorative bricks made of plaster: cladding with decorative bricks looks completely different in different interior styles; the painting method is simple or multilayer.
Painting plaster to look like granite
Painting decorative gypsum bricks
Country styles are characterized by painting gypsum tiles to imitate brick in white, cream, or grayish colors with a varnish coating that imitates glaze. Gypsum tiles are dipped in paint of the desired tone, dried and varnished.
Painting gypsum tiles for a loft style, when the look of clinker brick is required, requires multi-color painting: terracotta, ocher and blue-black pigments will create a color transition characteristic of hand-made clinker tiles. To imitate hand-made clinker, the surface of the ingot is pre-treated with sandpaper and a brush with metal teeth, adding irregularities characteristic of hand-made products.
Finishing with decorative plaster
The latest technologies provide paints and varnishes that imitate any surface. Now you can buy ready-to-use decorative mineral plaster with quartz grain or crushed marble of different fractions, which will give the tiles the appearance of natural stone with a wild, ground or polished surface.
Silicone and latese paints replicate the texture of Venetian plaster, patina, velor or velvet. Without multi-layer painting, you can achieve many unique color and texture effects with just a spray gun. The same compositions will give the gypsum moisture resistance.
Painting 3D gypsum panels is done using a variety of techniques, but since their pattern is very active, you should be wary of the idea of bright tinting. Basic painting in one color with light accent tinting of individual parts is best. The easiest way to decorate is with a spray gun.
Painted 3D panels in the interior
We turn plaster into natural stone
- If you want the gypsum product to not expose its snow-white structure when chipped and not ruin the entire impression of imitation stone, then it is better to paint it at the stage of mixing the solution;
- The excellent, but uneven adhesion of the gypsum surface will help you imitate stone. Thanks to this, veins are formed on it, characteristic of the surface of natural stone;
- Use the glazing method - applying different layers using paint of different shades. In this case, even marble can be imitated on a gypsum surface.
Patination Brushes
With a high cast quality, a plaster product, just taken out of the mold and not yet dry, visually looks very beautiful, alive and bright. But after a few hours, when the casting begins to dry out, its surface becomes covered with spots. The pleasant, lively appearance of the material gradually disappears and the plaster surface ends up looking dry and lifeless. Only in rare cases do the authors of gypsum products leave them in their original form without using patination. Consumers of sculptural products also prefer sculptures imitated in bronze, stone, bone or other materials, rather than those made only from white, quickly contaminated plaster.
For high quality patination it is necessary to use good brushes. Panel brushes are recognized as the most convenient and functional for any type of patination. They have medium-length bristles with a cone-shaped end, while they have soft and elastic bristles, which allows you to distribute paint on the surface of the product in an even thin layer. Brushes are available in various sizes, the range of which is marked with numbers from 1 to 24.
Filet brushes leave strokes on the surface of the product. To smooth them, mainly when covering with oil paint, flutes are used. These are brushes with soft fluffy bristles, made from badger hair. They are made in two shapes: round with a feather frame or flat with a tin frame.
Bristle brushes or French knit brushes are designed for applying and blending acid during the oxidation bronzing process, as well as for pre-shading oil paint before starting to flute, with a large working surface area. In this case, brushes with numbers 1 and 2 are used. For this work, you need to choose soft brushes with long fluffy bristles. Various small seals and other manipulations are performed using small core brushes; in extreme cases, squirrel brushes are also suitable.
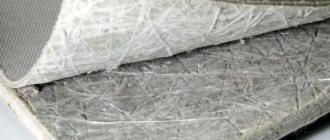
Primer for drywall. types of primers for drywall::stroy-gips.ru
Primer for drywall is intended for surface treatment before subsequent painting, putty or plaster. The primer is necessary to ensure that the subsequent application of finishing materials on the drywall is of high quality and does not allow cracks to subsequently appear in the putty.
The composition of the drywall primer includes various components that form a film, as well as various substances that give the surface different properties.
There is a huge selection of primers, for the manufacture of which mineral, alkyd, acrylic and other bases are used.
Primers for drywall based on acrylic components.
Primers based on this are universal compositions, moreover, diluted with water. They provide excellent surface adhesion and are used on a variety of plasterboard, concrete, cement and wood surfaces. These primers can also be used for surfaces painted with latex, acrylic or alkyd paints. Acrylic primers for drywall dry on average in 2-5 hours and do not have a sharp, specific odor.
Primers based on mineral components.
Primers on this basis are intended for the initial treatment of surfaces that consist of mineral materials - brick, concrete, plaster.
Alkyd based primers.
These primers are intended for treating wooden surfaces. Drying time for alkyd primers is 10-15 hours. This type of primer differs in composition and properties. Primers containing zinc phosphate are anti-corrosion and are used for applying alkyd paints. Zinc chromate-based primers have similar properties, but this type of primer should not be applied to surfaces treated with plaster or gypsum. Alkyd primers are also used on surfaces such as tile, glass and galvanized steel. Glypthal primers are used to treat metal surfaces in dry rooms. The drying time for such primers is at least a day.
Perchlorovinyl primers.
Perchlorovinyl primers are intended for treating metal surfaces.
These primers are not intended for interior use.
Polyvinyl acetate and polystyrene primers.
Polyvinyl acetate primers are intended only for surface treatment under polyvinyl acetate paint.
Polystyrene primers contain toxic substances, so they are not used in enclosed spaces.
Phenolic primers.
Phenolic primers are intended for the treatment of wooden and metal surfaces.
The drying time for these primers is 10-12 hours.
Primers for facade finishing.
Primers are used not only indoors, but also when finishing the facade. Facade primers are moisture-repellent and do not allow moisture to penetrate into the surface being treated. Antiseptic primer is intended for treating external wooden walls. This primer contains components that prevent the growth of bacteria and fungi. Anti-corrosion primer is used for metal surfaces and avoiding rust. If plaster is crumbling on external walls, then a deep penetrating primer will be used, which is also an excellent primer for drywall.
Primers for interior work.
When treating internal surfaces, the purpose of the room should be taken into account. To increase the moisture-resistant properties of wood and plasterboard surfaces, an acrylic primer for plasterboard is used.
LiveInternetLiveInternet
Quote from message princess_1
Read in full In your quotation book or community!
Artistic processing of gypsum, technology
I would very much like to touch upon such a wonderful topic as processing gypsum. One of the most interesting methods of working with plaster is casting. You can get a huge variety of master classes on this subject on the Internet, most of which teach nothing, and also lead the reader into global bewilderment. I myself, looking through these greatest masterpieces of modern educational science, only at the end understood what they were talking about.
Looking sadly at the souvenir market presented in most stores, you understand that almost no one deals with such hemorrhoids as working with plaster. This, of course, is easily explained, since this work requires remarkable patience, skill and a huge callus, because this process is long and usually takes place while sitting.
<<>>
Now, as always, about technology. The creation of a gypsum masterpiece on a global scale begins with the creation of a clay matrix. Let me translate into human language: first, as in any work, a sketch is developed (i.e., an idea is come up with and embodied on paper using a simple pencil and an eraser). Then the most interesting stage begins - molding the matrix. This is done as follows. We lay a plastic film on a flat surface, on which we carry out all the work. Now imagine that you are rolling out a pie crust - this is exactly what you should do with clay. The clay “cake” will have a thickness of 1.5-2.0 cm, the diameter of the work being created. The resulting product is called the base . Now, on the base, we sculpt a semi-volume image of the sketch. The height of the relief can be quite different - from a few mm to 1-2 cm. The most important thing is to very carefully stick all the details to the base, and not allow any cracks or holes between the surface of the base and what is stuck . After completing the work, dry the resulting product for 2-3 days, covering it with a plastic bag to avoid deformation.
After drying, the clay product should be wiped with a damp sponge or a wide wet brush to remove roughness and other unnecessary debris and bring it to the smoothest possible state. This process is called "washing". After repeated drying (1-2 hours) we finally get the matrix .
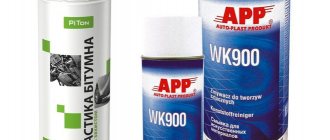
Next comes step number two. To implement it successfully, we will need silicone. This word is not new for a long time, but it still scares the average person with its direct relation to Hollywood boobs. However, we will not be afraid, but will go to a construction supply store and buy the most inexpensive silicone sealant for toilets and sinks. At home, we transfer the matrix onto a clean sheet of paper and, armed with a flat bristle brush (about a centimeter wide), apply a thin layer of sealant to the matrix, with the exception of the plane that is in contact with the table. The most important thing here is accuracy of application! The sealant must very well fill all the unevenness of the matrix, get into every hole and stick to every protrusion. After applying the first layer, a second, thicker one is immediately applied. The total thickness of both layers should not be less than 2-3 mm at the thinnest point. The maximum layer thickness does not matter. Since the sealant is very smelly and corrosive, you should work in a well-ventilated area, wear safety glasses, and, preferably, a respirator (this especially applies to craftsmen who suffer from allergies, asthma, or a weak stomach). After applying the sealant, the product is dried for two to three days. Due to its smell, the product should be dried on a balcony or in a well-ventilated place.
After drying, you need to carefully remove the silicone from the clay matrix. This silicone “negative” is, in fact, the working mold for pouring plaster. For convenience, you can make a plaster stand under this form. We’ll talk about making a stand next time, but now we won’t stretch our fingers and get glamorous, but for simplicity, we’ll use a little know-how. Take a bowl and fill it with some heavy cereal - rice, millet or buckwheat. We place the silicone mold in the cereal with the picture facing up so that the sides of the mold protrude about two millimeters above the cereal. The grain acts as a frame and prevents the form from deforming under the weight of the plaster.
Next, we proceed directly to mixing the gypsum solution. In the best traditions of “Very Skillful Hands,” we cut the plastic bottle crosswise and take the part with the butt. Pour water, pour plaster on top. Mix thoroughly. The resulting solution should resemble the consistency of very lousy kefir. ATTENTION! We pour gypsum into water, and not vice versa; otherwise, we'll end up with white, petrified turd.
Pour the gypsum solution into a silicone mold placed in the cereal. Gently shake the entire structure to ensure that air bubbles escape from the gypsum solution. Then we leave it all alone for ten minutes. During this time, the gypsum “sets”, and this reaction is accompanied by the release of heat. So, the plaster casting should be removed from the mold when it heats up. For those especially gifted, I’ll explain: temperature control can be done with your finger. After taking a plaster cast, it would be a good idea to subject it to decorative processing, that is, paint it and, if possible, varnish it. This is done in a huge number of ways at different stages of drying the cast. One of the most famous painting methods is the imitation of fired ceramics, glazed ceramics and wild stone. In addition, after priming with construction soil or PVA solution, the gypsum casting can be painted with any water-based paints.
The sealant mold can withstand several thousand castings, so it is an indispensable material for interior work, decoration, and, yes, just for souvenir prostitution.
So I would like to wish all the masters great success in the difficult task of working with plaster, mastering new creative heights and, of course, making great money from selling their souvenirs in all stores in Europe, and what’s more, the whole world!!!
https://mdpi.ru/xudozhestvennaya-obrabotka-gipsa-texnologiya/