Liquid rubber for cars, plastidip (from Plasti DipTM), liquid vinyl, rubber paint - these are all names for a special coating that is an alternative to traditional car enamels and vinyl films. And, as usual, simultaneously with the appearance of liquid rubber for car painting on our market, many disputes and discussions arose.
Some car enthusiasts believe that it is not worth spending money on painting a car with liquid rubber, since such a coating flies around very quickly, and the cost of work and materials is not at all small. To which their opponents claim that liquid rubber, if the application technology is followed, on the contrary, is a very durable thing, and that people even apply it to wheels.
Below we have put together all the information about liquid rubber for cars, the pros and cons of such a coating, described the painting technology, and also added an interesting video with reviews from car owners after six months of using a car coated with rubber paint.
For those readers who are new to our website, the following materials may be of interest:
- Instructions for painting a car yourself;
- Do-it-yourself car wrapping;
- Automotive paint codes and colors.
Now let's find out what exactly liquid rubber is and what properties and characteristics it has.
What is liquid rubber?
Liquid rubber for cars is an innovative coating for protecting the paintwork (abbreviated paintwork) of a car, and changing its appearance and style. In essence, liquid rubber is a rubber-based paint that can be applied directly to the car body, or to individual body elements or rims.
Painting a car with liquid rubber allows you to achieve high protective, shockproof and anti-slip properties of the surface of the painted elements. This coating is highly waterproof and elastic, it is resistant to temperature changes and ultraviolet radiation, and if necessary, it can be easily removed.
Rubber paint can have either a matte or glossy texture. At the same time, it does not have a very wide palette of colors, but by mixing the available ones, you can achieve many different shades.
Liquid rubber also comes in the following types:
- Metallic,
- Neon,
- Chameleon,
- Nacre,
- Transparent,
- Thermal.
Thermal rubber paint has the property of changing color with changes in body temperature and ambient temperature.
Liquid rubber compounds for cars are widely represented on the Russian market under the following brands:
- Plasti Dip (USA);
- Rubber Paint (Russia-China);
- Dip Team (Russia).
The products of the first two manufacturers are especially popular among car enthusiasts. In addition, Rubber Paint liquid rubber already has positive reviews, probably no less than Plasti Dip, despite the fact that it costs less.
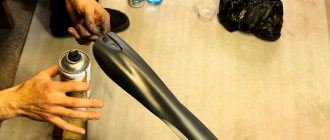
You can buy liquid rubber for cars in small aerosol cans with a sprayer, or in canisters (for application with a spray gun). Naturally, spray paint will cost more, but to paint body parts or wheels you won’t need a lot of liquid rubber (see consumption tables below). Moreover, even an inexperienced car enthusiast can use the can.
What type of paint is this
Liquid rubber (rubber paint, liquid vinyl, plastidip) is a special type of rubber-based coating that is resistant to impacts, moisture, ultraviolet radiation, and significant temperature changes.
In fact, liquid rubber is a seamless waterproofing material for application to various surfaces.
The main components of plastidip are bitumen and water, chemically reduced to a uniform liquid consistency.
The main advantage of such a coating is the ability to apply it without smudges to any surface, including uneven, horizontal or vertical.
Pros and cons of painting a car with liquid rubber
Liquid rubber for automobiles was developed as an alternative to vinyl film and auto enamels. Rubber paint combines the advantages of these two approaches to car styling.
The advantages of liquid rubber include the following properties:
- Painting with liquid rubber gives the car a very impressive, expensive and aggressive appearance, making the car stand out in the flow of traffic;
- This composition can easily paint even the most complex body elements (unlike vinyl film), and there is no need to completely disassemble the car;
- When applying rubber paint to a body, less stringent requirements are imposed on the work area than when painting a car with auto enamel;
- Liquid rubber can be applied directly over the paintwork, without the need to sand and prime the car;
- Rubber paint can be easily removed from painted surfaces, thereby returning your car to its original appearance.
The disadvantages of liquid rubber are:
- Short service life - up to a maximum of two years. But, according to reviews from many car enthusiasts, liquid rubber is removed from the body after an average of 6-12 months;
- Unlike vinyl film, rubber coating cannot have a pattern or be voluminous;
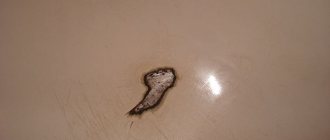
- After removal, liquid rubber can leave marks on the varnish, which are unlikely to be removed without deep polishing of the body.
It is worth remembering that you need to use and wash a car painted with liquid rubber with extreme caution. Weak points are the edges of the part; if you pick them up, a defect will develop and it will no longer be possible to stop it. Discuss all the details of the car wash in advance.
Liquid Plasti Dip rubber on a car emblem. How to apply it yourself. Video.
Plastidip will freshen up your car
In recent years, many motorists who want to stand out in the crowd have chosen liquid plastidip rubber. This is a unique way to decorate your car while benefiting the body. Of course, there are other methods - stickers, airbrushing... But there is a significant difference from airbrushing. You cannot remove it yourself. You will have to contact specialists or completely repaint the car. As a result, the work will be very expensive, but you can remove the liquid vinyl yourself.
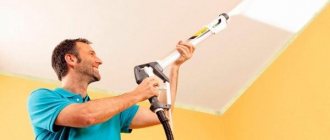
Technology of coating a car body with liquid rubber
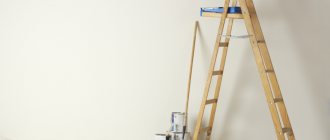
To paint a car with liquid rubber you will need the following materials and equipment:
- Liquid rubber (thick, in cans);
- Liquid rubber solvent;
- Masking tape, polyethylene, cardboard (to protect non-painted areas of the body);
- Sprayer and compressor, or a regular electric spray gun;
- Knife for removing excess coating residue.
Painting a car with liquid rubber occurs in three stages:
- Preparing the machine for applying rubber coating.
- Preparing paint and sprayer.
- Applying liquid rubber to a car.
Let's look at each stage of painting a car with rubber paint in detail, and just below everything will be shown in detail in the video instructions .
Preparing a car for painting with liquid rubber
Before painting a car with liquid rubber, the car must be thoroughly washed and dried (our instructions: how to properly wash a car), after which the surface to be painted should be degreased, and traces of dirt, wax and other substances and protective coatings must be removed from it.
Next, all areas that are not subject to painting must be protected from contact with liquid rubber:
- Radiator grilles, bumpers, air intakes, etc. covered with cardboard or sealed with masking tape;
- The headlights and taillights do not need to be covered, since after drying the liquid rubber can be easily removed from them in one whole piece;
- It is better to remove the mounting frames for state license plates altogether;
- Cover the rubber glass seals with masking tape, and it is better to cover the glass with plastic film;
- Don't forget to also cover the wheels if you don't want to paint them to match the car's color.
If you are going to paint the wheel rims, then take care of reliable protection from rubber paint getting on the elements of the brake system and the brake discs in particular.
Despite the fact that it is possible to paint a car with liquid rubber without prior disassembly, we still strongly recommend removing and painting separately such elements as door handles, spoilers, deflectors, etc.
Preparing liquid rubber and spray for painting
Since the starting material of liquid rubber is very thick, in order to obtain an even layer of paint on the surface of the car body, it must be diluted to the desired consistency with a special solvent recommended by the liquid rubber manufacturer.
Depending on the manufacturer, liquid rubber can be diluted with solvent in proportions 1:1 (PlastiDip) or 1:2 (RubberPaint). In any case, read the manufacturer's instructions and recommendations, which are printed on each can of liquid rubber.
Pour diluted rubber paint into the sprayer through a standard mesh filter. This is done so that during the painting process, coarse particles do not prevent the paint from being sprayed evenly.
It is best to fill the sprayer with the prepared liquid rubber solution half or 2/3 of the volume. Do not fill the paint to the brim.
After filling the sprayer with liquid rubber, it must be adjusted correctly. To do this, you need to set the minimum paint supply and test it on any convenient surface. By increasing or decreasing the feed, achieve an even layer of paint without smudges.
Applying liquid rubber to a car
When applying liquid rubber, always strictly adhere to the manufacturer's instructions and recommendations. Also, do not forget to protect your respiratory system; work should be performed in a respirator and in a well-ventilated area.
- The temperature in the room where painting is carried out must be at least +18 °C. Also avoid drafts and direct sunlight.
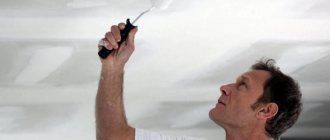
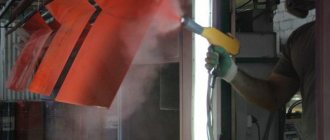
- The sprayer should be kept at a distance of 13-16 cm perpendicular to the surface to be painted. The paint should be applied smoothly (without sudden movements) in 2-3 layers. And don’t try to paint the entire surface of the car at once.
- The first layer should be very thin, so that subsequent layers will adhere firmly to the car. Pay special attention to ends, curves and edges. And you shouldn’t worry about the fact that the first layer did not paint the surface evenly or completely; 50% transparency is the norm!
- After applying each layer of liquid rubber, let them dry for at least 10-15 minutes.
- The second layer of liquid rubber is applied similarly to the first, only more slowly and carefully. After applying it, the transparency of the rubber coating will be somewhere around 70%, and stripes and transitions will still be visible through it.
- After the second layer has dried, you can begin applying the third, fourth, etc. The number of layers will depend on the desired result: the more saturated the color you want, the more layers of rubber paint will be required.
- So that your car can be easily freed from liquid rubber over time, manufacturers recommend applying at least 10-12 layers to the car body.
- After applying all layers, the coating must be dried for at least an hour.
- When the material dries, you can carefully remove the masking tape and liquid rubber from those parts on which it should not be (headlights, locks, etc.). Until the rubber paint has completely dried, it can be removed very easily.
- The liquid rubber will finally harden only after 12-24 hours, and it is better to leave the car in the box while it dries.
Advantages and disadvantages of rubber paint
The innovative coating has many advantages and only a small number of disadvantages, which mainly come down to a lack of experience in handling liquid rubber.
The main advantages of rubber paint:
- can be applied without completely disassembling the car using spraying;
- applied to any material, including plastic, paint, chrome;
- to apply liquid rubber, there is no need to clean and prime body parts before painting;
- minor damage can be removed by applying an additional layer of rubber paint;
- the ability to select any color (if necessary, tinting standard shades) and type of coating;
- painting the entire body takes 12-14 hours;
- drying time of the coating - from half an hour to an hour;
- rubber paint is applied and removed without leaving any marks on the old surface, liquid vinyl is removed in one layer without leaving any marks on the car body;
- You can apply plastidip either to one part of the car or to the entire body and rims;
- the cost of material and work is acceptable for regularly updating the appearance of the car;
- seamless coating unlike vinyl film;
- You can apply liquid rubber yourself;
- protects the paintwork from cracks and delamination;
- after plastidip it is easy to return the car to its original appearance;
- after applying the second layer, the coating becomes uniform and durable;
- protects the body when hit by small stones, sand and salt;
- Liquid vinyl can be used to treat even the smallest and most textured surfaces.
Article on the topic: How to replace starter brushes
This coating has few disadvantages, you can get used to them and avoid them, then the rubber paint will last a long time.
Disadvantages of liquid rubber:
- difficulty in applying it yourself, especially for the first time;
- it is necessary to avoid getting asphalt and bitumen on the surface during road work;
- at the car wash, it is advisable to warn about the presence of a coating on the body so that they do not show excessive zeal and damage the rubber paint;
- difficulty in washing off dirt from the coating; it is necessary to check after each soaping whether there are any streaks left;
- avoid contact with chemicals, as some of them can dissolve the rubber coating;
- It is undesirable to apply wax and other substances containing it on top of liquid rubber;
- It is necessary to be careful not only when washing, but also when getting out of the car, and to warn passengers, since damage to the plastidip layer on the thresholds is possible.
Approximate consumption of liquid rubber when painting
Below we provide tables with the approximate consumption of Plasti Dip liquid rubber when painting cars. The tables indicate the consumption of both finished paint in aerosols and concentrate in cans for high-quality car painting. Also note the notes below each table.
Consumption of liquid rubber in aerosol cans
| Operation | Liquid rubber consumption | |
| Painting of rims | radius 13-14″ | 2 aerosols |
| radius 15-16″ | ||
| radius 17-18″ | 3-4 aerosols | |
| radius 19-20″ | 4-5 aerosols | |
| Hood painting | 1.5-2 aerosols | |
| Roof painting | ||
| Painting the trunk lid | ||
* The consumption of liquid rubber in an aerosol is calculated according to the following principle:
- The consumption of liquid rubber for each layer is 50-80 g/m2.
- One aerosol contains 400 grams of liquid rubber.
- Each element is painted in 6-9 layers.
Consumption of liquid rubber concentrate for car painting
| Car classes and types | Consumption of liquid rubber concentrate | |
| Classes A, B | minicars | 3-5 liters |
| Classes C, D | small cars | 5-7 liters |
| Classes E, S, F | executive and crossovers | 9-12 liters |
* Please note that the table shows the consumption of liquid rubber concentrate, which must be diluted with a solvent before painting.
It is also worth considering that when painting a car in bright, saturated colors (for example, bright green or dazzling white), the consumption of liquid rubber can double.
How to paint a car with rubber?
Instructions:
- In order to paint, you need to select a coloring composition. In addition, you will also need a solvent. Typically, paint is mixed with solvent in a one-to-one ratio. After this, the composition is heated to 50 degrees, and it is in this hot state that painting is carried out.
- This mixture is poured into a spray gun and applied to the prepared body. The main advantage is that there is no need to sand, degrease, or otherwise clean the body, which is necessary when coating with conventional paint products.
- It is enough to simply wash the car using a special shampoo. After this, the car is completely dried and paint is applied. Before doing this, do not forget to seal the headlights, as well as the radiator grille and other places where paint cannot penetrate, using masking tape.
- The spray gun must be configured for medium or high-speed paint flow, and the nozzle must be quite large. This is due to the fact that the paint is very thick, so the thin nozzle will simply become clogged from the effects of the composition.
- During the painting process, it is necessary to go from top to bottom, and overlap one line with another very slightly. This type of painting may require up to 5 layers. Each new layer is applied after the previous one has dried. 5 layers is, of course, quite a lot, and is only required if the car is black or white. If the paint is applied to other colors, then 3 layers are enough. This is quite enough to give a shade or cover up some not very bright color with a dark one.
- Of course, this painting is very inexpensive, effective, and resistant to various mechanical damage. But she is very afraid of various solvents. Therefore, you need to behave very carefully at gas stations and not allow gasoline to get on the body. Because this will contribute to the destruction of the coating and the appearance of stains on it.
Removing liquid rubber
Preparation for painting a car with liquid rubber and an accessible video of the working cycle
The preparatory stage should begin with the choice of paint, although, in fact, there is not so much to choose from. There are mainly only two brands represented in Russia:
- Plasti Dip (USA).
- Rubber Paint (Russia-China).
You can purchase the rubber mixture both in aerosol cans and in containers of various sizes. Paint in a can will cost more, but you don’t need a lot of material to treat small areas. Moreover, it will not be difficult to work with it.
Equipment and materials
To perform the work you need the following:
- Paint thinner.
- Plastic film, masking tape, newspaper or cardboard.
- Spray gun and compressor.
- Stationery knife.
- Respirator and safety glasses.
Preparing the premises
Anyone interested in how to properly paint with liquid rubber should understand one thing - the more carefully the preparatory stage is completed, the better the result. If you have certain financial capabilities, you can equip a spray booth, but how justified this will be is for everyone to decide for themselves.
A budget option is possible using PET film, which covers all surfaces of the garage. The room is first cleaned of dust and dirt, followed by moistening with water. The temperature in the garage should be between 18-22°C. Ventilation is a must!
Preparing the car
Before painting, the car is thoroughly washed and dried, after which the surface is degreased. Next, the places that need to be protected from paint should be covered:
- cover the bumper, air intakes and radiator grill with masking tape or cardboard;
- Glue the rear lights and headlights around the perimeter with tape; after the surface has dried, it will be removed along with the rubber membrane;
- remove license plate frames;
- seal the window seals with tape, and cover the glass with polyethylene or newspapers;
- cover the wheels; if you plan to paint the wheels, then the brake drums need to be sealed with masking tape.
Preparing the mixture for coloring
The original rubber material has a thick consistency, so it should be diluted with the recommended solvent. The manufacturer of Plasti Dip advises sticking to a 1:1 ratio, and Rubber Paint – 1:2. The prepared mixture should be poured into the spray unit through a mesh filter. It is best to fill the spray gun container 2/3 or half full.
In the available video, painting a car yourself with liquid rubber includes setting up the emulsion supply unit, for which the minimum supply is set and the quality of the jet is checked on any convenient surface. The paint layer should be distributed evenly without drips.
Important! Observe the proportions of solvent and paint as accurately as possible. Deviation from the balance point threatens changes in the technological process. For example, it is possible to change the polymerization time of the composition, and, as a result, deteriorate the quality of the coating.
Preparing the car
The first step before applying paint yourself is to prepare the car. For this:
- We perform a thorough wash, removing dirt, dust, oil stains, wax, etc.
- We dry the car - an important condition is the absence of any particles of moisture. This may interfere with the quality application of the material.
- Now we need to hide all the places on the car that we do not plan to paint. We place a cardboard sheet under the radiator grille, protect the bumpers and other similar areas.
Taping glass and mirrors with tape
- There is no need to protect the optics - after finishing the car painting work, Plastidip can be easily removed from it in one piece.
- If you are going to paint your wheels, be sure to protect all parts of the brake system. If we do not plan to paint the wheels, we need to hide the entire wheels.
- We cover the glass and mirrors with construction tape and cover them with paper.