Candidate of Sciences, site expert.
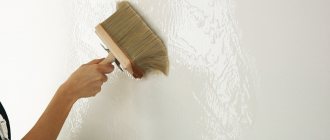
Despite the fact that in Russia painting walls in residential premises has become less common, this type of finishing dominates in the world. Especially in the USA, where wallpaper is treated with some prejudice. This situation is easily explained: painted walls look stylish, fit into any interior, are easy to clean and last a long time.
Unlike other finishing materials, paint requires a special attitude towards the preparation of walls: they must be perfectly even and smooth, unless of course we are talking about wallpaper for painting and decorative plaster. Therefore, when starting to paint walls, many owners of apartments and private houses are looking for various tips on how to level walls for painting with their own hands. Let's talk about this.
Creating a flat surface
Leveling the walls with plasterboard will solve the problem of curved surfaces
In new houses that have just been built, as well as in some old apartments, the quality of wall coverings is not the best.
There are different differences on the walls, in some cases reaching 2-5 cm.
In addition, cracks and holes always accompany buildings, so you can level the base for painting using several methods:
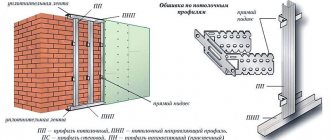
- If there is significant curvature on the surface, the corners of the walls do not match, and there are displacements, then it is recommended to use frame technology. To do this, a sheathing is created, which is attached to the curved walls, after which sheets of plywood, plasterboard, chipboard and other flat materials are installed. Then the entire plane is leveled and only then paint is applied. In the modern world, people use drywall for this technique because it is inexpensive and easy to work with.
- The second leveling method is the use of plasters or mortars based on sand and cement. This method is also called raw or wet. The method is used for minor defects and differences that do not exceed 5 cm. If the curvature is more than 5 cm, then it is better not to use the method. The use of cement mortar is the best option for brick.
Painting smooth walls will be a pleasure if you do them using the frame method. The wall turns out to be smooth, and insulation can be laid between the sheets of drywall and the wall itself.
Stage 1. Removing old coatings
www.stroy-podskazka.ru
If you have started the initial finishing of a new building, this stage will be quick and easy. In older homes it can take several days or even weeks.
At this stage, all old and weak coatings that interfere with the new finish and/or threaten its durability should be removed.
Please note: we are talking not only about old finishing materials (wallpaper, whitewash and chalk putty, tiles, etc.), but also about plaster that has lost its strength. It definitely needs to be removed. You cannot build a house on a dilapidated foundation. New plaster applied over worn old plaster will simply fall off.
As a result of the work at this stage, only solid foundations should remain; they are primed and dried.
How to check
Feel the walls and ceilings in different places. The palm should remain clean and dry.
The nuances of leveling for painting
Finishing of walls with paint is carried out in several cases:
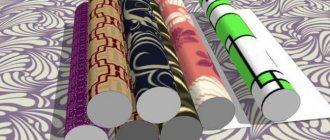
- Wallpaper was hung for painting;
- applied decorative plaster requires an accented color scheme;
- I want to change the color of liquid wallpaper;
- The decision was made to paint the walls.
In the first three cases, the walls are painted without leveling; in the latter, a complex of work is required to prepare the surface for painting. After all, slight curvature or surface defects (various shells, dimples, tubercles) are not hidden under a layer of paint, but, on the contrary, are accentuated by various lighting sources.
In the process of preparing walls for painting, the bulk of the work falls on leveling the surface to be painted. However, before this preparation stage begins, a number of technological operations must be performed. Let's give a step-by-step algorithm.
Step 1. The room is cleared of furniture, paintings, mirrors hanging on the wall, etc. Sockets and switches are removed. As a last resort, the furniture is moved to the center of the room and covered with plastic wrap. The floors are covered with old newspapers, film or cardboard from various packaging.
Step 2. Remove the old finish. This could be wallpaper, paint or tile. For each of these materials there are long-established removal methods.
Wallpaper
To remove wallpaper you will need:
- warm water;
- putty knife;
- soft sponge;
- spray.
In difficult cases the following will help:
- wallpaper "tiger";
- construction steamer or iron with a towel.
Most types of wallpaper can be removed with a spatula after wetting with water. For moisture-resistant wallpaper, you need a wallpaper “tiger” or a needle roller to break the water-permeable film. Damaged wallpaper is moistened with a sponge or spray bottle, after which (after 20-30 minutes) it is removed with a spatula. You can also influence the molecular structure of wallpaper glue with hot steam. To do this, use a steamer or iron with a damp towel.
Professional builders often resort to special washes to speed up work, which is not advisable to use when doing work yourself due to the toxicity of the solutions.
Dye
In the recommendations for preparing walls for finishing, the order of work is as follows:
- old finishing is removed;
- the walls are tapped to identify places with loose plaster;
- loose plaster is removed, etc.
For some reason, this chain ignores the fact that some of the paint can be removed along with the plaster. And if the plaster is completely removed, then there is no need to remove the paint. If you still have to remove the paint, you will need to find (buy, borrow, rent):
- hair dryer or blowtorch;
- a grinder with various attachments: a round metal brush or chains;
- narrow spatula;
- hammer;
- chisel;
- axe;
- knife.
If the work needs to be done quickly, literally in a couple of hours, buy paint removers and a brush. The choice of a specific paint removal method depends on the availability of tools, the type of paint (oil-based or water-based), experience in performing similar work and personal protective equipment. For example, you cannot use an angle grinder with attachments if you do not have a respirator - the probability of ending up in a hospital bed tends to 100%.
The most acceptable methods for removing paint from walls at home are a chisel with a hammer or a hair dryer with a spatula. In extreme cases, the paint is cut off with an axe.
Easier with whitewash. Here it is soaked with a sponge and then washed off with a rag or the same sponge. The processes of removing wallpaper and paint are described in detail in the work posted on our website: “How to prepare walls for wallpapering?”
Ceramic tile
The tiles, just like old plaster, are removed with a hammer drill. The work can be done manually, using a hammer and chisel - less dust, a little quieter. But then the process will last for several days, for which you need to be prepared in advance.
Step 3. The walls are inspected to identify loose plaster. Experience shows that in most cases it must be removed completely.
Step 4. Remove the old plaster.
Step 5. The surface of the walls is cleaned of various contaminants: soot, grease, mold, if any, etc. You can see how to do this work yourself in the material “How to prepare walls for plaster?”
Step 6. The walls are being repaired. Small cracks are widened and deepened using a hammer and chisel or a grinder with a special circle. This is done so that the repair solution has contact with a larger surface area of the resulting gap - there is a higher probability of keeping the wall from further cracking.
Before sealing the defect with a repair mixture made of cement (gypsum, polymer sealant or repair putty), the crack must be cleaned of dust and primed, twice. As the building shrinks, wide cracks may appear in the walls. Before sealing with mortar, they must first be tightened with reinforcing bars or metal staples.
Reinforcing bars are embedded in prepared grooves, and metal strips are placed on bolts. All metal parts are treated with an anti-corrosion compound before installation in the wall, and then after installation, to prevent rust. The crack is sealed with a repair compound or polyurethane foam with a low expansion coefficient.
Step 7. The walls are hung. The process is described in detail in the article “How to properly plaster a brick wall?”
In new buildings, work on leveling the walls begins with hanging. Based on the results of the hanging, a decision is made on the method of leveling the walls: wet or dry.
Step two: remove old paint
Water-based paint dissolves easily with water, so to clean a wall of it, you just need to wet it and scrape it off with a spatula. Ideally, oil paint should also be removed; this can be done in three ways:
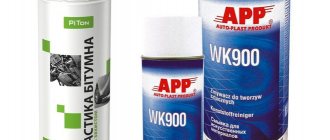
- Chemical - using special removers, after application of which the enamel dissolves and is easily removed with a spatula. The disadvantage of these compounds is toxicity: during their use and after, the room must be well ventilated.
- Mechanical - using a regular spatula, sander or iron brush. This method is the dirtiest: there will be a lot of dust, so you can’t do without a respirator.
- Thermal - using heating with a hair dryer, which softens the old paint and can be removed with a spatula.
If the paint sticks tightly and you can’t wash it off, we advise you not to waste your energy. It will be enough to simply clean the areas where the enamel does not adhere well. Then the wall is primed so that the putty will adhere tightly.
Preparing for work
Before you start leveling the walls, you need to clarify that a variety of surfaces are suitable for painting. As a rule, the following options are distinguished:
- plastered and putty surfaces;
- smooth surfaces (plastic and wooden panels, tiles, wallpaper);
- textured plaster;
- relief finishing materials.
In each of these cases, wall alignment has its own distinctive features that need to be known and taken into account.
The most effective and popular is leveling walls using putty.
Wall alignment diagram.
Before leveling the walls, you need to carefully study all stages of the work and understand what techniques are used in certain conditions.
Before starting work, prepare the following tools:
- several spatulas of different sizes;
- marker;
- chisel;
- small axe;
- portable lamp;
- hammer.
Return to contents
Options for leveling wall surfaces and preparing for applying putty
In the case where regular painting of the walls is planned, maximum efforts must be concentrated on combating various types of irregularities and other defects in the wall covering. However, before you start work, you need to understand how to prepare walls for painting in a particular case. In most cases, the following wall alignment options are used:
Sanding the wall
- Sanding the existing coating;
- Use of plaster;
- Wall decoration with plasterboard sheets.
The use of the first option is applicable if the existing base made of concrete or cement plaster does not have significant flaws on its surface in the form of cracks, tubercles and other defects, and also has sufficient strength. If any flaws are found on the surface, you will have to level the wall using putty. To do this, you will need to thoroughly clean the damaged areas using sandpaper. In addition, it is important to take into account that old surfaces must be treated with reagents specially developed for this purpose with an antiseptic effect, with further processing and priming.
It is also important to clean areas affected by fungus and mold, then open the wall with an antiseptic and level it with a composition based on the materials used during the initial plastering. After this, it is imperative to check the curvature of the surface using a building level. The maximum permissible differences should not exceed two millimeters.
Only after thoroughly leveling the entire surface can you switch to the next stage of wall leveling - applying putty. If the differences and unevenness of the walls are quite noticeable or the layer of plaster has begun to come off over time, then you will have to either completely replace it or cover the walls with plasterboard sheets. In this option, the choice of method and materials will depend entirely on the preferences and financial situation of the homeowner.
Regardless of the chosen method of leveling the walls, it is better to get rid of the old surface. Then, depending on the leveling method, it will be necessary to either cover the walls with plasterboard sheets or plaster them.
At the end of the preparatory stage, all walls must be re-primed and left until completely dry, but not less than 6-7 hours. Only then can you proceed to applying putty.
Building mixtures for leveling
To level the walls, you will need to prepare auxiliary materials, the description of which is given in the table:
| № | Materials | Description |
| 1 | Ready putty | The diluted putty must be used within a short period of time, otherwise the residue will thicken and the remaining amount can be discarded. It is recommended to purchase materials strictly according to the estimate. |
| 2 | Dry putty | It is more economical to buy dry mixtures, which can be diluted with water if necessary. Often mixtures are sold in bags of 25-30 kg, consumption is approximately 1-1.2 kg per 1 sq.m. The powder is poured into water according to the proportions indicated on the package, and then thoroughly mixed with a mixer. |
| 3 | Primer | Additional material that allows the putty to better adhere to the wall. The soil prevents the appearance of mold and dampness on the walls. On average per 1 sq.m. About 100 grams of primer are consumed. Often sold in metal cans or canisters. |
You need to prepare the putty in such a quantity that it is enough for the work and does not remain for a long time.
You need to work at average temperature, the room should not be more than 25 degrees.
Dry air is also not allowed in the room; humidity must be maintained so that the plaster dries evenly.
Before using the primer, it must be thoroughly mixed, and if necessary, diluted with water or solvent.
Tools
When doing the work yourself, you will need the following tools:
- it is better to purchase several spatulas of different sizes for work, they will help in applying the composition;
- a marker is required for initial preparation and marking;
- a portable lamp, it will provide complete lighting;
- small axe, hammer and chisel;
- abrasives: mesh, sandpaper, bars.
For puttying with your own hands, you may need: spatulas, a lamp, sandpaper and other tools.
When performing processing, all tools should be in the direct access area so that it is convenient for you to use them.
Sequence of applying starting putty
Painting directly on plasterboard sheets or a layer of cement plaster is not recommended. This is due to the fact that such materials have strong water absorption or have a porous structure, which in turn prevents the quality distribution of paint over the surface. This will ultimately lead to a change in the main color and the manifestation of even the smallest imperfections. To prevent this, the entire wall must be covered with a layer of putty, for application of which step-by-step instructions for performing the work are given:
- Before directly applying a layer of putty, you need to select a high-quality mortar that contains large additives in the form of sand. Thanks to the presence of sand, it becomes possible to obtain a fairly large layer, up to five millimeters, which will be quite reliable and durable.
Spatulas - In order to do all the work yourself, you will need a narrow and wide spatula. One will be needed for direct distribution of the mixture, and with the help of the other you can remove minor differences. Before preparing the putty, you need to find out in what proportions to mix the building mixture and water. If the proportions are not indicated on the packaging, then it is necessary to gradually add water to the putty, stirring the composition with a construction mixer until a sour cream-like consistency is formed. I would like to note that from the moment the solution is mixed until it hardens, 40-50 minutes usually pass.
- To make the surface more durable, you need to use a reinforcing mesh with 2 mm cells. To secure it, a building mixture is applied in a width equal to the reinforcing material, and the mesh is applied to the wall. Afterwards it is pressed into the solution with a spatula. Putty is again applied over the mesh and smoothed out well.
- Very often, when doing work on their own, beginners make a grave mistake, trying to immediately achieve a perfectly flat surface, for which they smooth out the stripes formed from the edges of the spatula in every possible way. In reality, these stripes have no effect on the final result and can be ignored at all. The most important thing is not to miss a single area and apply the composition over the entire surface. To level the mortar, you just need to run it over the surface several times with medium force, trying to smooth out the transitions between the strips of mortar. And all irregularities in the form of thin tubercles can be smoothed out before the finishing putty is applied. It is necessary to understand that the skill will appear only with time.
Leveling uneven surfaces - Usually the putty dries in 7-9 hours. Only then should you move on to sanding. For this you can use an abrasive mesh with a coarse grain. It is important to get rid of protruding tubercles and other imperfections. However, even after sanding, the wall covering will be very rough, and it is not recommended to apply paint to such a wall. It is for this reason that you need to apply a finishing layer of putty on top of the starting layer.
Methods for determining surface roughness
The degree of unevenness is determined visually or instrumentally by taking measurements. Knowing the size and type of deviations from the ideal geometric shape allows you to make a rational decision when choosing a correction method, as well as calculate the approximate volume of necessary materials. How to check how uneven the wall surface is?
To identify unevenness and their size, use a long (2-2.5 m) flat strip with a cross-section of 20 x 50 mm or a rule of the same length, as well as a level or plumb line. Applying the strip to the wall vertically, horizontally and diagonally, observe the deviation of the wall surface from the plane. To check the perpendicularity of the structures to each other and to the ceiling, use a square or measuring devices (tape measure, cord).
Lines are drawn horizontally on the walls forming the corner and measured from the corner on one wall - 2 m, on the other - 1.5. The legs of a right triangle are formed, the hypotenuse of which (the distance between the marked points) should be equal to 2.5 m. The distance less or more will show, respectively, an acute or obtuse angle between the walls.
Verticality or fall is checked using a plumb line or level. This and previous geometric checks can be done quickly and easily with a laser level.
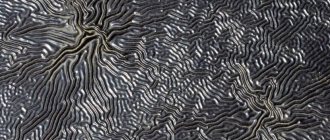
Leveling a brick wall
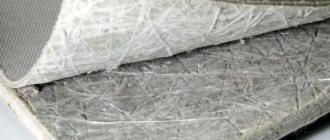
A thick layer of mortar requires reinforcement with metal mesh
If the leveling is carried out without using a frame technique, then the wall is immediately puttied. For brick you will need to complete the following steps:
- The old coating must be dismantled.
- All remnants of glue or finishing materials are washed off and then impregnated with antifungal agents. This will prevent mold and black spots from appearing on the surface.
- If the differences are small, up to 2 cm, then no additional work will be required. If the difference between the walls is large and the solution will be applied in a layer of more than 2 cm, then a special reinforcing mesh is applied to the surface of the wall.
- Next, vertical beacons are installed. They are leveled and attached to the walls using cement or plaster at a distance of 50 to 150 cm.
- Now the cement mortar is mixed and thrown onto the wall between the beacons. Using the rule, the solution is stretched along the wall from bottom to top; the movements of the rule should be in the form of a zigzag.
- When the entire space is filled, it is necessary to evaluate the evenness of the surface and, if necessary, add solution to the depressions and repeat the work.
- After the solution has dried, primer is applied to the wall and left for several hours to absorb. Then the finishing putty is spread and the surface is brought to perfect evenness.
After the work has been done, the surface is considered ready for painting. If necessary, you can additionally walk along the wall with sandpaper to smooth the surface. For more information about leveling brickwork, watch this useful video:
Before throwing the solution between the beacons, you should take care of laying out new wiring, as well as installing boxes for sockets and switches.
Putty when leveling walls: how to do it
- Carefully inspect the walls; if they are uneven or rough, you must first treat them with plaster.
- If there is old coating, such as paint, plaster, they must be removed.
- If they are leveling with drywall, check that all the screws are screwed in and do not protrude on the surface.
- When leveling with putty, you must use the rule to determine the evenness of the walls: apply a strip or level to the surface of the wall, monitor the size of the existing gaps between the wall and the tool, and determine the scale of subsequent alignments.
- Next, putty is applied. Putty is putty in two stages - starting and finishing.
- The next step is to apply the primer. It is necessary to save paint or glue in subsequent stages.
There are two types of putty. Starter – coarse-grained, suitable for the first layer of application, smoothes out shallow unevenness in the wall. The finishing putty is fine-grained, suitable for the final application of the layer, making the surface smooth.
Stage four: start leveling
After the wall surface is prepared, putty can be applied. This process is no different from leveling other surfaces. Here are the basic principles:
- The mixture is applied in several layers - this way it will lie more evenly.
- If the wall has many defects and significant unevenness, you first need to apply starting putty. They have a coarse-grained structure, lay flat and adhere firmly to the wall.
- An important point: each subsequent layer is applied only when the previous one has dried.
- The last layer is performed with finishing putty, which has a fine-grained structure. Before applying it, you need to treat the wall from sagging and remove marks from the spatula that could have formed after previous actions. To level the wall, you need to clean it with sandpaper or a special mesh.
- When the last layer of finishing putty has dried, it also needs to be sanded so that the surface is perfectly smooth. This is important, especially if subsequent painting is planned.
The very last step remains before using the decorative finish - applying a primer to the already leveled layer of putty. We assure you that after such treatment of the walls, any coating will last a long time, and the result will be beautiful and neat.
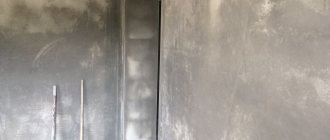
Leveling a concrete wall
A nylon mesh located between two layers of plaster will protect the coating from crumbling
Leveling a concrete wall for painting is a little different than a brick base. Those who do not know how to level concrete walls for painting can use the step-by-step guide:
- The walls are cleaned of old coating.
- A primer is applied to the surface, which is intended only for concrete.
- After 6 hours, this is exactly the time needed for the primer to dry, you should dilute the starting putty and begin applying it to the walls.
- After the first layer of plaster has been laid, you will immediately need to apply a nylon mesh directly onto it, the cells of which are 2 x 2 cm. Such a mesh will not allow the plaster to crumble over the years and will keep it in a heap.
- A second layer of solution is applied on top of the mesh. In this case, there is no need to wait until the previous layer hardens.
- The movements of the spatula should only be cross-shaped, gradually stretching and leveling the putty. It is better to use wide types of spatulas.
- When the second layer is laid, the wall should be allowed to dry for 24 hours.
- To ensure the most even surface possible, apply finishing plaster in a very thin layer. She will be able to level out and remove even minor holes.
- After another day, the walls are sanded with sandpaper to give them perfect smoothness and evenness. Watch all the intricacies of concrete leveling in this video:
Now the concrete base is ready for painting. To improve the adhesion of materials, primer is used before applying paint, and the surface is left to dry for the time specified in the instructions.
For concrete walls, gypsum-based plasters are used. Such mixtures are inexpensive and show excellent performance characteristics. They are flexible, easy to work with and adhere well to the surface.
Rules for painting walls with your own hands
Poorly painted walls can tarnish the decor of your room, which will end up looking sloppy. Therefore, it is worth knowing certain steps that will help you achieve flawless wall painting. In this article, we will give you some tips that will help you paint your wall like a pro.
Checking and cleaning walls
After the walls have been leveled for painting, but before you start painting, you should inspect it again for any damage. Look for dents and cracks in the wall. They must be puttied.
Cleaning the walls is also an important step. There may be dust on the wall that will prevent the paint from adhering well. Use a damp cloth to lightly clean the surface.
Checking the weather
Although you may not realize it, the weather outside your home can have a huge impact on the conditions inside. Rainy days are not the best time to paint as it will take longer to dry. You will also need to open the windows to allow for better ventilation.
Preparing the work area
Preparation is the main stage when working with paint. Cover the floor and furniture with plastic sheeting to prevent paint from getting on them. Cover all openings, switches and sockets with masking tape.
Selecting quality tools and paint
When making repairs yourself, never skimp on the tools you will use. Buy quality paint rollers and brushes. You will need:
- flat and angled brush,
- rollers with plastic cores.
The paint sticks to them better and is applied more evenly.
There is a wide variety of paint. Choose one that will highlight the overall design of the room. Paint is a material that you should not skimp on. For best results, use a high quality alkyd or acrylic paint.
Start painting from the cladding
Not everyone knows that it is best to start painting with the cladding. Once the paint is completely dry, use masking tape to hide the trim and prevent it from getting splashed when painting the walls.
Apply paint evenly
Paint stains and streaks are not what you want to see on your wall. To avoid streaks, paint should be applied one time, moving the roller from top to bottom. The paint must be applied before it dries, otherwise streaks will appear after the second coat is applied.
Assessment of wall unevenness
To properly level the walls for painting, you need to find out the degree of unevenness of the wall. To do this you will need a level, a plumb line, thread and nails. With their help, beacons are set, which identify unevenness and differences. Depending on their size, the technology for leveling walls for painting is selected:
- To level smooth concrete walls with differences of up to 5 mm, you only need putty.
- It is better to plaster differences of up to 3 cm first, then putty.
- Differences greater than 3 cm are plastered using reinforced mesh. For final leveling, putty is used.
Types of surfaces for painting
When carrying out renovations, an important question for the apartment owner is: how to prepare the walls for painting? The work may require different materials, the choice of which depends on the base. Most often you can find concrete walls. Also, partitions made of wood or plasterboard can be erected in the apartment, the preparation of which for painting has its own characteristics.
Walls may differ in appearance:
- smooth surface leveled with plaster or putty;
- surface with relief;
- smooth, flat surface made of finishing material;
- facing with relief.
Preparing walls for painting in most cases is done by leveling and puttying.
Useful tips
- Since the quality of painting work in general depends on the quality of each stage, try to put the entire complex of plastering and painting work into one hands. The master will know that he is responsible for the final result, and will not deliberately slack on the preparatory stages.
- When drawing up an estimate with the foreman, break the entire scope of work into more or less large parts. If you have to part with the master, you will know how much to pay for this or that type of work.
- At the very beginning, discuss the quality you want to receive. Specify how you will check it. The higher the desired quality, the longer and more thorough the work will be, and the more expensive it will be. Draw up a contract on paper and specify in it the quality requirements and methods of controlling it.
- Ask the master more questions. A qualified specialist will never refuse to explain to the customer what he is doing and why.
Good luck with the renovation!
Does the topography of the wall greatly affect the result?
It is impossible to answer unequivocally. Of course, the terrain has an effect. And when painting, this influence is much greater than when gluing wallpaper. With the help of wallpaper with a large thickness, and even some kind of image, you can easily hide unevenness. But with paint everything is more complicated.
Important: The paint may cover some uneven areas. High-quality material can tighten certain problem areas, but they should not be too large, neither elevations nor recesses.
Here's when a slight unevenness of the wall when painting is acceptable:
- if the unevenness is small;
- The paint is high quality and can handle a lot;
- I plan to paint the wall.
In the latter case, you get the same effect as with wallpaper on which something is depicted. When many elements and colors are combined into a picture, this greatly masks certain defects of the wall on which all this is displayed.
Please note: Painting on a wall yourself requires slightly different skills than working on paper. So, even if you are a good artist, you should not rely entirely on your skills, because perhaps this will ultimately fail you.
Cost of work
Leveling surfaces for painting compared to leveling for wallpaper requires special care and precision, so if you are not confident in your abilities, you can entrust this part of the repair to specialists. Prices for services will be approximately as follows:
- In Moscow, leveling walls with plaster using beacons will cost from 300 rubles. per 1 m2, plasterboard using a frame - from 500 rubles. for 1 m2, using the adhesive method – from 350 rubles. for 1 m2, putty - from 100 rubles. for 1 m2;
- in St. Petersburg, plastering walls on lighthouses costs from 280 rubles. for 1 m2, plasterboard cladding on the frame - from 460 rubles. for 1 m2, without frame - from 320 rubles. per 1 m2, puttying work - from 80 rubles. for 1 m2;
Prices for leveling walls in regions vary greatly, in large cities approaching the level of capital cities.
In order for the apartment renovation to be completed successfully, you need to know how to level the walls correctly for painting or wallpaper, what actions need to be performed and in what sequence.
Preparing the base
Surface preparation should be done very carefully. This stage begins with removing the previous finish. Next, perform the following steps:
- the base is thoroughly cleaned of dust, stains, etc.;
- crumbling areas of old finishing should be removed from the surface;
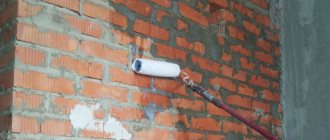
- treating walls with a primer;
- It is recommended to secure the plaster mesh (if plasterboard is not being plastered for painting) to strengthen the plaster layer.
The primer contains antiseptic additives. This treatment makes it possible to protect the coating from fungi and mold. The primer composition is applied with a roller (in the corners - with a brush). The solution adheres better to primed surfaces. The base needs to dry (6 hours).
To ensure that the mortar layer holds securely, the walls are reinforced with nylon reinforcing mesh. It is completely covered with the composition. The layer is dried for six hours or more.
To obtain a high-quality surface, it is recommended to use a gypsum mixture. If plastering walls for painting is done in the bathroom, then you should choose a primer with waterproof characteristics. Modern manufacturers offer quick-drying compounds that are highly durable. Work with this mixture is completed much faster. Manufacturers provide each type of paint with fairly detailed instructions with recommendations for carrying out preparatory work for the specified composition.