Andrey
16993 0 4
Andrey November 12, 2016Specialization: facade finishing, interior finishing, construction of dachas, garages. Experience of an amateur gardener and gardener. We also have experience in repairing cars and motorcycles. Hobbies: playing the guitar and many other things that I don’t have time for :)
Penoplex has many advantages over other insulation materials, so it is not surprising that many home owners try to use it when insulating their homes. However, not everyone knows that the process of filling this heat-insulating material has a number of nuances. Therefore, in this article I decided to share with you the technology for filling penoplex, which allows you to obtain a reliable and durable rough coating.
Puttying penoplex
How and with what to putty penoplex indoors and outdoors
› Low-rise construction › Finishing
08.09.2020
Proper insulation of housing allows you to reduce heating costs, create a comfortable microclimate in the premises and beautifully decorate the facade of the building. Properly fixed and finished polystyrene foam on the outside of the house creates sufficient levels of thermal insulation and protection from dampness.
A few words about the features of penoplex
Penoplex is a porous substance with closed cells.
The raw material for production is polystyrene foam. The mass is heated to a high temperature, foams, and then passed through an extruder under pressure. The material is exposed to ultraviolet radiation and is not durable enough; it should not be left open.
A plastering technology has been developed specifically to protect the EPS surface, which will be discussed further.
Key Features
The material is practical and easy to use.
It has the following properties:
- ease;
- low thermal conductivity;
- environmental Safety;
- long service life;
- ease of installation;
- ease of processing;
- high strength;
- waterproof;
- good ventilation qualities;
- homogeneous structure;
- smooth surface.
The latter characteristic is also regarded as a disadvantage, since due to it the material has low adhesion. Therefore, to the question of novice craftsmen about whether it is possible to putty penoplex using standard methods, the answer is negative. A special technology is used here, associated with multi-stage preparation of the base and the use of special means.
Specifications
Extruded polystyrene foam belongs to the category of modern thermal insulation materials with a wide range of applications. With its help, not only external, but also internal insulation work can be carried out.
The manufacturer announces the following technical characteristics of its products:
- sizes - 60x120, 100x100, 100x200 cm;
- thickness - 2-20 cm;
- density - 25-35 kg/m³;
- thermal conductivity coefficient - 0.028-0.034 W/(m*K);
- percentage of water absorption - no more than 2%;
- service life - more than 50 years.
Penoplex putty technology
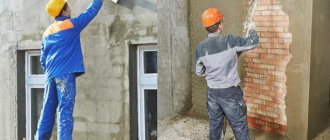
The first part of the façade finishing is carried out in the same way as in the case of insulation with foam plastic slabs. First, the base is cleaned and leveled, after which the sheets are glued and nailed to the wall. Then the cracks are sealed. And only then differences begin both in terms of the features of the work and the materials used.
The nuances are that putty is not applied to penoplex immediately, but only after strengthening and increasing the adhesion of its outer side. To do this, use a strong reinforcing mesh with a large mesh and adhesives with an increased level of adhesion to any surfaces.
Tools for work
To insulate a house with EPS slabs, the contents of a DIYer’s pantry are more than enough.
To work you will need the following devices:
- construction mixer;
- perforator;
- level;
- stationery knife;
- roulette;
- square;
- wide, even spatula;
- notched spatula;
- stitching roller;
- paint brush;
- scissors;
- hammer;
- grater;
- safety glasses and gloves.
One of the issues that needs to be thought through in advance is the arrangement of a reliable platform. Many people are interested in how to putty penoplex indoors. This is not difficult, unlike exterior work, which involves height. If the farm does not have climbing equipment, then you should rent a folding ladder or prefabricated sawhorses.
Preparation of materials
To plaster extruded polystyrene foam, you need to buy the highest quality materials from trusted manufacturers. Savings in this area can have dire consequences.
Need to purchase:
- abrasive nozzles for graters;
- sandpaper;
- special primer;
- putty mixture;
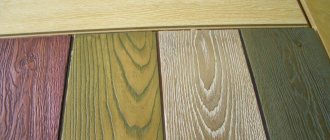
- decorative plaster;
- plastic corner profiles;
- painting mesh;
- glue for reinforcement;
- paint;
- buckets for solution and washing tools;
- rags.
It is recommended to take the material with a small reserve in case of damage during installation and errors in your own calculations.
Surface preparation
The main nuance for penoplex is the preparation of its surface after fixing it to the facade.
This event is carried out in the following sequence:
- Inspect the outer layer of insulation, identify cracks and fill them with foam. The excess is cut off after the polyurethane foam has hardened.
- If there are protruding dowel heads, they are either driven in deeper or cut off. After this, a new fastener is driven in nearby.
- Treatment of the working area with a needle roller. This increases the degree of adhesion to the glue.
- Grout the surface with coarse sandpaper or a float. The relief also has a positive effect on the adhesion of the polymer.
- Applying a primer or a special “concrete-contact” composition. The treatment is carried out twice, in thin layers, without drips.
Reinforcement
The reinforcement is carried out with a mesh with thick threads that provide good adhesion and a relief texture.
Process order:
- It is necessary to cut strips of the required length from the mesh, leaving an allowance of 10 cm at the corners (for overlapping installation). Since the segments will be different, it is better to mark them.
- Prepare glue in accordance with the manufacturer's instructions. The solution should be mixed in the volume that can be used before it is curdled.
- Fastening the mesh. This is done from one of the lower corners. Each new strip is overlapped with the previous one by 10 cm. The material is smoothed with smooth and angled spatulas so that no air remains under it.
- Apply a second layer of glue after the first has dried.
This is where the reinforcement ends. All you have to do is wait until the surface hardens completely.
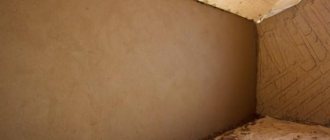
Final putty
The purpose of this stage is to mask the unevenness of the rough finish, create a protective layer, and decorate the facade. The plastering technique does not differ from similar actions for leveling walls indoors. The only difference is the scale of the work.
It is recommended to do it with 2 spatulas - narrow and wide. The first is used to collect the solution, place it on the blade of the second and remove any residue that has moved towards the handle. A wide tool is needed to directly apply the mixture to the facade. Its thickness should be no more than 3 mm to avoid cracks.
Conclusion
As the experience of professional plasterers shows, penoplex lends itself well to puttying. The main thing is to strictly follow the work technology, use high-quality tools and materials.
How and with what to putty penoplex indoors and outdoors Link to main publication
Types of mixtures
Penoplex plaster for the facade requires strength; it should not change under the influence of precipitation. There are compositions for universal and specific purposes. When choosing, you should take into account all possible types of loads on the coating.
Multifunctional tools
The universal composition can be used at several stages of finishing work. With this plaster you can attach penoplex to the wall, then fix the reinforcing mesh on the outside on the sheets. The universal mixture can not only be used for plastering, but also for pre-priming surfaces. The product costs a little more than formulations with strictly targeted action. The higher price is compensated by the possibility of multifunctional use.
Mineral products
A cement mixture that contains sand and a small amount of polymer filler, which improves the fixation of the material on the surface, is popular among craftsmen. Often such plaster is called mineral due to the predominant amount of inorganic components. The mixture must be prepared in accordance with the manufacturers' recommendations, which often contain instructions on the need to add PVA glue to the mixture. If the accompanying documents do not specify the introduction of additional components, there is no need to do this yourself. Some plasters contain gypsum and stabilizers. Such mixtures are very plastic and stick to the penoplex more slowly.
If you don’t have enough money to purchase ready-made plaster, you can make your own compositions from two components:
- cement and lime;
- clay and lime;
- clay and cement;
- clay and gypsum.
This is not the best solution, especially since the type of clay is fundamental to the quality of the plaster. If you have suitable clay, high-quality cement and slaked lime, the mixture can turn out quite successful. Mineral compositions can be used to plaster facade insulation on the outside and putty penoplex indoors.
Acrylic
Mixtures based on acrylic polymers are intended primarily for finishing areas located in areas of high humidity and high mechanical loads. The cost of polymer plasters is higher than that of mineral compounds, but their greater resistance to external influences justifies the difference in price. Acrylic plaster masses have great elasticity, which makes them easier to work with.
Silicate
A successful combination of properties is demonstrated by silicate plasters, which do not contain polymer additives and therefore do not become electrified. Silicates allow steam to pass through well, are not destroyed by atmospheric moisture, and are not subject to microbiological destruction. This is the most acceptable mixture that can be used to plaster both external and internal walls. It is enough to properly treat the surfaces once and you won’t have problems for many years. Silicate material is environmentally friendly, does not contain harmful impurities, and guarantees the cleanliness of the surrounding airspace.
Is it possible to putty penoplex: let's look at it in detail
I’ll say right away that it’s more correct to call penoplex extruded polystyrene foam, since the word “Penoplex” is the name of the company that produces this material. This is reminiscent of the situation with copying machines, which in our country are still called “copiers”.
As you might guess, extruded polystyrene foam is based on ordinary polystyrene foam, i.e. Styrofoam. Due to the processing of foam plastic using a special thermal method, the material acquires the following qualities:
- strength, which is several times higher than the strength of conventional foam;
- uniform structure and smooth surface;
- almost zero moisture absorption;
- higher vapor permeability.
Extruded polystyrene foam has a smooth surface and uniform structure
On the one hand, the performance qualities of penoplex are much better than those of expanded polystyrene. But, on the other hand, as a result of these same qualities, this material has much worse adhesion than polystyrene foam.
Therefore, the mistake of many beginners is that they try to putty penoplex using the same technology as polystyrene foam. Moreover, similar recommendations can be found even on some construction resources. All this leads to the fact that the glue, which is used as putty, lags behind the insulation along with the reinforcing mesh.
The result of improper puttying of penoplex
This raises the question: is it possible to putty penoplex? I’ll say right away that this material was not originally intended for wet finishing. However, our craftsmen have come up with a technology that allows you to achieve high-quality results, in fact, I will introduce you to it below.
It makes sense to use penoplex for wall insulation only where its properties, such as strength, are really important. As a rule, these are ground floors or low first floors. In other cases, its use is impractical, since the price of this material is much higher than the cost of expanded polystyrene and mineral mats.
Penoplex finishing scheme
Penoplex putty technology
The process of filling penoplex can be divided into several stages:
Work order
Is it possible to paint penoplex? What to paint with?
The final finish of the insulation will be more wear-resistant and aesthetically beautiful if it is subjected to the dyeing process. But be careful: not all putties benefit from staining, so read the instructions on the packaging of the putty you are using. In the instructions you should probably find all the answers to your questions: is it possible to use paint, and what composition should the paint have in order to ideally match your putty. When choosing paint, you should also take into account the chemical characteristics of the insulation itself, since not all paint is suitable for penoplex. Only if you choose the right paint, taking into account all the nuances, will your facade be durable and of high quality.
Is it possible to putty penoplex: let's look at it in detail | Finishing experts
Gusevsky Andrey Anatolyevich After finishing the house with thermal insulation materials, the question arises: is it possible to putty penoplex or polystyrene foam?
Those who build or repair their own homes with their own hands often have difficulties associated with a lack of knowledge and experience in this area. For example, everyone knows that concrete, brick and block walls can and should be plastered and puttied for subsequent finishing. What if Are they made of OSB, wood and other non-standard materials? Is it possible to align them in a similar way?
What should be the surface for putty?
You can count on the fact that the plaster or putty will lie on the surface and stick to it well if the following conditions are met:
Note. The putty must also be suitable for the place of application - for interior or exterior use.
- The instructions for puttying surfaces require that they be porous and rough. Most compounds do not apply to a perfectly smooth, glossy base. Or the adhesion to the surface is not strong enough, as a result of which the putty quickly crumbles. Therefore, such bases are pre-prepared by covering them with a special primer (see Types of construction primers and their area of application) or artificially giving them roughness.
- The surface must be strong and stable - not crumble, crumble or delaminate. The same applies to the coating previously applied to it: if it does not adhere well, it is completely cleaned off before puttying.
Cleaning the surface from fragile coating
- Rigidity is one of the requirements for the surface to be finished. It is clear that soft and flexible materials are deformed under mechanical stress, which will cause instant detachment of the putty. But the necessary rigidity can be created using a reinforcing mesh and a sufficiently thick leveling layer.
Based on these basic requirements, let's consider the possibility of applying putty to some materials that can be considered problematic. Is it worth doing? Will the price of materials and the cost of work pay off for many years of trouble-free operation of putty-finished surfaces?
How to putty unusual substrates
Let's consider the main types of surfaces that may need to be leveled with plaster or putty mixtures. They are discovered both during the finishing of new and during the renovation of old buildings.
Fiberboard, chipboard, hardboard and other wood-like materials
They are often used to make internal partitions or sheathe walls and ceilings. If you plan to wallpaper or paint them later, then leveling and sealing the seams between the sheets is necessary.
Is it possible to putty fiberboard and other materials based on wood waste? Yes, but taking into account the natural ability of wood to absorb moisture and deform when swelling and drying.
Fiberboard has excellent adhesion to leveling mixtures
What does it mean? That before finishing it is necessary to reduce the absorbency of the material by covering it with a primer based on water-insoluble acrylic resins. The process itself is no different from puttying drywall or plastered walls:
- The first stage is dust removal of the surface and priming.
- The second stage is the putty itself. First, the joints between the sheets, then the entire plane.
- The third stage is sanding after drying, re-priming and finishing.
Advice. For such surfaces, characterized by good adhesion and the absence of large defects, finishing polymer or gypsum putties are recommended.
OSB
This new building material, made from wood chips and resin, has recently been actively used for the construction of frame houses. It is also the basis of SIP panels, in which a layer of insulation is glued between the OSB sheets.
External and internal structures formed by it require decorative finishing, since not everyone likes the appearance of the material. But is it possible to putty OSB? After all, its surface, filled with a binder, is very smooth; it will not allow the leveling compound to adhere firmly to the base.
It is possible, but also in compliance with a special technology, one of the stages of which is surface preparation. Its purpose is to give the material roughness and better adhesive properties.
This is done like this:
- The plane is treated with abrasives, which remove the top layer and make the slabs rough;
- The surface is cleared of dust;
- A deep penetration primer is applied to it.
Advice. It is advisable to use a primer filled with fine-grained mineral particles (quartz sand, for example). It will simultaneously strengthen the base and give it additional roughness for better adhesion to the putty.
As in the previous case, acrylic or gypsum compositions are recommended for finishing OSB.
If the putty is applied in a thick layer, it is necessary to reinforce the surface with fiberglass mesh
Insulation materials – polystyrene foam, penoplex, polyurethane foam
In our climatic conditions, insulating buildings with special materials is commonplace.
But what happens after this work is completed? Is it possible to putty polyurethane foam used to fill cracks in window and door openings? Or foam boards glued to the walls? Of course, yes, since these materials have both the necessary porosity for adhesion to leveling mixtures and surface strength. And insufficient rigidity is corrected by using reinforcing materials and increasing the thickness of the putty layer.
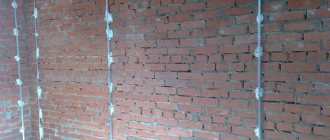
The photo shows the process of reinforcing an insulated wall
The fiberglass mesh is glued to the penoplex using conventional cement adhesives. After they dry, the surface is sanded and leveled with finishing putty.
And to finish areas treated with polyurethane foam, it is cut with a sharp knife to a small depth from the plane, the resulting depression is filled first with a coarse leveling compound, and then with a finishing compound.
Or, after rough leveling, the surface is completely puttyed.
Holes in the ceiling are filled with foam and plastered
Clay bases
Old buildings were often “smeared” - finished with clay mortar over shingles. These are thin wooden slats placed on the walls that act as reinforcement for the mortar. Unfortunately, no putty, even with preliminary priming, will adhere well to such a surface, so this time we will answer the question: is it possible to putty on clay?
What to do in this case:
- If the surface is relatively smooth, with only minor defects in the form of cracks and small potholes, it can be cleaned of falling off and flaking pieces and re-leveled with the same clay. And then cover with whitewash, water-based paint or wallpaper.
- It is better to completely clean dilapidated, crumbling surfaces of clay, and then plaster or putty with compounds appropriate to the type of base material.
- Attach steel reinforcing mesh to the walls, plaster and putty it.
Advice. All these methods are very labor-intensive and do not guarantee excellent results. The easiest way is to line the walls along the frame with sheet materials, and then level them using standard technology.
Paint, whitewash
Old buildings often cannot boast of perfect finishing: a couple of decades ago, builders did not bother with leveling planes, they painted walls and whitewashed ceilings directly on the plaster.
If you have to correct such defects, then you need to know whether it is possible to putty over whitewash or paint. This depends on how firmly the coating adheres to the base, as well as on its physical properties.
Let's explain:
- Chalk and lime whitewash, like completely modern water-based or water-dispersion paint, swell when exposed to water. This means that when putty is applied to whitened or painted surfaces, these coatings will absorb moisture from the solution. Of course, the quality of such a finish is out of the question - it will fall off during the drying process. Therefore, the whitewash must be scraped off with a spatula, after soaking it with warm water. After which the surface is dried and primed as usual.
Whitewash can be easily cleaned off with a spatula after soaking.
- Oil and enamel coatings can be puttied if they adhere well to the walls, but they need to be roughened. If the paint is cracked, peeling or crumbling, it is cleaned off.
Conclusion
As you can see, even somewhat non-standard materials can be puttied if you know how to do it correctly. If you still have questions, watch the video in this article to resolve them.
Gusevsky Andrey Anatolyevich Leading specialist in a large construction company engaged in the construction of multi-storey residential buildings. Graduated from the Faculty of Architecture of the Penza State Institute of Architecture and Construction. Total work experience in the specialty is 18 years.
Foam putty is applied to the mesh and adhesive base
Extruded polystyrene foam is considered the best insulation for private homes. Due to its low weight, it does not create a load on the foundation.
High vapor permeability and the ability to retain heat and not allow heat to pass through create comfort inside the house. When finishing the facade, foam plastic is puttied to protect it from moisture, rodents and sunlight.
The smooth surface of foam plastic does not connect well with finishing materials.
Finishing house walls with putty
Light and warm foam must be protected
I insulated a friend's house and satisfied his curiosity. Vadika was interested in building materials and tried to do everything with his own hands. He and I have already glued the slabs to the walls and attached the mesh. We had to do foam putty and decorative finishing.
Installation of foam plastic and subsequent finishing with putty
Polystyrene foam practically does not absorb water. It can float for years without swelling. But when exposed to sunlight, wind and frost, it begins to deteriorate. Balloon material is eaten by rodents and birds. The facade insulated with air plastic must be puttied and plastered. The material is flammable and emits harmful substances.
The top layer must be hard in order to protect soft polystyrene from mechanical stress, contain antiseptics and antistatic agents to protect it from destruction by various representatives of fauna.
At the same time, the insulation is protected from UV radiation and frost and direct exposure to water. Putty applied to foam serves as the basis for cladding, plaster and decorative finishing.
Features of puttying the surface of extruded polystyrene boards
Putty for foam plastic
When working with polystyrene foam, you must take into account its characteristics and follow the rules.
- Before starting work, prime the lying slabs on all sides with a solution of PVA glue, preferably in 2 layers.
- The reinforcing mesh is overlapped onto the adhesive base.
- After each layer the surface is primed.
- Polystyrene foam has high vapor permeability. It is necessary to plaster and putty in a thin layer.
- Do not use materials containing solvents or acetone.
Putty for penoplex is necessary
Contents Hide ▲ Show ▼
The use of modern thermal insulation materials has made certain changes in the technology of wall finishing.
The best option for insulating the walls of a building is to strengthen the insulation from the outside, which requires the use of special fasteners and materials to level the surface.
The putty for penoplex used in this case also has an additional purpose, since its use involves the creation of a special reinforcing layer on top of the insulation.
Reinforcement of insulation increases the rigidity of the thermal insulation system
The universal characteristics of Penoplex insulation make it indispensable for creating a reliable and effective thermal insulation system for a building. And only the best equipment is used for the production of penoplex.
To increase the effective service life of the system, it is necessary to create a reinforcing layer designed to increase rigidity, protecting the insulation boards from exposure to direct sunlight and mechanical damage.
Therefore, before deciding how to putty penoplex, it is strongly recommended to purchase the necessary materials for the protective layer (reinforcement).
The use of putty for penoplex as a binder for the reinforcing layer allows you to create a uniform and smooth surface suitable for applying a layer of façade paint. Penoplex putty technology involves the use of materials intended for outdoor use.
How to putty penoplex? These can be the well-known dry mixtures TM Ceresit or products of the Finnish concern KIILTO OY. The frost- and water-resistant facade putty for penoplex offered by manufacturers is:
- for primary leveling of facades with a layer thickness of up to 30 mm;
- for final leveling of facades, with a layer thickness from 1 to 10 mm.
| There is no need to worry about whether putty can be applied to Penoplex, since the mixtures offered by manufacturers do not contain substances that destroy extruded polystyrene foam. |
The technology for applying putty to penoplex is not very difficult:
- The surface of the base made of penoplex is prepared for applying the primary façade putty on the penoplex - adhering debris and dust are removed, damaged insulation elements are replaced.
- In accordance with the manufacturer's instructions, putty is prepared from a dry mixture (Kestonit TT facade mixture) - it is recommended to use a drill with adjustable speed, as well as a construction mixer.
- To create a reinforcing layer of penoplex insulation, in addition to purchasing the necessary building mixture for leveling the walls, you need to purchase a glass fiber plaster mesh for facades.
- Gluing the mesh should begin from the corners of the building.
- A piece of mesh, at least 30 cm wide, is folded in half along its length so that a kind of “rib” remains.
- A working solution (no more than 3 mm thick) is applied to the corner of the building, and the mesh is applied in such a way that the “edge” is exactly at the corner of the building.
- The facade mesh is pressed with a spatula into the layer of working solution previously applied to the penoplex, followed by smoothing - from the corner up or down.
- A facade mesh cut into pieces (no more than 1 - 2 meters in length, since the solution may begin to dry out) is glued onto the putty applied to the penoplex (according to technology) and pressed into it using a plastering tool.
- After gluing one strip is completed, you can apply putty to the Penoplex located nearby to continue gluing the glass fiber mesh overlapping (for reliable gluing of joints) and creating a reinforcing layer.
- The solution protruding through the mesh should be smoothed so that the surface is smooth, without obvious depressions and bumps.
| Since façade frost- and moisture-resistant putty mixtures contain cement, glass fiber meshes that are resistant to alkaline environments should be used. |
Penoplex finishing
After the reinforcing layer has been created, it is much easier to putty the penoplex with a mixture for finishing work, because you already have certain skills in working with the tool.
The question of how to putty penoplex insulation for finishing has now been resolved, thanks to commercially available mixtures.
After the reinforcing layer has dried, the penoplex insulation is puttied with the finishing mixture Kestonit SK, maintaining the layer thickness recommended by the manufacturer (up to 10 mm).
Conclusion
Penoplex, as we found out, can be putty quite successfully. The main thing is to properly prepare the insulation surface. Otherwise, the work resembles the process of puttying ordinary polystyrene foam.
Additionally, you can watch the video in this article to visually familiarize yourself with the process of filling penoplex. If any of your questions on this topic remain unanswered, write them in the comments, and I will definitely answer you.
The use of modern thermal insulation materials has made certain changes in the technology of wall finishing. The best option for insulating the walls of a building is to strengthen the insulation from the outside, which requires the use of special fasteners and materials to level the surface. The putty for penoplex used in this case also has an additional purpose, since its use involves the creation of a special reinforcing layer on top of the insulation.
Is it possible to putty penoplex and how to do it? Review +
it possible to putty penoplex and how to do it.
A material such as penoplex has a huge number of advantages compared to other types of insulation, and therefore it is no secret that most owners of private houses try to use this particular material to improve their homes. However, not every person knows that the process of puttingtying such material for thermal insulation has certain nuances.
For this reason, in the article below you will learn how to putty penoplex indoors and outdoors, as well as a work technology that will make it possible to create a reliable, high-quality and durable rough coating.
A little about the features of penoplex
It is worth noting right away that it would be more correct to call penoplex extruded polystyrene foam, since the familiar word “penoplex” is the real name of the company that manufactures and sells this heat-insulating material. To some extent, this is reminiscent of the situation with copying machines, which in the CIS countries are still called “copier”.
Extruded polystyrene foam is based on the simplest polystyrene foam, namely polystyrene foam.
But thanks to the processing of the material using a special thermal method, the material was able to obtain the following extremely valuable qualities:
- Strength, which is several times higher than the strength of standard polystyrene foam.
- Uniform structure and very smooth surface.
- Moisture absorption, which is practically zero.
- Higher level of vapor permeability.
In addition, a material such as penoplex has a low level of adhesion when compared with polystyrene foam. Because of this, it would be a grave mistake to putty such material using standard technology. This can lead to the putty starting to lag behind the insulation layer and reinforcing mesh.
Although penoplex is not intended for wet cladding, plastering it is in fact possible.
Construction specialists were able to develop finishing technology that makes it possible to obtain a high-quality result and also guarantees a high level of strength.
Penoplex puttying technology and its stages
The process of lining the heat-insulating material “penoplex” consists of the following stages:
- Preparatory work.
- Performing surface reinforcement.
- Applying a layer for leveling.
Each of the stages is extremely important, so you should treat all of them responsibly.
Preparation of material and surface for finishing work
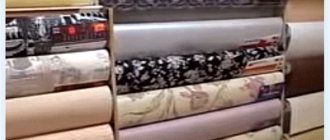
First, you should figure out what kind of plaster will be used to finish the penoplex. Experts advise using universal mixtures from popular brands for work.
But it is worth noting that there are also special compositions that are intended for slabs made of polystyrene foam.
One of these products for puttingtying penoplex is a plaster-adhesive mixture from the manufacturer Cerisit.
The composition should be prepared exactly according to the instructions indicated on the packaging, but there is a particularly important point that is related specifically to the consistency of the solution. To install reinforcing stacks, the consistency of the composition must be slightly lower than recommended by the manufacturer.
Please note that for leveling the solution must be as liquid as possible. In order to install a reinforcing mesh on the surface of extruded polystyrene foam, you will need 4 kg of composition per square meter, and to create a layer to level the surface you will need all 6 kg of composition.
In order for you to be able to properly plaster penoplex, you will need to prepare the following materials and tools in advance:
- Adhesive composition for expanded polystyrene and gluing reinforcing mesh.
- Deep penetration primer solution.
- Fiberglass reinforced mesh.
- For spatulas with different numbers, as well as a sanding float.
- Corners for perforation.
In addition, the preparatory stage will include grouting the penoplex in order to eliminate possible unevenness and differences in the surface. You should not rush to complete the work, since the overall result at the end will directly depend on the preparation.
Reinforcement
Installation work for plastered mesh is a very important stage, and without it, plastered walls may begin to crack, and this will significantly affect the service life. To install the reinforced mesh, you will need to apply a layer of adhesive to the surface of the penoplex, and its thickness should be 0.3 cm and glue it all to the product.
In addition, when performing such work, you will need to take into account the following nuances:
- The reinforcing mesh should be pressed into the plaster layer no more than 50%, but at the same time the entire surface of the product must be immersed in the adhesive composition. The plaster solution should not be applied at once, but in several stages. Most often this is done in strips that are no more than 1 meter wide, since this is exactly the width of the facade walls.
- The reinforcing mesh must be glued onto the fresh solution, and it must be immersed using a regular smooth spatula.
- Lay the strips of the product overlapping, the allowance should be at least 10 cm. Please note that all work should be done extremely carefully at the corners, from which, as a rule, reinforcement begins. To properly glue a corner, you should use strips 0.3 meters wide, bend them in half, and then press them to the corner and press them into the adhesive.
After the reinforcing layer has dried, you will need to grind the surface. For this task, we recommend using a grinding machine or a grater equipped with an emery cloth. Rubbing should be done in a circular motion and done counterclockwise, but do not put too much pressure on the working tool.
Pay attention to how to properly putty penoplex - it should be taken into account that the drying time of the solution will directly depend on weather conditions. In hot weather, you will only need to wait a few hours, and then you can grout, but in cold weather it is better to wait at least a day.
Finish coating (putty)
And the next, no less important and very last procedure is leveling the surface with plaster. To do this, use the previously unpacked universal composition, as for surface reinforcement. The solution should be applied using a spatula and distributed evenly over the surface of the entire wall. Please note that the layer thickness should not be more than 0.3 cm.
The final procedure is rubbing the penoplex. Everything is done in the same way as with reinforcement, and only after the solution has dried completely. For complete drying, you will need to wait at least 24 hours, and in the cold season, even more.
But it’s better not to wait too long, because after 4 days have passed, the solution can become very hard and grouting simply won’t be possible.
After you have completely treated the entire surface, the plastering process can be considered complete and we suggest moving on to puttying the premises.
Choosing putty for penoplex
Putty is a finishing surface coating using special putty mixtures. The choice of composition will depend directly on the surface on which it will be applied. There are compositions in the form of a powder, and there are in the form of a paste. The latter variety comes in acrylic, silicone, oil and combination types.
Interestingly, the best option for penoplex is an acrylic-based or powder-type composition. Even silicone varieties can be used for internal lining.
Also, when choosing a putty, you should take into account the binding components in the composition and the quality of the substances. The durability of the solution, as well as its protection from moisture, cold and various types of precipitation, will directly depend on the quality of the binding components.
When choosing putty for penoplex, it is better to additionally consult with sales consultants. They will help you make the right choice that can withstand the required loads.
In addition, you should take into account that facing mixtures for interior premises are not suitable for finishing the facade, so it is better not to save, as otherwise you will need to redo all the work.
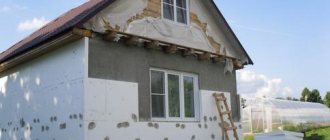
Facade plaster using penoplex
When the approach of cold winter is already felt in the air, we can’t help thinking about how to better insulate our home. Penoplex is a very popular option, optimal in price and quality. In use, the material will not take much effort and time from the builder, but it will definitely be necessary to protect the insulation from mechanical and weather influences. How to do this will be discussed in this article.
Penoplex is often used as insulation of buildings from the outside or inside. Working with it is made easier by the consistent physical characteristics and dimensions of the slabs. The strength of penoplex is not enough to prevent the slabs from collapsing from pinpoint impacts and other physical impacts (dents cannot be avoided in any case). Therefore, it is necessary to protect the material from the adverse effects of ultraviolet radiation, humidity, etc. And visually, a wall insulated with slabs still seems unfinished and requires additional finishing. The use of penoplex implies, in addition to insulation, also additional finishing.
Facade plaster using penoplex
A simple and inexpensive method of finishing surfaces after insulation is plaster. This type of construction work is appropriate when the slabs are attached to the surface by gluing. Penoplex can be installed in another way: in a supporting frame, in the cells of the sheathing. With this option, the facing of the plane will be done either with panels, or clapboard, or something else.
The plane of the penoplex must be prepared
We check if there are any gaps between the plates. Almost no one succeeds in laying insulation perfectly the first time. We seal the joints if this point was missed during installation. Pay attention to the curvature of the entire plane, because the adhesive solution is then applied in a thin layer. It will not be possible to level out unevenness due to the specific composition. To close the gaps between the foam boards, you can foam the gaps with foam for insulation systems (or usually mounting foam), for example, Ceresit CT-84. For one can (850 ml) you will need to pay approximately 600 rubles.
Insulation of the facade with penoplex
Penoplex prices
Making a plaster solution
Do not use a standard cement-based mortar with sand, as it will not give a good quality plaster composition. The store is full of mixtures with a composition suitable for laying on penoplex.
Experienced finishers advise using:
When mixing, strictly follow the instructions left by the manufacturer on the packaging. Experienced craftsmen make a mixture that is similar in thickness to sour cream. To glue fiberglass mesh, the consistency of the mixture should be slightly thinner than required by the manufacturer. In the case of a leveling layer, the solution should be so liquid that it flows freely from the spatula. Hence the different consumption of the composition: gluing the mesh will require 4 kg per 1 sq. meter, for a leveling layer - 6 kg of mixture per square meter. meter.
Preparation of plaster mortar
The compositions of different manufacturers, despite being very similar, have different components. Therefore, it is better to use products from the same manufacturer at the same facility to avoid unnecessary problems.
Use formulations that are universal in application, and you won’t have to think about additional nuances associated with limitations in the scope of application.
Prices for popular types of plaster
Primary layer sketch
Penoplex is prepared for plastering by laying the primary layer. For this purpose, alkali-resistant PVC mesh should be used. By using PVC, you will insure yourself against the aggressive influence of cement on the exposed mesh. Cement is known to react with many materials.
Cut strips the length of which should be slightly greater than the height of the wall. Please note that installation is done from top to bottom. Apply the strip to the fiberglass with one hand, and apply the solution to the mesh exclusively along the top edge with the other. Thus, the mesh is, as it were, “welded” to the penoplex. As a result, the primary layer should be up to 5 mm thick.
Penoplex insulation scheme: 1 - penoplex slabs, 2 - glue, 3 - dowels, 4 - reinforcing mesh, 5 - primer, 6 - plaster coating
When the top edge is fixed to the plane, apply the solution to the mesh so that it is evenly distributed across the entire width. Every movement comes from top to bottom. Be sure to leave a vertical “tape” clean of the plaster mixture on the right side, because each subsequent strip will overlap the edge of the previous one by almost 1 cm.
As a result, it turns out that the wall will be strip by strip covered over the entire surface with a mesh. Look at all the places on the wall where the geometry of the plane changes (door openings, slopes, window openings) - this is where you should first start laying the mesh.
Reinforcing mesh for foam plastic
Prices for reinforcing mesh for foam plastic
Smoothing the first layer
This procedure must be performed so that the base under the second layer is smooth and monolithic. Moisten the trowel with water and level the entire surface, lightly pressing on the foam. We do not pay attention to the sections of the mesh that appear through the solution to the outside - this is normal. It happens that, after waiting for the solution to dry, experienced specialists prime the primary layer again.
Finishing mixture
The second layer is necessary to complete the alignment of the wall and hide all auxiliary elements, such as reinforcement. The third layer is possible if the quality of the second for some reason does not please the master. But this is only a “rough” finishing before the final stage - the final surface design. The last stage is usually performed using decorative plaster. If the surface was made uneven, then normal installation of the “decoration” is out of the question.
Facade plaster using penoplex
Table. Necessary tools and materials.
| № | Name |
| 1 | Vessel for preparing the mixture |
| 2 | Water container |
| 3 | Spatulas of various sizes |
| 4 | PVC mesh for making a reinforced layer |
| 5 | Oil brush |
| 6 | Paint roller |
| 7 | Penoplex trowel |
| 8 | The plaster composition is either “Ceresit”, or “Ecomix”, or “Stolit” |
| 9 | Polyurethane foam Ceresit CT-84 (850ml) |
| 10 | Primer "Betonkontakt" |
| 11 | Glue CeresitCT 83, or KREISEL 210, or Glims KF, etc. |
What needs to be provided
Before purchasing plastering materials, make a calculation of the quantity purchased. If work is carried out using the established technology, the mixture consumption will be within 4 kg/m2 when laying the initial layer. The second layer will require from 5.5 to 6.5 kg/m2.
This advice: take a spare mixture in case you suddenly need to make a third correction layer.
Step-by-step instructions for plastering penoplex
To plaster the foam yourself, you need to do a series of preparatory steps, one after the other in a strict order.
First step. Ensure good adhesion by treating the surface with a deeply penetrating primer “Betonkontakt” (from manufacturers such as VIOLUX, Ceresit, Feidal). Price 700-1000 rub. for 15 l. A large brush or paint roller is suitable for the job. Before application, you need to shake the composition and pour some part into a suitable plane. Dip the brush into the liquid and apply an even layer of primer to the surface. Liquid should not leak or accumulate in certain areas. The surface is treated with a primer one more time after the first layer has dried.
Second step. Attach the base profile to the wall. You will need a measuring tool (for example, a ruler or tape measure) to mark the points on the wall where you will make holes with a drill. It’s better to take a hammer drill for this - you’ll waste less time.
Types of base profile
Fastening the plinth profile
Third step. To glue foam boards to the wall, mix the adhesive solution. To simplify the process and reduce work time, select a container that fits the entire bag of mixture. It is most convenient to knead with an electric mixer with a collapsible attachment.
Fourth step. As soon as the prepared solution is on the facade, glue the foam boards to it. But it will be more convenient and economical to apply glue to one side of the slab, distributing it evenly along the entire perimeter. And in the middle it’s enough to throw a few “cakes”. Place the insulation against the wall carefully along the pre-set load-bearing supports. It is recommended to slam the stove several times. Use a spatula to remove excess solution.
Insulating the facade with 5 cm penoplex and framing the corners with 2 cm penoplex
Fifth step. Each penoplex plate must be rigidly fixed using a dowel umbrella. This operation is carried out using a drill. 4–6 holes are made throughout the entire area, into which dowel umbrellas are placed. Cover the dowel caps along with all the recesses in the penoplex.
Facade dowel umbrella for thermal insulation
Sixth step. A reinforcing layer is made from perforated corners and fiberglass mesh. Aluminum corners are glued to the outer corners. The same glue is used for the corners and mesh: either Ceresit ST 83, or KREISEL 210, or Glims KF. Price 350-600 rub. for 25 kg. It is necessary to cut out a reinforced fiberglass mesh. It should be taken into account that the canvases should overlap each other no more than 10 cm when they are glued to the slabs. Also leave a distance of almost 10 cm for turning the corners. Apply the adhesive composition approximately 3 mm thick - it is more convenient to do this from top to bottom in small areas at a time. Its thickness should be slightly less than indicated on the packaging by the manufacturer. Compliance with these points ensures that the glue does not have time to set before the completion of the reinforcing layer. Then use a putty knife to glue the fiberglass to the wall.
Advice! If the fiberglass mesh does not have sufficient flexibility and the corners cannot be bent normally, apply liquid glue at the bends to make the fabric more elastic.
Corner with reinforcing mesh for building corners
Seventh step. The adhesive solution is applied to the reinforcing layer. An ordinary spatula will help you apply a layer of glue evenly. In essence, it looks like rough plaster.
Eighth step. A finishing layer (or two) of primer is distributed over the thermal insulation cake. This is done using a wide brush.
Facade facing brick
A description of the types and installation of facing bricks for the facade can be found in this article. We also recommend reading about decorative polystyrene foam elements for facades.
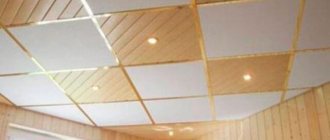
Ninth step. Plastering and painting of the facade is carried out at the final stage of work using a plaster falcon and a paint roller. The primer must dry before doing this. After drying, the finishing is completed with decorative plaster. It is rubbed over after the applied layer begins to set. When the plaster dries, the surface is painted with special facade paint. For these purposes, water-dispersed compositions are used.
Finishing the facade with decorative plaster
At the ninth step, work on insulating and protecting walls from freezing can be considered completed. When insulation is carried out inside a building, instead of plaster, putty is applied to the reinforced layer, followed by decorative finishing (wallpapering or painting). It should be noted that staining is not necessary in all cases. To the question of when to paint and when not to paint, you can find the answer on the packaging of the putty you are using.
Choosing material for home insulation
For thermal insulation, polystyrene foam or mineral wool is used. The first is flammable and can become a pleasant place for various fungi and bacteria, therefore it is not used for buildings made of timber, wood and frame panels. Otherwise, the properties depend on the varieties available on the market. It is permissible to lay slabs of greater rigidity and fire resistance around door and window openings.
It is permissible to lay slabs of greater rigidity and fire resistance around door and window openings.
Expanded polystyrene
Depending on the additives, there are different types: penoplex, teknoplex, extrol. All manufacturers guarantee high quality thanks to approved production standards and mandatory certification. Ideal for brick and concrete walls and gas blocks. It retains heat well and is easy to install: even one person can do the job. Reduces costs for air conditioning and heating, is valued due to its environmental friendliness and high resistance to temperature changes, and protects against noise.
The main disadvantage is flammability; it has a high hazard class, which manufacturers reduce with the help of special granules and additives, but even in this case it smolders, creating very toxic smoke. When burning, droplets cannot even set fire to paper, but inhaling such air is harmful. Expanded polystyrene of flammability class G4 is unacceptable to use, as it poses a threat to human life. It is possible to add special fire-fighting agents during installation, but it is better to immediately purchase slabs marked G3. This material will give people time to close their windows and leave.
It is afraid of ultraviolet radiation, so the conditions do not imply long-term storage on a construction site.
It retains heat well and is easy to install: even one person can do the job.
Mineral wool
Breathable and fireproof material. It weighs more than polystyrene foam, so the sheathing must be stronger. It is used on wooden, expanded clay concrete, aerated concrete and gas silicate facades.
The advantages include low thermal conductivity, non-flammability, resistance to deformation and temperature changes. It is not subject to mold, rotting, or decomposition from sunlight. Cotton wool allows moisture to pass through without absorbing it, but during installation it is advisable to add a layer of waterproofing and treat the slabs with a moisture-repellent agent.
When wet, it loses its thermal insulation qualities. Installation is carried out only with a mask, goggles and gloves so that dust does not get on the skin or into the lungs.
The advantages include low thermal conductivity, non-flammability, resistance to deformation and temperature changes.
Necessary equipment and materials
In order to plaster penoplex, you will need putty and plaster mixture. When working, you will use a spatula, a grater (wooden or plastic), special scissors, reinforcing mesh, a bucket, gloves, a roller and a sponge.
Where to begin?
Any construction process begins with preparation.
- Cleaning and leveling walls.
- Penoplex fasteners
- Mesh installation.
- Preparation of the reinforcement layer.
- Grout.
- Primer
- Finishing with decorative plaster.
Penoplex not only has thermal insulation properties, but also suppresses noise. This photo shows material that has not yet been treated with plaster.
Puttying process
If dry putty is used, it will need to be diluted first. To do this, take a bucket of water and gradually add powder, while the composition is stirred using a construction mixer. The consistency of the putty should resemble mashed potatoes. After the putty has reached the required level of consistency, it will need to be left for 5 minutes, then stirred again and only then begin puttying work.
Important! Before the puttying procedure, it is recommended to treat the surface with a special primer, which will ensure adhesion and a high level of waterproofing.
How to putty penoplex correctly? To apply the solution, you need to use a wide spatula, onto which the mixture is applied with a narrow spatula. When performing finishing cladding, it is extremely important that the new treated area of the surface merges with the previously puttied one. The joints should be almost invisible, so if you have no experience in performing such work, it is better to seek help from specialists. They know how to putty penoplex quickly and correctly.
The maximum permissible thickness of the putty layer when applied is 5 mm; after it hardens, the entire coating is grouted. Grouting is done in a circular motion using an abrasive mesh. It should also be taken into account that grinding is carried out no earlier than 4 hours after applying the composition.
Having finished grouting, you will need to apply the primer again - it will remove settled dust from the surface and make the coating even and smooth. After the primer has dried, you can proceed to painting or other decorative cladding.
As can be seen from the article, penoplex insulation is a good solution. This material can be plastered and puttied without any problems, which provides it with additional protection and an attractive appearance. The main thing is to take a responsible approach to the choice of mixtures for processing and their application, since the result of the work will directly depend on this. If any complications arise, it is better to immediately contact a specialist.
Required tools and materials
First you need to find out what to plaster penoplex with. For external surfaces it is better to choose cement-based mixtures, for internal surfaces - gypsum. In this case, the use of ordinary cement mortars is prohibited, since they corrode the surface of the penoplex. It is necessary to choose special compositions in which cement acts as a binder. You also need to choose the right reinforcing mesh. The product must be resistant to alkaline environments and have high density. At the same time, too rigid meshes are difficult to install on corners and openings, so the best option is a mesh with a density of 160 g per square meter.
The following tools will be needed:
- mixing container and electric drill with mixer attachment;
- spatulas of different sizes;
- paint brush or roller;
- sandpaper or sanding machine.
Tools required for penoplex plastering
Calculation of insulation thickness
Manufacturers offer sheets of standard thickness: 20, 30, 40, 50, 100 and even 150 mm - for each climate zone they select the desired value or a combination of two sheets to create the necessary protection.
Building codes and regulations (SNiP) strictly establish total thermal resistance indicators. Values for regions on the map.
When calculating insulation, the thickness of the walls and the material from which they are built are taken into account. The final formula for calculation looks like this:
Dut = (Rtr/R – 0.16 – Ds/Rs) × Rus, where:
- Dth is the thickness of the insulation;
- Rtr is the standard value of heat transfer, individual for each region;
- R is the technological uniformity coefficient (for a plaster facade we take 0.9);
- Dnes - thickness of the load-bearing wall;
- Rnes - thermal conductivity of the load-bearing wall material;
- Rth is the thermal conductivity coefficient of the insulation.
As can be seen from the formula, it will not be possible to make an accurate and correct calculation quickly. To do this, you need to know all the characteristics of wall materials and insulation. For example, solid sand-lime brick has Rnes = 0.7, and hollow products made from the same material are already 0.52, which is 24% better.
It’s easier to use online calculators, of which there are many on the Internet.
Here are some combinations for the Moscow region without taking into account interior decoration.
| Wall material | Load-bearing wall thickness, mm | Thickness of expanded polystyrene, mm |
| Solid sand-lime brick | 250 (per brick) | 87 |
| Expanded clay concrete blocks | 200 | 90 |
| Expanded clay concrete blocks | 400 | 82 |
| Aerated concrete and foam concrete | 200 | 82 |
| Natural wood | 200 | 52 |
| Concrete | 200 | 94 |
A comparison of the insulating properties of insulation and materials is clearly shown in the picture.
Generalists and specialists.
Penoplex - ideal insulation for floors
The most important thing is that the solution for finishing foam plastic, expanded polystyrene or penoplex must be specialized, designed specifically for working with synthetic insulation.
The choice in building materials stores is quite wide. Prices from different manufacturers vary significantly
It is important to understand that it is worth choosing a high-quality composition. This directly affects the quality of the wall covering and how reliable it will be.
It is convenient to use a universal one, suitable for all work performed in the process of plastering synthetic insulation. Options when one composition is used to glue the reinforcing mesh, and another when creating the leveling layer, are also acceptable
It’s important to just decide what’s right for you and what’s more profitable for you.
More about the process and material
Penoplex screed
Penoplex is a popular insulation and sound insulator these days. But after installation it sometimes has to be processed additionally
What is penoplex? The answer to this question is known to many today. This is an excellent material that has decent noise insulation and thermal insulation characteristics. However, the thermal insulation parameters are comparable to polystyrene foam, although sellers and manufacturers often deny this. Of course, there are certain differences, but they are not critical. Also, it is recommended to read the material about different options for finishing facades.
You can safely plaster penoplex if this is the task. The advantage of this material is its high level of strength. At the same time, its surface is smooth, so the products must be plastered carefully.
This material is also actively used for basement work.
Experts recommend using reinforcing mesh, it is also worth using an adhesive primer (the popular “Betonkontakt” is suitable), and it is customary to use a special adhesive composition as plaster.
Some home craftsmen confidently declare that ordinary plaster is a suitable material and the answer to the question of how to plaster penoplex on the outside.
That is, such experiments are carried out even without using a grid.
Delaminations and other defects are also observed. Therefore, the conclusion is simple: you don’t need to do this; you should approach the plastering process thoughtfully.
Putty and insulation of walls. Rust repair
Putty is a well-known term used to describe a material with high ductility. It is similar to dough or clay and is widely used as a protective undercoat for surface paint, as well as a sealant and filler. Putty is necessary for the strength, durability and smoothness of the wall surface. Our repair school will teach you how to putty walls easily!