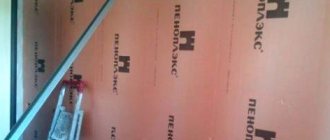
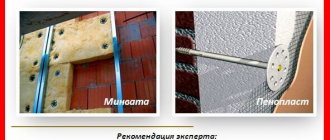
Thermal insulation work is associated with a number of difficulties. One of these is the choice of insulation. Recently, penoplex, which is made by extrusion, has become a popular material for facade insulation, which gives it special properties. Due to its high quality and strength characteristics, you can perform insulation using extruded polystyrene foam yourself, without involving outside specialists.
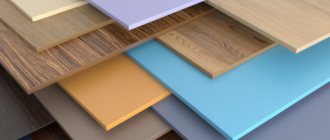
Reliable thermal insulation penoplex
Step-by-step instructions for plastering penoplex
To plaster the foam yourself, you need to do a series of preparatory steps, one after the other in a strict order.
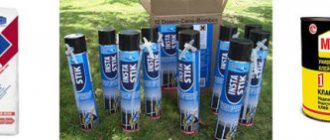
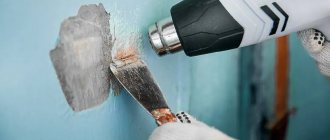
First step. Ensure good adhesion by treating the surface with a deeply penetrating primer “Betonkontakt” (from manufacturers such as VIOLUX, Ceresit, Feidal). Price 700-1000 rub. for 15 l. A large brush or paint roller is suitable for the job. Before application, you need to shake the composition and pour some part into a suitable plane. Dip the brush into the liquid and apply an even layer of primer to the surface. Liquid should not leak or accumulate in certain areas. The surface is treated with a primer one more time after the first layer has dried.
Betonokontakt KNAUF
Second step. Attach the base profile to the wall. You will need a measuring tool (for example, a ruler or tape measure) to mark the points on the wall where you will make holes with a drill. It’s better to take a hammer drill for this - you’ll waste less time.
Types of base profile
Fastening the plinth profile
Third step. To glue foam boards to the wall, mix the adhesive solution. To simplify the process and reduce work time, select a container that fits the entire bag of mixture. It is most convenient to knead with an electric mixer with a collapsible attachment.
Fourth step. As soon as the prepared solution is on the facade, glue the foam boards to it. But it will be more convenient and economical to apply glue to one side of the slab, distributing it evenly along the entire perimeter. And in the middle it’s enough to throw a few “cakes”. Place the insulation against the wall carefully along the pre-set load-bearing supports. It is recommended to slam the stove several times. Use a spatula to remove excess solution.
Insulating the facade with 5 cm penoplex and framing the corners with 2 cm penoplex
Fifth step. Each penoplex plate must be rigidly fixed using a dowel umbrella. This operation is carried out using a drill. 4–6 holes are made throughout the entire area, into which dowel umbrellas are placed. Cover the dowel caps along with all the recesses in the penoplex.
Facade dowel umbrella for thermal insulation
Sixth step. A reinforcing layer is made from perforated corners and fiberglass mesh. Aluminum corners are glued to the outer corners. The same glue is used for the corners and mesh: either Ceresit ST 83, or KREISEL 210, or Glims KF. Price 350-600 rub. for 25 kg. It is necessary to cut out a reinforced fiberglass mesh. It should be taken into account that the canvases should overlap each other no more than 10 cm when they are glued to the slabs. Also leave a distance of almost 10 cm for turning the corners. Apply the adhesive composition approximately 3 mm thick - it is more convenient to do this from top to bottom in small areas at a time. Its thickness should be slightly less than indicated on the packaging by the manufacturer. Compliance with these points ensures that the glue does not have time to set before the completion of the reinforcing layer. Then use a putty knife to glue the fiberglass to the wall.
Corner with reinforcing mesh for building corners
Seventh step. The adhesive solution is applied to the reinforcing layer. An ordinary spatula will help you apply a layer of glue evenly. In essence, it looks like rough plaster.
Eighth step. A finishing layer (or two) of primer is distributed over the thermal insulation cake. This is done using a wide brush.
Ninth step. Plastering and painting of the facade is carried out at the final stage of work using a plaster falcon and a paint roller. The primer must dry before doing this. After drying, the finishing is completed with decorative plaster. It is rubbed over after the applied layer begins to set. When the plaster dries, the surface is painted with special facade paint. For these purposes, water-dispersed compositions are used.
Finishing the facade with decorative plaster
At the ninth step, work on insulating and protecting walls from freezing can be considered completed. When insulation is carried out inside a building, instead of plaster, putty is applied to the reinforced layer, followed by decorative finishing (wallpapering or painting). It should be noted that staining is not necessary in all cases. To the question of when to paint and when not to paint, you can find the answer on the packaging of the putty you are using.
Additional information about gluing penoplex
Gluing the material and then mechanically fastening it is a more reliable approach than any other technology. Work should start from the bottom corner. To do this, you should prepare a small and large spatula. The first thing you will do is apply the solution to the large tool.
If the walls are perfectly leveled, then you can apply the glue with a notched trowel. If you decide to insulate the outside walls of your house with penoplex, then it is important to check the level differences; they should be less than 1 cm. In all other cases, the glue is spread in thick piles.
The mixture is applied to the walls, and not to the sheets, because the latter are not so rough and therefore may not adhere firmly enough. The amount of glue can be adjusted depending on the difference in the facade. The sheet is applied to the surface and pressed well against it. On penoplex, for tight joining of sheets at the ends, quarters should be selected that eliminate the formation of cold bridges.
External mounting technology
Facade adhesive for mesh - The best facades of private houses
It is quite possible to insulate the facade of a house with your own hands. The main condition is to follow the technology of laying penoplex. First, let's look at how to cover a “wet” façade with penoplex.
First, you should install a ready-made profile along the perimeter of the facade (at the bottom). Thanks to this detail, it will be more convenient for you to align the bottom row of insulation. It is recommended to install the profile using dowel nails
It is very important to position the guide correctly, so it is recommended to use a building level during all work. Next, the adhesive foam needs to be applied to the insulation around the perimeter and at the central point. It is advisable to leave several strips of adhesive in the center. After this, you should attach the penoplex to the wall
It is worth starting such work starting from the corner. Insert the slab into the guide profile and then press it against the wall. Be sure to check the position of the penoplex using a level.
- Then you can proceed to installing the second row of insulation:
- It should be installed with a slight offset (like a checkerboard layout).
- When all the floors are covered with insulation, you need to install penoplex on the slopes. To do this, cut the slabs into the required dimensions. Next, you need to seal the window and door openings with cut materials.
- Then you need to additionally fix the penoplex on the walls. To do this, you can use special dowels, which are popularly called “fungi” or “umbrellas”.
- To install the dowel, you need to drill a hole in the ceiling, breaking through the insulating material. The hole must correspond to the dowel (its diameter). As for the length, it should be a little longer - 5–10 mm.
- Insulation materials located on slopes do not need to be additionally secured with dowels. This completes the process of laying insulation on the “wet” façade.
When insulating a suspended facade, you should also adhere to a certain technology.
- First of all, as in other cases, the floors should be prepared.
- It is necessary to mark the floors for the correct location of the racks in the form of vertical stripes. The ideal step between these parts would be 50 cm.
- On the indicated lines on the walls you need to attach brackets with a similar vertical distance of 50 cm. To fix these elements, you can use dowel nails.
After this, you can begin covering the walls with penoplex:
It is simply strung on brackets. With this method it is not necessary to use glue at all.
It is only important to ensure that each tile is captured by at least one dowel. If you are insulating a wooden house, then it is not necessary to foam the cracks: these elements will provide good vapor permeability characteristics of the insulation, which are especially important for wood floors. If the walls in the house are made of brick or other similar material, then it is recommended to cover all cracks and joints with polyurethane foam. It is recommended to cover the surface of the penoplex with a vapor barrier material if you are insulating a wooden building. In this case, the additional film should be secured to the umbrella dowel. Next, you need to fix metal racks or wooden blocks in the brackets.
At this point, the insulation of the suspended facade can be considered complete. After this, it is permissible to proceed to the installation of decorative finishing materials. For this purpose, profile structures are most often used, on which the sheathing itself is installed, for example, lining.
Penoplex wall insulation
The use of modern insulation for external walls Penoplex® is the most effective way to save heat and save on electricity or other types of fuel. Insulation for wall enclosing structures of a house PENOPLEX® is an ideal solution for use in individual construction. PENOPLEX® WALL slabs with a milled surface are recommended for use under plaster, for installation of clinker tiles or for finishing with stone (natural or artificial). PENOPLEX® WALL gives the best adhesion effect to finishing materials. This material will allow you to implement the most daring design solutions for the facade of a private house. If the finishing of the walls is: siding, imitation timber or well masonry (brick lining), then in this technical solution you need to use PENOPLEX COMFORT®.
- Low thermal conductivity coefficient – 0.034 W/(m×°K), which means consistently high thermal insulation properties.
- Moisture resistance.
- Resistant to temperature changes and can be installed in any weather.
- Low vapor permeability.
- Light weight slabs with the best thermal conductivity coefficient.
- Convenient plate geometry and ease of installation.
- The presence of an L-shaped edge on all sides, which allows the slabs to be tightly joined like a construction set.
- Biostability.
- Durability.
- Environmentally friendly.
The thermal insulation material penoplex has fairly high characteristics and has a number of advantages over many other thermal insulators, as a result of which it has recently become widespread. However, its use for external insulation of housing is associated with some difficulties and has a number of important nuances.
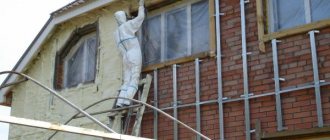
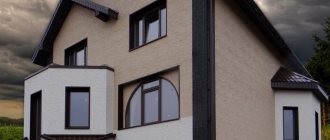
Insulation of external walls of a house with penoplex
Therefore, in this article I decided to tell you in detail how to properly insulate the outside of a house with penoplex and avoid the mistakes that beginners often make.
Features of installation in different areas of application
How to properly install polystyrene foam on the facade of a house
The specifics of working with penoplex depend on the purpose of the insulation and the upcoming conditions of its operation. Compliance with the scheme and technology for placing the thermal insulation layer helps to maximize the properties of extruded polystyrene foam.
In itself, insulating the walls from the inside of the room is an undesirable process, which should be resorted to only if thermal insulation from the facade is impossible. Internal installation of insulation has significant disadvantages:
- the point of condensation accumulation moves to the side into the thickness of the wall, and increased humidity leads to its destruction;
- the usable area of the room decreases;
- supporting structures remain unprotected from exposure to cold air.
Negative effects of condensation on the wall
Thermal insulation algorithm from the inside:
- Prepare the base:
- remove old finish;
- fill cracks, clean from dirt and dust;
- treat the surface with a primer.
- Cut the penoplex and prepare the adhesive solution.
- Apply glue to the wall and insulation boards.
- Glue the penoplex to the wall, check the evenness of the adjoining sheets in the places of door and window openings.
- Additionally, secure the material with plastic dowels.
- Plaster the walls.
When working, you must consider:
- the optimal thickness of penoplex for insulating walls from the inside is 3-5 cm;
- it is necessary to ensure normal air circulation in the room - install wall valves or an air handling unit.
“Rolling in” the insulation with a needle roller
The technology for installing extruded polystyrene foam boards on the outside of the house is similar to the process described above. However, there are some nuances:
- The recommended thickness of penoplex, according to SNiP 23-02-2003, is at least 12.4 cm.
- To increase the adhesion of the insulation to the wall surface, the slabs must first be “rolled in” with a needle roller.
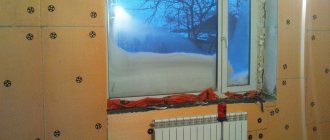
- Installation of penoplex is carried out after installing window sills, ebbs and finishing slopes.
- The support for the insulation is the base profile, which is selected in accordance with the thickness of the material.
- The cladding is carried out with tile moisture-resistant adhesive, for example, Ceresit CT-83.
- The final fastening with dowel umbrellas is carried out after the glue has hardened - after 3 days.
- The joints between the sheets must be foamed.
- When using two layers of insulation, the layout of the slabs is done in a checkerboard pattern.
- A reinforcing mesh is glued onto the fixed insulation, and a leveling layer and finishing are placed on top.
Video: using penoplex to insulate walls outside
The technology of floor insulation depends on its base. Thermal insulation of the floor on the ground is carried out in the following sequence:
- Cover the soil base with gravel 40 mm thick.
- Lay a sand cushion 10 cm deep.
- Thoroughly compact the base.
- Lay out the penoplex, insulating the seams with metallized tape.
- Lay the waterproofing membrane and secure the joints with tape.
- Place reinforcing composite or galvanized mesh.
- Place beacons for the screed and fill with cement-sand mortar.
- After the screed has dried, cover the floor with finishing.
Scheme of floor insulation on the ground
Insulation of a concrete floor is carried out in several stages:
- Inspect the floor slabs for damage.
- Level the base, removing cracks, recesses, protrusions and remove dust from the surface.
- On the first floor, the floor is covered with waterproofing film, and on the second floor and above, polystyrene foam is laid directly on the concrete.
- Place the insulation on the glue, placing the sheets offset so that the seams do not coincide.
- Lay the waterproofing film and fill the floor with a self-leveling mixture.
- Lay down a clean surface.
Insulation of concrete floor
Laying a water-heated floor involves placing layers in the following sequence:
- Fill the reinforced concrete floor with a leveling screed.
- Lay foam sheets and cover them with polyethylene, seal the joints.
- Place reinforcing mesh over the entire area of the room.
- Arrange the heating elements in a spiral and fill them with heat-resistant screed.
- Cover the floor with a finishing finish - tiles or laminate.
Layout of pipes when installing heated floors
Knowing the purpose, loads and operating conditions of penoplex, it will not be difficult to choose the right insulation. It is quite possible to do the installation of penoplex yourself, with the exception of high-rise facade work - in this case it is better to resort to the help of construction climbers.
Subsequent nailing of insulation
Mechanical fasteners are installed 3 days after attaching the sheets with glue, during which time the composition will set well. If you plan to do the work yourself, then this time will be freed up by itself, because you will insulate the facade in sections. This is due to the fact that half the work is done from the ground, while the other part is done using scaffolding and scaffolding.
When home craftsmen decide to insulate the foundation of a house from the outside with penoplex, they choose mechanical fasteners. It is better to use completely plastic ones, because their price is lower, in addition, they do not contribute to the transfer of cold, unlike metal. However, you still shouldn’t choose the cheapest dowels, because they will bend when driven in. Holes are drilled in the selected area using a 10 mm drill. The depth should be 2 cm greater than the length of the fungus. One sheet will require about 6 umbrellas; if necessary, you can make more holes, which especially applies to areas in the corners.
Penoplex facade insulation technology
Expanded polystyrene 30 mm
Installation of insulation boards on the wall of a house
Preparatory stage
- Preparation of the working surface of the base: removal of dust, mastic and oil stains, mortar residues, peelings. It is better to remove paint coatings and salt deposits mechanically down to the very base.
- Mold and fungal lesions are treated with special compounds. Plant deposits of moss and algae are effective agents with bactericidal properties.
- Inspecting the surface of the facade with a plumb line for the presence of irregularities. Leveling by plastering with a solution of cement and sand.
- Metal structures that will be hidden under the slabs are coated with anti-corrosion paint and varnish.
- Unplastered surfaces are treated with a fixing primer.
- Clean solid reinforced concrete bases from grease and prime them.
- Prepare brackets for hanging structures, protection of window grilles, various signs and signs.
Leveling façade irregularities
In practice, several alignment methods are used:
- Special plaster solution. In this case, installation of the slabs is possible no earlier than after four weeks.
- By adjusting the thickness of the slab according to the calculated value.
- Special linings with leveling properties.
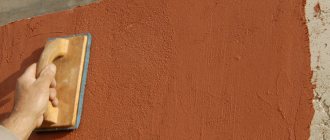
Penoplex plaster
Installation of insulation boards on the surface of the facade
- Base profiles are secured with dowels and nails.
- Penoplex slabs are cut. Only whole slabs are used around door and window openings.
- The slabs are fastened from bottom to top in rows with special glue according to the principle of brickwork. If necessary, the surface of the slab is treated with sandpaper.
- It takes three days for the glue to dry. After this, the slabs are fastened with dowels-nails, each in the corners and in the center.
Arrangement of connections along the perimeters of door and window openings
Thermal insulation in the corners of door or window openings is made only from whole slabs with fragments cut out on site
It is recommended to pay attention to the following:
- The overlap of insulation boards on the frame of a window or door block must be at least 20 mm.
- Insulation material is also installed on the slopes of windows and doors.
- A connection profile is first installed on the window and door frames. The slabs are installed close to the inside.
- In the corners of the opening the profile is installed at 45 degrees.
The installation of insulation of the building facade is completed with cladding, which is carried out by plastering in two layers over a metal mesh used as a base.
The use of modern insulating material - penoplex for insulation of building facades and walls ensures guaranteed effective maintenance of thermal conditions in the premises. In addition, to a certain extent, the problem of ensuring the durability of structures and the safety of building structures and equipment is being solved.
Of significant practical importance is the fact that the installation of this insulation costs much less than using other materials. In addition, it is quite possible to carry out the process of insulating the facade with penoplex with your own hands, without using the services of specialized organizations.
A few words about extruded polystyrene foam
Before we begin the technology of external insulation of a house, let’s consider what penoplex is. I’ll say right away that it is more correct to call this material extruded polystyrene foam, since “Penoplex” is the name of the manufacturing company of this insulation.
Extruded polystyrene foam is made from ordinary polystyrene foam (foam plastic). As a result of special heat treatment, it acquires higher properties, and along with them, properties that affect the installation technology and the area of application of the material.
These properties primarily include:
- low level of moisture absorption;
- smooth structure.
Penoplex has a smooth structure
On the one hand, this allows the material to be used in unfavorable operating conditions; in particular, it can be used for façade insulation. But, on the other hand, penoplex has poor adhesion. Therefore, it is not even a façade material, much less intended for “wet” finishing.
The most common mistake made by beginners is that when insulating a facade, they work with penoplex in the same way as with ordinary polystyrene foam. Some construction resources “help” with this, for which would-be specialists write articles. The result of this approach is clearly visible in the photo below.
The photo shows the result of improper reinforcement of penoplex
However, this does not mean that insulating the facade using the “wet” method using penoplex will have to be abandoned. The technology that I will discuss below will allow you to create a reliable and durable finish on top of this insulation.
Beginners probably have a question: why use penoplex if it can be replaced with polystyrene foam, which is cheaper and has good adhesion?
The fact is that extruded polystyrene foam has several important advantages over polystyrene foam:
- has higher strength, and accordingly, the façade finish is more durable;
- is a vapor-permeable material;
- thermal conductivity is lower than that of foam.
Therefore, it makes sense to use penoplex for “wet” finishing of the facade. As for the “dry” insulation, which is used for a suspended facade, this procedure practically does not contain any special features.
Advantages
If you place a thermal insulation layer inside the house, the dew point will shift. This indicator determines the temperature value below which condensation occurs. In this case, the dew point moves indoors. This means that the humidity will increase, the walls will begin to “sweat” and mold will form. Internal insulation reduces the space of the room.
Even a small thickness of insulation can significantly reduce the square footage, because to thermally insulate a wooden building you will need to install sheathing. Another factor is the deterioration of the internal microclimate. The use of even modern thermal insulation materials will not allow wood to “breathe”. Insulation from the outside eliminates all of the above factors.
Decorative cladding
If you are planning to insulate a brick house from the outside with penoplex, then you will also need to carry out decorative finishing of the thermal insulation. It is important to follow a certain algorithm. The facade is first treated with a primer, and then the surface is covered with a layer of plaster. The composition is diluted in water.
After the plaster has set, the surface is rubbed with sandpaper. Once the layer has dried, you should use a roller to apply the paint. Such a finish should be two-layer. Coating should be done with extreme care, applying layers evenly. At this point, finishing the facade using the wet method can be considered complete.
Preparatory work
Before laying penoplex, it is necessary to properly prepare the base. This stage of work cannot be neglected, otherwise the insulation will not adhere well to the walls. Let's take a closer look at how to properly prepare floors for the installation of this thermal insulation coating.
First, you need to stock up on all the necessary tools and equipment before proceeding directly to the preparation and installation of penoplex on the “wet” facade. To carry out all work you will need the following items and materials:
- high-quality adhesive mixture;
- special adhesive primer;
- corners;
- deep penetration primer mixture;
- reinforced mesh (it is advisable to stock up on a fiberglass product);
- dye;
- plaster.
If you plan to install penoplex on a suspended base, then you will need the following tools and materials:
- wooden slats (metal profiles are possible);
- brackets;
- vapor barrier film;
- glue foam;
- antifungal impregnation designed specifically for wood processing;
- decorative finishing material (this can be lining, vinyl siding, block house and other coverings).
If you have stocked up on all the necessary materials and tools, then you can proceed directly to laying the insulation on the walls. First, let's look at how this work is done with a wet facade.
- Remove from the walls all foreign parts and elements that may interfere with further cladding and finishing.
- Now you need to form the most reliable and strong base for the insulation. For example, if you suddenly notice that there are pieces of plaster mixture falling off on the walls, then they definitely need to be removed.
- Then you should walk along the facade with a damp cloth. It is acceptable to use a vacuum cleaner to help remove excess dust from the floors.
- Next, the bases need to be thoroughly primed with a special deep penetration façade primer. This work can be carried out conveniently using a roller or brush. Apply primer in a thin layer when preparing. After the first layer has dried, proceed to applying the second.
When designing a curtain wall, preparation for laying insulation occurs as follows:
- remove all dirt and dust from the base;
- treat the walls with special impregnation;
- insulate the roof gaps by filling them with suitable thermal insulation materials.
Penoplex can be used to sheathe not only the façade bases, but also the interior of the home. To do this you will need the following materials:
- high-quality penoplex (it is advisable to buy material with improved characteristics);
- glue;
- primer;
- plaster.
In this case, it is also necessary to prepare the walls for laying insulation. To do this you need to do the following:
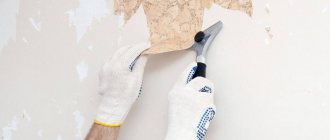
- remove any old finishing from the floors, be it wallpaper or paintwork;
- make sure the walls are even: they should be smooth, without drops or potholes (if any are present, they should be removed using plaster and primer);
- if there are protruding parts on the ceilings, then they need to be thoroughly cleaned;
- After this, it is recommended to prime the walls twice so that the penoplex adheres to them better. After completing all of the above steps, you can glue the insulation.
What materials will you need?
If you are thinking about the question of how to insulate a house from the outside with penoplex with your own hands, then you need to follow a certain algorithm. At the first stage, materials are prepared. It is very important to choose the right adhesive composition; it is better to use foam. You will also need the following materials:
- adhesive primer;
- a primer that penetrates deeply into the structure;
- dye;
- corners;
- reinforced fiberglass mesh;
- plaster.
The façade must be insulated using 50 mm material. This value is the minimum. The slabs are laid in 2 layers, and it is necessary to ensure that the seams do not overlap.
Classification of insulation by purpose
Along with the marking described above, there is another system for designating different types of penoplex. It is simpler, and the name of the insulation indicates its scope of application.
Penoplex-Wall (series C) is primarily used for external insulation of walls and for the installation of plastered facades. Finishing the base and internal partitions improves sound insulation and energy saving of the house.
Characteristics of K series penoplex
Penoplex-Roofing (series K) is used as a thermal insulation layer for a roofing pie or insulation for an attic floor. The density of the brand is 28-33 kg/cubic. m, so the material does not significantly burden the rafter system.
Technical characteristics of Penoplex-Foundation series F are designed for insulation of the basement of a house and foundation. Suitable as a thermal insulation material for septic tanks where there is a risk of freezing of the body. Insulation materials of category F are used for improving garden paths on a sand-cement base.
Qualitative properties of Penoplex Foundation
Penoplex-Comfort is designed for internal and external home insulation work. It is considered universal and is in demand for thermal insulation of balconies, loggias, roofs and walls. Minimal water absorption makes it indispensable for insulating “damp” rooms.
The density of the Penoplex base of the Comfort series is in the range of 25-35 kg/cu. m, and the remaining parameters correspond to insulation category 31C.
Characteristics of Penoplex-Comfort
Carrying out reinforcement
External finishing of insulation must begin with reinforcement. First you'll start on the slopes. To do this, Ceresit CT 83 glue is diluted in water. The resulting composition is applied to the slope to which the mesh is applied. The same scheme must be followed when reinforcing façade walls. After this, finishing is carried out.
Tools used for work
The technology of insulating walls with penoplex from the outside does not present any difficulty, so it is quite possible to carry out all the work yourself, saving on turning to professional builders.
To complete this work you will need the following:
- High-quality penoplex.
- Foam glue or SSS glue (dry construction mixture).
- 6 dowels for each slab.
- Toothed and needle spatulas.
- Sandpaper or needle roller.
- Hammer.
- Fine-tooth hacksaw and steel knife.
- Drill or screwdriver.
- Starting bar.
- Reinforcing mesh.
- Primer.
- Finishing material.
Working with the surface of the material
If you are faced with the question of how to insulate a private house from the outside with penoplex, then you should also take care of the appearance of the facade. Since polystyrene foam has a smooth surface, it needs to be roughened so that the cladding fits well. The work is performed in a certain sequence. First, the surfaces are treated with sandpaper; in addition, you can use a needle roller.
An adhesive primer is applied to the base. The joints of the slabs should be filled with adhesive foam. Perforated corners are glued to the outer corners. During their installation, you should use a building level, then the craftsmen begin installing the reinforcing mesh.
Technology for insulating a brick house with penoplex from the outside
Insulation of brick walls with penoplex can be carried out using various methods:
- Using the “wet facade” method with further finishing with plaster.
- Using the “ventilated facade” method with siding cladding.
“Wet façade” insulation method
The wet facade method is based on the use of mixtures and compounds that are diluted in water for insulation: this is glue for fixing foam boards and a layer of plaster with a reinforcing mesh.
The output is a multilayer structure without air layers.
Multi-layering is a feature of this method, in which each layer plays a specific role:
- adhesive – special glue or dry mixture diluted with water, fixes the structure;
- thermal insulation – foam layer;
- reinforcing – painting mesh, gives strength and facilitates further wall finishing work;
- plaster – a layer of plaster that protects the insulation layer from snow and wind and mechanical damage;
- decorative – finishing layer.
Insulation technology using this method:
- Cleaning walls of old coating and dirt.
- Applying a layer of primer.
- Fastening the insulation boards with glue (for example, Teploklue or Cerezit CT-43).
- Laying the slabs begins from the bottom corner of the wall. For external brick walls, it is recommended to take penoplex slabs 5-6 cm thick. An adhesive layer is applied to the sheet, the sheet is applied to the wall and held for 30 seconds.
Important: foam sheets must be mounted tightly to each other. The glue must be allowed to dry for 3 days before the next step.
- The glued sheets are additionally fixed with plastic dowels with an umbrella cap.
- Fastening with special glue of the painting mesh.
- After the glue dries, within 1-4 days, apply a layer of plaster.
- Applying finishing – façade primer and wall painting.
The complete technology for applying plaster on penoplex is described in the article “Plastering on penoplex is the best way to protect the facade from bad weather.”
Insulation method “ventilated facade”
This method is used when insulating a house with penoplex under siding.
Siding is a modern material for finishing external walls. It perfectly protects the facade of the building, easily withstands the effects of snow, wind and rain, is easy to clean and retains its original appearance for many years.
Insulation of a brick house with penoplex under siding takes place in several stages:
- The walls are cleaned of dirt and old coating, then a layer of primer and antiseptic is applied to them.
- After they dry, the sheathing is mounted on the walls.
- Penoplex slabs are cut and laid between the sheathing beams, secured with special glue.
- After the glue has dried, the slabs are fixed with dowels with an umbrella cap.
- A sheathing is installed under the siding, on which the panels are installed.
Important: installation of siding panels can be done at temperatures from -10 degrees. More detailed technologies for insulation with slab materials are described in the article “Technology for insulating building facades with foam plastic: recommendations from experts,” t
j. technologies are identical
More detailed technologies for insulation with slab materials are described in the article “Technology for insulating building facades with foam plastic: recommendations from specialists,” since the technologies are identical.
Laying protective composition
Reinforced mesh is laid on penoplex under the plaster.
Trading sites offer a large selection of finishing materials that differ in purpose, performance characteristics and cost. Considering that the finishing of a house is done for decades, you should choose the most expensive, high-quality and frost-resistant materials. To increase the protective properties of penoplex, it is recommended to buy mixtures with ball fillers. They will improve the thermal insulation of the building and allow thicker layers of coating to be made without increasing the weight of the entire structure. Light solutions with a thickness of 2 cm weigh up to 5 kg/sq.m. after complete drying. This eliminates the need for expensive work to strengthen the foundation.
Step-by-step instructions for exterior finishing of reinforced slabs:
- Clean the base from any dust and dirt that has settled on it. Treat it with a primer. If the solution is immediately absorbed, repeat the procedure. Wait until the surface is completely dry.
- Prepare spatulas, a hammer drill with a mixer, and a dielectric mat. Supply electricity. Provide a level platform for installing the stepladder. Wear gloves, goggles and a respirator.
- Mix the solution according to the manufacturer's instructions. You should pay attention that there are no lumps in it. The consistency must be precisely maintained, since a mixture that is too liquid will flow down the wall, and a thick mixture will harden quickly and be difficult to smooth out.
- Chop the glass, add it to the solution and mix well again. This technique will create a pleasant diffused glow of the facade and will prevent birds and insects from destroying it.
- Start applying plaster. The process is performed from the bottom up to create support for the newly applied layers against slipping. The thickness of the applied material must be at least 2 times thicker than the size of the filler, which is responsible for thermal conductivity or texture formation.
- Surface structuring. It is carried out in accordance with the intended pattern using a grater, spatula or other device purchased for this purpose. When forming a decorative protective layer, it is necessary to act continuously so that the coating turns out uniform and without errors.
- Painting of decorative and protective coating. To do this, use a roller, brush or spray gun. Additional finishing gives the surface additional strength and resistance to moisture.
Another option for applying a protective coating is to use panels made of steel, plastic, artificial stone and natural wood. First, boards are fixed to the walls in a vertical orientation. For ease of work, the distance between them is taken to be 100 cm - the width of the foam sheet. If a material of a different configuration is purchased, the lathing is adjusted to its dimensions. After priming, the surfaces of the boards are coated with glue and inserted into the cavities from bottom to top. By analogy with the “wet facade” technology, cracks are sealed and plates are fixed with hardware. Then a windproof film is placed on the frame. The final stage is covering the sheathing with metal siding or other protective coating of the selected texture.
External thermal insulation
Do-it-yourself wall insulation can be divided into five main stages:
- wall preparation;
- vapor barrier sheathing;
- arrangement of sheathing;
- installation of penoplex;
- home decoration.
Before starting work, it is necessary to check the foundation. The base for the heat-insulating device must be reliable.
Preparing the walls
The wood must be dried. If there is paint on the surface, it must be removed. The joints between the beams are also checked. They must be caulked along their entire length.
If there are protruding parts on the outside, they must be cut down. The last step in preparing the surface should be treating the wood with special impregnations.
Sheathing with vapor barrier
Along the entire perimeter of the walls, wooden slats with a thickness of 25–30 mm are installed. The step between them should be no more than 1 meter. A vapor barrier is laid on the slats and secured with nails or a stapler.
Due to the stuffed slats, a gap is formed between the logs and the vapor barrier material for ventilation.
Arrangement of sheathing
It must be made from bars measuring 25×50, 50×50 or metal profiles. The arrangement of the sheathing is necessary for the installation of thermal insulation material. The pitch between the padded beams is selected according to the width of the insulation sheets.
In order for the penoplex to be firmly installed in the formed openings, the size between the beams should be 5 cm smaller.
Installation of penoplex
A heat insulator is placed in the openings between the guides. If two thermal insulation layers are used for insulation on the outside, then the insulator can be laid in two ways:
- sheets of two layers are placed offset to avoid cold bridges;
- the arrangement of two layers is carried out in perpendicular directions.
Let's take a closer look at the second do-it-yourself installation option. The lathing is laid on the vapor barrier first in a horizontal direction and the first layer of penoplex is laid into it. Then vertical bars for the second row of thermal insulation are installed perpendicularly on top of it.
Finishing
Before you begin finishing work on the house, you need to install another row of sheathing. It is nailed directly to the base of the building. This sheathing is necessary to create ventilated channels. After its arrangement, you can begin cladding the outside of the building with finishing materials; siding is most often used for this work.
Which insulation method to choose
When building housing, especially in the northern regions, it is necessary to insulate the walls. There are two ways: external and internal. Each has its own advantages.
More often, houses are insulated from the outside. Advantages:
- An additional layer of thermal insulation protects the wall from environmental factors. In this case, the base is not subject to erosion due to wind or erosion by precipitation.
- Living space is preserved. This is important for small buildings. When covering all the walls, a large area is taken away.
- No steam on the walls. Residential buildings generate large amounts of condensate. Penetrating through the outer layers of finishing, it lingers on the heat insulator and spoils it.
- When the walls are insulated from the outside, heat is better retained inside the room.
During work, it is necessary to choose a time so that there are no showers or frosts. This is the only drawback of the method.
If you choose internal insulation, the area will be reduced. There are other characteristics and features that need to be taken into account:
- There is a high probability of condensation forming indoors. Therefore, you will have to additionally install a vapor barrier layer and leave a gap for liquid movement.
- The surface of the walls from the outside is exposed to environmental factors that cause its deterioration.
Therefore, the optimal method of insulation is to install a heat insulator outside. However, there are situations where this is not possible. For example, if the house is made of carved timber or has complex decor, which is undesirable to hide under sheet material. The only way out is insulation with penoplex from the inside.
Insulation pie
Is penoplex suitable for insulating a wooden house?
Since ancient times, in order to insulate a wooden building, it was lined with brick. Such buildings can often be found in villages and holiday villages. However, old methods are being replaced by new technologies that allow for quick thermal insulation and the beginning of effective heat conservation. Today, it is increasingly practiced to insulate a wooden house with penoplex, which, however, does not in any way interfere with giving it a “traditional” look using facing bricks. What other options are there for using a material such as penoplex for a wooden house? In a wooden house, you can insulate the facade and interior walls, ceiling and floor with penoplex. You can read more about how to insulate the floor of a frame house with extruded polystyrene foam here. We'll tell you more about the rest below.
Insulation of a wooden house from the outside
Insulation of the outside walls of a wooden house with penoplex is carried out in compliance with certain rules. The structure itself is built on the principle of a ventilated facade. In addition, it is possible to use extruded polystyrene foam for stone cladding. This means that there must be a gap between the penoplex and the wooden wall of the house to ensure air flow. If this is not done and a wooden house is insulated directly along the walls with penoplex, moisture condensation and, as a result, the “start” of the rotting process can hardly be avoided.
- Insulation of a wooden house from the outside with penoplex begins with the installation of sheathing made of 50x50 mm wooden blocks.
- Insulation boards are laid in the sheathing. If the house is made of logs, then their unevenness will create conditions for ventilation. If it is a flat beam, then slats should be laid between it and the penoplex to create the necessary gap.
- The exterior finishing of a wooden house with penoplex is completed with cladding - siding, blockhouse or the all-familiar brick.
Particularly worth mentioning is frame houses. Along with the widespread use of mineral wool, penoplex for insulating a wooden frame house has also become widespread. At the same time, it can be mounted both outside and inside. Finishing the outside of a wooden house with penoplex is carried out using the technology already described, while the inside layer of insulation is usually covered with plasterboard, fiberboard or other materials for interior decoration.
Insulation of a wooden house from the inside
If insulating the facade of a wooden house with penoplex from the outside is impossible for some reason, then it costs nothing to transfer this process inside. The installation methods are the same here. As already mentioned, the internal insulation of the walls of a wooden house with penoplex is completed with a layer of plasterboard, lining, and decorative panels. The ventilation gap between the insulation and the wall is also important.
A good move to save heat would be not only the floor with extruded polystyrene foam, but also the ceiling and walls. In a wooden house, this material is quite acceptable for a wide variety of structures, as they say, from floor to ceiling. Its benefits are as follows:
- Small thickness saves space. For example, insulating a ceiling with sawdust requires a layer of at least 20 cm, while the thickness of extruded polystyrene foam requires much less.
- In cases where work can only be carried out from below, insulating the ceiling in a wooden house with penoplex foam can be a way out of the situation.
- Simple installation on the lathing does not require much effort.
Thermal insulation of the walls of a wooden house with penoplex is quite effective. True, many people use polystyrene foam and mineral wool for these purposes - the difference in price affects it. Extruded polystyrene foam is preferred by those who, firstly, cannot afford to lose extra centimeters of space (penoplex sheets are thinner than polystyrene foam with the same thermal conductivity, and even more so mineral wool), and secondly, pays fair tribute to the other properties of this excellent material (low vapor permeability, long service life). Insulation of the walls of a wooden house, including a frame one, with penoplex is possible outside and inside; it can also be used for thermal insulation of the foundation, floor, ceiling, roof. An important condition is the installation of ventilation gaps between the penoplex and the insulated wooden surface of the wall or floor. This must be remembered during installation.
Advantages of penoplex
Penoplex has practically no disadvantages, except for the high cost of the material.
The insulation is produced by extrusion of a foamed polymer mass based on styrene. The finished product is a slab with edges in the form of steps. The main difference from analogues is the structure of the substance. It consists of open cells, due to which it has ventilation properties. This makes it possible to insulate buildings of any type with penoplex, including those built from timber, logs, bricks and aerated concrete blocks.
In addition, the material has the following advantages:
- minimal thermal conductivity;
- flexibility, allowing finishing of uneven surfaces;
- fracture and impact strength;
- waterproof;
- biological inertness - fungus and mold do not grow in the mass, animals and insects avoid it;
- resistance to chemically active reagents;
- long service life of 50 years or more;
- wide operating temperature range;
- excellent sound insulation properties;
- a wide variety of types for finishing surfaces of different compositions.
There are practically no negative aspects to the decision to insulate housing with penoplex. The main one is the high cost, justified by the manufacturing features. Despite the fact that the repair estimate may be impressive, the investment will pay off with comfortable living in the building.
Please note that the material decomposes upon contact with toluene and acetone-based liquids. When burned, polystyrene releases large amounts of caustic toxic smoke.
Features and production
Penoplex is high-quality foamed polystyrene. This type of material is produced by extrusion.
A similar production process was developed more than half a century ago in American laboratories. Thus, a completely new material appeared, the structure of which consisted of closed microscopic cells. From the very beginning, their dimensions did not exceed 0.2 mm. In a single structure, these components created a neat and uniform surface without potholes or differences.
The granules of this polymer contain a special additive that has a foaming effect. This component is combined with granules under pressure or under heating conditions to a certain temperature. The result is a mass that is then passed through an extruder.
Foaming components (as a rule, they are represented by carbon dioxide or a mixture of light freons) are non-toxic and absolutely safe from an environmental point of view. In addition, these components are not flammable.
The result is a high-tech thermal insulation material with excellent performance characteristics. With its use, your home becomes much warmer and more comfortable - a comfortable microclimate is created that you don’t want to leave.
The main distinguishing features of penoplex are:
- low level of thermal conductivity;
- good strength characteristics;
- minimum level of moisture absorption.
As a rule, this insulation is packaged in film, which protects it from aggressive sunlight. Thanks to such packaging, such material can be easily stored outdoors. However, it is worth considering that even if there is plastic packaging, the product must be additionally protected from ultraviolet radiation.
Insulation of walls from the inside under plasterboard
To insulate walls under plasterboard, they do not need to be leveled.
It is enough to clean the walls of old plaster, putty, mold (if any). And treat everything with an antifungal additive. In order to insulate walls under drywall, you need to build U-shaped frames made of metal or wood. The insulation panels will be attached between these frames. Often this is mineral wool, but other materials (foam plastic, penoplex) can also be used.
Frame installation
The frame is made using wooden slats or metal profiles. First you need to mark the entire frame. Vertical profiles are attached at a distance of 60 cm from each other. They are secured using self-tapping screws or dowels in increments of 100 cm and secured with rivets.
Installation of thermal insulation
Plates
If you use mineral or other slabs, they can be glued between the frames using ceramic tile adhesive.
However, if there are frames, this is not necessary. Since fastening brackets are installed on the frames (there are 4-6 brackets per 1 vertical profile) for plasterboard profiles, they can also be used to secure the thermal insulation.
Rolls
Important! If you use mineral wool in a roll, then the roll must be taken with a “reserve”. If your ceiling height is 2.6 m, then you need to cut off no less than 2.7 m
Since the wool is deformed, the precisely cut length may not be enough.
We begin to attach the rolled mineral wool from top to bottom. It is easily pierced and fixed on brackets and hangs vertically.
The width of the wool should be wider than the distance between the profiles, so it is folded like an accordion. For tighter insulation, you can slip the edges of the wool under the profiles.
All that remains is to secure the sheets of gypsum board to the frames. Plasterboard slabs are fixed with self-tapping screws 2.5 cm long (for a metal frame), or with screws 3.5 centimeters in size (for a wooden base). Next you need to putty the seams and apply a layer of primer.
Preparing the wall surface
Before installing the insulation, prepare the materials and wall surface. For reliable fixation, choose an adhesive composition. It's better to take foam glue.
Surface preparation
You will also need:
- Adhesive composition for plastering.
- Set of corners.
- Decorative plaster.
- Primer with adhesive properties.
- Facade paint.
- Deep penetration primer.
When the materials are ready, start working on the walls:
- Remove decorative and functional elements from the surface that will interfere with the finishing: antennas, visors and other parts.
- Inspect surfaces for defects. If you find them, eliminate them. These include brittle or peeling plaster.
- Wipe the facade with a damp cloth or get rid of dust in another way.
- Cover the walls with a deep penetration primer. Use a brush or paint roller.
The primer should be applied in an even, thin layer. When it dries, reapply.
Marking the zero line and setting the starting profile
Installation of the starting profile requires care. It is needed for:
- The correct direction of the initial row of slabs.
- Performs a supporting function.
- Protects the lower part of the slab from various influences (loads, damage due to animals and insects, moisture). In this area, the slabs are not protected by plaster.
The width of the profile should be equal to the thickness of the sheets. You should not use a wider or narrower profile.
To prevent excessive dampness in the rooms, it is required that the insulation be attached 20-30 centimeters below the ground floor floor. This place is vulnerable because the cold penetrates through it.
Marking must be carried out with maximum accuracy. Even minimal errors will lead to a cascading increase in the size of the error. And on the upper tiers of penoplex sheets, cracks will form that will interfere with the performance of the thermal insulation function.
The starting profile is attached with dowels. The distance between fasteners is 30-50 cm. However, if the insulating layer is thick, a minimum step must be ensured. The length of the dowel is taken depending on the walls:
- Concrete walls or solid brick - 40 millimeters.
- Hollow brick - from 60 mm.
- Gas silicate blocks – 100 mm.
In the areas of contact, it is necessary to ensure good fastening, but without deformation of the metal. For minimal gaps, it is advisable to install shim washers.
Adjacent profiles are installed end-to-end or with a small gap. Overlapping is prohibited. To combine them into a single network, you need special fasteners, sold in hardware stores. You need to choose elements with a width of 40 or 60 millimeters. If the width of the heat insulator is large, use several inserts.
Corners are attached at the corners. If you can’t find them, you can cut part of the profile at an angle of 45 degrees, then join. A corner connecting element is attached at the connection point.
When installing wide sheets of penoplex, temporary supports are attached, which are mounted to install the first row of sheets. This is necessary to prevent sagging.
Adhesive for penoplex
Preparation and cutting of foam boards
Before starting work, it is necessary to measure and adjust the insulation sheets. There are no problems with this on straight sections of walls. However, there are difficulties at corners and near windows.
During installation, the slabs are installed one by one, like bricks. The joints should not match. Retreat at least 20 centimeters on each row.
In the corner areas where the slabs will be joined, place them in the form of a toothed lock. For this purpose, they are installed alternately. Part of the slab extends outward to a width slightly greater than the thickness of the sheet. After finishing the work, the penoplex is trimmed. The width of the fragment in contact with the corner must exceed 20 cm.
It is most difficult to install slabs around windows and doors. They need to be installed so that the seams are not located along the continuation line of the opening. If you use this method for new buildings, cracks will appear as they shrink. To avoid this, L-shaped sheets are required. The width of each part must exceed 200 mm.
When cutting sheets, provide an allowance inward for joining with the slope insulation. When there is an expansion joint or joint between plates, position the sheets so that the joint does not coincide with the problem area.
The slabs are cut with a hacksaw or cutter. If you need to adjust them while working, use a sharp knife. Before installation, sand them to improve their fastening properties.
Preparation of adhesive composition and installation of insulation boards
After preparation and fitting, prepare the glue. Mix the adhesive powder with water, stir until a homogeneous consistency is obtained. You need to stir for 5 minutes, then leave for a few minutes and repeat stirring.
Penoplex installation
The adhesive composition will not lose its properties at normal temperatures (about 20 degrees) for two hours. Its consumption is high, so it will not have time to harden. However, it is not advisable to cook excessive quantities. If the composition begins to harden, we do not recommend using it.
Apply glue to the slabs with a spatula, following the recommendations:
- Stripes no narrower than 10 cm are applied along the perimeter.
- There are small slides in the center.
- The thickness of the adhesive is no more than 25mm.
- When installing the slab on a corner, do not apply glue to the protruding part.
- If the wall is smooth, you can apply glue with a spatula over the entire area. The thickness should not exceed 10 mm.
Technology of wall insulation with penoplex:
- The first row of slabs is attached to the profile. The edge of the sheet must be attached to the limiting board of the profile. If there is a gap, increase the amount of glue.
- Press all sheets tightly to the surface of a brick or wooden wall. Afterwards you can align it in both planes with a clamp.
- Remove any protruding glue. It is prohibited to leave them between the slabs. This will lead to the appearance of blowouts.
- When attaching the next slab, align the joining slats. If they had to be cut off during cutting, you need to achieve a minimum gap.
- All insulation sheets must be installed in the same plane. The correctness of their fastening is checked using a rule with a plumb line or a laser level. Defects can be corrected while the glue is still wet by tapping it with a polyurethane float.
After finishing fixing the slabs, you need to wait at least 72 hours until they are completely dry. Then you can secure the slabs with mushroom dowels. They are placed in the center and corners of the sheet. The dowel head should secure adjacent sheets.
This method ensures less dowel consumption and reliable fastening.
- A drill of the required diameter and length is attached to the drill. The perforation depth limiter is adjusted. The working length of the drill is equal to the dimensions of the dowel, to which 15 millimeters are added.
- In places with markings, carefully drill holes through the foam and sheets and insert the dowel spacer, press until the cap comes into contact with the insulation.
- Screw in the core or drive it in with a hammer. To prevent rusting, the holes are covered with a cap. If it is missing, it is fixed with polyurethane foam.
If there are gaps or holes between the slabs, it is worth sealing them with scraps of material. Perform final sealing with polyurethane foam. There is a composition of the same name, which is adapted for fastening foam boards.
Reinforcing network
If plastering is not planned, materials are installed for temporary protection from precipitation and ultraviolet radiation. It is better to plaster the surface immediately.
Creation of a reinforced protective layer
The finished layer of penoplex must be plastered after installation. This is necessary for maximum fixation. The best material is fiberglass mesh with a density of 140 to 160 grams per meter.
For installation, you can use the adhesive composition used for installing the heat insulation sheets. It has a high grip relative to penoplex. Dilute the composition in the same ratios.
Fastening the mesh begins with difficult areas - corners, slopes. For them, strips of 30x100 cm are cut, which are folded along the entire length to obtain an L-shape. You can buy corners.
For fastening, apply an adhesive solution up to 2 mm thick and 10 cm wide to both surfaces. Then the corner is installed and leveled. The plates are pressed with a spatula onto the glue.
After securing the corners, you can proceed to installing the strips on flat parts of the surface. To do this, cut into even sections, no more than 100 cm in length. Then they are attached to the surface in one of the following ways:
- The network is attached to the top point with a solution, then an adhesive is added with a spatula. Presses down to get under the net. The thickness of the composition must be at least 2mm.
- An alternative method is to pre-apply the solution, spreading it with a notched trowel with a small comb. Afterwards, the mesh is attached to the wall and embedded with a wide spatula.
Plastering
Work begins from the corners. Adjacent strips are laid overlapping, with a width of at least 100 mm.
After the solution has set, rub the surfaces. Using a grater with sandpaper. There is no need to press hard.
After preparation, you can apply a leveling layer of the adhesive composition that was used previously. The next layer is applied with force. Use a rule or a wide spatula and gradually add the solution. It is necessary to ensure a layer thickness of at least 4 mm. If the facade is to be painted, increase the thickness of the solution to 5mm. In the area of the base it should be more than 7mm.
After the composition has set, a final grout is needed. This must be done before it completely hardens. Otherwise you won't get a smooth surface.
Decorative finishing
After plastering - decorative finishing. The work is carried out according to the following scheme:
- Treatment of the facade with a primer.
- Application of decorative plaster. The layer should be thin and uniform.
- Pre-grouting when the plaster layer begins to harden. To do this, use a plaster grinder.
- Painting the walls after the plaster layer has dried. Produced with a paint roller. When dry, reapply paint.
Materials: what is better to use?
There are several materials that are most often used for insulation:
- Mineral wool. It has excellent vapor permeability, but shrinks if installed incorrectly. Some types of this insulation can only be installed using protective equipment. This type of insulation must be securely closed, since wind and other external influences can spray small particles. Capable of accumulating moisture, so it cannot be installed in bad weather. The most popular type of mineral wool is stone (basalt) wool.
- Polystyrene foam or polystyrene foam. They are excellent thermal insulation materials, although they do not have vapor permeability. They do not shrink, are not afraid of cold weather, have a water-repellent effect and are a sound insulator. But polystyrene foam does not tolerate exposure to direct sunlight, which means that it must be covered with decorative materials. In addition, mice love polystyrene foam, and if they make their nests in this thermal insulation layer, their quiet life will end. Penoplex insulation will avoid these disadvantages, but will cost much more.
- Polyurethane foam. Another material that is often used for insulation. The advantages include excellent adhesion to any surface, no need for leveling the wall, priming and construction of the frame, ease of transportation, light weight, it does not weigh down the walls and roof, improved thermal insulation and strength characteristics of the wall during installation, improved sound insulation, resistance to temperature changes , seamless, no fasteners required. Disadvantages include fear of exposure to sunlight, ultraviolet radiation destroys the material, and fire hazard during prolonged exposure to high temperatures.
Typically, a material is chosen that does not block air circulation through the walls of a foam block house. Therefore, it is better not to use polystyrene foam and penoplex.
The cheapest option that meets this requirement is mineral wool insulation.
Insulation with this material should be carried out strictly according to technology, taking into account its characteristics.
Material selection criteria
In order for the insulation to serve for a long time and justify the money invested in it, you should check whether it complies with GOST. Sometimes manufacturers offer products that are made in accordance with their internal requirements, but have passed state certification. In this case, the properties of the material may differ from generally accepted ones and require careful study.
It is recommended to touch the material before purchasing. It should be durable and not deform from light pressure. You should evaluate the storage location of the product, its protection from sunlight and possible exposure to solvents (acetone, petroleum products, etc.).
Before purchasing penoplex, you need to check the certificates of conformity.
The thickness of sheets of the same type must be the same. Pay attention to the fire safety mark. If, as a result of finishing, it is necessary to enhance sound insulation, the layer of material should be thicker.
Subtleties and advice from professionals
In order to insulate the outside or inside with your own hands correctly, you need to take into account some of the nuances of the work:
- instead of polyethylene film for waterproofing, it is better to use a multilayer membrane;
- to insulate a wooden house from the inside, it is better to choose vapor-permeable types of materials;
- polystyrene foam must be laid tightly against the wall;
- there should be good ventilation in the room.
Penoplex insulation has its own characteristics, but if all installation rules are followed, the material will provide high-quality protection against heat loss and will last a long time.
Preparing the sheathing - step-by-step installation
To make the lathing, you need to decide on the material from which it will be made:
- aluminum;
- tree.
Wood is more environmentally friendly, but more complex in terms of installation. The aluminum frame is much more convenient and practical. Let's move on directly to installing the sheathing:
- The first step is to clean and prepare the surface for future lathing.
- At the second stage, you will need certain tools to attach the frame to the prepared wall.
- The third step is to mark the entire surface where the sheathing frame will be installed.
- After all the preparatory work, you can begin installing the sheathing elements according to the marked marks.
Preparing the sheathing
How to calculate thickness
Penoplex insulation inside or outside, with siding sheathing, is carried out after calculating its thickness. The thickness of the walls, their properties, and finishing characteristics are taken into account.
- The first step is to calculate the thermal resistance, which is taken from the building codes for a specific region.
- Sandwich panels have several layers with different resistance to heat loss. To get the result they are summed.
To calculate the thickness of penoplex for wall insulation, the formula is used:
Р=R/К
in which R is the thickness of the sheet, K is the heat conductivity.
Foundation insulation
Characteristics
Penoplex: pros and cons of the material
To begin with, it’s worth talking about what the material itself is. Penoplex is foamed polystyrene foam, which during the production process is treated at high temperatures and is subjected to pressure. As a result, a lightweight but at the same time very durable material is formed. The air inside the penoplex is in small balls that are glued together.
This material has many positive qualities such as:
- environmental friendliness;
- high density coefficient, due to which heat is well retained;
- has strength, can withstand repeated stretching and compression;
- ability to have low vapor permeability, penoplex will not allow the formation of moisture;
- flame retardants increase the fire resistance of the product; fire of this material will occur only at temperatures above 500 degrees;
- penoplex is wear-resistant and will serve you for a long time;
- prices for material are quite affordable
The disadvantages include the fact that the material does not absorb adhesives well. This happens due to its high density.
Common Mistakes
At first glance, insulation work looks simple. However, inexperienced installers may make mistakes that will not allow them to achieve the required thermal insulation properties or may lead to delamination of the material. Most often, beginners make the following mistakes:
- The number of slabs is calculated incorrectly or the design stage is completely neglected. There is not enough material or there is a large residue.
- During installation, moisture is allowed to enter the work surface or the temperature regime is not observed.
- The place and tools are poorly prepared. This increases the risk of damage to the insulation or contamination of surfaces.
- They do not follow a checkerboard pattern when laying them. Because of this, cracks form and heat escapes from the room.
- Glue is applied unevenly or in insufficient quantities.
- Neglect grinding the material. The grip becomes less strong.
- Do not fill the seams with foam.
To insulate the joints, fill them with polyurethane foam.
How to choose penoplex insulation
Before carrying out thermal insulation work, you will need to select a material. To choose the right insulation, you need to focus on 3 indicators:
- thickness;
- density;
- a type of heat insulator.
Before choosing penoplex, you should not pay attention primarily to its prices. This moment is not always decisive. If you focus only on cheap insulation, then expensive material may turn out to be more effective, durable and reliable.
Penoplex insulation of a wooden building can be done using this material, which has a density of 25 kg/m3. If the density increases, then the strength of the material also increases. The main indicator of this thermal insulation material is thermal conductivity. As its density increases, the thermal insulation characteristics of the material decrease.
This requires additional calculations before purchasing. To determine the thickness of the insulation, it is necessary to take into account the location of the house, as well as the climatic conditions of the region where it was built. To clarify the value of this indicator, it is best to seek help from a sales consultant.
When considering the advantages of using various types of materials for insulating wood walls, special attention should be paid to extruded polystyrene foam. It is a productive heat insulator with many positive qualities:
- low moisture absorption due to the cellular structure, which practically does not absorb water;
- high thermal efficiency, allowing the use of an insulating layer of the smallest thickness;
- fire safety, the material is not flammable;
- expanded polystyrene does not emit toxic substances;
- is easy to install;
- has good strength;
- resistant to mechanical stress;
- resistant to mold and mildew.