Date: 2012-07-01 17:30:17
Mirror tiles are a type of ceramic tile.
At its core, it is mirror glass, which means you need to work with it accordingly. It is worth noting that laying mirror tiles
with your own hands differs from installing ordinary glazed ceramic tiles.
Especially great difficulties arise with cutting this material. To cut regular tiles, use a grinder with a special disc or a tile cutter. However, tile cutters do not allow you to make special cuts in tiles. In this case, the material may simply break. For complex tile cuts, the most suitable tool is a grinder. However, when using it, the edges of the material are knocked off, as a result, the damaged areas are noticeable. Therefore, it is better to combine the advantages of a grinder and a tile cutter, using both of these tools. When laying mirror tiles
with your own hands, you will certainly need to cut them.
Using a tile cutter, place a flat object under the mirror tile to bring it closer to the knife blade. To perform this operation you will have to get used to it. Until you get the hang of cutting tile, you may need to break a few nail files. Don't be upset - this is a common thing. Mirror tiles are best cut using a glass cutter, and a diamond glass cutter will be the most optimal solution. It will allow you to cut the tiles like regular glass.
Mirror tile laying technology
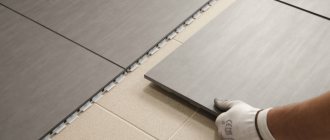
How to lay mirror tiles? Similar to regular tiles. First, achieve a completely flat surface and apply tile adhesive or sealant to it. Experts recommend using 25-kilogram bags of this glue. One such bag is enough for approximately 3 square meters of coverage.
Tile adhesive is a convenient and effective adhesive mixture that is not affected by fungus, water or frost. Apply this glue to the wall in a layer of 0.5-1 centimeter over the entire size of the tile. After this, the excess solution is removed with a notched trowel, forming a wavy layer of glue. This laying method will give additional strength to the coating, since the wavy layer creates an adhesion effect. Even when the tiles are not completely dry, they will be extremely difficult to remove from the wall.
Install plastic crosses between adjacent elements. The size of the crosses should correspond to the spaces between the tiles. On sale you will find crosses for tiles 0.1-1 centimeter. When choosing them, it is important to take into account the design of the entire room, since the thickness of the seams will immediately catch your eye. If it is too thick, then the mirror image will be broken into separate images, and a seam with very little thickness will make alignment between individual tiles difficult if their walls are very uneven.
Installing mirror tiles is similar to laying ceramic
The procedure for installing mirror tiles is the same as for laying ceramic tiles. However, it is important to remember that we are working with glass, which means that shrinking the elements with a rubber hammer should be done more carefully, otherwise you will simply break it. You can grout the seams with regular grout, but when working in the bathroom, both the grout and the glue must be moisture-resistant. You can use one sealant. Its main advantage is that over time it will become rubber and will not allow moisture to pass through to the edges of the coating.
Some people believe that mirror tiles do not withstand humid environments well enough and deteriorate over time. But its manufacturers convincingly assure that mirror tiles are resistant to moisture. And it seems reasonable that a good quality mirror is not afraid of moisture.
If you are afraid that mirror tiles will darken over time, then use a natural sealant rather than tile adhesive for its installation. However, in this case, the laying technology will change slightly: the tiles will be glued to the wall. Any unevenness that may occur can be eliminated by adjusting the layer thickness.
A variety of modern finishing materials allow you to embody the most daring design ideas. One of the most convenient finishing materials, which has recently become increasingly popular as a universal decorative element, is mirror tiles.
Mirror tiles are an excellent material that will eliminate the shortcomings of repairs and visually enlarge the room. Mirror tiles are used for almost any room: in the bathroom, in the hallway, in the bedroom, for suspended ceilings. Mirror tiles have a lot of advantages, thanks to which they stand out among other finishing materials for decoration.
Advantages:
High level of light reflection; . Resistance to external influences: indoor humidity, use of chemicals; . Versatility and a wide range of products for any interior; . Practicality (ease of care)
Mirror tiles are presented in a wide range that can satisfy any consumer taste. Mirror tiles come in a variety of shapes, colors and sizes. The main dimensions of mirror tiles: small size - 292x295 mm, large size - 1195x1995 mm.
If you decide to add some variety to your interior or eliminate existing repair defects, or simply want to visually expand and brighten the room, then your choice is mirror tiles. Mirror tiles are easy to lay on your own, without resorting to the services of professionals. The process of laying mirror tiles
1. First of all, prepare the surface
The surface for laying tiles must be perfectly flat and free of any flaws. If necessary, remove the plaster from the surface down to the concrete or brick. Then level the surface with putty. Finally, prime the surface with a primer and let dry.
2. Mark the surface for laying tiles
It is imperative to apply markings to the finished surface in order to lay the rows of tiles perfectly evenly. When determining the markings, take into account the actual dimensions of the tiles so that there is no bevel. In the case of laying a panel of mirror tiles, first select all the tiles for the future panel and lay it out on the floor. Only after this can you transfer the panel directly to the surface.
3. Start laying tiles
Remember that laying tiles must begin with a horizontal row. The installation scheme is simple. First, take one tile, apply a specially selected adhesive mixture to the inner surface, then apply the tile to the surface and press it with your hands. Be careful not to damage the tiles. As soon as the tiles are glued, place a cross on the border (purchased at a special store, which is used to determine the thickness of the seam between the tiles). Then you continue in the same order. If you plan to lay out a large panel, break the work into several stages.
4. Grout the joints
Only after all the tiles have been laid, let them dry for several days. Only after the glue has completely dried can you start grouting the joints. For this, a special neutral silicone (transparent) is used, which is absolutely invisible on the surface. To do this, prepare a glue gun and silicone. Using a gun, squeeze a small amount of silicone into the seams. Excess silicone must be wiped off immediately with a damp sponge. After the silicone has completely hardened, rub the tiles with a cotton cloth until glossy.
Mirror tiles are a new word in interior decoration. simple, and the result will harmoniously complement any interior. This is a decorative material for finishing work. It is resistant to moisture, detergents and cosmetics, so it can be used in the bathroom. Due to the fact that such a product has a light reflectance coefficient of up to 92%, the presence of decorative elements from this material visually enlarges the space and makes it lighter. It is also used as all kinds of wall panels. We should not forget that this is a rather delicate material, so there are certain rules on how to lay mirror tiles.
Classification of mirror tiles
Depending on the material used in the production process, decorative elements are of the following types:
- glass - made by melting a mass of glass with mufflers and gaseous crystalline compounds;
- metal - the polishing method is used in production;
- plastic - panels are made of polyvinyl chloride or polystyrene by gluing a reflective film or applying paint with tiny particles of steel.
Decorative tiles made on the basis of PVC or metal are an imitation of mirror cladding, are lightweight, low cost, and flexible, but the reflectivity of the coating is worse than that of glass products.
Glass tiles are classified:
- by purpose: wall, floor, ceiling and universal;
- in shape: square, rectangular, mosaic (individual chips or modules), in the form of stripes, rhombus, triangle, circle and semicircle, hexagon;
- according to color scheme: the front side of the cladding can be bronze, gold, silver, blue, pink, green. In addition, the tile can be plain or with an ornament or pattern applied to it using thermal printing or sandblasting;
- surfaces vary according to the processing method: polished, glossy or matte;
- according to the method of edge processing: with or without bevel.
Installation of mirror cladding is identical to the process of laying ceramic tiles, but there are products that do not require the use of adhesives. This tile has a thickness of 4-6 mm, consists of an outer (reflective) surface and an inner (adhesive) layer, covered with a protective film, which must be removed before work.
Types and types of tiles
The range of mirror tiles is not rich. It can be classified as follows:
- by type of edge processing;
- in shape - rectangular, square, triangular, diamond-shaped, hexagonal, etc.;
- by color - painted gold, bronze, silver, dark gray (graphite), etc.;
- by the presence of a pattern applied by sandblasting or thermal printing.
Sellers accept orders for original shaped tiles. Since mirror tiles are laid on walls, ceilings and floors, two types are available: ordinary ones for walls and ceilings, and reinforced ones for floors.
Advantages and disadvantages
The advantages of the products include:
- moisture resistance, which allows the cladding to be used in rooms with high humidity levels;
- long service life, subject to compliance with installation technology and maintenance rules;
- fire safety (glass and metal products are not subject to combustion) and environmental friendliness;
- resistance to aggressive chemicals, easy to maintain.
- the material is subject to darkening, which can be prevented by organizing ventilation in the room or regularly ventilating the room;
- The facing elements are fragile; chips may form on the edges during transportation and installation.
How to glue mirror tiles?
The main condition for high-quality work is the evenness of the base.
Preparing the base
- remove old wallpaper, tiles, glue residues, plaster. Inspect the base: if there are minor defects, level the surface with plaster. In case of large differences in heights, fix sheets of plasterboard on the walls, check the evenness of the surface with a level and plumb line;
- apply primer mixture. When renovating a bathroom or kitchen, use a moisture-resistant composition;
- draw vertical marking lines: it is advisable to place a solid element near the ceiling;
- Mark the horizontal line around the perimeter of the walls, taking into account the seams. Check the markings with a level;
- if glass tiles will be used during the installation process, install the support rail under the start line of the first row and start work from this mark.
Preparing the adhesive mixture
Glue containing additives in the form of acidic oxides is not suitable for mirror cladding.
Glass products are fixed to the walls using a special tile adhesive intended for mounting mirrors, or other chemically neutral mixtures based on epoxy resins, silicone sealant, liquid nails:
- Installation moment - a moisture-resistant composition containing synthetic resins, suitable for fastening mirror tiles indoors, has good adhesion and resistance to vertical shifts, and is elastic;
- Titan Professional - adhesive based on synthetic rubber and resins, suitable for work on horizontal and vertical surfaces, moisture resistant;
- When installing with liquid nails, make additional fixation before installing the tiles using double tape glued to the back side.
Laying tiles
- start work from the farthest corner of the room (when covering the entire surface of the wall), laying out rows from the floor to the ceiling;
- Apply a small layer of adhesive with a notched trowel onto the back surface of the cladding, wait a while (2-3 minutes) and carefully place the tile on the base, press lightly with your hand;
- install the remaining products by inserting dividing crosses into the gaps between adjacent elements;
- Having laid several rows, remove excess glue with a sponge or damp cloth;
- cut the products with a diamond glass cutter with oil, be careful in the process: first draw a line on the surface, then run the tool along it, leaving a scratch mark, then cut the material with strong pressure;
- one day after finishing the work, grout the joints with a rubber spatula: use the composition used for installation for this purpose, you can also use neutral silicone sealant (gray or transparent);
- After 5-6 hours, wash the finished coating.
Laying tiles
As we have already noted, this material is quite delicate, so it is not recommended to lay it without prior marking. The result obtained may be far from the desired one. mirror tiles so that the result harmoniously complements the interior?
To do this, we suggest that you divide all the work into several stages:
- Marking the surface for laying tiles. In order for the picture to come out perfect, you should first lay out the desired pattern on the floor, on a flat surface. Then carefully mark the wall or ceiling along this blank. It is important to approach this stage responsibly, without unnecessary haste.
- Laying tiles. After you have prepared the base well, chosen the right glue and outlined the future pattern, let's get started. You need to start from the bottom and glue along horizontal rows. It is very important not to deviate from the markings.
If there are temperature changes in the room, it is better to leave a small gap between the tiles. This will protect the mirror coating from deformation and cracks in the future. To ensure uniform seams, use special crosses. They will ensure the step you have in mind.
Directly during installation, it is better to store the product not in stacks, but vertically. This will protect the sensitive coating from.
- Apply glue. If you plan to glue it with a special mixture or sealant, then there should be no problems. The covering elements are attached well and do not slip. The adhesive base (mixture, sealant, liquid nails) is applied directly to the tile, which is then applied to the desired location and pressed down for a few seconds. It is worth noting that liquid nails are not suitable for laying over a large area, as the rows can creep one on top of another. To prevent this from happening, secure each tile with tape.
Video on how to glue mirror tiles:
If the need arises, it is best to use a diamond glass cutter for this. Then the edges will be smooth, without unnecessary chips.
- . After you have laid out the entire surface, you need to let it harden well. This often takes several days. If you left seams, they must be closed in order to protect the tiles from moisture and give it an aesthetic appearance. Neutral transparent silicone will cope best with this task. Apply it using a special gun, and then remove the excess with a damp cloth or a special non-metallic spatula.
By following these guidelines, you can install mirror tiles yourself, decorating the interior with an elegant and beautiful decorative element.
- Also, acidic (acetic) “universal” sealants should not be used. The use of these materials may lead to the destruction of the mirror amalgam.
- If difficulties arise with leveling the surface, the tiles can be laid on plasterboard, smooth slate or plastic, which are pre-attached to the wall or ceiling.
In rooms with sudden temperature changes and high humidity, in order to avoid peeling and breaking of the tiles, it is recommended to lay the tiles leaving a thermal seam between the elements.
Compositions for application. It is best to use any neutral (without vinegar) sealant as glue. It is possible to use the “Liquid Nails” composition LN-930 Mirrors, but it is inconvenient to work with large volumes, since it takes a long time to set, and the laid tiles can “crawl” under their own weight.
The most commonly used sealant is dark gray - it does not create a contrast with the mirror tile itself and has bactericidal and antifungal properties (unlike transparent), which is important for rooms with high humidity.
When laying on a neutral sealant, the seams can be grouted within 24 hours. It is advisable to grout tiles laid with mirror adhesives after a couple of days. Using a neutral sealant has another advantage - mirror tiles are glued and grouted with the same compound.
Laying mirror tiles.
1. Calculate the number of tiles in vertical and horizontal rows.
2. Mark the base on which the mirror tiles will be applied.
3. Lay out all the mirror tiles on a flat horizontal surface as they will be located after sticking.
4. If you are laying the tiles end-to-end - Due to possible incompatibility (permissible deviations in size are always present), select a place for each tile so that all the tiles in the mirror panel fit tightly to each other.
5. Apply the entire tile to the base.
6. Wipe away any traces of glue or sealant from the mirror surface with a non-metallic spatula. Sealant residues are best removed 2-3 hours after application. To remove particularly stubborn stains, you can use Pemoxol or another fine cleaning agent.
Drilling a hole in mirror tiles is quite difficult. But if you need to display electrical or plumbing wiring on a mirror panel, you can make markings on the glass with a regular felt-tip pen or marker and contact an organization that produces glass drilling and processing or our organization.
For mirror tiles of any format, a 4 mm thick mirror is used. Note that modern ceramic tiles are in any case much thicker (8 mm or more). Therefore, it is best to compensate for the difference in the thickness of ceramic and mirror tiles with the most common cement-sand mortar, applying it in a suitable layer to the section of the wall where it is planned to lay the mirror tiles.
- When laying tiles, they must be kept in an upright position, leaning them against any vertical surface. Storing tiles in a stack can scratch the glass on the front of the mirror.
When laying tiles on the ceiling, in addition to gluing, you can use a standard suspended set from conventional suspended ceilings.
Buy several more tiles than you plan to use: - during transportation or application, one or two tiles can be damaged; - it is better to leave a couple of tiles in case of repair.
This instruction was compiled with the help of Sergei Aleksandrovich Spesivtsev. City of St. Petersburg.
To lay mirror tiles with your own hands, first of all, decide on the choice of material.
There are two main options:
- base – polystyrene foam. Paint with metal particles is applied to it, which gives a mirror surface. They are light and cheap. Extremely easy to install - they are mounted on glue. However, they cannot achieve a smooth mirror surface - they produce distortions. Overall the appearance is pretty average.
- base – glass. The mirror layer is formed by algamum, metal coating, foil, etc. applied to the back side. The quality depends on the strength and properties of this layer, as well as the quality of the glass, which together determine the cost. They require careful preparation of the base and careful handling (the main enemies are chips and darkening of the algama). Stable, durable.
Let's talk about laying glass tiles in more detail.
Preparing the base for installation
Laying mirror tiles with your own hands is possible on almost any flat, dry, clean surface with sufficient adhesion. The key word is “flat”, since large differences across the entire surface give a “broken” mirror image and are immediately visible.
The base (walls or ceiling) must be cleaned, treated with an antiseptic and a deep penetration primer, leveled with base plaster, then puttied and polished (irregularities up to 2 mm), dusted, and primed.
If leveling is impossible, the base is covered with a sheet of plasterboard or asbestos. Measure the area of the base, purchase tiles with a reserve (defects, chips during delivery and installation, errors, as well as several pieces that will be spare).
While the base dries, go over the tile itself. Place it on the floor as it will lie on the surface.
Attention:
The sizes of the tiles, even within the same batch, can vary within 2 mm (more is defective), so the installation will need to be repeated on the surface exactly.
Advice: the most important thing is the angle at which the eye first falls when entering the room and the direction that is closest to the window. They are performed as carefully as possible.
To lay tiles with your own hands, you will need a glass cutter (diamond is ideal), a glass or metal drill. You can also work with a tile cutter. The rest of the set of tools is similar to the set for laying ordinary ceramic tiles: level, plumb line, ruler, square, notched trowel, rubber or other non-metallic trowel, masking tape, double tape.
Choosing an adhesive mixture
You cannot glue the mirror with regular tile adhesive because the algamum begins to darken after a while when exposed to an acidic environment. Therefore, glass mirrors are glued only to chemically neutral bases based on silicone (no acid in the composition), epoxy resin, or mastic. If there are concerns that the wall or ceiling will become damp, then the tiles can be glued with a sealant.
The adhesive is applied to the wall according to the size of the tile in a layer 0.5 - 1 mm thick, and then leveled with a notched trowel. When gluing to liquid nails, which harden slowly, the tiles are duplicated on the back side with double tape.
Using mirror tiles
Bathroom finishing
In most cases, bathrooms do not have windows, which requires the presence of light sources when present in the room. You can visually increase the dimensions and improve the illumination of the room by using mirror cladding in the interior.
Decorative products must be designed for use in conditions of high humidity, otherwise the coating will fade or begin to blacken.
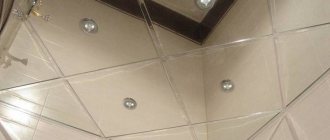
A bathroom ceiling lined with mirror tiles will visually increase the space. A coating that combines the design of its central part with glossy cladding and placement of tiles decorated with ornaments around the perimeter will look beautiful.
If the dimensions of the room are large, you can additionally decorate pieces of furniture (cabinet doors and shower stalls) with tiles.
If desired, individual fragments of the cladding are decorated by applying designs with acrylic or stained glass paints.
Kitchen finishing
A reflective coating can not only visually change the size of a room, but also its shape, which is especially important for oblong kitchens. It is advisable that there is a window opposite the cladding - this will fill the room with light.
A beautiful design solution would be to decorate the wall with a combined coating of mirror and ceramic tiles of the same format.
The manufacture of furniture facades is also possible using glass reflective surfaces.
Features of working with ceiling tiles
- Before laying on a wooden surface, be sure to treat the base with an antiseptic compound and primer;
- it is easier and more convenient to fix the cladding onto a plasterboard frame: leveling the ceiling with putty will lead to higher costs of work and greater labor costs;
- installation is carried out in two ways: with screws or gluing. When laying on drywall, adhesive must be applied around the perimeter and in the center of the tile. Fixation with screws requires complex drilling of elements, which is associated with the risk of damage to the material.
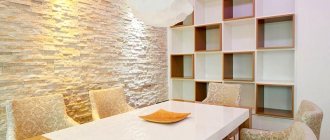
Interior with mirror tiles
The ability to visually expand the dimensions is relevant for an elongated room: placing the tiles on a long wall will correct such disproportion.
You can achieve a simultaneous visual increase in width and height of a room by laying elements on one wall diagonally or in diamond shapes.
To avoid the “labyrinth” effect, it is not recommended to place mirror surfaces opposite each other.
Covering the entire surface of the ceiling of a large room with tiles creates a feeling of emptiness and coldness; in such cases, it is advisable to do the installation only in the center or perimeter with the arrangement of spotlights.
The desire to make an apartment or house cozy and bright can easily be realized with the help of mirror tiles. Refrain from covering too large areas: reflective elements can be irritating to the psyche and cause anxiety, therefore, when trying to create an original design, be careful and do not overuse the number of reflective surfaces.
Examples in the interior
Mirror tiles with bevel (photo): advantages and disadvantages, installation features
Tile is a popular material used for finishing homes and commercial premises due to its affordable installation and easy maintenance of the surface during use. Over time, its parameters, decoration and composition changed. Not long ago, a mirror version appeared on the market, which aroused great interest among users. The article discusses the advantages of beveled mirror tiles, its properties and installation features.
The finishing material is made using modern technology, the essence of which lies in a special method of processing the edges. Removing a chamfer from a beveled surface gives the tile a sophisticated and sophisticated look, which plays with a variety of shades when the light turns.
Finishes are available in a range of sizes and colors. The choice of tile shapes also surprises consumers. You can develop a surface decor design by combining triangular, square, oval and rectangular fragments.
A mirror surface helps transform the interior of any room, but it looks especially beneficial in small rooms. The decision to lay such tiles will visually expand the space, raise hanging ceilings, and create the illusion of a fairy tale or something unusual.
Tiles with a mirror surface are made from different materials: glass, plastic, polyurethane. The most popular variety is glass products. In terms of properties and reflective effects, they are ahead of their analogues. The production technology provides for modern types of mirror processing; in the process of edge suppression, gaseous, amphora and crystalline compounds are used, which makes the material durable. It is quite difficult to damage it, but it is still recommended to be careful when transporting and performing installation work.
Variety of choices
Today on the market there are all kinds of tiles with a mirror surface. This is a universal material that has a rich range of colors. Thanks to this variety, you can lay out any pattern or even a picture. Manufacturers offer a choice of not only square tiles, but also rectangular ones and those with beveled edges. There is also a wide range of sizes - from the smallest 292x295 mm to the largest 1195x1995 mm. This will help create a unique and sophisticated interior, turning any design idea into reality.
Advantages and disadvantages of mirror tiles
Before purchasing tiles with a mirror finish, you should familiarize yourself with its advantages and disadvantages in order to take into account the features during installation and during operation.
• universal application (laying can be done on walls, ceilings, floors);
• the ability to visually enlarge the space due to the reflective effect;
• suitable for almost all interior styles;
• resistance to moisture, mechanical stress;
• bevel adds security to the finish;
• beveled edges make the material modern and presentable;
• simple installation technology;
• during maintenance you can use detergents; the tiles are not afraid of contact with household chemicals;
• tiles are produced in an assortment of parameters, shapes and colors, which makes it possible to develop an exclusive design solution when decorating the interior of a room.
• it is difficult to clean the mirror surface; detergents leave stains;
• over time, dark spots appear on the tiles;
• resistance to high-power mechanical shocks is not so high.
How to lay mirror tiles or install a mirror panel
How to lay mirror tiles
Tiles with a mirror surface are a new word in decorating walls and ceilings in an apartment house. Surprisingly, laying mirror tiles with your own hands will not be difficult, provided, of course, that you follow certain recommendations.
In addition to the fact that mirror tiles are an excellent decorative material, their surface is also resistant to various detergents and moisture. Well, thanks to the ability of 95% light reflection, mirror tiles placed in the bathroom can not only make it visually larger, but also lighter.
How to lay mirror tiles will be discussed in this article.
How to lay mirror tiles
And although mirror tiles are not afraid of moisture and cleaning agents, you should not forget that this is a rather fragile material, which must be handled very carefully. This is due, first of all, to the small thickness of mirror tiles, which is almost 2 times less than the thickness of ordinary ceramics.
Therefore, the base, before laying mirror tiles on it, must be more carefully prepared than in a number of individual cases:
1. To do this, remove plaster, glue and wallpaper from it. Sometimes, when the old finishing material does not hold up well, you even have to scrape the wall down to concrete or brick, depending on what material it is made of.
2. The cleaned base is then leveled to the ideal level. If you do not level the surface before laying mirror tiles on it, then you can forget about the effect created by this decorative material.
3. After all the above procedures, the wall is primed. As a result, the base, before laying mirror tiles on it, should be as smooth and well-primed as possible.
Laying mirror tiles on the wall
Before laying mirror tiles on the wall, an adhesive composition intended specifically for these purposes is carefully selected. It is important to know that cement-based glue is absolutely not suitable for this.
When choosing adhesive for mirror tiles, you also need to be careful with various types of sealants, the main component of which is vinegar, since it can destroy the amalgam of the mirror surface.
In this case, the ideal adhesive for mirror tiles is a special composition designed specifically for working with mirrors. Mirror tiles can also be glued using liquid nails or neutral types of sealants. By the way, you can read about how to use liquid nails in another article on the site https://samastroyka.ru/.
Laying mirror tiles on the wall is carried out in the following steps:
1. First, the surfaces are marked. It is advisable, in order to get a complete picture of how the mirror tiles on the wall will ultimately look, to first lay them out on the floor in the desired shape.
2. After marking, the mirror tiles are laid on the wall, and it begins in the traditional format - from the bottom up. When gluing tiles, it is very important not to deviate from the existing markings, continuing to glue the material from the corner, along horizontal rows.
When laying mirror tiles, small gaps should be made to help compensate for the expansion of the material during its use. This is especially true for rooms where there are constant temperature changes.
Mirror tiles should be stored in a vertical position, this will protect its surface from damage. If you need to cut mirror tiles, the best tool for this purpose is a diamond glass cutter.
Well, read about how to cut glass correctly in the following review of a construction magazine.
samastroyka.ru
Tips/Tricks
• When installing mirror tiles in rooms with temperature changes and high humidity, it is worth considering that the gap between the fragments must be at least 3 mm. The requirement is due to the fact that when the temperature rises, the finish expands, so it can become deformed and crack.
• To prevent the grout from contaminating the mirror surface, it is recommended to cover the edges of the tiles with masking tape before sealing the seams.
• To eliminate the effect of a hanging ceiling, which is present in small rooms, you should choose large and medium tiles for the walls. Large fragments are laid out from below, and closer to the ceiling they should decrease. Visually, the ceiling height will increase by 20-30 cm.
• If you have difficulty choosing a color, you should give preference to the colorless option. Such tiles will decorate the interior of any room, regardless of the style being created.
• When decorating a bathroom or bathroom, you should not lay out all the surfaces with mirror tiles, it will be too much. In some cases, only a panel area on the largest wall is enough.
• The finishing solution looks interesting, combining tiles of varying degrees of reflectivity.
• Spot lighting is considered a good addition to a mirror surface, thanks to which graceful fractures of light are created.
It is always a pleasure to work with mirror tiles in design; the flight of imagination and non-standard solutions is unlimited.
Selection, photo and laying of mirror tiles with and without bevel
The mirror tiles in the photo look great. There are mirror tiles with and without bevel. The price of the tile is about 650 rubles. The material itself appeared in our country recently, but this did not prevent it from acquiring an army of fans and admirers in such a short period of time. You may well join them. First, we will tell you what advantages mirror tiles have, what disadvantages they have, and also how exactly to lay this material on the walls.
- 1 Pros
- 2 Cons
- 3 Installation features 3.1 Installation
- 3.2 Care
What it is?
Glass tiles of various shapes and sizes can be attached to the wall. The beveled edge itself - bevel - is its characteristic feature and decorative element. Some families still have ancient mirrors, 100 years old, with such a characteristic edge. The technology for producing a bevel is not that complicated, but it requires a special machine. Therefore, it is not advisable to classify the production of beveled tiles as “do-it-yourself”.
pros
Photo of mirror tiles laid on the wall
The production of such elements is carried out by adding special suppressors - crystalline, amorphous or gaseous. This is where the name of the manufacturing technique comes from - jamming. The features of such components give the surface of the material the necessary transparency, a mirror effect.
Many people still don’t really trust such products. Although they have clear advantages, among which are the following:
- Able to last for a long time;
- They don't burn;
- Do not react with alkalis and acids;
- They are very easy to care for;
- They allow you to achieve the required level of decor, make the surface of the walls shiny and unusual;
- Due to the effect of mirrors, the bathroom space visually increases.
Minuses
Of course, where there are pros, there are also cons. Let's not hide the fact that tiles have certain disadvantages. Here are the main ones:
- If you transport the material carelessly, it can crumble, break, or be scratched;
- Over time, the surface of the tiles may become darker.
In principle, carefully delivering the material home is not so difficult. In addition, darkening can also be avoided by providing effective ventilation in the room.
It wouldn’t hurt to know what beveled mirror tiles are and what their features are. Essentially, this is removing material from the beveled edges. With the help of bevelling, the product becomes more aesthetically pleasing and attractive.
It should also be understood that beveled mirror tiles can only be obtained using high-tech devices. Unfortunately, such a process will be quite expensive. This also affects the final cost of the material itself. However, this does not prevent it from being very popular nowadays.
Laying features
In fact, in terms of installation, mirror tiles have quite a lot in common with regular tiles. The preparatory activities are identical, but the installation itself has some features.
- If the surface is not transparent, but smooth, it is necessary to create the desired roughness on the back side of the material by using bitumen and coarse sand, which is sprinkled on the product.
- When using transparent tiles, apply liquid glue to the back side and add coarse sand.
- Installation can be done using silicone and liquid nails. Only in silicone the presence of acid is strictly prohibited.
- To fix the material on the surface, a solution of cement and sand is often used. Only its layer should be thin. This will avoid peeling of products along the wall with regular changes in temperature and humidity.
- For better fixation of the material, use not just hand pressure, but a rag. This way you have less risk of damaging the stove.
- Do not make joints between slabs more than 3-4 mm wide.
Installation
Well, it's time to talk directly about how mirror tiles are mounted on walls. The process is labor-intensive, but it is quite possible to do it yourself. Especially if you have previously dealt with ordinary ceramic tiles.
- To begin with, experts recommend laying the material on the floor in exactly the pattern that you want to apply to the wall surface. This will make it easier to understand which element goes where.
- The most important stage is preparing the walls. It is extremely important that they are even. Any deviations or bends will cause the reflection to break, causing the mirror effect to fail.
- Choose a tile of a suitable size so that you do not have to cut or trim it. It is much easier to adjust ceramics, but working with mirror tiles in this component is very difficult.
- Select the material that will be used to adhere the products to the wall - liquid nails, mortars, etc.
- After this, proceed to laying the first row. It must be horizontal.
- Take into account the fact that mirror tiles are characterized by the presence of certain errors regarding the uniformity of the sides. Therefore, it is not worth laying them end to end. Make a small gap, keep the lines even. The distance is usually about 3-4 mm.
- Using this method, lay one row after another, forming a pattern. In fact, there is no need to take a break between laying several rows. The material does not have a lot of mass, so a high-quality adhesive composition will withstand the load.
- Once installation is complete, leave the material to dry for several days.
- As soon as the products have adhered to the wall, you can begin grouting the joints using silicone, which is produced without the inclusion of acid.
- After waiting for the silicone to dry, arm yourself with a microfiber cloth, mirror cleaner, and polish the wall thoroughly.
Installation features
Mirror tiles can be laid on almost any surface; they look especially attractive on walls and ceilings. An untrained person may have difficulties with installation, since such tiles have a smooth surface, unlike tiles.
Don't miss: Which doors to choose?
Before installing the tiles, you should prepare the base. It should be as smooth as possible; without this it will be almost impossible to achieve a uniform surface. If you do not get rid of roughness, this will lead to deformation of the mirror image. Think in advance about the order in which you will lay out the tiles. Dimensions may vary, so take this into account before you begin installation.
If it is possible not to trim the edges of the plates, it is better to use it. The appearance of the product noticeably deteriorates if specially treated edges are cut off. If you cannot do without adjusting the facing material to size, use a glass cutter. Use it carefully to avoid chipping and cracking.
If the base and material are prepared, installation work can begin. The first row of tiles is laid horizontally. The evenness of each laid row is checked with a building level. Small joints (up to 4 mm) are left between the plates, this will preserve the integrity of the pattern.
There is no need to rush when laying the mirror elements, otherwise there is a risk of damaging them and leaving unsightly scratches. Press the tiles to the base carefully, using a soft cloth. Then you need to wait a few seconds for the adhesive to set.
Mirror products are fixed in several ways. It is attached to the suspended ceiling using screws. For walls and floors - silicone-based glue, liquid nails, a mixture of bitumen and sand (if the back side is opaque). It is important that the composition does not contain acids, because they can cause stains to form on the surface.
When the installation process is completed, the tiled surface is left to dry completely. This may take from 1 to 3 days. After this, the seams are treated with silicone grout to prevent moisture from penetrating between the mirror tiles. The final stage is polishing with a soft cloth.
How to glue mirror tiles on walls
Mirror tiles look very beautiful.
It is usually used to decorate kitchen aprons, bathrooms, as well as in cafes and clubs.
Installing such tiles is no different from gluing ordinary tiles to walls. However, the main thing in such work is the glue.
What you need to consider when working with mirror tiles:
- Cement-based glue cannot be used, as it spoils the amalgam;
- you can use TY TAN - mirror glue, which contains synthetic rubber and resin;
- Loc tite Mir ror – assembly adhesive;
- Sim son is another elastic adhesive;
- moment of installation of glue for the mirror.
Since the tiles should look perfect on the wall, it is necessary to level the base. If the defects are minor, then you can get by with plaster. If there are large potholes, then drywall is needed underneath.
The manufacturer recommends treating the surface with a primer before gluing the walls. When pasting walls in a room with high humidity, namely in the kitchen or bathroom, you need to treat the walls with a special antifungal agent.
Pasting should be done after the walls have completely dried.
For wall cladding you will need:
- glue and means for installing liquid nails;
- double-sided tape for construction;
- level, ruler;
- grout spatula;
- marker and rags.
To ensure that the tile lays beautifully, we line the wall underneath it. If there are temperature changes in the room, be sure to leave a seam for grouting.
During the work process, glue is applied to the tile, which after 2-3 minutes of exposure is glued to the wall and pressed. Install the tiles from bottom to top in one row. To prevent the tiles from sliding, you can use double-sided tape, but adjusting the position is impossible.
After 3-4 hours, the gaps are grouted. If desired, you can use the same glue. Then the remaining grout is removed. If the tiles need to be cut to fit the wall, then a regular glass cutter will do.
Selection of adhesive mixture
Before gluing mirror tiles, you should carefully select.
Cement-based glue is absolutely not suitable for such material. You also need to be careful when choosing a sealant, because cement and vinegar destroy the mirror amalgam and spoil the appearance of the surface of the product.
The best option is a special tile adhesive that is used for mirrors. It is also good to lay tiles using neutral sealant or liquid nails.
Gluing the mosaic
Gluing mosaics is a little more difficult, since you need to apply the product to each of the tiles, which are very small in size. However, there is no need to use more glue than necessary. It will be difficult to remove from small seams.
The canvas needs to be lifted all at once, so you will have to use someone’s help, after which it is pressed against the wall. It is very important that each of the small tiles fits against the wall. Then another sheet is glued, and so on until all of them are glued. When the glue has dried, you can grout the joint.
In order to pass the wire through the tiles, it is better to use the services of a workshop. They will drill a hole there carefully without cracking. When buying tiles, you should take them with a reserve, as they may break or you will have to replace them after some time.
As you can see, there is nothing complicated in installing this material, you just need to use the right glue and do all the work carefully and slowly. In general, the installation itself is no different from gluing tiles.
If the installation itself seems difficult, then you can use the services of professionals.
Useful tips
During installation, you need to work with the tiles very carefully so as not to scratch the surface.
If you need to drill a hole in a tile to bring out a wire for a lamp, etc., it is better to mark the place with a marker and use the services of the nearest glass company (they are in every area).
It’s cheaper and easier than buying an expensive glass drill, and a beginner is unlikely to be able to drill a mirror the first time.
Don't miss: What is a laser ruler for?
It is advisable to immediately buy several more tiles than the calculations show. Firstly, the fragile material can be damaged during transportation or installation. In addition, it is advisable to have a couple of tiles in case of repairs.
Care Tips
Caring for mirror tiles comes down to keeping the surface clean. To do this, clean the tiles once or twice a month using detergents and a spray bottle included in the package. After spraying the product, let it sit for 30-40 seconds and rub it with a special soft cloth over the entire surface. If necessary, the operation is repeated. If the surface is heavily soiled, products are used to remove grease or limescale, depending on the type of contamination. To clean glass surfaces, in order to avoid damage, do not use scrapers, steel wool, or cleaning powders.