How to remove wallpaper adhesive after renovation?
You can remove the glue with warm water. If the composition has already dried, use more aggressive solvents, for example, vodka or vinegar.
Warm water
Fresh stains can be easily removed with warm water. Procedure:
- Wet a clean sponge and squeeze it well.
- Rub the sticky stain 2-3 times.
- Rinse the sponge in warm water and walk over the surface to consolidate the result.
You should not rub the wall covering too hard to avoid damaging it. If the non-woven material is not too sensitive to moisture, then paper wallpaper should be handled with care.
How to remove dried residue with vinegar?
If the glue has dried, table vinegar will help to deal with it. Use it as follows:
- apply a small amount of vinegar to a cotton pad;
- moisten the stain with it and leave for 2-3 minutes;
- walk over the problem area again to thoroughly clean it.
There is no need to rinse the vinegar with water - it will evaporate on its own. It is necessary to wear gloves when working with acid.
Vodka
The alcohol contained in vodka allows you to dissolve dried glue and remove the stain without a trace. Procedure:
- Apply vodka to a clean cloth.
- Treat the stain and leave for 2-3 minutes.
- Remove the softened compound from the wall surface with a light movement.
It is not recommended to use alcohol in its pure form; its concentration is too high, which can cause damage to the wallpaper.
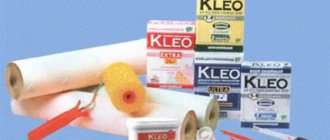
Professional products
If the wallpaper is expensive, then it is better to use professional removers to remove the glue. These include:
- H.G. This all-purpose cleaner is suitable for removing glue from wallpaper, painted walls and plastic. With its help, you can remove even dried stains in a few minutes. The cost of a 500 ml spray is 330 rubles.
- Prosept Duty Scotch . It contains solvents that allow you to quickly get rid of wallpaper glue. Simply spray the product onto the stain and wipe it with a paper towel. The cost of a 400 ml bottle is 350 rubles.
- Mellerud. A universal adhesive remover that can be used to clean wallpaper. The cost of a 250 ml bottle is 440 rubles.
You can purchase household chemicals in hardware stores or order them online.
Self-cleaning wallpaper from glue
First of all, in order to avoid damage to the new finishing material that was glued to the walls, you need to perform a trial removal of the composition using a clean damp rag in an area that will be hidden from view, for example, where furniture will be located in the future. If after such exposure the appearance of the wallpaper has not deteriorated, then you can continue to clean it with its help.
If there is a need to remove a fresh glue stain, the best option is to use wet wipes, which in most cases do an excellent job of this task. If the method is ineffective, then it is necessary to consider other methods and use them.
When wallpapering walls, it is best to immediately completely remove excess glue from the outside of the finishing material. It must be removed from paper wallpapers with a clean, dry rag, and from those with a higher density using a dampened rag. If you do not remove the mixture in time before it hardens, then removing it becomes much more difficult.
When wallpapering walls with your own hands, one of the most often worrying moments among novice craftsmen is concerns about the protrusion of the adhesive composition at the seams. If high quality glue is used when gluing wallpaper, it generally does not form stains. In cases where the manufacturer does not indicate anything about this on the packaging with the mixture, their occurrence is quite likely to occur.
To remove protruding adhesive from problem areas, for example, in seams, there is a special “Anti-Glue” product on sale. During its use, it is possible to remove not only wallpaper, but also PVA, polyurethane, contact and some other types of adhesives, including those that harden extremely quickly. If necessary, the product can even be used when it is necessary to clean traces of ink and markers. After treatment, the stain dissolves and is then removed manually.
Note! Initially, you need to read the instructions for the product in detail and perform a test application in a place that is away from the eyes and, if the effect is negative, will not be able to visually spoil the appearance of the finish.
Particular difficulties may arise when it is necessary to remove the polyvinyl acetate cellulose composition. After final hardening, the likelihood of its elimination becomes extremely low, even with the help of Anti-Glue or similar. Taking this nuance into account, it is better to glue wallpaper using starch-based wallpaper glue.
It is imperative to clean the seams from the exposed adhesive mixture, because if this is not done, then after some time they can acquire a yellowish tint or become infected with microorganisms dangerous to human health, which will not only lead to a disruption in the appearance of the coating. If the latter are detected, it will be necessary to remove mold from the wallpaper using appropriate means.
Wash the wallpaper
Important! It is better to deal with any stains on the wallpaper immediately after they appear. In this case, there is a high probability of their instant removal.
Wallpaper glue is a simple product, but prompt action will be beneficial.
To prevent stains from appearing on the surface of the wallpaper, use the following preventive measures:
- Lubricate the fabric with adhesive without excess so that it does not bleed through the seams;
- The work surface on which you lay out the canvas must be clean;
- After you have applied the coating, treat it with a clean cloth, and then go over it with a roller. If the glue still bleeds through, blot it again with a rag.
Remove old, dried construction material from walls
Before you start gluing new wallpaper, you need to clean the walls of old, hardened PVA glue. Removing dried adhesive from the surface of walls is a labor-intensive task. Special solvents of natural and synthetic origin will help get rid of it:
- Try washing off the adhesive. Wet the problem area with a spray bottle, wait a while, then start scrubbing with a clean cloth. Repeat the procedure if necessary;
- When choosing a dry cleaning type, use only brushes and sponges. The task is to act abrasively on the surface of the wall. Clean off any stuck adhesive. Be careful!
- Dried glue is much more difficult to remove than fresh glue. Take a rag and soak it in soapy water. Treat the problem area and wait a few minutes. Then try scraping off the glue with a spatula. If it is difficult to remove, then moisten the problem area again;
You can try removing old glue stains with steam under pressure. Use a special pump for this; In some cases, you can use a vinegar solution to remove dried glue; Sandpaper will help get rid of dried glue on the wall. The method is very labor-intensive, since the dried mass can leave glaze on the wall. You will have to spend a lot of effort to sand off the glue.
Wash non-woven and vinyl after gluing
It is not difficult to wash non-woven wallpaper after gluing, which is facilitated by the water-repellent qualities of the material. After completing the procedure, the coating must be wiped with any cloth. Processing wall coverings requires compliance with the following rules:
- The drying time of the canvas will be commensurate with the treated area;
- The water-repellent properties of the material prevent moisture from penetrating deeper than the decorative layer;
- The canvas dries quickly, no more than an hour.
When choosing a method for processing non-woven wallpaper, it is necessary to take into account the quality of the dye that was used to finish it.
Information. You can remove traces of water-based paint from the surface using a damp cloth. This way the top layer will not be damaged.
When processing wallpaper, take the following precautions:
- work carefully;
- the top layer of wallpaper should not be damaged;
- take into account the characteristics of the canvases used. They can be: painted, paintable, non-woven;
The moisture resistance of vinyl wallpaper depends on its type. Compact vinyl products have the best waterproof qualities.
Such fabrics can be treated with a brush and detergents. Avoid abrasives when cleaning.
To remove stains from wallpaper after gluing, dissolve soap in water and apply to the problem area.
The coating with a convex texture can be cleaned with a damp sponge. Do not rub too hard to avoid damaging the top layer.
Markings on vinyl wallpaper allow you to apply certain processing methods to them. A square wave means that the surface can be cleaned with a damp sponge. Use as little water as possible and limit the use of cleaning products.
Wipe and remove stains after repair
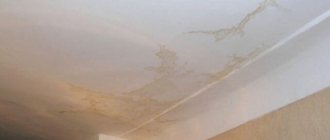
Usually, yellow spots appear on the surface of the wallpaper after repair. Often, even if all instructions are followed, yellow stains still appear on the wall. The cause of such contamination is wallpaper glue. Just wait a little time and the stains will disappear.
Attention! But in some situations, glue stains do not disappear. Sometimes this is evidence that the purchased materials are of dubious origin.
Adhesive formations sometimes appear immediately after gluing the coating. The reason for this is high humidity, for example, in case of flooding by neighbors.
Rust stains may also appear on the surface of the walls. This is evidence that all metal parts were not removed from the walls. You will have to re-glue the wall again, removing all problematic stains.
If the recommendations are not followed, or if the wrong type of primer is used, pink spots may appear on the wall after repair. In the first option, it will be enough to wait until the plaster dries, but in the second situation, the wallpaper will need to be re-glued.
Remove the primer layer from the wall and replace it with one more suitable for your situation. Such stains often appear on vinyl wallpaper. They are a type of dense coating that takes a long time to dry. Therefore, contaminants form on their surface. This is especially true for white wallpaper.
Causes of glue stains on wallpaper
Their appearance can occur not only if a person with little or no experience is engaged in pasting, but even when the work is carried out by a specialist who has previously successfully pasted wallpaper more than a dozen times. This is due to many different factors that should be familiarized with in advance to try to avoid the formation of stains that will later require wasting extra time to remove.
First of all, such a defect may appear due to poorly performed preparatory work, which can result if, before the process of gluing new canvases, you do not remove the wallpaper glue from the walls that remains from the old trellises. In situations where you have to glue wallpaper onto drywall, the surfaces made from it must be completely putty again.
In addition, it is necessary to treat the walls with putty in cases where lime is present, since due to contact with wallpaper glue it leads to the formation of yellow spots on the glued canvases, the removal of which can no longer be accomplished.
Taking into account these nuances, you can start gluing wallpaper only after thoroughly preparing the surfaces that need to be treated with special compounds. If necessary, you should level the walls, and also carefully remove the whitewash, oil paint, plaster or other finishing material that was on them instead of trellises. In addition, in any case, they must be pre-coated with an antifungal composition and cleaned of contaminants.
Also, before starting the main work, it is imperative to wait until the mixtures used during the preparatory work have completely dried, since otherwise stains and smudges may appear in the future, which will also spoil the appearance of the finishing material.
If you are going to glue non-woven wallpaper, then you do not need to apply glue to the canvas itself. They only need to sequentially process the areas of the walls on which the pasting is carried out, which is why the appearance of excess adhesive mixture used on their surface can be avoided.
Very often, during wallpapering, one serious mistake is made, the reason for which is poor initial fixation of the canvases, which ultimately leads to their rapid peeling. Many inexperienced craftsmen in this case do not see any other way out but to increase the amount of glue applied. In most situations, this does not help, since the problem lies in the adhesive composition itself, the preparation technology of which, most likely, was not fully followed.
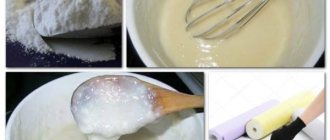
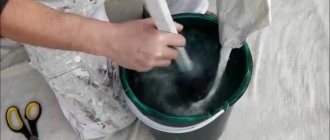
If you need to dilute wallpaper glue, then dilute it exactly in accordance with the manufacturer’s recommendations. When preparing the mixture, you must use slightly warm water. After thorough mixing, there should be no lumps in it, and then the glue should be given a few minutes during which it will swell. Taking into account the rather short shelf life, it is recommended to prepare the adhesive composition in small portions. Otherwise, after the period of time specified by the manufacturer, the technical performance of the finished mixture will begin to decline.
Often the reason for peeling wallpaper also lies in non-compliance with the correct conditions in the room that should be in it when carrying out such work. For example, when wallpapering a room, you should exclude drafts and direct sunlight and ensure an optimal temperature, which, if negative, can also lead to their falling off.
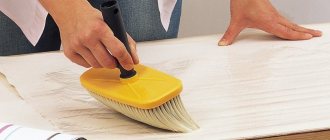
Note! To apply the optimal amount of glue, the best option is to use a wide brush with natural bristles.
When stains are a problem
The glue coming out of the seams of the wallpaper is not always noticeable. But in some cases this still happens. First of all, we are talking about dark wallpaper, where all the flaws in the joints are much more visible. And of course, such shortcomings are unacceptable for really expensive repairs. If the wallpaper cost you a fortune, then, of course, you don’t want to see traces of glue and other imperfections in the work.
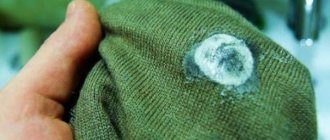
Eraser
If the glue stain is already dry enough, rub the damaged surface with an eraser. This will remove any remaining glue. You just need to act very carefully, because too intense movements will remove not only the stain, but also the coating pattern. Therefore, it is recommended to first try on inconspicuous areas of the wall.
How to prevent stains?
To avoid having to deal with the problem of stains on wallpaper in the future, you need to follow simple recommendations:
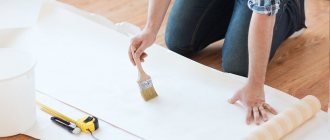
Don't skimp on buying brushes. To apply the glue evenly and accurately, you need to choose a tool with natural bristles.- If excess glue appears, it must be removed immediately with a clean, damp cloth.
- You should not apply too much glue to the wallpaper strip so that it does not protrude beyond its borders.
- For a better fit of the material to the wall, you need to go over it with a roller. For this purpose, use only clean tools.
Special means
It happens that the problem cannot be solved by any of the above methods. In such difficult cases, a tile adhesive solvent is used. Pulikol 2000 gel copes with the task professionally. Apply the product to a sponge or float and carefully clean the tiles, being careful not to scratch the gloss or damage the seams. It is even more difficult to remove tile adhesive from the floor or wall if too much time has passed and it has completely hardened.
To do this, you will have to resort to acidic cleaners, working with which requires care and attention:
- wipe the tiles with a wet cloth;
- spray a product to remove dried glue onto the areas where the dirt is located;
- maintain the time recommended by the manufacturer;
- moisten a sponge in water and remove the product along with the separated glue.
In order to increase efficiency for tile cleaning, it is recommended to select a solvent of the same brand as the adhesive used. It is important to try it on the remaining pieces of tile before applying the product to large areas, as the chemical effect may be too aggressive and ruin the glossy finish.
Among the professional products, the Atlas SZOP cleaner has proven itself well, with the help of which it is easy to remove hard adhesive and limescale deposits, as well as rust. The drug is used for ceramic, clinker and chrome cladding. If the contamination is minor, it is a good idea to use Luxus Professional to clean tiles and PVC tiles, which also has a disinfecting effect.
A universal product is Bass, a cleaning product that does an excellent job of removing small, old adhesive residues. Bass has a thick consistency and does not contain abrasive components or acids, so it is ideal for treating walls. Another substance, Mapei Kerapoxy Cleaner, is capable of removing up to 1 mm of adhesive. Mapei Pulikon 2000 copes better with large amounts of pollution. These products are not cheap, but are worth all the costs.
What do you need to prepare?
Auxiliary tools for removing the old wallpaper layer:
- Spatulas with pointed edges (various widths).
- A bowl with a polymer sponge or a special container with a paint roller.
- Roller with a needle-like texture (wallpaper “tiger”) for perforation.
- Polyethylene film.
- Old layer remover, warm water.
- Carpenter's knife.
- Masking tape.
- Mop with steamer or iron with cotton cloth.
Is it possible not to remove the adhesive mixture from the walls?
As a rule, any facing work begins with preparing the working surface and removing the old layer of adhesive mixture. An exception may be when dismantling the floor, when the tiles come off without effort, and the hardened mixture is a monolith without serious irregularities or cracks.
In this case, carefully seal the cracks, dents and voids that remain from the previous masonry. You can do the same when removing tiles from the wall, if you are sure that the walls were initially well prepared. Otherwise, the glue must be removed without fail.
Options for withdrawal
The main difficulty is removing the hardened adhesive mass. Depending on the strength of the composition and the age of installation, the following cleaning methods are used.
- Dry. The adhesive mixture is removed from the surface using a hammer and chisel or a hammer drill with a wide blade. The hammer drill should be held at an angle - this will make the process easier and faster. Residues are cleaned with sandpaper or a brush (manual or rotary).
- Wet . Tile adhesive is moistened generously with water using a spray bottle or a wide brush, which greatly facilitates dismantling work. After the moisture is completely absorbed into the hardened glue, it is removed mechanically.
How to remove old glue
The use of chemicals has proven successful in removing old glue. The method is used on surfaces for which intensive exposure is contraindicated. For these purposes, acid-containing substances (vinegar, citric acid), soda, and lime are used. Also, regular Cola has proven itself to be a good solvent for tile adhesive.
How to remove fresh adhesive from glossy tiles?
Often, stains remain on the tiles during the work process. Fresh adhesive from glossy tiles can be easily removed with a cloth soaked in warm water.
It is convenient to use a sponge for washing dishes - with the hard side you can clean up dry areas.
The remaining stains are wiped off with a rag or thick cloth.
Removing liquid glue from wallpaper
When gluing heavy wallpaper that requires diluting a thick adhesive, situations often arise when it is not enough to simply remove the adhesive with a damp cloth or sponge. And no matter how much treatment is done, the stain does not disappear. In this case, you can use the following advice:
Take a clean sponge and moisten it with warm water and squeeze thoroughly.
Rub the stain in a circular motion, occasionally rinsing and squeezing the sponge until the stain is removed.
Vinyl and non-woven wallpapers are resistant to moisture, so removing glue from them is not difficult, but paper wallpapers require special treatment. Sometimes it is better not to try to treat them with a damp cloth, but to leave everything as is, so as not to aggravate the situation. After drying, the glue will become almost invisible, but rubbing with a damp sponge will only cause the surface to wear off.
Special means
It happens that the problem cannot be solved by any of the above methods. In such difficult cases, a tile adhesive solvent is used. Pulikol 2000 gel copes with the task professionally. Apply the product to a sponge or float and carefully clean the tiles, being careful not to scratch the gloss or damage the seams. It is even more difficult to remove tile adhesive from the floor or wall if too much time has passed and it has completely hardened.
To do this, you will have to resort to acidic cleaners, working with which requires care and attention:
- wipe the tiles with a wet cloth;
- spray a product to remove dried glue onto the areas where the dirt is located;
- maintain the time recommended by the manufacturer;
- moisten a sponge in water and remove the product along with the separated glue.
In order to increase efficiency for tile cleaning, it is recommended to select a solvent of the same brand as the adhesive used. It is important to try it on the remaining pieces of tile before applying the product to large areas, as the chemical effect may be too aggressive and ruin the glossy finish.
Among the professional products, the Atlas SZOP cleaner has proven itself well, with the help of which it is easy to remove hard adhesive and limescale deposits, as well as rust. The drug is used for ceramic, clinker and chrome cladding. If the contamination is minor, it is a good idea to use Luxus Professional to clean tiles and PVC tiles, which also has a disinfecting effect.
A universal product is Bass, a cleaning product that does an excellent job of removing small, old adhesive residues. Bass has a thick consistency and does not contain abrasive components or acids, so it is ideal for treating walls. Another substance, Mapei Kerapoxy Cleaner, is capable of removing up to 1 mm of adhesive. Mapei Pulikon 2000 copes better with large amounts of pollution. These products are not cheap, but are worth all the costs.