Andrey
9070 0 10
Andrey July 28, 2017 Specialization: facade finishing, interior finishing, construction of dachas, garages. Experience of an amateur gardener and gardener. We also have experience in repairing cars and motorcycles. Hobbies: playing the guitar and many other things that I don’t have time for :)
In Soviet times, PVA was often used for gluing wallpaper, but is such a solution justified in our time? To answer this question, I propose to understand all the features of this material, as well as all the pros and cons of its use.
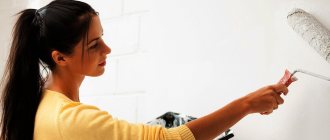
Polyvinyl acetate glue can be used for wallpapering
Main characteristics
Dispersion adhesive consists of small polymer particles mixed with water. When the moisture evaporates, a homogeneous film is formed - polymerization occurs. After this, it cannot be dissolved with water.
Compared to simple wallpaper, this adhesive has significantly higher adhesive strength. These features have pros and cons:
- fairly thick consistency;
- composition features;
- uneven drying.
Spread wallpaper is very difficult to level due to its thick consistency. Thanks to the addition of special components, wallpaper adhesives allow the canvas to slide over the surface being pasted. PVA does not have such properties, so gluing wallpaper on it is quite difficult. It can be used to glue joints.
The adhesive contains rather long cellulose fibers, which do not allow wallpaper to be properly glued to rough and porous surfaces. It is not able to properly fill the pores of the substrate.
PVA is characterized by the fact that it dries for a long time and rather unevenly. Where there is a thin layer of glue, a polymer film forms very quickly. In those places where a thick layer has formed, a film “bag” can be created that does not allow air to pass through well. Therefore, the glue takes quite a long time to dry.
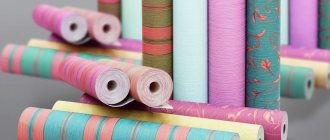
Is it possible to glue non-woven, paper and other wallpapers?
PVA is good for wallpapering. But it is not suitable for all types of fabric.
It is suitable for working with light wallpaper. It is better for them not to glue the following types of wallpaper:
- Non-woven. The fabric is too heavy for PVA composition. For them it is better to use glue with increased adhesion.
- Vinyl. Technically, it is possible to glue such wallpaper with PVA, but the quality of the gluing will be low. Vinyl wallpaper is heavy, so it will not provide high-quality joints (the edges of the strips will come off).
- Too thin with a paper base. Through such wallpaper, glue can come out in unsightly yellow spots.
General recommendations
Today there are many different adhesive compositions, specifically designed for certain types of wallpaper or universal, for any financial opportunity. You just need to purchase a suitable one, carefully coat the canvases, paying special attention to the joints, and do not stretch the canvases when gluing.
If you follow all the gluing rules, then you do not need to add PVA to the wallpaper adhesive. It doesn't make high-quality wallpaper turn yellow, but paper wallpaper can, but it becomes tougher. To ensure that the joints do not diverge, and that the heavy wallpaper is glued well, it is necessary to perfectly align the base being pasted - the ceiling or walls. A special paper tape is glued under the joints.
If the walls have previously been painted, they must first be primed, but PVA ensures reliable adhesion. For example, when gluing wallpaper on a non-woven basis, you can add it to the wallpaper glue at about 150 ml/liter.
The worst thing to do is to stick to thick paper ones, where the joints constantly come off. All other types of wallpaper, also dense and heavy, are easy to glue and the joints are secure. Under the seams of wallpaper, you can stick paper strips that are specially produced for this purpose.
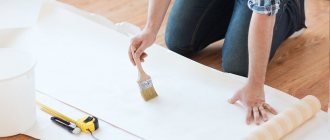
Gluing technique
There is no particular difficulty in gluing vinyl wallpaper on a non-woven backing. However, the technology still has certain subtleties that should not be neglected.
Tools and materials
What is needed for high-quality wallpapering of walls like this?
- wide spatula;
- container for diluting glue;
- stationery knife;
- sponge;
- plumb line;
- a special brush or rubber roller for smoothing the canvas;
- pencil;
- brush for applying glue;
- meter ruler;
- scissors;
- working surface.
Preparing the walls
Careful preparation of the walls directly affects the quality of the wallpapered walls. This primarily concerns the elimination of surface defects (filling cracks, potholes, leveling).
Any wall surface (concrete or plasterboard) must be treated with a thin layer of putty to obtain a uniform white base. Next, a layer of primer is applied. It’s even better to prime the surface twice: before filling and a second time after. Then you just need to proceed to further steps.
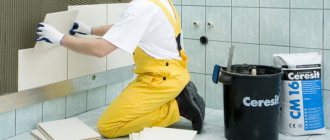
What to glue with?
For vinyl wallpaper on a non-woven base, you must purchase only special glue. It is usually presented in two versions:
- Ready-to-use adhesive composition.
- A dry mixture that must be diluted immediately before starting the gluing process.
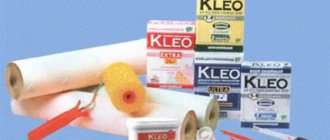
Today the most common brands of glue are:
- "Kelid Special non-woven fabric." It is dry flakes based on starch, which are diluted with water before gluing. There are versions of this glue designed for light and heavy, narrow and wide wallpaper.
- "Pufas" Powdered adhesive composition, which is prepared 30 minutes before the start of work. Contains antiseptic additives that prevent the formation of fungus and mold. You can purchase varieties of glue from this brand for light and heavy vinyl wallpaper.
Pasting process
You should start work by marking the walls. Vinyl wallpaper on a non-woven backing is not glued overlapping, but joint to joint.
- Using a level, draw a vertical line. Any wallpaper is glued away from the window, so place the first mark at a distance equal to the width of the covering from the corner of the wall with the window opening. Please note that it is not recommended to join the panels in the corners. An overlap (5-10 cm) should be left on the adjacent wall in advance.
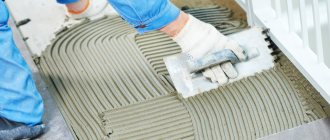
- Dissolve the glue. If it is a powder, then slowly pour it into the water while stirring the solution. Leave the composition to swell (time indicated on the instructions).
- Apply the swollen solution to the marked area for gluing the first canvas. This is done using a brush or roller. Coat the surface thoroughly so that there are no uncoated areas left. Please note that the glue is applied only to the walls, not to the wallpaper.
- Print out your first roll of wallpaper. You should not cut it into pieces in advance: this will be a waste of effort and time. Pull the free end of the canvas up to the level of the baguettes. Align the wallpaper exactly to the vertical marks. Smooth the surface of the coating well with a plastic spatula or rubber roller, expelling excess glue and air bubbles. The direction of movement is from the middle of the strip to the edges and from top to bottom.
- Use the sharp end of a putty knife to tuck the excess wallpaper under the ceiling plinth. Use a utility knife to trim off the excess at the bottom.
- Perform similar manipulations with subsequent strips. Further work will be much easier, since it will be possible to focus on the edge of the previous canvases. Don't forget to roll the joints with a roller.
- The most difficult stage is fixing the wallpaper in the corners. Perfectly straight corners will not create problems, but in crooked corners the stripes will wrinkle. That is why the work should have started by retreating from the corner.
Iron the corner thoroughly, eliminating any air pockets. The next strip must be fixed on the other side of the corner, also leaving a free edge for overlap. Iron the fabric on the fold and trim off any excess wallpaper with a utility knife. Carefully iron the edges of the joint, pressing them with a brush or clean rag. If you do everything carefully, you can end up with perfectly fitted canvases.
Some features
If the wallpaper was glued with regular glue, then you can simply remove it by first separating the top layer.
Then the base can be soaked and easily removed with a spatula. When gluing was carried out using dispersion adhesive, the finishing from the walls had to be scraped off with great difficulty. It is recommended not to do this, because this option is not the best method, as it can damage the surface.
You need to know that after gluing with PVA, it is very difficult to remove the finish. This is a waterproof glue, and wallpaper glued with it cannot simply be soaked and removed from the surface. You have to work with a spatula, damaging the wall covering. If the surface is made of plasterboard, then it will suffer very seriously. In order to obtain a new base suitable for pasting, it will have to be puttied and leveled a lot and for a long time.
PVA is more expensive than regular wallpaper glue, which is more suitable for these purposes. You can add a little dispersion glue (0.5 liters per 10 liters), the wallpaper will stick better and stick more securely. For joints, you can dilute PVA glue with water in the proportion of 2 parts glue and 1 part water. Then it will be easier to apply it to the surface. The adhesive strength is significantly higher than when gluing with simple wallpaper glue.
Principles of using wallpaper glue
To obtain a high-quality adhesive solution, it must not only be chosen correctly, but also mixed well. You should always study the instructions from the manufacturer, which indicate the required ratio of components.
There should be no lumps left in the finished solution; it must be used within a certain period of time so that it retains its properties. It is advisable to select a specialized mixture for the selected type of wallpaper. So there are subtleties in diluting different adhesives. For example, how to dilute glue for non-woven wallpaper is somewhat different from working with glue for paper and vinyl.
It is advisable to select a specialized mixture for the selected type of wallpaper.
Important disadvantages
The negative properties of PVA include the following:
- Even professional glue has such a consistency that it does not glide properly like regular wallpaper. Ingredients that promote gliding are specially added to the composition, therefore;
- It dries unevenly and takes quite a long time, it depends on the glue layer, if it turns out to be very thin, then the polymer film forms quickly, immediately after the moisture evaporates. When the layer has formed thick, the resulting film “bag”, which does not allow water or air to pass through, takes quite a long time to dry; simple glue evaporates evenly without forming a film;
- PVA consists of fairly long cellulose fibers and this is how it differs from ordinary wallpaper. It provides reliable fastening as a result of polymerization, but does not glue rough, uneven surfaces well because it is not able to fill large pores in the base;
- after polymerization and drying of PVA, it almost becomes plastic, so it is very difficult to remove wallpaper covered with dispersion glue, because they are securely held in place by a waterproof film.
PVA wallpaper glue exists, but is rare.
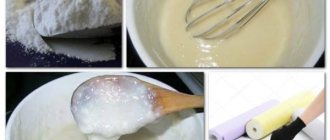
Making PVA glue at home
Before you make PVA glue, you will need to prepare a certain list of its ingredients. In particular, for the production of 1 l. composition you will need:
- 100 g of wheat, high-quality sifted flour.
- 20-30 ml of ethyl alcohol (technical alcohol can be used).
- 5-10 g of finely dispersed (photographic) gelatin.
- 5-10 g glycerin.
Homemade PVA glue for household needs
Making your own PVA glue
The process of making PVA glue with your own hands is as follows:
Dilute water with dry gelatin in a ratio of 10 to 1. After thorough stirring, leave the composition for a day. This exposure will ensure the maximum combination of components.
To perform the following steps you will need 2 enamel or glass containers of different sizes
An important condition regarding size: the dishes must fit into each other according to the principle of nesting dolls. Manipulations consist of boiling in a water bath
To do this, the gelatin solution is poured into a smaller container, which is installed in a second, larger one. Water is poured into the latter and set over high heat. After the gelatin mixture boils, flour is gradually added to the mixture. The principle of operation is similar to preparing choux pastry: by pouring it evenly and constantly stirring, the number of lumps is reduced to a minimum. Mixing is done with a wooden spoon. After the composition has acquired the consistency of thick sour cream, you can begin to add the remaining ingredients: alcohol, glycerin, coloring pigments (if necessary). After thoroughly stirring the contents and keeping in a water bath for another 30 minutes, remove from heat and cool at room temperature.
Making PVA glue for wallpaper
To prepare PVA wallpaper glue you will need the following components:
- Starch or sifted flour 250 g.
- Half a teaspoon of salt.
- 750 ml. water.
We make wallpaper paste with our own hands.
The procedure is as follows:
- Mix water with flour and mix thoroughly until a homogeneous consistency is obtained.
- Add salt and mix again.
- Place the contents of the container on low heat and, with constant stirring, cook for 10 minutes.
- After removing from the heat and cooling the contents, you can work with the composition.
Some nuances
Several features that can be useful when making PVA glue with your own hands:
- When making PVA wallpaper glue, other components that perform bonding functions can also be used. For example, PVA glue (super or construction) + water. When mixed in equal proportions, an excellent paste is obtained that can be used for gluing wallpaper of any type. The second option involves the use of wood glue. The mixing proportions are identical: 50 to 50. The only condition that distinguishes the resulting composition from the first method is the dark shade of the resulting mixture. As a result, this becomes the reason for its applicability only with dark wallpapers.
- Unlike wallpaper paste, PVA glue obtained according to the first recipe can be stored for up to several months. The conditions for this are minimal: a dark place, no direct sunlight, hermetically sealed containers and a temperature from +5 to +15°C.
- When used after long-term storage, homemade PVA glue should be thoroughly mixed and brought to a uniform consistency.
DIY PVA glue is a universal product for household use. It can be used for wallpapering, making crafts from various materials, minor home repairs, and even in the production of building mixtures. The composition is completely safe for humans, non-flammable, and has excellent performance properties. In addition, in order to prepare it at home, you do not need any complex components, which explains its mass popularization.
conclusions
All of the listed characteristics make this method not a very good method for gluing walls, but sometimes it is still recommended.
- Quite often they resort to this method; if the joints come off, then you should coat the base with the canvas, wait a little until the glue begins to dry. You can press the wallpaper against the wall, it will grab tightly;
- if you plan to glue fairly heavy canvases, then you can add a little dispersion glue to simple wallpaper for absolute reliability. Special PVA for wallpaper is quite rare, it is too expensive and requires learning to work with.
If, after all, there are no options and you need to glue the wallpaper with PVA glue, then it is better to dilute it with water in a ratio of 1:2 or 1:3. To stir thoroughly. It is not recommended to glue wallpaper onto drywall with this glue, even in diluted form. An exception may be non-woven wallpaper. Then you won’t have to prepare the walls before the next gluing; the non-woven base and PVA will do a great job with this.
Some useful information about PVA glue in the video:
Recommended Posts
3d wallpaper for the living room + photo
How to properly glue wallpaper on drywall with and without putty…
How to hang wide wallpaper
Options for wallpapering in the living room, kitchen, bedroom
How to choose two types of wallpaper for the living room
How to glue wallpaper with your own hands
How to glue wallpaper on painted walls, is it possible to “strengthen” the glue?
Modern adhesive compositions are already endowed with qualities that enable them to cope with the functions of connection and protection. But sometimes reinforcement is required for a long shelf life.
In the case of wallpaper work, the following types of compositions available on the modern market are suitable:
- PVA.
- Bustilat.
- Methylane.
- Moment.
The last two varieties are produced in the form of powders that require prior mixing with water. PVA and Bustilat are characterized by the consistency of sour cream; they are immediately ready for use and cannot come off.
To make the materials adhere to each other faster and more firmly, PVA is added to the composition of liquid wallpaper adhesives.
To make the materials adhere to each other faster and more firmly, PVA is added to the composition of liquid wallpaper adhesives.
The process of wallpapering a painted wall with your own hands
Preparing the tools will not take much time. There are enough devices that are on hand at home. Don’t forget about personal protective equipment to prevent harmful substances from getting on your skin.
The work order is as follows:
- First, we look for places where some problems initially exist. For example, mold and mildew, peeling pieces of material. It will not be possible to glue without this.
- Use a spatula or sandpaper to clean off the paint that has already begun to peel off. Fix cracks by filling them with special solutions. Purchased products are used to combat fungus and mold.
- Irregularities in the form of cracks and other defects are filled with primers. After drying, the surface is puttied.
- Dust and dirt are removed by adding warm water to the surface. The same applies to any greasy stains and dirt. At the same time, they use improvised means, including household chemicals. The painting does not suffer from it.
The main stages were discussed above, because each material requires certain processing actions.
After drying, the surface is puttied.
Tips you may need when mixing glue
Experts with experience have identified some simple techniques that will help you get the desired result. The recommendations are as follows:
- Studying the manufacturer's instructions is mandatory; when a universal adhesive is selected, you need to change the ratio to suit a certain type of wallpaper. So, when asked how thick the glue for non-woven wallpaper should be, they answer that it is necessary to achieve a consistency so that the composition does not flow down or form clumps;
- To improve adhesion, it is better to deviate somewhat from the manufacturers’ instructions and reduce the amount of water by 10%;
- There is no need to add PVA to the composition yourself, this will violate the characteristics of the product.
To improve adhesion, it is better to deviate somewhat from the manufacturers’ instructions and reduce the amount of water by 10%.
To ensure that the wallpaper fits tightly to the wall and does not fall off the next day, special attention is paid to the choice of adhesive. It is not recommended to resort to universal formulations; it is better to take specialized ones. Dilute the product carefully and step by step so that the mass is homogeneous and without lumps.
How long can diluted glue be stored?
To preserve all the properties of the adhesive, you must use it on time. Therefore, before diluting wallpaper glue, calculate how much it will be needed for the room.
To do this, you need to understand how long diluted wallpaper glue is stored. There is no definite answer, because adhesives differ. Or it may be necessary to complete the gluing process before all the canvases are glued, or the amount of product is incorrectly calculated.
Then, to avoid using a spoiled solution, evaluate its condition, there should be no unpleasant odor, and the mass should not change in appearance. They also conduct a quality test by gluing a small piece of wallpaper; if the fixation is good, you can continue to work with this product.
It is better to store the solution in its finished form by covering the container with plastic wrap and a lid; this will increase the service life to several days.
They conduct a quality test by gluing a small piece of wallpaper; if the fixation is good, you can continue to work with this product.