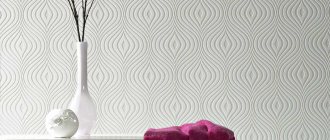
At the moment, the most common material for interior decoration is OSB, which without subsequent cladding does not look aesthetically pleasing. Many owners of apartments and houses who have used this material in finishing work are wondering how to properly hang wallpaper on an OSB board so that it does not fall off after a short period of time.
Types and characteristics of OSB boards
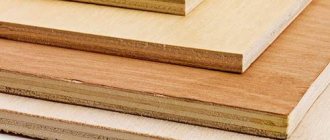
This material consists of several layers of sawdust and shavings, compressed and bonded with a special composition consisting of glue, paraffin and various resins. This impregnation not only transforms wood waste into a single whole, but also serves as reliable protection against moisture. After pressure treatment, the sheet obtains a beautiful glossy surface.
In terms of its characteristics, such as strength, resistance to deformation or rigidity, it is superior to plywood, hardboard, particle board and plasterboard. Builders are attracted by the ease of processing of these panels and their ability to hold various fasteners well. They are compatible with all types of finishing work: puttying, painting, wallpapering, varnishing, tiling.
There are 4 types of boards on sale from OSB-1 to OSB-4. The higher the number, the higher the strength of the sheet. Three and four have increased moisture resistance.
Important! When decorating the interior of residential premises, it is imperative to pay attention to the environmental friendliness of the material. OSB boards must be marked “ECO”. Environmental safety class E0 or E1 is allowed, but the latter type of material should not come into contact with air, and therefore requires mandatory rough finishing.
All other types of OSB boards can be used only for outdoor work, as they are capable of releasing compounds harmful to the human body.
Wallpapering
Step-by-step instruction:
The technique of wallpapering OSB walls is no different from working on other types of walls.
- According to the manufacturer's recommendations, glue is mixed.
- The wallpaper is cut into strips of the required size, taking into account the fit of the pattern.
- If a meter-wide variety is used, it is recommended to involve an assistant. Products can be laid overlapping or end-to-end. In the latter case, it is advisable to prepare special tapes for insertion under the combined canvases.
- The cut strip and base are treated with glue. To prevent it from drying out, the wallpaper is folded in half.
- The canvas should be glued from top to bottom, smoothing with a dry rag or a special rubber spatula.
- The rest of the wall is covered in the same order.
At the final stage, moldings are installed.
There are universal types of glue, but to obtain a truly high-quality result, it is advisable to use highly specialized compounds
What happens if you simply stick wallpaper on an OSB surface?
Such an experiment can have negative consequences:
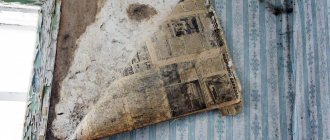
- Oriented strand board appears smooth only at first glance. After drying, all the unevenness and roughness of the surface will definitely appear on thin wallpaper. Interpanel seams will also appear, as well as places of fastening with self-tapping screws.
- Under the influence of temperature, stains from released synthetic resins and paraffin will appear on the wallpaper over time.
- Impregnation of the OSB board impairs adhesion, so the glue or primer will slide off its surface.
- Wallpaper glue can cause the material to swell, so it is necessary to create a barrier against its penetration into the panel.
To avoid this, you need to listen to the recommendations of experts. It will be possible to properly glue wallpaper onto OSB only after the necessary preparatory work has been carried out.
USEFUL INFORMATION: Gluing wallpaper for painting on the ceiling
Small tips
A few more tips to help you get the job done better :
- The joints of the wallpaper sheets should not coincide with the joints of the OSB boards;
- Don't neglect reusable priming. The primer closes small pores in the putty and creates a thin film on its surface that will prevent the composition under the glue from getting wet;
- Be sure to avoid drafts during and after work.
If all the rules are followed, wallpaper pasted on OSB can last at least 5 years.
Tags:Wallpaper
When can you get by with minimal processing?
As already mentioned, it is impossible to glue wallpaper onto slabs marked E1 without creating a protective layer. For OSB class E0, the following options are possible:
- Dense and large-relief vinyl or non-woven wallpaper, as well as fiberglass and glass wallpaper can be glued to the slab without leveling the surface, just priming and sealing the joints. For light-colored panels, it is recommended to additionally coat the slab with white insulating paint.
- Liquid wallpaper, due to its ability to hide unevenness, can also be applied to a primed slab with pre-treated joints.
- Smooth or thin wallpaper is glued only to a slab leveled with plaster or putty.
Conclusion: for some types of wallpaper, provided that the slab belongs to class E0, when preparing for gluing, you can limit yourself to sealing joints and priming, omitting several labor-intensive steps.
Method No. 1 - without putty
This method is often used to reduce finishing time and in case of lack of skills in working with building mixtures.
In this case, the surface of the plates is processed as follows:
- You must first seal all the joints between the slabs. It is best to use acrylic or silicone sealant in white or transparent color. If this step is neglected, over time, folds may form on the wallpaper at the junction of two plates. In no case should the sealant protrude beyond the plane of the slabs; its excess can be smoothed out with a rubber spatula, which is usually used to grout tile joints;
- When the sealant has cured, it is necessary to make the surface of the slabs smooth and increase their level of adhesion. If you are gluing smooth and not very dense wallpaper, the surface must be sanded. For thick vinyl or non-woven wallpaper, glass wallpaper or liquid wallpaper, the surface can be treated with coarse sandpaper. At this and the next stage, be sure to use eye and respiratory protection - there will be a lot of dust;
- Remove wood dust from the surface. This can be done with a brush;
- Now let's start priming. You can use purchased compounds (Ceresit ST17 deep penetration primer has proven itself well) or prepare the compound yourself. To do this, you need to mix PVA glue and clean water in a ratio of 1:3;
- It is necessary to prime with a purchased composition at least 2 times after each previous layer has completely dried. If a homemade solution was used - at least 3;
- Many experts, after the soil has dried, claim that the surface is ready for gluing. However, many users, from personal experience, still advise covering primed slabs with white interior paint. If possible, use two layers. After the paint has dried, you can begin gluing the wallpaper. The procedure will be standard.
I would like to note right away that if after a few years you have a desire to re-glue the wallpaper, it will be quite difficult to do so. The canvases will stick to the interior paint very firmly. And, secondly, if the walls are still shrinking, then sealant filling the seams alone will not be enough. Over time, these places will collapse and the wallpaper will tear. We can conclude that this method will be successful only for finishing utility rooms or a summer house. For finishing a residential building, it is better to use the second method.
Surface preparation
Forming the desired base for wallpaper includes the following steps:
- Sanding and leveling slabs.
- Primary primer.
- Processing panel joints and recesses at fastening points.
- Installation of fiberglass reinforcing mesh.
- Applying a layer of plaster or putty.
- Secondary primer of the leveled surface.
Application of primer
This stage allows you to:
- Create a waterproofing layer that will prevent the slabs from swelling when in contact with wallpaper glue.
- Eliminate the slightest irregularities remaining on the OSB surface after sanding.
- Improve the adhesion of the material, which was initially low due to the properties of synthetic resins and paraffin.
- Eliminate the possibility of impregnation stains appearing on the wallpaper in the future.
The primary primer is carried out in two or three layers. It is recommended to cover the panels with an acrylic or latex based solution.
Important! The primer must have antifungal and water-repellent properties.
Consequences of pasting on an untreated surface
Pasting untreated OSB boards with wallpaper can lead to a lot of negative consequences.
For example:
- Correct installation of OSB boards implies the presence of technological seams between the elements in order to compensate for the linear expansion of the material. In addition, the surface of the slab itself is uneven and heterogeneous. In this regard, after the wallpaper dries, all these places will be clearly visible. Exactly like the screw heads. All the decorativeness of such decoration will be reduced to nothing;
- Under the influence of temperatures, synthetic resins and paraffin will be released from the surface of the slabs. Accordingly, they will appear on the wallpaper in the form of spots;
- OSB boards are additionally impregnated with special solutions, which ensure their moisture resistance, but at the same time reduce the adhesion of the surface with any other composition. Wallpaper glue will simply roll off, just like primers;
- If you do manage to apply glue to the surface, it may cause it to swell. Therefore, it is simply necessary to create an intermediate protective barrier.
All OSB boards, depending on the formaldehyde content in them, can be classified into two categories - E1 or E0. All of the above is more true for class E1 slabs.
Sealing joints
Particular attention should be paid to processing joints and sealing screw heads. These shortcomings will definitely appear after wallpapering.
OSB, like any other wood-based element, tends to change geometric parameters under the influence of temperature or moisture. Therefore, during installation, a gap of several millimeters is left between the plates. To seal it, it is recommended to use silicone sealant. Even if the house is constantly heated, the possibility of an accident cannot be ruled out. With a sharp change in temperature, the plasticity of the silicone solution will prevent cracks from forming between the fragments.
USEFUL INFORMATION: What glue should I use to glue photo wallpapers: what glue is needed for different photo wallpapers?
You can smooth the joints of the sheets using polyurethane foam or plastic wood putty with the obligatory use of sickle tape.
In the absence of silicone-based sealant, the heads of hardware are coated with oil paint. It will prevent rust from appearing.
Preparatory work before gluing
As with conventional walls, it is important to ensure thorough surface preparation before the process. Otherwise, all efforts will be in vain. What is included in the preparatory stage? The process is like this:
- The base is leveled. This is especially true in cases where there was already some kind of finishing on the surface of the walls. A protective layer is removed from the surface, which will interfere with the application of primer. After which the OSB board is sanded using a grinding machine or sandpaper. The second option requires more effort and time.
- The first layer of primer is applied. The primer fills all the pores and creates a protective film on the surface. In addition, it improves adhesion, so the putty will be held more firmly on the slab. For the best effect, apply two layers with breaks for drying. Then the slab will not swell from the adhesive. Acrylic or latex primer is better.
- When the slab has dried, it is important to treat the places where the slabs are fixed to the wall and the seams. They will be visible and become a weak point after gluing the wallpaper onto OSB. The seams create a gap of 2 or 3 mm. To remove it, just use silicone sealant, polyurethane foam or putty with sickle tape (as when working with drywall). It is important to treat the heads of screws or nails with paint so that the metal does not rust in the future.
- The main feature of the preparation is the installation of a fixing mesh or fiberglass sheet. Thanks to it, the putty will not fall off the slab and will not crack. A stapler is needed for fixation. The mesh should not sag, but should not be too tight. The installation process begins from the slope. Instead of a stapler, it is allowed to use fiberglass glue.
- The next stage is puttying. A layer of putty will protect the OSB boards and make the surface smooth and ideal for gluing wallpaper. In addition, if they are thin or light, then dark stains from the slab will not show through and spoil the appearance. There is a special putty for sale on wooden surfaces. When the layer is dry, the surface is rubbed with sandpaper or a grater.
- Secondary priming. On top of the putty layer you need two layers of primer. It will improve adhesion to the wallpaper itself.
It is important to carry out each of the stages carefully and carefully, so that before gluing wallpaper onto an OSB board, you do not have to think about whether the surface will withstand the weight of the canvases or not. Such events will make the walls ideal for gluing. All that remains is to do the standard wallpapering.
OSB surface primer
Under no circumstances should this stage of surface treatment be ignored before wallpapering it, as it allows you to:
- create a protective layer that will prevent deformation of the slabs when moisture gets on them;
- eliminate small irregularities that will remain after grinding work;
- improve surface adhesion;
- eliminate the appearance of stains on the facing material during operation.
The primer is applied in two layers, and the composition must be latex or acrylic.
Padding
The priming method will make it possible to create a waterproof film, which will not contribute to the swelling of the slab from contact with liquid and glue.
In addition, priming will make it possible to smooth out unevenness; resins and impregnated substances will not be able to form on the surface, which will significantly increase the strength of gluing with trellises.
Latex or acrylic primers have good qualities, since they contain antiseptic components. A more acceptable version is to use a mixture of PVA glue and water in a ratio of 1:3.
We recommend: Standard for the height of the sink from the floor in the bathroom: washbasin parameters, at what height to hang and install, standard and optimal, what it should be and at what height to install it
The soil substance purchased at a hardware store is applied in two layers; if the soil mixture is made of PVA and liquid - in three layers. This surface will take approximately two to three days to dry.
When the surface is dry, white paint is applied to it using a roller. When the surface has been treated with putty material, the priming step is omitted.
Secondary primer
Repeated application of the primer not only improves the adhesion of the wallpaper to the putty surface, but also protects the latter from the penetration of moisture from the adhesive. Move to this stage after the putty has completely dried.
Seams on OSB boards
Seams and fasteners should be well hidden. OSB is based on wood, and therefore does not have good resistance to moisture, and can change under its influence. Therefore, during installation, a small distance is left between the seams, and they are sealed.
Silicone sealant is better; it will not allow the panels to deform.
It is more difficult to work with a putty mixture for wood; when using it, the seams are sealed with sickle to avoid the appearance of many cracks. The material is applied with a spatula, when the layer dries, sanding is carried out with sandpaper. Start with coarse grains, then use small ones.
The material is applied with a spatula, when the layer dries, sanding is carried out with sandpaper.
Grinding
The surface preparation process begins by sanding the OSB boards with sandpaper to remove wood fluff and the smooth outer layer of binder resins. The moisture-repellent properties of resin and paraffin impregnation impair the adhesion of the primer to the surface, so in order to prevent it from rolling off under a roller or brush, grinding is used.
Wallpapering walls made of OSB sheets
Wallpapering interior partitions made of oriented strand boards is carried out in exactly the same way as when working with walls made of other materials. The most important requirement is that the surface is prepared correctly. If this condition is met, the result will be positive.
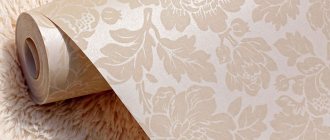
Any type of wallpaper is suitable for the job. The table below shows the recommended types of wallpaper adhesives for different types of wallpaper:
| Types of wallpaper | Recommended glue |
| Paper wallpaper | KCM-1 or regular paste |
| Non-woven and glass wallpaper | Methylane-glass fiber, Methylane-granulate |
| Velor and textile wallpapers | Oscar |
| Vinyl and acrylic textured wallpaper | Lakra, Methylane-vinyl |
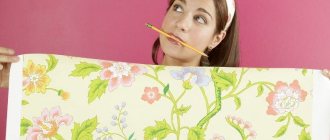
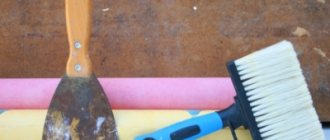
Everyone has their own method for gluing wallpaper. And here it is appropriate to recall the main points of this process. First of all, you should prepare the wallpaper by cutting the roll into pieces of the required size. In this case, you must remember to combine the pattern, if any. The canvases are laid out on the floor so that you can work with them sequentially. Then the glue is diluted according to the instructions printed on the package. You can start gluing.
The glue is applied to the wall and to the canvas with a roller or wide brush. The operation must be carried out as quickly as possible to prevent the canvas from getting wet through. Then the prepared piece of canvas is carefully applied to the wall in the right place. The wallpaper should be smoothed to remove air bubbles and small wrinkles and irregularities. Excess glue is removed with a dry cloth. To achieve a better effect, the joints between the sheets can be rolled with a rubber roller. Then the next piece is taken and everything is repeated. It takes some time for the wallpaper to dry completely.
It is very important that while the wallpaper is drying, the windows and vents in the room are closed. A draft can lead to uneven drying of the canvas and the formation of bubbles and even tears.
In conclusion, I would like to note that walls made of OSB panels are a rather difficult material for finishing work. But there is no need to be afraid of this. If everything is done correctly, then you can work with them in the same way as with concrete and brick partitions. It’s just that OSB requires somewhat more expensive preparation for finishing work, including wallpapering.
Other methods of finishing OSB walls can be found in the article: finishing OSB walls indoors.
Sealing joints
When attaching the slabs, expansion joints are left between them. There are also depressions on the surface at the fastening points, and there may be other surface defects. After the primer has dried, all these defects are eliminated using sealant, putty or foam; to eliminate large gaps, plaster or the same foam are used. Sealing joints with putty can be done simultaneously with filling the surface.
Expansion joints left to prevent linear expansion are best sealed with silicone sealant, as it is more elastic. At the same time, they should lubricate the fastener heads to prevent traces of rust from appearing on the surface. If silicone sealant is not available, the fasteners can be coated with oil paint.
Puttying
Smoothing the walls is another step in the preparatory work before covering with wallpaper. The walls will look even and glossy if you go through the stage of applying putty mixtures.
In the meantime, a putty mixture with an elastic structure is used; acrylic or oil is included in the stock, since this is an excellent ratio for woodworking.
It is important to remember that the putty must be selected depending on the type of finishing material used so that an incorrectly selected mixture can lead to peeling of the wallpaper.
Puttying procedure:
- use a construction mixer to mix the putty;
- Using a spatula, spread a thin layer of putty solution onto the wall;
- level well so that the surface becomes perfectly even;
- Use sandpaper to wipe away traces of joints;
- Use a construction brush to get rid of dust;
- then apply a ball of soil mixture for approximately 24 hours;
- start wallpapering.
Sanding OSB surface
Sanding is required to level the coating; in addition, this step helps to improve the impregnation of the base with the primer solution, it will be able to penetrate deeper. It is more convenient to work with special grinding equipment; the wheel is taken with fine grain. It is possible to work with the sanding mesh manually, but it will take a lot of effort and time.
Sanding is required to level the coating; in addition, this step helps to improve the impregnation of the base with the primer solution.
We recommend: Decorative stabilized and living moss in the interior: panels, walls made of decorative flowering moss
Installation of reinforcing mesh and protective corners
At least the seams need to be strengthened with reinforcing mesh (serpyanka), but it’s better to use the entire surface of the slabs. Installation of fiberglass mesh begins with a slope. It should be ensured that the joint of the panels does not fall at an angle. The mesh is applied to the staples with a stapler every 10–15 cm. For reliability, so that there is no sagging, you can additionally place it on glue.
Plaster for wallpaper can be applied to shingles instead of reinforcing mesh. Protective paint or plaster corners are installed on the outer corners of surfaces.
All stages: how to glue wallpaper on an OSB board
So, to summarize what has been said, we can say that such preparatory work is an important stage that will allow the OSB board to become an ideal surface for wallpapering. The preparatory process itself consists of several points. It is advisable not to skip any of them.
The preparatory process is:
- Grinding;
- Primer for leveling;
- Sealing joints;
- Installation of reinforced mesh;
- Leveling the entire surface;
- Primer;
- Direct wallpapering.
Before you start wallpapering, all preparatory work must be carried out.
The OSB board is usually sanded using sandpaper. This helps eliminate wood lint as well as the smooth outer layer of resin binders. The fact is that the impregnation has moisture-repellent properties; they impair the adhesion of the primer to the surface of the slab, which is why mandatory sanding is required.
The primer solves several problems at once: it creates the necessary moisture-permeable film, neutralizes the chip pattern, protects against resin and paraffin stains, and increases the adhesion of the base to the coating. It is recommended to prime in two or three layers; acrylic or latex primer is usually used.
When the slabs are fastened, expansion joints are left between them. It makes the most sense to seal these seams with silicone sealant; it is sufficiently elastic. You can also coat the fastener heads with it so that traces of rust do not appear in these places later. If you don't have silicone sealant, you can simply coat the fasteners with oil paint.
Applying putty
Rubbing the putty
After the primer has dried, it is necessary to proceed to the next stage of work. Regular putty used for concrete or brick surfaces will not work. It will peel off from the surface within the first few months after installation. For these purposes, you need to apply a special putty composition designed for leveling and processing wood.
The most practical way to stir the mixture is with a mixer, this way you can get a homogeneous composition without lumps or clots. The installation process is practically no different from application to other types of coatings. The technology is as follows:
- A small amount of the finished mixture is applied to the surface using a mat.
- The rule is stretched in the thinnest layer possible.
- After drying, some areas that have grooves from a spatula or rules are rubbed with a float.
- A primer is applied to the leveled and dried puttied surface, and when it is completely absorbed and dry, proceed to wallpapering.
Before applying liquid wallpaper to the OSB board, puttying is not necessary. Without this, the composition is well absorbed and adheres to the surface.
Plaster and putty
Depending on the curvature of the walls, both of these leveling methods or only the last one are used.
For application to OSB, compositions intended for wood that are highly elastic are selected: nitro putty, as well as acrylic-based or oil-adhesive solutions.
Leveling mixtures are applied until all surface imperfections are eliminated, and after hardening they are rubbed with fine sandpaper or a sanding mesh.
Applying plaster or putty is not necessary if liquid wallpaper, fiberglass or thick wallpaper with a textured pattern are used.
Selecting materials and tools
To make the job easier, you need to prepare the tools in advance. We will need the following to prepare the surface:
- To apply the plaster you will need a spatula;
- to clean the applied layer of plaster - sandpaper or a special mesh for sanding;
- brushes and roller for applying primer and glue;
- dry rag.
Materials for work:
- dry plaster for performing the process of filling the OSB sheet;
- primer;
- masking tape;
- wallpaper glue;
- directly wallpaper.
Our usual process of wallpapering is not suitable in this case. Here are several factors for the need to adhere to a special technology for wallpapering on OSB:
- since the slab consists of 90% wooden components, it has high rates of liquid absorption, so you cannot simply apply glue to the slab;
- Since wood absorbs liquid and the glue contains water, the process of applying glue can lead to swelling.
To avoid all these unpleasant facts, you should carefully prepare the surface for wallpapering.
Wallpapering
The procedure is no different from the standard one: cutting pieces of the required length, taking into account the adjustment of the pattern, and gluing in accordance with the recommendations of glue and wallpaper manufacturers. It is useful to take into account some nuances:
- The gluing pattern must be chosen so that the joints between the wallpaper fragments do not fall on the seams between the OSB boards.
- As a rule, glue is applied to the wall and to the mounted fragment. For each type of wallpaper, you need to wait a certain time before attaching it to the wall. In some cases, to prevent the glue from the back surface from drying out prematurely, craftsmen advise folding the strip to be glued in half, bending its top and bottom towards the center.
- On the wall, each fragment is carefully leveled with a roller or soft cloth to eliminate air bubbles.
USEFUL INFORMATION: How to properly glue 8-piece photo wallpaper
After pasting, it is necessary to ensure a constant temperature in the room for a day and take care of the absence of drafts.
The process of gluing different types of wallpaper is described in detail in the following articles:
- technology for working with non-woven fabrics;
- gluing vinyl on paper;
- nuances of gluing vinyl sheets on non-woven fabrics.
Application of liquid wallpaper on OSB
Liquid wallpaper does not need to be joined, it is not afraid of drafts and temperature changes, and the final appearance creates the illusion of an expensive coating, although in fact, silk plaster is a budget cladding option.
In any case, you must follow the instructions on the wallpaper packaging, but there are universal rules that must be strictly followed.
To estimate the approximate consumption of liquid wallpaper before purchasing it, you can use the information from the article: consumption of liquid wallpaper, weight and price of packaging.
Liquid wallpaper is afraid of contact with metal surfaces. The working tool must be made of plastic, and all metal surfaces protruding from the walls must be carefully insulated from contact with them.
The process of applying liquid wallpaper is performed according to the following algorithm.
1. Pour the contents of the whole bag into a plastic container. Gradually add the required amount of warm water and mix by hand.
2. Pause. The mixture will swell from 8 to 12 hours - it all depends on the manufacturer. At this time, you can stick cardboard templates on the walls if you need to create a decorative design.
3. Before application, stir the mixture again. It is better to distribute wallpaper on the wall with a spatula, starting from the corner. The thickness of the applied layer is 1-4 mm. No voids or gaps should be allowed.
4. Leave surfaces to dry. It is necessary to create active ventilation and heating in the room in cold weather.
5. After drying, remove the decoration templates and fill the voids they create with liquid wallpaper of a different color. Repeat drying.
6. If desired, the surface of the liquid wallpaper can be covered with a layer of protective varnish.
You can’t finish work on half the wall; you need to go from corner to corner. If, according to preliminary estimates, the solution is not enough for the entire wall, then you need to pour the whole package into the soaked composition and leave it to swell.
To more accurately match the shades of different walls, it is recommended to mix the solution on all walls at once.
The result is an impeccable, designer coating that looks very advantageous in any interior. Moreover, you can choose combinations for the ceiling and walls. The whole process is visually shown in the video:
Preparing for wallpapering fiberboard (hardboard)
With fiberboard, everything is more complicated due to the high hygroscopicity of the material. It cannot be treated with a deep penetration primer; without putty, seams will be visible through the finish.
There are 3 options for preparing hardboard for wallpapering.
Method No. 1:
- The surface is covered with white alkyd paint or primer on a similar base in 2 layers. This will create a moisture-proof barrier and increase adhesion.
- When gluing canvases, PVA is added to wallpaper glue at the rate of 50 ml per 1 liter.
This method is only suitable for thick textured wallpaper, through which seams will not show through.
Method number 2:
- The hardboard is primed with undiluted PVA glue.
- Fiberglass or fiberglass mesh is glued to the surface using PVA.
- The fiberboard is puttied with a gypsum compound. Layer thickness is about 1 mm.
- Putty slabs are sanded.
- A deep penetration primer is applied.
- Wallpaper is glued in the usual way.
The only drawback of the method is the one-sided protection of fiberboard from moisture. At high humidity, sheet material may become deformed.
Method No. 3 includes the following steps:
- Impregnation of hardboard with hot drying oil before installation, which will make the fiberboard moisture resistant.
- Treatment with a primer with quartz sand - “Concrete Contact” - making a smooth surface rough.
- Putty the slab with a thin layer. In this case, it is not necessary to use fiberglass mesh.
- Coating with acrylic primer.
- Wallpapering.
Processing slabs without putty
OSB has such a feature as the presence of gaps necessary for the movement of OSB when it is necessary to expand or narrow the space.
It is also important to take into account the type of finishing material, since the surface is usually uneven and rough, as a result of which the trellises will not completely cover surface imperfections. It is recommended to sand the surface with a grinding machine before gluing.
It is recommended to sand the surface with a grinding machine before pasting.
Gluing the material directly to the surface promises a number of disadvantages from this method, namely:
- poor-quality gluing work and visual visibility of unevenness;
- the structure of the slab is visible in cases of light-colored wallpaper;
- as a result of an increase in temperature, impregnation, paraffin substances and resins will clearly appear through the wallpaper layer;
- the quality of wallpaper sizing will deteriorate as it dries, as peeling occurs from the surface;
- A slab of poor quality that is not environmentally friendly will not fulfill its protective properties.
For example, gluing vinyl, non-woven wallpaper, thick-layer wallpaper or large-embossed wallpaper. To isolate the coating, if the glued material is white, you must apply light-colored paint to it.
There are wallpapers, after application, the quality of the slab itself improves, even if before that it had various unevenness, roughness and other flaws. These are liquid wallpapers, they are usually applied directly to the object.
Liquid wallpaper
If the preliminary preparation was carried out correctly, you will get a beautiful decor, since the silk decorative plaster will strongly adhere to the OSB board after hardening, which will make it possible to eliminate the penetration of impregnation and have an elegant finish.
Regular wallpaper
When the wallpaper is light in color, it is recommended to apply insulating paint. But it is also possible to apply wallpaper to an untreated surface in the case of thick wallpaper or a relief structure.