Paintable wallpaper is an excellent option to update a room in a short time. They do not require lengthy surface preparation; you can glue them yourself. When you get bored with the color of the coating, you can easily paint them a new color. The main thing is to understand how to properly glue wallpaper for painting. This will be discussed in more detail below.
Classification
The building materials market presents a huge selection of wallpaper, differing in cost and characteristics. The most popular are:
- paper ones are inexpensive and short-lived. Quality indicators leave much to be desired, and in most cases they are used to create the main interior background. Gluing is carried out in the usual way, but to obtain the desired effect, the preparation of the base must be carried out in compliance with all technological methods;
- vinyl based on paper - a two-layer material of high quality, not durable and quickly abrasive. To extend the operational coverage, coating treatment is recommended;
- non-woven - used for finishing walls as a finished covering or for painting. The basis is non-woven fabric, the decorative covering is made of vinyl material. They are easy to work with, have good strength, and the adhesive is applied only to the wall surface;
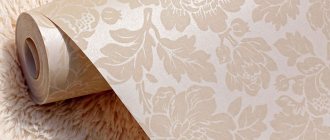
- glass wallpaper - the raw materials are paper and fiberglass threads containing quartz sand and other components. A distinctive feature of the material is the density of the structure and the clarity of the relief lines. Woven threads form a variety of patterns, wallpaper is characterized by durability and long service life. They are allowed to be wet cleaned.
Advantages and disadvantages
There is a large selection of paper wallpapers for painting. In the store you can choose wallpaper with any texture you like. At the same time, the price range of such wallpaper will please any wallet. One of the main disadvantages of these wallpapers is that they tear and deteriorate easily. When the house shrinks, this wallpaper forms an unsightly crack. They are also afraid of humidity.
Non-woven wallpaper is quite easy to glue and can also be quickly removed if necessary. Wallpaper that is not covered with a vinyl layer is distinguished by its durability and quality. They are recommended to be purchased for new homes. This wallpaper is able to resist cracks and maintain its original appearance. The disadvantage is that non-woven wallpaper in rolls is easily torn. They become more durable only after painting.
Vinyl wallpaper is easy to glue, however, due to the textured surface, it becomes difficult to apply an even layer of paint. You need to handle this wallpaper quite carefully, because the top layer of vinyl can be easily scraped off, for example, by hitting it with heavy furniture. But after painting, the top layer becomes stronger.
Glass wallpaper has a number of advantages. It is worth noting their decorative effect and ability to correct certain flaws in the walls. They are treated with special impregnation to increase the level of fire safety. These wallpapers are easy to glue, but difficult to remove, so they are more often used in non-residential premises.
The main advantage of wallpaper that can be painted is that it can be repainted 10-15 times.
Preparatory activities
The quality of wallpapering walls for painting depends on the preparation of the surface for repair.
The technological process involves several working stages:
- in rooms planned for renovation work, the electrical network is turned off, sockets and switches are removed, and wires are insulated;
- the old covering layer is dismantled. The wallpaper is moistened and peeled off with a spatula, the paint is removed by mechanical action or chemical means, the surface is preheated with a hair dryer. A warm solution with added soap washes off the whitewash layer;
- areas where mold has appeared are cleaned and treated with an antiseptic solution;
- the connecting sections of walls and ceilings are checked for evenness, and putty mixture is applied to angles of ninety degrees to facilitate the gluing process;
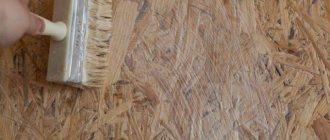
- wall surfaces are treated twice with a primer to ensure reliable adhesion. All that remains is to wait the time necessary for the walls to dry completely.
How to paint wallpaper correctly
To paint wallpaper you will need the following tool:
- masking tape;
- paint tray;
- brush;
- long pile roller.
If tinting is carried out, additional capacity will also be required. You need to tint all the paint at once. The dyeing process is divided into several sequential operations.
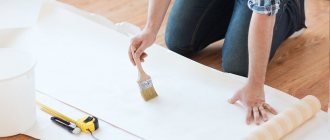
- It is necessary to stick masking tape along the edges of the walls and ceiling that are in contact with the wall to be painted so as not to stain them with paint.
- Pour paint into the tray and roll out the roller so that the fur coat is completely saturated.
- After removing excess paint, use a roller, without pressing too hard, to apply paint to the surface.
- The surface should be painted from top to bottom. It is more convenient to work near windows, ceilings and in corners with a brush. If you plan to additionally apply a pattern to the surface, then this should be done only after the main tone has dried.
The result obtained will certainly not be inferior to the results of the work of a team of professional finishers.
Marking the wall, cutting wallpaper strips
Before wallpapering for painting, the required dimensions are taken and the rolls are cut into strips of appropriate length.
To ensure that the canvases are glued as evenly as possible and the wall surface looks beautiful, the necessary markings are applied. First of all, a corner area is selected from which it is planned to begin gluing work. As a rule, this is a wall with a window opening.
Having chosen a starting point, mark the distance corresponding to the width of the wallpaper roll, minus two to three centimeters (reserve for finishing the corners).
Using a plumb line, draw a straight vertical line, which will serve as the main landmark. Having retreated a distance corresponding to the width of the wallpaper, draw a second marking line. In a similar way, markings are made on all walls.
The next step in gluing wallpaper for painting with your own hands will be cutting the canvases. We clarify the distance from the ceiling to the floor surface, while taking measurements at several points, selecting the average value and adding a ten-centimeter margin to it. It can be reduced to three centimeters if you plan to use a baguette.
All that remains is to cut the canvases with a sharp knife into pieces of the required length and begin gluing.
Leveling the surface using putty and primer
After this, you need to level the resulting surface using putty. It is not difficult to purchase such a mixture. It has a start and a finish line. Starter putty is designed to smooth out large gaps and cracks, and is used at the beginning of the process. The finishing putty smoothes out all the small unevenness that has formed after the starting mixture.
After this, with the help of special nets for rubbing the surface of the walls, the ceiling is finally brought to ideal condition. The main purpose of these finishing mixtures is to make the walls flat and even, and the corners perfectly straight.
It should be noted that this is a dirty and dusty job, so it is necessary to carefully insulate the furniture, as well as windows and other objects that are forced to remain in the room being repaired.
To do this, the best option would be to prepare oilcloth and tape for future use, which are convenient for packing everything.
After leveling the walls and ceiling, it is necessary to treat the surfaces with a primer. This solution performs several useful functions at once - it protects the walls and ceiling from fungus and will improve the separation of wallpaper during subsequent repairs, so we can safely begin the priming process with our own hands. When all the preparatory and rough work is completely completed, the most important and final stage remains - wallpapering.
Work on preparing, processing and wallpapering surfaces
Gluing paper and vinyl sheets
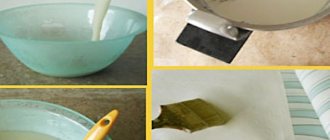
Let's look at how to glue wallpaper for painting on walls. Strips, cut to the required length, are rolled out onto the floor, the surface of which is even and clean. The back side is coated with an adhesive mixture, for which it is best to use a wide brush.
The corners and edges of the wallpaper are treated with special care so that air bubbles do not accumulate here in the future.
If you don’t know what kind of glue to use to glue wallpaper for painting, purchase a mixture with a special indicator composition, using which as a guide, spread the mixture evenly over the wallpaper surface.
The strip is folded into two parts or like an accordion so that the glue completely saturates the material, at this time the wall surface is also coated with the adhesive mixture, covering the areas behind the marking line.
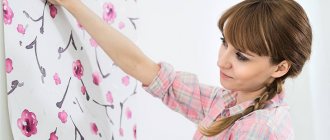
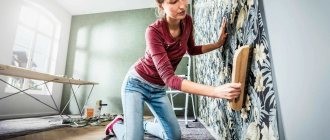
How to properly glue wallpaper for painting? We apply the first strip to the surface, check its location relative to the markings, adjust it and roll it with a roller, squeezing out excess glue and removing it with a sponge.
According to this principle, all wall surfaces are pasted over, the strips are joined end-to-end, and the edge sections are pressed tightly.
How to start gluing wallpaper for painting on non-woven backing
Pasting the walls begins from a window or corner, slowly moving deeper into the room. The first strip of wallpaper is marked and glued strictly according to the level; it is this strip that sets the direction for all other strips. The canvas is carefully brought to the glue-coated surface and the upper part is pressed; pay attention, do not paste the wallpaper upside down. The edge of the strip should lie strictly along the drawn line. Then, using a plastic spatula, smooth the wallpaper from the center to the edges so that there are no folds or bubbles. You should make sure that the wallpaper is glued evenly and well fixed. The excess length from below is cut off with a stationery knife. There is no need to worry about making the cut line perfectly straight, because the baseboard will cover it. If the wallpaper is uneven, you can quickly peel it off and stick it back on. Non-woven wallpaper “slides” along a wall coated with glue, which makes it possible to move the canvas and adjust the joint.
The second and subsequent sheets are glued, guided by the first, always end-to-end, without overlap.
Each strip of wallpaper is not glued all at once, but holding one edge at a short distance from the wall, the other is joined to the already pasted canvas. It is important to avoid overlapping edges and at the same time to prevent gaps between them. The correct joint is almost invisible.
A joint is always needed in the corners; you should not try to seal it with just a strip. If the corner is even, glue the edges of the canvases with a slight overlap, then, pressing the spatula against the wall, cut the corner, remove the excess and glue the wallpaper end-to-end. If gaps have formed in the corner, narrow strips of wallpaper are glued under the canvas.
Pasting with non-woven, glass wallpaper
It is easier to work with such a finishing material, because the adhesive mixture intended for repair is applied only to the wall surface. This saves time because there is no need to wait for each strip of wallpaper to be thoroughly soaked.
How to glue non-woven wallpaper for painting? The wall is coated with glue, and wallpaper is applied to the treated area. There is no need to cut the material into strips in advance - the adjustment is done on the spot: attaching a roll, unwind it to the desired length and cut it with a sharp blade. The exception is wallpaper that requires matching patterns.
Before gluing wallpaper for painting on a non-woven backing, you should take care to create an optimal temperature regime in the room - not lower than twenty degrees Celsius. In addition, it is necessary to eliminate the possibility of drafts that negatively affect the drying process of the canvases.
Fiberglass wallpaper takes much longer to dry than other wallpaper material.
By following simple recommendations, you can easily install non-woven wallpaper for painting yourself.
Choosing glue and paint for wallpaper
The paint and varnish material to be used is also selected according to a number of criteria. Not only the shade is important, but also the type of coating and the type of room. Water-soluble types are not suitable for painting in a room with high humidity.
Wallpaper with a base of vinyl, non-woven fabric, or paper requires the use of water-based paints; fiberglass must be painted with latex or acrylic paint. The latter is distinguished by its durability and versatility, withstands moisture and mechanical influence. Latex, like the previous one, has similar properties, but unlike it has a glossy finish, acrylic will give the surface a matte tint.
Wallpaper with a base made of vinyl, non-woven fabric, or paper requires the use of water-based paints.
It is also important to know how to glue the canvases. After all, if the adhesive solution is chosen incorrectly, the wallpaper may peel off prematurely. For a paper look, vinyl adhesive works well. Non-woven fabrics should be selected with the glue intended for them. Fiberglass sheets can only be glued with special glue, which says that they are intended for fiberglass; they are heavy, and other means will not withstand such a load.
For a paper look, vinyl adhesive works well.
Dyeing process
As soon as the wallpaper on the walls has dried, you can begin painting it.
For any type of wallpaper material, paint compositions that do not contain solvents are used.
Paper canvases are painted with water-based paint, and water-based compositions are used to decorate vinyl and non-woven trellises. For glass wallpaper, it is recommended to use a composition based on acrylic or latex.
The paints are evenly distributed over the entire surface of the wallpaper.
In order not to damage the relief texture, you should not paint one place several times. Re-painting is allowed when the wallpaper is completely dry from the first coat of paint.
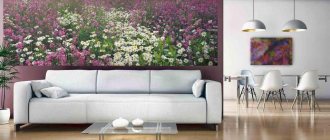
Using wallpaper intended for painting, you get the opportunity to completely update your interior without making major repairs. The color shade can be changed up to eight times, refreshing the atmosphere, creating original design solutions, giving the interior practicality and modernity.
Tools and materials
In order for the repair to be carried out correctly and efficiently, and to last a long time, it is not recommended to skimp on materials and tools. You will need:
- a roller or brush to apply glue to the wallpaper;
- a container to dilute the glue according to the instructions;
- a construction knife or sharp blade for cutting wallpaper;
- polyethylene;
- dry rags to wipe off excess glue from the wallpaper;
- building level.
The selection of glue should be taken more carefully. In the case of paper web, a standard adhesive composition is suitable. To glue non-woven or glass wallpaper, you should choose glue for heavy wallpaper. This will be written on the packaging, so be careful when making purchases.
What is vinyl wallpaper?
Vinyl wallpaper consists of two layers. The top layer is made of PVC, and the bottom layer is made of either paper or non-woven fabric. Experts conditionally divide all vinyl wallpapers into three main types: flat, foam and kitchen.
Kitchen vinyl wallpaper has a fairly significant thickness, as well as an absolutely smooth surface. Thanks to these qualities, they can be easily cleaned from almost any type of contamination.
If we talk about foamed vinyl wallpaper, then their main advantage is the fact that even if the walls are not completely level, or there are some defects on them, this type of vinyl wallpaper will successfully hide them.
The last, third type of vinyl wallpaper, which is called flat, is quite thin, but at the same time they have one very important competitive advantage - they have a stunning design, which is presented on their surface with a mixture of silk threads.
In addition to the differences mentioned above, all vinyl wallpapers have the same number of advantages:
1. During gluing, vinyl wallpaper sheets do not tear, as they have high density and elasticity coefficients.
2. Vinyl wallpaper can be easily washed. This is ensured by a very significant level of moisture resistance.
3. During operation, the color of vinyl wallpaper does not change. This is due to the fact that they are not afraid of direct exposure to sunlight.
4. Vinyl wallpaper is very difficult to damage by mechanical action.
5. Thanks to the widest range of textures and designs, vinyl wallpaper can imitate almost any type of material, including natural wood, plaster, suede and ceramics.
Unfortunately, vinyl wallpapers are not without flaws, the main one being the fact that they do not allow air to pass through and, as a result, do not allow the surface to “breathe”. It is for this reason that most experts do not recommend using this type of wallpaper for decorating bedrooms and children's rooms.