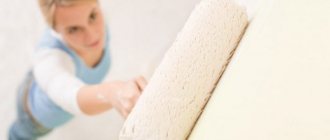
When arranging a room, it is not at all necessary to purchase textured wallpaper with a pattern, since a beautiful image can be applied to the surface of a structural element, without even needing a stencil. A roller with a ready-made pattern for the walls is used especially for this purpose. This device has an already prepared image on the cylinder. Not everyone is familiar with such a tool, the procedure for selecting it, and the method of application, which is why we will dwell in more detail on this version of the device.
How to make drawings on walls using a stencil?
Prepare a stencil for painting walls, glue for it, a roller or brush.
Spray or acrylic paint will work. Prepare the surface for painting. Clean it from dust, dirt, wash it if necessary. Apply markings to the cleaned surface. If possible, use a level: this way there is less danger of distorting the design or applying it incorrectly. Mark the outermost points for the stencil with a pencil, so that you can then fix it evenly on the surface.
Paint can be applied to the stencil using a piece of foam.
Practice a little before you start. To do this, you can use a piece of wallpaper or find an inconspicuous section of the wall. Preliminary work helps to practice a little in terms of application technique and choose the desired color of the ornament. Experienced craftsmen try to create several designs in different shades to see what best reflects the idea on the wall surface.
To fix the stencil on the wall, it is better to use a special aerosol glue. There will be no sloppy marks left after the stencil is removed. Neither wallpaper nor paint will come off the wall. The glue is sprayed in an even layer onto the made stencil, and then pressed to the surface. To be on the safe side, you can additionally use tape. It must be kept in mind that glue will not prevent paint from getting under the stencil.
When painting through a stencil, remember that high-quality wall painting does not tolerate fussiness. To do this, it is better to choose acrylic-based paint: it will dry faster and is suitable for any surface. You can apply paint using a sponge, brush or roller. When working, add the coloring matter little by little (this eliminates the risk of smudges).
When working with small stencils, it is recommended to use a brush to apply paint.
When working with a brush, you need to hold it perpendicular to the surface of the wall. Apply the paint using the padding method, so that neither lint nor the coloring matter gets beyond the edge of the product. When painting with a sponge, the first impressions must be made on a separate sheet of wallpaper. This will remove excess paint. When using a roller, make sure that the paint distribution is as even as possible. Particular care must be taken when handling corners and small details of the stencil. The roller is best used for products with large patterns.
To paint using an aerosol paint mixture, try to hold the can at a distance of 30 cm from the wall. Sometimes the wall needs to be protected from paint smearing over the edges of the stencil.
The drawing is saturated with color in several stages. If you get not very distinct boundaries, you need to draw them with a thin brush.
To create a three-dimensional pattern on the wall, acrylic putty is suitable. It must be applied using a spatula. This is done layer by layer until the required thickness is achieved. To create a three-dimensional pattern it is 1-3 mm. The putty sets 2-3 minutes after application, but does not completely harden yet. At this time, the stencil must be carefully removed so that the ornament is not damaged. A not entirely even layer, after the putty has dried, can be leveled using fine-grained sandpaper. The resulting pattern can be painted or tinted.
After finishing the work, the stencil must be washed and dried. In most cases, it can be reused several times.
When working with a stencil, mistakes are sometimes made that need not be made. For example, this is a displacement of the product or smudges of dye. To avoid this, you must first securely fasten the stencil. Use only a small amount of paint and use gentle movements when painting.
Technique for applying cladding and design
To apply the finishing material, the surface must be prepared. Clean it from the previous coating. Then it should be primed, preferably with a deep penetration primer.
If it is intended to apply two layers of plaster of the same shade of different saturation, then first the surface is leveled and the first layer of the desired color is applied.
Next, a decorative layer is applied. If there is a need to emphasize the exact boundaries between layers, you can use masking tape. Before applying a layer of decorative plaster, the composition should be well tinted and brought to the required consistency.
Plaster application technique
Apply layers with smooth movements directed from top to bottom.
When working with a roller, in order for the design to be applied efficiently, the following rules must be observed:
- Do not put too much pressure on the roller when working, as this will interfere with the creation of a textured and voluminous pattern;
- movements should be smooth and sliding;
- if desired, the protruding parts can be coated with acrylic paint. Depending on the color scheme used in the interior, you can cover the depressions or protruding parts with gold or silver paint. It is best to apply acrylic paint when the plaster is completely dry after about 48 hours.
The process of obtaining different designs can be a lot of fun, because thanks to this you can decorate the walls so that the room will have its own individual style. You can involve the whole family in this process so that everyone can show their imagination and contribute to the design of the room.
If you really want to create a stylish, unique interior, but don’t have enough money for a great wall finishing specialist, don’t give up on your idea.
Textured rollers for decorative plaster will allow you to do it yourself, without the help of specialists. But before you run to the store for this unusual tool, study the information provided in this article about its types and the technology for creating a textured coating with its help.
We are all familiar with ordinary paint rollers for painting walls and ceilings. And older people, from the stories of their parents, remember wooden cylindrical devices for applying designs to walls, which were widely used in the era of the absence and shortage of wallpaper.
It was they who became the prototype of modern decorative rollers with a pattern for decorative plaster.
Construction market offers
Let's see what types of rollers manufacturers of construction tools offer. They are all designed the same way and consist of a rotating cylinder attached to a handle.
The cylinder coating can be:
- rubber;
- plastic;
- silicone;
- foam;
- tissue;
- leather,
- fur.
The texture of the future decorative surface, which can imitate brick or stonework, marble, wood, fabric, or be decorated with an original design or ornament, depends on the type of coating and its relief.
Here are some examples:
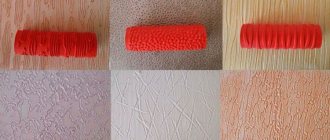
- A relief plaster roller with a hard rubber or plastic coating
and a relief pressed into it will create a convex pattern on the wall surface;
- A relief protruding above the surface of the coating
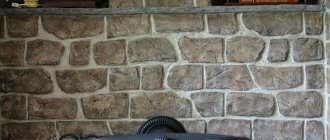
, on the contrary, will allow you to squeeze out a pattern on fresh plaster. For example, create the effect of brickwork or tree bark;
- Fur
for textured plaster is used to create a “fur coat” effect;
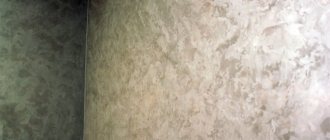
- A roller-tampon made of soft crinkled fabric
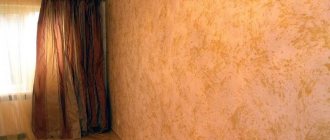
imitates a marble surface, which will look very believable if you choose the right plaster and paint the walls (see) in a special way after it dries.
Decorative paints: types and positive properties
Decorative painting is carried out with special paint and varnish compositions that have special properties that allow you to paint walls with unusual visual effects and patterns.
Let's look at the most common types of patterned finishes:
- With mother-of-pearl effect - allow you to paint walls with the effect of an iridescent canvas. When changing lighting angles, the patterns and shades of the surface change;
- With the effect of velor or velvet, the composition includes multi-colored solid particles, which allow an application similar to velvet;
- The mosaic effect is applied using a special device - a spray gun. Here, an unusual pattern is achieved thanks to the spreading of tiny acrylic bubbles.
- Paints with various additives, such as crushed shells, sand, flakes.
In addition to the listed paints, one cannot help but recall glazes and enamels, which make it possible to obtain unusual patterns on walls using various application methods.
Decorative wall paints have a number of positive qualities:
- durability;
- antistatic;
- safety and environmental friendliness;
- ease of care;
- resistance to atmospheric and mechanical stress.
But it is also worth mentioning the disadvantages of decorative paints:
- high cost;
- the need for a perfectly flat wall.
Interesting to know! Sometimes decorative painting of walls with your own hands, in order to save money, is done not with specialized materials, but with water-based paint and varnish compositions, which, when used correctly on the walls, allow you to obtain patterned surfaces
But here it is important to take into account some nuances: in no case should such a product be applied with rollers and sponges made of synthetic material, since small bubbles may form
Summing up
If you want to create a special design in your apartment or country house, but don’t know where to start, think about the prospects for finishing vertical surfaces: walls. Give up the usual wallpaper and consider the option of applying colorful patterns or relief plaster to the surface yourself.
To get an aesthetic result, it is necessary to prepare the walls for processing and select the appropriate tools. Structural rollers for decoration are a unique way of arranging the most intricate and extraordinary patterns and ornaments, which can differ not only in their visual embodiment, but also represent a three-dimensional surface.
Rollers of various types have individual technical parameters and create a unique design, changing the space in accordance with the design concept.
The application of ornaments can be used for zoning a room, decorating it and visually changing its parameters. Tags:roller, Wall
How to choose the right paint
Structural paints are one of the increasingly popular finishing materials. They are applied in different ways and different types are also needed for certain rooms. Painting mixtures for living rooms (bedroom, living room, nursery) are selected with the texture of silk, velvet; it is recommended to paint the ceilings in light colors, but it is better to keep the relief as minimal as possible. A bulk water emulsion is best.
Wet areas of the bathroom, toilet, and combined bathroom are decorated with waterproof compounds. In the kitchen, especially in the work area, the likelihood of contamination is high; it is recommended to use washable surfaces. The external parts of buildings of any type are often exposed to temperature changes, precipitation, and sunlight. For facades, the most resistant brands of dyes are used - vinyl is optimal, but acrylic is undesirable, since it fades in the sun in just one or two seasons.
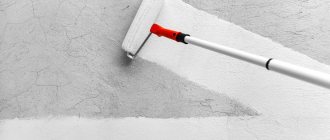
Textured rollers for decorative plaster and wall painting
A textured roller for decorative plaster or painting a wall surface is a special type of tool that comes in a wide variety. You can buy it ready-made or make it yourself using an old roller and scrap materials as a base.
A textured roller is a great way to decorate a surface without resorting to too complex and expensive technologies. And in order to see how unusual and beautiful the effect of using a textured roller for painting walls can be, just look at the photo examples presented on the Internet.
Using a textured roller you can quickly give decorative plaster the desired pattern.
How to choose the right roller for painting ceilings and walls: expert advice
A huge selection of different rollers can confuse almost anyone
So, in order not to make a mistake in your choice, you should once again pay attention to all the important aspects and follow the following recommendations from experts:
- Before you buy a roller, check it directly in the store. To do this, wrinkle the fur coat with force and evaluate the deformation. If the fur coat is too wrinkled, then it is better not to buy such a roller;
- When purchasing a roller with long pile, the coat must first be inspected to make sure that the fibers do not fall out. Otherwise, you will have to deal with hairs on the surface of the painted wall or ceiling;
For high-quality surface painting, when purchasing a lint roller
it is necessary to pay attention to the quality of pile fastening
if you are not sure which roller is suitable for which paint, it is best to give preference to a universal option, which is, for example, polyamide rollers; if you have to paint the walls in an apartment, then a roller with a short handle will be enough
But if you pay attention to how to properly paint the ceiling with a roller, you will see that there are special telescopic handles for this; the roller clasp should not be too soft, as this can cause deformation, which in turn will affect the quality of the surface painting and the lifespan of the tool.. By following these simple but extremely important recommendations, you can purchase a high-quality roller that will allow you make a high-quality surface coating, while spending a minimum amount of time and effort
By following these simple but extremely important recommendations, you can purchase a high-quality roller that will allow you to make a high-quality surface coating while spending a minimum amount of time and effort.
Before painting the ceiling, the surface must first be primed
Helpful advice! If you need to work with several colors at once, it is not at all necessary to purchase several rollers. It is much easier to buy additional coats that can be changed on a roller as needed. In addition, this way you can save a lot.
Using a homemade tool
In order to make a textured roller, you need to tie or glue pieces of foam rubber, fabric or cellophane onto a regular one. After completing this procedure, you can use such a roller to apply a water-based composition to the surface of a wall or ceiling. This decor option will look very original and aesthetically pleasing. You can also use wire wound on a roller.
DIY roller making methods
There are several simple methods for making a textured roller for decorative plaster work. To make a tool that imitates brickwork, you will need:
- rubber-based roller;
- sharp knife.
The roller should be wide enough. In order for the imitation to resemble the original as much as possible, the surface of the roller must be divided into 3 equal parts by two channels. Then, on each of the parts, transverse grooves are cut in a checkerboard pattern, reminiscent of seams between bricks. The result of the work is rectangles separated from each other, which, when printed, will become bricks.
To obtain prints that imitate marble, you can use another simple method. Here you need to use compressed fabric or leather. The material is crumpled and, in a crumpled state, glued to the roller using universal glue. When working with such a tool, movements should be slow and even. You must try not to take your hand off the wall as long as possible.
In addition, you can use crumpled foil or a plastic bag, which are secured to the base of the roller in such a way as to create the maximum number of folds. The folds are fixed with tape and glue.
Unusual effects on plaster are created using tools wrapped in thick rope or rubber band. In this case, the turns should be done in random order. If you wind the rope in even rows, the plaster will look like a natural sheet of bamboo or reed. Uneven winding will create an imitation of wood.
But this is not all that can be achieved by making a structural roller yourself. For example, by gluing a piece of textured fabric (burlap, canvas, etc.) to the working surface, you can get walls with imitation textiles.
Another interesting solution is to use various grains to create a textured tool: peas, rice or buckwheat. The surface of the roller is coated with glue and sprinkled with any of the selected cereals. To create certain patterns, you can paste over only areas in the shape of flowers, twigs, leaves, etc.
Advantages of painting with a roller with a pattern
Thanks to the roller, you can create an original coating.
The most important advantages of this method of decoration are ease of implementation and economic feasibility.
This method allows you to make even the most boring walls with a gray background bright and beautiful, creating a joyful and cheerful interior.
A beautiful drawing made with a roller can transform not only the walls, but also the ceiling, furniture, floor and other objects in the room.
The positive qualities of applying a patterned design with a roller are as follows:
- The ability to create an original interior using various decorative elements.
- Simplicity of execution allows you to apply any designs that embody the designer’s intentions to the surfaces to be painted.
- A roller with a pattern for painting, made from elastic templates, allows you to decorate not only smooth, but also convex surfaces. The versatility of this method of surface painting makes it popular.
- Buying decorative rollers or making them yourself is much cheaper than paying for the services of an artist.
- If it is necessary to paint a damaged area of the wall, a roller with a pattern is the simplest and most convenient tool that allows you to perform high-quality decoration.
Rollers with patterns allow you to create a space in which attention is focused on a specific area, without cluttering the created interior with various objects.
Interior decoration using a roller with a pattern can be done by painting any surfaces, including glass, ceramic tiles, concrete, plaster, plasterboard and others.
A beautiful drawing made with a roller can transform not only the walls, but also the ceiling, furniture, floor and other objects in the room.
How to work with a structural roller - all the secrets of a successful interior
You should not use rollers that are too large for work, since with their help it is very difficult to achieve uniform distribution of paint over the surface. To avoid drips, the tool should be thoroughly rolled out in a special tray before painting. If you don't have one, you can use plywood or corrugated iron sheet. As a result, the required amount of paint will remain on the instrument.
Never use the same tool for working with different types of dyes. As a last resort, you can make a textured roller with your own hands. As you know, it is almost impossible to work with such a tool in hard-to-reach places. Therefore, all corners, surfaces of platbands and baseboards must be covered with a paint brush.
Typically, paint is applied on walls from top to bottom, and on ceilings in the direction of the incident light. This will make it easier for you to notice minor errors. Painting with a structural roller is carried out in the same way. The paint is applied in strips or lasses, preferably overlapping by a few centimeters.
At the very beginning, the paint is applied in as thick a layer as possible, after which it is rolled out with a roller. With each pass, the pressure on it is gradually increased. The main thing in this work is to shade the paint as thoroughly as possible. If you find gaps, the painting should be repeated in this place.
Sometimes experienced painters first apply the paint with a brush, after which it is carefully rolled out with a roller. In order to understand how to work with a structural roller, you can first practice on a piece of cardboard. And only after that start painting the walls. At the end of the work, the tool should be thoroughly washed or placed in a container, filled with paint, and then tightly wrapped in a plastic bag.
Surface preparation
Painting walls is a type of finishing work that anyone can master, the main thing is to properly prepare the surface. If you neglect the pre-treatment of the walls, then you can’t count on the quality and durability of the finish.
Work order:
- Clean the surface from old coating, for example, wallpaper.
- Smooth out any uneven surfaces on the plaster or concrete base using a sander.
- Prime the wall and seal cracks, sinkholes, and chips with a plaster mixture.
- Level the base with finishing putty and sand.
- Dust the surface with a vacuum cleaner or grass brush.
- Re-treat the base with primer to increase adhesion to the decorative coating and reduce its consumption.
When the wall is completely dry, you can start decorating.
We recommend: DIY textured roller 9 manufacturing methods
Is it possible to create a decorative effect using regular wall paint or why pay more?
You can use several simple techniques to get an unusual effect without special paints. An example is applying one layer of water-based paint, onto which another color will be applied with a sponge. The result is a “crumpled paper” effect.
To obtain the marble effect, the surface is painted sequentially in different colors, then treated with a stiff brush, and a special wax should be applied. Fabrics, yarn and other available materials are also used for various options.
You can use several simple techniques to get an unusual effect without special paints.
Wall roller - choice and technique of working with the tool
At the beginning of the process of painting walls, you need to choose the right paint, and then the roller itself. For painting interior spaces, water-based and acrylic paints are often used. They are harmless to health, have no toxic odors, are diluted with water and dry quickly. In addition, such paints are suitable for different substrates - wood, stone, concrete, brick.
Water-based wall paint provides the surfaces being treated with vapor permeability and a breathable effect; the microclimate of the room becomes favorable. The quality of the coating remains bright and rich during operation. Read on to learn how to paint with a roller and how to choose the right one.
Which roller is better to choose?
Rollers are great for working with water-based and acrylic paints. They are often used for interior painting. Rollers come in different coverings and sizes. Knowing all their features, you can decide which roller is best to paint the walls with.
The most popular rollers are foam rubber. This material wears out quickly, but is inexpensive. It is better to take fur or velor rollers for oil compositions or enamels. These polyamide and thread tools have proven themselves to be quite good. For deep relief and creating the necessary texture on the surface, it is better to choose a roller with long pile.
The rollers are durable, easy to clean and after use they can be stored until the next repair. By size they are divided into large, medium and small. Professionals work first, medium ones are convenient for painting walls at home, small ones are used for painting around baseboards, jambs, and windows.
Recommendations before painting walls
Considering the tips below will improve your technique of working with a roller, which will affect the quality of the repair:
- The estimated area for cladding must be measured in order to know the required amount of material. A large assortment of water-based and acrylic paints in the retail chain will help you decide on a color. Their consumption is always indicated on the jar label, and the drying time is also indicated there.
- After painting, it is worth purchasing a primer, putty (deep penetration, starting, finishing), sandpaper, masking tape, and plastic film.
- You will also need additional tools - a bucket, brush, gloves.
- The surface that is going to be painted must be carefully prepared. Old layers of paint and wallpaper are removed with a scraper. After the surface is degreased, cracks and chips are sealed with putty.
- Using an emery block, rough edges are removed (sanding walls), and any dust that appears is removed with a damp cloth.
- To ensure strong adhesion of the paint to the base, the entire prepared surface is treated with several layers of acrylic primer. As a result, the painting will be smooth and durable.
- Each subsequent layer of primer is applied only after the previous one has completely dried.
- The paint is diluted according to the instructions on the can. The emulsion is poured into a tray and you can begin painting after putting on glasses.
We recommend: Joint roller - design and technique for working with the tool
Such recommendations will be useful to those who want to know how to properly paint walls with a roller.
Roller technology
To get a perfectly smooth and neatly painted surface, you need the correct technique for working with a roller. It has characteristic features:
- Painting boundaries are marked with masking tape. It must be at the same level, which is checked with a spirit or laser level. When gluing the tape, it is advisable to press it for a tight fit to avoid water-based paint getting under it. The height, shape, size and location of the tape can be any - vertical, horizontal, high or low. It depends on the intended interior and the taste of the owner. The tape is removed when the coating is completely dry.
- The roller should not be completely immersed in the paint; the axis of the tool must remain dry. Several twisting movements are made on the ribbed wall of the pallet to evenly distribute the paint throughout the masking tape, which can be removed, washed and stored upon completion of the repair.
- The movements of the roller should resemble the letter W, that is, up and down, if horizontally, then from left to right, with a brush in some narrow places crosswise. Vertical movements in one direction leave marks. Knowing how to paint walls with a roller without streaks, you can get the perfect result.
- The sequence of work is to paint the ceiling first, then the walls. Usually start from a corner or doorway. A small roller is used here
- You shouldn’t apply a lot of paint in one stroke; smudges and drops should be rolled out. Often one layer of water-based paint is not enough. They are applied at least two, and each subsequent one when the previous one is completely dry.
- If the strokes are uneven, the roller is renewed.
- If it is not possible to remove the furniture, it is moved to the middle of the room, covered with covers or film, which is secured with masking tape. The same is done with doors and windows. Water-based paint drips from such surfaces are difficult to remove.
- For high-quality painting near electrical wiring, the power must be turned off, and the sockets must be protected with the same tape.
- After completing the painting of the walls, all switches and sockets that were dismantled at the beginning of the work are installed in their places, the floor is cleaned, and covers are removed from the furniture.
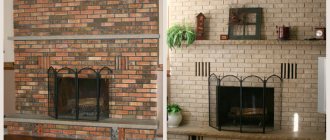
How to repaint it yourself?
Over time, the paint crumbles and burns. If the surface is flat, then removing the old layer is not a problem. It is much more difficult to repaint a relief surface. But in both cases, the plaster needs to be treated for painting:
- Clean old plaster from dust and dirt. The non-moisture resistant paint coating is removed with a spatula, a steam generator or by wetting it with water.
- Then apply primer. It is advisable to take white or a composition with pigment to avoid unpainted colors.
- Now we paint the walls in any convenient way.
Primer is necessary for strong adhesion of new paint and old surface.
Kitchen interior with decorative plaster
Materials for making decorative rollers
Modern instruments differ in the type of material they use. Today the following types of decorative rollers are available on the market:
- Rubber cover. On the base of the tool there are protrusions with depressions of various shapes and sizes, thanks to which a pattern or texture is created on the surface. For example, imitation of a relief plane with patterns, brickwork, etc. But such a tool is suitable only for experienced craftsmen, because it requires certain skills in operation.
- Wooden base. Such texture tools are best used for painting walls in children's rooms, since wood is considered an environmentally friendly material, and therefore does not emit harmful substances when used. It can also be used to create original convex patterns and ornaments on a painted surface. But there is one significant drawback - a wooden roller, unlike its rubber counterpart, can swell during operation. To avoid this, the instrument must be thoroughly cleaned and dried after each use.
- Leather base. With it you can give the surface a marble effect. An excellent choice would be a tool with a base made of genuine leather. If we are talking about applying Venetian plaster, then it will become an indispensable assistant.
- Plastic base. Not the best option. The thing is that with prolonged use, the plastic base can crack, thereby ruining the pattern on the surface of the walls. If you decide to use it, you must remember that textured plaster can only be applied on a perfectly smooth surface.
- Pile base. The roller cover is made of synthetic or natural fur with fibers of various lengths. When choosing this type of tool, you must remember that the longer the fibers, the rougher the surface will be and the more patterned the inclusions on the wall will be. It is recommended to give preference only to high-quality tools with reliable fastening of the fibers.
There are also analogues with a base made of foam rubber, polystyrene foam and fabric. Foam rubber options are used for priming the first layer for subsequent application of decor. They are also great for creating bubbles on the surface. Fabric analogues, for the manufacture of which plush soft fabric is used, form relief marks (patterns) on the wall. Devices with a foam base resemble a rubber counterpart. But you need to remember that polystyrene foam is short-lived.
Kinds
Currently, there are various options for such products for making a decorative pattern on the prepared surface. Let's look at the main types of textured rollers:
- soft, which are made from the appropriate material and quickly absorb a large amount of paint;
- hard products, which are most often made of wood, and are used for rough surface treatment;
- a separate version of foam rollers, which are distinguished by their versatility in use.
In practice, these devices can also be divided into sponge, leather and rubber. A variety of device options allows you to select the optimal type of product for more accurate placement of the image on the corresponding structural element.
Materials
First of all, we should consider the main difference between this tool and the nozzle material used. In practice, the following main varieties have to be distinguished:
- fur or pile (this variety is optimal for working with porous surfaces when increased dye consumption is required);
- foam rubber or polyester (a softer type of nozzle that absorbs paint well);
- wooden or rubber rollers (used mainly to cover rough surfaces without pre-treatment, for example, brick);
- leather attachments (usually used for processing soft surfaces where a more accurate image is required);
- foam cylinders (used for almost any surface, while allowing for minimal paint consumption).
It should be understood that not all types of rollers that can be used for textured designs are presented here. In practice, very often special products are used from several components, where there is also an addition in the form of a rope.
Invoices
The textures that are used in rollers to apply an image to the surface of a structural element deserve special attention:
- simple (represents a slight roughness that forms a single layer and does not require care when painting);
- stencil (in this case we are talking about using a nozzle where a certain pattern is already present);
- complex (here a combined version is used, where an image and additional irregularities are applied to the wall).
It is necessary to understand that in the case of a stencil or combined texture, you will have to apply the dye correctly and also monitor the proportions.
Effects
Depending on the texture of the roller, you can achieve one or another effect after applying paint and varnish to the surface of the structural element:
- if you use a tool with a soft nozzle, you can achieve a “fur coat” effect, when the surface after painting has a pronounced roughness;
- if foam rollers with deep slots are used, you can achieve the effect of decoration with a simple repeating pattern;
- if a wooden roller is used in the work, then you can easily get a pronounced figured decor;
- if you use a foam roller, you can easily achieve a “brick-like” effect.
It is important to consider that the material used for the cylinder directly depends on the composition of the surface. For example, soft products are ideal for even coverage. In turn, hard products made of rubber and wood are best suited for plaster.
Important! Solid products cannot be used with oil paint, as they do not retain a sufficient amount of dye on their surface.
What is decorative wall paint and methods of applying it
Decorative paint is a paint that creates some visual effects. This group does not include ordinary opaque monochromatic compositions. Only those that are at least somewhat different from them. These compositions reproduce various natural materials. Silk, velvet, plush, sand, natural stone, leather, velor, etc. They are sometimes called decorative paints, since they are not just a background, but an independent decorative element.
Decorative wall paint with a silk effect is a decorative element in itself
Most often, decorative paint is applied as usual - with a brush, roller or spray gun. If the texture itself is “rich”, this is quite enough. The walls already look unusual. In this case, they are just background. Beautiful, unusual, stylish, but background.
Rollers with embossed relief - easy and simple way to get unusual wall decor
To obtain more interesting surfaces, special application techniques are used. The simplest ones are relief rollers. They break up the monotony of paint by adding relief. There are other methods too.
- The applied paint is rubbed off. So you can get wet silk or plush from “silk” paint.
- Partially wipe off the paint with crumpled paper, a sponge, a piece of fur, plastic or metal notched spatulas, metal wool, etc.
- They go over the top with a semi-dry roller or a hard brush with darker or lighter paint.
- Place plastic film on the painted piece, crumple it a little and remove it.
Some ways to get creative
In general, there are a lot of options. This process is completely creative and there are a lot of variations. And the result can be very different, even if you use the same paint.
Advantages of textured finishing
When decorating walls in a room, it is worth presenting two options - the use of special textured paint or the use of different finishing technologies. In using the first option, you will have to go to a hardware store and choose a special paint that contains acrylic components. When finishing, this paint spreads unevenly on the surface, so you can get a granulating effect.
Textured painting of walls has many advantages: the work can be done with your own hands, without having any special construction skills, such a finish masks all unevenness well, the paint is non-toxic, prevents the formation of mold, and is resistant to mechanical damage.
There is another option for decorating - painting the walls using stencils. This painting is done with a water-based substance. This finishing method has the following advantages:
- low cost of work;
- allows you to draw in those places where you like;
- large selection of colors;
- the ability to do the work yourself, etc.
How to choose?
The variety of painting tools for decorative painting can complicate the choice of roller. To avoid mistakes when purchasing, we suggest using tips from craftsmen who have been engaged in decorative and finishing work for many years.
What should be done:
Check the quality of the working part of the roller and its resistance to deformation. To do this, you need to noticeably crumple the fur coat, and then assess the condition. Severe dents on the fur coat are a reason to refuse to purchase such a roller.
- When choosing a long-pile roller, it is necessary to conduct a visual inspection of the fur coat for falling fibers, which will certainly stick to the painted wall, which looks unattractive.
- Make sure that the clasp - the bracket that acts as the basis of the tool - is reliable. Soft clasps deform faster, which not only shortens the service life of the roller, but also negatively affects the quality of the finish.
What to look for when purchasing:
Structural rubber roller - in this case it is important to evaluate the quality of the rubber and the operation of the cylinder. A good tool has an elastic coating and an easily scrolling, non-vibrating roller
The optimal solution for creating the perfect pattern is a tool that has a lubricating cylinder and a hopper, which allows you to draw the entire pattern without having to stop to saturate the coat with paint; A textured tool with a foam rubber coat - here you need to make sure that the selected sponge coating has pores of the required diameter to obtain the decorative effect of burst bubbles or lunar craters;
- Leather embossed roller - since it is used primarily for working with Venetian plaster, try to consider only those products that have a natural leather covering. Using devices made from synthetic analogues, it is impossible to make prints on a plastered base - one, and they can dissolve - two;
- Pile roller - here you need to be guided by the length of the piles, which ranges from 0.2 cm to 2.5 cm. The effect of a strong “shaggy” wall is created with a long-pile roller;
- Pattern tool - the design of the figured stamp is of great importance: the most beautiful ornaments are obtained thanks to the combination of thin lines and bridges present in the pattern.
Choosing a roller with a pattern
When choosing a roller with a pattern for painting, it is necessary to take into account the features of the interior being created and the wishes of the owners of the room.
To do this, it is enough to comply with the following requirements:
- before choosing a roller with a pattern, it is necessary to complete a design project for the entire room to create a harmonious combination of interior items, patterns and decorative elements with each other;
- the most popular is a drawing without a large number of small details and bright colors, made in subdued colors;
- To create a beautiful ornament, it is recommended to select templates that have jumpers and thin lines.
Decorating rooms using various ornaments allows you to create additional comfort and coziness in the room.
Features of painting with a roller with a pattern, depending on the room, are shown in the table. For an overview of the patterned roller, watch this video:
| № | Type of room | Decoration method |
| 1 | Hallway | Decorated with small or medium-sized designs |
| 2 | Living room | Beautiful and bright landscape drawings and compositions |
| 3 | Bathroom | Not only walls are decorated, but also plumbing fixtures and shower stall walls |
Using a patterned roller to paint interiors is well suited for novice decorators and for those owners who want to decorate their premises themselves.
Preparing textured paint
Before using textured paint, you should carefully study its instructions, which indicate the drying time, preparation procedure and application tips. Mostly such mixtures are sold in plastic buckets.
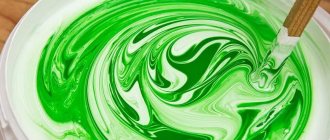
Its consistency is impressively dense, which is why a small amount of water is added to it before application, after which mixing is carried out using a drill with a mixing attachment installed. In this case, the main thing is not to pour more liquid than necessary, since as a result the product may no longer fully adhere to the base due to its excessive rarity, for example, on the ceiling. When diluting, experts do not recommend adding more than 1/10 of water relative to the total volume of the mixture. In practice, on average, 4% is enough for optimal stirring.
If, according to the plan, the surface should be painted in a color other than white, then a suitable pigment is added to the mixture.
After each portion, you need to pause, stirring and checking the resulting shade for consistency. If the color is still too light, you can continue adding pigment. To check the degree of color intensity, a stroke of paint is applied to an unnecessary piece of wallpaper or other material, which can be dried with a hairdryer to dry quickly. The best quality of pigmentation is achieved by adding a color from the same manufacturer that produces the paint used.
Painting process
To decorate the walls with a figured coating, you will have to use at least two shades of decorative paint: the base one and the one with which the ornament itself is applied directly.
You can paint the base in a darker tone and put a light-colored pattern on top, or vice versa. The main thing is to maintain relative contrast so that the shades do not merge. Staining is carried out as follows:
- The surface is carefully prepared, that is, cleaned and leveled, if necessary (in any case, it must be perfectly clean and level). To solve the last problem, use regular and finishing putties, as well as sandpaper.
- The walls are treated with a primer to create strong adhesion (adhesion of the painting material to the surface), as well as for the purpose of more economical consumption of the decorative coating.
- A base coat of paint is applied to a completely dry base. At the beginning of this stage, you will have to work with a brush to paint joints, corners and other hard-to-reach places, and get around sockets and switches. Do-it-yourself decorative plaster of walls using ordinary putty video? The remaining area is treated with a roller, moving from top to bottom, and alternating vertical and horizontal movements to thoroughly paint the entire surface.
- When the first layer is completely dry, they begin the most interesting part - working with a curly nozzle. A steady hand is important here because you need to act carefully and precisely. Having practiced beforehand, you can be sure of success. The roller is rolled from top to bottom, carefully aligning each new strip with the previous one (there should be no overlaps).
Sometimes the resulting dried surface is also treated with a transparent varnish to give the coating strength and extend its service life.
How to make your own decorative roller
Some finishing tools are quite expensive. Therefore, making a roller with your own hands from scrap materials will be an excellent and inexpensive way out of this situation. And now you will find out how to do it.
First method
In this case, we will need: a clothesline and an unnecessary old roller with a strong handle and a reliable roller. Wind the rope around the roller and secure the ends. Please note that depending on the frequency of the winding, you can adjust the texture of the stripes and patterns on the wall.
Option number two
For this method we need an old foam roller. We make cuts on the foam rubber in several places with sharp scissors and get a texture tool with an original effect.
Third way
Another method is to wrap the roller with polyethylene and then secure it with thread. And to give the marks texture instead of polyethylene, you can use regular tape.
Fourth option
Skilled craftsmen offer to make a structural roller yourself, the creation of which will require some imagination and a little patience and perseverance. And in order to achieve high-quality coverage, you need to think through your idea in detail. You can also use templates when covering the surface with finishing material. So, to obtain structural plaster, it is worth considering the following option for creating a tool yourself:
- We take an old roller. And it’s best if it is foam rubber.
- We take thick fabric and cut out figures of the same size from it.
- We form fantasy flaps from the cuts and twist them according to the origami principle.
- We attach evenly obtained flaps along the entire length of the roller with a construction stapler or pins.
In a word, you can create absolutely any structure on the wall using available materials.
Textured rollers - understanding the variety of species
How to use this tool, and where is it used? The surface of the structural (relief) rollers is made in the form of various patterns. Their very name suggests that they are intended for creating decorative coatings. To create the most uniform pattern on the surface, the structural roller must be rolled in different directions, while trying to maintain uniform pressure.
Working with a structural roller involves forming a three-dimensional pattern on decorative plaster. There are two types of tools: soft - made of foam rubber or fabric, and hard - made of rubber. A texture roller is used if it is necessary to level a surface covered with liquid wallpaper.
Most often, rollers with a textured surface are used to create a uniform relief pattern on wet plaster; its depth does not exceed 5 mm. They are made from wood, linoleum or rubber. To achieve a textured effect, use a figured roller. You can even do it yourself. To do this, the surface of the sleeve should be tied in several places with thread.
If you have a foam roller, use a knife to cut out the simplest pattern on its surface. A structural rubber roller is usually used indoors for applying dispersion paints. With their help, a coating with a pronounced relief structure is formed.
Work technology
Before applying to the walls, test the tool on paper.
To obtain a high-quality textured design using a roller with a pattern, you must adhere to the following recommendations:
- Before applying a patterned coating to the walls, it is necessary to perform a test painting on a sheet of paper.
- You need to start painting from the upper left corner, rolling with a roller without intermittent movements.
- The paint should be contrasting.
- Each subsequent pass with a roller on the surface to be painted must be carried out in conjunction with the previous one.
- Before painting, the walls must be cleaned of dirt.
When creating a patterned coating on surfaces whose dimensions are smaller than the size of the pattern roller, apply the pattern using a crumpled rag.
Stone effect paint
Another decorative paint, in appearance very similar to decorative plaster. This is a stone effect paint. It is safe as it is made on the basis of acrylic emulsion. Decorative elements are added to it, which create the required appearance and relief. For example, Rust Oleum Multispec Stone Accents, Siberia Rock`n`Wall. This paint has 10 shades - from very light to quite bright. Can even be used in kitchens on work aprons.
Both natural stone effect paints look about the same
A very good specimen in terms of performance properties. Has very good adhesion. Very smooth surfaces - such as plastic - require a primer. The rest can be painted immediately. It is applied from a spray gun or using a special roller (from the same company). Appearance depends on the method of application. After the roller, a surface with clearly defined flakes of “stone” remains. After the spray gun the surface is smoother.
This stone-imitating paint is easy to use and durable. It can even be washed with a brush. For Rust Oleum, application of additional protection (in the form of varnish) is not required, but in areas of heavy pollution it is better to coat Siberia with varnish. The paint is repairable. If you get a bald spot or a chip somewhere, you need to moisten a piece of sponge with water, squeeze it out and dip it in the paint, apply it to the desired place and wait until it dries.
There are also stone paints in cans. But you are unlikely to use them to paint walls. Perhaps for a panel or some kind of decoration. It's too expensive.
This is what the stone paint “Alatyr stone” looks like
Another type of surface is provided by paint with the effect of burnt stone Alatyr-stone. It is also called “liquid granite”. Apply by spraying through a spray gun. There are single-color and multi-color options. Less shiny than the ones described above. Positioned as resistant to cracks and ultraviolet radiation. After drying it must be varnished.
Imitation of various surfaces
Using textured rollers, you can create a texture like marble, brickwork, various floral patterns, abstraction, etc., for this you just need to choose the right tool. Therefore, you need to figure out how the appearance of the surface of decorative plaster will change from the selected relief roller:
- a roller covered with lint creates a fur-imitation surface. The shorter the pile, the smoother the surface will be. If the plaster is applied to brick or concrete, it is better to use a roller with a pile of at least 1.8 cm;
- if it is necessary to obtain a three-dimensional pattern that will protrude above the surface, then the pattern on the cylinder should be pressed in, applied in the form of indentations;
- if you need to get an extruded pattern on the wall, then the working surface of the cylinder should have a convex image;
- to create a longitudinal texture, patterns in the form of waves are applied to the cylinders; there is a wide variety of such patterns;
- The imitation of natural stone is created by a roller with loops in the form of ears applied to it.
To get an imitation of brickwork, you need to apply channels on a rubber roller that has a flat surface that will divide the surface of the cylinder into three equal parts. Then, to obtain an imitation of one brick, transverse notches are made in a checkerboard pattern.
If you take a roller with a nozzle made of crinkled fabric or leather, the plaster will look like a marble surface. When applying a drawing, you should move evenly over the surface, trying not to tear yourself away from it as long as possible.
You can get an imitation of wood fibers by winding a rubber cord around a rubber roller, winding the turns in different directions. By changing the direction of the turns, you can get different patterns.
Paint rollers
General information
Paint rollers appeared in the middle of the last century, and since then their popularity has been growing.
It's connected:
- with a simple design;
- low cost;
- excellent quality of coatings applied using this tool.
The roller consists of a frame on which is mounted a rotating cylinder (roller) covered with absorbent material. The frame has the shape of a number 7, with the short upper part serving as the cylinder axis, and the long one acting as a handle.
When the cylinder is rolled over the surface, the paint absorbed into its coating is imprinted on it, while it does not smear, but is shaded as smoothly and evenly as possible.
It was this feature that determined the main advantages of this device, which guaranteed its continued popularity:
- When working with a roller, even an inexperienced painter shows satisfactory results, which are not so easy to achieve with a brush;
- Material consumption is noticeably reduced, which for large volumes results in a significant difference and affects the total cost of work;
- The speed of work increases, which is especially noticeable when painting large, flat surfaces - walls, floors, ceilings and facades;
- The quality of the coating is always high, its uniformity is especially noticeable, reminiscent of working with a spray gun;
- A roller for decorative painting allows you to create relief, apply patterns, and change the texture of the surface;
- When working with stencils, this device proved to be better than other tools, since during the work it presses the stencil and allows you to achieve the smoothest borders and outlines; the paint does not flow under the paper and does not get into unwanted areas;
- The price of the tool allows us to consider it a consumable item.
Roller knurling rules
To use stencil rollers more efficiently, it is best to make a special device in the form of a machine consisting of two rollers. One roller will contain a rubber stencil, and the second should be smooth, made of porous rubber or a rubber sponge. They should be pressed tightly together so that they rotate freely.
Before starting work, the roller is soaked in paint, after which the excess paint is squeezed out. Next, the roller is inserted into the machine and work begins. After this, the machine is placed with a stencil roller on the surface to be painted. To apply decor efficiently, you should apply a certain amount of pressure while moving the roller along the wall.
Effective use of screen rollers
For ease of use, you can supplement a machine with two rollers with a paint reservoir, which will constantly supply paint to the tool with a stencil. This addition allows you to paint for much longer. The design of the machine makes it possible to adjust the pressure that is used to press the rollers against each other. Thanks to this, you can change the saturation of the pattern and make it the same over the entire surface of the walls.
This technique is called the color knurling technique. Using stencil rollers, you can achieve a crumpled surface effect that will add originality to your interior.