The most popular type of residential decoration is wallpapering. If you figure out how to hang wallpaper in a room yourself, you can save money and nerves. After all, the main problem of joint repairs is frequent quarrels and family discord. Compliance with the rules and accuracy are the components of success.
Required Tools
To ensure that nothing distracts you from your work, prepare all the necessary equipment in advance.
- ladder;
- plumb line or level;
- knife-cutter;
- scissors, pencil, ruler;
- cuvette and glue bucket;
- wide brush for applying glue;
- rubber roller, wallpaper brush or spatula;
- screwdriver and electrical tape (for electrical appliances);
- sponge, rags for cleaning excess glue and covering material for the floor.
How to hang wallpaper yourself: what do you need?
To conveniently glue the wallpaper yourself, prepare all the necessary equipment in advance. Every tool should be at hand.
Outline an action plan in advance, because this will make it more comfortable to cope with the task. But first of all, stock up on canvases for pasting, because without them, repairs are impossible.
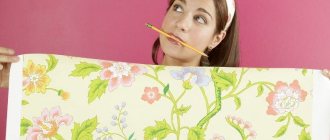
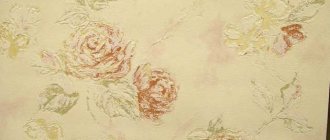
Selecting wallpaper depending on the room
To install high-quality wallpaper, study the room in which you plan to renovate. Don't rush to buy the first copy you like.
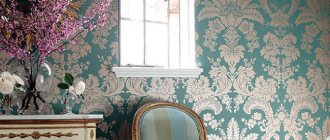
You cannot focus only on the color of the roll. Therefore, we advise you to study the composition of the paintings. Take into account the climate in the room, or rather its humidity. Based on these criteria, buy those wallpapers that will provide a long service life.
For example, for a room that is constantly humid, it is better to buy a wall covering based on non-woven fabric. Paper ones perform well in the bedroom. Vinyl is a relatively versatile type, so they can be used in any room.
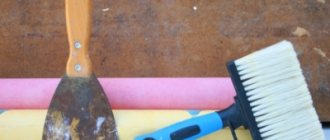
Necessary equipment
To glue the wall covering, you need the bare minimum of equipment:
- ladder or stepladder;
- two buckets - one for water and one for glue;
- ditch for adhesive composition;
- 2-3 rubber rollers and a paint brush;
- metal and wallpaper spatula;
- laser level, ruler and simple pencil;
- construction knives and scissors;
- rags and foam sponge;
- screwdriver and electrical tape.
It is better to choose rollers of different sizes. This will improve the usability. They can also remove air bubbles from under the glued coating.
Preparing the surface for gluing
When you have stocked up with all the necessary equipment, you cannot immediately start working. After all, the first (and main) stage of wall cladding is their preparation.
The master needs to remove the remnants of the previous finish. If you can’t do this right away, clean the wall with a construction knife and a wide metal spatula. Remove all disturbing furniture from the room, isolate sockets and remove switches.
Inspect the walls carefully to check for chips, gouges and cracks. To eliminate them, we recommend using putty or other leveling mixtures. After the putty has dried, all areas must be thoroughly sanded with sandpaper.
If the walls are too crooked, you will have to level them. Construction dust is removed with a broom or rag, and the wall is primed. And then the facing material will lie more evenly and will adhere better to the surface.
Marking the walls
The craftsmen also mark the walls. This should be done with a level and a simple pencil.
We do not recommend gluing canvases to walls without drawn proportional lines. After all, it is not always possible to achieve the desired result.
Material calculation
When the tools are prepared, it’s time to go for the most important thing - wallpaper. But when purchasing, the question of calculating the quantity often arises. To deal with this, it is enough to know the parameters of the room: length, height, width.
Now you need to combine these indicators with the data indicated on the rolls.
It is important to choose wallpaper with the same series, otherwise the color of the stripes will be different.
Calculation: divide the perimeter (the sum of all sides) by the width of the roll, we get the number of panels per room. This does not include window and door openings. Then we’ll find out how many whole sheets will come out of the roll by dividing its length by the height of the room. And finally, the required number of rolls - divide the number of panels by the number of whole sheets. These calculations will be reliable only if the wallpaper is selected without the need for adjustment to the pattern.
If you decide to decorate the wall with large figures, you need to take into account the wallpaper. It is indicated on the label. It is not difficult to calculate how many of these quantities are needed per roll length. Even if you are confident in the accuracy of the calculations, purchase a spare one. It happens that there is not enough wallpaper during the renovation process, and the store does not have what it needs. This problem can be solved by combining wallpaper by combining wallpaper.
Preparatory stage
First, everything in the room that can be removed is removed, including door frames and baseboards, if possible. They also remove sockets and switches, closing the boxes with wires with plugs - plastic or wooden.
You also need to know how to glue wallpaper correctly
Turn off electrical outlets
When working with electricity, we de-energize the room and do not turn it on until we are finished. It is advisable to carry out all work, including wallpapering, with the power turned off. The work is “wet”, and water or glue can get on the wires and short out. If the wiring is done according to all the rules and there are protective circuit breakers, this is not a big deal. They'll just turn off the power and that's it.
If the wiring is still done in the old way, it can be dangerous. The worst part is that in this case there is often no way to turn off the power in a separate room. Only in the entire apartment or, at best, in half of it. Then the solution is to remove the power wires from the sockets and switches (with the power off, of course) and carefully insulate the ends, then hiding them under plugs. Then you will have to unwind them and put them back in place, but it will be safe.
Lighting during work is temporary - extension cords are pulled from other rooms and portable lamps are turned on. Once you have dealt with electricity, you can move on.
If the walls are just leveled and puttied, you don’t need to do anything other than primer. But if they have an old coating - wallpaper or paint - they will have to work. First, remove the previous finish.
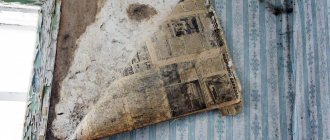
Cleaning off old wallpaper
If wallpaper is pasted on the walls, pry it up in a random place with the corner of a spatula, then pull it by the bent corner, tearing it off. If you're lucky, entire strips come off, sometimes several meters long in a single strip. But more often it comes out in small fragments. First, they remove everything that comes out “dry”. If it’s really difficult and in small parts, take a bowl of water and a roller and wet the walls in this way. To make them come off easier, you can add dishwashing detergent to the water.
Things don't always go so well
If the wallpaper is paper, water is simply applied to the surface. If they are vinyl or with some other durable film, first they break through the film. This can be done using a spiked roller, or with a brush with metal bristles. The main thing is to break through the film so that water can be absorbed into the base - paper or non-woven fabric - and soak the glue. Sometimes you need to wet the wallpaper several times to make it come off easier.
Next, the steps are the same as with paper ones: pry them with a spatula and tear them off. Sometimes this technique of tearing off pieces is ineffective. It works faster if you scrape off the soaked finish with a spatula. Then scrape the blade along the wall at an acute angle. In general, it doesn’t matter how, but the old wallpaper must be completely removed.
Removing paint and whitewash
You also have to work with a spatula, scraping off centimeter by centimeter. The work is monotonous and rather tedious, and also dirty. There are several ways to speed things up.
Oil paint on concrete
There are actually two options: chemical and mechanical. Chemical - these are special paint removers. The composition most often looks like a gel. They are applied to the surface and, after some time, (indicated on the packaging) it rises with bubbles or begins to shrink. The paint has softened and can be removed with any spatula.
This is what the paint looks like after the “work” of washing
Everything happens quite simply, but there are two “buts”. First, the price of the wash is quite high. Secondly, the fumes are clearly not useful. You need to work in a ventilated area, but do not let the remover dry, otherwise there will be no effect. And still, even with ventilation, sometimes my head hurts. So a respirator won’t hurt, and gloves are a must.
The mechanical method is not just a spatula. This will take a very long time to scrape. Use a grinder or hammer drill. The grinder has brushes made of metal wire. You can try to remove it like this. The method works, but not always or it is too slow. Then you can take a hammer drill and a chisel, and holding the chisel perpendicular to the surface, move it along the wall without deepening it. The paint bounces off quickly. After such a “shock” treatment, all that remains is to clean off the residue with a spatula.
Water-based emulsion, whitewash or paint on gypsum plaster
Removing this type of paint on walls is no easier. You can scrape it off, just very, very slowly. The solution is very simple: again water and a special paint scraper. You can buy it at a hardware store. Immediately take several spare blades: for example, the kitchen needs three or four of them.
Coat the wall well with water. Brush or roller, several times possible. Then you leave it to soak. And then you start cleaning with a scraper. The paint just pops off. It is only important that the wall is well wet.
Read how to choose wallpaper for the corridor and hallway here.
Sealing irregularities
Here you will first have to assess the condition of the walls. First you need to remove all the nails and screws, remove chips and repair cracks. Then examine the results. If the walls are more or less even, there are only small defects, you can get by with occasional leveling. Only cracks, dents and chips are repaired. They can be covered with finishing putty. Just before leveling, completely clean the wall of dust and pieces of wallpaper, and then cover it with a primer (with a wall roller and a brush in the corners).
If the wall has been “treated” with a hammer drill, you cannot do without full putty of the entire wall. Mostly today they use gypsum putty. First, apply a layer of primary or starting. It has a coarser grain and the layer can be up to 3-5 mm. This composition is used to level out the main unevenness, trying to achieve a smooth surface. After drying, they pass through a special mesh, removing any unevenness or sagging that may exist.
Afterwards finishing putty is used. It is very plastic and is applied in a thin layer - up to 1-2 mm. After this, the wall becomes smooth (after the irregularities have been smoothed out with a mesh, only with a smaller mesh).
Primer of walls
The second layer of primer is applied after puttying. It forms a film on the surface that reduces the absorption of the glue and also improves adhesion. For wallpapering, you can use a thinner wallpaper glue as a primer. Each pack has a table indicating the amount of water for gluing and priming. We dilute the glue in the required proportion, wait for it to be ready (also on the package) and cover the walls with the composition. The priming technique is the same: first go over the corners with a brush, then with a roller on smooth surfaces.
In the video, for some reason, the use of primary putty is called plaster, but otherwise the sequence of actions is presented correctly.
The rules and methods for combining wallpaper are described in this article.
Surface preparation
Even the thickest and most expensive wallpaper will look sloppy on uneven walls. If we are talking about how to hang wallpaper for one person in a new building, then the procedure will consist of plaster, putty and subsequent primer. If all stages are completed efficiently, the wallpaper will look perfect.
But in most cases, pasting of a living space is required. The preparation steps will vary.
- Removing old wallpaper . To simplify the procedure, thoroughly moisten them with water, wait 10 minutes. Then remove the old layer with a metal spatula. If vinyl wallpaper is being removed, this procedure will not be required. After removing the old sheet, you will find a paper base for the new wallpaper.
- Leveling walls and eliminating defects . It is difficult to do without the help of professionals. Especially if the geometry of the walls is severely disturbed. Small potholes and chips can be repaired yourself.
- Primer of walls . To prevent wallpaper glue from being absorbed into the wall, it is coated with a special compound or slightly diluted glue.
Where to start gluing wallpaper in the hallway: tips and nuances
When deciding where to start gluing wallpaper in the hallway, you must take into account that this room has a number of significant differences from other rooms. The main one is the lack of windows. In addition, there are more doors, openings and corners here than in any other room - both internal and external. Often the corridor is decorated with arches. Therefore, it is better to start gluing wallpaper from the farthest inner corner.
When the angles are straight, the work will go quickly and easily. Otherwise (which happens quite often), the order of work will be as follows:
For wallpapering in the hallway, it is advisable to use a special composition with increased adhesiveness.
- On the wall opposite the entrance doors, you need to make a vertical mark using a building level or plumb line at a distance of 10 cm from the nearest corner and stick the first strip.
- The next strip should be glued so that its edge touches the adjacent wall, where a vertical line is also applied.
- If the room has complex geometry, then a vertical line must be drawn for each strip.
To apply wallpaper in the hallway, it is advisable to use a special compound with increased adhesiveness, and the walls should be thoroughly primed beforehand. The adhesive solution is not applied to the wallpaper; they are applied dry to the wall so that their edges exactly coincide with the vertical mark. The edge is pressed and the canvas is lightly ironed in the middle with a special spatula. Next, the surface is smoothed in the direction from the middle to the edges in a Christmas tree pattern.
Important! Applying an adhesive composition simultaneously to walls and canvas can lead to complications during work. Bubbles and wrinkles often appear on the surface, which do not always disappear even after complete drying. It is best to follow the manufacturer's instructions that come with the wallpaper.
Applying an adhesive composition simultaneously to walls and canvas can lead to complications during work.
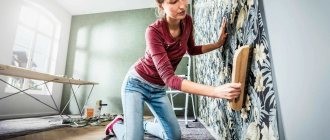
DIY wallpapering technology
The tool is prepared, the amount of wallpaper is counted and purchased with a reserve. The walls are leveled and primed, everything is ready to start work. But you need to know the order in which they are carried out in order to understand how to glue wallpaper for one person.
Fitting and marking
If the wallpaper is chosen with a large pattern, then it is necessary to adjust it and mark all the resulting elements. For this:
- lay out two canvases with a combined pattern on the floor;
- measure a length equal to the height of the flow + a margin of 10 cm on one of the sheets;
- make a mark with scissors on the second canvas and cut it off;
- mark the finished cut with a number in order indicating the top;
- We make twisted sheets against the prepared wall.
Getting started - choosing a starting location
In many instructions on how to hang wallpaper yourself, the window opening is the starting point for gluing. This is true for paper wallpaper. If you paste on different sides of the window, the joints will be less noticeable. For denser and heavier types, other pasting schemes are possible.
To carry them out you will need a vertical plumb line or level. You need to mark a vertical line on the wall and start pasting the room from there. It is also worth doing by starting work from the corner of the room. If you intend to glue from the doorway, you won’t need a plumb line, since the slopes will serve as a guide.
Wall marking
The more accurately this operation is carried out, the more accurate the final version will be. Among the tools, you can use a traditional plumb line or a laser or water level. You will also need a soft pencil. You should not use a pen or marker, as the mark will show through and spoil the overall appearance.
Using the selected equipment, a vertical line is marked. It will serve as a guide for sticking the first canvas. It is worth taking the advice and marking it with a small margin in width. For example, if the width of the sheet is 106 cm, it is worth measuring 107 cm. This will allow you not to lose sight of it and prevent curvature.
Glue application technique. Gluing the canvas
The sheets are cut and labeled, and markings are applied to the walls. You can start diluting the glue and begin the most difficult process - wallpapering. Let's look at how to put wallpaper on walls alone.
For each type of wallpaper, its own specialized glue is selected. It should be diluted in clean cool water, pouring in a thin stream, stirring continuously. According to the instructions, let the glue swell. You should not dilute with reserve, as the resulting mass will begin to thicken and form lumps. This will complicate the whole process.
If the choice is made of non-woven wallpaper, the glue should be applied directly to the wall. Vinyl and paper have their own impregnation procedure:
- the canvas is spread on the floor or a long table;
- apply the glue with a roller to the entire surface evenly, thoroughly covering the edges with a brush;
- The sheet is folded into a “book” for the time specified in the instructions for the wallpaper (from 5 to 10 minutes).
Following the mark indicating the top, wallpapering begins from the ceiling. In this case, you should navigate not by the ceiling curb, but by the previously applied vertical strip. Carefully straightening the canvas from the center to the edges, they go down. Air should be removed with a brush or spatula. But for the joints, you should arm yourself with a rubber roller and roll them without unnecessary pressure. You need to work with the edges carefully. If you press too hard, they will subsequently move away and become unnecessarily noticeable. Remove any released glue with a dry sponge or cloth.
Pasting places with sockets and switches
If you know how to handle electrical wiring, then the question of how to hang wallpaper in a room yourself will be resolved by itself. First you need to dismantle the sockets and switches, of course, turning off the power to the room. Insulate the wires well and hide them in the installation box.
This move will allow you to choose new fixtures to match the color of the wallpaper, and will also significantly simplify the gluing of the canvas. To make even cuts, you need to use a knife to cut a circle with a diameter smaller than that of the device. This should be done immediately after gluing the corresponding sheet. Otherwise, there is a risk of not finding the right place. Also, the wallpaper stretches when it dries, which will complicate the task.
Wallpapering behind a radiator
The answer to how to glue wallpaper yourself behind a radiator depends on the type of housing. In many new buildings, the heating radiator can simply be removed. In the secondary you will have to be patient. It is not possible to use spatulas and rollers, so smoothing is done with a rag. Pasting this area should be left for the final stage.
The canvas is measured according to the size of the opening under the window sill. Vertical cuts are made on the sheet at the junction points with the radiator mounts. Now the sheet, with glue previously applied to it, is placed behind the battery and carefully smoothed out. The junction with the wallpaper is cut with a cutter using a spatula.
Wallpapering corners
Prepare a sharp knife (cutter) and a metal ruler. If you follow a few rules, this procedure will not take much effort and time. The tips are similar for both internal and external corners.
- do not use a single sheet for gluing a corner;
- make an allowance of 2 cm on the adjacent wall, then glue the new canvas overlapping;
- should be cut exactly in the middle of the seam.
Pasting door and window openings
If there are usually no problems with the window, trimming is done with scissors of already dried cloth. You should be more careful with the door frame. Following the technique will help to avoid inconvenience and non-connections.
To begin, place the wallpaper sheet on top of the door and join it to the one already pasted. To glue the corners of the casing, make diagonal cuts in this place. Then roll the wallpaper tightly and remove the excess behind the casing with a metal spatula. If there are too many of them, first trim them with scissors.
Trimming excess
The presence of excess is inevitable, especially if you decide to paste it yourself. To perform this procedure as carefully as possible, prepare a flexible ruler and a wallpaper knife. Their feature is the ability of the ruler to press quite tightly to uneven surfaces. And the wallpaper knife has a blade with a break-off tip, which allows it to remain extremely sharp.
Now press the ruler in the cut area and draw the knife. Even damp wallpaper will have a smooth edge. Wipe the surface from which the excess was cut (floor or ceiling) with a sponge to remove the glue. If all the conditions are met, by this stage your room will already be wallpapered evenly and quickly.
How to hang wallpaper yourself video instructions
Professional Rules
What you need to know before hanging wallpaper alone:
- During work, doors and windows in the room must be closed. Recommended air temperature – not lower than 5, not higher than 25 °C. Air humidity should be moderate. If gluing is planned in cold weather, it is advisable to turn off the heating.
- To apply wallpaper to areas around doorways, the canvases are positioned so that they protrude a couple of centimeters. After the adhesive solution has dried, use a construction knife to trim off the excess to create a neat edge.
- Wallpaper should be glued only with suitable adhesive: vinyl with a compound for vinyl, non-woven wallpaper with a compound for non-woven wallpaper.
- The strips are trimmed only after drying. If you do this immediately after gluing, the canvas will shrink. You will get a large open distance from the floor and from the ceiling.
- When gluing corners, the canvas should extend slightly onto the adjacent wall. If you glue them close to the adjacent wall, they will not fit tightly to each other, and after drying, in addition, they may separate.
Features of gluing for each type of wallpaper
Technologies do not stand still and the market is ready to offer a wide range to suit every taste and budget. A variety of textures, gluing methods, width of the canvas and a variety of colors and patterns. But in order not to make a mistake with your choice, you should know the disadvantages and advantages of each type of wallpaper. The most popular at the moment are four types.
Paper wallpaper
They are environmentally friendly and low cost. They are the ancestors of all wallpapers. Modern species are also based on them.
On a note! To cover a room with paper wallpaper, you need to perfectly align the walls. Even a small defect will show through.
You will also have to give up the idea of washing anything on them; after getting wet, the paper becomes deformed and tears.
Non-woven wallpaper
These are paper wallpapers with the use of special additives that turned them into a real find. They can be painted (repeatedly), they do not fade in the sun, they are very durable, waterproof and fire resistant. At the same time, covering a room with them will not be difficult; the glue is applied directly to the wall. The only disadvantage of this type is the high price.
Watch the video on how to glue non-woven wallpaper
Vinyl wallpapers
They are distinguished by reliability, wear resistance and durability. A special feature of the gluing is its two-layer nature. The base (the bottom layer, which is glued to the wall) can be paper or non-woven. The advantage of the first option is the ability to stretch. They are convenient for covering niches and complex openings. But at the same time, glue must be applied to the surface of the canvas itself and the wall. After applying the adhesive mass, extreme caution should be exercised, since the paper base can easily tear. The non-woven base is more durable and saves glue consumption (since the composition is applied only to the wall). It can easily hide minor defects, but due to its rigidity it creates problems when straightening folds and removing air.
Watch a detailed video on how to glue vinyl wallpaper
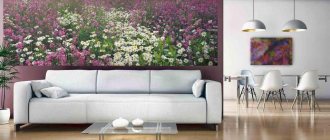
Photo wallpaper
The variety of themes and designs of this type of wallpaper is fascinating. You can find real works of art that can transform the interior beyond recognition. Based on the base material, photo wallpapers are divided into subtypes: paper, vinyl and fabric. The main difficulty in covering walls with such wallpaper is matching the pattern. At the preparatory stage, you need to make precise element-by-element markings on the wall, then remove the white edges from the fragments and only then apply glue.
Detailed video of gluing photo wallpaper
Choosing wallpaper glue
Hanging wallpaper yourself is impossible without wallpaper glue. It should be enough to glue the entire cladding, so the master needs to carefully calculate the required amount of composition.
Manufacturers indicate on the packaging the planned consumption per ten-meter roll with a width of 0.53 meters. Therefore, for wallpaper of other sizes, the amount of glue must be calculated individually, based on these indicators.
List of popular universal adhesives
We recommend purchasing adhesive mixtures designed for specific types of wall coverings. Universal compositions are used for paper webs.
If you want to cover your walls with paper wallpaper, then pay attention to the following brands of adhesives:
- KLEO. Universal composition for non-woven, paper, vinyl and other cladding.
- Metylan. Adhesive made in Germany. Pastes different types of wallpaper, even heavy ones. The company presented a wide-profile, universal-type product that can also be used for sealing joints.
- PUFAS. Country of origin: Germany. The brand's catalog contains more than two hundred types of adhesive products. This is an adhesive for all types of wall coverings.
- Quelyd. Sold in every hardware store. This is a general purpose wallpaper adhesive. Bonus - it contains substances that protect against mold.
Preparing the glue
Before applying to the wall or sheet of wallpaper, prepare the glue. To do this, you need to dilute it with water according to the manufacturer's instructions. Follow all instructions exactly so that the composition can reliably hold the material on the wall.
The glue should be diluted only with clean water. The container in which the composition will be prepared must also be cleaned. You can stir it with a wooden stick or a gloved hand. Make sure that the mixture is mixed evenly and that there are no lumps left in it.
Mistakes when wallpapering
How to hang wallpaper yourself and get an excellent result in the end? Of course, adhering to the rules described. But in theory everything is usually very clear, but in practice difficulties arise.
- Pattern mismatch . The most common problem. Solved by proper cutting. Match the pattern on several canvases while still on the floor. There is no need to cut the entire room at once; if somewhere there is a skew, you will have to purchase the rolls again.
- Peeling off wallpaper . If the windows and doors are open in the room, and the glue is diluted in hot water, problems are guaranteed. Read the instructions on the box carefully, 30-35 C° is the ideal temperature for the adhesive composition. You should purchase glue along with the wallpaper and use one specifically designed for it. And it’s worth reminding that there should be no drafts in the room where the work is being done during work and 24 hours after.
- Skewed joints . A common mistake people make is neglecting the preparatory process. A vertical plumb line or level is simply necessary when gluing the first sheet.
- Air bubbles and folds . They happen if you first completely stick the sheet onto the wall and then start leveling it out. It is better to follow the advice and glue the canvas gradually, starting from the top. If a bubble remains, use a syringe to push the glue into it.
- Tears in corners . Pasting the corners is the most crucial moment. You should not be economical and leave more than 3 cm on the adjacent wall. Glue the canvases overlapping and cut off all excess with a sharp cutter.
- Noticeable joints . It is worth taking into account the direction of light in the room and starting from the window. The exception is thin paper wallpaper, which requires overlapping stickers. Their sticker sequence is exactly the opposite of the standard.
Where to start gluing wallpaper on the ceiling in a room?
First of all, you need to decide where exactly you plan to hang the wallpaper. If such finishing will be done throughout the entire room, including the ceiling, then you need to start there. In this case, two methods of wallpapering are used (photos show the sequence of work):
- from the wall;
- from the center of the ceiling.
The first method is considered simpler, but it is effective in the case when the wallpaper is without a pattern. These are the types of fabrics that are most often used to cover ceilings.
On a note! Before you start gluing, it is recommended to watch a special video on how to properly glue wallpaper, where to start work and how to match the pattern on the ceiling.
Ceiling decoration has two methods of wallpapering: from the wall and from the center.
If wallpapering requires the need to follow patterns, then it is recommended to start working from the center to the sides - in this case an equal number of solid strips will be used. After pasting from the center of the ceiling, the pattern will be located symmetrically, which will ensure its correct visual perception, since the outer strips will be the same width, which will create a natural and harmonious look.
In case of gluing from the center, it is necessary to mark the entire ceiling. To find the central point, just break the ceiling diagonally with a thread. The intersection of the threads clearly indicates the center. From this point it is necessary to mark a distance equal to half the width of the strip. Usually this is 26.5 cm - half of a standard strip measuring 53 cm. The first strip will lie between the markings, and the rest of the pattern will “dance” from it.
If wallpaper is glued from the wall, then you need to draw a strip 50 cm wide, which should be clearly perpendicular to the window. The first canvas is glued along this mark, and the remainder near the wall is removed with a construction knife.
Expert advice
To achieve ideal results when wallpapering yourself, you need to know some secrets. For example, you should not neglect buying a stepladder. Its ease of use will save your nerves and wallpaper from damage. Also remember to leave an allowance around the edges. For non-professionals, you can lay down 10 cm of the future cut. Don’t forget about the main rule for gluing corners - the canvases are overlapped, and then the excess is cut off with a cutter, 3 cm from the edge. In order not to spoil the floor covering, it is more advisable to lay it after gluing. Unless, of course, parquet or tiles are planned. When working, they are simply covered with cardboard. Well, be careful, wipe your hands often from excess glue.
Although repairing with your own hands is a labor-intensive task, the result will leave pleasant memories for a long time. Well, if you follow the advice and strictly follow the technology, you can also be proud of your ideal creation.
How to make joints invisible
Care must be taken to ensure that the joints of the canvases are invisible during gluing. You need to connect the canvases so that there is no gap between them, but also so that they do not overlap one another even by a millimeter. A perfect match must be achieved.
Move the strip in the desired direction
Since we, alas, rarely see perfectly smooth walls, it turns out that the seam either creeps in a little or diverges. Your task is to move the canvas so that it becomes perfect and invisible. You can move the canvases with your hands - they can slightly stretch and contract. Due to this, you achieve the required match. If the resulting defect is too large and nothing can be achieved by shifting, the strip is peeled off to this place and, having corrected it as necessary, is glued again. Sometimes, if the seam is sticking out a little, rolling it with a special tapered roller can help.
With this technique, it turns out that first the edge is glued, which is joined, and then, from it, they begin to smooth out the rest of the surface of the canvas. If you have examined the seam and are satisfied with the result, take a clean rag and wipe it off any excess glue that may have come out during all these actions.
To learn how to glue meter-long vinyl wallpaper on a non-woven backing and how to make the joint invisible, watch the video.
Classification
All self-adhesive wallpaper can be divided into categories based on material, number of layers and type of design.
The main components in different wallpapers are: polyvinyl chloride, synthetic fiber, propylene, which are supplemented with stabilizers and plasticizers. Color and texture are provided by dyes and artificial fibers of the fabric.
Types by number of layers
Self-adhesive wallpaper is distinguished by the number of layers.
- Single layer. Single-layer self-adhesive wallpaper, otherwise known as PVC film, has a complex multi-component composition, including PVC resin, plasticizers, stabilizers and pigments. All components combine and form a homogeneous mass. After which the process of transformation directly into film takes place through heat treatment or extrusion. The result is a self-adhesive, moisture-proof film.
- Double layer. Double-layer self-adhesive wallpaper consists of a base and a top layer. Paper and fabric are most often used as a base. The top layer has a complex composition based on polyvinyl chloride resin. The resulting material is inferior in technical characteristics to single-layer PVC film, but is more flexible and easier to work with.
Types by material
In all types, the base is an adhesive layer, but the decorative part, that is, the top coating, can be different.
Vinyl
Durable and washable self-adhesive fabric is available in stores in a variety of colors. The production features almost completely deprive the material of the ability to pass air, so in a room with high humidity it is worth taking care of ventilation. The advantages of the coating include low cost.
Paper
Paper is an environmentally friendly and inexpensive material, but, unfortunately, it does not have high technical characteristics. The coating fades in the sun, is not resistant to moisture and has low wear resistance.
Cork
Cork self-adhesive coating has an absolutely natural composition and is made directly from cork wood, which means it is safe for all residents of the house. The material is hypoallergenic, has good sound insulation properties and retains heat.
To decorate the kitchen, you should choose a canvas coated with wax; it protects against the absorption of odors, increases its service life and simplifies the cleaning process. Self-adhesive cork wallpaper will be a good solution for decorating a child's room; you can use it to create a whole shaped composition.
Fabric
In other words, satin self-adhesive wallpaper has a dense fabric base. Externally, the coating is matte, reminiscent of fabric. The material has high strength indicators and hides minor wall defects.
Types by type of coating
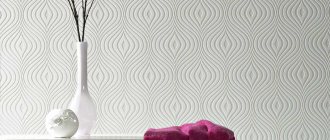
Matte
The surface has a velvety appearance, the walls do not reflect light or glare, and the interior is very soft. The matte self-adhesive coating is suitable for modern and classic designs. Drops of water and stains are invisible on them.
Glossy
Glossy self-adhesive wallpaper will help make the room brighter and lighter due to the reflective properties of the film. This finish is suitable for decorating a room with poor lighting. The coating requires careful care, as settling dust and drops of water will be visible on the shiny surface.
Cretaceous
A great idea for decorating the interior of a children's room, hallway or kitchen. Otherwise, chalk self-adhesive wallpaper can be called a painting surface; visually it resembles a black slate board. You can draw on the surface with crayons and then erase it. For a children's room or cute notes in the kitchen, this type of self-adhesive wallpaper will be the best option.
In the photo, the decor of the wall above the headboard is made using chalk wallpaper, which is convenient for taking notes before bed.
Holographic
Self-adhesive wallpaper with a 3D holographic effect will look good in a stylish and modern interior. Shiny film is best used for partial decoration of a room or individual objects.
Mirror
Self-adhesive wallpaper with a mirror effect will look harmonious as part of the decor or as a complete decoration of an accent wall. The surface will reflect objects, thereby creating the illusion of even more space, and the patterns applied to the canvas will not make the design vulgar.
Eliminating shortcomings
If there is a lack of experience, it may happen that bubbles appear on the walls after or during drying. You can remove them with simple steps. Take a large syringe, fill it with glue, pierce the bubble and inject some glue into it. Vinyl wallpaper, acrylic, paper - the top part is unimportant. The actions vary depending on the basis. If the wallpaper is paper-based, wait five to seven minutes; if it is non-woven, act immediately.
Next, you need to use a roller, spatula or rag to expel the air from the bubble. First, move the glue inside, then from the edges to the puncture, displace the air along with excess glue. Wipe them with a clean cloth.
How to remove bubbles from wallpaper
Seams come apart quite often. Wallpaper may peel along the thread or baseboard. There are two ways to glue them. Use a brush and the remaining glue or buy a special one for seams. It comes in a tube and is applied precisely. And again, the procedure depends on the base. After wetting the paper, wait a while, then glue it, making sure the edges match.
What to do if the seams on the wallpaper come apart
How to cover areas with sockets and switches
Before gluing the strips alone, you should dismantle the electrical wiring elements. To avoid short circuits and injury, the household power supply is de-energized.
Sockets and switches are removed from the installation box. The wiring is disconnected from the working part of the electrical equipment elements. To avoid a short circuit when voltage is applied, the ends of the electrical wiring are insulated. You can use adhesive tape or insulated terminal strips.
After gluing the wallpaper, holes are cut in the locations of the mounting boxes. An even cut is obtained using a stationery knife. The working elements of sockets and switches are connected to electrical wiring and installed in the mounting holes. Irregularities in the cut are covered with decorative parts of switches and sockets.
How to carry out pattern fitting and marking?
When pasting, the main difficulty is related to matching the pattern. Rapport is part of an element of a repeatedly repeating ornament. It is rapport that is taken into account when adjusting the pattern. The size of the repeat is related to the size of the ornament or pattern. The larger the drawing, the larger the step will be, and accordingly the amount of waste will increase.
Preparing walls before wallpapering
The initial stage of work involves adjusting the pattern, marking the fragments and folding the prepared strips in the desired sequence. Photo 1 shows heavy vinyl wallpaper with large patterns.
Photo 1
First, roll out 2 rolls of wallpaper. You need to make sure the floor is clean. From the first roll, measure a strip along the height of the ceiling, adding 10 cm. This strip is laid out on the floor. The second one is combined with it so that the pattern of one stripe continues on the second fragment. Marks are made on the canvas as shown in photo 1.
Photo 2
Photo 2 shows how to make marks using scissors. The alignment of the strip in the area where there is a cut is shown in photo 3. The bend is smoothed out by hand.
Photo 3
Next, cut off a strip of wallpaper using scissors. How to do this is shown in photo 4. The edge will be a little uneven. There is nothing wrong with this, because an allowance of 10 cm is left. It allows for more accurate and even cutting on the spot.
Photo 4
The strip that was previously used for marking must be put aside, but first you need to make a mark indicating the upper part. And put a number on it. How this can be done is shown in photo 5. Then the strip is folded as shown in photo 6.
Photo 5
Photo 6
It is more convenient to place the prepared strips near the wall for which they are intended. The vertical position will help save space. See photo 7.
Photo 7
Do the same with the next canvas. See photos 8, 9. This method of preparing wallpaper allows you to subsequently correctly join the pattern, quickly straighten the canvases, and save space and time.
Photo 8
Photo 9
In the standard preparation method, strips cut to size are laid flat on top of each other. Next, the upper strip is smeared with glue, while the edges of the lower ones get damaged, get dirty, and then the overall picture deteriorates.
Non-standard use of self-adhesive wallpaper
On the door
An old, well-worn door will look like new. The surface of the door must be cleaned and, if necessary, sanded, otherwise the film will “indicate” unevenness. This is an easy way to refine a doorway and change its appearance to suit the design of the room.
For furniture
A budget option for restoring furniture. A table, wardrobe or wardrobe will quickly change its appearance. The presented colors can make the furniture a bright piece of decor or simply update it.
For the ceiling
Photo wallpaper will look especially impressive on the ceiling. The image can create the illusion of open space, thereby radically changing the interior. It can also be a glossy or mirror self-adhesive fabric, a good alternative to a stretch ceiling and especially whitewash, but you will first need to level the surface, otherwise the desired effect will be ruined.
The photo shows an example of an interior where a bright ceiling is combined with plain walls.
For window sills
An ordinary self-adhesive PVC film will help you quickly update your window sill; by cutting it to the required size, you can return the window sill to its whiteness and smooth surface or create a bright design element.
For refrigerator
The refrigerator will become a real art object in the kitchen. A retro pattern or photo print will turn an old refrigerator into the main accent of the room. For decoration, a single-layer self-adhesive PVC film will be sufficient.
How to apply glue and stick canvases?
If the preparation was successful, you need to begin the pasting process. While work was being done on the last stripes, the first ones were already well straightened out. The glue is diluted according to the instructions on the package. Regardless of the type of glue, prepare clean cold water. The glue should be poured little by little, in a small stream. In this case, the composition must be constantly stirred.
DIY paper wallpapering
There is no need to rush and pour 2 packs of glue into the bucket at once. The mixture will gradually begin to thicken, and the resulting lumps will interfere with your work. When choosing glue, you need to take into account the characteristics of the wallpaper. Each variety needs its own type of glue. Wide cardboard or prepared film is spread on the floor. Wallpaper is laid on it, base side up. For more convenient use, pour a small amount of glue into a cuvette, into which the roller is then dipped. The most common application method is shown in photo 11.
Photo 11
When applying glue, pay special attention to the edge part. Today they produce glue with an indicator. After dilution, it has a certain color shade, which allows you to know exactly where the glue has already been applied and where it has not yet been applied. If glue gets on the surface under the wallpaper, there is no need to panic. It can be easily removed later. When working, you need to make sure that the layer of glue is not too thick, and that the application itself is even.
Photo 12
When the glue is applied, the wallpaper is folded in half. You can see how to do this correctly in photo 12. The wallpaper should remain in this position for at least 3 minutes. This time is enough for the glue to be absorbed. You can increase the time to 5 minutes when the wallpaper is too thick. If the next section of the wall is smooth, without protrusions and various parts, you can immediately prepare the 2nd strip. But you shouldn’t get carried away with this. The number of prepared strips should not be more than 3. Otherwise they will begin to dry out and stick together.
When the strip is ready, it is unrolled, gradually ascending the stepladder. You need to hold the strip by the part on which there is a mark indicating that this is the top. When applying wallpaper to the wall, you need to take into account that you need to make an overlap on top. Its size is individual, depending on the characteristics of the room.
Photo 13
In photo 13 you can see where the pasting and fitting begin. First they work with the upper part. When everything is ready there, they come down from the stepladder and straighten it, applying the lower part. When everything is joined, you can start working with a smoothing roller, spatula or brush. Movements come from the top, from the middle. Then they go down. How to squeeze out the air can be seen in photo 14.
Photo 14
When the wallpaper is smoothed and the air has been removed, you need to roll the joints with a special rubber roller. However, seams do not like too active exposure. Therefore, you should not rub them or put pressure on this area. When excess glue appears, it is carefully removed with a sponge or napkin, and they are subsequently rinsed in water.
Photo 15
If you do not put unnecessary pressure on the seams, they will look almost perfect after drying.
How to Trim the Excess
Excess parts are cut off after the canvas has dried. If you cut damp wallpaper, the cut area will tear. The excess is cut off with a utility knife. At the same time, its sharpness is controlled. The blade of such a knife is divided into several sections. If the extreme part is dull, it is broken off. The edge of the blade becomes sharp.
To prevent the edge of the wallpaper from tearing when trimming, it is pressed tightly against the wall. To do this, use a flexible ruler or a wide metal spatula.
The part is pressed to the cut site. A knife is drawn along the line of contact. Hold the spatula and remove the excess. This makes it possible to make an even cut.
What to do with corners
In most cases, the width of the wallpaper is not enough to cover the entire wall. If there is just a little bit missing from the corner, you need to cut off part of the strip so that it extends to the other part of the corner by 1-1.5 cm. And it is this cut piece that needs to be glued. Afterwards the next strip will be connected to it. If you do everything carefully and slowly, then there should be no problems with gluing.
A few nuances and tips
Beginners usually have difficulty cutting off the protruding edges after sticking flat on the wall. The most convenient and effective ways are to use scissors or a stationery knife. In the first case, you need to press the edge against the ceiling with the back side, and then carefully cut off the excess.
If you press the edge with a spatula, it will be convenient to remove the excess using a stationery knife. In fact, both methods are quite effective and do not take much time. How to use it is everyone's business.
The next possible difficulty is sockets. The fastest, easiest and safest way is to turn off the voltage and remove the front part. After this, you can glue the wallpaper without fear or difficulty. Then use a utility knife to cut out the required hole and give it the desired shape. If the edges are not too smooth, you don’t have to worry about this at all. The front cover of the socket will cover all the shortcomings.
The process of gluing above the door is practically no different. A strip of the required length plus 5 mm is glued on. After removing the air, the excess can either be cut off or hidden under the jamb.
Comment! To simplify the process of gluing wallpaper yourself, you can purchase meter rolls. They have their own advantages and disadvantages.
Preparing walls (removing old wallpaper, priming)
The first thing to do is prepare the walls. This is the most important requirement, the compliance with which determines the quality and durability of the finish. Wall preparation occurs in several stages:
- Removing old coating. To make removing old wallpaper easier, you can use a metal spatula and soap solution. The walls need to be thoroughly moistened, then all material must be completely removed. Small pieces of wallpaper can be removed by applying a cloth to it and ironing it with a hot iron.
- Primer must be applied to clean walls. This is a mandatory step that affects the reliability of the wallpaper’s adhesion to the surface. Moreover, the primer strengthens the concrete itself, preventing its destruction and the appearance of fungus and mold. For these purposes, you can use primer glue, but there are also more successful compositions, such as acrylic primer.
- Puttying. This procedure is necessary only if there are cracks and other defects on the surface of the walls. Before applying the putty, the dried primer layer must be sanded with fine-grained sandpaper. Before wallpapering, only one layer of putty is needed.
The preparatory stage does not involve any difficulties, so anyone can cope with it. Proper preparation of the walls will ensure the durability and aesthetics of the final coating.