Primer of walls for plaster, why is it needed?
Each treated surface differs both in structure and in its own set of physical and mechanical characteristics, such as adhesion, adsorption or wettability. In order to ensure the predicted result (quality), they resort to a kind of “intermediary” - an intermediate layer of a special composition, which makes it possible to bring the mentioned physical properties to a certain average level:
- Level out unevenness. Thus, the primer for brick under plaster will differ in composition from that needed for wood;
- Increase the level of adsorption. Glue and paint last longer on a pre-treated surface;
- Ensure the required degree of adhesion, for example, for wallpapering walls;
- Get a protective waterproofing effect. Some materials become saturated with moisture over time and become unusable.
The primer for brick under plaster will differ in composition from that needed for wood.
Do I need to prime the walls before plastering?
Purpose of primers:
- strengthening loose foundations (binding dust);
- increased grip;
- sealing pores;
- protection against microorganisms.
In other words, primers (or primers) are used for various purposes, the main thing is to ensure a reliable, strong interlayer connection of building materials. Where materials are easily connected to each other without intermediaries, primers are not needed.
The use of impregnations leads to a reduction in the consumption of plaster mixtures for leveling.
Let's look at the possible problems that the primer is designed to solve:
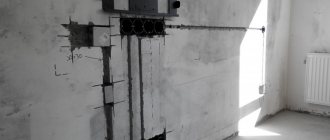
- A loose, porous base that has low strength and generates dust (stains your fingers when touched) needs to be strengthened. If you apply a plaster composition to it, then, having wetted and bound the upper part of the base, the solution does not obtain reliable adhesion to the wall. The strength of the solution itself is higher than that of the base material, so peeling will occur in the contact area as the plaster mixture gains strength. The primer, penetrating deep into the loose base, binds its individual particles, increasing strength.
- The porous base is capable of absorbing moisture from the solution through its pores. And water is necessary for chemical reactions, due to which crystallization and strengthening of the plaster mortar occurs. If the mixture loses water, strength will not be gained. By plugging the pores, the primer prevents the “leakage” of water from the solution.
- Where moisture is possible on one of the contact sides, colonies of microorganisms can develop, leading to stains and deterioration of the finish. To prevent this, the base is impregnated with fungicidal compounds. These compositions are especially in demand for wood bases.
- Prevents the formation of efflorescence. There are special types of waterproofing compounds that form a dense film that does not allow water molecules to pass through.
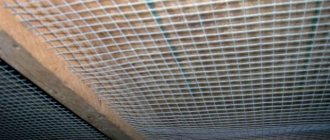
- Increased adhesion on smooth substrates. Quartz sand of a certain fraction is added to the impregnation composition. Grains of sand make it possible for the plaster mixture to cling to them.
For what surfaces is plaster primer used?
Sometimes priming the walls before plastering may not be necessary if the base is sufficiently smooth and hard. However, during typical repairs, most surfaces do not meet these conditions.
Special processing is required for:
- Porous surface. For example, concrete or brick;
- Plastered wall. This is also true for asbestos-cement bases;
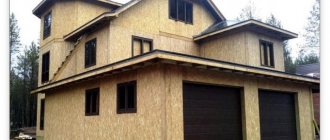
- Wooden structure. Typically, the primer for plastering wooden walls contains special additives that prevent the appearance of mold;
- Plastic or other inorganic material with similar properties;
- Metal. The soil contains special components that prevent corrosion.
Typically, primers for plastering wooden walls contain special additives that prevent the formation of mold.
Wall priming technology
To complete this work you will need the following tools and materials:
- painting tray (ditch);
- wide brush (maklovitsa) and brushes of various sizes;
- porous roller, extension;
- ladder;
- polyethylene film;
- bucket;
- primer.
Priming is carried out in the following sequence:
- All furniture is removed from the room. Objects that cannot be carried and door panels are covered with film.
- Polyethylene is laid on the floor.
- Before use, impregnations are checked against the expiration date on the container.
- The liquid is poured into a cuvette and a porous roller is immersed in it. Excess liquid is squeezed out on a tray.
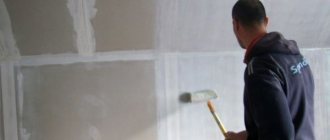
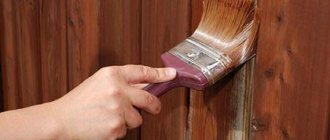
- Using an extension holder, coat the vertical planes with impregnation from top to bottom.
- Instead of a roller, a roller is often used.
- All corners and hard-to-reach places are coated with a narrow brush.
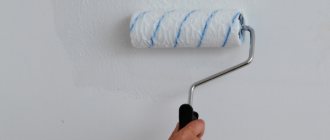
Priming the wall with a roller
Priming the walls before plastering is done in two times. The surface can be treated with primer a second time only after the first layer of impregnation has completely dried.
Types of primers for plaster and their composition
The type of primer required for plaster and which one to choose for a particular case is determined by the range of tasks that arise during repair work. Often the choice depends on the properties of the surface, the type of materials and operating conditions: temperature range, humidity, exposure to the external environment.
All soils are divided according to their purpose and chemical composition:
- Acrylic. In this case, it does not matter which primer to use before plastering the walls - this is a universal mixture suitable for most finishing works;
- Mineral, gypsum-based (less commonly cement). Here the choice is determined by the base material;
- Glypthal. Designed for metal or wood;
- Acrylic. A good option for porous coatings;
- Polyvinyl acetate. Specialized composition for special types of paint.
Separation by purpose is used when it is necessary to prime dissimilar surfaces.
The choice depends on the surface properties, type of materials and operating conditions.
Universal primer
This primer for plaster is suitable for most surfaces. Although it generally exhibits good adhesive properties, specialized formulations have better performance. Suitable for wallpapering, installing tiles, painting, forming screeds and self-leveling floors.
A universal primer for plastering walls has its advantages:
- Increased operating time when installing tiles or applying plaster to a substrate with a high degree of adhesion;
- When pasting wallpaper, it slows down the setting process;
- Dust removal, strengthening of the surface layer. Allows you to reduce paint consumption per linear meter.
A universal primer for plaster suitable for most surfaces.
Deep penetration
Typically, a primer for plaster is used to strengthen the structure of the loose, porous surface of walls made of cellular concrete or already plastered. As a rule, a “deep” solution is created on the basis of a water-polymer composition, which, upon evaporation, forms additional bonds at the molecular level.
A distinctive feature is the need for complete drying. For example, a primer for gypsum plaster can retain moisture for two to six hours. Moreover, experienced craftsmen recommend continuing work only the next day. It is advisable not to apply more than two layers, since an excess of polymers will significantly worsen the moisture absorption process, which will weaken the adhesion force.
A distinctive feature is the need for complete drying.
Adhesive
This plaster primer is intended for surfaces with low absorption levels. It is usually made on the basis of acrylate water-dispersed resin with the addition of a mineral filler. When dried, it forms a protective film layer with a roughness effect.
Typical applications are concrete lintels, floors and old painted substrates. This primer for plastering walls has a water-repellent effect and also ensures air penetration - allows you to “breathe”. These compositions are a good basis for subsequent application of gypsum or cement finishes.
There is a special type of soil - aluminum plaster. It is intended exclusively for wood.
This plaster primer is intended for surfaces with low absorption levels.
Do-it-yourself priming of walls before plastering: step-by-step technology for application and use
To get a good result, you need to properly prepare the walls and treat them with a primer. Before starting work, it is recommended to read the manufacturer's instructions, which are located on the product packaging.
Preparing the surface for applying primer - what is it?
The old coating is removed from the walls, and then all existing defects are eliminated. It is necessary to widen the cracks, i.e. remove that part of the material that does not adhere well, and then cover them with plaster. If there are stains on the wall, they are removed using solvents, degreasers or other compounds (they are selected depending on the stain). If mold is detected, cleaning and disinfection are carried out.
To improve the adhesion of the putty to the concrete surface, notches can be made on the latter. Preparation includes protecting windows, doors, furniture or other items that may come into contact with the primer. They are sealed or covered with thick fabric or polyethylene. You can begin priming when the preparatory work is completed and the wall is completely dry.
Tools for work: how to apply primer under plaster
In most cases, a roller is used. A brush is necessary for treating hard-to-reach places, such as corners. They rarely resort to using a spray bottle.
Additionally, you will need a container into which the primer will be poured (cuvette).
Applying primer to the wall
If the purchased composition is concentrated, then before use it must be diluted with water. The proportion is indicated on the primer packaging.
The entire working surface of the roller must be moistened with primer, but it should not drip. At this stage, it is convenient to work with a special bath, the design of which allows you to remove excess liquid.
Apply the composition starting from the corner. To reduce splashing of the working composition, it is recommended to move the roller in the direction from bottom to top. Unevenness should not be allowed, so if drips appear, they are rubbed off immediately. It is not recommended to stop work until the entire wall has been completely processed, i.e. one plane. After the roller, you can take a brush and treat hard-to-reach areas.
The next layer of primer is applied with a roller, the movements of which should be transverse to the previous one.
Source
Preparatory work
Any primer for walls under plaster requires preparation of the walls. To work you will need a brush, a solution tray, a roller or a spray bottle. Before applying the composition, it is necessary to carry out mechanical treatment of the surface in order to eliminate unevenness, seal cracks or remove the old coating.
For example, before priming concrete walls before plastering, a number of additional operations should be carried out:
- Scraping;
- Grinding. It precedes the painting process and also allows you to remove unevenness;
- Puttying. Required for damage spread over a large area;
- Repairing cracks and deep scratches;
- "Fine" alignment.
Before applying the composition, it is necessary to perform mechanical treatment of the surface.
Walls
Standard wall treatment before plastering prepares the surface for two types of finishing:
- Coloring. It is advisable to remove all layers of old paint, clean and sand the front side. Sometimes leveling may be required - there are special putties for this. To achieve good coloring, it makes sense to choose a special color primer;
It is advisable to remove all layers of old paint, clean and sand the front side. - Plastering. The quality of the preparatory work will determine the durability of the decor. For example, a primer for gypsum plaster “loves” the presence of roughness and stabilizing the porosity of walls.
The primer for gypsum plaster “loves” the presence of roughness and stabilizing the porosity of walls.
A properly prepared surface will both ensure the necessary strength of the finishing layer and create the most even base possible.
Primer mixture
When choosing which primer to treat the walls before plastering, you should consider two key points:
- Surface type. “Crumbling” structures are recommended to be plastered with deep penetration primer. A base with a weakly absorbent surface can be treated with the so-called concrete contact. In other cases, standard universal impregnation is selected;
- Special properties. Sometimes, which primer is best for walls for plastering or painting will be determined by its specifics. There are mixtures with anti-corrosion additives, with an anti-fungal effect or insulating ones, for rooms with high humidity. In addition, combination primers-varnishes or primers-paints may be useful.
A base with a weakly absorbent surface can be treated with the so-called concrete contact.
Materials
Often the primer for plaster and the material of the walls determine the strength with which the decorative layer binds to the substrate. This aspect should also be taken into account:
- Cement, concrete (or equivalent). Soil with a mineral base;
- Chipboard, fibreboard. Alkyd compounds are the best option for priming walls before plastering;
- Glossy surfaces, synthetic paint. Acrylic primer is the best choice;
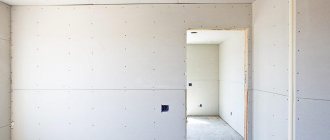
- Gypsum board. Mixtures with high penetrating power will be required.
Often the primer for plaster and the material of the walls determine the strength with which the decorative layer binds to the substrate.
How to choose soil
Let's look at the main types of primer solutions and their features:
- Universal . This acrylic-based material can be used on any surface except wood and metal. The composition of this primer provides increased adhesion, improved strength and protection against mold (if the composition contains the appropriate additive). Dries quickly and has no unpleasant odor.
- Deep penetration . This impregnation is used mainly on loose and crumbling plasters. Penetrating deeply into the pores, the solution slightly strengthens the wall and increases its water-repellent properties. This material dries quickly and does not have a strong odor.
- Adhesive soil type concrete contact. It allows you to significantly improve the adhesion of materials due to quartz sand in the composition. After the primer solution dries, a rough surface with good adhesion is formed. This is required when leveling concrete walls with gypsum plaster, when gluing tiles to drywall, as well as when finishing smooth materials, such as fiberboard, OSB boards, etc.
These are the main three types of primers used for interior work to treat walls before plastering and puttying.
Primer application process
When priming walls before plastering, you should understand that the typical work procedure includes only a basic set of operations and can change depending on the situation.
- Mechanical preparation. Wallpaper, nails, fasteners are removed and the old finish is removed.
- Alignment. All cracks, chips and protrusions must be removed. Before treating the walls before plastering, you should wait until it is completely dry.
- Applying the first layer.
- Drying out.
- Applying the second layer. A mandatory step to smooth out the heterogeneity of the material and achieve uniform distribution of the composition.
Applying a second layer is a mandatory step to smooth out the heterogeneity of the material and achieve uniform distribution of the composition.
The most common mistakes when priming
In order for a primer for plaster to provide the expected result, you should take into account the accumulated negative experience and prevent its manifestation in your work:
- Refusal to carry out the preparatory stage;
- Failure to comply with drying times;
- Incorrect preparation. Before application, impregnation for walls under plaster (concentrate) must be diluted in accordance with the instructions;
- Excessive layers;
- Leaks;
- Using old mixture.
Before application, impregnation for walls under plaster (concentrate) must be diluted in accordance with the instructions.
A complete repair is impossible without carrying out all the necessary procedures. Both the customer and the builders must understand this. Therefore, priming for plaster is a prerequisite for high-quality work, since this is where the foundation of the required degree of coziness and comfort in the house is laid.