Characteristics and composition
The name "gypsum plaster" is not entirely accurate. Gypsum is a mineral from the sulfate class. It has a double structure: fibrous - selenite, granular - alabaster. It is from alabaster that the plaster mortar is obtained, which everyone knows as gypsum.
The technological process is not very complicated:
- the mineral is fired at high temperatures for a long time;
- crushed to a powder state - the smaller the particle fraction, the higher the plasticity and better binding properties;
- additives are introduced:
- fillers with granules no more than 1.5 mm - reduce the weight of the solution. For these purposes, the smallest particles of polystyrene foam, foam glass, vermiculite, and perlite are used;
- plasticizers and modifiers - reduce the speed of setting of alabaster (without additives, after 5 minutes the mixture becomes stone) and improve the level of adhesion.
- bleaches - lime (used before), titanium or zinc based white;
- polymer additives - increase the viscosity and strength of dried plaster.
Available for sale in bags of 5, 15, 25 and 30 kg.
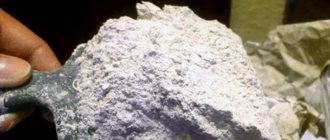
Crushed alabaster.
This is the composition of the dry mixture. Water and retarding agents are added to the ready-to-use paste, as a result of which the solution does not harden without access to air. Pasta is sold in plastic buckets.
Technical characteristics depend on the density of the material and the size of the component fractions. Therefore, specific numbers may vary. The main indicators are:
- color - can be white, gray with different shades, pink and beige;
- The proportion of water for mixing is on average 2:1, where 2 is gypsum, 1 is water. But different manufacturers have deviations - from 0.4 l per 1 kg of mixture to 0.6 l / kg. You need to look at the recommendations on the packaging;
- the thickness of the base layer without reinforcement is from 2 to 5 cm (different for each manufacturer);
- compressive strength - 25-40 kg/cm2 (according to GOST 31377-2008 - 2.45 MPa);
- work is allowed at a temperature of - +5-+30oC;
- solution lifetime - 1 hour (according to GOST - 45 minutes for manual laying, 90 - machine);
- complete drying time - 3-7 days (depending on the thickness of the layer);
- composition consumption per 1 mm of layer - 0.8-1.2 kg/m2 (hand laying - 0.85-1.0 kg/m2, machine - 0.75-0.9 kg/m2;
- adhesion force to the base - 0.3 MPa;
- moisture retention without dripping - 90%. Solutions with 95% appeared on sale, which is much better;
- density - 950 kg/m3;
- vapor permeability - 0.11-0.14 mg/ (m*h*Pa);
- shrinkage of the base layer is not allowed.
Features and Specifications
The coating retains a monolithic surface at a layer height of 5–6 cm, since the composition contains polymer additives that increase the plasticity and adhesion of the solution to the base. The material has a reduced density and low weight. The solution does not separate or dehydrate when applied to the wall, and sets quickly. Dried gypsum plaster absorbs excess moisture from the air and releases it when the room temperature rises, without changing its characteristics. A properly prepared plaster layer does not require repeated puttying.
The setting time of the gypsum coating of concrete is about 40 minutes (in the ambient temperature range plus 5 - 30 degrees), which saves finishing time and increases productivity (10 - 15 m2 per shift with a coating thickness of 2 cm). As a result, the premises acquire additional qualities in terms of aesthetics, hygiene, sound and heat insulation, fire safety (the fire resistance of the composition corresponds to concrete).
Plaster that has been flooded with water only needs to dry for a few days to completely restore the aesthetic appearance of the surface. A significant disadvantage is the direct “conflict” interaction between the surface substances of concrete and gypsum plastering solutions. High humidity (above 5%) of the concrete surface (especially lightweight concrete) does not promote the absorption of moisture from the solution, but its release from the concrete into the gypsum plaster.
The primer imparts good adhesive properties to concrete.
For this reason, recrystallization of the plaster layer material occurs, which causes a decrease in adhesion to concrete. Another danger is the shrinkage of lightweight concrete (which continues for years) due to a gradual decrease in the moisture content of the material, leading to stress in the boundary layer and cracking of the plastered finish. This is how the coating peels off from the base and its destruction. A smooth concrete surface with acceptable humidity also does not absorb moisture well, so to give it good adhesive properties it must first be coated with a deep penetration polymer primer.
Return to contents
Pros and cons of gypsum plaster
Gypsum plaster has gained popularity due to its advantages :
- high plasticity - easily applied and stretched in a thin layer onto horizontal and vertical building structures;
- good adhesion to almost all building materials, including concrete, brick, aerated concrete and clay bases;
- formation of a smooth surface after drying - no further processing is required: grouting and sanding with finishing mixtures;
- absence of shrinkage with a plaster layer of up to 3 cm, and, therefore, the entire surface - no microcracks form;
- excellent soundproofing properties - absorbs indoor noise, weakens structural noise;
- prevents heat loss due to the low thermal conductivity coefficient - 0.23-0.3 W/m*K;
- low weight - no serious loads are created on the walls and foundation;
- environmentally friendly - sanitary standards allow use in any room of a house or apartment (children's room, bedroom);
- ability to pass vapor molecules (vapor permeability). Thanks to this, a comfortable microclimate is maintained in the plastered room;
- economical consumption - allows you to completely offset the higher price compared to CPR;
- fast setting - the following stages of the technological process are not delayed;
- short drying period - from 3 to 7 days, which significantly reduces repair time;
- does not serve as a basis for the development of fungi and mold;
- thinner base layer than cement mortars - 2 cm versus 3 cm;
- fire safety - fire-resistant partitions are manufactured.
The list of strengths is impressive. However, the existing disadvantages narrow, however significantly, the scope of application:
- afraid of moisture - cannot be used outside (on facades) and in rooms with high humidity (basement, bathroom, open balcony or loggia, etc.);
- having an acidic environment, it corrodes metal, even galvanized;
- has low surface hardness - can easily chip or leave a deep scratch;
- Quick setting for beginners in plastering creates problems: they do not have time to work out the batch. But this is the other side of the coin, because... for professionals this is an undoubted advantage;
- Do not work in unheated rooms in winter. Only at positive temperatures - from +5oC or more.
Application: work stages
To mix the material well, use a construction-type mixer.
The gypsum plaster mixture is diluted with water in accordance with the instructions. Pour it into water in a thin stream and mix with a mixer. The approximate proportion is 1 kg per 500 ml of liquid. The consistency of the solution should resemble thick sour cream. The process of applying gypsum plaster is simple, but the quality of the final result directly depends on the correct mixing.
Preparing the base
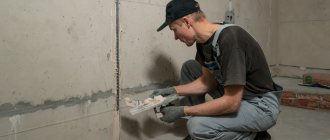
Before finishing concrete walls, special treatment is done. To begin with, dirt, dust and old coating are removed from the surface. For better effect, wash the base. Concrete itself is smooth, so for adhesion, notches are made on it and roughened. When the surface is completely clean, it is coated with a primer. It helps the plaster adhere to the concrete and performs a protective function against fungi and mold.
Before performing the main stage of work, the walls must be primed.
Application
After the primer has dried, the plastering process begins. Without a special machine, the material is applied manually with a spatula from bottom to top. Plastering begins from the middle of the wall and moves to the corners. The layer of the mixture is distributed and leveled according to the rule. After 40 min. After application, sanding is done. To do this, use a wet sponge. Cleaning the corners is done with a special plane. To make the wall glossy, use a steel trowel. For the final result, such actions are repeated 3-4 times. If two layers of plaster are laid, then notches are applied to the first of them, and after hardening, the second layer is distributed.
Application area
Alabaster-based plaster was originally intended for plastering walls and ceilings inside residential premises made of any materials: concrete, brick, aerated concrete, plasterboard, etc. under wallpaper and paint. Later, they began to putty on slopes, use it to seal seams between sheets of drywall, and with the advent of fiberglass reinforcement, to strengthen the joints of concrete ceilings.
You cannot plaster metal, facades, walls and ceilings in damp and damp areas. There are two reasons:
- acidic environment corrodes metal structures;
- At high humidity, gypsum plaster actively absorbs water vapor, softens and floats or collapses.
But there are exceptions here too. So, gypsum plaster is used under tiles in the bathroom, but not under wallpaper or painting. Gypsum mixtures also appeared for facades. But the amount of polymer additives there is so large that it is not correct to talk about gypsum solutions. These are rather gypsum-polymer plasters.
Dry plaster
Now let's talk about dry plaster - what it is, how it differs from the so-called “wet” plaster, which was discussed above.
This category includes two almost identical materials: drywall and gypsum fiber boards. The first is a gypsum layer covered on both sides with cardboard. The second is simply a gypsum board, in the manufacture of which not only gypsum was used, but also various additives that increase the characteristics of the material.
Both materials received their name, namely dry plaster for interior work, only because they can be used to level both walls and ceilings without using water or other liquids. At the same time, the quality of the final result is always excellent.
While gypsum sheets may seem expensive, it will actually be cheaper than leveling with mixtures. Especially if walls and ceilings with large defects are being repaired, where it is necessary to use a large volume of plaster solutions. And this is even though profiles and fasteners are needed to install the sheets.
Attention! Today, manufacturers offer moisture-resistant drywall that can be used both in wet rooms and outdoors. In the latter case, the main task is to install the material under a canopy.
Leveling walls with plasterboard Source wp.com
Types of gypsum plaster
The criteria for classifying plaster by type are:
- size of component fractions;
- method of application;
- appointment;
- release form;
- color.
Fraction size
When doing plastering work with your own hands, it is important to select the correct mixture according to the particle size of the components. After all, the purpose of the solution depends on the fraction:
- coarse-grained - intended for thick layers of plaster (5-8 cm) when eliminating large surface defects. Difficult to find on sale. You definitely need a reinforcing mesh - without it it will shrink and crack;
- medium-grained is the most popular type of dry mortar. Used to level small differences in height, up to 3 cm. The maximum possible layer thickness is 5 cm, but from individual manufacturers;
- fine-grained - applied with a thickness of no more than 8 mm onto existing layers of previous types. With a thicker layer, extensive cracking is possible. Can be used for putty for painting.
Application method
You can plaster walls in different ways:
- manual - used in small areas or when performing work independently;
- machine - the solution is quickly applied to the walls. The quality of the dried surface is almost perfect. However, to mechanize the process of leveling walls, a stirring station and a pneumatic blower are needed. The equipment is expensive, which is why the prices are high. They can be reduced to an acceptable level only by increasing the volume of work.
Purpose
According to their intended purpose, solutions can be:
- starting ones - applied directly to the walls, hiding defects;
- finishing - laid on an existing layer of plaster. The only function is to make the surface smooth to a mirror shine;
- universal - can be used for any purpose.
Attention: finishing solutions can be applied to drywall without an underlying layer of coarse or medium-grained mixtures.
Release form
Gypsum solutions are offered for sale in the form of:
- dry mixes - sold in bags;
Dry mixture.
- pastes - ready-to-use solution. Packaged in plastic buckets. Weight can be from 1 to 18 kg.
Paste.
Color
Gypsum plaster is associated with the color white. However, you can find dry mixtures on sale:
- white;
- gray, with different shades;
- beige;
- pink.
Colored gypsum mixture.
Manufacturers
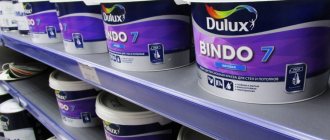
Competition influences the improvement of the quality of dry mixtures. The building materials market offers a wide selection of gypsum plaster from domestic and foreign manufacturers. The Knauf company produces two types of this material: MP-75 and Rotband. The first type of dry mixture is intended for machine application to any surface. Rotband is applied by hand. Master produces Isopro plaster. This is a starting material with good vapor permeability and resistance to base shrinkage. The “Canvas” mixture is used to treat walls for tiles, wallpaper or painting. offers "Gipswell T-25" for work inside dry rooms. Other manufacturers:
This type of material is produced by Bergauf.
- "Khabez";
- "Prospectors";
- "Bergauf";
- "Fast."
Recommendations for selection
The quality of repair depends on the materials. When choosing gypsum plaster, you must first pay attention to the technical characteristics . They must comply with GOST (given at the beginning of the article). If there are deviations, and they occur in imported products, you need to analyze what consequences this will lead to.
For example, with a manual application of plaster consumption of 12 kg/m2 per 1 cm layer, the cost of finishing increases sharply. In this case, you need to look at the price and the presence of unique properties - the low cost compensates for the overexpenditure, and moisture resistance or high strength will allow you to plaster the walls in the bathroom or kitchen.
The second indicator that you should pay attention to is the date of manufacture . As a rule, the shelf life of mixtures is 6 months. After it expires, problems arise with stirring - many lumps form inside the bag, which are difficult to dissolve. True, the quality characteristics remain virtually unchanged.
The container must be undamaged - gypsum actively absorbs moisture from the air. The result is lumps that practically do not grind. It is better not to buy such dry plaster. Two more important indicators:
- drying time. Varies from 3 to 7 days. More flexible solutions dry faster;
- viscosity. The more plastic the mass, the more convenient it is to work. But such mixtures also have increased consumption. More consumption means higher repair costs. You need to choose one thing.
For wet rooms you need to buy moisture-resistant brands of gypsum plaster. But for financial reasons, it is better to use a well-tested technology - cement-sand mortar for interior work.
If you want to reduce the cost of materials, you can buy alabaster (sometimes they write gypsum on the packaging, which is the same thing). Rapid setting can be eliminated using diluted PVA glue (1% of the solution volume), slaked lime, citric or tartaric acid, or even better by adding the retarder “Plast Retard PE”. In any case, it will be cheaper than dry mixture or paste.
And, of course, look at the manufacturer - for time-tested brands, all the strengths and weaknesses can be found on various forums. Here, buying a “pig in a poke” is excluded.
Features of the compositions and their varieties
First, let's figure out what gypsum plaster is. The mixture is prepared on the basis of gypsum, a natural material that provides high strength coatings and very fast hardening of the finish. The composition is strong and durable, but unlike cement mixtures, gypsum does not resist moisture well, and this is the main difference between these options.
The popular Rotband plaster is used exclusively for interior work; other compounds are used externally
Previously, gypsum plasters were used exclusively in dry rooms with a stable microclimate. But modern additives provide the necessary level of resistance to moisture, which makes it possible to use this option for exterior finishing. It is in no way inferior to cement; moreover, due to its high elasticity, it is much easier to apply and the surface is smoother and neater.
Advantages and disadvantages
Let's start with the main advantages:
| Illustration | Description |
| Ease of use . Gypsum-based compositions are applied using hand tools, which cost little and are sold in all specialized stores. You can save significant money by doing the work yourself, since the services of finishers are often more expensive than the materials themselves. | |
| High elasticity of the finished solution . This is the main advantage over cement options, thanks to which it is much more convenient to work with gypsum mixtures. Another important plus is excellent adhesion to substrates if they are properly prepared. | |
Surfaces rub easily. You can easily remove minor blemishes and level the façade using a grater. Gypsum is easier to process than cement, and this is also an important advantage, because the work takes much less time and effort.
| |
| Resistance to cracking . If the finishing is done correctly, the walls will retain an attractive appearance for many years and will not crack due to changes in humidity and temperature. This is ensured by the properties of gypsum and special additives that make the coating even more reliable and durable. | |
| Different texture options . You can make either a perfectly smooth surface or give it a structure; this is achieved through different application methods. For example, when machine distributed on the wall, a so-called fur coat is formed, which is what is shown in the photo. There are other options, there are many of them, so it makes no sense to list them all. | |
| No shrinkage . Another very important aspect to achieve perfect finishing quality. The layer practically does not change its parameters when drying, which simplifies the work and eliminates the formation of unevenness and cracks. |
Let's look at the main disadvantages:
- High price . The mixture itself is inexpensive, but when compared with cement options, the difference is noticeable;
- Demanding adherence to technology . To get a good result, you need to properly and properly prepare the surface, prepare the composition as prescribed in the instructions on the package, and apply it within half an hour while it is plastic.
Types of plasters
You can find different formulation options on sale, but they are all divided into three main groups:
- Fine grain plaster . It consists of crushed sand and gypsum of the smallest fractions, resulting in a perfectly smooth surface during finishing. This option is suitable for finishing leveling, since it can only be applied in a layer of no more than 8 mm; if you apply more mortar, it will simply crack. But if you need to perfectly level previously plastered walls, then this is exactly what you need;
- Medium grain compounds . The most popular and sought-after solution, which is distinguished by its versatility of use and ease of application. The composition can be distributed in a layer of up to 5 cm, and it will not crack. The result is a fairly flat surface with minimal errors, so you can use this option for finishing facades without additional putty;
Universal compositions have a medium-grained structure
- Coarse mixtures . This option is most often used in industrial facilities and is applied by machine; it can be distributed in a layer of up to 8 cm, which is very convenient on uneven surfaces. The composition contains fairly large inclusions, so a leveling layer is most often applied on top of the base layer to achieve an ideal result.
Also, gypsum facade plasters differ in the method of application; there are only two options:
- Hand applied compositions . This is the most common type of plaster, specifically designed to be prepared and spread on the wall using hand tools. Many special additives increase plasticity and improve adhesion to different surfaces. Setting time usually ranges from 40 to 60 minutes, so you should cook only as much as you can use in that time;
- Machine applied plasters . This option is used on an industrial scale and is excellent for external walls, because it allows you to very quickly apply the composition to large areas. The composition contains additives that simplify its application with special equipment, and the setting time is about two hours, so that after application the master has time to level the surface.
With a mechanized method, it is best if one person does the application and another does the leveling.
How to choose a mixture
When choosing a specific option, consider several aspects:
- Purposes of use . The packaging must indicate that the composition is suitable for outdoor use; the plaster must be frost-resistant and impervious to moisture. If decorative finishing is carried out indoors with high humidity, then it is also recommended to use mixtures for exterior work so that the finishing is not damaged by moisture;
- Application layer thickness . The volume of composition that needs to be purchased directly depends on this. Gypsum options have much lower consumption than cement ones, so when choosing a specific solution, carefully read the information on the packaging to make the necessary calculations.
As for specific brands, the products of three manufacturers are most often found on the market:
- Knauf. The company, present on the market for more than 20 years, has a wide range of products that have proven themselves well among customers. The compositions are more expensive than their analogues, but the quality is appropriate, so most professionals choose this option;
- Volma. A domestic brand that produces lightweight compounds with reduced consumption and increased plasticity. It has an affordable price and can be considered the optimal solution in terms of price-quality ratio;
Volma compositions have good quality at low cost
There are options for Volma compositions that do not even require preliminary priming of the surface. This simplifies the workflow and reduces material costs.
- Berghauf is a brand that has a large range of plasters for external and internal use. The compositions are of high quality and are characterized by plasticity and good adhesion, making them easy to apply even for inexperienced people. The line includes compositions of different price categories, so each buyer will choose an option within their means.
Excellent composition with increased plasticity for ease of application
Which option to choose is up to you, it all depends on how much money you are willing to spend. But it’s better not to save money; if you have the opportunity to purchase a higher-class composition, then take it, since external plaster must be of high quality and resistant to adverse influences.
How to prepare and apply plaster
Now let's look at the main aspects of using the composition:
| Illustration | Description |
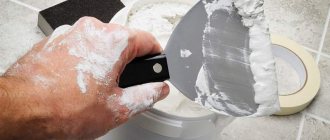
To prepare the solution you need the following:
| |
| The required amount of water is poured into the container . Usually it is taken at the rate of 0.5 liters per kilogram of dry mixture, but the proportions may vary, so it is better to read the information on the packaging. The required amount of dry composition is poured into the water in small portions. | |
| The composition is thoroughly mixed . You need to try to go through the entire volume of the bucket so that there are no dry layers left at the bottom. The solution is left for 5 minutes, then mixed again, after which it can be used. | |
Application can be done in different ways:
|
Popular manufacturers
Many companies produce gypsum plaster. But in terms of popularity, not a single product can compare “Knauf” Rotband (“Knauf” Rotband) Indeed, high plasticity, an easy-to-work consistency, which is why the mortar adheres well and adheres well, the absence of shrinkage and, as a result, a surface without cracks after drying, are liked by builders.
But there is one big drawback: the price is greatly inflated. At the same time, not due to the best quality and operational characteristics - they are approximately the same for all leading ones, “DeLuxe”, “Unis”, “Ceresit”, etc.), but due to the promoted brand.
Among the competitors, there are several companies that are really good in terms of product quality.
"Volma". The Russian manufacturer supplies the following line of mixtures to the retail chain:
- “Layer”, “Plast”, “Canvas” - for classic manual application;
- "Gypsum asset" - for mechanized.
The product is intended for leveling walls, restoration and decorative work. Peculiarities:
- low price;
- good adhesion to all types of wall materials;
- insufficiently high ductility;
- does not like significant changes in temperature and humidity;
- maximum thickness of one layer - 3 cm;
- no shrinkage during drying;
- does not peel off or crack;
- the color is not only white, but also beige or pink;
- It sets faster than the stated 45 minutes, which creates problems, especially for home craftsmen.
The company guarantees high performance characteristics of the plaster with a layer thickness of up to 5 cm, but subject to reinforcement with fiberglass or basalt mesh.
"Prospectors". Another domestic manufacturer. Supplies mixtures for interior work to the building materials market. They can be used for finishing walls and ceilings, sealing seams and joints, and restoring stucco.
There are no complaints about product quality. It is plastic, fits well, and glosses easily. Plus, the maximum permissible thickness of the base layer is large - up to 5 cm. The disadvantage lies in the area of logistics - packaging in bags of 15 and 30 kg, which is not always profitable.
"Unis". The Russian one has several enterprises in the country. It produces products with the following technical and operational parameters:
- White color;
- diluted in a ratio of 0.4-0.5 l / kg;
- base layer thickness - 5-50 mm;
- compressive strength - 2.45 MPa;
- plasticity is maintained at temperatures from +5 to +30°C;
- the life activity of the solution is 50 minutes;
- consumption per 1 cm of layer - 8-9 kg/m2.
Reviews vary widely in quality. At some enterprises, control over compliance with the technological process has been established. As a result, there are no complaints. At the same time, where this point is missed, shortcomings are noted:
- does not mix well - lumps remain;
- slides off the walls, despite experiments with the amount of water;
- takes a long time to dry.
Can be applied manually or by machine.
"Ceresit". The German company, under the trademark “Ceresit”, produces in the Urals (Chelyabinsk) not only gypsum plaster, but also gypsum-polymer plaster for facade work.
The plaster mixture is impact-resistant, plastic, with an optimal consistency, which allows you to apply different patterns using rollers - imitation of some types of decorative plaster. The disadvantage is the price. Too high. But you have to pay for quality and brand.
"Deluxe" Plaster mortars are not inferior in quality and technical characteristics to German manufacturers, but at a lower price.
"Bolars." The product is used for leveling walls and ceilings. It has:
- color - white or gray;
- compressive strength – 2.45 MPa;
- consumption for a layer 1 cm thick - 10 kg/m2;
- solution lifetime - 60 minutes.
Mixes easily. Lay in a layer of 2 to 30 mm. If the solution thickens ahead of time, you need to re-stir without adding water. Among the disadvantages, consumers note the high price - the most expensive plaster among domestic manufacturers.
Manufacturers of dry gypsum mixtures
Manufacturers produce gypsum plasters for interior use, differing in characteristics, aggregate size, consumption and recommended layer thickness.
Gipswell presents a series of compositions developed by the Osnovit enterprise in Russia; they are intended for rooms with normal humidity and are represented by the following brands:
- gray mass Gipswell PG25 is intended for manual application, after mixing it is suitable for work within an hour and a half, a layer of up to 8 cm can be applied, with such a thickness about 9 kg is consumed per square area;
- white mixture Gipswell PG25 W is used in a similar way, but its original color is white, so dyes can be added;
- white mixture Gypswell PG26 MW is applied by hand and machine, used as a final coating.
GIFAS is also domestically produced; three brands go on sale:
- GIFAS START mixture is used in rooms with normal humidity, the permissible layer thickness is 10 mm, the consumption is from 10 to 11 kg per square wall, the production time is 50 minutes;
- the GIFAS MN composition is applied manually and by machine, the layer thickness is slightly less - up to 7 mm, the setting time of the working solution begins after 40 minutes;
- gray plaster GIFAS PREMIUM is characterized by increased vapor permeability and is intended for initial leveling to a thickness of up to 8 mm.
The Etalon brand is produced by the Etalonstroy enterprise, it represents an excellent combination of price and quality, and is presented in two types on the market:
- a gray mixture of a light shade, ClimLife, is designed for manual production of a layer of up to 50 mm, it needs to be worked within an hour at normal humidity, it is strong and elastic;
- a solution from the dry composition of ClimLife MN is made for machine application and repeats the characteristics of the previous brand.
The Bergauf company produces a plaster mixture only for manual application in rooms with normal humidity levels. The construction market is represented by the following brands:
- EASY BAND is used to level surfaces of no more than 40 mm, gray in color, plastic and movable, viable after mixing for an hour, the manufacturer recommends it as insulation due to its perlite content.
- PRIMA PUTZ GIPS has a medium filler size, is used for applying a layer under wallpaper, white, and is used as a finishing texture for painting.
- BAU PUTZ GIPS is recommended as a base for the final decorative layer of fine-grained plaster.
Other common brands
Compositions from some manufacturers are used in various areas of finishing work. Dry compositions are impact-resistant, hydrophobic, and resistant to sunlight. These include:
- gypsum mixtures for heated premises Perfecta;
- plaster Pobedit Egida for leveling and insulation inside and outside the building;
- the Knauf brand is represented by a wide variety in which the consumer will find the desired brand of excellent quality;
- Rotband facade dry mixtures for machine and manual application produce products that have proven themselves in wet conditions;
- Volma products are distinguished by their consistent quality; the line includes brands for use in conditions of high humidity and on external walls.
Materials and tools
To work with gypsum dry plasters you need to have:
- dry mixture;
- primer;
- reinforcing mesh made of fiberglass, basalt or plastic;
- metal profile for beacons;
- self-tapping screws;
- special clamps for attaching beacons: “Kremmer”, “Ushastik” or clips. What they are and how to use them can be found here.
Tools and equipment needed:
- stepladder or strong table;
- container for mixing the solution - a 10 or 12 liter bucket;
- electric drill or powerful screwdriver with different attachments (mixer, drill and cross-shaped bit);
- grinder or metal scissors;
- trowel (trowel) for applying mortar to the wall;
- h-shaped rule - for leveling and redistributing the solution;
H-shape rule.
- trapezoidal rule for pruning;
- spatula, even better two: wide and narrow. The first is used for polishing the solution and instead of the falcon, the solution is collected, the second is for processing hard-to-reach places;
- primer cuvette;
- roller or mat - walls are primed;
- sponge grater for polishing the surface. You can take P400 sandpaper and wrap the block;
- laser level or building level;
- roulette;
- plumb line;
- fishing line or twine for hanging walls;
- simple pencil.
Advantages and disadvantages
Gypsum plasters for interior work are endowed with a fairly large number of advantages, which makes them extremely popular among buyers and qualified craftsmen.
Its main advantage is durability, which is facilitated by enviable wear resistance and strength. The dried composition does not tend to crumble or crack, or deteriorate under periodic exposure to moisture.
This results in a property such as moisture resistance. When wet, the surface does not “thin” and does not lose its original technical properties. The soaked plaster layer returns to its normal solid state within a couple of hours.
The risk of mold growing on a gypsum plaster base is virtually nil unless any particular area is constantly exposed to moisture.
That is, another plus for the material is vapor permeability, which helps to ensure a comfortable microclimate in the room by “absorbing” excess moisture when there is an excess of it or, conversely, releasing a small proportion of moisture vapor when the air is excessively dry.
Along with this, starting gypsum plaster is famous for its impeccable plasticity. Due to the viscosity of the gypsum composition, applying even a sufficiently thick layer will not cause it to crack or slide down the surface.
It is this plasticity that eliminates the need to use reinforcing mesh when the application thickness reaches 5 cm. As a result, working with gypsum plaster can easily be done on your own.
Gypsum plaster, the characteristics of which indicate a low level of thermal conductivity, is an excellent heat and sound insulator. By its nature, gypsum is recognized as a poor thermal conductor, which indicates its ability to prevent the penetration of cold from outside, preventing the loss of “home” heat.
The same can be said about the sound-absorbing functions of the composition. By blocking incoming noise, the surface prevents internal noise from leaving the room.
After hardening, gypsum-based plaster for interior work does not create additional weight on the finished surface, maintaining the integrity of the structure and reducing the load on load-bearing wall bases.
The only drawback is that it cannot be used in rooms with the constant presence of damp vapors, such as a bathroom or kitchen. Constant humidity will lead to inevitable swelling of the plaster composition and its peeling.
Calculation of plaster consumption
The consumption of gypsum plaster per 1 m2 is influenced by several factors:
- curvature of the walls - the greater the slope or height difference, the thicker the layer of plaster is needed;
- type of mixture - grinding depth and consistency affect technological consumption rates. Indicated on the packaging;
- manufacturer - the plasticity of the solution depends on the additives added. But this is a double-edged sword: convenient application equals increased consumption, for which you have to pay.
Master plasterers use several calculation methods to calculate the amount of dry mixture. More accurate results can be obtained after installing the beacons. To do this, design points are marked vertically and horizontally at equal distances from each other on the wall surface. Experts call them key. The more there are, the more accurately the required volume of the mixture is determined.
Then, at each point, the distance from the wall to the conditional plane, which is formed by the beacons, is measured. The resulting numbers are added and divided by the number of measurements. The result is an average layer thickness. Then everything is simpler. The area of the surface to be plastered is found (window and door openings are subtracted from the area of the wall), the consumption rate is taken and the amount of dry plaster in kg is calculated. The formula looks like:
V = S x T x N x k , where:
- V is the volume of dry gypsum mixture, kg;
- S—wall area for plastering, m2;
- T—thickness of the plaster layer, cm;
- N—consumption rate for a layer of plaster 1 cm thick, kg/m2;
- k is the coefficient of unaccounted losses. For professionals it is around 5%; home craftsmen need to target an overrun of around 10-15%.
The procedure ends with determining the number of bags. To do this, the result obtained when calculating using the formula is divided by the weight of the bag and rounded up.
Features of use
To prepare the solution, use dry and clean containers. All components are added strictly according to the instructions, the ratio of water and dry powder is observed. Dyes are added from brands that combine well with gypsum.
If a ready-to-use solution is purchased in a plastic container, then water or other solvents other than dyes are not added to it. The pigments are thoroughly mixed using an electric drill with a whisk.
Material consumption
This indicator is influenced by the thickness of the application and the condition of the surface. The consumption of plaster per square meter of area with a thickness of 1 mm is indicated by the manufacturer on the packaging. To calculate the total amount of material on the wall, use tools to check the verticality of the wall corners and measure the ceiling area with a level.
Measure the layer in the protruding part and in the deflections of the surface, based on these values, find the average size of the layer (in millimeters) and multiply by the weight indicated on the packaging. The more measurements taken, the more accurate the required amount of dry mixture will be.
Plastering stages
Be sure to prepare the base, which involves cleaning off old deposits and mold. Protrusions that are too large are crowded, since a lot of solution is used to raise them to their level. After this, the surface is primed. If the base is weak, then primer treatment is done twice:
- the first layer is diluted less than recommended by the manufacturer for deep penetration into the thickness of the wall;
- the second is done according to the recommendation on the packaging after the first layer has completely dried.
For precise leveling, beacons are placed, which greatly simplifies leveling the surface. For this purpose, perfectly smooth wooden slats or a metal profile are used, which are reinforced with mortar or hardware over the entire surface of the wall.
Applying the solution when leveling or finishing coats is done several times, since the result cannot be achieved the first time. A trowel and spatula are used; large thick layers shrink or crack when dry, requiring subsequent application. After final sanding, paint is applied.
Preparatory work
You need to start leveling the walls by preparing the surface for applying plaster. During the work, the following tasks are solved:
- the strength of the walls increases;
- the level of moisture absorption from the solution by wall materials is reduced;
- adhesion between the base and plaster improves.
The process consists of several independent stages:
- wall repair;
- applying primer;
- installation of beacons;
- mixing the solution.
Repair
At the first stage of preparatory work, the strength of the plastered surfaces is restored. For this:
- Electrical wiring, wall lights, sockets, switches, etc. are removed from the wall. The surface must be cleared of anything that interferes with further work;
- The furniture is moved to the center of the room. If necessary, covered with plastic film;
- old finishing is removed;
- if there is a large area of “bubbling” plaster, it will be completely knocked off;
- cracks, chips, cracks are repaired;
- Contaminants are removed: dust, dirt, greasy heels, traces of paint.
Unfortunately, the length of the article does not allow us to consider this stage of preparatory work in more detail. You can find out more details in the material “How to prepare walls for plaster?”
Primer
Concrete and brick walls actively take water away from any solutions, disturbing the water balance. There is no need to explain what this leads to. Therefore, surface waterproofing is necessary. This can be done using a primer, which not only prevents unauthorized removal of moisture, but also improves the adhesion of the solution to the base.
You need to prime it 2 times, and preferably aerated concrete three times. The next layer is applied to the completely dry previous one. On a flat surface, 1-6 hours are enough for complete drying, on a porous surface - 6-12 hours.
For all types of concrete, it is recommended to use “Betonokontakt”; for other surfaces, other types of primer: acrylic or styrene-acrylate deep penetration primers are cheaper.
Attention: concrete and brick are also primed twice until they are saturated with moisture. But here it is allowed to use a diluted primer for the first layer.
Important! In many works devoted to the problems of gypsum plaster, it is recommended to reinforce the walls after applying the primer. This cannot be done for two reasons:
- Only metal fittings are attached to the wall. But metal and gypsum mortar are incompatible - the reinforcement is corroded by the acidic environment of the plaster within 5-7 years. The option is no longer available;
- Fiberglass mesh is ideal. But it is not attached directly to the surface, but is pressed into the already applied solution and covered with a thin layer of gypsum. More detailed information about reinforcing mesh and fastening methods can be found here.
Reinforcement with fiberglass mesh.
How to plaster walls with gypsum plaster
Due to the characteristics of SGShS, the process of plastering surfaces with them differs from the application of cement and lime mortars. Work is carried out at air humidity no higher than 60%, base temperature not lower than +10°C, positive air temperature (above +5°C). The metal parts of the tools must be made of stainless steel. The order of plastering is ceilings, walls, slopes.
Stages of work:
- preparation of the foundation with installation of beacons;
- mixing the solution;
- applying a layer of plaster along the beacons and leveling,
- preparation for finishing (griding and glossing).
To dry the plaster layer (~ 5 days), provide ventilation, preventing drafts in the room.
The tools are periodically washed with water, and the container for preparing the mixture is washed immediately after it is emptied. The ingress of particles from the old solution sharply reduces the setting time of the new one.
preparation of gypsum plaster
wall application
removal and sealing of beacons
alignment rule
grouting gypsum plaster
Preparing the base
Before plastering the walls with gypsum plaster, various layers (old peeling plaster coating, wallpaper), growths, oil contamination, and cleaned of dirt and dust are removed from the surface of the base. Remove old nails and other metal parts. If they cannot be removed, they are coated with anti-corrosion agents.
Rust will certainly appear on the surface over time. Working with gypsum plaster requires protection from corrosion of all metal parts under the coating.
The base is primed. Walls made of dense glossy concrete are covered with Betonokontakt. Substrates that absorb moisture (foam, expanded clay and aerated concrete, etc.), as well as rough and porous concrete - with deep penetration primers, for example, Grundirmittel. Apply the primer with a roller or brush, after which the base is dried for at least 3 hours. The wrong choice of primer mixture and non-compliance with its application technology often causes the coating to peel off.
If you plan to apply plaster without putty (with gloss), then the electrical work is done after priming and installing the beacons, but before applying the solution. Because on glossy surfaces it will not be possible to close the groove unnoticed. The socket boxes are placed in the same plane as the beacons. They are embedded in the same mixture that will be used to plaster the walls, checking their level with the rule until the plaster hardens. After the mixture has set, a wire is inserted into the socket boxes and twisted into a ring inside the socket boxes. After this, they are sealed with masking tape, the excess of which is cut off with a stationery knife. When applying gypsum plaster to the wall, the tape reliably protects the socket boxes from getting the solution inside. After the grouting is done, the tape is carefully cut out.
Read more about how to mix gypsum plaster.
How to thin gypsum plaster
To prepare the solution, prepare a clean plastic container. When working alone - no more than 65 liters, when working with two or three people - a larger capacity. Cold water from the water supply is poured into it in the proportion of 18 liters per 30 kg of SGHS (0.6 l/1 kg). First, 8-10 trowels of GS are poured into it, stirred for ~ 2 minutes. Then, gradually, stirring, add the rest of the mixture. Leave for about 3-7 minutes and mix with a mixer. Do not add dry mixture after aging. The entire prepared mass should be laid within 20-25 minutes.
If you do not have experience working with a quick-hardening mixture, reduce the volume of the prepared material until you get used to it.
Installation of beacons
To install beacons, walls are hung vertically and horizontally. To do this, stepping back from the top of the wall and each corner by ~30-40 centimeters, drive in dowels made of a material that is not susceptible to corrosion. Their caps should protrude above the base by the planned thickness of the plaster layer. The other 2 dowels are installed along a plumb line lowered from the caps 30-40 cm above the floor. Pull the cord diagonally and horizontally, determine the place where the layer thickness will be minimal. After this, the cords are moved, moving them on dowels, closer to the wall and set to the minimum layer thickness that is planned for future plaster. 2-3 dowels are installed along the vertical cords, the heads of which have the height of the cord above the wall, or the already driven ones are buried to the required amount. They are needed for installing/making beacons.
Throw the solution along the line of the cord (slightly higher than the plumb line goes). Then take a long building level, moisten it with water (so that it does not stick to the solution) and install it on the dowel heads (the plane of the level ruler should be perpendicular to the wall). In this case, the level is slightly pressed into the solution. Then, using a spatula (on both sides of the level), remove the solution protruding from under it. The level is removed downward and to the side. A rectangular plaster beacon remains on the wall. Such a beacon does not need to be removed after plastering. Saves time and effort on removing the beacon and sealing the groove.
The installation of metal beacons occurs in the same way. Only instead of plaster, a beacon is pressed into the wall onto plaster “cakes”.
The pitch (distance) of installing beacons is determined by the length of the rule. It is 20 -30 cm smaller. If the beacons are made from a galvanized profile, then a plumb line is drawn on the wall, onto which a solution is applied with slaps every 30 cm, into which the beacons are pressed, controlling the surface vertically and horizontally. Correct installation is checked using a plumb line. At internal and external corners, mesh corner profiles are installed (also on mortar slats) in the same plane with the beacons of adjacent walls.
The beacons are removed when the solution has set a little. To ensure that the edges of the grooves are even, you can cut a layer 6 mm from the beacon on both sides. The grooves are sealed with mortar.
Application
Probably, as many masters as there are, there are as many peculiarities in applying SGHS. There are many variations, you can get acquainted with them from the videos.
The procedure for applying the solution to the wall in a thick layer.
- Using large slaps (one to one), apply the solution to the wall with a trowel, covering the entire surface (without gaps). At the same time, the entire amount of the batch in the basin is produced at a time, trying to keep the line of the plastering edge horizontal. Since the layer is thick, the mixture will not be enough to cover the entire gap between the two beacons.
- Use a float to level the applied material, lightly pressing the solution against the wall and squeezing out air bubbles. The thickness of this layer should be such that there remains at least 1.5-2 cm between its surface and the rule attached to the beacons. This distance must be maintained throughout the entire plastered area so that the next layer is even in thickness. Where the wall comes closer to the rule, there is no need to apply the first layer.
- Having leveled the layer, use the sharp end of the tool to draw long wavy lines on its surface, going from top to bottom (the more, the better), covering the entire surface of the solution with them.
- Apply the first layer to the next area. Level it again with a grater. Check the remaining gap using the rule. Draw the lines again with the angle of the spatula. So until the end of the wall.
- Allow the layer to dry.
- Using a spatula, apply the second layer in small increments and smooth it with a grater, moving it horizontally. In this case, the new solution engages with the grooves of the first layer.
- The solution applied in small areas is smoothed over using the rule. And fill the next area with the solution according to the same scheme (applied, leveled with a grater, stretched with a rule).
- Having completed the work between the two beacons, they move on to the neighboring area.
- When the wall is plastered, allow the solution to set for about 40 minutes.
- The rule is to trim the protrusions remaining after editing along the entire wall.
- They take out the beacons and once again trim the irregularities with a rule placed diagonally against the wall, drawing it horizontally.
- The grooves are covered with a diluted thick solution.
They start plastering from the ceiling. The gypsum plaster mixture is applied with a large spatula or wide float towards you. Some plasterers apply the mixture with a trowel. Some craftsmen apply plaster to the wall from top to bottom, others from bottom to top. The scope of work is filling the area between the beacons. There are differences here too. Some apply the mixture in small areas, immediately leveling it with a rule, others, working quickly, fill the entire area between the two beacons with slaps (this is not recommended for beginners).
If the coating thickness is large, the solution is applied in two or 3 layers. In this case, a notch is applied to the still unhardened first layer with a notched trowel. The second layer is applied on the dried previous one.
Alignment
Usually, when plastering walls with gypsum plaster with your own hands, the mixture is leveled using the n-rule in the direction from bottom to top in a zigzag manner. There is no need to stretch the rule from floor to ceiling in one go. You can level in sections up to a height of 1 meter, removing the excess from the rule with a spatula (trowel) and sending it to the wall where there is not enough mortar. The corners are leveled with a corner spatula.
The solution that falls on the floor is not reused. It is not added to the container with the mixture, otherwise the lifespan of the mortar mixture is sharply reduced.
After the solution stops being pressed with your finger (45-70 minutes after the start of setting, or 65 minutes after mixing), the protrusions are cut off with a wide spatula or a trapezoidal rule. The surface after cutting is suitable for tiling work.
Grouting and glossing
In the case when the coating is prepared for wallpaper or painting, after waiting for ~ 15-20 minutes (95 minutes after mixing, when the surface is pressed with a finger), the gypsum plaster is grouted with a hard trowel (felt or sponge) moistened with water. This smooths out the remaining traces of a spatula or rule. Wetting (this and subsequent ones) should be abundant. After waiting until dullness begins to appear on the surface to be rubbed, begin smoothing with wide movements of a wide spatula or stainless steel trowel. In this case, laitance comes to the surface, which fills the dimples and large pores. An ideally smooth surface is obtained if, within 24 hours after the solution has set (no earlier than 2 hours after mixing), it is generously moistened with water and smoothed again. After this treatment, puttying before painting is not required.
After plastering the ceiling, in order to prevent possible cracks from spreading from the walls to its center, the applied coating near the walls is cut along the perimeter of the room to the full thickness of the layer.
To obtain a relief decor, after leveling the laid mixture, the coating is usually rolled with a relief roller or a pattern is applied with a forming tool. A smooth coating can also be used under decorative plaster for interior decoration, for example, Venetian or Moroccan.
Watch also videos on how to properly plaster walls with gypsum plaster.
How to paint
Without compaction, gypsum materials become porous and small irregularities are possible. Therefore, you can decide whether puttying is necessary after applying gloss to a plaster wall by looking at the surface and illuminating it with side light. In any case, it is primed before puttying and painting, and there is no need to gloss the surface under puttying (for better adhesion). The putty layer is up to 2 mm (sanded after 24 hours).
For painting, acrylic water-soluble paints (aqueous emulsions or dispersions) are used. Sometimes (much less often) oil paint is used. The paint is applied after the plaster has completely dried. You can also use other materials for painting finishing plaster. For example, if you saturate the finish with a shellac-rosin solution in alcohol (sold ready-made) or with heated drying oil, this will make the surface look like aged marble. This impregnation additionally protects against moisture.
Installation of beacons
Beacons are installed when the thickness of the plaster layer is more than 10 mm. The process is complex. Requires a detailed description of each action. Therefore, we refer everyone who is interested in technology to the relevant material, which can be viewed here.
Lighthouses on mortar piles.
Let us note only one nuance that needs to be taken into account. When reinforcing the solution, the beacons are installed only on self-tapping screws. If you do not plan to use reinforcement, you can use mortar piles.
Mixing the solution
When mixing the solution, you need to follow a few simple rules:
- the mixing container must be clean;
- the mixture is poured into the water, and not vice versa;
- mandatory adherence to the proportions recommended by the manufacturer (available on the packaging). Deviation disrupts ductility, drying time and, as a result, leads to shrinkage with cracking of the surface;
- the plaster removed according to the rule is dumped back into the solution and mixed;
- Before each subsequent batch, the dishes and tools are washed well. Otherwise, the next batch will set faster. Or there may be lumps.
The instructions on how to thin gypsum plaster are simple:
- 1 liter of water at room temperature (20-25oC) is poured into a clean bucket or basin;
- pour out the amount of dry mixture in accordance with the recommendations;
- Using a power tool with a mixing attachment, the solution is kneaded until a homogeneous consistency is obtained for 2-3 minutes. You can stir by hand, which is more difficult and takes longer;
- the solution is infused for 5-7 minutes. Some manufacturers indicate 2-3 minutes;
- mix again until a creamy consistency without lumps is obtained.
The readiness is checked with a trowel - the solution should not drain from the plastering tool. For putty - slowly slide off the trowel tilted at an angle of 45o.
Plaster plaster mortar can be prepared independently from pure gypsum. Several recipes from professionals will help with this.
Recipe No. 1. Take 4 parts of alabaster (gypsum) without additives and mix with sawdust (1 part) and ceramic glue (1 part). All this is thoroughly mixed and then diluted according to the technology described above.
The process takes place in two stages - the solution must mature for 3-4 minutes (it gains strength and plasticity), after which it is stirred again. You can slow down the setting process with PVA glue (1% by weight of the solution) or citric acid (tartaric acid is also allowed, but it is more difficult to find on sale). You need 0.05-0.15% dry citric acid powder by weight of gypsum
Recipe No. 2. Mix 1 part gypsum with 3 parts ground chalk. Add 5% of the resulting mass of wood glue and mix again. Dilution and introduction of retarders, as in the first recipe.
Recipe No. 3. Lime dough is being prepared. Gypsum is mixed in the same proportion, after which the compositions are mixed.
The best cement plasters
Most craftsmen, when choosing a suitable material for plastering the walls of rooms with high humidity levels or carrying out facade work, pay attention to dry cement mixtures. This choice is due to strength and resistance to low temperatures.
The cement variety of plaster is stronger than its gypsum counterpart and is not afraid of moisture - that is, the coating does not get wet and thus provides reliable protection for the walls. Therefore, cement plaster for the bathroom is a good solution. At the same time, gypsum is not capable of shrinking while the solution dries, which cannot be said about cement analogues, which is considered their disadvantage. The coating also runs the risk of cracking.
In any case, the plastered surface will have to be covered with putty before further finishing (wallpaper, paint), since the walls will have a characteristic graininess. And before plastering the walls under wallpaper, it is advisable to cover them with a primer, which increases the adhesion of the material to the base.
The plasticity of cement mixtures is low in comparison with gypsum plasters, and the same can be said about vapor permeability. However, plaster “lives” longer, and the main advantage lies in its low price. The combination of cement, sand and other chemical components is suitable for both interior and exterior work. And judging by the rating of cement-based plasters, the KnaufGrunband product is considered in demand in the construction market. But other brands also deserve attention.
Knauf Grünband
The plaster is easily applied manually or using special equipment. The fraction of powder grains is no more than 1.5 mm. The permissible coating layer ranges from 10-30 mm. These figures are less than that of gypsum plaster and the gravity of the cement material. As for the consumption per 1 square, the KnaufGrunband material has the lowest among all other similar analogues - no more than 12 kg.
The plaster is suitable for application to ceiling surfaces. Thermal insulation qualities are achieved by adding perlite and expanded polystyrene components to the composition.
Crack-resistant dry plaster Knauf Grunband
Ceresit CT 24 Light
A high-quality and effective solution for leveling horizontal and vertical surfaces, as well as corners and slopes. The lifespan of the finished solution is short - about 60 minutes, and the consumption is 14 kg / square with an average thickness of 3-30 mm. The high quality indicators of Ceresit plaster are confirmed by craftsmen and experts.
Additives include polymer fillers that reinforce fibers. This is not the most budget option - there are cheaper compounds on sale. The solution can be applied by machine or manually. This is a good choice for weak and fragile foundations (cellular concrete).
Ceresit CT 24 Light
Weber Vetonit TT40
The finished mixture has a long time before it sets - it should take 2 hours. This allows you to work slowly, which is important for most beginners who are still learning the basics of plastering art. The product is supplied to construction markets in the form of a fine dry powder (up to 1.2 mm). The consumption is considerable - at least 17 kg of material per square surface is required.
Fact!
Among the main qualities are high “stickiness” and ease of application. The coating is durable, and the characteristics correspond to the manufacturer’s assurances.
Axton cement
A universal plaster that is easy to apply manually or with equipment. Before setting the solution, you will have to wait 2 to 3 hours, which has its advantages. Acceptable coating thickness is 5-40 mm, consumption is 11-12 kg/square.
Bergauf Bau Putz Zement
For beginners, working with the composition will cause difficulties in mastering plastering work. The average consumption is high - per square surface you will need from 16 to 18 kg. The lifetime of the finished mixture is impressive - it should take at least an hour before it sets! The product is sold in the form of dry powder with a grain size of no more than 0.63 mm. Because of this, the material is positioned as smooth plaster.
Axton cement
Weber Vetonit TT40
Bergauf Bau Putz Gips
Osnovit Pro cement
Ideal for black leveling surfaces of residential and public buildings. Moreover, both from the inside and in the façade. It is acceptable to use the product in damp conditions. The material can eliminate a number of defects:
- large height difference;
- potholes;
- cracks;
- grooves, channels.
The solution is suitable for repair work in case of coating shedding. Russian plaster is sold as a dry mixture. It is packaged in paper bags of 25 kg.
Osnovit Pro cement
Glims Velur cement with perlite
Another universal composition, suitable for exterior and interior use. The minimum coating thickness is from 5 to 35 mm. The inclusion of perlite in the composition of the material makes the mass lightweight, warm and resistant to cracking.
A solution with high adhesion is an effective solution for weak floors made of foam concrete or gas silicate blocks. Due to its plasticity, the mixture is easily smoothed out, as is the case with the use of gypsum plaster.
The product's focus on weak grounds is considered an advantage. However, there is another feature - a long setting time - about 4 hours (a champion in this category).
How to finish a façade using a cement composition with Glims Velur perlite, advice from the manufacturer
Litokol litoplan rapid
This is a cement-thixotropic building mixture with the inclusion of moisture-resistant binder fillers and organic additives. The presence of impurities allows the solution to set and dry faster after application to the walls or ceiling. It is permissible to form a layer up to 25 mm thick. After a few hours, the coating becomes resistant to compression and bending. The material is not able to shrink and is not erased.
Litokol litoplan rapid
How long will it take to dry?
To continue finishing work, you need to know not only how long it takes for gypsum plaster to dry, but also at what speed it gains strength. After all, the finishing touches: gluing and painting can begin after the plaster has completely hardened. This takes from 3 to 7 days, depending on the thickness of the layer. But it’s better not to risk it and start the next stage of repairs in a week. But the applied solution dries within 1-2 days.
The process of strengthening should take place under natural conditions at a temperature of +5-+25°C. No heat guns, heating devices operating nearby, or drafts.
Checking the moisture content of the plaster.
Before subsequent finishing, the room is ventilated and the plaster is primed. The surface ready for wallpaper or paint should be smooth and light. Humidity for wallpaper should not exceed 4-5%, for paint - 1%. Drying up to 10 days may be required to achieve this moisture content.
Bottom line: what plaster to choose for the walls in the apartment
When it comes to the question of how to choose plaster, there is no universal solution in nature. It is customary to choose a material taking into account its main purpose. It is rational to distinguish two types of premises:
- dry;
- spaces where the humidity level is variable.
For dry conditions, the best option is gypsum plaster. A favorable microclimate is created, which will save money, energy and nerves. In wet rooms it is permissible to use the following options:
- Gypsum plaster - only those compositions recommended by the manufacturer and be sure to take protective measures. This avoids direct contact of water with the surface.
- Cement mortar - for strong foundations. The coating will not collapse from contact with moisture.
- Cement-lime mixture is the best alternative to cement analogues.
For most property owners, the cost factor is a fundamental criterion. Luckily, inexpensive options are coming onto the market, allowing you to choose the right solution for any occasion. A competent approach to deciding what is best to plaster walls in an apartment, office, or private house will provide reliable protection in the long term, and residents will receive comfortable conditions.
Was this information useful to you? Share in the comments!
Recommendations for subsequent finishing
On gypsum plaster it is allowed to glue wallpaper, apply liquid trellises and cement-based decorative solutions, and paint. At the same time, you need to remember that for decorative finishing based on CPR you need to apply a primer twice. Paint can be of different types. But whitewashing with lime mortar is excluded. Even with a primer.
Instead of a conclusion. There are no bad gypsum based plasters. The finishing can be done independently with excellent quality, if you take into account the characteristics of the solution and the nuances of working with it.
Gypsum solutions for interior finishing
Dry mixtures are popular for making decorative surfaces; they are suitable for bases made of any material. When applying the decorative mixture, special attention is paid to the last layer. Thin and thick layers of material differ in shade, so preliminary leveling is required so that the plaster is applied in the same layer. The final texture of the plaster hides small cracks and additionally insulates the wall.
Venetian plaster
The filler used in the solution is crushed marble, so the final processing results in a marble surface . Using pigments and dyes, the finishing layer is given the desired shade. After completion of work, the composition becomes waterproof, which is important in conditions of high internal humidity.
Venetian plaster is not susceptible to temperature changes, so it is recommended to decorate walls with it in unheated or irregularly heated rooms. During operation, it wears out slowly and does not absorb unpleasant odors.
Structural plaster
The structure on the surface of the layer appears as a result of the addition of various additional inclusions - small stones, mica, quartz, and wood fibers are also used. The binding components in the layer make it elastic and plastic; this finish does not crack when drying and does not shrink.
For interior wall decoration, water-based material is used, and for non-residential premises and external walls, plaster based on synthetic latex or cement is used.
Textured plaster
The composition contains silicone resins, which help create any texture on the surface of a wall or ceiling and increase the reliability of the coating. The mixtures are presented on the market in a wide variety of colors. To plaster a large surface, purchase a mixture from one series, since different ones give a difference in shades.
All rooms in the house are treated with textured plaster. Its strong connection with the base allows the work to be completed in a short time, and its service life is quite long.