Nowadays, a particularly popular building material used for finishing rooms, cladding walls and partitions is plasterboard. This material itself is quite simple, but its proper and high-quality installation will require the use of special tools. These may include special planes, which are useful only at some stages of working with drywall, but their absence can stop all finishing work. Thus, every finisher needs to know the features and be able to use such tools.
Scope of application of plasterboard planes
Plasterboard sheets (abbreviated as gypsum board) are a rather fragile material and therefore their edge parts are prone to various chips or coloring. From this it can be seen that although the sheets are far from small in format, they require careful handling. For the highest quality and smooth joining between individual sheets, they must be properly processed. It is for these purposes that planes are used, which, in fact, are a type of rasp.
In addition, this tool will be needed at the final stage of work, so that after installation and finishing of surfaces, the seams can be puttied without problems. To do this, a chamfer is removed along the edges of the sheet using a plane, which forms a recess, which is subsequently filled with putty, which will eliminate the risk of bulges and cracks in the seams in the future.
Conditions for high-quality seam sealing
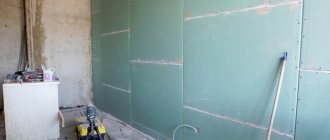
It is very important to properly prepare the frame before installing drywall.
To do this, it is necessary to follow the technology of its assembly, which includes the use of the required number of wooden blocks or metal profiles, compliance with their pitch, correct fastening, placement of the profile exactly under the joints of the sheets, etc.
Drywall is attached to the frame with self-tapping screws. Sheets are used with chamfered edges. If the drywall is installed with a cut edge at the joint or does not have a factory chamfer, it is necessary to create one using an edge plane. Tilt angle – 45°. It is not always possible to remove the chamfer in a timely manner, so it can be done locally after installation using a painting knife. Putty will subsequently be placed in the resulting recess.
When the joints are processed, dust is removed from them and the quality of the screws is checked. They are wrapped to the depth of immersion of the head by 1 mm in a sheet of plasterboard (paper base).
It is advisable for beginners to visually familiarize themselves with the technology for preparing drywall sheets (video, photo).
Technical parameters of the plane
In order to carry out the highest quality and efficient stripping process, it is necessary that the tool meets the following technical parameters:
- The length of the working platform - it will determine the speed of cutting work. The length of the handle for different models can be different and range from 15 to 24 centimeters. A large platform is not an objective indicator of the best working results - first of all, the plane should be convenient for the user and suitable for those gypsum board sheets that are supposed to be processed.
- Width of the cutting part - this parameter can vary from 1.4 to 4.3 centimeters. Its choice depends entirely on the thickness of the sheet being processed.
- Blade - this element of the tool can be made of various types of steel. Blades made from tool steel grades are of great quality. They are considered stronger for work and are able to provide smooth edges.
- Housing – it can be made of either metal or plastic. Naturally, a tool in a metal case has a longer service life because it can withstand mechanical stress better.
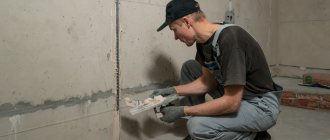
Technology
First of all, evaluate how good the edge of the plasterboard sheet looks. If it’s not perfect, then you definitely don’t need to skimp on putty. By the way, the putty itself can be bought at a hardware store, or you can make it yourself from a dry mixture.
The process will then look like this:
- The surface is cleared of dust. This applies to both the sheet itself and the seams directly. It is often at this stage that it is discovered that the screws have not been tightened in the most thorough manner. If so, fix it.
- Straight and cut edges are chamfered using a sharp knife.
- Application of the solution. Use only freshly prepared, properly diluted solution. It is applied to the surface with a spatula using vertical movements. The mixture should fill all the gaps between the plasterboards.
- The front side of the seams should be treated as follows: excess putty should remain on the surface of the drywall so that it fills all the gaps between the seams before the putty dries. The length of the seam is processed in the same way.
- The mixture is applied, dries, then a reinforced mesh is applied to the seams. If the mesh is of high quality, then it is elastic and good at the installation stage.
- After laying the mesh along its entire length in the middle of the seam, you need to press it correctly into the putty layer with force. The mesh is rubbed into the solution, after which you remove the remaining mixture with a wide spatula.
After the caulking, leveling and sanding are completed, and the seams between the plasterboard sheets themselves are processed, proceed to leveling and pulling out the seams.
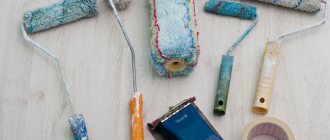
Modern types of planers for gypsum plasterboards
There are two types of them - peeling and edge
Roughing planer - features of device and use
This plane is a tool used to straighten the edges of a plasterboard sheet. With its help, it is possible to create a smooth and flawless edge, which will serve as a good help when installing drywall sheets and their finishing. A special feature of the roughing plane is its appearance - the working platform is located on the lower part of the device and has many cutting pointed holes on its surface (for the edge model these are blades). The structure of the peeling model itself is very simple:
- Handle for holding;
- Working platform - grater;
- Housing for fastening structural elements.
Using this type of device is also not difficult: a sheet of drywall must be held tightly, running the device along its edge and removing all irregularities and roughness. It is worth remembering that, unlike wood, gypsum does not shrink, but grinds off. To achieve the best effect from the peeling operation, it is preferable to place the sheet itself with the edge up and move the plane evenly along its entire length. The pressure on the sheet should not be excessively strong - light and firm pressure is sufficient. For some types of drywall, it is better to repeat the edge stripping operation several times (2-3 times).
IMPORTANT! Professionals believe that the optimal parameters of a roughing plane will be the following: the width of the working platform is no more than 3 centimeters with a total length of no more than 25 centimeters.
Edge planer - features of device and use
This plane is also used for trimming the edges of plasterboard sheets and chamfering, the bevel angle of which can be 45 degrees. The blades of this device are made in the form of a trapezoid and can be moved by the user in order to achieve the required processing depth.
The edge plane consists of:
- Steel blade mounted on the side of the device;
- The screw with which this blade is fixed in a stationary position;
- A housing that holds all structural elements.
IMPORTANT! An edge plane, the blade of which is made of high-quality and durable steel, can be used even for processing soft wood.
The design of the device itself allows you to replace the blades as their cutting edge wears out. In principle, there are no difficulties with finding and purchasing such parts in retail chains of specialized stores in the Russian Federation, and their cost is not high.
It is worth noting that using an edging tool differs significantly from a roughing tool and looks a little more complicated. In general, the whole process comes down to the following steps:
- The plasterboard sheet to be processed is installed edgewise in relation to the master;
- Initially, they pass along the edges once with a plane to remove the chamfer;
- Further passages will form a recess 5 to 11 millimeters wide;
- When moving the tool, you should put a little pressure on the rear handle so that the front one acts as a guide and with its help it is possible to maintain a uniform size of the layer being removed;
- Then the sheets are applied to each other as tightly as possible;
- The final stage will be filling the resulting grooves between the sheets with putty.
Thus, if all stages of working with edging tools are strictly followed, the joints between the sheets will be strong and unnoticeable.
IMPORTANT! To obtain the required performance when using an edge plane, its blade must be made of durable steel, preference is given to tool grades. The process of replacing blades should not cause problems and be hampered by the device body.
Cutters for working with metal profiles
Gypsum plasterboard wall cladding is carried out using a metal profile, which can significantly simplify the repair work being carried out. If in the past the profile frame was connected using self-tapping screws, today a special cutter is used that simplifies this work and reliably connects the metal frame elements together.
A profile cutter is a cross between pliers and pliers. On sale you can find different types of profile cutters:
- Professional.
- Manual.
- Reinforced.
reinforced cutter
The most widely used today is a reinforced cutter, which is capable of perfectly coping with the connection of profiles of different sizes.
The advantage of a manual cutter is its affordable cost and ease of use with the tool. Quite often, such a manual profile cutter is used by ordinary homeowners who independently carry out home repairs.
manual cutter
The use of this type of tool not only simplifies the work with plasterboard, but also improves the quality of the profile connection. The cutter does not deform the profile, which in turn eliminates the distortion of the completed drywall frame.
The resulting holes and grooves have smooth edges and regular shape. The absence of self-tapping screws, the heads of which must subsequently be thoroughly puttied, reduces the cost of finishing work and speeds up home renovations.
A manual or reinforced cutter will allow you to make a frame from a metal profile in just one or two hours, whereas when using self-tapping screws, this work could take several days.
The ability to create planes for processing drywall yourself
The easiest way to make a rough model at home is to make it. For this you will need:
- Guide profile based on durable metal (it is possible to use spare parts from other tools, it is preferable that the profile be made of metal);
- A small piece of board or block;
- Several screws;
- Scissors for working with metal;
- Screwdriver;
- Small hammer (if necessary).
Step by step, the entire process of manufacturing a peeling device is as follows:
- On the profile it is necessary to measure the total length of the future tool (this parameter should be twice the length of the required cutting part);
- Next, the sides are trimmed in such a way that when the profile is folded in half, a box-like shape is obtained;
- Facial, i.e. the working part of the profile must be laid on a piece of wood and holes must be drilled in it using a screwdriver - the more holes are drilled, the better the platform-grater of a homemade plane will be;
- Next, the sides are bent and you should get a kind of box;
- Using self-tapping screws, the sides are secured to the platform;
- Using a hammer, too sharp edges of the holes are eliminated;
- To make it easier to hold a homemade tool in your hand, the part that will be intended for gripping is wrapped with electrical tape.
As for making an edge plane yourself at home, this process will be very problematic, because you will need to find a suitable frame, make a mount for the blade and select a reliable screw to secure it. All such actions will require not only the presence of certain knowledge and experience, but it will also be necessary to use special tools, which are not available to every master. Thus, it is easier to buy a device for edging work on drywall in a specialized store.
What are they?
There are 2 types of tools on the market. Groups have structural differences and perform specific tasks.
- Kromočny. Necessary for aligning edges, chamfering and cutting at a certain angle (mostly 45). If you do not carry out all the necessary manipulations, the decorative finishing of the joints will be deformed in the future. The body is made of plastic or metal. The latter has received an increased service life and will be relevant for those who work with it a lot. To increase service life, a powder anti-corrosion coating is applied. There are 2 trapezoidal blades installed at the bottom. The solution allows you to achieve the required cutting depth through alignment. The points are secured with a bolt. The simple and functional implementation of the fastening ensures quick replacement of dull knives and setting the required angle. The availability of such functionality depends on the manufacturer. The cutting part does not need to be sharpened after each use. Just turn it over and continue using it. The dull part is renewed over time. Unified blades make it easier to purchase components. All you have to do is go to the nearest specialized point. The top of the body received 2 handles. They are either wooden or plastic. One of the handles is installed at the front and acts as a guide. The second is located at the rear and is used to move the gun. For professional activities, it is better to give preference to the first option. The final result and how quickly the performer gets tired depends on how it lies in the hand. For home use this is not important. The main thing is that it fits comfortably in your hand and is durable. A universal and functional tool that, provided the blade steel is of the proper quality, can be used to work with plastic and soft wood. In most cases, small surfaces are treated with this product. Depending on the manufacturer, the kit may include a side stop, a stopper and a blade sharpener.
- Rip-off. The edge of the plasterboard sheet (GKL) obtained by cutting is curved. Such an element is difficult to dock with the main structure. The main task of a roughing plane is to correct the situation that has arisen. It is used to grind the edges of the edges, which are joined at an angle of 90. The basis is a steel frame, on which the remaining components of the structure are fixed. It is installed in a reinforced plastic or wooden case. In this way, an ergonomic shape is achieved. There are models with a completely plastic frame. They have a short service life. Designed for use at home if no more than 10 sheets need to be processed. The professional construction tool has a steel body. This increased the service life, but had a negative impact on the cost. A special canvas is placed below to interact with the material. Outwardly, it resembles a kitchen grater. It has many holes with protruding sharp edges. There is an arched handle at the top. This solution makes it easier to interact with the tool with one hand, making it possible to hold the plasterboard. There are models similar to a cheese grater. They are characterized by a small blade mounted on a regular rod handle. It is relevant for processing small areas. Using a plane will not cause any difficulties. It is enough to hold the drywall and gradually remove all surface defects. You should be careful when interacting, as the material is fragile. Wood processing is allowed.
Difficulty of choice
Regarding the competent selection of a planer for scraping drywall, first of all, you should pay attention to what its scraping platform is made of and what the sharpness of its cutting holes is. Naturally, cheaper models are designed to work with soft materials - the sharpness of their holes is not great and leaves much to be desired, and the sole itself is made of soft material (even thick sandpaper). If the roughing sole is made on a metal base, then you should check how well it can resist corrosion. At the same time, if the peeling holes are extremely sharp, they will cause the drywall material to crumble and become jagged. Professional craftsmen advise purchasing a small peeling device, no more than 15 centimeters in length, so that it fits comfortably in the hand.
For an edging device, in order to select it correctly, you need to pay attention to the following parameters:
- The length of the working platform - it can range from 15 to 24 centimeters, which will depend on the length of the edge of the sheet to be processed. Also, the length of the platform will directly affect the speed and overall productivity of work.
- The width of the working platform - as a standard it can vary from 15 to 42 millimeters. The value of this indicator should increase as the thickness of the plasterboard slabs is supposed to be processed. Some edge planes allow you to manually adjust this parameter, which allows you to use the device for plasterboard panels of any thickness.
- Working blade material - as mentioned above, blades made from tool steel are preferable, because it is more durable and strong, and, accordingly, will last longer. At the same time, if a single job is planned with sheets of small thickness, then the blade can be selected from ordinary steel, so as not to incur additional financial expenses.
- It is also worth paying attention to the handles - they must be held securely in the hand. The front handle should allow the tool to be controlled comfortably, while the rear handle should provide the proper amount of pressure.
Blades
The blades of planes for processing drywall are usually made of alloy steel and have high-quality factory sharpening. Therefore, the cutters serve for a long time and without failure.
How to choose the right blade?
In most cases, edge planes use trapezoidal blades. Choosing the right blade depends on the brand and model of the plane. They are not expensive and are always freely available. In addition, there is always the opportunity to choose universal cutters, which are much cheaper than branded ones.
How to sharpen a blade and does it make sense?
Drywall is a soft material that is easy to process. Therefore, factory-sharpened blades last a long time. If chips or burrs occur on the surface being treated, it is necessary to sharpen the blade or simply replace it.
Fine-grained sandpaper is used to straighten the cutting edge of the blade. Sharpening with an abrasive stone is impractical, since the wrong choice of processing angle will inevitably lead to blunting of the cutters and the need for constant sharpening.
Accessories and equipment for plasterboard planes
By and large, the issue of configuration and additional fittings concerns only edge models, because peeling ones, in fact, are a disposable monolithic device.
Some edge models are provided with removable handles - these can be either front or rear only, or both together. They can be adjusted in such a way as to provide the desired support on the rear part and at the same time provide comfort for the direction of the front handle. To do this, the front handle is set to a position just below the conditional “zero”, and the rear handle should be slightly higher (depending on the thickness of the material). If you do not ensure uniform distribution of the load between the handles, this will affect the accuracy of the cut.
Also, the edge device may have a side limiter and a ruler. This set will help you trim the edges of a sheet of drywall without going beyond the desired angle.
Optionally, the set may also include a special sharpener, which can be used to sharpen dull blades. However, this only applies to models whose blades are made of tool steel. However, you may not even need a sharpener - some blades have double-sided sharpening and when one side is ground down, it is simply turned over to the other. But when both sides are ground off, the manufacturer considers that the blade has become completely unusable and simply recommends replacing it with a new one.
Expensive kits, as a rule, have spare blades in their set, although they can be of different sizes, which is quite convenient when processing sheets of different thicknesses. The set may also include a special mount that turns the plane into a jointer.
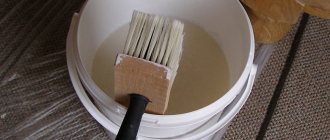
How to mix putty?
Since we are moving directly to the question of how to seal the seams between the slabs on the ceiling, we need to learn how to make putty for this job. Typically, the solution is prepared from a certain proportion of water and a mixture that manufacturers indicate on the packaging. It must be stirred until it becomes thick sour cream (this is best done using a construction mixer or a drill with a whisk at a speed of 600 rpm). Afterwards, the putty is left for 5 minutes for final softening and mixed again. The mixture is ready!
It is important to remember that once the solution is mixed, it must be used in about 2 hours, because dried putty can only be thrown away. Any attempts to restore it with water or add it to a fresh batch will lead to the appearance of grooves on the ceiling that cannot be eliminated
Also, to seal the seams, you will need serpyanka - reinforcing tape, which can either be glued from the very beginning (the base of the tape usually allows you to do this), or pressed into the first layer of already applied putty. The order here is not particularly important, the main thing is that the seam is in the middle of the tape. The solution is applied to the seams using a spatula, which must be rubbed through the tape into the joint. To make it more convenient to take the putty in small portions, it can be placed on the falcon.
Excess solution is removed and the tape is covered with another thin layer of putty
It is important to level all layers with a spatula. When it dries, the final layer is applied and the joints are allowed to dry for about a day.
The seams must be even and level with the plasterboard sheets. You can check and control the evenness of the surface using a building level.
Sealing drywall seams
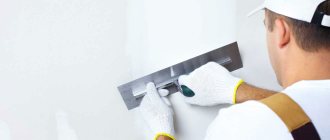
Processing corners of plasterboard slabs
Knowing how to seal regular seams on the ceiling, you will be able to cope with the processing of corners, because the principle of operation is approximately the same. The difference is that metal corners are used here as a reinforcing element (you can also use serpyanka, but it won’t be as reliable). They are attached to the first applied layer of plaster, pressed into it, excess mortar is removed and covered with several more layers. For such work, it is recommended to use special corner spatulas.
Angle spatula
Instead of an epilogue
Based on the analysis of the market for the instruments under consideration, it was established that the majority of the instruments on it are of foreign origin. Moreover, an unpleasant trend is emerging when even models from famous brands, primarily Western European ones, have a lot of negative reviews. This circumstance is most likely due to the fact that some of the production facilities of these companies are located in China, and the Russian consumer has little trust in everything Chinese. At the same time, the Russian manufacturer, although poorly represented in this segment, has the most optimal price-quality ratio for its planes.
If we talk about the direct cost of planes, then this parameter depends little on the technical characteristics. If the design uses a working platform based on tool steel, then the price for different brands will not vary much. It's a different matter when it comes to packaging. It is the presence in the set of additional blades, removable handles, rulers and corner stops - these are the elements that can significantly increase the total cost of the product.
Serpyanka mesh for seams or tape
Finishing can be done with either tape or mesh. Which method should you prefer?
Features of working with reinforcing materials:
- The mesh is simply glued on, but some manipulations need to be done with the tape;
- The mesh needs to be leveled a little by hand, but this is not difficult to do;
- The mesh must be wiped with a spatula so that it can penetrate well into the adhesive;
- If the mesh threads protrude, you just need to cut them off.
You will spend less on paper tape, but serpyanka will cost a lot. But sealing seams with mesh is easier, so many people prefer to work with it.
Grinding tools
Grinding grater
The product in the form of a plate equipped with special clamps for replacing the mesh is used in the process of dry grinding of plasterboard sheets and seams treated with a putty mixture.
Grater with extendable handle
Here, in addition to the clamps, there is a handle, which is secured in a hinged manner. The tool is designed primarily for working in hard-to-reach places. If necessary, the handle can be extended independently, thus increasing the range of action. This will allow the technician to be away from the area with the most dust generation.
Vibratory grinders
These devices allow you to speed up the surface cleaning process, which is due to a fairly high vibration frequency. In addition, such devices are capable of absorbing dust that accumulates in a special dust collector.
Marking the installation sites for partitions made of PGP
Marking of installation locations for partitions is carried out according to the layout of the premises. Marking of installation sites for partitions made of PGP is carried out using a measuring tool - a tape measure and a plumb line, and markings are also applied using a laser plane builder (axle builder). When marking for partitions made of piece materials, it is necessary to strictly observe the verticality of the markings applied. Why?
For example, if the partition is framed, then a slight deviation from the vertical axis may simply not be noticed when installing the racks, since the rack has a height equal to the distance from the lower and upper guides, the result is a rack made of solid material. In the case of installing partitions made of piece materials, such a deviation will be noticeable after the installation of the second or third row of gypsum tongue-and-groove slabs.
Applying vertical markings only using a tape measure in this case is not advisable, since the wall landmark (A and B) may have a certain vertical deviation and in this case it is necessary to use a plumb line, which will more accurately determine the vertical axis of the marking, as well as the parallelism of the horizontal axes .
To construct marking axes, you can first determine control points on the ceiling, maintaining the required distance, which is provided for by the plan of these rooms. After this, the vertical axis is determined with respect to the already marked control points using a plumb line (in Figure 5, the measurement result of the plumb line is indicated by arrows). If the plumb line measurement indicator coincides with the control point determined using a tape measure, then in this case everything is normal, the wall (A and B), which are taken as a guide, have no deviations in verticality.
But in the case where the control marks do not coincide, priority remains with the control point found using a plumb line. After work has been carried out to determine control points, marking axes are drawn horizontally (ceiling, floor) and axes are drawn vertically (on the walls of the house adjacent to the future partition).
Important details during work
Compliance with these rules will give guaranteed good results:
- First of all, a guarantee of a high-quality result will be the correct joining of plasterboard sheets. The sheets must be firmly fixed and not separated from each other by a distance greater than 7 millimeters;
- Monitor the room temperature. The thermometer should not fall below plus ten degrees Celsius. At the same time, it is necessary to maintain the same temperature for two days after work;
- Use two types of putty: starting putty for sealing the seams under the tape, and finishing after, this will give the best result for subsequent finishing;
- Wet work must be completed before starting work with drywall, since it is very hygroscopic and carrying out such work after its installation can cause distortions and distortions of the finished structure.
It goes without saying that the fastening of the sheets to the frame must be 100% reliable and without backlash.