It is better to do electrical wiring before or after plastering
Every craftsman, be it an electrician or a plasterer, wants to complete his part of the job without interference.
However, if the repair is done by 1 person, follow the following sequence of actions:
- Clean the walls from old finishing material. Markings are applied along which the wires will be laid, distribution boxes and socket boxes will be installed.
- They lay grooves for thick cables and corrugated sleeves. The use of the latter is mandatory when repairing wooden houses. Such elements facilitate subsequent replacement of wires. Cables are laid in the thickness of the plaster without corrugated sleeves.
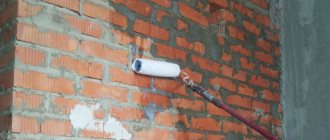
- Thin wires are placed on top of the base layer without channeling if the finishing will hide the elements.
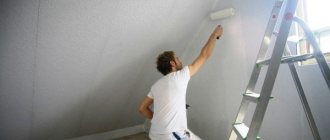
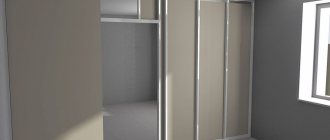
- Lay the wiring and secure it. Plaster the walls with or without beacons. The ends of the wires protruding from the channels are covered with film.
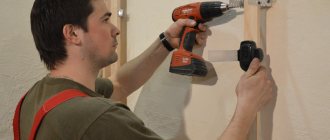
- A hammer drill with a core bit is used to drill out spaces for sockets, junction boxes and switches. This is done after plastering, otherwise it will not be possible to determine the depth of the seat correctly.
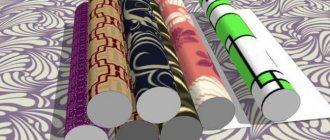
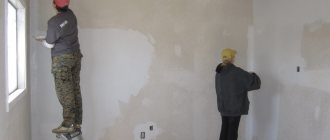
- The walls are covered with wallpaper or textured plaster.
Experts advise laying electrical cables after plastering the walls. The grooves are made on the 2-3rd day, when the composition has not yet completely dried. Making channels in concrete or brick takes longer and is more difficult.
Determination and marking of conductor paths
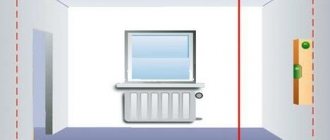
The drawing of lines reflecting the location of wires and other elements of the electrical network begins with the installation locations of panels, switches, sockets, and lighting fixtures. The grooves must run strictly vertically or horizontally. The markings are applied with a marker or chalk using a building level. Laying at an angle is allowed when electrifying attics or staircases.
The marking lines must run parallel to the surface. This prevents damage to cables when driving nails.
Wire laying rules
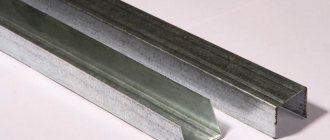
According to safety standards, in homes and industrial buildings, cables are covered with a metal box or flexible insulation.
You should also consider the following recommendations:
- Fastening is carried out without sagging. When forming turns, the fasteners are shifted 8-10 cm from the bend.
- The screws are screwed in until they stop. This way the elements will not damage the braid. The distance between fixation points should be 0.5 m.
- Cables are laid in straight lines. Wires should not interfere with the application of the finishing layer.
- Grooving is not performed in the presence of tension or multi-level ceiling structures.
- When carrying out installation work, a hammer, hammer drill, and screwdriver are used.
Closed technology
This installation method is considered the most common. Walls need to be tapped before finishing.
To secure cables in channels use:
- screeds or mounting pads;
- clips of the required size;
- pendants;
- trays (when laying thick bundles).
Wires can be hidden in walls, floors or ceilings.
Open way
The wires are secured while maintaining the aesthetics of the finish.
To do this, use the following means:
- plastic cable channels fixed to the wall surface;
- skirting boards with wood or other textures;
- clips and staples, the fixation of which is carried out using a stapler.
The open installation method is used when decorating interiors in Provence, country, and loft styles.
General rules for fastening cables in grooves
The cable fastening is selected depending on the type of laying (open or closed) and the type of base
Safety rules note that in residential, public buildings and in production it is necessary to install wiring with non-combustible insulation or in a solid metal box. Experts provide several universal recommendations:
- the main task of fastening is to ensure reliable fixation without sagging;
- at turns of the route, the fastening elements can be moved 5-10 cm from the bend point;
- screws, self-tapping screws and dowels are tightened for support - this way the protruding cap will not damage the insulating layer;
- fastening is carried out with a maximum distance between points of 50 cm;
- laying is done strictly along a vertical or horizontal line, the stock is masked;
- Before finishing with plaster, the wire is positioned so that it does not interfere with the application of coatings;
The cable reserve can be rolled into a ring.
Features of the procedure depending on the wall material
The most difficult is considered to be the gating of concrete elements of a building, the simplest is plaster.
The procedure also has its own characteristics when working with different materials:
- Channels in aerated concrete are easy to make. To do this, use a hammer drill or a circular saw. To reduce the volume of dust generated, a manual wall chaser is used. A homemade pointed tape or plate is sometimes used to form grooves.
- It is possible to groove durable concrete only with the help of powerful tools, such as a wall chaser. It is not advisable to use an angle grinder in this case. The disc can come off and injure the technician.
- It is recommended to form horizontal grooves in brickwork. When getting into a seam, a chisel and hammer are sufficient. Vertical channels are made with a wall chaser or perforator.
- When laying electrical wiring in a monolithic house, take into account that grooves cannot be cut in load-bearing walls, columns or elevator shafts.
- When electrifying wooden buildings, it is recommended to use an open installation method using corrugations and cable ducts.
How to lay cables in a groove: installation, fixing the corrugation before plastering
When installing electrical wiring in a house, it becomes necessary to hide some of the wires. A reliable and safe option is to lay the cable in a groove. Wires hidden in the wall are resistant to mechanical damage, high humidity and other negative factors.
How to fasten
Before final finishing of the walls, you need to choose a method for fixing the wires.
Alabaster
Gypsum composition is used when it is necessary to quickly fasten the cable. The solution holds a small number of soft braided wires. Alabaster is applied in small portions. The main disadvantage is the rapid hardening of the mixture, which cannot be prepared in the required volumes.
Cable ties
Non-flammable plastic fasteners are suitable for installation on aerated concrete, brick, wood or concrete. It is used in combination with screws, screws and dowel nails. Before installation, a hole corresponding to the diameter of the fastener is formed. After this, the dowel is inserted, the tie-plate is hammered in, and the cables are laid on the finished route.
Dowel-ties
The product is a dowel-nail with a screed made of self-extinguishing plasticizers. The fasteners are equipped with one-piece or detachable locks. In the second case, you can supplement the bundle with new wires or remove unnecessary elements. Dowel ties are used for open or hidden laying of cables on brick or concrete surfaces.
Plastic dowel
Polyamide nails with a hole head help to quickly secure the cable in the groove. First, the fixing element is hammered in, then the cable is pulled through.
Dowel clamps
Products of different diameters are offered in white or black. The fastener has the form of a loop with clamps on the legs. Before installation, a groove is made, a clamp is placed, and wiring is laid. The disadvantage of this method is the need to strictly select the size of the fastener for the cable cross-section.
Types of holders for corrugated pipes
The main type of hose for electrical installation is corrugated pipe. A corrugated pipe or corrugated hose is a plastic or steel shell assembled from individual ring-shaped segments. The minimum pipe diameter is 16 mm. The most commonly used hoses are 20, 25 and 32 mm in diameter. The product allows you to lay cable lines with bends and transitions, but frequent fixation of the line is required. For these purposes, several fastening options are used.
Corrugated clips
The main fastener for corrugations with a diameter of 16 to 25 mm is special clips. They come in two types:
The first type is similar to flat, curved horns. This clip holds the pipe or sleeve due to the elasticity of the material from which it is made. On the side of the clips there are often couplings that allow them to be connected to each other. This feature facilitates installation and subsequent maintenance of networks.
There are holders with D-shaped latches. The semicircle is the clip itself, and the stick is the latch that closes the upper gap of the clip. This type of clamp increases the reliability of pipe fastening, but makes the fastener more expensive. Models with latches are used for pipes with a diameter of 40 mm and larger, as well as when installing cables on ceiling surfaces.
The closed clip resembles a regular clamp. It presses the pipe to the surface on which it is fixed. The process of fixing the device can be mechanized using mounting guns. A clip of clips is inserted into the gun, after which the installer “shoots” the pipe or the cable itself to the surface.
Dowel tie for fastening corrugated pipes
The next type of device for fixing pipes to the wall is a tightening nylon clamp hooked to a special dowel.
To install the equipment, you need to pre-drill a hole, then insert the dowel leg there and secure it by driving in a spacer rod. The pipe is secured using a flexible tie.
Varieties of such dowels are mounting platforms. They are fastened with a self-tapping screw, a nail, or simply inserted into the hole, after which they pull the tie clamp into the existing gap.
Metal staples
Where the strength of the plastic is not enough, metal brackets or clamps are used as fastenings for the corrugation. This is a regular curved steel plate with one or two holes on the sides for fastening. The bending radius of the bracket depends on the diameter of the pipe for which it is intended. For a corrugation with a diameter of 25 mm, you need a bracket with a bending radius of 12 mm, etc.
The bracket is secured by pre-drilling holes for plastic dowels. If the surface material allows, screw the fastener with self-tapping screws or nail it.
Homemade devices for fastening corrugated pipes
If you don’t have standard equipment from the store on hand, it’s easy to make fasteners for corrugations with a diameter of 16–20 mm on your own.
Read also: How to clean the carburetor of a Shtil 180 chainsaw
Usually for homemade devices they use:
The tin is cut into centimeter-wide strips. Holes for self-tapping screws are punched in the middle of each.
Instead of tin, wire noodles will do. It is cut into pieces sufficient to wrap around the pipe, after which it is nailed or screwed, piercing the plastic between two wires (see photo).
If there is no double wire, use a regular single wire, wrapping it around the head of the screw, or wire.
How to identify wiring under trim
To find cables under plaster, use wiring diagrams. However, drawings are not always at hand.
In this case, the following recommendations will help:
- According to building codes and regulations, wires are laid in straight lines at an angle of 90°. From sockets or junction boxes they go in these directions.
- Special devices are used to capture electromagnetic waves. They can be used in dry rooms without metal elements.
- In small areas they use an indicator screwdriver with a light or sound alarm.
- Radio receivers are often used to pick up interference from wiring. The measurement error can be quite large.
You can find the wires by visually inspecting the walls. Small protrusions are found on the plaster.
What is needed for gating
After completing the marking, you will need to decide what to use for gating. There are quite a lot of options.
The most commonly used tool is a hammer drill with a special attachment, which has a simple name - a strober. It is a curved blade with a groove.
Its end is sharp enough to cope with punching a groove. It is necessary to work with such a nozzle in shock mode. As a result, you will get an even and deep coating.
The other attachment is a regular flat spatula. The processing procedure is almost the same as the previous device, but the productivity will not be as high.
The grinder will become an auxiliary tool for gating
It is quite difficult to achieve a great effect when punching with a hammer drill, especially if the processing is carried out on a concrete wall.
Many professionals recommend using a special disc cutting tool for this type of work.
A grinder with a diamond blade is used as such a device.
It will help to make cuts to the required depth, and then knock out the central section using a hammer drill.
Although the number of procedures looks quite impressive, the effect from an angle grinder can be achieved much more than from a hammer drill. The speed of the grinder is quite high, so construction work will not take up much of your time.
Well, the most effective tool for gating is a wall chaser. This device is somewhat reminiscent of a grinder in design. You have the opportunity to adjust the distance between the disks, therefore, you can set the required width of the groove.
Such procedures generate quite a lot of dust and contaminants, so it is imperative to use a respirator and earplugs during work. This will help maintain your health and prevent dust from entering your respiratory tract.