Hello, this is Anton Ageev, a teacher of the course on procedural textures “Procedural Trip”. You can read more about it in the announcement. In the course, I teach how to work in Substance Painter and Designer and tell you how to create realistic procedural textures at the level of game industry professionals.
This is a tutorial on creating a procedural concrete texture in Substance Designer. Concrete is a trivial material at first glance, but its proper use will help build the style of the entire game. Like, for example, in last year's Control.
By the way, the textures for it were also made in Substance Designer
I will describe the process in detail for beginners - if you want to take the course, but are not sure whether it will suit you, try repeating all the steps in the article. You can start from scratch, in a trial version of Designer for a month, if you are not sure whether you want to immediately spend money on professional programs.
In each step I will indicate the exact values of the parameters that I used, but this does not mean that you need to repeat everything after me - experiment!
Repeat after me, create your own texture and post it in the comments below this article. The author of the work that gets the most likes will receive a prize from XYZ - any art book worth up to 2 thousand rubles.
Go!
Collecting references
We go to Artstation, Behance, Google and look for suitable images.
Here are three pictures that I liked
I liked the first one because of its cracks, and from the second one I took the color and pores. In the third I liked the general noise: plaster, chiaroscuro, and micro-details.
Setting up the program
The Substance Designer interface looks like this:
Looks scary, but you get used to it quickly
The interface is divided into several work areas: the effects panel on the right, 3D viewport - displaying material on a 3D model, 2D viewport - shows the contents of the selected node. Below is a workspace called Graph View, in which we create material using nodes.
A node is a block of code or operation that creates or processes an image
Nodes have outgoing ports - outputs, and some also have incoming ports - inputs. Information is fed into the inputs, processed by the node, and leaves the output to the next node.
The nodes are connected in a chain of actions that leads to a result - a texture or its individual element.
For example, the Blur node takes an image as input, and outputs it more blurry:
Input left, output right
This approach to creating textures and materials is called procedural.
One of its features is a non-destructive pipeline. This means that at any stage of creating the material, you can return to any action and make changes to it and influence the result.
For example, I can return to the Blur node after half an hour of work and configure it again, adjusting the degree of blur. In Photoshop, for the same operation, you would have to roll back all the actions until the desired change.
There are more than two hundred nodes in the Designer library. They are divided into groups according to tasks.
For example, the Noises group contains procedural textures that are used to create noise. They do not have inputs, only outputs and parameters with which you can customize the appearance of these textures.
There are other groups: patterns, operations and effects.
Here's what the original diagram looks like in Graph View. I'll leave it in good quality on Google Drive so you can refer to the final version if you get confused.
In each step we will analyze a piece of the diagram
Imitation of concrete with decorative plaster: advantages and disadvantages
Concrete effect paint has advantages and disadvantages. It is worth highlighting the following advantages of using the technology.
- A “concrete” wall, created with a layer of plaster, looks aesthetically pleasing and meets modern trends.
- Wide selection by type.
- High thermal efficiency coefficient. Room heating costs can be reduced by 25%.
- The finished coating is durable. The plaster surface, after complete hardening, is so strong that for holes for fastenings, a diamond drilling method may be required.
- The mechanism for applying the material is simple; finishing is easy to do with your own hands without special knowledge or experience.
- Moisture resistance.
- Fire safety.
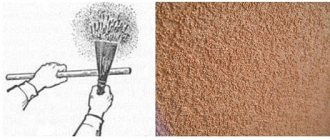
Plaster, as a decorative coating for concrete, has the following advantages:
- The surface relief is minimal and you can set it to the desired “format”.
- The coating looks natural thanks to sand and small pebbles. The layer has a roughness effect.
- Wide choice of gray saturation and color shades.
- Wear resistance. The interior looks “like new” for a long time.
- The thickness of the layer can be adjusted.
- It is possible to vary the texture, create a smooth look, “ragged”, “sprayed”, imitation of rivets, blocks, etc.
- The plaster layer retains its plasticity for a long time; relief can be given to it in various ways: artistic carving, stamps, stencils.
The concrete imitation solution has the following disadvantages:
- prolonged drying of the surface;
- vulnerability of the coating during drying to moisture, heat, temperature changes, and mechanical damage;
- solutions are not universal; for different wall materials you need to select the base composition individually;
- toxicity of some suspensions, they should be handled with care;
- building mixtures, especially foreign ones, are quite expensive.
Scope of application of plaster with imitation concrete
Concrete-look wall coverings are suitable for rooms with high ceilings and large areas. If the room is small, such decoration can further visually narrow it. The material can be used not for the entire interior, but for the wall. It needs to be emphasized.
For ceiling cladding, “concreting” with plaster mixtures is also appropriate. It is advisable to mix them with other finishing variations.
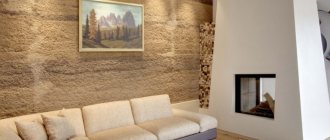
Concrete surfaces can sometimes appear harsh, even rough. In combination with wood they seem cozier!
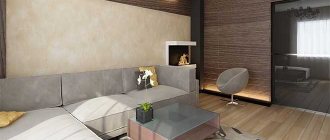
Walls in high-tech or loft style are in harmony with bright furniture or decorative elements. Illumination will help focus attention on the coating and emphasize texture.
Mortars based on a sand-cement “base” are used in external coatings, for example, as facade cladding.
New project
First of all, we create and configure a new project.
In the new project window, give a name to the future graph, set the resolution to 2048x2048 pixels, the document bit depth to 16 bits, and select PBR (Metallic\Roughness) as a template from the left list.
Thanks to templates, you can quickly create and configure special nodes - outputs. These are the points where information exits the graph, and the textures that we will create while working on the material are connected to them.
If you forgot to select the required template or accidentally deleted outputs while working, don’t worry, they can be created and configured manually.
Advantages and disadvantages of the material
Plaster for concrete in the interior has a number of its own characteristics - both advantages and disadvantages.
The most significant “advantages” of this material are the following:
- Ease of operation. To apply such plaster, you will not need to involve specialists with specialized skills - you can easily do without outside help. Having familiarized yourself with the basic recommendations for work, it is not difficult to create a suitable surface relief.
- The work can be done quickly - the raw material is flexible and dries in the shortest possible time. Do-it-yourself decorative plaster for concrete can be installed faster than many other materials, even if the room has high humidity.
- Heat resistance. The coating can be used in rooms where temperature changes are not uncommon.
- Moisture resistance (does not apply to all materials). If there is consistently high humidity in the room, then a coating of this type would not be a bad solution. Why is that? Its hygroscopicity plays a decisive role - the porous structure makes it possible to absorb excess moisture.
The statement about moisture resistance is true only for individual types of mixture; in all other cases, a protective coating must be applied.
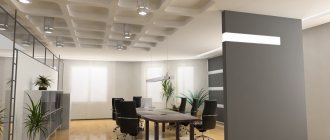
- Versatility - the material is suitable for different styles. A beautiful texture will add exclusivity to any room - it can be not only a home, but also an office.
- The textured coating not only has an inimitable appearance, but also has significant technical characteristics - it effectively absorbs sound, which is why it often decorates audio studios.
- Non-flammable, resistant to fungi.
- It does not require special care. The finishing appeals to practical people who do not tolerate great frills.
But there are also disadvantages of such compositions as loft concrete - you need to remember them:
- High price. Loft decorative plaster (even domestically produced) looks expensive but is also worth it.
- If decorative plaster for concrete is installed with your own hands, then when working with the material you need to remember the importance of following the application technology.
Height map
Our task is to competently construct a height map (Height).
Height is a black and white texture in which the brightness of a pixel specifies the height of a point in 2D space.
The darker the pixel, the deeper it is. And the brighter, the higher, on the contrary, the point relative to the plane on which the texture is located.
Thus, when working on a height map, we create a relief of the future material, but only in one dimension.
The height map takes up 80% of the work.
It also affects all other textures of the material - color, roughness, shading (AO) and so on.
Texture
The first element is a texture that I made based on the procedural noise of Fractal Sum Base. Its task is to add small irregularities and texture to the concrete so that the material is not perfectly smooth.
I assembled this texture from four nodes, starting with the procedural noise Fractal Sum Base.
I signed all the parameters in order to make it more convenient to focus on my result.
Next we experiment. I don't know how to make an element, so I work through several ideas until I get it right.
I'll try to explain the process of thinking in the process of creating a texture.
I started with Fractal Sum Base because I thought it looked like a uniform rock surface. But in the default state it makes too much noise.
Therefore, a Slope Blur node was added to reduce detail.
Slope Blur both blurs and distorts the texture, which led me to this result:
Here I show the result with color for clarity. We'll get to creating the color texture later.
The next step is the Blur HQ node, with which I soften the resulting texture.
The last node is Histogram Range. In it, using the Range parameter, I control the intensity of the element:
Types of material, their characteristics
The advantage of textured plaster for concrete is its variety. The mixtures are different in the content of ingredients, purpose, color scheme, and structure. In terms of composition/application, the following options exist.
- Gypsum, gypsum-lime mortars. Mainly internal finishing material before the decorative layer. It is white in color, so its cladding becomes simpler and is used to hide small flaws in the “base”.
- Mixtures based on sand and concrete. They can level out more serious defects and wall relief. Manufacturers produce material with additives, which adjust the characteristics of the finished product. The texture of sand-concrete mortars can be fine-, medium-, or coarse-grained. The material is for external use; it is used for exterior finishing and plastering of basements. When the plaster has a structure with a wide fractional composition, its application by hand is difficult. Larger items may simply fall out.
- "Warm" mixtures. They are available in dry form. The base contains light porous components instead of sand. These include granules of “expanded” vermiculite, foamed polystyrene, perlite, and foam glass balls. Fillers dominate in volume and provide the material with a high thermal insulation coefficient. It is used as an addition to wall insulation. Thanks to its grainy texture, it also acts as decoration. Suitable for interior and exterior cladding.
- Solutions with special fillers. The function of additives is to improve the technical characteristics of the suspension. They are waterproof, aimed at increasing heat or sound insulation.
- Material with decorative effects. Its properties allow it to be used for finishing. No additional design is required on top of it.
Products are manufactured on the basis of microconcrete or microcement.
Characteristics of microconcrete: good plasticity of the material; high adhesion; resistance to sudden changes in temperature; resistance to humidity, chemicals, synthetic products can be used to care for the coating; not susceptible to mechanical damage; the surface does not absorb odors; wear resistance.
Characteristics of microcement decorative for concrete: use as a finishing finish or as a coating before facing with another material; the composition fits well under different finishes, creating an impenetrable layer; the coating has a high density; moisture resistance; resistance to mechanical stress.
For the beauty of the surface and to improve the performance characteristics, finished walls are coated with waxes and varnishes.
Pores
The structure of concrete is heterogeneous - in addition to cracks, there are many small holes scattered over the entire surface, which are formed due to the evaporation of water from inside the material.
I created the pores from the Dirt 1 texture procedural texture.
In order to make the pore depths more varied, I duplicated Dirt 1 and configured them differently using the Position parameter in the Histogram Scan nodes.
By adjusting this parameter, I control the brightness, so in the two options we get a different number of holes:
After that I apply a Slope Blur to both textures to simplify the shape of the pores and make them look like holes in stone:
Pores in the material
The use of decorative plaster compositions for concrete
The properties of the material have determined its demand in wide areas of construction and finishing. There are claims that concrete plaster is good only in spacious rooms, but much depends not on the area, but on the skill of the performer and the chosen composition. In a small space, they use finishing on one or two walls, combining it with wooden or metal elements, highlighting it with furniture and decorative elements. This means that textured compositions can be used in different qualities:
- finishing walls and ceilings in order to decorate a room in a certain style or to disguise their shortcomings (when renovating secondary housing);
- a practical and long-term solution for the design of a functional room (kitchen, toilet, bathroom);
- design of entertainment and public spaces;
- facade finishing of private houses and city buildings;
- for creating decorative panels with variable effects;
- plastering furniture and creating pockets in the bathroom, forge and toilet for plumbing and kitchen equipment.
An undeniable advantage is its high adhesiveness, which allows it to be applied to a wide variety of surfaces - from metal and wood to plastic and ceramics. According to construction experts, such properties have expanded the scope of application of the compositions and made them a universal decorative and finishing agent.
Application does not require a large amount of tools
Procedural noises and effects
Slope Blur is controlled by a different texture. In our example, the black and white texture controls the intensity of the effect. The brighter the pixel, the stronger the Slope Blur is at that location.
Most often, other effects are controlled by procedural noise - from now on I will call them drivers.
Slope Blur for pores, driver is BnW Spots 2
The result of the effect depends on the texture driver, so don't be afraid to experiment. This will lead to results faster and teach you how to work with different effects and textures.
Decorating the surface for concrete
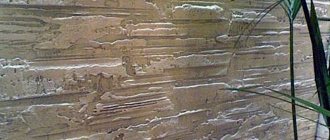
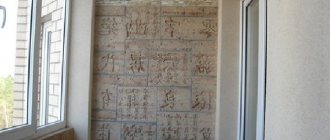
Plaster that imitates the surface of concrete has become a popular type of decoration for rooms in the minimalist style. Walls with a “concrete effect” look durable, solid, monumental, even if they are built from plasterboard.
Users are attracted not only by the illusion of strength and reliability, but also by the minimalism of appearance. Plastered in this way, the wall imitates the surface before the renovation began. But when looking at her, there is no feeling of incompleteness.
Decorative plaster for concrete in the interior in this style is usually performed in rooms with a simplified, at first glance, general design.
Damage
Whole pieces of cement sometimes fall off the walls, exposing the interior of a material with a larger, more porous texture. We will now create these dark spots.
1. I create the texture of rough and porous cement, then mix it into the material using a mask made from procedural noise - BnW Spots 1.
2. I make a mask using the Histogram Scan node, increasing the texture contrast. Using Position I adjust the damage area.
3. I apply Slope Blur to the mask; as a driver I use BnW Spots 3, which is already in the graphics - it participates in the creation of pores.
4. Before mixing the texture from BnW Spots 1, I shift the texture to the side and rotate it with the Transform 2D node so that the texture pattern does not coincide with the mask pattern.
Practical recommendations
Experts recommend purchasing primer and plaster from the same manufacturer, taking into account the ratio of work speed and speed of setting of the solution. You should cover the door perimeter with masking tape so as not to stain it with decorative plaster. Considering the type of decor you want to make, you need to choose a type of composition - they are available with metal and composite fragments, large and small fractions, intended for a specific surface and universal.
When using decorative plaster in the interior, do not overdo it
Interesting experiments by folk craftsmen have shown that, using certain techniques, it is possible to imitate the laying of concrete slabs, formwork or cellular concrete. Of the classic variations, we can again recall the already mentioned dry and “wet”, fresh and rusty, with painted and unpainted convex patterns. Using certain compounds, you can block the loss of heat and get rid of the noise of neighbors.
Was this information useful to you? Share in the comments!
Mix
To blend, I’ll create 4 consecutive Blend nodes, connecting a different element to each one, adjusting the degree of transparency and blending type:
Cracks and damage are mixed with the rest of the material in the masks. This is an inverted version of the same mask. The mask in the cracks prevents them from crawling onto the damaged areas, as if only the top layer was cracked.
The height map is ready. It remains to create additional textures that will be needed when working with color and Roughness.
Red granite
30-40 years ago, red granite was one of the most prestigious finishing stones. Now it has somewhat lost ground to newfangled stone types, but still remains quite in demand.
The advantages of such washed concrete include a pleasant, not too flashy color, which will fit equally well into a garden or park landscape, the hall of an official governing body, the interior of a spacious private house or the exterior design of a store. An excellent choice for paving slabs - small stones will resist ice. Discreet tones make any contamination relatively unnoticeable, so the surface of steps, sidewalks, and halls decorated with such material do not require complex surface care work.
Ambient Occlusion
AO is the texture of shading that occurs under diffuse lighting. The more difficult it is for light to reach the surface, the more intense the shading will be in that area. Dust and dirt accumulate in places that are difficult for light to reach.
The shading texture is used to create masks for pollution effects.
Designer has a node that generates an AO texture from a height map. We will need it later when creating color and Roughness textures.
Imitation of concrete texture
As we already mentioned, modern decorating styles sometimes involve unplastered concrete surfaces.
But before imitating concrete, you should take into account some general requirements for the construction of such surfaces:
- the area of the room must be significant - for the “fake” to work, the distance to such a surface must be more than 1 - 2 m;
- ceilings in the room should be higher than 3 m - in low rooms concrete walls will be oppressive;
- the reduced level of heat and noise insulation should be taken into account; if there is a need to increase these characteristics, it is better to plaster the room.
On a note! When creating concrete surfaces, keep in mind that authenticity is not always good. Play with shades of gray, or use a splash of mother-of-pearl.
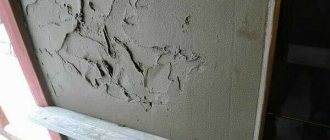
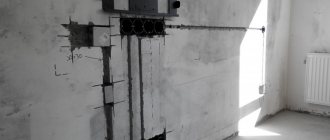
Concrete plastering technology
It is very important to properly prepare the original concrete surface before carrying out decorative work.
The stages of work are as follows:
- Before creating the illusion of concrete using plaster, it is necessary to clean the surface from defects:
- traces of corrosion,
- cracks and chips,
- oil stains.
- The walls are cleaned of dust and dirt with a damp cloth.
- Next, you need to treat the surface with a deep penetration primer.
- After the primer has dried, the surface is plastered.
You can learn more about the process of plastering a concrete wall while maintaining and enhancing the effect of uneven texture by watching the video in this article.
On a note! To make it more similar to concrete, there is no need to plaster small defects. Before starting work, carefully inspect the surface and determine the places that will participate in creating the style and cannot be processed.
Grunge
In a separate graph I will mix several grunge concrete textures taken from the Substance Painter library.
To add them to the chart, find them, right-click, and select Show in Explorer from the context menu.
Substance Painter Library
The textures are located in the library folder in .sbsar format; they can be imported into the material graph by dragging the file from the folder into the Graph View window.
Texture will be needed to add details that do not affect the relief, but will be visible in the color and texture of the Roughness.
Types of plasters for concrete
Like any building material, decorative concrete plaster has several varieties. All of them are very popular among designers implementing renovation projects for modern houses and apartments.
Decorative concrete is divided into microconcrete and microcement. The features of each material allow them to be used in any room, to implement not only decorative, but also practical functions.
Microconcrete is a cement mixture with the addition of various polymer components, dyes and quartz chips. The finished solution is plastic and has excellent adhesion properties.
Advantages of microconcrete:
- resistance to various temperature conditions;
- high moisture resistance;
- immunity to chemical compounds;
- fire safety;
- resistance to mechanical damage;
- does not emit odors.
Thanks to the water-repellent properties of microconcrete, a wall coated with this material will not become covered with mold, mildew, or become a breeding ground for insects.
Concrete-look walls in the bathroom interior
Microcement is also based on cement and polymers. The mixture can be applied to both walls and floors - for example, as an insulating waterproof layer under tiles. Advantages of microcement:
- excellent water-repellent properties;
- resistance to impacts, chips, scratches, etc.;
- high composition density.
This mixture is ideal for finishing bathrooms, kitchens and saunas. At the same time, the material can also be used for external work (on the facade of a building, steps, terraces).
Microcement can also be used on floors
This is interesting: decorative concrete does not have to be gray. Various colors and mineral chips added to the mixture will give it a unique look. In addition, the final result can be tinted or painted over with any type of paint.
Roughness
The microsurface texture (Roughness) is responsible for the scattering of light by the material.
Smooth surfaces reflect light rays without scattering them at the angles of their incidence on the surface. As a result, reflections on the material become clear and highlights are sharp.
Rough surfaces scatter light, causing reflections to wash out and highlights to become dull and broad.
In my Roughness chart it's done like this
A common way to start working with Roughness is to use a Curvature texture as a base. In the original Curvature, the recesses, pores and cracks are darker than the corners and planes.
However, in the Roughness texture, the darker the surface, the more glossy it is. Therefore, the first step is to invert Curvature - cracks and depressions will become matte. To do this, we use the Grayscale Invert node.
I mixed the resulting result with the grunge texture I made earlier to add more detail and depth to the Roughness.
The last node is Histogram Range. In it, using the Position parameter, I adjust the overall level of smoothness:
Concrete wallpaper for walls
Sounds hard, doesn't it? But the first doubt that arises when familiarizing yourself with the material immediately disappears, since rolled concrete or concrete wallpaper weighs on average 1.0-2.5 kg per square meter. The main weight is created by stone flour applied to a textile or fiberglass base in a layer of 1.0-5.0 mm. Thus, the material resembles wallpaper, although it is heavy and not always easy to use for a beginner.
The main visual advantages of this option for finishing concrete walls is the versatility of the texture, which can replicate a standard concrete surface without seams, the appearance of large concrete blocks or panels, or a concrete wall from which the formwork has just been removed. The surface and texture can be porous, with seams, bubbles, imitating the texture of wood, imprints of beams and form-building elements of the formwork system.
Rolled gray concrete is suitable for finishing walls of regular and irregular geometric shapes, as well as architectural elements and furniture indoors and outdoors!
Color
Our concrete turns out to be simple, so I color it using one node - Gradient Map, with which I color the black and white Height Map.
- Before this I mix it with a grunge texture so that there is more detail in the color. If you only use a Height Map in a Gradient Map, the result will look flat and uninteresting.
- Before connecting the texture to the Gradient Map, I increase its contrast using Levels.
- Gradient Map. The node converts gray tones into color using a custom gradient.
Settings editor, opens by clicking on “Gradient Editor” in the node properties
Colors can be added and edited manually, or grabbed directly from a reference using the Pick Gradient tool.
Capturing a gradient always gives different results