For many, a balcony or loggia remains that part of the apartment where household members rarely enter. But if you are used to spending a lot of time there, you need to think about what materials to decorate the surfaces with. The largest area there is occupied by walls, which can be decorated with different solutions from paint to lining. An excellent option for finishing the walls on the balcony is decorative plaster. It can perform not only an aesthetic, but also a functional role, for example, providing insulation, making the indoor microclimate more comfortable.
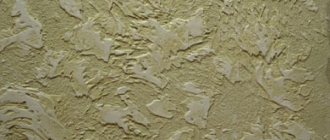
If the consumer still cannot decide which finish to choose for the balcony walls, he should pay attention to plaster. It does not take up useful space, looks attractive, is ready to last for a long time and allows you to create unique effects on the walls. The bark beetle refers specifically to this kind of cladding. This plaster, or rather its texture, looks much more impressive than an ordinary smooth wall.
Advantages of decorative plaster
Finishing a balcony with decorative plaster has many advantages.
- Firstly, the composition looks attractive.
- Secondly, it can be selected for difficult operating conditions.
- Thirdly, it may have special properties, for example, biostability, fire safety and resistance to abrasion and mechanical stress.
This wall decoration will be ready to last for a long time, allowing the owners to clean its surface.
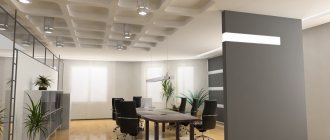
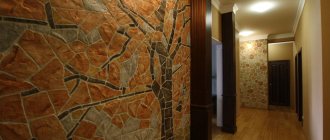
Decorative plaster is not a primitive finish that may seem dull and monotonous. Having looked at the photo, you can understand that such wall cladding on the balcony can make the space truly cozy. Using plaster, you can create different effects, create designs and patterns, and also give walls the imitation of various materials, such as fabric, stone or brickwork.
Another advantage of this decorative wall covering is the ability to combine it with other materials. This could be stone or its artificial analogues, tiles and even wallpaper. Everything will depend on the budget, your preferences and the desired result.
Proper care of the walls on the balcony
The decorative coating does not require special care. Almost all plasters repel water, so surfaces can be wiped with wet rags or damp wipes. Do not wash plaster with abrasive agents, which will damage the paintwork and scratch it. If dust settles on the walls, treatment with antistatic agents will allow them to always remain clean. In general, covering a balcony with decorative plasters is a very good solution, since it will not cause unnecessary hassle, and the finished coating will look stylish and attractive.
Types of decorative plaster
When a consumer decides which decorative plaster to choose for a balcony, he should pay attention to the basis of the composition, which can be:
- mineral;
- acrylic;
- silicone;
- silicate.
The first is based on cement, mixes well with water and can be applied to mineral surfaces. They are pre-treated with quartz primer.
Acrylic plaster is made on the basis of a resin of the same name and has water-repellent characteristics, which is ideal for balconies and loggias.
The consumer's choice may fall on a silicone composition, which is versatile, which is why it is so popular. But the silicate mixture contains potassium glass, and the composition itself is rarely used for interior decoration. It is probably better to avoid such decorative plaster in conjunction with a balcony, because the material is most suitable for facades, as it emits harmful substances.
Mineral plasters
When choosing decorative plaster for a loggia, special attention should be paid to mineral mixtures, which may differ from each other in the fraction of the filler and its composition. The mixture can be made from:
- marble;
- granite;
- quartz;
- gold particles;
- cellulose;
- pearlescent particles.
This decorative mixture is good because the craftsman can create an imitation surface with his own hands:
- oak bark;
- traffic jams;
- marble covering.
The material allows you to obtain three-dimensional reliefs and unique embossed images.
Acrylic
When thinking about the question of which plaster to choose for a balcony, you should consider the features of acrylic mixtures. They are good because they are characterized by high impact resistance and the ability to repel dust. The last characteristic is especially relevant for the balcony space, because not a single loggia can be glazed so that dust and dirt do not get inside. Even if the walls become dirty during use, they can be washed. Acrylic compositions can be divided into mixtures for external and internal use. The first type of plaster is suitable for loggias and balconies, which is frost and moisture resistant and also has protective properties. Operation can be carried out in any climate zone.
Silicone mixtures for balconies
Such compositions are offered for sale in a wide range of colors and textures. With their help, you can create unique effects, providing walls with the qualities of wear resistance and reliability. This plaster is suitable even for a beginner, as it is easy to apply due to its plasticity. The layer tolerates temperature influences and high humidity well, but such conditions often persist on balconies and loggias.
Types of materials by composition
Its characteristics depend on the basis for making the mixture. Ability to withstand negative natural factors, resistance to mechanical damage and high humidity. Also, the coating on the balcony must have high resistance to UV radiation, otherwise the color will quickly fade and lose saturation under the influence of the sun.
Mineral
They are produced on the basis of cement, gypsum and lime, and the addition of chemical components improves the characteristics and quality of coatings. Mineral plaster mixtures are safe for indoor use, do not burn and are resistant to external atmospheric influences. To improve the quality of the coating, the main components of the composition are mixed together in different proportions and plasticizers are added.
Types of mineral solutions:
- Cement. It is used for leveling work and is included in decorative mixtures in the form of white cement. It has excellent moisture resistance, strength and is able to withstand repeated freezing cycles. Suitable for cladding cold and unglazed balconies.
- Lime. Less resistant to moisture. Plasticizers are often introduced into the solution, which improve the coating’s resistance to negative factors. It is plastic, not susceptible to the formation and spread of fungi and is vapor permeable. Recommended for use on glazed loggias and balconies.
- Plaster. Used for leveling and finishing bases with complex reliefs. It has low strength and strongly absorbs moisture from the environment, so it is undesirable to use the material on cold balconies. The solution will perform well in dry, warm rooms. To protect the coating, plasticizers are added to the composition, which prevent water absorption and increase frost resistance. They also cover the finishing layer with primer and protective compounds for durability.
Cement
Lime
Plaster
Acrylic
They are made on the basis of resins, which have increased ductility and resistance to moisture. The coating is durable, it can be washed without worrying about the color and texture, which is important in a balcony setting. Acrylic plaster is produced in color and as a white base, which can be given any shade. The material is easy to work with and create complex reliefs on the walls. Disadvantages include high static nature, which attracts dust and low fire resistance.
For your information! Acrylic-based mixtures can be used to decorate walls in both cold and warm rooms.
Silicone
The most resistant compounds to any negative manifestations. They have excellent ductility, durability and color resistance to fading in the sun. Based on silicone resins, plasters for exterior use are made that can withstand mechanical damage. Various components are added to the composition, which gives the finished coating relief, texture or smoothness. Silicone mixture can be used on any type of balcony.
Acrylic
Silicone
Features of plaster for cold glazing
If the house is located in a climate zone with difficult weather conditions, then glazing is unlikely to achieve a comfortable temperature in the space adjacent to the apartment. Therefore, special requirements are placed on finishing materials. Thus, the plaster must have waterproofing and water-repellent properties. The mixture should be able to withstand sudden changes in temperature and humidity. If possible, the created layer should not become a favorable environment for the emergence and subsequent development of biological life.
Walls lined with plaster should be easy to clean, and condensation should not cause peeling and the development of fungus and mold. Taking all this into account, the plaster must be selected in such a way that it has a special purpose and characteristics. Most often, compositions are used for external work, which make it possible to create a layer that can withstand difficult operating conditions.
Features of choice
Before finishing a balcony with decorative plaster, you should constructively evaluate all the features of such a room. First of all, pay attention to the following items:
- application surface - brick, concrete or wood;
- sun resistance;
- level of moisture and vapor permeability;
- Is sound insulation important?
- difficulty of application;
- strength and durability of the coating.
Unglazed loggias require the use of finishing materials intended for outdoor use.
The quality of finishing work and visual appeal will depend on the correct choice of plaster. A good option is silicone mixtures. They do not lose their luster and brightness for many years, and are resistant to the most unfavorable external manifestations. Venetian plaster is undoubtedly beautiful and looks rich. But an open balcony may suffer from precipitation.
When choosing, you should focus not only on decorative characteristics (color and texture), but also on technical properties - the proportions of artificial and natural components, antifungal qualities, and others.
Warm plastering of the balcony
Such work involves the use of mixtures that are suitable for the premises. If the balcony becomes an extension of the room, then it can be covered with decorative plaster, for which there are no special requirements. Usually the composition is laid on a whole pie of insulation, waterproofing, wind protection and vapor barrier film.
Attention! All other materials under the plaster layer must be selected with special care. For example, insulation should not cake under the influence of moisture and lose its properties. Therefore, it is worth abandoning mineral wool. The thermal insulation must also be rigid enough so that plaster can be applied to its surface.
Expanded polystyrene is best suited as insulation, but you need to take care of the method of attaching it. Installation can be carried out using cement mixture or mastic, but the most suitable option would be polyurethane foam. With its help, it will be possible not only to carry out installation work, but also to fill the resulting gaps.
Before starting work, the walls are treated with special compounds that will be able to eliminate biological formations. All joints are waterproofed using a solution of cement and PVA glue. Additionally, you can use waterproofing tape.
Decoration methods
In terms of its composition, depending on the fractions of the components, decorative plaster on balconies and loggias can be small- or large-relief. While preparing the solution, it can be tinted to the desired color, and after the finish has completely dried, it can be covered with a protective transparent varnish, colored paints, and a patina can be applied.
Finishing loggias with decorative plaster, photo ideas for applying the composition
Coarse-grained is much easier to work with, it is easy to apply with your own hands, does not require perfect alignment of the walls, can be applied to brickwork and concrete, and after drying it resembles natural stone in appearance. Different application methods allow you to achieve interesting solutions:
- antique plaster;
- textured coating, here when applying different tools or improvised materials are used: sponges, crumpled paper, you can form a pattern with your hands.
Finishing balcony walls with decorative plaster with fine-grained filler requires careful leveling of the surfaces; the finishing layer is smoother. With the help of special devices: trowel, roller, brush, stamps, you can achieve interesting artistic effects.
Various designs on the plaster of balconies and loggias can be applied with special tools and rollers
Special abilities
Decorative plaster is a very plastic and pliable material to work with. Texture compositions include various fillers, which, when applied to the wall, allow you to achieve the effect of mosaic, shagreen, oak bark, etc.
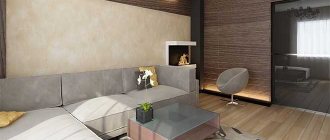
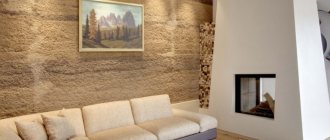
Finishing the loggia, a combination of decorative plaster with stone and wood
Simulated plaster walls on balconies and loggias open up wide horizons for design:
- If the composition includes mineralized pigment, the coating will imitate crinkled fabric;
- Cracks and antique coating are achieved using different tools and methods of applying strokes; the technology for finishing a balcony with plaster is presented in the video below.
- Decorative plaster for loggias and balconies bark beetles is one of the most popular ways to decorate open and closed extensions; such surfaces are easy to paint and can always be renewed if necessary.
- “Soft gold” plaster contains bactericidal fillers - micro-sponges, which allow you to achieve high heat and sound insulation characteristics of the finish.
- Flock plaster for balconies and loggias has two stages of application: first, the adhesive composition is applied to the wall, then particles of dried acrylic paint are pressed onto it, they can be applied randomly or in a pattern, it all depends on your imagination.
- Venetian plaster is used in luxury interiors. This is one of the most expensive and beautiful ways of finishing surfaces. It can imitate marble, malachite, onyx and other stones. And various methods of applying and processing the composition make it possible to achieve the effect of wet silk, craquelure, etc.
In our galleries we have selected interesting ways of how decorative plaster can be applied to loggias.
The photo will help you choose an interesting decoration method to implement the idea in your interior.
Finishing the balcony with decorative plaster
Before doing such work, the walls must be inspected for mold, putrefactive formations and defects. If the surface is uneven, it is better to level it to avoid overuse of expensive plaster. But if the surface area is not so large, you can do without leveling.
All elements that may interfere with the work are removed. Walls should be primed to increase the adhesion of materials. The composition must dry well, only then can you begin plastering.
Do-it-yourself balcony plaster for painting
Comments: Comments to the post Finishing a balcony with plaster: step-by-step instructions are disabled
Finishing a balcony differs from work in an apartment. This is a special room that is closest to the street, and therefore is more at risk of penetration of moisture, light, dust, etc. That is why not all finishing materials are suitable for balconies and loggias, but decorative plaster is not one of them. This is a universal material that can transform any room. In this article we will tell you how to decorate a balcony with decorative plaster and reveal several secrets of beautiful wall decoration.
Plaster is a special type of finishing material, the composition and method of application of which depends on the desired purpose. So, if you need to make the wall smooth for finishing cladding, use leveling plaster. It is convenient to glue wallpaper, lay tiles or apply decorative plaster compositions on top of it. They often contain solid particles, pigments and various additives to create an original effect.
The plaster on the balcony must withstand temperature changes and high humidity levels, and also provide additional protection for the room. Making smooth walls is not a problem if you strictly follow the instructions and prepare the right mixture.
Any finishing begins with leveling the walls, and often you have to use special plaster for this, since it allows you to hide obvious differences in the surface. Moreover, the leveling composition improves the performance characteristics of floors and takes up minimal space, unlike plasterboard boards.
To prepare walls in this way, use cement-sand or gypsum mortar - the choice depends on the material from which the wall is made. In order for heavy cement mortar to remain on a vertical surface, it needs support in the form of metal profiles and reinforcing mesh. Plaster is much lighter and firmly attached to the wall without additional support. However, such plaster is not recommended for use in rooms with high levels of humidity, so if you are going to choose it for a balcony, make sure that it is reliably insulated. Gypsum plaster is mainly used for finishing with a layer thickness of no more than 20 mm.
Leveling walls with plaster can be divided into three stages: preparing the wall, preparing the solution and actually applying it to the surface. To prepare the wall, you need to remove the old coating. It is best to finish the balcony with plaster immediately after installing the hydro- and thermal insulation.
If you are working with a “bare” wall, then the mixture will not be able to adhere tightly to a smooth concrete surface, so you need to make it rough - put notches or small chips. To do this, they usually use a stiff steel brush or a regular chisel. To ensure reliable adhesion of the plaster, any wall must be coated with a deep penetration adhesive primer. Before applying the plaster, the wall must be wetted so that all the water from the mixture is not absorbed into the brick or concrete. Also, the surface must be dusted and wait for the primer to dry completely.
Prepare the plaster solution strictly according to the instructions on the package to avoid unpleasant surprises. You don't need to mix too much at once - you may not have time to use it up before it hardens (especially gypsum). Mix the mixture thoroughly so that not a single lump remains. To ensure a perfectly smooth surface, guide strips are used. They set the desired plane and do not allow the plaster to fall off. Such beacons are installed at a distance of about 50 cm, and then hidden under a layer of plaster.
No one succeeds in creating a perfectly even coating the first time, but don’t worry - 2 - 3 hours after applying the plaster, it can be sanded down with sandpaper, thereby hiding all defects. According to the technology, you need to adhere to a certain layer thickness, so measuring instruments are useful for the work. Over time, you will be able to do this “by eye,” but the main thing is to remember that the thinner the layer, the better.
Another important point when working with cement-sand plaster is the reinforcing mesh. It is needed in order to increase the rigidity of the wall and prevent the plaster from collapsing under its own weight. When purchasing, check with the seller that the mesh is intended specifically for interior work. Attach it to the wall with the same solution and lightly recess it.
Helpful advice: To ensure that the plaster does not fall off, apply several thin layers, allowing the previous one to dry completely. In total, the coating should not be thicker than 30 mm.
If this is your first time plastering a balcony with your own hands, it is better to use a wide spatula - apply the composition to the wall and stretch it from bottom to top. A trowel is also designed for this, but you need to know how to handle it to make the surface smooth and beautiful.
If the walls on the balcony are made of brick, then to ensure that the plaster holds tightly, first clean the seams to a depth of 8 - 10 mm. The truth is, brick and block walls are a little more difficult to work with than concrete ones. The fact is that bricks have a porous structure that absorbs water very quickly, and there is a risk that the plaster will crumble and swell. To do this, at the preparatory stage, the wall must be covered with 2 - 3 layers of adhesive primer.
Important: If the house was built very recently, it is not recommended to putty the walls - the building will definitely shrink a little, and all your efforts will be in vain.
The layer of plaster for a brick wall must have a thickness of at least 10 mm. Be sure to reinforce it with reinforcing mesh, as it helps level the surface. To protect the plaster from cracking and deformation, you can use a regular painting mesh. This is especially true in places near door and window openings.
Let us briefly describe the technology for plastering a brick wall on a balcony:
- Clean the seams.
- Cover the wall with primer in 2 - 3 layers, waiting until the previous one has completely dried.
- Apply a little plaster mixture and embed the reinforcing mesh in it, attaching its sections overlapping by 10 - 15 cm.
- Wait for the holding layer to dry completely.
- Apply a leveling layer along the guide strips and beacons.
- Wait a few hours and smooth out surface defects with sandpaper.
As you can see, there is nothing complicated about this, and plastering the walls on the balcony can be an excellent practice for renovations in the apartment itself.
When the walls have become even and smooth, you can begin the most enjoyable part of the work - applying beautiful decorative plaster. The peculiarity of modern compositions is not only in their effectiveness and diversity, but also in decent performance characteristics. They can easily withstand temperature changes, do not fade from direct sunlight, help retain heat inside the house and are completely environmentally friendly. Even those who have never picked up a spatula or roller can create a unique interior on a balcony using decorative plaster! And the best part is that the cost of the compositions is generally low - much lower than that of wallpaper, tiles or panels.
Decorative plaster can consist of one, two layers or more. Typically, the composition already includes adhesive additives, dyes, plasticizers and other components to increase the practicality and aesthetics of the coating. Almost all plaster compositions are based on lime, gypsum or white cement and quartz. Mineral mixtures are sold in powder form, which just needs to be diluted with water to the required consistency, but if you are afraid of not being able to cope, you can buy ready-made paste plaster in a bucket.
None of the modern plasters contain harmful substances, and the amount of plasticizers and additives usually does not exceed 3%. Due to their natural composition, the surfaces easily allow steam to pass through and do not interfere with the natural micro-ventilation of the room. Most compounds do not accumulate dust and even withstand wet cleaning.
Decorative plaster on the balcony is preferable to wallpaper or wooden panels also because it is completely fireproof and does not fade under the sun. The service life can be safely calculated in decades, while wallpaper is recommended to be changed every 3 years.
Helpful advice: There are special plaster mixtures with antiseptic additives that prevent the formation of mold and fungi, which is important for balconies.
And, of course, the main reason why many choose decorative plasters is the amazing variety of colors and textures. Even without being a designer, you can create a stylish and original interior.
It would be simply wonderful if decorative plaster did not have its shortcomings, but, unfortunately, it could not be done without them. So, due to its mineral nature, it can become cracked if applied incorrectly or after some time. In most cases, restoring the surface is not difficult, but the fact remains. This is a controversial drawback that disappears if you buy a mixture with various synthetic additives and plasticizers to increase elasticity. They cost more, but you can be sure of a successful outcome.
As we have already said, there are a lot of decorative plasters, but to make your choice easier, we have classified them into groups depending on the effect they produce.
Classification of decorative plasters:
- Structural - they contain crumbs of quartz or mica, due to which, when applied, they form chaotic scratches and abrasions. The popular “Bark Beetle” plaster, which imitates the passages of the bark beetle, belongs precisely to this type. It is noteworthy that for such mixtures you do not need to first level the wall - they themselves mask small defects. Structural plaster can create an imitation of not only wood, but also cracked stone and even snakeskin! For work on the balcony and inside the house, it is better to buy water-based mixtures, since they do not have a strong odor.
- Textured - have inclusions of granite or marble fractions, organic fibers (linen, cotton). If you want to create a surface that reliably imitates natural stone, choose textured plaster. You can also use it to “fake” leather, velvet and wood.
- Flock - the composition contains small particles of acrylic, which help to imitate a silk surface. This finish looks very impressive and rich, but requires special care and careful handling. To make flock plaster last longer, apply it over acrylic paint, and then cover it with a transparent protective varnish.
- Venetian is one of the most popular types. The mixtures are created on an acrylic base with the addition of special dyes. They are sold in the form of a thick paste, to which you add pigment and mix. Using Venetian plaster you can imitate silk, marble, paper and even pearls.
As we promised, we will reveal a few secrets of spectacular design finishing with plaster. The point of all the methods listed below is to additionally act on the plaster while it is still wet.
Techniques for creating original relief:
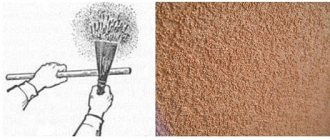
- Spray - Take a small trowel, scoop up some plaster and throw it onto the wall.
Another option is to dip a broom in the mixture, bring it closer to the wall and lightly tap it with a stick so that small splashes litter the surface. This technique is described in detail in the video below: - With a sponge - when you have applied the plaster in an even layer, take the sponge and press it lightly against the wall so that there are no gaps (apply overlapping). It's better to use a loofah sponge (natural, not synthetic) to get a more natural and unpredictable print. Periodically wash the sponge in soapy water.
- Cellophane – To achieve a crumpled paper effect, place a cellophane bag over freshly applied plaster. Before doing this, crumple the bag thoroughly (it is better to take large bags made of durable cellophane). After the wall has dried, go over all the folds with a spatula and do not be afraid that you will spoil the result - the spatula will only remove unnecessary fragile elements.
- Brush – apply the plaster with a layer of 2 mm, then use a spatula to place the mixture in small portions on the wall and spread it with a hard synthetic brush in different directions. Since the first layer has not yet dried, the brush will glide smoothly along the wall and create beautiful “waves.” To make the walls more voluminous, after drying, go over the surface with a color that matches the plaster, making circular movements and rubbing the grooves.
- The “dry earth” effect is a very beautiful effect that is not at all difficult to create. To do this, you need to wait until the plaster has set a little, and then drive a wooden tongue into it so that cracks appear from it and depressions form.
- Grooves – If you have an extra float with a serrated edge, we recommend trying it out. Apply the plaster in a layer of 2 - 3 mm and run a float over it, changing its angle to get grooves of different depths. A slightly untidy, random relief looks the most beautiful.
- Another original way to “revive” the walls on the balcony is to work with a structural roller. In construction stores you can find rollers with various patterns - run them over fresh plaster and get an even, neat impression. You can add your own touches to the purchased composition so that “it’s not like everyone else” - add dots, lines, ticks or other elements with a wooden stick.
Finally, we invite you to watch a useful video about plastering a balcony, which describes many ways to apply it in an interesting and unusual way:
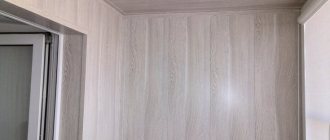
Hello, dear readers of the site sesaga.ru. In this article I want to share my experience and show you one of the options for interior finishing of loggia walls for painting , which even a novice “plasterer-painter” can repeat. Why am I saying this with such confidence, because it was my first time finishing walls at this level, and everything worked out. I even received praise from a specialist.
According to the project, the loggia was intended for drying clothes, so for these purposes, through holes in the form of a pattern were provided on the outer plate. However, these holes turned out to be not entirely practical, since through them dust and debris entered the loggia, water flowed in during rain, and in winter, cold penetrated from the loggia into the room.
And so, in order to make maximum use of the space of the loggia, they decided to make a cold room out of it, in which it would be possible to dry clothes all year round, and store food and keep some things. However, due to lack of time, the entire finishing process was spread over three stages.
At the first stage, in the fall, only surface finishing was done: the walls were simply leveled with putty and painted, a screed was made on the floor, and the floor was also painted. In the spring, a plastic window was installed, the ceiling was covered with plastic panels and light was installed.
In the summer the finishing was completed. First of all, the outer wall was completely cleared of putty, which did not survive the winter well and in some places became unusable. Then the walls were treated with anti-fungal agent
and primed
with concrete contact
. This took a day and a half.
Next, the holes on the outer wall were sealed, which required 40 pieces of red brick (an average of two bricks per hole). To prevent the brick and mortar from falling out during the work, the holes were covered from the street side with a piece of plywood, which was secured with wire to the concrete lintels between the holes.
The brick was installed in the middle of the hole, and carefully sealed with mortar on the sides so that no voids formed between it and the concrete. The outer side of the brick rested against the plywood, and thereby became flush with the outer side of the slab. After 30 - 40 minutes, when the solution had hardened, the plywood was removed and the next two holes were closed for further sealing.
The next step is to plaster the brick to bring the formed depressions to the same level as the wall surface. For plastering, add a slightly larger amount of sand to the solution than usual.
After the plaster has dried, prime the wall with concrete contact again. Let the concrete contact dry.
Now we start plastering the wall. Since I was not involved in plastering of this scale, I decided to install construction beacons
, since they help to level out even strong unevenness, and most importantly, anyone can plaster a wall with beacons, since after installing them you don’t have to think about the thickness of the applied layer.
The only inconvenience of beacons is that they are pre-installed on the wall, and this takes time. But this time is nothing compared to the end result
.
Construction beacons
They are thin galvanized metal profiles with perforated holes for self-tapping screws, and serve to limit the layer of plaster during the process of plastering the surface. Beacons are produced in lengths of 250 and 300 cm and profile thicknesses of 4, 6 and 10 mm.
Before installing the beacons, we inspect the wall and note significant depressions and convexities: we will install beacons in the depressions, and the plaster border will run along the edge of the convexity. For better clarity, you can stretch a thread or fishing line along the wall and use it to see the differences on the wall. In the same way, we check the differences in the upper, middle and lower parts of the wall.
If the wall is wavy and more than two beacons are required to level it, then first of all we install the outermost beacons, which we place 10 - 20 centimeters from the left and right edges of the wall. Pay special attention to the installation of the outer beacons, since their installation will determine the verticality of the wall and the thickness of the plaster layer.
Remember
.
The greater the distance of the beacon from the wall surface, the thicker the layer of plaster
.
Now we stretch a thread between the beacons, along which the remaining beacons will be placed. We retreat about 5 - 10 centimeters from the top and edge of the wall and make a hole for the screw. We do the same on the opposite side. Then we screw in the screws and pull the thread onto them. It should look like the picture below.
We will place the remaining beacons along this thread, and four such horizontal threads need to be stretched: one at the top and bottom, and two in the middle.
The installation process itself is as follows: we place the beacon under the threads so that it lightly touches them, and fasten it to the wall with self-tapping screws. The figure below shows an example of how beacons should be set relative to the threads:
Now we need to decide on the number of beacons, for which we measure the width of the spatula with which we will work. From this width we subtract 5 - 6 centimeters, where the result will be the distance between the beacons. For example. If the width of the spatula is 30 centimeters, then the distance between the centers of the beacons should be 24 - 25 centimeters, which will allow the spatula not to move from the beacons during the process of applying plaster. In my case it turned out to be 11 pieces.
A little about attaching beacons vertically. We decide on the location of the beacon and, using a level or plumb line on the wall, mark a vertical line along which the beacon will pass. We screw screws at the top and bottom of the line and pull a thread on them, which will serve as a guide. Then we insert a beacon under the thread and, every 50–60 centimeters, fasten it to the wall with self-tapping screws so that its entire surface is in slight contact with the thread.
But since our wall is wavy, so that when attaching the beacon to the wall it does not repeat its outline, but always remains straight, we place wooden or plastic blocks of different thicknesses under the beacons. And in order not to plan or saw out such blocks, I immediately purchased plastic fasteners in the store intended for these purposes.
Everything is simple here. A self-tapping screw is inserted into the fastening grooves and screwed until the fastening is pulled to the wall at the desired height. Then the beacon is put on the mount and secured with a latch. It took me 6 – 8 hours to install the beacons.
Well, now that all the beacons are attached to the wall, we begin plastering. mounting dry gypsum mixtures as plaster.
, since they dry quickly, allow you to apply a layer of up to 50 mm at a time, are elastic, allow the walls to breathe, etc.
This is what a great wall I made. Now let the putty dry thoroughly. Since I was plastering for the first time, naturally, not everything turned out smoothly, and therefore, when the wall dried, I had to cover it with another thin layer of putty to remove the potholes and grooves.
And at the end of the plastering, the wall was covered with finishing putty
. And if you apply it carefully, then you won’t even need to sand the wall, since after drying the finishing putty becomes like a mirror. It took a day and a half to plaster the wall with putties.
Well, the last step is to paint the walls and floor of the loggia. We pre-treat the walls with a primer so that the paint lays down well and evenly (I haven’t primed it before - but in vain). We used white façade paint and diluted it to the desired shade. Regular floor enamel was used to paint the floors.
The walls were painted with a roller, but first all corners and “dangerous” places were painted with a brush. The floor was also painted with a brush.
Now it remains to improve the loggia a little: make simple shelves for storing food, things and tools, hang a clothes dryer
(two wooden blocks and a clothesline), and a little more useful living space was added to our apartment.
The wood for the shelves is pre-treated with medium sandpaper and then varnished. Select the color of the varnish based on the interior color of the loggia.
Now, using my experience, you can easily finish the interior walls of the loggia for painting . Good luck!
Technologies for applying decorative plaster
Before work, it is important to decide which application algorithm to choose. To do this, you can use one of four methods, each of which involves the use of:
- roller;
- brushes;
- spatula and trowel;
- fabrics
- films;
- sponges.
Venetian plaster, which is very common among consumers, can be applied with a trowel and putty knife. A small portion of the mixture is applied to the trowel and distributed over the surface.
If you want to get an unusual texture, you can use available tools and materials. The first layer is applied using a trowel, left to dry for a while, and then processed with a textured roller or improvised means.
Surface preparation
Special attention should be paid to preparation. The walls are cleaned, degreased, and dust is removed from them. The walls may need to be washed and left to dry. The priming step is mandatory. This not only increases the adhesion of the materials, but also reduces their absorption.
Attention! For an unheated balcony, it is best to choose a primer with special properties. Mixtures with fungicides and antiseptics are suitable.
The preparation stage may also involve leveling; for this, starting plaster is used. It has particles with large fractions. Then another layer of primer is formed. After it has dried, you can begin plastering.
Application of decorative plaster
Application techniques may vary. If desired, you can create a travertine effect. At the first stage, the composition is distributed over the surface into the thickness of the particle fraction. As soon as the first layer has dried, you can begin to apply the material in strokes, covering individual areas. This allows you to form a characteristic pattern over the entire area.
Finishing
The final step may be staining. Work can be done in one or two colors, as well as using the dry brush technique. To lighten, you can remove part of the paint layer or give the surface the effect of Venetian plaster. In the latter case, you will have to give the wall an imitation of natural stone, for example:
- malachite;
- granite;
- marble.
The technology involves the use of a glazing composition. First, the plaster is painted one color using a long-nap roller. The second color should have a metallic sheen. A common one is silver, which is diluted with a universal primer and, using a small roller, passed over the tops of the texture. At the final stage, the plaster is coated with varnish.
Attention! Painting decorative plaster is no less important stage than the formation of the texture itself. You can complete the finishing decoration of the wall using special rollers and mittens, which create unique effects on textured coatings.
Finishing technology
I think I'm done with the choice of material. Now I’ll tell you how to plaster walls with your own hands.
Tools
Before starting work, I always prepare the necessary tools. Typically used in work:
- plaster trowels and trowels;
- abrasive graters for cleaning treated surfaces;
- trowels for working with plaster mortar;
- spatulas (I have a whole set of such tools, which differ from each other in shape and size);
- a drill with a long attachment, with which I prepare the plaster mixture for work;
- containers in which plaster compositions will be stored (usually plastic buckets);
- brushes and rollers for priming surfaces and subsequent painting;
- texture rollers or stamps (these are special tools with convexities, with the help of which a pattern or relief is formed on the surface of a plastered wall).
Tools for plastering walls.
I also recommend immediately coming up with some kind of device with which you will climb to the top of the wall. I always use an aluminum stepladder. If you build something yourself, make sure that this structure does not collapse (there were precedents in my practice).
Surface preparation
Having prepared all the tools, you can proceed to preparing the walls for plastering. It is from this stage, in my opinion, that the quality of the entire work depends. The scheme here is not too complicated:
- First, I dismantled all the decorative elements, shelves and cabinets on the balcony. If you are going to decorate the room from the outside as well, then you need to remove the window sills, drainage systems and brackets on which all this was attached.
- I cleaned the walls of the remnants of the old decorative finish. I still have a concrete wall that I will apply plaster to. If your material is held too tightly, there is no need to remove it. Even better, you won’t have to level the surfaces using beacons.
Removing old plaster.
- I took a hammer drill with a chisel attachment and used it to process all the cracks found. It is necessary to ensure that there are no areas of crumbling concrete around these defects. If the gaps are narrow, you can file them down with an angle grinder equipped with a concrete cutting disc.
- I filled all the cracks and cracks with the repair mixture. If this is not done, moisture may get inside, which negatively affects the integrity of reinforced concrete structures.
Be sure to seal the cracks before plastering.
- Primed the surface. I used the composition Ceresit Beton-Contact ST19. This primer is specifically designed for treating concrete surfaces. It improves the adhesive properties of surfaces and facilitates the application of leveling and decorative plasters. By the way, this composition can be used to prime chipboard and plywood too.
Before applying plaster, the walls are primed.
I treated the walls with two coats. Moreover, I applied the second one only after the first one was completely dry.
- I plastered the wall with cement plaster (in principle, you can also use gypsum, since the humidity on the balcony is not too high). I used dry construction mix from Knauf. I did not use beacons, since it was not necessary to perfectly display the vertical. And minor defects will be leveled out by the decorative composition.
The walls must be plastered with cement or gypsum mortar.
If you are going to use, for example, Venetian, it is better to first cover the walls with plasterboard (at the same time you will cover the insulation). In this case, you need to first putty the seams in the gypsum board and prime the surfaces.
- After the plaster had hardened, I took a large paint brush (called a paintbrush) and cleaned the entire surface of the walls from dust and particles of the leveling layer that were not adhered tightly.
At this point the preparation can be considered complete. Below I will tell you how to plaster a wall with decorative plaster.
Application of the composition
To decorate the walls with decorative material, I proceed according to the following scheme:
- Using a drill and a mixer, I mix the decorative plaster until the composition becomes completely homogeneous.
Mixing the plaster with a mixer.
- Then I scoop some of the mortar onto a trowel and apply it to a specific area of the wall (the exact size depends on your working style).
- Using a grater (or you can take a wide spatula), I level the decorative composition so that its layer on the base surface is 3-5 centimeters, no more.
Leveling the first layer of decorative plaster.
- As soon as the composition sets, I level it using a metal grater.
- Then I apply the top coat. To do this, it is better to use a fattier mixture containing less filler, but more binder.
- The thickness of my front layer is 2 mm. But it all depends on the type of decorative plaster you use. In some cases, the thickness of the finishing layer can be no more than half a millimeter.
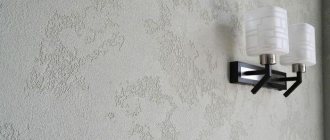
Formation of surface texture.
We recommend: Nuances and features of sealing drywall joints
After this, you can begin to form the relief, for which some types of decorative plasters are famous. I had plaster with a mineral filler and I made the relief quite simply - I smoothed the plaster applied to the surface with a plastic trowel. And the quartz granules themselves formed grooves and furrows.
The photo shows texturing plaster with a washcloth.
However, it is not a fact that you will prefer the same plaster as I do. Therefore, I have prepared a small table to help you when forming the surface texture.
| Texture | Processing method |
| Bark beetle | You need to place a flat grater on the pre-leveled decorative plaster, then rub the surface with longitudinal movements (or circular, depending on your desire). The granules included in the decorative material will independently make grooves and form the desired pattern. |
| Venetian | On the base layer you need to apply separate and very small strokes, which are then stretched with a spatula in different directions. The result will be some kind of transparent layers, thanks to which the plastered wall will acquire a depth specific to this type of finish. |
| Textured coating | In this case, the texture of decorative plaster is given with the help of certain devices. In my practice, I used brushes, spatulas with jagged edges, foam sponges, and so on. It all depends on the designer’s idea. |
| Folded covering | To form such a surface, I use plastic film. You need to cover the wall with it, and do it in such a way that the polyethylene forms a large number of folds. After the decorative composition has hardened, the polyethylene is removed. The result is a relief that no one can replicate. Even if he also uses the same method. |
| Textured finish | It is formed using stamps or rollers made of polyurethane or rubber. By running them over a still damp surface, you can make symmetrical or repeating patterns. By the way, this is one of the fastest finishing methods. |
One of the ways to texture a surface.
However, the work does not end with this stage. Still ahead is painting and drying the plastered walls on the balcony. But more on this in the next section.
Final operations
I begin this stage of work after the treated surface has partially hardened.
To give the surface the desired color, I painted the walls. Although this can be done even if the decorative composition contains pigments. But then the purpose of painting is to give the surfaces a specific shine.
The finishing itself is carried out according to the following scheme:
- I first sprayed on the base color (although you could also use a brush or roller). Here it is important to cover the wall so that the coloring composition gets into all the recesses, but is not applied in too thick a layer and does not drip.
Painting the plaster with a base color.
- Then I did what is called a wash. I took a darker color of paint onto my brush and painted it over the entire area of the walls. It turns out that the paint flows into the recesses of the plaster, thus forming peculiar “shadows”.
- Once both paints were dry, I glazed. To do this, I used a roller to paint the wall with translucent paint of a light (relative to the main) shade. You can also use a pigment with a pearlescent or metallic sheen.
Plastered wall after glazing.
- Then all this must be left to allow the plaster to dry completely. During this process, I advise you to ensure that the surfaces are not exposed to external mechanical influences, that there is no draft on the balcony, and that the temperature is at the same level. Otherwise the finish may crack.
Consequences of improper drying of plaster.
- After drying, I treated the plastered walls on the balcony with varnish. You can also use wax, but it must be thoroughly rubbed into the surface. But not all decorative compositions can withstand such exposure.
Varnishing composition for plaster.
Caring for decorative plaster
No special devices are required for this. The wall surface can be washed periodically with water with or without soap. You can even use dishwashing detergent or laundry detergent.
If the surface is damaged during operation, then a smooth plaster layer will be easier to restore. If there is a defect in wet silk, it is enough to apply a new decorative layer, but repairing Venetian plaster will be problematic. If the wall has simply lost its shine, you can apply a new layer of wax and polish the base. Whereas, if you want to change the shade or pattern, you will have to completely dismantle the coating and apply a new one.
In general, wax - artificial or beeswax - can give the surface waterproofing properties and protect it from damage, dirt and dust. If you treat Venetian plaster with this composition, it will begin to shine in a new way. The mixture should be applied in two approaches, armed with a sponge or paint brush. A spatula is also perfect for this purpose. Once the layer has set, it is polished with a soft cloth. You can care for such a surface using the same water or soap solution. But it is better to avoid using solvents.
If, after creating the decorative layer, there is a desire to give the shade more expressiveness, you should purchase a glaze composition. It has no color, is transparent and additionally emphasizes the contour and volumes. Distribution is carried out with the same devices: sponge, rubber spatula, brush. Such a surface can be cared for using detergents and water in which soap or dishwashing detergent is dissolved.
Rules of care
Using decorative plaster for interior decoration, moisture-resistant coatings are created that can be washed with a soft brush or sponge. For washing, use warm water with standard detergents. But harsh abrasives or solvents are prohibited.
If we are talking about preventive care that does not allow heavy contamination, then wet wipes will be quite enough.
Decorative plaster on the balcony is a great way to decorate a room with a non-standard texture. All you need to do is choose the right material and texture. The application process itself is simple even for a beginner.
Application of decorative plaster video
We bring to your attention a video on the topic of our article “Do-it-yourself finishing of balconies and loggias with decorative plaster.” You will see the entire sequence of actions to create a structure on the wall.
Decorative plaster in the interior photo
In this section you can see photographs on the topic of our article. All photos are clickable.