Is it possible to paint decorative plaster?
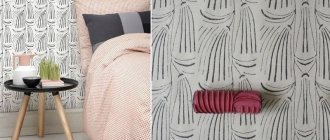
Decorative building mixture is divided into two main types - smooth (Venetian, Moroccan plaster) and textured coatings (bark beetle, lambskin, fur coat). In the latter case, a volumetric surface is formed. Most manufacturers supply markets with plasters that already have a color tint. However, if you need to create your own color palette, you need to buy mixtures that do not contain additives and tint them in the desired range.
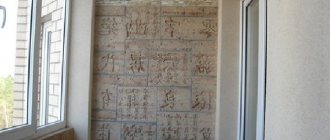
Decorative plaster after application is a matte, plain white surface
Venetian plaster, like Moroccan plaster, does not require painting. Color is usually acquired at the production stage of the material. Painting textured plaster is already a mandatory event. Even novice finishers can cover a surface in one tone, but more complex tasks require the appropriate skills and abilities. In addition to paint, the decorative coating can be treated with varnish or wax.
The process of painting decorative plaster is fascinating in itself, and if you use your imagination, you can create entire pictures or compositions. A special harmony is formed when combined with various finishing options:
- brickwork;
- PVC wall panels;
- wallpaper;
- glass.
The plaster mixture is colored immediately before use by adding coloring pigments to the solution. The right choice of what to paint the walls with has a positive effect on the properties of the paint and varnish material. The paint lies evenly on the plastered surface, does not come off, adheres firmly, and retains its appearance for a long time. In addition, the risk of fading is minimized.
Painting decorative plaster by introducing colors of various shades will help to revive the interior.
What are the difficulties?
Unlike applying plaster, painting bark beetle in two colors has some difficulties.
The decorative coating has a two-layer texture. When leveling occurs, solid inclusions and granules in the mixture move throughout the thickness of the applied solution. This leaves traces. It's like a bark beetle moving chaotically around a tree.
The furrows vary in shape, size, and depth. Although the depth is more understandable. Depends on what diameter granules were used. They are the main source of problems.
- If you use a roller with a small pile, trying to save on paint, the recesses will not be partially or completely painted. It's not just a matter of appearance. Without a protective layer, plaster becomes less resistant to external factors;
- If you take a long-haired roller and saturate it well with paint, all the furrows will be painted. But it takes a long time to dry. As a result, some of the paint flows out and moves down along the grooves. In order not to spoil the appearance of the coating, you will have to remove all smudges using dry brushes and rollers. And this is time, nerves and your strength.
Is it possible to solve such a problem? Yes. And there is more than one way.
Paint for decorative plaster
Painting compounds are made on different bases and can be used inside and outside buildings. Material for external use must protect the plaster layer from external influences. These are precipitation, gusts of wind, temperature fluctuations, and solar ultraviolet radiation. The optimal choice for facade parts of buildings is acrylic, silicone, silicate paints. They have a rich color palette, and the walls are endowed with the ability to breathe. Often the composition for the facade is sold in white, which allows you to give the desired shade.
These options are best suited for painting indoor walls:
- Water-based paints create a matte finish on the surface, and therefore this option is not suitable for gloss lovers. The paint must be applied in two layers, no less.
- Latex compounds are affordable, but do not last long. The material also does not tolerate temperature changes well.
- Acrylic materials are a good solution for those residents who live in the northern regions. The surface withstands low temperatures. The compositions are divided into subtypes - special, glossy, glyphthalic. The latter are increasingly used due to acrylic resins, which improve the quality of the paintwork.
Attention!
Paint based on water-based dispersion, as well as latex, prevents the development of fungus and other pathogens.
The choice of coloring composition depends on the place of its use
Tinting
It is better to select suitable dyes at a hardware store. Specialized software usually helps consultants find beautiful color combinations.
To obtain the desired color, during the process itself, one or more dyes are added to the paint in the required quantity. It is better to use a construction mixer for mixing. It is worth considering that when the paint dries, it becomes lighter. Therefore, it is important to check the color shade of the composition by doing a test painting of a small area. For this reason, you should add a little more color in advance.
Several pigments are often used for tinting.
How to calculate consumption
Before deciding what paint to coat the decorative plaster with, you need to calculate the material consumption. To do this, the first step is to calculate the area of all surfaces that need to be processed. The result is summed up. Next, the area of window and door openings is subtracted. The required data is obtained, which must be multiplied by the average material consumption (information is indicated on the label) and the number of layers.
It is worth considering that each type of coating has its own indicators:
- 1 liter of water-based paint – enough for 8 m2;
- 1 liter of oil composition – can cover from 8 to 18 m2;
- 1 liter of acrylic material – from 10 to 20 m2.
However, the consumption is indicated in relation to smooth coatings. A textured surface will require more paint. Using a spray gun allows you to reduce paint consumption. When calculating, you should also take into account a number of nuances:
- The thickness of the paint plays an important role. If the mixture is too thick, it is better to dilute it with a special solution.
- It is advisable not to ignore the priming steps, otherwise the consumption will increase by about 10%.
- Using a paint brush also increases material consumption by up to 5%.
Usually hard-to-reach places are painted and only then the rest of the area. If you reverse this order, the losses will average from 1% to 2%.
Accurate planning of materials costs becomes an obligatory stage in finishing work.
Various color options
When painting bark beetles, you can use monocolor or combined options, that is, tinting in two colors.
The first option is the initial tinting of the mixture
There are several ways to paint bark beetles, and each of them will be optimal for a specific situation. At the same time, it is important to maintain the technology at each stage of coloring in order to obtain the expected effect.
Applying plaster with color already added to the mixture
If you do not have much experience, and you are thinking about how to paint bark beetles, you can choose the simplest option - this is the initial tinting of the mixture. The color is added to the finishing mixture, so after applying the plaster the wall looks already painted. You can leave the façade in this form, or you can make the resulting color scheme the basis for subsequent painting.
The color is added at the stage of mixing the decorative textured composition. In this case, it is worth preparing the entire volume of the mixture at once, since it will not be possible to achieve the same shade in the future. After applying the composition to the surface, you must leave it alone for at least two days.
The second option is double coloring
Double painting involves applying paintwork in 2 layers, which allows you to paint both the recesses and the convex part of the surface. The first layer is applied in a thick layer, which allows the paintwork to penetrate into all the recesses, so that there is not too much paint, non-periodically we blot the wall with a sponge. After this, you need to leave the wall to dry the surface.
The bark beetle is painted in two layers to obtain a rich color.
The second layer allows you to paint exactly the convex part of the structure, so the process is carried out using a short-pile roller.
The third option is to use a primer
To paint the bark beetle, you can use not only paint, but also pigment along with a primer - in this case, the coloring composition is applied in several layers, which allows you to paint all the pores, as well as the convex parts. The color is less vibrant than with double dyeing, but still attractive.
Painting tools
Depending on the coloring technique, one or another set of tools is used. In most cases, you will need brushes of various sizes and shapes (flatted, brushed, long-haired). You also need rollers (the fur coat is selected depending on the type and depth of the relief). In addition, these tools may be useful:
- Spray gun - for treating large areas.
- Painting tape - to limit the area to be painted and protect adjacent areas from paint.
- Trays – for paints and other used compositions.
- Mixer – it’s more convenient to stir the paint when tinting.
- Foam sponges.
- Rags.
If the work is carried out indoors, a stepladder will be useful. To process the facade, it is worth preparing scaffolding. The implementation of more complex ideas requires the presence of stencils, as well as gauze.
The chosen tool also depends on the chosen technique for applying the paint layer.
Advice from experts and specialists
Experts recommend adhering to the following tips:
- Decorative plaster can be tinted in several ways. The result will depend on the option. You can work with a dry brush: this method is the simplest. To wash out the color, this method is difficult to implement and requires a large investment of physical effort and resources.
- If the designer’s plan involves a combination of textured and smooth areas on the wall, experts first recommend painting the textured parts. Elements with a smooth finish are painted after the paint has dried.
- If there is no information about the components of the plaster used, you can make several test strokes on a small area of the wall and then compare the results. Colors for gypsum plasters are used based on alkyd and oil solutions (enamel painting). There are also acrylic, latex, and water-based PVA-based colors.
ImportantEach type has its own set of characteristics that allow the use of a painted coating in specific microclimate conditions and room operation. You can read about the nuances of use on the product label.
- The texture of this decorative plaster is two-layer: when leveled, solid mineral granules move through the mortar, leaving behind traces reminiscent of the chaotic passages of a bark beetle. These grooves have different shapes, change direction, and their depth is determined by the diameter of the granules.
Tinting decorative plaster is one of the stages of work to create an interesting interior decoration. Depending on the type of surface, different shades are used. Their choice depends on the material and its ability to transform the applied paint into the required color.
Preparing the surface for painting
The preparatory stage should never be neglected! Otherwise, the durability of the coating is reduced, and the paint will not stay on the plaster for a long time. The treated surfaces are cleaned of dust and pellets that remain after plastering work. To do this, use a damp sponge or vacuum cleaner. Then the walls must be covered with a primer, which has a basis:
- the level of adhesion between plaster and paint improves;
- small cracks are filled;
- The spreading of the plaster is prevented.
Since the work uses a paint composition, it is necessary to take measures to protect the floor, as well as nearby areas, including trim, window sills, and the ceiling, from paint drops and accidental strokes. The demarcation is made with masking tape. A film is spread on the floor.
Before applying paint compositions, the surface should be prepared
How to paint decorative plaster with your own hands
After choosing the paint, the main and important stage of painting the plaster layer begins. There are no particular difficulties here, but you need to stick to technology. For the most part, this applies to beginners, since professional finishers know about all the features. There are several effective methods for coating a textured surface with paint:
- painting the walls in one color shade;
- two-color design;
- dry brush technique;
- wash method;
- highlighting areas by removing paint;
- imitation of a Venetian.
Each of the presented techniques has its own characteristics. All methods of applying paint are easy to implement.
Painting decorative plaster is a responsible, but not complicated process.
One color
Painting the surface in one tone is the easiest technique to implement. The paint is applied in strips up to 60 mm wide in one pass. You need to make vertical strokes with a brush, roller or spray gun. When using a roller, each subsequent vertical rolling should overlap the previous strip within 3-6 cm. All excess and smudges are shaded with horizontal movements of the tool. Using a similar technique, the entire surface of the wall is painted.
In two colors
Two-color tactics are used in cases where it is necessary to darken or, on the contrary, lighten depressions (relief zones). This is a suitable solution for coverings with protruding elements. In this technique, it is recommended to use mother-of-pearl as an addition to the main tone.
Experienced finishers paint decorative plaster in two colors in different ways:
- If the surface is smooth, it is torn with the main color. In this case, it is better to use a wide brush or spray gun. When the paint has dried, another layer is applied using a textured roller.
- To emphasize the protruding parts, the wall is painted in the basic color scheme. The second color is applied to the bumps with a sponge or narrow brush.
- For the third method, the depressions are painted first with the first color. If the grooves in the coating are deep, it is better to use a roller with long pile. With this tool you need to process the entire surface, avoiding unpainted areas. After 2 hours, a second color shade is applied with a sponge or using a foam roller.
Attention!
The two-color technique can be implemented in another way. Initially, add the color to the primer mixture, and at the next stage the protruding parts are painted over.
One color
In two colors
Dry brush technique
To visually increase the depth of textured plaster, the “dry brush” painting technique is suitable. As a result, the recesses acquire a dark tone, and the protrusions become a lighter shade.
To begin with, the white paint is tinted to the desired color. This should result in a bright shade. It is advisable to apply the prepared mixture using a long-nap roller. Allow the surface to dry completely.
Prepare the composition for the second tone - the color is the same, but a smaller amount of dye is added. The color should be slightly lighter than the first “layer”. Now painting should be done with a short-nap roller or brush. Cultivate hills only. To prevent paint from getting into the recesses, you should apply a minimum amount of paint to the tool.
If a brush is used to apply the second layer, it must first be wiped with paper or cloth. This will remove excess paint. At this stage, you can add metallic or pearlescent powder.
The dry brush technique is used to enhance texture.
Blur method
The technique of highlighting by washing is relevant for plaster textured coatings. Suitable mainly for interior surfaces. In this case, a roller is used, which needs to be passed over the surface, soaked in water-based paint. When the composition dries a little, the protruding parts are rubbed with a sponge. As a result, in the recesses the color remains intact, while areas with reliefs become lighter.
To implement this method, it is advisable to use different paints and varnishes.
Removing paint for highlighting
The method is only suitable for relief coatings. The whole point comes down to highlighting the depressions. To begin with, using long-haired rollers or a brush, the entire wall is covered with a paint composition. When the first layer has dried, apply the second layer of paint in the same way. However, the tone should be darker and gaps should be avoided.
There is no point in waiting for the second coating to dry; you can start removing the paint on the protruding parts of the surface with a rag or sponge. In this case, the mass is not completely removed - a partially light shade will remain on the bulges, and a dark color will remain in the depressions. In this case, the convex parts of the plaster are lightened.
To save time and effort, you can go a different route. Paint the plaster also in one color, but limit it to one pass. Wait a day or two, then go over all protruding parts of the surface with a grinding machine or sandpaper. As a result, a worn effect is created, which allows the surface to age.
The dried surface, painted in one go, is sanded using sandpaper.
Venetian plaster effect
Imitation of natural stone (malachite, granite and other varieties) requires the preparation of a flat surface. The walls need not only leveling, but also covering with a high-quality primer. Only this measure makes it possible to strengthen the top plaster layer and at the same time increase the quality of adhesion of paint to plaster.
Typically, stone chips are used to create the desired texture. But due to the high cost of the material, it is replaced by a gypsum building mixture with the addition of the desired color. The dyeing technology includes several stages:
- First, the surface is prepared for work. This includes cleaning surfaces and removing minor defects.
- Using a long-nap roller, apply the base coat. Hard-to-reach places are treated with a narrow brush. Wait for the coating to dry.
- A second decorative layer (bronze or gilding) is applied. To give a silver tint, aluminum powder is often used (it is inexpensive). You can apply the paint either with a short-haired brush or with a foam roller. The pressure applied by the tool should be light. If the technique has been followed, the first layer will be visible under the second.
- Consolidation stage. The surface is coated with water-based varnish. Since this substance forms a crust, the composition must be diluted with water in an amount of up to 20-30% of the total volume. It is advisable to apply the varnish using a foam roller.
There is another way - creating marble using water-based paint. Suitable for smooth and textured finishes. You need to add gray dye to the white paint. After which the material is applied to the surface using a roller. The “dry brush” technique is acceptable for use. In this case, part of the wall should remain completely or partially unpainted.
For the second layer, slightly less coloring pigment is added to the paint. The composition is applied with a different tool. Now you can enter both unpainted areas and those places where there is already paint of a darker shade. It is permissible to begin work without waiting for the base layer to dry.
After two or three days, using a thin brush, the veins that are characteristic of marble are drawn. Finally, the surface is made matte when you want to create the effect of unpolished stone. Or acrylic varnish is applied on top.
Imitating a Venetian with the help of coloring compounds requires the preparation of a flat wall
Where can it be used?
On gypsum mixture
Dry gypsum-based building mixtures must be tinted during mixing. After drying, they lose a little of their original color and become less saturated. The color saturation of the liquid solution should be at least a couple of tones darker than desired. The disadvantage of tinting on gypsum plaster is poor mixing of the color with the gypsum composition.
If the drying temperature is not observed, the topcoat may appear unevenly distributed over the surface. Tinting does not play a role in the adhesion of gypsum plaster to a wall. It can be added in any reasonable quantities without fear of poor quality or color of the result.
You can take the standard color - red-brown. The color can be immediately added to the plaster mixture during mixing . But such a solution must be ready for the entire wall at once, otherwise the shades may differ greatly.
The seams are painted with a thin brush after finishing the main work with a thick tool. It is better to apply two layers of paint of different colors. The second - immediately after the first, after waiting no more than two minutes.
Attention
After complete drying, the plastered surface is coated with acrylic, latex, alkyd or water-based composition. If you want to achieve a unique shade, you need to experiment first so that the combination lives up to your expectations.
On polymer
Coloring paste can be added to any white plaster mixtures. Polymer ones are completely ready for finishing. They can be coated with silicone, latex or acrylic mixture on different bases. Just before application, you need to mix the color with the decorative plaster, then apply the finished product in several layers.
Polymer compositions are suitable for painting the finishing layer. They spread perfectly and lie flat on the surface without the use of tools.
To achieve the desired effect or ornament on a more complex composition, you need to put in a lot of effort and use several objects (for example, a roller or sandpaper to smooth out sharp corners). But if the layer lies on a flat surface, then there are no problems.
The advantages of polymer mixtures with color are resistance to:
- sunlight;
- temperature changes;
- moisture ingress;
- minor mechanical damage;
- wear and tear
Important
Polymer mixtures easily tolerate sudden temperature changes. Positive temperatures are practically not scary for them; negative temperatures can cause changes in the internal layers that are not visible on the surface.
On the cement
Tinting a cement-sand mixture involves adding dry pigments (powder) to the composition. Chromium or iron oxides can be added. Such compositions are used in the production of paving slabs, curbs, and other concrete structures.
Cement plaster is used in a natural gray color for rough leveling of walls. It can also be colored with pigments, given a bright color or matte finish. An example would be decorating such a base mixture to imitate stone.
Tinted decorative plasters for cement coatings should be used only for interior decoration. Ready-made mixtures can be sold already painted and ready for application, or you can make such mixtures yourself.
Cement-based plaster under stone with tinting is easy to make. Stages:
- The basis. Leveled walls must be prepared for applying the base. They need to be dried well and placed in an even layer no more than 3 mm thick. The future decor from the tinted mixture will be perfectly highlighted under the first layer of this thickness and prepared for the final application of the topcoat.
- Texture. The second layer is applied in the same color as the first. Place a small amount of mortar on the trowel with a spatula and trim with light movements. Use the tool to make quick, smooth pushes so that small spots of plaster remain on the wall. You can try to trim the entire surface, but you need to have time to apply the final layer before the paint dries completely.
- Smoothing. The tops of the relief should be smoothed well with a trowel or a medium-sized spatula. Align in different directions so that the tool is pressed tightly against the wall, while leveling the fresh mortar. The result is wide, smooth spots of even diameters. Small islands with a rough surface will form between them. The texture of the stone becomes visible.
- Glazing. After the finish dries (5 minutes after completion of the work), the material begins to set. At this time the next layer is applied. After drying, the plaster is leveled with a trowel. The coating becomes dense and leveled. Then you can start glossing.
- Tint effect. Using a fine-nap roller, apply paint tinted in a lighter shade in one layer so as to cover only the smooth tops. The roughness should not lose its original color. Then they do the glossing again.
- Polishing. After complete drying, the wall is covered with gloss. The decorative plaster is treated with a roller and a soft sponge. At this stage, you can already add glitter to the solution, and use a brush to smear the areas with a matte effect to give them a slight shimmer.
Advice
After 20–25 minutes, the applied wax is polished. To do this, wipe the entire surface with a soft cloth until a gloss is formed.
How to repaint decorative plaster a different color
Sometimes, for various reasons, it becomes necessary to change the color of the decorative coating when the paint has already been applied. In this case, to repaint the wall, you will not need to clean it of the previous shade. All that remains is to coat the surface with a white acrylic primer. The texture is not lost. You can start painting after the material has dried. In other cases, it is not necessary to use a primer. For example, to lighten Venetian plaster, 1 layer of pearlescent glaze is enough.
If you need to remove the old coating, it is moistened with warm water and left wet for 1.5-2 hours. To reduce waiting time, you can use a steam generator. Next, the old layer is removed with an abrasive material, and before further processing, allow the surface to dry thoroughly.
To cover the existing color of the finish, it is necessary to apply primer to the walls.
What else do you need to know
There are a number of recommendations that provide the most correct preparation and simplify the work itself. So:
- To get a surface that will be distinguished by its individuality, but reduce labor costs, do the following: initially add the desired color to the mixture, which echoes the color of the paint.
- When choosing a material in a store, pay attention to the manufacturer and the availability of the necessary certificates. It should be understood that the market is flooded with fakes. After applying them to the wall, many problems appear. Sometimes it comes to the point where you have to completely remove the textured layer.
- You need to wait for the plaster to dry completely. It often happens that you want to finish work faster. The result of such haste is stains, swollen and destroyed areas.
By following technology, you can achieve an amazing effect.
For greater convenience, use the following tools:
- A roller with medium pile (short - it produces an excellent effect, but you need experience).
- Set of brushes: wide and small.
- A sponge, or better yet a mitten.
On a note! A roller with a long pile covers the wall perfectly, making it possible to treat large areas at once. But a lot of compound accumulates in the recesses, it takes a very long time and dries poorly, cracks and swelling appear.
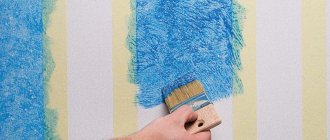
Painting plaster with a roller
Wax
One of the final stages of processing the plaster layer is coating the surface with wax. Such compositions are available in several types:
- Synthetic - the material has water-repellent properties and is resistant to temperature fluctuations. This wax is easy to apply with any tool.
- Gel-like - mainly rubber spatulas are used to apply these compounds.
- Liquid - such compositions are suitable for application to almost any surface, but it is better to use fabric.
The use of these products allows you to enhance the brightness of the colors, add gloss, and change the color shade of the Moroccan or Venetian coating. To obtain an original effect, glitter or a coloring pigment of the desired color is added to the wall wax. However, the mixture must be constantly stirred to maintain uniformity. 3-4 hours after covering the surface with wax, the layer can be adjusted.
To ensure that the plaster retains its properties longer, a protective layer of wax is applied to it.
Additional compositions for processing decorative plaster
You can make the appearance of plaster more impressive and create an additional protective layer using wax, varnish and various glazes.
Wax creates a protective, waterproof coating that gives the surface a shine and bright color. Suitable for any type of plaster, looks especially impressive on Venetian. Both transparent and colored formulations are available for sale. Before application, dust must be thoroughly removed from the base. Plaster coating is done in one go without stopping. The setting time of the wax is about 4 hours; during this period, the resulting flaws can still be corrected.
Varnish is a single-layer finishing coat. Creates a durable water-repellent film on the surface that strengthens the plaster, protects it from damage and, most importantly, makes the appearance of the finish more attractive. Acrylic varnishes are used for indoor work, and organic solvents for outdoor work.
Before work, mix the composition thoroughly, add glitter or coloring pigment if necessary. The coating is done in one layer using a foam roller. Approximate consumption – 50-80 g/m².
Glaze is a glazing translucent composition for the final coating of paint, allowing for smooth color transitions. It is used for application on flat and textured surfaces both indoors and outdoors. Work can be carried out at temperatures below +10°C. The coating is applied with a sponge or a special mitten using strokes.
Recommended Posts
Composition of mixtures for plastering walls
Do-it-yourself brick wall plaster
Plastering walls under wallpaper
Decorative plaster mosaic
Aligning walls with beacons
Decorative plaster: master class on application
Glaze
The glazing composition or glaze can be applied to a smooth or embossed surface. Suitable for painting walls inside and outside buildings. However, the use of glaze is fraught with a number of disadvantages:
- Firstly, shading of the joints is required as soon as the composition is applied.
- Secondly, to cover the surface with the material you need to make small strokes. And this takes a lot of time.
- Thirdly, the temperature when working with glaze should not fall below +10 °C.
Attention!
The glazing composition is applied with a special mitten or sponge. In addition, if you feel dizzy or suffocated, you need to take care of respiratory protection. Therefore, in some cases it is better to find a replacement or another alternative.
The glaze composition for decorative plaster is applied in the thinnest layer
In the interior
Rough bark beetle plaster is not suitable for every style.
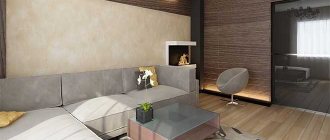
Decorative plaster works well in loft-style interiors, which are gaining popularity. The more the room resembles a factory premises, the better. The “bark beetle” with its grooves highlights such an interior well.
"Bark beetle" in loft style
The minimalist style also goes well with bark beetle plaster. Calm, pastel colors are ideal for decorating a bedroom. To create an unusual interior, there is no need to plaster the entire room; it is enough to treat one wall. You can arrange the lighting in such a way that the wall sparkles and looks advantageous.
Decorative plaster in a minimalist style in the bedroom
Interestingly, this material will look in a rustic or chalet style. Wood, stones, and decorative plaster are very useful in such an interior. If you have a fireplace, you can treat the wall behind it with bark beetle. Cozy lighting will highlight the relief structure, and the flame will cast fancy shadows on the wall.
"Bark beetle" in the living room with a fireplace
For practicality, you can apply bark beetle plaster in the hallway or corridor. Thanks to its durable characteristics, the bark beetle will last a long time in a small room and will withstand abrasion and repeated touches. After a few years, it is enough to paint the surface to update the interior.
Exquisite corridor with decorative plaster
Varnish
You can strengthen the plaster and complete the finishing using varnish. The surface becomes semi-matte or acquires a mirror shine. To treat rooms in an apartment, it is better to choose acrylic water-soluble compounds. Varnishes based on organic solvents are more suitable for façade parts of buildings. As a result, a coating is created that protects the plaster not only from mechanical damage, but also from moisture, including precipitation.
Immediately before use, glitter or dyes can be added to the varnish. Varnish compositions are usually applied using a brush, sponge, or foam roller to create a single-layer coating.
In order to protect decorative plaster, experts advise using varnish
Advantages and disadvantages of painting for bark beetles
Painting of decorative bark beetle plaster is carried out taking into account the peculiarities of tinting the porous structure of the treated surfaces.
The dense layer needs to be updated by painting to solve the following problems:
- interior renovation without major renovation;
- increasing the protective characteristics of the plaster layer from high humidity;
- visual expansion of the room (using two-color processing or using triple tinting);
- increased resistance to mechanical damage;
- enhancing the operational characteristics of the layer.
The list of shortcomings that are taken into account before painting a bark beetle includes;
- the complexity of multi-layer tinting due to the textured structure of the base;
- the need to use a set of tools and several application techniques;
- reduced aesthetics when using a single color coating for a complex textured base.
Review of popular manufacturers
The modern construction market contains a rich assortment of mixtures for various purposes. As a rule, the line of one manufacturer may contain several types of paints and varnishes, including those compositions that are commonly used to paint plaster surfaces. Among all the brands, these brands especially stand out:
- Tikkurila. Finnish company specializing in the production of paints with good vapor permeability and immunity to solar ultraviolet radiation. The material is completely safe to use, but has a high cost.
- Belinka. A manufacturer from Slovenia with an impeccable reputation, which regularly introduces innovative technologies into its own production process. The automated line ensures the production of products where there are no differences in color shade in each batch. Also, the use of paint requires strict requirements for surface preparation. Failure to comply with the conditions may result in the coating peeling off the walls.
- Finncolor. This paint and varnish material has a long service life, which in no way affects its characteristics. The finished coating withstands weather conditions and fungus does not develop on the walls.
- Alpina. The paint is easy to work with and therefore it is most often used for painting decorative plaster. The treated surfaces acquire the ideal color, repel moisture and do not create obstacles for steam to escape from the inside. The development of pathogenic microorganisms is excluded.
- Dulux. This brand is known in many countries around the world and is preferred by many professional finishers. The manufacturer can offer a wide range of color palettes, which allows each buyer to choose the appropriate option for themselves.
However, the world is full of other companies, both in Russia and abroad. When choosing paint, you should carefully study the technical characteristics of the offered options. It also doesn’t hurt to visit several forums and read customer reviews. Often people share their personal experiences and can advise on a good choice.
Today there are products available for sale for different operating conditions.
Which paint to choose?
It is the last point, which relates to the advantages of decorative bark beetle plaster, that can be considered the most significant when it comes to creating an individual interior.
On a note! It should be understood that there is no special bark beetle paint designed specifically for such work. Therefore, you need to focus on available materials.
Preference should be given to the most common options.
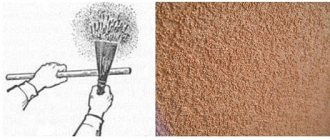
Oily
This suspension allows you to create a very bright and rich surface. But there are also numerous disadvantages. Among them are especially distinguished:
- Almost complete absence of vapor permeability.
- Fear of exposure to alkaline substances.
- Low fire resistance.
In principle, this option is considered outdated for this type of work. Therefore, it is preferable to give preference to more modern formulations.
Oil paint allows you to create a bright finish
Alkyd
An excellent composition, but it is best used for work carried out outdoors. The reason for this is simple: this mixture has a very specific smell, which can erode (indoors) for many years. But there are also advantages:
- Low price.
- Neutrality to temperature and humidity.
Alkyd paint has a specific smell
Acrylic
Many specialists who professionally paint bark beetle plaster prefer this particular suspension. She deserves this treatment for the following reasons:
- Environmentally friendly. The mixture is completely safe.
- The components included in the composition, namely acrylates, make the coating strong and very durable.
- Variety of color shades. There is a lot of scope for the manifestation of imagination.
- Vapor permeability. That is, the wall will breathe and the structure of the coating will not be disturbed.
Acrylic paint is the safest to use.
We can conclude that this material is truly the optimal solution.
Expert advice
To achieve maximum results, it does not hurt to take into account the recommendations of professional finishers. In particular, these tips may help:
- Painting must be done at a temperature not lower than +5 °C.
- Before the coating sets, you must avoid contact with the sun's rays and moisture on the treated surface.
- If acrylic or water-based paint has thickened, it is diluted with water to the desired consistency.
- Usually the color of the paint in the container is brighter than on the wall after drying. Therefore, it is worth carrying out a test painting on a small and inconspicuous area.
- to start painting plaster
from hard-to-reach areas (for example, corners). - In cases where the surface is painted with two different colors, it is advisable to mark the border with masking tape to avoid contamination of the wall.
If the dyeing technology is followed, the treated surface gets an attractive appearance. The walls not only look beautiful, but are also reliably protected from external interaction, and also serve for a long time.
With the help of decorative plaster and a palette of colors, creating a unique wall design turns into a creative process
The considered methods of applying a coloring composition to decorative plaster can be used separately, choosing the appropriate option, or combining several techniques. In the latter case, it is possible to create a new effect, which will emphasize originality. Minor deviations from technology will not cause harm, as will the use of your own imagination.
Did you learn something new? Share in the comments!
Do-it-yourself bark beetle
The work process has its own nuances, but in general, anyone can master it with a set of all the tools.
Facade surface preparation
Textured façade plaster “bark beetle” is applied only to smooth putty surfaces. In this case, height differences on the plane within 2 mm should not exceed the size of the fractions in the mixture. Before applying the bark beetle, the surface is cleaned, then primed in 2 layers. When applying covering acrylic compositions or primers with quartz, they are limited to one layer.
Preparation of the solution
There is no need to invent or experiment in this matter. If it is a dry mixture diluted with water, there must be instructions on the packaging that should be strictly followed. If this is ready-made facade plaster, then it is already ready and there is no need to add anything to it. Just stir before use.
The packaging also indicates how long the solution is suitable for use. For beginners, it’s best not to knead too much at once.
Tinting bark beetle plaster
Any bark beetle plaster (with rare exceptions) can be given the chosen shade and a colored composition can be applied to the façade. When preparing dry mixtures, the color is added to the water before mixing. Ready-made mixtures are often sold with a tint.
The first thing you need is to experimentally achieve the desired shade. Mix a small amount of the mixture with the color, apply it to the wall, create a pattern and let it dry. If the shade is suitable, you can mix a larger batch.
Advice! To plaster one plane (from corner to corner), it is advisable to make one portion of the solution to avoid visible differences in shades.
Technology for applying bark beetle plaster
The plaster is applied in horizontal or vertical stripes covering the entire width or height of the wall. After applying the whole strip, the plaster is allowed to “set”. But usually this happens during its application. That is, having finished the strip, they return to its beginning, where the mixture has already dried and begin to rub it in the chosen method to the end.
The adjacent two rows of plaster are overlapped. Beforehand, the edge of the dried layer is well sprayed with water from a spray bottle to make the transition smooth and less noticeable.
Technique for applying plaster with a spatula:
- Using a small spatula, apply the mixture onto a large one, and from it onto the wall.
- The residue is removed from the large spatula with a smaller one, placed in a bucket and mixed. This point is important: in these residues there are practically no pebbles left on the instrument and a characteristic pattern at the place where they were applied will not be created.
- Then again take a new portion of the mixture onto a large spatula and so on.
After applying the plaster to the area, use a clean trowel, which is held at an angle, to remove uneven areas - “cream”. They are thrown into the trash bin. The surplus does not contain any pebbles needed for the design.
Grout: creating a decorative pattern
The creation of a particular pattern depends only on the direction in which the grater moves:
- Rain (vertical) is done by rubbing the surface vertically, up and down.
- Non-standard rain can be diagonal or horizontal. Accordingly, grouting is done horizontally or diagonally.
- The lamb or cork is created by circular movements of the grater, alternately, then clockwise, then counterclockwise.
- Geometric grout, also known as “carpet,” is produced by alternating even vertical and horizontal (cruciform) movements of the trowel in one area.