What is the decorative roller for?
A decorative roller is a construction tool that consists of a handle, a metal bracket and a cylinder that rotates freely around an axis. The rotating element has an applied ornament or is made of a textured material (leather, natural or faux fur). Thanks to the texture of the working part, an original print is created on the base.
With the help of a decorative roller you can get an impressive wall design. The classification of devices is carried out depending on the working material, the resulting pattern and size. Experts distinguish three main sizes:
- mini – diameter no more than 15-20 centimeters, suitable for small spaces;
- midi – medium size, with a diameter of up to 250 millimeters;
- maxi - products for finishing large areas, cylinder diameter more than 250 mm.
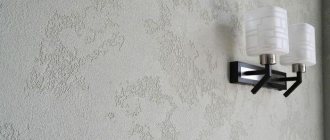
The main purpose of the device is to carry out repairs indoors and outdoors. It is used to decorate the plastered layer. Rollers also allow you to apply primer or paint evenly.
Plaster rollers differ in length, width and diameter of the working surface
Structural rollers with complex patterns
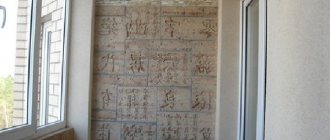
Several decades ago, children had fun in class by cutting various designs on erasers using scissors. Such a rubber band could be smeared with a ballpoint pen or pencil and applied to paper, after which imprints of the pattern would remain on it.
This principle is also used to create structural rollers based on rubber, only here the pattern must close on a cylindrical surface. Drawings can be different, everyone chooses according to their artistic abilities and taste. It is also necessary to take into account that complex patterns impose certain requirements for their application:
- surface treatment is carried out from top to bottom;
- the next pass is carried out from the previous path, without overlaps or indentations.
You can make tools for decorative plaster using silicone sealant and acrylic putty. You will need:
- thick foil (from 50 microns);
- acrylic putty;
- a crochet hook with a rounded smooth end or a similar tool;
- thin rubber;
- universal glue;
- silicone sealant;
- sealant gun.
First of all, you need to apply the selected pattern to the foil, then press it with a crochet hook or other tool. The distance between the elements of the pattern should not be less than 5 mm. Otherwise, when working with plaster, the pattern will become clogged.
Then you need to fix the embossing with acrylic putty. First, the putty is applied to the foil, then the foil from the putty side is applied to the working surface of the roller and pressed to create a rounded shape. When the putty dries a little, it is removed and left until completely dry. The resulting template is freed from the foil and glued to the working surface of the roller.
Using silicone sealant and thin rubber, creating a pattern on the instrument is even easier. First, a piece of rubber is laid out on the table and a design is applied to it. Then silicone sealant is carefully squeezed onto the drawn lines. In this case, it is undesirable to use very complex patterns. Geometric shapes, simple flowers, waves or leaves look ideal. When the silicone lines are dry, the rubber is glued to the working surface of the tool.
Advantages of decorating with decorative rollers
Decorating with the help of special devices allows you to quickly obtain high-quality and unusual ornaments over a large area.
Among the advantages are:
- high speed of stencil application;
- ease of operation;
- variety of ornaments;
- ease of cleaning and storage.
Due to the variety and availability of materials, specialists make the working element themselves or use ready-made options. The result is unique finishing options.
Decorative roller allows you to create a unique coating in a short time
Technique for tamping decorative plaster with fabric
Another unusual method for decorative plaster is tamponing with fabric. As a rule, non-fibrous, highly absorbent materials are used. The design can be applied in two ways: with a fabric cord or with flaps. The first method can create a soft, unique pattern, and the second is similar to treating the surface with a sponge. There is also some combination of a tampon and fabric in the form of special tampon rollers. Such a roller does not create any differences in surface treatment, but it is much more convenient and faster to work with. Also on sale in specialized stores you can find design rollers that form complex and beautiful designs.
To create an orange peel effect, you can use a medium-grit sponge roller. To achieve a “country” effect, a honeycomb roller is used. If you want to leave marks with a brush, it is applied over the applied plaster. In this case, the brush should be Spanish or short-haired.
Varieties by type of material of manufacture
There is a wide variety of surface decoration shirts on the market. They are made of rubber, plastic, fur, foam rubber or leather. The result obtained depends on the type of working part.
Rubber
Rubber models are the most popular. This is due to the excellent performance and variety of lines created. For production, hard or soft rubber is used, on which an ornament is applied.
Rubber roller is durable
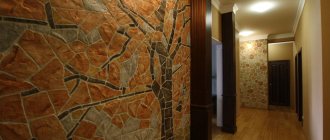
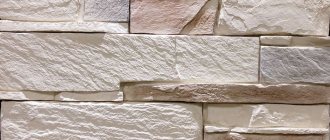
The use of rubberized shirts allows you to create a pattern with clear lines. Depending on the model, it can be an imitation of brickwork, leather, wood, or stone. More complex options include leaves and flowers, images of birds or animals.
Among the shortcomings, they note the demands on the experience of the master.
Plastic
Plastic rollers of different hardness are used to make plastic rollers. Rigid models are used to create convex shaped images. They have clear lines and require strong pressure when applied.
The soft plastic creates a light, barely noticeable impression on the base. It does not require pressure during application.
A hard plastic roller is suitable for applying curly designs.
The main disadvantages are the possibility of deformation, the tendency to crack, and rapid contamination. They need to be cleaned regularly, especially when creating raised images.
Pile
The pile working elements are based on polyacrylic, synthetic or natural fur, and polyamide. Decoration is carried out only on a freshly plastered layer. The severity of the lines depends on the length and rigidity of the pile and its shape. If the hair is short and soft, then the impression is smoothed, if it is hard and long, then it is more noticeable.
The pile base of the roller is made of polyacrylic, synthetic fur, polyamide
Foam rubber
Foam rubber is an inexpensive, accessible material. Products with foam rubber are rarely used for painting walls. They are more suitable for applying primer or decorating fine plasters.
Foam rubber allows you to create a pattern in the form of small bubbles or craters. Foam bushings with a dotted pattern are available on sale.
Work with such a device is carried out only on a fresh layer without serious pressure.
A foam roller is used for applying fine-grained plaster mixtures
Leather
The material for the working part can be artificial or natural leather. Depending on the desired result, it is made smooth or crumpled. In the first case, the texture will be light, barely pronounced. In the second, it will be well drawn. Thanks to the mobility of the folds, experienced craftsmen achieve a natural application.
Leather shirts have become widespread in the creation of Venetian or imitation marble. A distinctive feature of leather is its durability.
The surface of the leather roller may have a smooth or wrinkled surface
How to create a winter garden in your home with your own hands
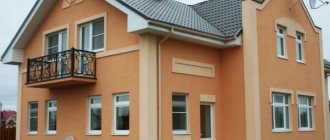
In fact, erecting a greenhouse is not an easy task. This process will require a lot of time, effort and investment from you. But these efforts are justified by the great pleasure of the work done, since the created transparent cap will help to “preserve” the summer and the greenery of the garden for an endless period.
Selecting a location
The structure should be installed from any edge of the cottage in order to save on energy and use all the physical capabilities of the greenhouse garden
The following aspects need to be paid attention to:
- The southern extension will instantly heat up in winter. If you use heat-intensive materials during installation and additionally install a heat accumulator, a suitable climate for growing will be established. True, on sunny days you will have to protect the plantings from overheating and remove fumes.
- Transparent northern gardens quickly accumulate and release heat. The presence of a powerful heating installation will enhance the thermal effect and protect the northern side of the estate from wind and drafts, but this will not be a cheap pleasure.
- The eastern side will protect the building from overheating, creating a very good environment for the growth and development of crops.
- The building erected from the west is the warmest. It will accumulate and retain heat until the evening (on frosty days). On summer days, you will have to take care of darkening surfaces and installing powerful ventilation.
Selection of materials
When choosing building materials, you should focus on the following qualities:
- Transparency should be at least 80%, but the surface should not be marked. Then it will be possible to grow not only greens, but also tropical fruits and vegetables.
- You should take care in advance about the durability of the building. Therefore, there is no need to skimp on the quality of building materials.
Typically used to build a winter garden:
- Glass. Withstands loads (snow, hail, wind), transmits up to 98% of light. The disadvantage is the relatively high cost and heat transfer (practically does not retain heat).
- Polycarbonate. Low cost, obedience, sufficient transparency (88%). Poor thermal efficiency - you will have to heat the building in winter, which will entail additional financial costs.
- PVC bags. Advantages - economy, heat preservation. The only negative is the heavy weight. You will have to spend a long time fiddling around with the installation of double-glazed windows; you will additionally need a foundation for the reliability of the structure and a powerful metal frame.
- Plexiglas. Most often used in enclosed spaces, to erect side walls. The material is very heavy, easily soiled, but easy to work with (just cut strips of the required sizes and bolt them to the metal frame).
Heating system
Almost all types of winter gardens are capable of accumulating a large amount of heat, but it will not be enough, especially during the cold period. For this reason, the most efficient heating system should be installed. Can be used:
- electric heaters (ceiling Timberk TCH A2 1100, glass Peony Thermoglass 1000 W);
- air conditioners (GC/GU-S07HRIN1, AERO ARS-18IHR7-01/ARS-18OHR7-01);
- water, steam, gas installations (gas Neoclima 09HW-B, autonomous EcoOndol, combination boiler Wirbel MAXI EKO-CKS – 250);
- heated floors (film “Zebra”, GL 500/500Р).
Their choice depends on the budget and size of the greenhouse. Provided that the air temperature inside the park will be automatically maintained at the same level around the clock.
Ventilation
Without ventilation, green spaces will not be able to grow and develop normally, so natural or mechanical ventilation must be present in the room. The fumes will quickly evaporate thanks to a powerful unit, for example, STADLER FORM Otto O-006 Dark wood. Its body is made of natural wood, processed in such a way that the device can also serve as a decorative item.
Lighting
Some shrubs and flowers need additional light, while others, on the contrary, prefer shade. Therefore, it is logical to choose artificial lighting based on fluorescent lamps and distribute it or make it directional. At 5 sq. m of territory, four 40-watt light bulbs will be enough.
Types by type of pattern applied
Decoration devices create imitation marble, brick, wood, textiles, and sand on the walls. Depending on the force of pressure and the depth of the ornament, the lines are more or less convex.
More complex patterns include waves, braids, shells, flowers, and imitation bark. In some cases, individual stencils are developed. Experts divide all types of shirts according to the type of pattern into textured and structural.
Textured
Textured products are made of hard or soft rubber on which an ornament is applied. The working part is pressed into the top layer of the solution and rolled along its entire length. The result is relief.
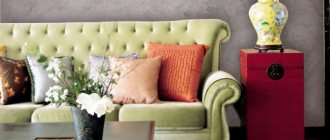
A textured roller with ornaments will add individuality and style to the interior
Depending on the print, designers get imitation fur, wood, and textiles. More complex ones include braids, waves, zigzags or individual stencils. The most popular finishing option is a fur coat. It allows you to hide small unevenness in the base and get an original decor.
Structural
The tasks of structural devices include the translation of repeating patterns that are applied to a movable head. The transfer of the image occurs only after high-quality preparation of the wall and treatment with soil. For decoration, preference is given to products made of hard rubber.
When finishing, follow the sequence of actions:
| 1.The plastered layer is allowed to dry for 15-20 minutes. After this, the stencil is passed along the wall from top to bottom. Pressure force is average. | |
| 2. The next line starts next to the previous one. The pressure is maintained the same. |
Applying patterns at intervals or overlapping can ruin the appearance of the finish.
Types of textured rollers and features of their use
Special painting tools help create textured patterns to decorate walls and facades, and give them a decorative effect.
A standard paint roller consists of a metal rod - holder, cylinder and handle. During operation, the roller cylinder with the coloring composition rotates, resulting in the surface being painted. A carved ornament is applied to the attachment of textured rollers; when the base is rotated on the wall, they leave an impression.
The division of textured rollers for decorative plaster into varieties is arbitrary; their operating principle and material of manufacture are almost the same.
- Textured. They work with such a tool after priming the surface. With the help of such rollers you can imitate fur pile, wood, textiles and natural stone (crumbs) on the wall and ceiling.
- Structural. Such rollers are used to make decorative plaster. The figured cut on the roller cylinder attachment allows you to get a rather complex and repeating pattern at the finish. Unlike textured rollers, structural rollers are used to apply patterns and designs to the prepared wall surface. For example, first the wall is painted or plastered, dried, and then decorated with a textured roller.
Materials for making decorative rollers
Different materials are used to make textured rollers for painting walls.
The simplest of them is rubber.
The rubber coating of the roller has protrusions of different shapes and sizes that can be used to create a pattern or texture. For example, you can imitate brickwork or relief with beautiful patterns.
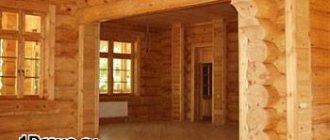
Wooden cylinder. Such texture tools are used to decorate children's rooms with images of various ornaments, since wood is environmentally friendly and does not emit toxic substances.
- Leather roller. Gives a marble effect. This roller works well for applying Venetian plaster, resulting in a smooth surface on the wall.
- Plastic. To achieve the effect of a perfectly smooth surface, you need to use such a tool on an absolutely flat surface. However, after prolonged use, plastic is prone to cracking.
- Pile (fur) can be used both natural and artificial (polyamide, polyester or polyacrylic) with different lengths of pile. The length provides the degree of roughness and depth of small patterns on the surface. This decorative plaster helps to mask uneven areas of the wall.
Classification of decorative rollers by pattern texture
These rollers are classified according to the texture of the image.
- In the first case, a roller is used to stamp various fancy, fancy and simple patterns and designs: they are connected to each other, as when sticking wallpaper. The tool is pressed with different forces to obtain a more or less pronounced textured relief. This method uses a roller with hard or soft rubber, which is rolled over the damp plastered surface of the wall. After this, it acquires a beautiful relief with different textures. Such tools with different patterns or just a rough cylinder make it possible to imitate different materials: fur and wood, textiles and stone chips, as well as bamboo fibers.
- In the second case, a textured roller with a rough or patterned nozzle gives the wall the texture of different materials: wood, brick or natural stone, and they also perform glazing to obtain spectacular blurry spots. With their help, complex patterns on plaster are repeated. The finishing coat is applied after painting or plastering the wall. Decoration begins when the surface is completely dry.
In any case, before working with a textured roller, the walls must be cleaned of dirt, the surface must be leveled and primed.
Ready-made decorative effects for textured plaster
Manufacturers of building materials supply the market with ready-made rollers with various patterns on the working part.
The most popular in the imitation market:
- stone;
- tree bark;
- plants and flowers;
- skin.
There are options with abstractions and geometry. Among the common models are:
- Rain - resembles raindrops or streams of water on a glass base.
- Frosty morning - imitation of frozen glass.
- Blots are random spots and drips.
- Diagonal - broken straight lines located at an angle.
Textured stencils with images of birds and plant elements look beautiful.
Textured rollers are used to create impressions of wood, brick and other types of surfaces
Do-it-yourself imitation of a brick wall (50 photos, video)
Decoration of premises is done in many ways. If we consider the cheapest and most accessible technologies for independent implementation, then one of the simplest and cheapest is imitation brickwork.
This design option is applicable to almost any building, regardless of the wall material. How to do this with your own hands, without the involvement of assistants, and especially specialists, we will figure out in this article.
Making your own decorative roller
All rollers are a cylinder on a roller support. The shirt has an image or texture printed on it. Therefore, the product is based on any object of suitable shape. A bushing or rolling pin works best. To create the desired texture, rubber, rope, fur and other available materials are used.
Made from thin rubber and silicone adhesive
An interesting option is made using thin rubber and silicone glue. First, prepare the necessary components.
The rubber is degreased in advance. A suitable ornament is applied to it. Geometric or wavy lines, leaves, and flowers look best. A layer of glue is applied along the given lines. The product is allowed to dry.
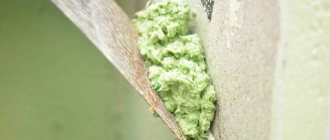
Using silicone sealant, you can create a convex pattern or imprint on the surface of the instrument
To make a textured roller, objects with a relief pattern are used. To do this, glue is applied to the rubberized sheet. Prepared objects are pressed into it in random order. After drying, they are removed.
The assembly of components completes the production. To do this, the rubber is securely glued to a rotating cylinder.
From the sleeve
Rolls from toilet paper or paper towels are an accessible and inexpensive material for making a decorating device. When choosing, you should give preference to paper that does not dissolve in water.
Prepare a handle from an old device in advance. The handle is securely connected to the cardboard cylinder. The latter is varnished for additional protection against moisture.
Toilet paper rolls are an excellent base for decorative rollers
From a rolling pin
An old rolling pin is perfect for decoration. To make a roller, a through hole is drilled inside the shaft. A thick wire or metal rod resembling a handle is inserted into it. A handle from an old tool will also work.
The decorative part is made from a cord, a plastic bag, vegetable net or other objects wound around the base.
You can make a shaped plaster roller from an old rolling pin
From a rubber roller
A rubber blank allows you to quickly make a textured model.
Any rubber roller will do. The frequency of drawing will depend on its size. To create, you will need to prepare a stencil. It is transferred to rubber and then cut along the lines. It is important that the finished texture is complete, the lines smoothly transition into each other.
A textured roller can be easily created using a knife used to cut a pattern on a rubber tool
From foam rubber
The original pattern is obtained by adding pieces of foam rubber to the cylindrical base. The features of the material leave room for creativity.
The most interesting ideas include:
- foam cord wound around the base;
- pieces cut in the form of geometric or arbitrary shapes, mounted on a cylinder;
- a thin sheet gathered into original folds and glued to the roller.
Foam roller with cutouts to create texture on the wall
Thin strips of foam rubber are suitable for braiding braids, which are wound in random order on the workpiece. Depending on the density of the weaving, the structure and clarity of the pattern will change. Such tools are suitable for decorating only freshly applied plaster.
Made from foil and putty
Foil is an indispensable material for making textured rollers. It is resistant to mechanical damage and moisture. The main manufacturing technique is embossing. Thick foil is used for the device. If you don’t have it, then a package of sour cream or other products will do:
| 1. The foil sheet is laid out on a strong, flat surface (plastic or rubber). | |
| 2. Apply a pattern with a marker. The recommended distance between decorative elements is 5 millimeters. | |
| 3. The contour is squeezed out with a sharp spatula, large areas are smoothed out with a teaspoon. | |
| 4. The back side where the work was carried out is covered with a thin layer of putty. It is important to fill all the recesses. | |
| 5. The plastered side of the sheet is applied to the roller. The drum must be completely wrapped. The foil is pressed into a cylindrical shape, then carefully removed without unrolling completely. | |
| 6. The solution is allowed to dry and only after that the workpiece is glued to the roller with glue. |
To create a chaotic pattern, the instrument is wrapped in crumpled foil.
With a rope
Clothesline or thin cord provides an unusual texture.
The master prepares 1-2 meters of rope in advance. The thread is wound onto the workpiece in a random order. The more often the winding is done, the denser the pattern turns out. Different winding options look original: longitudinal, intersection, oblique. Before using the tool, check it on a small section of the wall.
To obtain relief on the roller, a regular rope is suitable, which is used to wrap the cylindrical part
With a plastic bag
Plastic bags allow you to create folds at the base. Depending on the hardness of the material, the pattern will be more or less pronounced. Using bubble wrap will add original polka dots.
The main task when creating a tool is the correct choice of film and its reliable fastening on a cylindrical base:
| 1. Cut a rectangle of a suitable size from the film. It should be enough to wrap the cylinder with a slight overlap. | |
| 2. Polyethylene is collected into expressive folds. | |
| 3. The top and bottom edges are secured with double-sided tape. | |
| 4. Remove the protective layer from the adhesive tape. The roller is rolled over the polyethylene so that the assembly is securely glued to the roller. | |
| 5. Securely secure the edge to the handle. |
The tool is ready to use.
From a wallpaper roller
To smooth the wallpaper, use special rubberized rollers. They are quite elastic and have different sizes. For work, choose a tool up to 20 centimeters long. It allows you to create an original pattern.
On this basis, the pattern is applied with a pencil and cut out with a construction knife. Waves, geometric lines, bricks look great.
Patterns on the wallpaper roller can be cut with a knife
If desired and with sufficient care, you can create any pattern.
Made from wallpaper roller and insulation
Another interesting option based on the wallpaper tool is using pipe insulation. 4 rings 1 centimeter wide are cut out of it. The rings are glued to the cylinder. Two on the edges, 2 at equal distances from each other. Perpendicular strips are glued between the central rings. They should be on both sides of the roller opposite each other.
Technique for making decorative tools from wallpaper roller and insulation
This tool is distinguished by its simplicity and high production speed. Disadvantages include fragility and rapid wear. It is not suitable for finishing large areas.
From a paint roller with sealant
To imitate rough brickwork, a roller based on sealant is suitable. This method is simple and suitable for beginners.
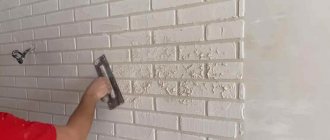
To work, you will need an old tool and white silicone sealant. The entire cylinder is coated with a layer of silicone. After it dries, a second coating is applied. At this stage you should not achieve a smooth surface. Roughness reproduces the features of the brick relief.
Making a roller from a painting tool with sealant
When the second layer has dried, the sides are applied. They are made 1 centimeter wide and 5 millimeters thick. For authenticity of the drawing, transverse partitions are added at intervals of half a turn.
From sewer plugs
If you have sewer plugs in stock, you can make a stencil that imitates masonry from small bricks. Suitable plugs with a diameter of 50 mm, a screwdriver or a drill with a 45 mm bit are suitable for the job.
Technique for making a roller from sewer plugs
The number of plugs is prepared equal to the length of the roller. Holes are drilled from the end sides, and protruding parts are trimmed with a knife. The rings are put on the roller and secured with glue. Crossbars are installed between the end parts. The pitch between the crossbars is 180 degrees.
Roller from scratch
The above describes methods for making textured rollers, which involve the use of old tools. But there is an opportunity to make it yourself from scratch. The first step is to make a base - a cylindrical part. There are several options for blanks for the base:
- Wooden rolling pin. This is the most suitable product. If the rolling pin is equipped with a handle, it must be cut down, leaving only an even cylinder. Then drill a through hole in the center into which you need to insert a metal rod or wire. You can use a handle from an old product.
Homemade tool from a wooden rolling pin
- Plastic pipe. For these purposes, you will need a pipe with a diameter of 5 cm and a length of 10 cm. After cutting the workpiece, you need to make plugs for the ends of the product; it is recommended to cut them out of plastic. Then you should glue the plugs and cut holes in them for the handle.
Next, the roller needs to be covered with foil, plastic bags, scraps of fabric, mesh, and so on. Finally, you need to thread the handle into the roller and bend it on the back side for secure fixation.
Making a textured roller from a plastic pipe and rope
Making a textured roller is a fairly simple process. This is not to say that you can save a lot of money this way, but a one-of-a-kind roller will help you create a truly original coating.
How to secure a roller
Most rollers have 3 types of fastening.
- Rigid construction. Such rollers cannot be disassembled. The roller and handle are rigidly connected. Once worn out they cannot be repaired. They are thrown out.
- With coupling. If necessary, the working part is changed.
- Frame option. The tool is reusable. Allows you to quickly change the roller by choosing the appropriate pattern or roller size.
The roller on a long handle has different types of fastening
To make a tool, a used model or a finished handle is most often used.
Textured rollers to imitate various materials
If you want to create a relief on the surface of a wall by covering it with plaster, it is necessary that there is a certain structure on the surface of the tool. To obtain protruding prints, textured rollers must have recesses that reflect the selected pattern; if, on the contrary, the pattern on the wall surface must be extruded, use a work surface with a relief pattern. In particular, if we need an imitation of brickwork, we take an ordinary smooth rubber roller, make two annular channels, dividing the working surface into three equal parts, after which we cut out transverse notches on each of them in a checkerboard pattern. We get a rectangular imprint in each row, they will be bricks.
To imitate marble, just take a roller with an attachment made of crinkled leather or fabric. In this case, during operation, movements should be made uniformly, without lifting the tool from the surface for as long as possible. Another way to get a structural roller with your own hands is to wrap a rubber nozzle with a rope of the same material, making turns in any direction. This uneven work surface can be used to represent wood fibers. It is possible that the direction of the turns will have to be corrected to obtain greater reliability of the texture. And finally, by gluing a piece of coarse fabric onto a rubber nozzle, you can get an imitation of textile upholstery. Almost any imitation can be obtained with a foam nozzle by applying the desired pattern to its surface.
How to apply decorative plaster for walls with a relief roller
Decorative plaster is the final stage of finishing a room. It is applied at air temperatures from 5 to 30 degrees. The optimal value is 20-25 degrees Celsius. It is important that during operation there are no heating devices and no direct solar radiation.
Preparing the surface for decorating with a pattern
Work begins with preparing the foundation. The subsequent result depends on the quality of the stage:
| 1. The surface is cleaned of existing particles of dust and dirt. At this stage, it is believed that there are no serious differences, unevenness or defects on the walls. | |
| 2. The base is covered with deep penetration soil. It increases the adhesion of the material. | |
| 3. For decoration, apply at least 3 base layers. If the base is flat, then their thickness does not exceed 5 millimeters for brickwork and 2-3 millimeters for concrete. In total, the layer should not exceed 15 millimeters in thickness. It is important to take breaks for the plaster to dry. | |
| 4. The finished base is additionally primed. |
After the coating has dried, sanding is not performed. A slight roughness contributes to better adhesion of decorative plaster to the walls.
Selecting a mixture for plastering work
All decorative plasters differ in composition, fraction, and additives used. For decorating with rollers, preference is given to fine-grained masses with high plasticity. The consistency of the solution should resemble thick sour cream. Among the most expensive options are Venetian and silicone plasters.
When choosing a solution, pay attention to:
- appointment;
- grain size;
- compound;
- plastic;
- moisture resistance.
Decorative plaster must have plasticity and be resistant to moisture
For facade work, only cement compositions are used. They are resistant to adverse external factors and moisture.
In addition to ready-made mixtures, the material is made independently:
- From starting and finishing putty. The ingredients are mixed in equal proportions. To add shade, color is added.
- Made from putty and sand. The finishing composition is combined with fine-grained sand. The mass of sand should not exceed 15% of the solution.
- With grout mixture for drywall.
To impart roughness and relief, components such as shell, mica, coarse sand, and ground marble are added to the composition.
Features of applying the ornament
Wall decoration begins with preparation. It lies in choosing the necessary tools.
Required:
- roller with a stencil applied;
- plastic container for solution;
- a sheet of plastic for practicing the ornament.
Tools for applying decorative plaster
When everything necessary has been prepared and the test application has been completed, proceed directly to decoration:
| 1.The roller is dipped in the solution. Its consistency should resemble medium-thick sour cream. | |
| 2. Roll the roller several times over the plate, evenly distributing the composition over the working part. | |
| 3. A pattern is applied to the selected area. Movements are made vertically, with moderate pressure. | |
| 4. When the first stripe is applied, move on to the next section so that it exactly matches the previous one. |
When the work is completed, the plaster is left to dry for 1-2 days. After this, they move on to painting the walls.
How to paint walls with a roller: the correct technology for applying paint
Choosing and purchasing a quality tool is not everything
It is equally important to figure out how to paint walls with a roller, and what rules you need to follow so that the result meets your expectations
How to paint with a roller correctly is a question that at first glance may seem strange and even inappropriate. After all, given the simplicity of the design, it may seem that it is almost impossible to make a mistake during the work process. In fact, there are several subtleties that must be taken into account in order for the final surface to be perfect.
According to experts, using a long-nap roller creates fewer streaks and splatters.
First of all, you need to pour the paint into a tray specially designed for this purpose, the size of which will allow you to freely dip a roller into it. This container has special grooves along which the roller must be rolled so that the paint is evenly distributed over the entire surface of the coat. You need to do this several times.
After this, you can start painting, however, you first need to decide on the painting scheme for the room. Usually they start from the corner of the room that is located near the window.
Another important aspect that many experts pay attention to is how to properly paint walls with a roller without leaving marks. According to professionals, to do this it is enough to adhere to the following rules:
- the pressure on the roller should not be too strong;
- when using a textured roller, the second layer of paint must be applied only when the base is completely dry;
- When painting completely, one should not allow gaps or poorly painted areas;
- every movement must be performed smoothly;
- the roller must be moved evenly from bottom to top and then back;
- Ideally, the movement should be directed slightly diagonally away from you.
In order for the drawing to be clear and even, it is necessary to control the amount of paint absorbed by the roller
How to paint a ceiling with a roller: features of work and recommendations from experts
Particular attention should be paid to the technology of painting the ceiling, since such a surface is somewhat more difficult to work with. Many people are interested in which roller to paint the ceiling with, and here it is worth paying attention to the following aspects:
- the rougher the surface of the ceiling, the longer the pile of the roller coat should be;
- to paint the ceiling, it is best to use a roller, the length of the rod is approximately 25-40 cm;
- if there is a seam on the fur coat, stripes will remain on the painted surface, which is not very good if you are trying to make the surface smooth and beautiful.
Before painting the ceiling, it is necessary to seal the corners and all protruding surfaces with masking tape.
Otherwise, you can make a choice based on standard types and sizes of paint rollers, using all the same guidelines as when choosing a tool for painting the surface of walls.
Common mistakes when applying decorative plaster with a patterned roller
In any business, especially when it comes to repairs, mistakes are possible. They often appear in novice craftsmen who do not have enough experience working with textured materials or tools.
You can avoid most problems using recommendations from experienced professionals and studying the list of common problems:
- Lack of preparation. The preparatory stage is the most important at the entire finishing stage. Dust, dirt, old coating - all this reduces the degree of adhesion of the material to the base, manifests itself in the form of unevenness on the surface of the finishing layer, or simply can ruin the result.
- No primer. After preparation, priming is a prerequisite. Deep penetration soil binds dust particles, penetrates deeply into the material, making the surface more durable and resistant to moisture. Thanks to priming, the consumption of paints and varnishes is reduced.
- Refusal of testing. When choosing plaster, it is not always clear from the sample what the final result will be, how well the material will adhere to the walls. Therefore, experts recommend testing in a small area on an inconspicuous side.
- Inappropriate tool. The choice of tool plays an important role in the plastering process. It is recommended to apply the solution and level it with a spatula. They pass along a flat area with a decorative roller. Medium length tools are suitable for the job. You should not choose a blade that is too large, trying to trim the maximum area in one go.
- Violation of application technique. This item includes working in a room that is too cold or warm, using heat devices to dry the layer, and direct sunlight on an undried surface.
- Direction of roller movement. To create a beautiful pattern, you need to think in advance about how the pattern should be applied. If it is an ornament, then it is carried out from bottom to top, moving in stripes. If the texture is arbitrary, then movement in different directions is possible.
The pattern is formed by laying a patterned path from top to bottom
Failure to clean is one of the common mistakes. The hardened solution negatively affects the quality of the working surface. It leads to cracking, chipping, and cracking. The quality and hardness of the pile changes. As a result, the appearance of the finish suffers.
Unusual options: description and photo
Unusual painting methods are becoming increasingly popular. Paint can stylishly and inexpensively transform a room and give a new look to the interior of your apartment. Several types are considered unusual: decorative, textured painting.
Decorative
Before decorative painting, the wall goes through several main stages. This is the preparation and application of the base coat of paint. Preparation includes sanding, after which the base should be smooth, without unnecessary defects. The base layer is needed for the background and hiding possible defects.
There are several ways to decorate surfaces.
Stardust effect
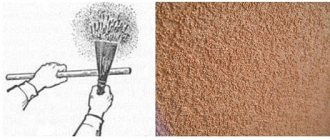
This is a very simple technique: specks of paint of a different color are applied to a dry surface. To do this, use a brush with coarse bristles. The tool is dipped into the paint and carefully squeezed out. Then the master “sprays” specks with a brush.
Contrast staining
The wall is divided into smooth or uneven sections. They are painted in different combined colors. To use this method, you need to think through every detail. An approximate finishing scheme is first drawn on a piece of paper. The result is original: rhombuses, squares, ribbons and other shapes are possible in the interior.
Textured material
Painting with a textured material provides the apartment with an unusual and elegant look. For textured painting you will need: a special roller (can be purchased at a hardware store), paint, and other materials.
Advice Using textured painting you can create different shapes. They are applied by hand, brush or comb. The effect of textured painting is also achieved by moving an ordinary construction brush over wet paint. Shapes on the surface can be made with any object: sponge, paper.
There is such a known method as textured coloring using paper. To do this, paper, previously formed into an unusual shape, is pinned to the roller. The master moves the resulting tool across the paint. This causes amazing shapes to appear on the layer.
Roller with stencils
Stencils are one of the easiest ways to decorate surfaces. You can make them yourself or purchase them at any building materials store. The buyer will find a large selection of designs. There are 3 types of stencils:
- simple;
- complex;
- anti-stencils.
The style of the templates is varied - from antique themes to animalistic ones. Stencils are divided for certain types of premises:
- room;
- bedroom;
- kitchen;
- bathroom.
Any paint is suitable for applying drawings or figures. Acrylic is most often used, as it is easy to apply and dries quickly. If a certain shade is required, the desired colors are mixed. Acrylic paint is easy to wash off if a mistake is made while working.
The work uses a roller, sponge or balloon. It is not advisable to use a brush. A roller is better: it will evenly distribute the paint over the surface. What to do and how to paint:
- Make sure the wall is ready for painting.
- Attach the stencil to the wall with tape or glue. The pattern should fit tightly and evenly to the surface.
- Dip the roller in paint and move it over the design. The paint is applied with neat, gentle movements.
- The stencil is removed only when the paint is completely dry.
If unevenness occurs during work, you can correct it with a thin artistic brush.
Attention: Stencils can be used along the entire length of the wall and replace wallpaper. Such decoration can be done by an ordinary person without special education, and the financial expenses with this method will be insignificant.
Caring for a decorative roller
Any job ends with proper tool care. The durability and quality of the working surface depends on how competently the maintenance is carried out:
- During work, the work area is periodically cleaned of any pieces of plaster that may remain on it. This especially applies to textured models.
- After work, the product is thoroughly washed and dried. Long pile can be combed with a comb. Dry tools in the open air in a suspended state.
- If difficulties arise during cleaning, then use special compounds. They are selected depending on the type of base. For fur and fleecy hair, a soap composition is suitable. A removable shirt with pile can be washed on gentle cycles.
- For storage, choose a closed box or room away from direct sunlight. Rubber dries out and cracks when exposed to the sun and increased dry air.
- At the first signs of material degradation, the roller is thrown out and replaced with a new one.
After finishing work, the plaster roller must be cleaned
A roller for decorative plaster is a convenient way to create an original pattern on the surface of the walls. The tool is easy to use and has a variety of designs to create. Depending on the chosen shirt, it allows you to imitate brickwork, tree bark and other images on plaster. The right choice and competent approach to application are the key to high-quality and stylish repairs.
Have you used a roller to decorate plaster? Homemade or ready-made? Share your experience in the comments.
DIY roller making methods
There are several simple methods for making a textured roller for decorative plaster work. To make a tool that imitates brickwork, you will need:
- rubber-based roller;
- sharp knife.
The roller should be wide enough.
In order for the imitation to resemble the original as much as possible, the surface of the roller must be divided into 3 equal parts by two channels. Then, on each of the parts, transverse grooves are cut in a checkerboard pattern, reminiscent of seams between bricks. The result of the work is rectangles separated from each other, which, when printed, will become bricks. To obtain prints that imitate marble, you can use another simple method. Here you need to use compressed fabric or leather. The material is crumpled and, in a crumpled state, glued to the roller using universal glue. When working with such a tool, movements should be slow and even. You must try not to take your hand off the wall as long as possible.
In addition, you can use crumpled foil or a plastic bag, which are secured to the base of the roller in such a way as to create the maximum number of folds. The folds are fixed with tape and glue.
Unusual effects on plaster are created using tools wrapped in thick rope or rubber band. In this case, the turns should be done in random order. If you wind the rope in even rows, the plaster will look like a natural sheet of bamboo or reed. Uneven winding will create an imitation of wood.
But this is not all that can be achieved by making a structural roller yourself. For example, by gluing a piece of textured fabric (burlap, canvas, etc.) to the working surface, you can get walls with imitation textiles.
Another interesting solution is to use various grains to create a textured tool: peas, rice or buckwheat. The surface of the roller is coated with glue and sprinkled with any of the selected cereals. To create certain patterns, you can paste over only areas in the shape of flowers, twigs, leaves, etc.
From an old rag and roller
You need to cut a piece of old fabric of the required size, and then put it on a velor roller, forming folds. The edges of the rag must be secured with rubber bands.
The resulting decorative roller must be soaked with paint and then passed along the wall.
1