Oil-based wood putty
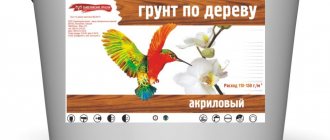
If you need an external product to protect wood, then purchase the oil variety. It is perfect for processing facades. The product has excellent water-repellent properties and the ability to withstand bad natural phenomena. Any other composition for wood would simply crack and crumble. Manufacturers create this plaster in different shades, so you do not need to use additional paint. It is produced in containers ranging from half a kilogram to 15 kilograms, so you can buy putty in any quantity.
Selecting putty
This substance allows you to fill cracks and holes in the wood, while creating an appearance almost identical to the original. Today there are several types of putty, which differ only in the base. Among them are the following products:
- acrylic;
- aquatic;
- varnish;
- nitro putties.
They all have their own advantages and disadvantages. When purchasing this substance, you should definitely pay attention to such parameters as:
- No significant shrinkage and the possibility of cracks when the material dries.
- Adhesion level. High-quality putties should adhere firmly to the wood, forming a durable structure.
- Environment of use. There are substances that are intended for internal or external use.
- Color. This characteristic is very important if you want to imitate the color of wood using putty.
Polymer wood putty
It is also called acrylic putty. Suitable for any type of repair and construction activity. This can be explained by its excellent performance properties, such as durability, lack of shrinkage and elasticity. The product can be used in dry and damp areas. This variety not only withstands various temperature changes, but also withstands significant loads. Therefore, it can be used to process wood intended for flooring.
Main properties of acrylic putty:
1. High level of elasticity. The substance can fill even the smallest cracks.
2. Easy to install. It is enough to apply the product to the surface once and it dries completely.
3. Long period of use. Depending on how you care for it, wood can last you from 4 to 12 years!
4. This putty is very expensive, but its cost will pay off in the first time, since water-based and oil-based products would have already cracked by this time.
5. Rich colors.
6. Almost no dust accumulates on it.
7. Dries quickly.
Features of application
Puttying work can be carried out with any type of wood, at any degree of wear of the material. Wood is puttied mainly to eliminate defects on the surface, but this is not the main function of wood putty.
Among the advantages of using the mixture are the following:
- Hydrophobic properties. Putty prevents moisture from penetrating into the wood structure.
- The mixture can be used to seal deep cracks, eliminate damage from poor wood processing, and restore wooden decorative elements.
- Parquet mortar has a high level of adhesion. Putty applied to the floor easily penetrates cracks and hides surface defects.
- After the mixture dries completely, it becomes transparent and does not change the natural appearance of the wood structure.
There are many different types of wood putty, which differ in some properties, color and composition.
Based on their composition, the following types of mixtures are distinguished:
- Plaster.
- Acrylic. The acrylic mixture allows you to extend the life of the wooden structure. Positive qualities also include low price, good adhesion, large assortment, short drying time. A quick-drying, heat- and moisture-resistant acrylic putty that is perfect for treating wooden floors.
- Water resistant. A variety of acrylic mixtures. In addition to acrylic, waterproof solutions include some resins and latex. It is used for both internal and external work.
- Non-shrinkable. They are characterized by the absence of material shrinkage and good adhesion performance. Suitable for finishing furniture and new flat floors.
- Nitro putty (solvent based). Such mixtures contain solvents. They are resistant to household chemicals and moisture.
- Adhesive. Such materials include mixtures made by yourself on an adhesive basis.
- Latex or polymer. Polymer and latex putty easily lay on the surface, forming an even layer. They have a high drying speed. The disadvantages include high cost. Perfect for processing parquet.
- Oily. Produced on the basis of natural oils. They have good strength and moisture resistance. The disadvantage of this solution is the long drying time.
- Oil-adhesive.
- Alkyd. The mixture contains alkyd resins. Alkyd putty is elastic and viscous. It is used mainly as a coating for painting with enamels. Also, varnish adheres well to this coating.
- Epoxy. Epoxy putty has a plastic structure and a high level of adhesion. This solution can be used as a base layer or for finishing.
Colorless and colored compositions are distinguished by shades. Colorless putty hides various damage on the surface of the wood. Using this solution you can restore an old floor. To form the base layer, the thickness of the applied putty can range from two millimeters to several centimeters. For finishing you need to apply a layer from one to five millimeters thick.
Colored furniture putty is used for restoration and is selected according to the shade of the wood. Using this mixture, damage on the surface caused by long-term use of a wooden structure is filled and leveled.
What to look for when choosing wood putty
Agree, it is stupid to assume that any type of putty will suit your wood and type of work. A high-quality product should completely fill all voids and holes. If you have to work with fibrous wood, then self-leveling putties are used. They will fill the pores and decorate the natural texture of the material. Using wood putty, you can create amazing effects on the material you are working with. To highlight the texture of porous wood, use a contrasting shade. Today, the Russian Tikkurila putty is extremely popular. Many construction and repair specialists speak quite well about it.
Note! Before applying putty, take a closer look at how it will look. Apply it to an inconspicuous area and wait until the product dries. After all, do not forget that some rocks are deformed by wet compounds, and you need to know whether this putty is suitable for you or not.
To get the best result you must:
1. Conduct testing on a separate section of wood, pay attention to the filling of pores, the level of drying, etc.
2. Purchase several shades of putty. You won’t be able to immediately determine the color of the product, so you will have to select it.
3. Pay attention to the thickness of the composition. For example, solvents do not fill voids much.
4. Pay special attention to the water solution, as it takes a long time to dry.
Wood filling technology
Many home craftsmen, having figured out the choice of putty, are interested in how to putty wooden windows or, for example, wooden floors. This procedure is not complicated, the only thing is that you need to follow a certain sequence of actions. (See also the article How to paint wood with varnish: features.)
So, the instructions for filling wood are as follows:
- Before you putty on a wooden window or other wooden product, you must thoroughly clean it of dust and any contaminants. To do this, you can wipe the surface with a damp cloth or even sand it with sandpaper.
- Next, the cracks are prepared - if they are too narrow, then they need to be slightly widened. Peeling or chipping parts must be removed.
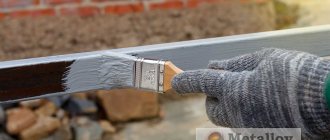
In the photo - primer for wood
- Then the wood must be treated with a primer, which will prevent it from rotting or mold, and also improve the adhesion of the putty. The primer is usually applied in two layers. Moreover, the surface is treated with liquid a second time after the first layer has completely dried.
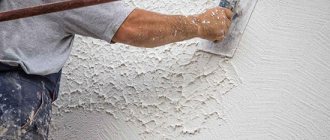
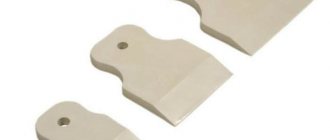
- After this, the putty is taken from the container with a small spatula and applied to the surface in a layer of 2-3 mm. The spatula should be pressed tightly and held at a slight angle to the surface.
- When the first layer has hardened, you need to remove any unevenness with a spatula or sandpaper and apply another layer. The surface must first be cleaned of dust.
- If the desired result is practically achieved, you can apply the finishing putty in a layer no thicker than 1.5 mm.
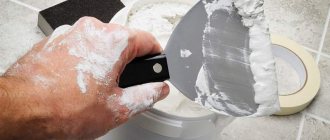
- After this, the surface must be thoroughly sanded with zero-grit sandpaper dipped in water.
Sanding the treated surface
- At the end of the work, the putty surface must be coated again with primer to improve the adhesion of the paint and varnish coating to the wood.
Advice! When choosing a primer, you should focus on the type of putty. For example, it is better to use a nitro primer under nitro putty.
This completes the work. Now, knowing how to putty a wooden floor or other wooden surfaces, you can handle this task yourself.
Types of putty layers
When starting work, you should decide which layer of putty needs to be applied - base or finishing. In the first case, fillers that have a medium fraction are added to the putty composition. When it comes to homemade wood putties, use ground pumice or sawdust. After drying, this layer has roughness, and its thickness can reach several centimeters. The finishing putty should be more uniform so that after drying you get a smoother surface. The finishing putty is applied in 2-4 layers.
Stripping and stripping
First of all, decide how to prepare and whether the surface needs to be cleaned of old paint. It is better to peel off multi-layer coatings, but if the previous coating holds firmly, after sanding and washing you can paint over it.
Hot scrubbing with a construction hairdryer
Once the paint begins to swell, scrape it off with a wide spatula. Do not heat one area for too long, otherwise the wood may char.
Safety precautions
Wear a respirator to protect yourself from harmful fumes from heated paint and chemical cleaners. Wear gloves. Do not leave a hair dryer on. When stripping very old paint, check to see if it contains toxic lead. What putty should I put on fiberglass before painting?
Test kits are sold for this purpose. If lead is found, do not apply heat or sand, but use chemical cleaners.