Putty is a building material that is used for final leveling of the surface before the final finishing. It comes in several types depending on the composition, application and other characteristics.
Before you start working with the material, it is worth determining how finishing putty differs from regular putty, whether it can be replaced with plaster or not used at all. This will help avoid common mistakes and subsequent rework.
Source denizliyapi.com
What types of putty are there?
Even with the huge abundance of various putties on store shelves, in fact, there are not many types of this material. According to their purpose, they are divided into two groups:
- Starting
As is already clear from the name, it is necessary for the initial alignment of the walls, provided they are uneven. They are made from chalk, a gypsum component and a fairly coarse filler - usually crushed perlite or pumice.
Starter putties are used to roughly level the surfaces of walls, ceilings or slopes and can be applied in a thick layer. Due to its composition, this material hardens quickly, which allows you to process the surface layer by layer without waiting for the previous layer to dry for a long time.
These putties are sold dry, packaged in bags - to use they must be diluted in the required amount of clean water. Typically, breeding recommendations are indicated on the packaging and may differ from one manufacturer to another, so you need to approach this process responsibly.
Ready-to-use putties are sold in buckets of different sizes, but still, even the largest of them are not sufficient for finishing large areas.
It is beneficial to take such putty “for testing” - to understand whether this type of material from this particular manufacturer is suitable for you, you can buy putty in a bucket, and then, for a complete repair of the entire area, purchase the same one in dry form.
Starter putties can also, if necessary, be reinforced with mesh or fiber. Such strengthening is especially important in the presence of strong defects in the walls, a weak foundation, or in new buildings when the shrinkage of the building has not yet been completed.
- Finishing
Designed for surface finishing. This type of putty is used over already dried starting putty. It is always applied in a thin layer - the maximum can be up to three millimeters. The dried finishing putty forms a dense, hard layer without cracks or chips.
Finishing putties are commercially available in two forms: dry and ready-to-use. Dry mixture - diluted in water, similar to the starting mixture, in accordance with the instructions on the package. It is important to thoroughly stir the powder to the desired consistency, so that there are no lumps left. For high-quality mixing, it is most convenient to use a special construction mixer, which is driven using a conventional hammer drill. Ready putty made from dry powder cannot be stored for a long time, as it quickly hardens upon contact with open air.
Finishing putties, ready for use, are sold in buckets of various sizes. This is very convenient in terms of the fact that, if necessary, you can purchase a small amount of the product. Also, ready-made putty is convenient in that it can be used immediately after opening the package, however, it is still advisable to mix it - this may be necessary, since during storage it can separate and become heterogeneous.
- Universal putty
You can often find universal putties that can be used both for the initial leveling of surfaces and for creating a final smooth layer.
What is finishing putty and why is it needed?
By putty we mean a leveling mixture with a solid filler with a fraction of less than 1 mm. The material is supplied to trading platforms in the form of a finished paste or dry powder for mixing with water. The composition is used for the final stage of preparing the surface for subsequent painting or wallpapering.
Types of putties
In addition to dividing the material according to purpose - starting, finishing and universal, putties also amaze with their variety of varieties. Here, the type of putty is determined by the raw materials from which it is made. In fact, modern manufacturers have a wide range of starting components for putties in their arsenal. Which ones exactly and what is their difference? The main three types of putties used in the construction market can be described as follows:
Gypsum putty
As the name implies, it is made on the basis of gypsum. This product is distinguished, firstly, by its dazzling whiteness, and secondly, by its plasticity. Also important is the ability of gypsum to absorb and release moisture when interacting with the surrounding air. Walls treated with gypsum putty can create a favorable indoor microclimate due to proper moisture circulation.
Naturally, this type of putty is only suitable for interior work, since gypsum does not perform well for exterior work. It is ideal for working on drywall - since these materials have a common structure.
It is easier to putty a plasterboard wall than usual, since it does not need to be leveled - you just need to seal the seams and places where the sheets are attached. Gypsum putty is produced as a starting and finishing putty.
Cement putty
It is also clear that its main ingredient is cement. Accordingly, the properties of cement coexist perfectly in it: moisture resistance, immunity to temperature changes from frost to summer heat. This putty is convenient to use both indoors and outdoors - since it is resistant to atmospheric conditions.
For interior decoration it can be used in conditions of high humidity and steam formation, for example, kitchens, bathrooms, swimming pools and the like. The disadvantage of cement-based putty is its rough structure - this is also caused by its main component - cement. It is quite difficult to process and sand after drying. Typically, this putty is used for finishing with tiles, decorative plaster and similar materials that can hide a layer of plaster.
Acrylic putty
The most modern material is made from chemical raw materials using modern equipment. It has a dense structure and plastic consistency - suitable for leveling walls and for finishing. Acrylic putty is easy to apply, easy to sand, and not susceptible to cracking. It is somewhat universal because, firstly, it is suitable for treating surfaces made of various materials, and secondly, because it can be used as a starting putty and as a finishing putty, depending on needs.
But, due to its considerable cost, it is hardly advisable to apply it in a thick layer. Typically, finishing specialists prefer to apply acrylic putty in a thin layer, no more than one millimeter, thus finishing the surface.
With careful and careful application, acrylic can look perfectly smooth, beautiful, even glossy. An important advantage of acrylic putty is its environmental safety.
In addition to these widely popular types, polymer putties are also on sale - they are made on the basis of acrylates or vinyl compounds. Such products are more expensive and are universal.
Polymer putty
Polymer mixtures are gaining popularity - nowadays they are used, perhaps, even more often than gypsum and cement-containing ones. They are easy to use and durable in use. By type, polymer putties are divided into three main groups: acrylic, polymer-cement and latex - according to the main ingredient in each of them.
- Acrylic polymer putty - characterized by the presence of acrylic in the composition. It can be starting, finishing or universal - depending on the need and purpose of use.
- Polymer-cement putty - mainly used for leveling cement-concrete, lime and brick bases. The main component here is cement, to which there are special polymer additives. This putty has a plastic consistency and can be used both as a starting putty for leveling and as a finishing putty for finishing.
- Latex putty - made on the basis of styrene - this is a certain type of latex on an acrylic base. This type of polymer putty is ideal as a finish and is well suited for finishing various surfaces: drywall, brick, wood, concrete and others.
Polymer putties are very convenient due to their special appearance - they are plastic and elastic, which makes them ideal for work. Even amateurs can create a perfectly even layer using polymer materials.
They are also convenient because they can be applied in the thinnest layer, which is impossible for gypsum or cement putty. However, the minimum thickness does not make the putty layer less durable than those that are applied thicker. It is also important to note the strength characteristics: polymer putty is not subject to shrinkage and cracking. In addition, they are vapor permeable, that is, they allow the walls to breathe, and are resistant to moisture and have thermal insulation properties.
Polymer putties are sold, just like other analogues, in dry or ready-to-use form. Dry mixtures, as a rule, make sense to choose if we are talking about finishing large volumes, and ready-made plastic mixtures will come in handy if you need to finish a small area.
This type of putty is presented on store shelves in three types: starting, finishing and universal. Selecting the necessary putty is not difficult. The material consumption is indicated on the labels - just calculate the required area for finishing.
The only drawback of polymer putties is their high cost. Unfortunately, due to the content of polymers, which due to their cost simply cannot be cheap. Of course, the many positive characteristics of these materials fully justify their price, so when choosing a material for wall decoration, you should pay attention to polymer putties.
Making your own starting putty
On the modern market of finishing materials there is a huge range of different putty compositions, including basic varieties.
However, in some cases large hardware stores may not be available. For example, when a house located somewhere in the countryside is being renovated. The table below provides recipes for preparing starting putties at home.
| № | Name | Application area | Preparation |
| 1 | Gypsum-chalk | Leveling walls made of concrete and gypsum plasterboard in dry rooms | Mix 1 part plaster and 3 parts chalk in a dry bowl. Gradually, while stirring, pour the mixture into a container with a 5% solution of wood glue and stir until smooth. Use immediately - the solution hardens quickly. |
| 2 | Oily | Wooden surfaces exposed to temperature changes (wooden façade cladding, window frames). | Mix 2 kg of chalk with 1 kg of drying oil, add 0.1 kg of drier and put the mixture on fire. Bring carefully to a boil and cool. Use warm. |
Types of putty application
Having decided on the type of material, it is necessary to choose the method of its application. Putty is usually applied using three traditional methods:
Mechanical method of applying putty
For mechanical application, special installations are used, with the help of which the finished mass is sprayed onto the surface of the walls. This application is convenient, fast and high quality. But, of course, purchasing special equipment for household needs is impractical. And, as a rule, putty is applied in a similar way by specialists in the field of finishing work, when working on an industrial scale, large volumes, and so on.
Semi-mechanical method of applying putty
The semi-mechanical method also requires a compressor or pressure tank - in this way the putty is “sprayed” onto the walls, which is also much faster than applying it manually, although slower than in the first case.
Manual method of applying putty
Well, the most common way is to apply it manually. Since this is what is used most often by both professional builders and those who decided to make repairs on their own for the first time, we will consider it in more detail. For application, a ready-made putty mass is used - prepared independently from dry powder or already purchased in ready-to-use form.
- using a flat paint spatula and a small float
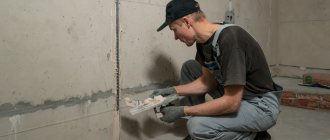
A small amount of putty is scooped onto the working surface of a flat spatula and applied and distributed over the wall using a small trowel. This method is simple and convenient even for those who have never done such work.
- putty "bloopers"
This name speaks for itself: with a small spatula, putty is applied to the wall in the form of “bloopers” - large spots, and then, using a long trowel, the mass is evenly distributed over the entire surface. This method allows you to complete the finishing quickly, but it is physically more difficult than the previous one, since in order to level the material with a smoothing iron, a length of fifty centimeters, you will need muscles.
- using two spatulas: main and auxiliary
The main spatula should be approximately two to two and a half times longer than the auxiliary one. For example, spatulas with a length of 45X20 cm or 35X10 cm go well together. The longer the main spatula, the more force is required to work with it.
During the application process, the putty is distributed over the main putty using an auxiliary spatula and is then transferred to the wall. It is important that when distributing the mass, the pressure on the spatula is the same over the entire surface to be treated - then the material will be distributed evenly. The basic principle of applying putty: from dry to wet. That is, it is necessary to work in such a way that each subsequent finished section is connected to the previous one and they can be immediately compared with each other - then the work will be done accurately, without unevenness and sag.
Applying putty is not a complicated process, however, it requires care and a certain skill. Starting for the first time, you can practice on not too noticeable places, get your hands on. When muscle memory remembers hand movements, the work will go faster and better. Manual putty is available to anyone; there are no particularly critical nuances in it.
Wall putty: detailed application instructions
Many owners strive to carry out repair work themselves: this is not always caused by the desire to save on paying specialists. Many people like to make repairs themselves, taking into account their every wish, or simply because they like this activity. As for the puttying process, there is nothing complicated about it, you just need to purchase a high-quality putty mixture and follow the correct work technology - these two facts will allow you to get a smooth, beautiful wall, ready for further finishing.
Preparing the wall for further puttying
Before you begin the puttying itself, the walls must be properly prepared.
1) Remove as much remnants of old building materials as possible. Traces of varnish, paint, wallpaper can significantly affect the quality of the finished coating; in the worst case, the remainder of the old varnish may simply fall off after finishing the putty, violating the integrity of the finished layer.
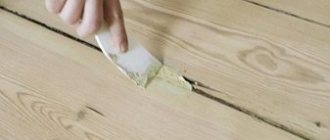
2) Carefully examine the surface for cracks, chips, and irregularities. If there are any, then they must first be sealed, flush with the wall, making sure during work that no bulges appear. After sealing the cracks, you need to wait the time necessary for the material to dry completely and only then proceed to the next stage.
3) Thorough cleaning of the walls and the room as a whole. There should be no dust, dirt, or greasy stains left - all of them must be removed, cleaned, and degreased. It is advisable to vacuum the walls to remove small particles of dirt and dust as much as possible.
4) Primer of surfaces. The primer must be selected based on the material from which the walls are made, and, depending on their condition, it must be applied in one or several layers. A primer with antifungal additives is preferred to prevent mold or similar problems. The primer should be applied with a paint brush or a special roller that can transfer the liquid well to the wall.
This stage is important, since well-primed walls have stronger adhesion to the putty mixture and are protected from damage by fungus. Therefore, you need to try to apply the primer as carefully as possible, without missing a single millimeter. After application, leave the primer alone until it dries completely, which is at least six to eight hours, at room temperature. But it is best to leave the walls to dry for a day.
Preparing dry putty for application
If you are planning to putty a room, or even more than one, then ready-made putty in buckets will probably not suit you - although this is convenient, it is clearly not cheap. A dry putty mixture, packaged in bags, is perfect for treating large areas, from which you can independently prepare ready-to-use material. This is not difficult to do, but it is important to follow the correct cooking technique:
1) Pour one third of clean water into a clean, preferably plastic, container. It is necessary to use cool or even cold water, since hot water accelerates the hardening of the finished putty.
2) Dry putty mixture is poured into the water. It is difficult to say exactly quantitatively; it all depends on the manufacturer and needs. Manufacturers' recommendations and experience will help resolve this issue.
Firstly, the packages always indicate the proportion of water and dry components, which will allow you to obtain a ready-to-use mass. Secondly, after trying the ready-made putty prepared according to the instructions, you may need a thicker or, conversely, more liquid consistency. Of course, during the process of stirring the mass, the dry product can be added, therefore, initially try not to exceed the amount indicated on the package.
3) For the next step you will need a construction mixer. Having installed it on the hammer drill, it is necessary to carry out the initial mixing of the mixture. Its purpose is to completely wet the dry powder with water. You need to stir at low speeds of the tool, using slow circular movements, trying not to scatter the putty around the container.
After the initial mixing, you need to leave the mixture for five to ten minutes, this is necessary so that the water completely soaks the dry putty, and especially the lumps that are in it.
4) Mix again using the same construction mixer. This time more intensive mixing is possible. After which, leave the mixture alone again for swelling. Thus, it is necessary to make three to four approaches, alternating the processes of mixing and settling the finished mixture. You need to stir for about three minutes, let it sit for about five. Thus, gradually, the consistency will reach the desired level - medium thickness and high plasticity.
It is important to prepare not too large a volume of putty, since it is not stored in finished form. In this case, it is more convenient to get a smaller quantity and, if necessary, finish more. The thickening mixture is also not suitable for dilution with water and further use - since the formation of lumps in this case is simply inevitable. Therefore, thickened or completely hardened putty must be thrown away, washed the container in which it was and prepared again.
Recommendations for use
The putty is sold in packages that should contain instructions for diluting dry mixtures and recommendations for use. They also indicate the thickness of the layer and the tools that will be useful for the job.
Putty consumption
It is impossible to accurately determine material consumption without studying the instructions from the manufacturer. It largely depends on the thickness of the applied layer and the type of work. We can give average standards:
- 1.6-1.7 kg per 1 m² when finishing facades;
- 1.2 kg when leveling walls indoors;
- 1.1 kg when leveling for wallpaper or painting;
- 0.9-1 kg when covering cracks at the joints of drywall sheets;
- 0.5-0.6 kg when gluing wooden elements.
The mixture must be prepared in small batches to prevent drying out and increased consumption.
Required Tools
When mixing and applying the finishing putty, you will need the following tools:
- a construction mixer or drill with a similar attachment for comfortable mixing;
- 10 liter capacity for mixing putty;
- several spatulas 25-60 cm wide and 30-40 cm long;
- a narrow spatula 6-10 cm for scooping up the solution and spreading it over the main tool;
- sandpaper and sandpaper for smoothing the surface with medium and fine grain;
- a respirator is used at the stage of grouting walls;
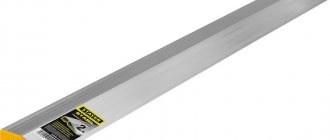
- rule up to 1.3 m long - to identify irregularities.
Additionally, a portable floor lamp or lamp may be required. With them it is easy to identify irregularities on the surface being treated.
Rules for preparing the mixture
Ready putty paste does not require preparation. The powder must be diluted with water in a container, which you don’t mind throwing away later. Plastic buckets and basins are best suited . A metal bucket increases the risk of particles joining with the putty mixture, which leads to corrosion.
For dilution, use cold tap water. A construction mixer is necessary for thoroughly mixing the ingredients without lumps.
Immediately after preparation, leave the mixture for 5-10 minutes and then stir again. After this, you can begin applying the coating.
When mixing putty, it is important to remember: the thicker the layer, the thicker the starting material should be.
Application technique
Putty is applied after priming the surface. This material increases adhesion between layers and improves moisture resistance. Otherwise, fungi and mold may form on the walls. Before priming, a starting (base) putty is also used.
When the primer dries, begin finishing. This is done with a wide spatula:
- adhere to a layer of 3 mm;
- hold the spatula straight, 90 degrees relative to the wall;
- press firmly on the tool when applying.
1 layer of putty is enough for further application of paint or gluing wallpaper. In some cases, make 2 layers, waiting for each of them to dry before applying the next.
Drying time
The time it takes for the putty to dry completely depends on the type of mixture used:
- polymer compositions dry for 24 hours;
- gypsum putties dry out after 1.5 hours;
- cement ones set within 5-6 hours.
If a thick layer is applied, it can dry up to 2-14 days.
Applying putty to the wall
Correct adherence to the technology of this process requires the application of putty in at least two layers - the starting one, and then the finishing one. But in fact, there may be more layers, depending on the condition of the walls and their visible defects.
1) To apply putty you will need two spatulas - a wide one and a narrow one. A wide spatula should be slightly smaller than the diameter of the container in which the putty is located - this is necessary so that it can fit there. The second, narrow, spatula is needed to distribute the putty along the entire length of the wide one, as well as to correct flaws. It can also be used to select a product for a wide instrument - here everyone develops a technique that is convenient for them.
2) The first layer is the starting putty, it is looser and can be applied in a thicker layer than the finishing one. With its help, you can hide minor wall defects - sinks, small cracks. It is convenient to apply the putty from bottom to top, using a wide spatula. The spatula is held by the handle with three fingers, and two - the middle and index fingers - act as stops and are convenient for adjusting the pressing force on the spatula, holding it from above, by the plastic base.
The finished putty is plastic and easy to apply; it should be uniform and not contain lumps or other inclusions. It is necessary to apply the solution as evenly as possible, avoiding unevenness or visually noticeable strokes - a wide spatula helps with this. It is advisable to work quickly, since the putty mixture hardens quite quickly and after just fifteen to twenty minutes it will be problematic to correct application errors.
3) You can continue working only after the first layer has completely dried. If you plan to make a lot of layers, then at this stage it would be best to use a reinforcing mesh.
After the layer of starting putty has dried, the net must be secured to the wall with temporary fasteners, and then a layer of finishing putty must be applied. It must be applied in such a way as to hide the mesh as much as possible, but at the same time, not in a too thick layer - the maximum it should be no more than five millimeters. After this layer is applied, you should also wait for it to dry completely. If the reinforcing network is not completely covered by the first layer of putty, then it is necessary to apply another one, which will hide it completely. This layer should also dry well.
4) The next stage is applying the base layer. This is a high quality finishing putty - it is applied very thinly - a couple of millimeters, no more. It must be applied simultaneously to the entire wall - otherwise, the transitions will be visually noticeable. It’s not for nothing that this layer is the main one; it should be as even and carefully laid out as possible. If there are still minor defects, then after finishing the work and drying the putty, they can be cleaned up with a fine sanding mesh.
The mesh grain size should be no more than 3 mm mesh, otherwise, the thin layer of the finishing coating can be damaged and visually noticeable sanding marks can be left. Under no circumstances should you use sandpaper on a fabric basis - after such treatment, noticeable marks almost always remain!
The finished surface, finished with putty, dries, depending on the room temperature - from 8 to 24 hours. After complete drying, further finishing work is possible.
How does starting putty differ from finishing putty?
In this case, the compositions can be easily distinguished based on their grain size:
- Starting compositions are applied in a fairly thick layer from 3 mm to several centimeters. They contain larger granules, which makes it possible to correct quite serious defects. Typically, starting compositions are applied in several layers at once.
- The finishing putty has a smaller grain size, so that after treatment the walls do not look “loose”. Such compositions are used after applying starting mixtures. As a rule, they are applied in a layer of up to 5 mm.
In addition, there are universal compositions that can be used with minimal defects. In this case, there is no need to use first the starting putty and then the finishing putty.
Rating of the best putties
The modern construction market does not stand still and every year pleases consumers with new products, including putty mixtures. Today, according to customer surveys, certain products are leading.
Starting putties
Volma Standard. This starting putty has proven itself excellent both in Russia and abroad. Well suited for leveling surfaces and for fine finishing. Suitable for plaster or cement walls. It performed best when used indoors.
Although this composition is intended for initial application, many experts note that with its help it is possible to obtain a finished surface without applying a “finish”, since this putty is easily sanded and does not leave behind defects. This is a high quality material, easy to use and affordable. One of the disadvantages is the rather long drying time.
Founded Ekonsilk. A domestically produced product that has firmly established itself in the finishing materials market. This brand of putty is convenient due to its plasticity, attractive appearance and, of course, very affordable cost.
It can be applied in a not too thick layer, preferably up to 5 millimeters. Unfortunately, if this condition is not met, cracks may appear on the finished surface after drying.
Bolars Facade. It is recognized as the best putty for facades due to its excellent performance qualities: frost resistance, insusceptibility to precipitation. It can also be used in rooms with increased vapor generation. It has high resistance to mechanical damage, good vapor permeability, which allows the walls to “breathe” and creates proper moisture circulation in the room.
The maximum permissible layer is up to 10 millimeters, and this is without the formation of cracks. Accordingly, this plus entails a minus - high consumption. Also, some unpleasant point is its high cost.
Finishing putties
Sheetrock SuperFinish rightfully takes first place among finishing products. It has the smallest grain size among putties, it is 0.03 millimeters.
This fact allows you to get a smooth, ideal surface using putty on almost any wall - drywall, concrete, and others. When dry, this putty does not tend to crack, again due to its finely dispersed structure - it adheres tightly to the surfaces and does not peel off. All these advantages are complemented by the quite reasonable price of the product, which makes it an excellent solution for every buyer.
By the way, until 2021, a bucket of putty had a different appearance. Then it transfers the line of ready-made SHEETROCK® putties under the umbrella brand of building materials DANOGIPS.
Knauf Rotband Pasta is a putty based on vinyl compounds. It is universal in terms of surfaces to be treated, suitable for concrete, gypsum boards and others, and has good adhesive ability.
Another distinctive feature: fast drying - about 5 hours. Some disadvantage is that this ready-to-use putty mixture requires a lot of consumption, even when applied at a thickness of about one millimeter. Also not pleasing is its high cost of 700 rubles.
Ceresit CT 225 is a cement-based putty. Suitable for both indoor work and facade finishing. Can be applied to cement bases. The putty has excellent qualities: adhesion, moisture resistance and frost resistance.
It is popular due to the presence of special reinforcing fibers in the composition - they prevent cracking and shrinkage of the finished coating. You should also pay attention to the environmentally friendly composition. Of course, such putty is not cheap.
Universal putties
Knauf is a fugen. It has proven itself to be excellent when used indoors at room temperatures. The gypsum-based putty also contains polymer compounds, which make the finished composition elastic. Good adhesive properties.
Suitable for walls made of cement or covered with plaster. The list of advantages is complemented by low cost and minimal consumption. Despite its versatility, use in rooms with high humidity is not recommended, since the composition is hygroscopic.
VGT acrylic, universal. Completely ready for use immediately after opening the package. Suitable for warm interior spaces, without increased vaporization and moisture. It is possible to apply a thick layer - up to seven millimeters. Suitable for wood, concrete, gypsum and cement surfaces. Disadvantages: quite high consumption, the possibility of shrinkage when the composition dries and quite a lot of dust during subsequent processing.
UNIS BLIK. Gypsum-based putty. It is convenient because it can be applied in different layers - both thin and thick. According to the manufacturer's recommendations, the application layer can range from half a millimeter to eight millimeters. The quick drying of the mixture is also convenient - even with a thick layer it will take no more than seven hours.
The putty is easy to use, elastic and does not form cracks. However, there are also disadvantages: high consumption, the presence of foreign inclusions - there may be pebbles that interfere with the uniform distribution of mass over the wall surface.
How to make the right choice for plaster?
To ensure that the quality of the repair leaves no doubt, when choosing ready-made solutions, you should be guided by certain circumstances:
- the material from which the surfaces are made;
- potential operational humidity of premises;
- location of premises inside the building or outside;
- the main putty material for starting work in case the remaining layer is applied to it.
To select a putty for plaster, it is important to consider the specifics of the work that will need to be done.
Work on finishing gypsum plasterboard and gypsum fiber board includes these procedures:
- sealing seams;
- applying the remaining layer.
Due to the fact that the surface of the plasterboard sheets is already needed for applying the remaining layer, the starting layer must be used when sealing the most sensitive parts that are best susceptible to deformation. These parts are seams.
To process the seams, starting gypsum mixtures of a coarse fraction with high resistance to shrinkage and mechanical influences are used. Apply the starting layer in 2 stages using painting mesh.
Workers and specialists in repair and finishing work when finishing plasterboard partitions recommend using gypsum-based mixtures for work involving putty. And there are a number of explanations for this:
- such a mixture does not sag;
- plaster combines perfectly with plaster;
- easy to apply and level;
- dries very quickly.
Attention! When covering walls in rooms where there is high humidity, it is necessary to use moisture-resistant gypsum boards and putty with water-repellent fillers.
