Glue for wallpaper joints can be purchased at any hardware store. One of the main problems when gluing wallpaper is the so-called bubbles. The only thing that can compete in this title with the collected air bubbles under the canvas are the joints, which strive to separate. More than once, the next day after repairs, wallpaper has to be glued at the joints. What is being done wrong? And how to adjust the wallpaper when gluing it so that these problems definitely do not arise?
Features of butt wallpapering
This method of joining fabrics is one of the most difficult and in some situations requires some experience.
In its absence, you need to practice. Peculiarities:
- The advantage of such joining is the ability to obtain a uniform coating that will not have visible seams. This imposes certain restrictions on the gluing process: it is necessary to eliminate the smallest gaps and excess glue.
- In addition to smoothing tools (different devices are used for different types of wallpaper), a rubber roller with a soft roller is used.
- Great importance is attached to the preparation of the walls. They must be smooth and free of defects. If work is carried out on geometrically complex surfaces, then end-to-end fitting will require much more time.
- Any violations of technology and the choice of unsuitable material lead to the appearance of gaps or peeling at the joints.
It is necessary to glue wallpaper in this way while strictly observing the optimal temperature and humidity levels. Drafts and the use of heating equipment should be avoided.
Wall decoration with wallpaper
In order for your room to delight you with a feeling of warmth and comfort for many years, you need to know how to glue paper-based vinyl wallpaper.
From numerous reviews about the technique of pasting walls, it follows that you need to accurately follow all the recommendations for working with this material, as well as take into account useful tips on the most important stages of the process.
Selecting wallpaper and glue
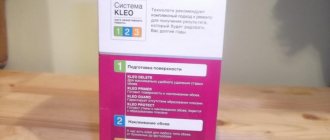
First, purchase wallpaper and glue recommended by the manufacturer for this type of finishing material. On the packaging you will find the necessary information on the use of vinyl wallpaper, as well as data on glue consumption. Sales consultants, more often than other gluing products, recommend using KLEO for vinyl wallpaper.
Preparing walls for pasting
Walls for pasting must be smooth and dry. Their leveling is done with putty after they have been cleaned of the old coating. Before gluing, the wall must be treated with a primer, as well as a composition that protects the surface from mold that appears under the wallpaper.
To work you will need a tool, which is a set of the following items:
- bucket for clean water;
- basin for wallpaper;
- two pressure rollers and a special plastic spatula. The wide roller is the main one, but for the joints you will need a narrow one;
- fur roller, wide and narrow brushes. The latter is used to apply glue;
- scissors, tape measure, ruler, pencil and knife (construction knife);
- rag, sponge (for removing glue).
Before starting work, the floor is covered with newspapers or polyethylene.
Procedure for covering walls with vinyl wallpaper
If you follow all the rules for decorating walls with trellises, then the room after renovation will have an impeccable appearance. Each stage of repair can be performed even by an inexperienced performer, but he is required to follow the gluing technology and be careful in his actions:
Vinyl wallpapers with a paper backing cannot be glued to the wall after applying glue, but need to be folded back to back for swelling. Usually the waiting time is indicated on the roll (thicker material will take longer); It is imperative to ensure that the applied layer of glue is uniform and thick (the swelling time of the glue will be the same for all canvases)
For trellises with a paper “backing”, it is important to treat the edges of the canvas well with glue; the strips must be glued starting from the corner, end-to-end (the place of contact should not be very tight to prevent “swelling” of the material). When gluing, the canvas is pressed against the wall with a rubber roller, carefully smoothing the seams; you need to glue, focusing on the vertical elements of the interior (window and door openings, corners of the room), but not plumb; gluing is done by two people
The first worker, standing on a stepladder, carefully presses the upper end of the canvas to the wall. The second one, standing on the floor, should support its lower end and carefully align the wallpaper vertically. You can and even need to draw a vertical line on the wall for reference; the strip is pressed against the wall and the air is forced out from under it, quickly moving the brush downwards and from the center to the edges; excess glue may protrude beyond the edges of the canvas, so it is immediately removed with a clean rag. The main thing is that there are no marks left on the front surface of the material; Existing excess parts of vinyl wallpaper near the ceiling and at the baseboards are cut off with a sharp construction knife, and their lower end is folded under the baseboard (about 5 mm). Experts recommend removing the baseboard before gluing the walls; All sockets and switches are removed after disconnecting the power. The wallpaper is pasted, covering its holes, and then, when the canvas has dried, the necessary sections are cut out and screwed into place.
Gluing wallpaper in the inner corners of walls is especially difficult when you don’t have the skills. Often wrinkles appear in these places, which you can try to remove by smoothing. Small defects can be eliminated this way. If it doesn’t work out this way, then make one cut with a knife along the entire length of the fold and very carefully straighten the canvas until it fits completely against the wall.
Why does wallpaper peel off at the joints?
Often this problem occurs when there is no overlap between adjacent panels. This also occurs if the work surface is poorly prepared. If, when processing the walls, the putty was not applied in a continuous layer. Such processes can occur after puttying, and when the surface has not been treated with a primer.
The problem of wallpaper peeling off at the joints can arise if the thickness of the wallpaper and the glue used do not match. Wallpaper glue must be suitable in all respects for a certain type of wallpaper (vinyl, textile, etc.). Taking these requirements into account will ensure the necessary adhesion. During work, do not allow the wallpaper to become excessively wet with glue. These measures will eliminate the troubles associated with unevenness and the appearance of a wavy edge after drying.
Professionals recommend fixing the edges of the wallpaper with glue intended for joints. Experts advise not to purchase wallpaper with uneven edges. To do this, you need to pay attention to the end of the roll.
To avoid undesirable consequences when drying wallpaper, it is necessary to observe the required temperature and humidity conditions. The temperature should be room temperature, and the humidity should be within 70%, the best indicator is less. Drafts are very undesirable, as they will increase the number of poor joints. This problem occurs when the surface of the wallpaper is exposed to water. This can happen during an unusual situation (accident).
How to glue seams at joints and corners that are broken?
The main problem why wallpaper peels off is that working with it seems simple.
They start it without knowing the subtleties and rules. The recommendations are as follows:
- Do not skimp on finishing materials and try not to buy discounted goods.
- Before starting work, read the instructions.
- Use special spatulas and rollers.
- Have a supply of clean cloth napkins.
- Buy good wallpaper glue and a special one for joints.
- Carry out high-quality preparation of the base.
- Carry out gluing before the start of the heating season. It is advisable that the papered walls dry out in natural conditions.
- After repairs, you cannot ventilate the room to prevent drafts.
Recommendations for use
Gluing wallpaper joints is best done from a small stepladder that can be easily rearranged. In addition, the following tools will be needed for the job:
- construction knife;
- narrow metal spatula;
- thin brush;
- a spray bottle with water and a damp cloth;
- a piece of hard material measuring 20x30 cm (cardboard or other);
- special roller for rolling wallpaper;
- construction hairdryer.
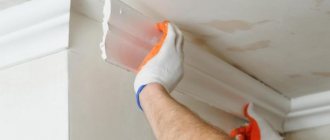
The joints are glued, sequentially moving from one section to another. If the wallpaper has already been glued before, the damaged area is first moistened with water from a spray bottle and given time to soak a little. Then the edge of the canvas is separated from the wall with a metal spatula and then proceed according to the standard scheme.
How to use glue for wallpaper joints?
- Carefully coat the inside edges of the panels with glue. It is best to use a thin paint or art brush for this purpose.
- Place cardboard or another hard sheet over the coated area so that it overlaps both sheets.
- Press the cardboard firmly and smoothly move the turned on heat gun towards the joint. Warm up the treated area for 20 seconds.
- Remove the cardboard before it sticks and roll the surface with a roller.
- Wipe the treated area with a damp, soft cloth to remove any remaining adhesive. Do not press on the wallpaper to avoid damaging the pattern or design.
- Treat all problem areas in the room in a similar manner.
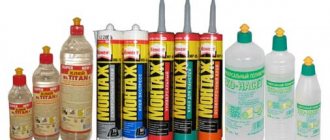
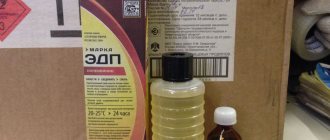
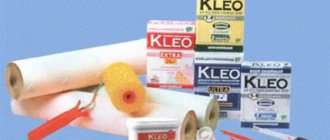
So, glue for gluing wallpaper joints is very helpful when using heavy panels, uneven walls or a draft in the room. It allows you to glue delicate wallpaper that stretches when wet. It can be used to eliminate defects in the form of loose pieces. All types of joint adhesives are suitable for non-woven, vinyl, fabric and paper wallpapers. This line of products is produced by many companies. But it is better to give preference to well-known manufacturers: Metylan, Kleo, Moment. The choice between them is a matter of taste and material capabilities.
Peculiarities
Wallpaper seam glue is fundamentally different from other varieties. Its main features:
- does not require dilution with water – ready for use immediately;
- Convenient to apply thanks to the special spout on the tube;
- has a viscous consistency and does not flow;
- after drying, it does not dissolve with water, withstands temperature changes and high humidity;
- almost instantly grabs the edges and holds them securely;
- suitable for joining wallpaper seams, eliminating defects, gluing sheets in hard-to-reach places (niches, near window sills, behind radiators, etc.).
It is distinguished from traditional means by the presence of a polyvinyl acetate emulsion in its composition. It is this that provides the seam with strength and a short setting period. Construction PVA, which some continue to use the old fashioned way, is inferior in all respects and has not been used in professional repairs for a long time.
The main secret of high-quality wallpapering without visible seams is to quickly and reliably fix the joints.
This group of products is represented on the market quite widely. Adhesive for wallpaper joints is, as a rule, produced by all manufacturers of adhesive bases.
According to the 2021 rating, the following types of glue are considered the highest quality and most reliable:
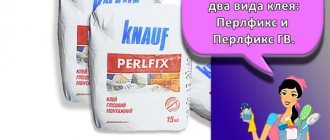
- Metylan. Country of origin: Germany. German quality speaks for itself. It even glues vinyl to vinyl and is effective when gluing to plastic windows. Designed for gluing joints, but can also be used for repairing individual areas and gluing sheets in hard-to-reach places (behind the radiator, etc.). "Methylane" is available in a convenient tube with a special spatula for application. The cost of a 60 g package is 200–250 rubles.
- Kleo. Produced in France. Contains acrylic and polyvinyl acetate, thanks to which it reliably glues light finishing materials. Used for gluing wallpaper joints and eliminating defects in the form of peeling pieces, etc. Fixing time is 10–15 minutes. Operates at temperatures not lower than 5 °C. The approximate cost of a tube (80 g) is 200 rubles.
- "Moment". Product of the German company Henkel. It has a high adhesive force, does not spread and reliably fixes wallpaper joints. It is considered the most budget option among well-known glue brands. The price of a package of glue (120 g) ranges from 120 to 160 rubles.
120 g of joint adhesive is enough for approximately 60 linear meters of wallpaper.
The wallpaper came apart when glued end to end
A trivial problem typical of paper-based canvases. The gluing of such canvases is carried out by applying glue twice: on the wall and on the canvas. When coating wallpaper, the paper becomes saturated with moisture and swells. In this case, the width of the canvas lengthens by about 0.5-2 mm. After gluing to the wall, the glue dries, and the reverse process occurs with the material - shrinkage. The wallpaper pulls together and forms a sad gap.
There is only one conclusion - do not glue paper-backed wallpaper end-to-end unless the manufacturer specifies this in the instructions. Rolled panels on a paper basis are made with an overlap. However, if you make it large, then after drying the seams will be visible on the wall. To avoid this result, keep the overlap to a minimum of 1-1.5 mm.
Features of joining wallpaper with a pattern in the corners
With a geometric design, its distortion should be minimal. On wallpaper with vertical lines, the distortion in the corners will be pronounced. With a horizontal pattern, the distortion in relation to the ceiling and baseboard will be noticeable and the overlap of the canvases will be more pronounced.
To avoid such troubles you should:
- make a slight overlap on the adjacent wall;
- transfer the resulting curvature to the upper part and hide it behind the panels;
- try to glue the wallpaper in the corners so that the smooth edge lies plumb, remove excess material with a knife.
By adhering to the following recommendations, you will be able to minimize the curvature of the pattern and join the wallpaper correctly. Even if there is a flaw, it will remain invisible to ignorant people.
Various customization options
If there is a pattern on the wallpaper, then you should be prepared to match it when applying it to the walls. There are several ways to match wallpaper and adjust the pattern.
Direct docking
For the convenience of gluing wallpaper using this method, it is important to correctly calculate the length of the strips for further adjustment. This is done according to the following algorithm:
- The wall is measured in length and height. We record the results obtained, for example, the width of the wall is exactly 4 m, and the distance from floor to ceiling is 2.5 m.
- We measure the repeat (repetition of the pattern on the wallpaper sheet), let’s say it is 54 cm, given the length of the roll is 10 m, and the width is 53 cm.
- Now you need to calculate a number that is a multiple of the rapport (in our case 54 cm) and as close as possible to the height of the wall (in our case 2.5 m). To obtain this number, the possible value of the rapport number is determined at which all parameters will be met.
- As a result, if the step is four (4*54), the full cut will be 2.16 meters. This value is not enough for a given ceiling height of 2.5 m. Therefore, we increase the step to 5 (5 * 54), and this number is already suitable, it will be 2.7 m.
- Having calculated from the length of the roll (10-2.7 * 3) we find that 3 whole strips can be used for further use.
In this work, the first tape plays a very important role. After all, if you glue it crookedly, in the future the joints of the wallpaper will go at an angle and the whole picture will deteriorate. To prevent this, a plumb line is often used, which can serve as an accurate guide for evenly gluing both the first strip and the next ones. This measure, although optional, is recommended, because neglecting this little detail increases the risk of beveled blades.
Offset docking
With this method of gluing the joints of wallpaper, the pattern shifts along the second strip. It turns out that with the indicated shift of ½, the repeat length will be 2 times less than the original value. Consequently, a drawing 54 cm long will be reduced to 27 cm.
The pattern is adjusted so that every second strip is 2 times smaller than the first (in our case, 27 cm). But the multiplicity of the pattern in height is now determined to be 54 cm for the first, third and remaining odd stripes, and 27 cm for the second, fourth and subsequent even stripes.
Free docking
This gluing method will help you properly glue the wallpaper end-to-end and reduce material loss to a minimum. But it should only be used for canvases with small and symmetrical designs. Of course, it is worth calculating the length and height of the walls, but adjusting the design is no longer required, which saves resources and effort.
Counter joining method
This method is often used to simplify work. After all, as a result, the seam will not increase and the canvases will fit tightly to each other. To do this, the wallpaper is laid overlapping, and after adjusting the pattern, it is cut at the border in a straight line.
What glue to use for repairs ↑
Not repeating previous mistakes is one of the tasks that must be solved when gluing up peeling wallpaper. A responsible approach to the choice of composition eliminates the need to repeat the procedure and allows you to eliminate damage at no extra cost. How to glue wallpaper that has come off?
Special wallpaper compositions ↑
The range of adhesives intended for finishing materials is quite wide. The compositions are presented in all price segments. On the packaging, the manufacturer indicates what type of finishing materials the mixture is intended for.
Most often they are sold dry and prepared independently immediately before gluing.
Please note that some products are intended for non-woven wallpaper; they cannot be used for paper wallpaper, and vice versa
For peeling wallpaper, you can use the remaining glue after the main repair, if the expiration date has not expired. It is economically irrational to buy a whole pack for a small fragment or several plots. When restoring a large area, when you have to re-glue almost the entire strip, the cost of a new pack is completely justified.
PVA - pros and cons ↑
Familiar from childhood, inexpensive and not requiring special training, PVA is often used when deciding what to use to glue peeling wallpaper. Glue is applied to the paper over the entire area, the strip is pressed tightly against the wall and rolled several times. It would seem that the problem is solved. However, there is a high risk of new ones:
- PVA has high adhesion and reliably glues surfaces, but is practically insoluble in water. The next time you renovate, you will have to put in a lot of effort to remove the remaining paper and completely clean the wall.
- In areas of impregnation, yellow spots with sharp contours may appear, which are especially noticeable against a light background.
- PVA is suitable for treating small areas, up to 5 cm. For more serious repairs, other compositions are recommended.
Glue for gluing wallpaper ↑
The best option for small areas, a good way to glue loose joints, top or bottom edges. Sold ready-made at any hardware store. The tube volume is small - from 50 to 100 ml. This eliminates the worry about excess.
The spout is elongated and narrowed, which facilitates application in hard-to-reach areas and allows for high-quality work on joints and corners. For a better connection, use a roller to roll the glued strip to the wall.
It is recommended to choose glue from trusted brands and pay attention to the instructions and advice from the manufacturer. Most products are universal and suitable for all types of wallpaper - paper, vinyl, non-woven, fabric
At the final stage, the glued areas are heated with a regular hairdryer.
Why paste is a thing of the past ↑
Universal household glue at one time gained so much popularity that many still cannot refuse to use the viscous sticky substance. The main advantage of the paste is its low cost and quick preparation at home. This completes the list of advantages.
If you need to glue wallpaper, paste is not helpful. It is able to cope with clean paper that is not soaked in adhesive mixture and does not harden after drying. And there is a high probability that an unpleasant surprise will await you the next morning - stripes lying on the floor. To achieve high-quality results, we use proven products from recognized manufacturers.
Loose seams between fabrics
One of the most common wallpaper problems is loose or poorly joined seams. Such a defect can be observed after gluing paper wallpaper, which can stretch slightly under the influence of moisture. After drying, such stretched canvases shrink, leaving a gap between the joints.
Such gaps are very noticeable on bright and dark wallpaper, which are strikingly different from the gray base plaster or finishing white. On light-colored wallpaper, thin gaps between the seams are not so noticeable.
An example of a bad joint between canvases
Builders with experience, having found out what wallpaper they will have to glue to the wall, can play it safe and paint the expected joints with paint that matches the wallpaper that is being prepared for hanging.
But let's return to the problem, in our case we need to correct an existing defect. This is done using putty and tinting: a color matching the tone of the wallpaper is selected, the putty is tinted and applied to the joints. Remains of putty before drying are removed using wiping materials.
After drying, the joints may be slightly noticeable at close range, but completely invisible from afar. This method involves completely masking bad joints on the wallpaper.
Many wallpaper defects could have been avoided at the very beginning of working with them - when gluing them to the wall. A properly prepared surface, following instructions, using modern materials, all these factors would help you hang wallpaper seriously and for a long time.
Applying the final layer of plaster to the wall
We have prepared a number of important aspects that should be adhered to when working with finishing materials such as wallpaper.
Wallpaper repair is not complete without removing old, damaged layers; this must be done. Wallpaper remover and warm water will make the task easier; in this case, there is a chance to remove the wallpaper in one piece. Otherwise, use a spatula. You should always prepare a wall for wallpapering. Old plaster may fall off under the wallpaper, so it needs to be dismantled. Wallpaper also doesn't stick well to paint, so we sand it down. Important elements for managing space in a room are switches and sockets, and they also need to be taken care of in advance. Firmly mounted in the box and plastered, they will not cause problems in the future. In our houses, the walls are in most cases uneven, corners are no exception.
Taking into account the fact that gluing wallpaper in the corners is a complex and responsible process, you need to take care of this in advance and slightly correct these places. Using a primer is absolutely necessary; select the composition taking into account the material of your wall. The surface should absorb moisture, thereby allowing the adhesive composition to hold the wallpaper on the wall
Properly primed walls will speed up the drying process of the wallpaper and easily hold it on. The room covered with wallpaper must be completely isolated from drafts, both during the process of wallpapering and after, until it dries. In addition, there is no need to allow excessive humidity and heat in the room. We select wallpaper glue according to the type and quality of wallpaper, for light wallpaper we choose the simplest one, for heavy wallpaper - more concentrated, for paper - paper, for non-woven wallpaper - non-woven. in water at room temperature, you should not boil it, and heating it above 30 degrees will not do it any good. When working with wallpaper, try to pay attention to the little things, control the entire gluing process, it is better to identify and correct defects immediately than to deal with wallpaper restoration or repair later.
A smooth and neat wallpaper fabric attracts attention. Using these tips, you can repair damaged wallpaper yourself, thereby returning it to its original beauty and grace. However, remember that most defects could have been avoided by correctly gluing the wallpaper to the wall
The renovation is complete, but not everyone can breathe a sigh of relief, as after some time the residents begin to notice that the wallpaper is peeling off. What to do if the wallpaper comes off the wall? You can simply carefully glue back the wallpaper that has come off, but the question arises: why did this happen and will the problem happen again?
Yes, if you don’t understand why the wallpaper peels off at the joints or comes off completely from the walls and ceilings, you can remain in the repair stage for a long time. Today you will learn about the most common reasons why wallpaper comes off and how to most reliably solve the problem.
How to glue wallpaper at joints
The right solution to gluing wallpaper at the joints would be to use glue that is thicker in consistency than traditional glue. Its base should be polyvinyl acetate emulsion. Other options are also possible. Some owners make the mistake of hoping to solve this problem with regular PVA glue.
Special glue has a number of positive properties due to additional additives. Setting occurs much faster. Residues of glue are quickly removed from the wallpaper with a cloth. The resulting waterproof transparent coating will be almost invisible.
A distinctive feature of this packaging is the presence of a dispenser, which allows you to conveniently and thinly apply the glue. The brand Metylan glue is in demand. It has gained a reputation for superior quality from a German manufacturer.
Choosing glue depending on the type of wallpaper
Manufacturers provide wallpaper adhesive for gluing a certain type of wallpaper (non-woven, vinyl, fiberglass, textile, paper, photo wallpaper, etc.), as well as a universal solution that is suitable for working with all types. In the latter case, you only need to comply with the following condition: the heavier the wallpaper, the thicker the glue should be mixed.
We do not recommend our clients to purchase universal glue; it is better to buy glue specifically for your type of wallpaper, narrowly targeted, or the one recommended by the wallpaper manufacturer itself (this is often the case when gluing photo wallpaper).
When buying glue, you will be faced with another choice - a dry powder mixture, or ready-made glue, diluted in the correct proportions.
There is also an option when the wallpaper is already impregnated on the inside of the canvas with an adhesive composition - self-adhesive wallpaper. It is enough to moisten them with water for a certain time, and then get to work. In some wallpapers you just need to remove the protective film while gluing. This option is attractive because you don’t need to choose glue, calculate its quantity, purchase consumables (roller, brushes) and you can safely ventilate the room immediately after finishing the painting work.
But such wallpapers have some disadvantages. They are very thin. If the wall is not sufficiently prepared for wallpapering, self-adhesive will not hide the defects and they will be very noticeable. Another disadvantage is their high cost.
Let's return to the glue, which needs to be diluted with water. This is the one that is in greatest demand. This glue is diluted in a previously prepared container with water, gradually adding a small portion of the bulk mixture. The proportions will be indicated on the packaging by the manufacturer, try to follow all instructions. Calculate the glue consumption in advance depending on the area of the walls of the room, and do not forget to round up the figure as a reserve.
For beginners, there is a type of adhesive with an indicator, thanks to which the adhesive is painted in color (pink, blue) and you can clearly control where it is applied without missing a centimeter. After drying it becomes colorless.
How to glue wallpaper at the joints if they have come apart
It is not advisable to throw away the glue powder remaining after the repair; it will serve as insurance in case of defects in the finishing coating.
It must be diluted with water in the proportions specified by the manufacturer. The joints of the canvases need to be slightly widened to make it more convenient to distribute the adhesive composition. To ensure uniformity, a narrow brush is useful. The glue-treated canvas should be pressed tightly, smoothing the joint with a clean rag. If there are still air bubbles under the wallpaper, you can use a plastic spatula when smoothing.
PVA glue is suitable for working with paper webs, although it should be remembered that it can cause other problems. The “behavior” of polyvinyl acetate products varies depending on the manufacturer; sometimes they leave brown or yellowish stains on the wallpaper. Craftsmen advise diluting PVA with water in a ratio of 1:1 or combining it with wallpaper glue in a ratio of 1:10.
This option is not suitable for vinyl and non-woven materials; for them it is advisable to select glue for the joints. The main advantage here is the versatility of the composition - it is suitable for all types of fabrics and creates a reliable connection. Special glue for joints is easy to apply: it is packaged in tubes with a narrow tip. The product is already ready for use; it does not need to be diluted. When gluing wallpaper, manufacturers recommend maintaining the room temperature at +10 - +25°.
To prevent delamination of joints in the future even at the repair stage, you can glue paper tape between the canvases. This is a special narrow product that enhances the fixation of wallpaper. The solution is not suitable for thin non-woven and paper coverings, but works well with heavy vinyl sheets.
Finding a working glue is only the first stage of joint repair; the gluing process deserves more effort and responsibility. Operation Guide:
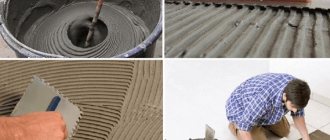
The panels at the joint should be carefully unscrewed. Use a vacuum cleaner with a narrow attachment to remove dust and debris. If an old layer of whitewash or loose putty is visible, they need to be removed. If the putty layer is destroyed, the seam area must be worked over again with putty and coated with a primer, and then wait until it dries. Glue is evenly applied to the joint, and the edges of the wallpaper are pressed and rolled with a rubber roller. The entire surface should be smoothed with a plastic spatula, simultaneously wiping off any excess glue with a clean rag.
Often, during gluing, voids are formed - air bubbles; they should be carefully pierced with a needle. Joint glue or wallpaper solution is injected into such areas using a syringe, and excess should be removed with a rag. If simple PVA is used for gluing, craftsmen advise immediately treating the joints with an iron or hairdryer: high temperature promotes the formation of a strong connection.
Do not skimp on the mixture: you need to coat the wall and wallpaper generously. In some cases, in order for them to soak well, you will have to wait 10-15 minutes according to the recommendation of the material manufacturer.
Is it possible to disguise the joint?
The question is relevant in situations where a thin strip of the wall is visible in the restored seam, which is especially noticeable on dark wallpaper. To prevent the light strip from standing out, it can be painted over to match the color of the trim. In such a situation, water-based paint is suitable; if the pigment is too saturated, then a little of the product is diluted with water.
How to join wallpaper correctly: we do the repairs ourselves
The answer is simple: roll materials are available in a wide variety of textures and colors, which allows you to implement any design solutions. In addition, you can glue them yourself, without paying for the work of qualified specialists.
When gluing wallpaper, you should follow a number of certain rules that contribute to the long-term use of the wallpaper.
The appearance of the room will entirely depend on the quality of gluing of rolled materials. Poor-quality gluing with sloppy seams or visible overlaps will ruin even expensive wallpaper. So there is no need to rush in this matter; it is better to comply with all the requirements and work technology. Let's look at how to glue wallpaper end-to-end in more detail.
Adviсe
- There is an opinion that you can get rid of bubbles by cutting them lengthwise or crosswise with a knife. This method is only suitable for professionals and only when a uniform pattern is printed on the covering, otherwise the remaining fragments will not form a single image (read about why bubbles appear and how to glue wallpaper without swollen areas, read here).
- To get rid of bubbles efficiently, you need a syringe filled with adhesive. Puncture the swollen areas with a needle and carefully pour a little glue inside. Wait a few minutes. During this time, the material of the canvas will soften, and all that remains is to smooth out the bubble with a roller.
- Often, new wallpaper develops creases and scratches. You can get rid of them in the same way as in the previous case. A little liquid glue is injected into the problem area with a syringe. Then you need to warm up the area with a hairdryer and carefully smooth out the scratch with a rubber roller.
ImportantIf excess comes to the surface, quickly wipe it off with a dry cloth. This is a quick way to eliminate such defects.
- If the wallpaper comes off the wall along with the plaster, then you need to apply new plaster and a new canvas to the problem area. This is possible if little time has passed since the repair, and the wallpaper has not yet changed color due to the influence of various external factors.
- Do not buy materials for repairs end-to-end.
After the repair, at least a few linear meters of canvas should remain. In case of an unforeseen situation, it is difficult to find the same materials in stores. Even if you manage to find the same sample, the rolls may be from a different batch and may differ in shades.
Peeling wallpaper is not a big problem . To prevent such situations, you need to adhere to the standards for wall covering. If the canvases do come off, this can be easily corrected; the main thing is to avoid making even bigger mistakes when choosing glue and during work.
How are wall markings and wallpapering done?
Marking walls is an important procedure. Marking the walls is done using a pencil and a laser level. When the level sets the vertical, using a pencil on the wall, draw a vertical line along the entire length of the wall. Wallpapering begins from this straight line (Fig. 3).
Scheme of puttying wall joints.
Where is the best place to start marking? If the pasting is intended to be non-woven, cork or vinyl wallpaper, the marking point does not matter. Walls can be marked from the middle of the wall or from its beginning, since in the corners such wallpaper is glued in a completely different way.
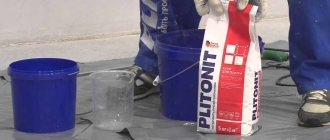
How to prepare glue for use? The preparation of wallpaper glue should be carried out strictly according to the instructions provided by the manufacturer. The glue should be diluted immediately before work, in a deep plastic or enamel bucket.
How to glue wallpaper correctly? Let's look at the technology of wallpaper gluing using the example of the most popular type, i.e. vinyl wallpaper. Vinyl wallpaper consists of two layers:
- bottom (paper or non-woven);
- facial (polyvinyl chloride or vinyl), where vinyl performs protective and decorative functions.
Due to the presence of two layers in the wallpaper, they are highly durable, reliable and durable, but are quite heavy for an unprofessional craftsman. It is better to glue them together. One worker should stand on a stepladder, the other on the floor.
How are wall markings and wallpapering done?
Marking walls is an important procedure. Marking the walls is done using a pencil and a laser level. When the level sets the vertical, using a pencil on the wall, draw a vertical line along the entire length of the wall. Wallpapering begins from this straight line (Fig. 3).
Scheme of puttying wall joints.
Where is the best place to start marking? If the pasting is intended to be non-woven, cork or vinyl wallpaper, the marking point does not matter. Walls can be marked from the middle of the wall or from its beginning, since in the corners such wallpaper is glued in a completely different way.
How to prepare glue for use? should be done strictly according to the instructions provided by the manufacturer. The glue should be diluted immediately before work, in a deep plastic or enamel bucket.
How then? Let's look at the technology of wallpaper gluing using the example of the most popular type, i.e. vinyl wallpaper. Vinyl wallpaper consists of two layers:
- bottom (paper or non-woven);
- facial (polyvinyl chloride or vinyl), where vinyl performs protective and decorative functions.
Due to the presence of two layers in the wallpaper, they are highly durable, reliable and durable, but are quite heavy for an unprofessional craftsman. It is better to glue them together. One worker should stand on a stepladder, the other on the floor.
Wall covering type
The type of wallpaper used may vary. At the same time, it is he who determines the degree of adhesion of the material to the surface of the walls: not every material adheres well to the surface prepared for gluing. One of the common wall finishing materials popular with buyers is wallpaper:
- paper (varieties on a two-layer basis);
- vinyl (hard, smooth, porous, silk-screen printing with embossing);
- non-woven (an alternative to vinyl, more environmentally friendly);
- textile (made of fabric fibers on a paper backing);
- glass wallpaper (created on a loom from fiberglass threads);
- photo wallpaper (paper wallpaper with a pattern);
- varieties of 3D (three-dimensional, changing space);
- for painting (certain types of paper, non-woven, glass wallpaper).
In their production, various natural and artificial raw materials are used, and all varieties are roll wall coverings that require joining when gluing walls. If desired, you can join all these varieties without seams: the thicker and more textured the material, the easier it is to join, but the more demanding the rules for choosing glue.
Causes of defects
First of all, you should understand the main reasons for the formation of defects.
- 1. The divergence of the edges of the canvases. When a layer of adhesive solution is applied to the material, the absorption process begins. The variety of bases used in finishing coatings is very wide, but the cellulose component is a traditional material. The properties of the base under consideration depend on many decisions of designers, including the development of the type of coating, shape, relief and width, but the very fact of moisture absorption and expansion of its original dimensions is undeniable. No matter how much glue is applied to the joints, they will definitely move and change their original position.
- 2. The applied adhesive does not correspond to the category of wallpaper used. Materials with great thickness and weight (2-layer vinyl, textile, non-woven or fiberglass) require the application of a special adhesive with a high degree of adhesion.
- 3. Insufficient number of preparatory operations or their low quality. This factor becomes significant when a uniform layer of “finish” putty was not applied to the surface of mineral compositions, or it was not sanded well enough, or was not treated with a deep-penetrating soil solution.
- 4. Failure to comply with optimal temperature and humidity parameters during the drying process of the freshly glued coating. The room must be dried under natural conditions at 20…22º and humidity below 70%. To speed up drying, do not use heaters or create drafts.
- 5. Prolonged exposure to dampness or water vapor, for example, in the event of an emergency in a steam heating structure or a roof leak.
How to glue it correctly?
To restore wallpaper that has peeled off, it is important to follow the following algorithm:
delicately unscrew the trellises that have come away from the wall; remove the resulting dirt and putty pieces from the back of the wallpaper; Vacuum the loose wallpaper, as well as the walls or ceiling. This will neutralize the harmful effects of remaining dirt and dust; remove any signs of abrasion around the edges. This can be done using a soft, colorless eraser; if the old trellises have come away from the wall with pieces of putty and a chip has formed, the wall should be puttyed and carefully treated with a primer; Apply glue to the trellis and wall using a narrow brush. If a small piece comes off, then the glue is applied using a special tube or a regular syringe; when using paper and textile trellises, they are pressed against the wall and straightened using a rubberized roller. For vinyl wallpaper and non-woven-backed trellises, use a damp cloth
It is worth noting that it is important to move the roller and rag in the direction from the middle of the trellis to the joint; For faster drying, you can use a hot hair dryer; The glued area is smoothed out again.
Do not forget that the trellises should be delicately attracted to each other.
Glue selection
Before purchasing glue for gluing joints, you need to consult a specialist in detail. The repairman will be able to select the necessary material more constructively. If glue is needed for a work team, there is no need to rush into purchasing. Most likely, the builders themselves know better what they need to complete the assigned work.
In today's reality, there is a lot of low-quality material or fakes on the market for these products. The purchase should be made from trusted sellers, thereby protecting yourself from possible problems. In addition to the fact that the glue itself for seams and joints may be of poor quality and the product will have to be purchased again, the workers themselves may refuse to work with this material. If you don’t have anyone to consult with, then the best option would be to find leading companies. Their products will not be cheap, but if you definitely buy a product from an official representative, you will not end up getting a fake.
The video will help you to hang wallpaper correctly and make the joints and seams between the wallpaper invisible:
Recommended Posts
How to properly glue wallpaper end-to-end
Which glue for paper wallpaper is better
Wallpaper glue Moment
Choosing wallpaper glue: consumption and tools
Which glue is best for non-woven wallpaper?
Non-woven wallpaper adhesive
Preparation for gluing
Before you learn how to glue wide wallpaper, you need to ensure a smooth surface of the walls.
First we remove the old coating. To facilitate the gluing process and for beauty, remove external boxes of sockets and switches, screws, self-tapping screws, and small furniture parts. If there are dents and irregularities, smooth them out using putty, sand and prime. Otherwise, defects may spoil the impression of the repair. The surface of the walls should become dry, hard and rough.
Tools
To hang meter-long wallpaper correctly, you need to prepare:
- level;
- putty knife;
- rubber spatula - for smoothing;
- scissors;
- knife, preferably a stationery knife;
- roller;
- brush;
- sponge;
- buckets for glue and water;
- roulette
Decoration Materials
Before you start wallpapering the room and cutting wide wallpaper, keep it there for at least 2 days. Be sure to check whether all meter rolls are from the same batch - look at the markings on the label
This is important because batch differences may differ in the shade of the pattern.
Continue to study the label. On it you will read about how to glue wide wallpaper by adjusting the pattern:
1. Counter docking.
On the label you will see arrows that are located in the opposite direction. This marking means that you need to alternate the direction of the roll webs, completely turning them over from bottom to top and vice versa.
2. Direct docking.
The coating should be correctly glued to the same length and direction.
3. Free docking.
Don’t think about the design, but glue one sheet after another without adjusting the pattern of the meter roll.
4. Docking with offset.
The most uneconomical, complex and time-consuming option, because meter-long wallpaper will have to be adjusted.
Taking into account the manufacturer's recommendations, you can begin cutting the roll. Using a tape measure, measure the height of the walls, add 5 centimeters from each edge and cut on a flat surface. After cutting, number each roll so you don't mix up the order.
Glue
Even before cutting the roll, prepare glue that should match its type. Pour water into a bucket and pour in the powder little by little, stirring in a circular motion. Before gluing, let the resulting solution sit for 15 minutes. The glue will swell and become more sticky.
What to use?
If the wallpaper does come off, you need to understand why this situation happened and try to solve these problems (for example, non-compliance with the temperature regime or uneven walls). If the canvas can simply be glued without completely redoing the work, then you should use the following recommendations.
Tools
Before gluing up the peeled wallpaper, you need to prepare the following tools and materials:
- rubberized roller;
- brush;
- glue;
- large syringe;
- narrow spatula;
- clean rags.
Sometimes you may need a hairdryer to dry quickly.
Which glue to choose?
You can glue the canvas with regular wallpaper glue.
Advice: The glue needs to be diluted to a more liquid state than for conventional gluing.
You should not use the old method of gluing with flour paste. This was once considered a good option, since good adhesives did not exist or were difficult to find, but thin paper wallpaper stuck well to homemade compounds
There are already more advanced wallpapers, for which it is important to comply with the exact norms and rules of pasting
Is PVA suitable?
It is often advised to use PVA, but experienced craftsmen do not recommend this. It is insoluble in water, and in the future during renovation it will be impossible to remove the wallpaper, since it will not be possible to easily tear off a piece of canvas from the wall. When using PVA, yellow spots may appear on the surface, ruining the appearance of the coating (you can find out why the wallpaper turned yellow after hanging and how to fix the problem here). As a last resort, you can mix PVA with wallpaper in proportions of 1 to 10.
Special glue for joints
Especially for such situations, there is an adhesive on sale that is designed for gluing wallpaper at the joints. Its advantages:
- Thanks to the special components in the composition, it provides very fast adhesion of surfaces.
- Does not require dilution, since it is produced ready-made, saving the user’s time.
- Available in tubes with a dispenser, it is convenient to apply.
- Often a brush is included to apply it in hard-to-reach places.
- Excess can be easily wiped off with a damp cloth.
- After complete drying, the glue becomes impervious to water, so the glued canvas will not come off due to high humidity in the room.
This glue can be used for any type of material - paper, non-woven, vinyl, etc. (find out how to properly glue non-woven and vinyl-based wallpaper). There are many manufacturers of this product on the construction market, so it can be easily purchased.
What are the features of gluing vinyl wallpaper?
The question of how to glue vinyl wallpaper, what are the features of working with it, worries many novice craftsmen. The process of pasting vinyl wallpaper includes the following operations:
Figure 3. Wall marking scheme.
- Applying glue to the wall surface. The glue is applied in an even layer using a brush or roller to a width slightly larger than the width of the wallpaper.
- Applying the top edge of the wallpaper to the prepared surface.
- Aligning the joint of the edges. The joints should not overlap each other.
- Gluing a sheet of wallpaper to the wall.
- Displaces air bubbles and excess glue from under the wallpaper. It is better to do the work using a cotton rag or a soft brush, moving from the middle of the panel to the edges and from the ceiling to the floor surface.
- Repeat the previously described operations until the entire room is covered with wallpaper.
If glue appears at the joint of the wallpaper, it should be removed immediately with a cotton rag, but under no circumstances use a brush.
Scheme for wallpapering butt joints.
After the wallpaper is glued to the walls at the baseboard and at the ceiling, excess material remains. Unnecessary material is removed from the walls using a ruler and a sharp knife with replaceable blades. During operation, the cutting part of the knife should be changed, since a blunt instrument tears and crushes the material.
How to glue vinyl wallpaper near the ceiling? Wallpaper at the top of the wall near the ceiling should be glued from a stepladder. The edge of the canvas adjacent to the corner of the ceiling and wall is turned up by 5 cm so that the glue cannot get onto the plane of the ceiling. Then the strip of material is carefully pressed against the wall and smoothed with a rag, moving along the surface from top to bottom. This is how all the canvases are glued.
If the canvases are not glued to the base of the ceiling (for example, 10-20 cm below), then before gluing them you need to mark the perimeter of the room with a level and draw a boundary line on the wall with a pencil. When gluing, you need to focus clearly on the drawn line, while aligning the joints.
How to re-glue a large area
What should you do if the wallpaper comes off completely, in a large area? There is also a sequence of work here. The tools are still the same. Problem solving technology:
We eliminate all drafts inside, close the doors and windows. You need to remove debris and adhering putty from fallen wallpaper. The wall is protected in a similar way. There should be no dust or dirt. They weaken adhesion. You can use a vacuum cleaner and thoroughly clean the problem area. The large peeled strip is coated with glue. She needs to let the glue soak in for 10 minutes. Glue is also applied to the wall. At the same time, you need to be careful if you work with a partially peeled trellis
It is important not to stain the front part with glue and not spoil it. The strip is neatly straightened and fixed in place
Ideally, this work should be done together to avoid creases in the material and the appearance of air bubbles. The final stage is to go over the wallpaper well with a rubber roller so that the trellis sticks securely. This removes excess glue and air. Remains of glue are removed with a damp cloth.
If everything is done correctly and efficiently, then the canvas will not peel off in the future.
How to glue wallpaper end-to-end: technology
The most important thing is that the voids between the joints were not visible. Such an adjustment is necessary, otherwise the gluing will not be aesthetically pleasing. If you paste wallpaper without observing precision in the joints, the feeling of carelessness in pasting will remain. And this, of course, is not correct.
Step-by-step technology for wallpapering butt joints:
- Cut the roll into sheets, adding another 5 cm to the strips; the excess will then be cut off;
- Spread the canvas with glue from the center to the edges, bend the strip in half and let it soak in the glue for a couple of minutes;
- Using a plumb line, draw a vertical line so that the first strip goes straight, then you will be guided by it - why there is often a bevel, precisely because of the imperfectly evenly glued first strip;
- Wallpaper is usually glued away from the window;
- Excess pieces are cut off with a knife only after the strip has dried; do not rush to remove the excess immediately;
- Smooth the wallpaper with a special spatula; if the glue comes out from under the canvas, remove it with a rag;
- Glue the next canvas flush with the previous one without spacing; if you have to adjust the wallpaper according to the pattern, the complexity of the work increases (in this case, always take more on the tube, as some pieces will fall out due to adjusting the pattern);
- The joint should be invisible; after the strip is glued, go over it with a special seam roller that will fix the joints.
Features of preparing walls and ceilings for gluing
Non-professionals need to take into account that the surface to be pasted must be prepared. For this:
- Remove dirt and remnants of old decorative coating.
- They putty the surface, eliminating cavities, cracks, and other irregularities.
- Primed. It is easier to apply the primer with a soft roller.
- Wooden walls are treated with antiseptic disinfecting compounds.
The primed surface must dry completely. Only after this can you start gluing.
Nuances depending on the surface
The table shows the types of surfaces on which you can paste wallpaper, but you need to take into account a number of features:
| Surface type | How to glue, what needs to be done for this? |
| Painted walls | The paint is completely removed. The procedure differs depending on its type: water-based, oil-based, acrylic, latex, water-dispersion. |
| Drywall (GKL, GVL, GKLV) | The joints are puttied; it is not necessary to putty the surfaces. |
| OSB board | It is taken into account on which side the laminated coating is applied, on which the wallpaper does not stick. |
| Plaster | Primed. But if it is plaster or other decorative, textured, then it needs to be removed and the wall treated as described earlier. |
| putty | After impregnation of the putty walls with primer, you can begin gluing. Latex finishing putty is removed. |
| Whitewash | Whitewashed walls are washed off until no traces of lime remain on the surface. |
| Plywood | You can glue paper wallpaper and paper-based materials without a primer. |
| Fiberboard and hardboard | The material does not have sufficient strength, which does not allow covering it with wallpaper. |
| Fiberglass | It is removed because it is a suitable base. |
| Old wallpaper | It is better to remove and treat the wall as required by the gluing technology. Instructions for removing wallpaper. |
| Concrete walls | It is enough to prime it if we are talking about a flat surface. Sinks and joints are puttied. |
| Plastic panels | The frame is dismantled. Plastic does not have the ability to hold a load. |
| Betonkontakt | This polymer coating is specifically designed to provide adhesion. |
| Wooden surfaces | The lining or timber will have to be sewn under the plasterboard frame. |
| Glass | Smooth and cannot be used as a base to be wallpapered. |
| MDF panels | It is better to abandon the idea, since the material has weak adhesion. |
| Cork | The cork covering is removed because it is soft and cannot guarantee the safety of the wallpaper under mechanical stress. |
| Styrofoam | The material does not have sufficient strength and must be dismantled. |
| Penoplex | Glue does not provide sufficient adhesion. |
| Tiles (tiles) | Completely dismantled. |
| SIP panels | The surface, if necessary, is puttied at the joints and primed. |
| Clay walls | They are treated with special impregnations to impart the necessary strength. |
How to glue laminate
Polymer compositions are used to lay adhesive-based coatings. Mineral compounds, casein adhesives for wood and rubber are not used due to strong shrinkage and uneven seams.
You can use the same glue for laying on the base and sealing the seams; sometimes craftsmen additionally glue the joints with sealant. This is not particularly necessary if a specialized composition from a well-known manufacturer is used, but if you plan to lay the laminate with Bustilat or inexpensive tile adhesive, then sealing the joints with colored silicone would be a completely reasonable idea.
The sealant is good, but only at the joints of the laminate
The main group of adhesives for gluing laminates includes:
- Specialized two-component adhesive compositions. It can even be glued to concrete or cement particle board. Does not age and is not subject to destruction, is not afraid of water and temperature changes;
- Water-based adhesives are the cheapest and most accessible to use. The quality and strength of fixation is below average, but due to the low price it can be used for laying laminate flooring on concrete as a continuous carpet;
- Polyurethane and polyester emulsions in organic solvent. They do not contain water, so the absence of surface swelling and joints is guaranteed. Can be used as an adhesive for flexible laminates.
To install laminate flooring, you cannot use adhesive compositions containing aromatic and chlorine-containing solvents. In addition to the fact that such glue can cause damage and dissolution of the panel material, its vapors are well absorbed by cellulose fibers and often cause poor health of apartment owners.
How to glue laminate to wood
The back side of the lamella resembles very thick cardboard in its surface structure, so there are no problems with adhesion. To lay laminate on an old sanded wooden floor, you can use acrylic material; it is best to glue it to PVA, water-dispersed “Stolyar” or even “Bustilat”.
Vinyl acetate material
Laminate is glued to a wooden base using one-component compounds based on vinyl acetate emulsion. You can, of course, use expensive brands, for example, the Italian “Sipol Leacher” based on polyurethane and epoxy resin, but given the price of 3,000 rubles. per packaging, such a solution will only be justified for very old plank floors.
How to glue laminate together
For sealing joints and gluing lamellas together, exclusively plastic compositions are used. Any high-strength grades, including two-component grades, provide sufficient strength to the seam, but under conditions of critical overload, cracks may appear at the joint, or the lock may even break.
To glue the lamellas together, as well as for laying them on a rough base, you can use any polyurethane adhesives, for example, “U BOND X-TREME”. According to reviews, this adhesive for laminate flooring can be considered one of the best. Provides high seam strength and absolute vapor tightness of the joint.
Polyurethane glue
In appearance, the glue resembles a viscous thixotropic paste, which can be easily applied to the floor and the back side of the laminate with a regular plaster spatula.
How to glue laminate to plywood
To lay laminate flooring on a plywood base, you can use the same “U BOND X-TREME”, but most often experts recommend specialized one-component Italian glue “Ecosimp”.
One of the few adhesives considered absolutely safe and environmentally friendly. Recommended for laying laminate flooring on boards and plywood bases in bedrooms, living rooms and children's rooms. It has high elasticity and resistance to watering.
Important! "Ecosimp" is one of the few environmentally friendly adhesives that are not afraid of flooding and direct contact with water. Recommended for laying coverings on heated floors.
The cost of the material is about 2000 rubles. per kg.
How to glue laminate to chipboard
Chipboard is a rather difficult material to handle; its surface has a high roughness, which should improve adhesion to the adhesive mass. In reality, on the surface of chipboard there is a large amount of residues of resins and binders used in its production, so the material does not adhere well to PVA and water-soluble compounds.
You can lay laminate on chipboard using “Sipol Leacher” or “U BOND X-TREME”, but two-component polyurethane adhesive “Legnopol 2000” produced by .
The glue consists of two components, which are mixed with a regular mixer in an open container. Unlike most polyurethane compounds, it does not have a suffocating odor and dries in just 24 hours. The mixture must be used within one and a half hours from the moment of mixing.
It has high elasticity, so it can be used to glue almost any floor, from laminate to mosaic parquet.
How to glue laminate to drywall
To glue lamellas to a base of plasterboard boards, you can use inexpensive water-acetate adhesive “POVICOL PROBOND”. The cost of a 25 kg package is only 5,500 rubles, with a consumption of 850-950 g/m2 this is enough to stick laminate in a one-room apartment.
In appearance, the glue is a thick paste that is applied to the base using a spatula. Despite the water-based material, moisture does not have any effect on laminate and plasterboard sheets. In order to glue the laminate to the chipboard, you just need to first clean the surface of the board from dust and debris. The wood-chip base produces a large amount of sawdust, so the material must be cleaned before laying the lamellas.
Drywall requires a very soft, flexible adhesive.
The glue gains strength within a day, and after another day you can walk on the laminate.
How to glue laminate to concrete
Most of the adhesive compositions listed above can be used as adhesive for concrete, cement screed, or any mineral base to which conventional adhesives do not stick. Dense cement stone is not the best base for laying laminate flooring. Alternatively, you can glue the laminate onto the foam. It is enough just to prime with acrylic concrete contact and dry the concrete surface.
You can glue polyurethane foam without a primer, but in this case it will be necessary to moisten the cement screed, since the foam does not adhere well to dry, dusty surfaces. After the lamella has been laid on the polyurethane foam, it will need to be loaded with pressure, otherwise the glue will lift the panel.
Two-component composition
For professional quality work, specialized brands of adhesives are used. For example, German polyurethane adhesive “Basf Fast 3000”. The composition includes:
- Polyurethane resin;
- Hardener;
- Stabilizing additives to reduce pore formation;
- Marble micropowder.
In fact, this is a universal adhesive that can be used to glue vinyl laminate, parquet, linoleum, boards and mosaics. Due to the mineral filler, the cured material has great strength, so Basf Fast 3000 can be used for the most stressed types of laminate. They are used to glue coverings in offices and shopping centers, where on average there are 150-170 people per m2 of floor per day.
Absolutely harmless to humans and the environment, can withstand heating up to 120°C. Price from 700 rub. per kg.