For proper, and most importantly, less costly finishing work, the amount of necessary building materials should be pre-calculated. The consumption of plaster per 1 m2 has already been pre-determined by the manufacturer, and additionally the consumption rates were calculated and repeatedly tested back in the Soviet era and prescribed in SNiP. Simple calculations will help you quickly determine the required amount of material. More details about everything below.
What regulatory documents should be used when calculating
Standards for plastering walls were drawn up a long time ago and over the years have been repeatedly tested in practice by many builders. To determine the material consumption per 1 m2, only 2 regulatory documents are required, namely:
- SNiP 3.04.01-87. The standards have been drawn up specifically to determine the thickness and quality of both insulating and finishing coatings.
- Standard indicators of material consumption (NPRM) Collection 15.02 Plastering works. The collection is quite extensive and is recommended by the State Construction Committee of Russia as information material for the development of construction estimates. Standards and types of finishing materials for any surface are given.
Many of the data specified in SNiP 3.04.01-87 or in the more current version SP 71.13330.2017 are also in NPRM, but in an abbreviated version. No more regulatory documents are required to calculate consumption.
Summarizing
To make it easier for the user to navigate the proposed calculations, we provide a table with comparative data on the consumption of plaster mixture on a wall of a given size.
| Wall size | Layer thickness, mm | Type of plaster | Brand name and bag weight | Package weight, kg | Consumption per 1 sq.m. with a thickness of 10 mm, kg | Consumption, kg/bags |
| 4x3.2 m, area 12.8 sq.m. | 25 | Cement | "Moment" cement | 25 | 17 | 544/22 |
| BauGut ZPT | 25 | 16 | 512/21 | |||
| Weber-Vetonit Facade Gray | 25 | 18 | 576/23 | |||
| 8 | Plaster | EUROGIPS IzoPover | 30 | 8 | 82/3 | |
| BauGut Baugips-START | 30 | 8,5 | 87/3 | |||
| 3 | Decorative | Mosaic Ceresit CT 77 | 14 | 30 | 115/9 | |
| “Bark beetle” POLIMIN ШФ-1 2.5 mm | 25 | 32 | 123/5 |
Recommended conditions before starting work
The consumption indicated in the regulatory documentation is relevant for certain environmental conditions both indoors and outdoors. Before starting finishing work, you should make sure that:
- The room temperature is at least 10 C0. Air humidity – no more than 60%.
- The room is ready for plastering. To do this, it is necessary to maintain the nominal temperature in it for 2 days before work and 12 days after.
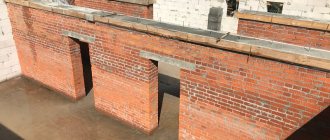
Preparation and plastering of a brick wall
Only if the above conditions are met, the consumption of plaster per 1 m2 will not exceed that stated in the regulatory documentation.
Tips for calculating cement consumption
Helpful tips and recommendations from experts will help you more accurately determine material costs:
- For calculations use a tape measure and a calculator. First, determine the zero point. Starting from it, find the minimum and maximum difference. If local bulges are too large, they are cut off with a grinder. It is recommended that the layer be as uniform as possible over the entire surface.
- When choosing a mixture, take into account the number of layers, type of base, type of finishing coating.
- The composition should be purchased in the required quantity. The stock is made no more than 10% of the volume.
- When calculating, the values for doors and windows are subtracted from the total area.
- When purchasing, pay attention to expiration dates and storage conditions. The longer the solution is stored, the worse its performance characteristics.
- When using stale goods, they make a larger stock in quantity.
Leveling the walls and creating a screed are mandatory stages in the rough renovation of apartments and houses. Theoretical knowledge and practical experience in calculating the required materials allows you to significantly save costs on materials and avoid making mistakes when choosing the appropriate composition.
How do you calculate the ratio of the components of the cement-sand mixture? Share your experience in the comments.
Permissible thickness of plaster layer
To determine such an important parameter as the permissible thickness of the plastered layer, you should look at Table 10 of SNiPa 3.04.01-87.
Technical requirements of the regulatory document:
- The layer thickness when plastering walls in one layer, for all categories of finishing materials except gypsum, should be 20 mm. When using gypsum-based solutions – 15 mm.
- Thickness at spray stone, brick, concrete walls in several layers - 5 mm. Wooden - no more than 9 mm.
The first stage of plastering. Spraying a concrete wall - When applying cement mortar-based soil Lime mortar (addition of gypsum is allowed) – 7 mm.
The covering layer when plastering the surface should be no more than 2 mm, but only if it is not a decorative finish - then it is allowed to make it 7 mm.
Plaster composition
Plasters have different compositions: clay, lime, gypsum, cement, but the most common are cement plasters, which have great durability and stability. To impart the necessary qualities, various additives are introduced.
Types of cement mortar:
- Cement, which consists of cement and sand fraction, is used for plastering internal and external elements.
- Lime, to which lime milk is added, which increases the plasticity of the mixture, is also used inside and outside.
- Cement-clay is recommended for use in conditions of low humidity.
The use of a particular composition is determined by operating conditions.
At high humidity inside and for finishing facades, cement and lime mortars of the required strength are used.
Finished walls
At low humidity, lime plaster and lime-gypsum mixtures can be used for interior and exterior decoration.
Calculation of the required amount of mixture
You can determine the required amount of material for plastering using this method. It is necessary to calculate the average layer thickness for a wall with an area of 12.5 m2. First, the wall is hung in several places; the more you do, the more accurate the result will be. The results obtained for the curvature of the wall, for example, 1, 4, 2 cm, must be added up and divided by the number of sags, in our case three. We get the middle layer (1+4+2)/3=2.33 cm.
Now you need to calculate the average consumption per square meter and the total amount of material. If you chose “Volma-layer” for plastering, which has a consumption of 9 kg/m2, then we get 9 * 2.33 = 20.97 kg, this is the average consumption. We multiply it by a total area of 12.5 m2, 12.5 * 20.97 = 262.1 kg.
The mixture is sold in 30 kg bags, so we calculate how many bags you need to buy: 262/30 = 8.73. We round up the resulting result and get 9 bags. Now it’s easier to calculate how much you need to spend to plaster a wall. You can use an online calculator to calculate.
Technology for determining the “average thickness of the plaster layer”
So-called “key points” or “beacons” are attached over the entire area of the wall to be plastered, which are set according to the level. These can be nails, self-tapping screws, screws or special strips. The rule here is “the more beacons, the more accurate the calculation.” In general, there should be at least three “key points” located over the entire wall area.
Linear measurements of the depths of the recesses are made, which in one place of the wall can be 5 cm, in another 2 cm, and in a third 6 cm. The measurements of irregularities are summed up, after which their average value is calculated.
Mixture consumption per 1 m2 of surface
In the collection 15.02 NPRM you will find all the tables with consumption rates for various types of plaster (lime, cement, cement-lime mortar). For ease of understanding, its GOST is indicated next to the solution, and the consumption of mesh, plaster and dowels is also given. An inconvenience arises when calculating the amount of mixture per 1 m2, when the data is given in relation to 1 m3/100 m2 of area.
Consumption per 1 m2 with the condition that the material is applied in one layer (layer thickness - 1 cm):
- Plaster – 9 kg.
- Cement or cement-lime mortar – 17 kg.
- "Rotband". The main difference between the mixture and standard gypsum mortar is the presence of adhesion-improving additives. The consumption of the Rotband mixture per 1 m2 is 8.5 kg.
- "Bark beetle." "Bark beetle" is often used for finishing the facades of buildings and much less often - indoors. This type of plaster has several varieties, but on average its consumption is 3 kg per 1 m2.
- "Volma". Volma plaster is popular due to the variety of products - there are at least 22 types. One of the most common is “Volma-layer”, and its consumption ranges from 8 kg.
- Venetian plaster. It is more suitable as a filling option, since its layer should be very thin, so the consumption of the “Venetian” is as economical as possible: 200 g per 1 m2.
Consumption per square meter for some types of plasters - Vetonit. It is widely used due to its relatively low consumption. The composition of Vetonit mainly includes: cement (base), sand, limestone and microfiber. Consumption: 1.5 kg per 1 m2.
- "Teplon". Gypsum-based plaster is valued for its high environmental friendliness, affordability in terms of pricing policy and high-quality vapor permeability. Teplon consumption is 1.8 kg.
Important! If the surface is too deformed or there are cracks and potholes, you should add a certain amount of material to the already calculated one. Sometimes it is simply enough to round the estimate number up if it is not a whole number.
Calculation of plaster for walls in general
In the basic version, the calculations are relatively simple: take the area of the wall, multiply the thickness of the layer - and the result is obvious. But there are some nuances here, even if a special calculator program is used.
The most common errors in calculations:
- Data in different units is entered into the plaster calculator. Example – height and length of the wall in meters, layer thickness in millimeters. If the units of measurement are not specified in the appropriate fields, the user receives completely incorrect results;
- The curvature of walls and corners is not taken into account. In fact, the influence of this parameter is such that the consumption of cement plaster for rough leveling can increase by 1.5...2 times compared to the calculated value for smooth walls;
- When calculating the thickness of the cement plaster layer, the presence of depressions and irregularities on the wall is not taken into account.
To avoid the first mistake, you just need to pay attention to the calculations and remember that for any mathematical operations, the elements of the expression must have the same dimension - if meters, then they indicate both the length of the wall and the thickness of the layer. For online calculators, input is required in the format specified in the notes to the columns of the calculation form.
The second and third mistake - inattention to the curvature of walls and corners, irregularities - is corrected by calculating the average value of the layer thickness. To do this, using a level, a rule and a cord, the contour of the future surface of the plastered wall is “beaten” and the distance from the conditional plane to the real surface is measured in several places. Fragments with the greatest curvature and the largest recesses are selected. All obtained dimensions are summed up and divided by the number of measurements.
Gypsum plaster according to GOST
Nowadays, the most popular mixtures for plastering premises are made on the basis of such a universal building material as gypsum. But not all manufacturing companies, due to the constant savings in component materials, strictly follow the letter of GOST. The main regulatory document that precisely specifies the requirements for the production of gypsum mixture is GOST R 57957-2017.
The following are available in GOST:
- Notation.
- Types of gypsum plasters.
- Labeling and packaging.
- Thermal conductivity values of the material after it hardens.
Composition of gypsum plaster
But most often, buyers are not interested in the composition of the plaster, but in its proportions. To find out the components of a dry gypsum mixture, just look at GOST 31377-2008, which consistently describes all the requirements for this product:
- The dry mixture must not contain grains larger than 5 mm. GOST allows the presence of grains measuring 1.25 mm - no more than 1%, 0.2 cm - no more than 12% and 0.125 - no more than 15%.
- Gypsum, which is added to the dry mixture, must be made in accordance with GOST 125.
- After adding water to the dry mixture, the resulting solution should set during manual application in at least 45 minutes. When using any application technique - no less than 90 minutes.
- The water holding capacity should not be less than 95%.
Important! If this GOST is indicated on the box of the purchased mixture, but the quality of the plaster, its hardening time or other characteristics do not meet the requirements of the regulatory document, then each buyer has the right to receive monetary compensation.
Main types and composition of gypsum plasters
A feature of gypsum plasters is their limited use: they can only be used for interior work. This factor is explained by its natural ability to absorb moisture.
The following surfaces can serve as the basis for gypsum plaster:
- clay walls and ceilings;
- brick-lined surfaces;
- concrete surfaces;
- walls of any size, finished with cement-based plaster;
- renovation of old plaster surface;
- walls made of various types of concrete with a porous surface: foam concrete, aerated concrete or expanded clay concrete.
Gypsum plasters, which contain polymer components, have a shorter drying and hardening period, which significantly reduces the time for repair work.
Volma
Currently, various additives are introduced into finishing mixtures, which give them new properties. To obtain finishing mixtures of a certain type, hemihydrous calcium sulfate, obtained after grinding and firing, is used as a basis.
The most commonly used components are:
- a group of thermal insulating fillers, such as perlite, foam glass, bulk insulation vermiculite, expanded polystyrene (an effective thermal insulator);
- plasticizers that increase the strength of the solution, reduce the setting speed, which ensures its good shrinkage and increases waterproofing properties;
- additives in the form of zinc or titanium white, providing a light tone to the finishing material;
- special additives designed to regulate the setting time of the solution and the time of its complete hardening.
Plaster Knauf Rotband
Knauf Rotband is very popular among craftsmen and finishers. Firstly, because of its versatility (suitable for concrete, brick, cement surfaces, as well as gypsum partitions). Secondly, because of its affordable price.
When purchasing Knauf-Rotband plaster, you should not pay attention to its color, since similar products can be white, gray or pink. Different colors and shades of the mixture are given by polymer additives, which are mixed with the main ingredients specifically to give good stickiness to the finished solution.
The consumption of Rotband is much less than cement-based solutions, since gypsum predominates in these products. 8.5 kg of mixture is enough to cover an area of 1 mm2. A layer 1 cm thick dries in no more than 1 hour, but to fully gain strength, the plaster should be allowed to sit for at least 7 days.
Gypsum solutions are capricious in some nuances, so Rotband has several minor drawbacks:
- A layer of Rotband plaster is inferior in strength to the same layer, but based on a cement component.
- It quickly enters into a process with metal parts (nails, screws, screws, self-tapping screws), which leads to their rust. Therefore, yellow stains may appear on the plastered surface over time.
- It is best not to apply Rotband in areas with high humidity.
Important! The building materials market is filled with fakes, which in appearance and cost are practically no different from the original. The main feature of Knauf Rotband unnatural plaster is the presence of sand in the packaging. Such a product should be returned to the seller immediately!
Advantages and disadvantages
No material is ideal for all situations. This also applies to a cement-based composition: it has both advantages and disadvantages.
A coating with this composition is used in the following cases:
- Plastering inside and outside.
- Block wall covering.
- Finishing of concrete structures to improve thermal insulation.
pros
- You can mix it with your own hands.
- The finished surface is resistant to moisture.
- Not afraid of temperature changes.
- Provides stable adhesion to various substrates.
- Provides the highest strength characteristics.
- Finishing is cheaper than other mixtures.
- Can be used for any design.
Work on lighthouses
Minuses
- To ensure strong adhesion to wood, ceramics and structures with paint residues, preparatory work is necessary: priming, notching or applying a mesh for reinforcement.
- The applied layer takes up to a month to gain strength.
- The process is labor-intensive: to achieve the required evenness, the experience and qualifications of the performer are needed.
- The surface requires additional operations: grouting, grinding, priming, puttying.
- Due to its significant weight, it increases the load on the building structure.
- When the building shrinks, cracks may form.
Consumption rate of plaster per 1 m2 - table
Consumption of gypsum plaster Rotband Knauf
| Plaster mixture | Approximate consumption, kg/m2 |
| plaster | 9 |
| cement | 17 |
| decorative | 8 |
| Rotband Knauf, grain up to 1.2 mm, layer 10 mm | 8.5 |
Consumption of decorative plaster CERESIT bark beetle | |
| “Bark beetle” Ceresit CT-35, dry, grain 2.5 mm | 2 |
| “Bark beetle” Ceresit CT-35, dry, grain 3.5 mm | 3 |
| “Bark beetle” Ceresit CT-63, acrylic, grain 3.0 mm | 3.7 |
| “Bark beetle” Ceresit CT-64, acrylic, grain 1.5 mm | 2.0 |
| “Bark beetle” Ceresit CT-64, acrylic, grain 2 mm | 2.7 |
| “Bark beetle” Ceresit CT-75, silicone, grain 2 mm | 2.5 – 2.7 |
| “Bark beetle” Ceresit CT-73, silicate, grain 2 mm | 2.5 – 2.7 |
| “Bark beetle” Ceresit CT-73, silicate-silicone, grain 2 mm | 2.7 |
Consumption of Volma gypsum plasterVOLMA-Layer, layer 10 mm VOLMA Gypsum Active, layer 10 mm Volma cement plaster consumptionVOLMA-Aqualayer, grain up to 1.25 mm, layer 10 mm VOLMA-Aquaplast, grain up to 1.25 mm, layer 10 mm VOLMA-Aquastart, grain up to 1.25 mm, layer 10 mm VOLMA-Bark beetle, layer 10 mm Consumption of Yunis plasterTeplon Universal, layer 10 mm Teplon Moisture-resistant, layer 10 mm Teplon White, layer 5 mm BARK BEAD-DECOR, grain up to 3 mm, layer 2 mm BARK BEAD-DECOR, grain up to 2 mm, layer 2 mm Consumption of plaster Prospectors“Optimum”, “MIXTER”, layer 10 mm “Gypsum”, “Gypsum White”, layer 10mm “Cement”, layer 10 mm BARK BEETLE, grain 2 mm, layer 1.5-2 mm BARK BEETLE, grain 3 mm, layer 1.5-2 mm Consumption of Bergauf plasterBAU PUTZ GIPS, layer 10 mm BAU PUTZ ZEMENT, layer 10 mm EASY PLASTER, for beginners, layer 10 mm PRIMA PUTZ GIPS, layer 10 mm EASY BAND, layer 10 mm | |
We plaster with our own hands
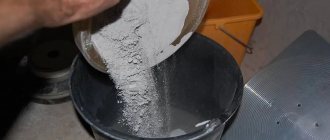
After we have calculated the required amount of material and purchased dry components, we begin to carry out the work.
- We prepare the surface. We clean the wall from dust and flaking building materials. We remove rust and oil stains.
- We prime the surface in 2-3 layers, applying each subsequent layer after the previous one has dried.
- Apply the plaster in three layers. First of all, spray a medium-consistency solution onto the wall; this can be done with your hands, with a spatula, or with a ladle. Then we rub the composition over the surface with a rule or a grater: apply 4-5 mm thick to a concrete surface, up to 7 mm to a brick surface, and up to 10 mm to wood.
- The second layer is the main one. Mix the solution a little thicker than for spraying. Using a spatula or trowel, apply the composition to the wall and rub it over the surface, leveling it.
- Apply the last layer with a thickness of no more than 4 mm, and prepare a more liquid solution for it. Apply the coating to the moistened base layer. After setting, but before the surface dries, we grout. For more information about plastering work without beacons, see this video:
A type of wall plaster is beacon finishing, which allows you to create a perfectly flat surface.
The guides are installed strictly according to the level at a distance slightly less from each other than the width of the rule. Beacons can remain in the wall or be removable.
Rule from the bottom up
Stages of applying plaster to lighthouses:
- We fill the area between the beacons with a solution and level it using the rule. We fill all the voids and carefully level them.
- We cover and rub the surface well.
We need to prepare such a volume of solution that we can apply it before it hardens.
Repair is not complete without leveling the walls and performing plastering work. The surface treated with a cement composition serves as a reliable basis for finishing.
In order not to make mistakes when purchasing materials for independent repairs or to control the builders, you need to know how much material is consumed. After studying this article, you can easily calculate these indicators.
Source
How to reduce consumption
As soon as a beginner calculates the total amount of dry mixture needed for plastering, he immediately asks the question: is it possible to reduce this value, because the total amount (and the amount of costs for its acquisition) is impressive.
The amount of plaster consumption per 1 square (per 1 m2) can be reduced in several ways:
- by clogging the pores of the base, which absorb part of the applied solution, by applying a primer;
- installing beacons on “low” sections of the wall, without trying to maintain an even distance between the planks (this achieves a reduction in the average thickness of the leveling layer);
- replacing metal profiles with mortar beacons made of gypsum mixture (their height in fact may be less than 6 mm of the profile + the height of the screws under the planks);
- by cutting down the most protruding sections of the wall (this will reduce the average thickness of the leveling coating);
- by plastering only those parts of the walls that are important for installing cabinet furniture or that are open to view, and the rest of the surface without plastering;
- using pieces of drywall in the “lowest” areas to reduce the curvature of the wall;
- having completed the basic leveling with plasterboard sheets (dry plaster with installation on the frame);
- replacing manual plastering with machine plastering.