Inexperienced finishers often ignore the process of properly preparing surfaces before gluing wallpaper, believing that it is enough to just eliminate unevenness, but in reality everything is more complicated.
It’s easy to understand whether the walls need to be primed before wallpapering, by appreciating the advantages that this procedure brings:
- walls treated with primer do not support the spread of mold and mildew;
- impregnation ensures better adhesion - the wallpaper will stick firmly to the wall;
- the treated surfaces have higher moisture resistance, which also ensures strong adhesion of the wallpaper to the wall even at high humidity;
- The primer levels out minor wall irregularities and eliminates excessive surface porosity.
The listed beneficial properties of the primer make it possible to complete the work of gluing walls with higher quality, ensuring the durability of the coating, which is especially important when installing expensive products.
Types of primers and their characteristics
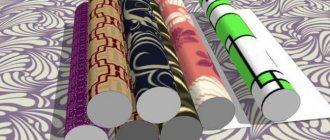
When choosing a specific type of primer, you should take into account the material that is the basis of the product. Manufacturers have developed special formulations that are optimally used for heavy and light materials. Based on their composition, soil is divided into several types:
- Acrylic. These impregnations are used for treating concrete surfaces, drywall and wood. Excellent for living rooms as they are odorless. Complete drying time is up to 24 hours. Impregnations of this type are considered universal.
- Alkyd. Used to prepare wooden and metal surfaces for subsequent painting or pasting. They dry quite quickly - up to 12 hours. Cannot be used to protect plastered walls.
- Glyptaliaceae. These impregnations are designed for metal products. It will take at least a day to dry.
- Perchlorovinyl. Prohibited for application in living rooms. Designed for coating mineral substrates and metal products. Drying time - up to 4 hours.
- Polyvinyl acetate. For high-quality impregnation under standard conditions, 30 minutes is enough. Used to cover walls before gluing with PVA-based products.
- Polystyrene. Also not recommended for interior protection. Designed to protect wooden and plastered walls.
- Phenolic. Designed to protect wood and metal elements.
Types of soil
The modern construction market offers a wide range of primer materials.
According to the type of primer solubility, there are:
- based on organic acids (alkyd resins, polyurethane, latex);
- water-dispersed, which can be diluted with water (acrylic, latex, silicate, silicone);
- mineral (based on lime, gypsum, cement).
Water-dispersed varieties are considered a harmless type; they are distinguished by the absence of odor during the treatment of walls. They should be used to prepare walls for interior wallpapering.
By purpose they are:
- universal;
- specialized;
- antifungal;
- insulating;
- strengthening.
Universal solutions took a little from each type with a separate effect. The rest have their own characteristics and are designed for a specific type of wall.
Consistency matters. Usually the transparent composition is more liquid. The white analogue has higher viscosity and density. Consistency determines penetrating ability.
Liquid transparent compounds strengthen the outer layer of the wall and bind dust. Among these varieties you can find solutions with special additives, through which alkalis can be extinguished. The price of such primers is reasonable.
Compared to denser analogues, their penetrating ability is 25% greater. The disadvantage of such a primer is the heterogeneity of application: when treating the surface, it is not visible which area is already covered with primer. As a result, the part with more soil reveals itself as glossy. Heterogeneity is dangerous because the adhesion when wallpapering will be different.
Thick primers, unlike liquid varieties, are able to correct the surface of the walls before wallpapering. They eliminate minor irregularities, have an antistatic effect, and quench alkalis, creating a smooth film. By filling micropores, they color the surface of the wall, so during the processing process the entire treated surface is visible.
Its penetrating ability is lower; this primer is good for walls with a uniform structure without visible defects. The smoothness created by this primer is suitable for plaster and thin wallpaper, as well as photo wallpaper. This primer is not suitable for liquid wallpaper.
Which one is better to use depending on the surface?
The undeniable advantages of impregnating walls using a primer prove that to obtain high-quality wallpaper, a primer for wallpaper is necessary. Which impregnation to choose depends not only on the composition of the rolled material, but also on the type of surface.
It is best to treat concrete These solutions, entering the concrete structure, create a slightly rough coating, which provides excellent adhesion when gluing both paper and non-woven wallpaper.
If the owners decide to paste over the ceiling, then these types of primers should also be applied to the surface of the floor slabs. Proper processing will not only increase adhesion, but will also impart water-repellent properties to the surface. N
Impregnation cannot be applied to concrete painted with water-based paint. To prepare such a wall, they clean off the old water-based emulsion, putty, level the base and only then treat it with a primer.
When it comes to covering wooden walls, paint primers based on oil solutions are used. for treating plywood or fiberboard .
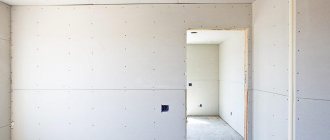
For sheet materials (gypsum plasterboard, plasterboard, OSB) , which are often used in new buildings, it is recommended to use universal acrylic solutions with an antiseptic. Such a base will be poorly impregnated due to the characteristics of the material, but vinyl wallpaper and glass wallpaper can be reliably placed on the treated surface.
When choosing a primer, you should first of all focus on the material from which the wallpaper itself is made. So, the primer for liquid wallpaper can be either acrylic or quartz. For paper products, it is enough to treat the base with a latex compound. A special vinyl acetate primer has been developed for vinyl products.
Question number two: what primer can be used before wallpapering?
Which primer to choose for walls under wallpaper? It’s quite easy to get confused in a hardware store, since the range of this product presented is simply dizzying.
Walls are treated with acrylic, alkyd, universal, latex, glyphthalic, mineral primers and even wallpaper glue.
Acrylic and alkyd compositions
The most popular is acrylic primer for wallpaper. It works great with putty, plaster and concrete, properly performing all its tasks.
You should not immediately buy a composition labeled “for wallpaper”; this refers to a marketing ploy PHOTO: oboi17.ru
Most likely, you will be handed highly diluted PVA glue at a high price. A good primer consists of a mixture of acrylic polymers; the word PVA should not be there. Product consumption: 100-200 ml per 1 m². The number is variable, since the porosity of the walls is different everywhere.
Alkyd primers resemble paint, since after they are applied, a film appears on the surface. Such primers are good for wooden and concrete surfaces. They fill the pores of the top layer. As a result, the wood does not swell, and moisture does not penetrate into the concrete.
After applying alkyd mixtures, the surface becomes moisture resistant and resistant to attempts to colonize mold and mildew.
You can use this type of primer as a base for subsequent processing with latex or acrylic, or acrylic paint PHOTO: sdelaipotolok.com
Alkyd primer does not penetrate deep into the walls, but it can perfectly prepare the surface for further work. This primer is good for coating reinforced concrete structures.
But surfaces with plaster, gypsum or drywall are not particularly well fixed with alkyd primers.
Product consumption is about 100-150 g per 1 m².
Latex and mineral primer
Latex has a number of useful qualities, such as strength, elasticity, water resistance, resistance to compression and stretching. Now a primer has similar qualities - there is a primer based on latex, which, after drying, forms a film that increases adhesion.
The product will be applied evenly to the wall and will dry quickly PHOTO: gidpokraske.ru
The purpose of such a coating is to strengthen loose surfaces that are prone to destruction. In addition, the waterproofing of the walls will be significantly improved.
This primer is ideal for precast concrete or fiberboard panels, natural stone and wall plastic. This is an excellent solution for rooms with high humidity levels. Consumption is high: 300-500 g per 1 m².
Mineral primer consists of lime, cement and gypsum. This composition is suitable for concrete, brick, expanded clay concrete blocks, plastered walls.
The packaging will indicate for which surface the proposed composition is used.
Glyphthalic and perchlorovinyl primer
If the wallpaper is to be hung in a garage, barn, on a wooden or metal surface in a room with a low level of humidity, then buy a glypthal primer.
The composition has a specific smell, the coating dries within a day PHOTO: deal.by
Wood, brick, metal and concrete are treated with perchlorovinyl primer both inside and outside. The mixture is not afraid of temperature changes, it is also quite resistant to humidity, and the coating dries in 1 hour at +20ºС.
Universal primer
The word “universal” itself will tell you a lot. This is a composition of acrylic copolymers, to which resins are also added. The primer is diluted with water and you get an excellent product with a deep penetration effect.
Walls with this primer can be treated in any room and outside the house. Thanks to the use of this composition, resistance to various influences increases, and the shelf life of the decorative coating will be increased PHOTO: zelest.ru
The product consumption is small, 100-120 g per 1 m².
Wallpaper glue
Some people just coat the walls with glue (casein based) for non-woven and other wallpapers and are satisfied. But such job satisfaction will only be temporary - defects will still manifest themselves. This is because there are no useful properties in this processing.
It is better to use wallpaper glue for its intended purpose PHOTO: zelest.ru
Related article:
How to glue wallpaper correctly : choosing a tool and glue, how to glue wallpaper on corners, around windows and behind radiators; nuances of gluing paper, non-woven, vinyl and self-adhesive canvases; how to select a pattern and mask the seams - read the publication.
Required materials and tools
To prime the walls before wallpapering, it is recommended to acquire some material resources. You will need:
- primer suitable for the surface to be pasted;
- container for preparing the solution;
- bath with a ditch for rolling out the roller;
- brush 150 mm;
- roller with fur skin on the handle, 50-70 cm long;
- damp cloth to remove smudges of primer.
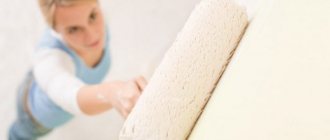
You will only need to use a stepladder or any other elevated position when working on corners at the top of the wall that need to be treated with a brush. Applying primer to the main surface can be easily done with a long-handled roller directly from the floor. Using the listed tools, it will be easy to perform soil protection of the foundation with your own hands.
Subtleties of application
Applying primer to walls with your own hands is easy.
To do this correctly, you should read these short instructions:
- Initially, you need to prepare the product for work. If the soil needs to be diluted, use water at room temperature. It can be diluted with water only if the aqueous type of solvent is indicated on the packaging.
- The product must be diluted until a homogeneous structure is obtained. This is especially true for concentrated material. For such soil you need to prepare a separate container.
- If necessary, you can add white color to the composition. If you need to tint the primer for wallpaper, it is not advisable to use beige, pink or another color: they will distort the original color of the wallpaper.
- It is worth pouring the primer into the container in parts. Firstly, the abundance of liquid will prevent uniform application to the surface of the walls (ceiling). Secondly, no primer should remain during the work: in any case, there will be specks of dust and specks at the bottom of the container, which should not be poured into a common canister.
Preparing the priming mixture
The primer before wallpapering is prepared using the instructions that the manufacturer places on the packaging.
Primer in factory packaging is most often supplied ready-made and already prepared for use. Stir this mixture well enough. If necessary (for processing reinforced concrete bases), walls under wallpaper are primed with less concentrated compounds; for this, acrylic primers are diluted with water, and alkyd primers with white spirit.
Concentrated primers are adjusted to the required consistency according to the manufacturer's recommendations.
To dilute the dry concentrate, you will need a deep container, a mixer and the solvent provided in the instructions. The powder is poured into water and brought to a homogeneous state; a properly prepared primer should not have lumps.
What is it?
This material is sold in two forms: in cans and canisters. The volume of soil is different: for wallpaper, raw materials with a volume of 5 and 10 liters are most often chosen.
In addition to the liquid type, there is concentrated soil. It must be diluted with cool water. This product is more convenient to store, it is more economical and allows you to vary the degree of viscosity when needed.
It is not difficult to dilute: the manufacturer indicates the proportions at which the optimal concentration is achieved. Typically it is 1:2 (1 part water to 2 parts primer).
Externally, the primer is a white or light gray composition. Sometimes it is transparent. Some varieties allow the addition of special acrylic paints to the solution (up to 15% of the total volume), which is especially convenient for light wallpaper with a dark wall surface (for example, concrete).
You can add white pigment so as not to distort the color of the wallpaper and give it maximum expressiveness. This is especially important if thin canvases are used as the basis for the cladding, which, with normal gluing, show all the stains of the base.
The primer differs in the type of action, which depends on the solvent. The degree of drying can be normal, slow or fast. The texture of this preparatory material depends on the type and is often matte.
The approximate consumption indicated by the manufacturer is 1 liter per 8-9 square meters. m. wall area. However, this indicator is conditional: it all depends on the absorbency of the walls.
Since the primer is applied in two layers before wallpapering, the first one will absorb more, especially if the walls are porous. During the second application, a little soil will be needed: the main part will already strengthen the walls, so during the second application the crystal lattice, which is located on the surface of the base, will be strengthened.
The product is not dangerous for the skin, but it should be stored away from children and sunlight. The shelf life is usually 2 years from the date of issue. After opening and application, the remaining primer can be stored for no more than 12 months - after that it loses its properties. In this case, storage in the cold is unacceptable.
You need to use the product with gloves and work clothes: when it dries, stains will remain on the textile, so the treatment must be done carefully.
Flow calculation
Primer consumption is influenced by many factors, so you should not rely solely on the rate per square meter recommended by the manufacturer. Increases consumption:
- increased indoor air temperature;
- surface structure (degree of porosity).
When calculating the required volume of material, you should follow the manufacturer’s recommendations, but there are average primer consumption rates for various surfaces:
- concrete surfaces – 350 g/m2;
- drywall, gypsum plasterboard, OSB and gypsum plasterboard sheets – 120 g/m2;
- plaster for painting – 100 g/m2;
- wooden surfaces, including plywood – 120 g/m2;
- metal surfaces – up to 120 g/m2.
The specified standards are indicative indicators, but in the absence of exact data, they can be used to determine the required amount of priming solution.
How to calculate primer consumption
To find out how much primer will be needed for a thorough study of the entire room, you will have to calculate the area of the walls without taking into account windows and doors. The final figure is doubled (two layers of primer), and then multiplied by 1.1 (taking into account unforeseen losses of 10%).
Next, we turn to the table below and calculate the approximate volume of primer that will be required to finish the room.
Table 4. Approximate consumption of different types of primer.
| Primer type | Surface character | Consumption, g/m2 |
| Acrylic thinned | iron; wooden. | 43 |
| Acrylic undiluted | wooden; OSB, chipboard; plywood. | 130 |
| Alkyd | concrete; brick. | 130-155 |
| Acrylic | anything other than wood. | 110 |
| Universal | for any type of surface. | 60-100 |
The figures are approximate; the exact volume of primer consumed can only be clarified when purchasing the composition. It is indicated on the packaging of the mixture in g/m2 or ml/m2.
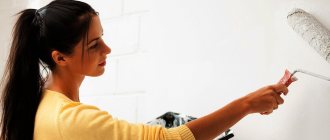
Wall processing process
How to prime walls for wallpaper
Preparing the wall surface for gluing is quite simple. Any beginner in construction can master this task; the main thing is to follow the recommended sequence of actions:
- To successfully treat walls with impregnation, it is recommended to ensure the temperature and humidity conditions in the room. To perform work, temperatures from +5 to +30°C are allowed, and humidity is up to 75%.
- All tools are prepared before work begins.
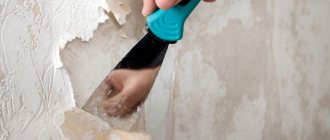
- Before priming, you should clean the walls of old wallpaper and paint. To do this, use a spatula and hot water. If the old coating is difficult to remove, you can use special solutions to remove wallpaper.
- The cleaned surface is checked for cracks and irregularities, which are corrected with putty, followed by the application of leveling solutions.
- In a bucket or other container, thoroughly stir (with a mixer or by hand) the prepared solutions or prepare the primer according to the instructions. If you plan to cover the walls with wallpaper for painting, it is possible to add appropriate pigment compositions to the soil, which will create a higher-quality base that does not contrast with the main color of the coating.
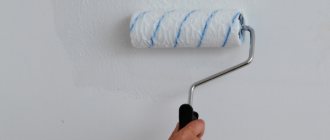
- Using a brush, first apply the prepared solution to hard-to-reach areas (corners, wall-to-ceiling junctions).
- The main area is covered with a roller. For ease of use, the primer is poured into a bath with a cuvette.
- Re-processing is possible after the previous layer has completely dried. For high-quality preparation for pasting, it is enough to treat the surface twice.
Advantages
Like any building material, primer has positive characteristics:
- It has an antiseptic effect. After treatment, the surface is resistant to the formation of fungus, mold, and blue stains, which is especially important in rooms with high humidity.
- The use of soil helps reduce the absorption of moisture by the walls. At the same time, the vapor permeability of the walls does not decrease.
- The primer can eliminate the negative effects of minor dirt, making the walls durable. Thanks to its white color, it masks foundation stains.
- Due to the use of primer when pasting wallpaper with a glossy surface type, the shine on the canvas becomes more pronounced.
How long does it take for primer to dry?
The drying period for different types of material differs and can vary from half an hour to a day. Many finishers prefer not to wait the allotted time and begin work 20-30 minutes after applying the primer.
Such haste is not welcome, but in conditions where the room temperature is above +25°C, the primer dries really quickly, which allows you to apply wallpaper glue without fear.
Under standard temperature and humidity conditions in a room, the drying times for different primers are as follows:
- Based on acrylic – up to 8 hours.
- Oil or contact – up to 24 hours.
- Alkyd - up to 12 hours.
- Special quick-drying - up to 7 hours.
It should be remembered that high temperatures and low humidity reduce the drying time of the solution, and vice versa, in more humid conditions at temperatures below +16°C, the absorption and drying process is slower.
The final stage of wall priming
The second layer of primer is applied with a more concentrated and thick solution. The whole process is carried out in the same sequence. Since the base is already strengthened and waterproofed by the first layer, for the second, instead of a primer, you can safely use wallpaper glue in a more liquid state than for gluing.
USEFUL INFORMATION: How to seal holes in concrete or plasterboard walls
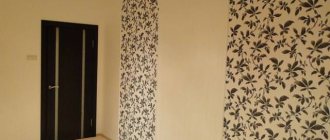
After finishing the priming work, when the wall has dried well, you can start covering it with new beautiful wallpaper.
How long before you can glue wallpaper?
To determine the exact period of time after which you can glue the wallpaper after priming, you need to determine the drying time of the primed surface. Rolled materials can be glued only after the last layer of solution has been completely absorbed.
To guarantee the completion of the polymerization process of the composition, you should definitely wait at least 24 hours after applying the finishing layer; this time is enough to safely glue the wallpaper to the prepared walls of the apartment.